Stellar ap Service 3lx72
This document was ed by and they confirmed that they have the permission to share it. If you are author or own the copyright of this book, please report to us by using this report form. Report 2z6p3t
Overview 5o1f4z
& View Stellar ap Service as PDF for free.
More details 6z3438
- Words: 14,026
- Pages: 75
248657/3 2016-02 Stellar series SERVICE ENG
Stellar™ series INVASIVE AND NONINVASIVE VENTILATOR
Service Manual English
ResMed ventilation solutions
Making quality of care easy
Global leaders in sleep and respiratory medicine
www.resmed.com
Manufacturer: ResMed Inc. Fraunhoferstr. 16 82152 Martinsried Distributed by: ResMed Ltd 1 Elizabeth Macarthur Drive Bella Vista NSW 2153 Australia ResMed Corp 9001 Spectrum Center Blvd. San Diego CA 92123 USA ResMed (UK) Ltd (EU Authorised Representative) 96 Milton Park Abingdon Oxfordshire OX14 4RY UK See www.resmed.com for other ResMed locations worldwide. For patent information, see www.resmed.com/ip © 2016 ResMed Ltd.
248657/3 2016-02
Contents 1
How to use this manual................................................................................ 4
2
Introduction ................................................................................................... 5 Intended s of this manual
5
Features of the Stellar 100 and Stellar 150 ............................ 5 Stellar model types ............................................................. 6
3
General inspection and servicing ................................................................. 7 Instructions for general inspection procedures ........................ 7 Equipment required Control and function keys LCD screen 1 Clean the flow generator 2 Record clinical settings 3 Internal battery remaining capacity test 4 Temperature sensor test 5 External examination 6 O2 connector test 7 Cooling fan test 8 DC power test 9 Internal examination (if necessary) 10 Replace the air filter 11 Pressure calibration test 12 Flow calibration test 13 Blower test 14 Humidifier test 15 Airpath leak test 16 USB port test 17 SpO2 port test 18 FiO2 port test 19 Keypad test 20 LCD test 21 LED test 22 Audible alarm test 23 Watchdog test 24 Internal battery test 25 Finalise manual check results 26 Set clock 27 Reload clinical settings 28 Fill out product problem report
7 8 8 9 9 11 12 12 13 13 14 14 15 15 16 16 16 17 17 17 18 18 18 18 18 18 19 19 19 20 21
4
Operator safety and static precautions .................................................... 22
5
Replacing major subassemblies ................................................................. 23 Equipment required
23
Outer components of the device ..........................................23 Components at rear of Type 1 device Components at rear of Type 2 device
24 24
Opening the Stellar ............................................................25 Internal components - main PCB, power supply, battery ..........26 Replacing the main PCB 2
Stellar™ series Service Manual
27
Installing the serial number Units with a service history Units without a service history
32 32 33
Replacing the power supply ................................................ 34 Replacing the battery ......................................................... 36 Recovering a deeply depleted battery
37
Accessing the airpath assembly ........................................... 38 The airpath assembly ......................................................... 39 Replacing the motor Replacing the muffler foam and the flow sensor Installing the airpath assembly
39 42 46
The bottom case ............................................................... 46 Replacing the cable harness Replacing the interface housing assembly
47 49
The top case ..................................................................... 50 Replacing the dial PCB
50
Closing the unit ................................................................. 52
6
Replacement parts list ................................................................................53 External components Internal components Air path components In the top case In the bottom case
53 54 55 56 57
Spare parts list .................................................................. 58
7
Calibration procedures ................................................................................60 Equipment required 1 Pressure calibration 2 Flow calibration
60 60 61
8
Troubleshooting guide ................................................................................62
9
System specifications .................................................................................67 Displayed values Symbols
10
69 69
Recommended maintenance schedule ........................................................71
Appendix A: Service request form .......................................................................72 Appendix B: Operational diagram ........................................................................73
Contents
3
1
How to use this manual Each of the sections in this manual have been written with a specific purpose in mind. Use this guide to help you find the material which is relevant to your task at the moment. 2 Introduction – Gives a brief overview of the Stellar series. 3 General inspection and servicing – Gives the procedures to help you examine a device which has been brought into a service centre. The general inspection procedures should be performed before any other work is done on the flow generator. 4 Operator safety and static precautions – Lists procedures to be followed whenever PCBs are removed from the unit. These procedures minimise the chance of ICs being damaged by static electricity. 5 Replacing major subassemblies – Highlights points to note when replacing subassemblies, reassembling the device and indications of when recalibration is necessary. 6 Replacement parts – Shows labelled pictures and part numbers of all the spare parts and subassemblies available from ResMed. 7 Calibration procedures – Lists procedures to follow when device calibration is required. 8 Troubleshooting guide – Gives you a way to quickly locate the problem and fix it if you know the symptoms of a faulty unit. 9 System specifications – Lists electrical and mechanical specifications of the device and air tubing. 10 Recommended maintenance schedule – Provides a brief description of the maintenance required for the unit. Some countries require all medical equipment to have a periodic service to confirm that the equipment is in good working order. Section 3, “General inspection and servicing” may be used in this situation. . Appendix A: Service Request Form - Fill out this form if you need to return a device to ResMed for servicing. Appendix B: Operational diagram - Provides a functional block diagram of the Stellar series. Note:
Schematics of all PCBs in this device are available to authorised service centres. To order, please your local ResMed office.
This manual contains special and icons that appear in the margins to draw your attention to specific and important information.
!
Warning alerts you to possible injury.
!
Caution explains special measures for the safe and effective servicing of the device. Note is an informative or helpful note.
Note:
4
If you have any regarding the Stellar series service manual please Technical Services, Sydney at [email protected].
Stellar™ series Service Manual
2
Introduction This manual is a guide to servicing and repairing the Stellar series of flow generators. It is written for ResMed distributors, and gives instructions for replacing subassemblies and for recalibration as appropriate. Work at the component level will normally be carried out by ResMed.
Intended s of this manual Before attempting any repair work, please ensure that you:
• are familiar with the operating manual and the clinical manual for the device • have suitable electrical and mechanical training to satisfy the requirements of the relevant regulatory authorities
• use the correct antistatic procedures described in this manual Use only approved ResMed parts and never use parts that have failed, show excessive wear, have been contaminated, or are ineffective for their intended use.
Caution • When switching off the Stellar ensure you also remove the power
!
cord from the device.
• Ensure the device is placed in such a way that the power cord can be easily removed from the device.
• Disconnect the device from mains power when using a DC external power supply.
• When a fuse is defective the entire subassembly should be replaced e.g. when the fuse on a power supply is found to be defective the power supply should be replaced.
Note:
Schematics of all PCBs in this device are available to authorised service centres. To order, please your local ResMed office.
Features of the Stellar 100 and Stellar 150 The Stellar 100 and Stellar 150 can deliver non-invasive ventilation for adult and pediatric patients in the home and hospital environment. In addition to the modes provided in the Stellar 100 and 150 (AP, S, ST, PS, T, PAC), the Stellar 150 includes iVAPS (intelligent Volume Assured Pressure ) mode. iVAPS mode is designed to maintain a present target alveolar minute ventilation by monitoring delivered ventilation, adjusting the pressure and providing an intelligent backup breath automatically.
Additional service features Service menu The Stellar series features a service menu including details such as the battery remaining capacity, the temperature of various internal components and the time since the device was previously serviced. To access the service menu, hold down the dial, Monitor button and Info button on the Stellar device simultaneously for at least three seconds. Press the Monitor button to exit the service menu. Service reminders Via the service software, the service technician can enable the service reminders to be displayed on the Stellar. Service reminders regarding the internal battery, motor and when the next service is due will be displayed (depending on regional settings). 2 Introduction
5
Stellar model types ResMed continually develops and improves its products. The different variations are referred to as type numbers, such as Type 1 & Type 2. The following table is a guide to identifying the two types of Stellar devices:
Type
6
Product codes
Characteristics
1
Stellar 150 • Original product release 24140 - Americas, 24141 - , Note: Type 1 units can be upgraded to 24142 - , 24143 - EUR G1, software version SX483-0230 and higher. 24144 - EUR G2, 24145 - UK, 24146 - Teijin, 24147 - Asia Pac, Stellar 100 24151 - , 24152 - , 24153 - EUR G1, 24154 - EUR G2, 24155 - UK, 24156 - Asia Pac, 24157 - Americas, 24158 - Fukuda
2
Stellar 150 24141 - , 24142 - , 24143 - EUR G1, 24144 - EUR G2, 24145 - UK, 24146 - Teijin, 24161 Americas, 24162 - Asia Pac, 24165 Brazil Stellar 100 24151 - , 24152 - , 24153 - EUR G1, 24154 - EUR G2, 24155 - UK, 24158 - Fukuda, 24163 - Americas, 24164 - Asia Pac
Stellar™ Series Service Manual
• SX483-0230 and higher • for remote alarm • New main PCB with some components removed & sensor tube routing changed • Ferrites removed from cable harness and Interface assembly • Thinner flexible cable running from Interface assembly • PAD printing on bottom case
3
General inspection and servicing Instructions for general inspection procedures Carry out the procedures on the following pages to confirm that the unit is in good electrical and mechanical condition. These tests will highlight any major mechanical or electrical problem with the unit. Note:
If the device requires a software upgrade, your regional Technical Services team for further details.
Equipment required • ResMed Service Software, available on the Technical Services website. Note:
• • • •
Ensure you check the technical services website to confirm the latest version of service software available for use with this product.
USB cable (part of kit #36950) Oxygen sideport connector (ResMed part #14915) Straight adaptor (ResMed part #19375) Calibration adaptor kit - contains calibration cap, air tubing connector and oxygen sideport connector (ResMed part #19911)
Note:
The above items are contained in the Service accessories kit (ResMed part #19919) S9 Adapter & USB cable, oxygen sideport connector, straight adapter, calibration cap and air tubing connector.
• • • • •
H4i heated humidifier
• • • •
Digital thermometer with external probe
Remote Alarm (ResMed part #27902) Remote alarm cable (ResMed part #27904) 2m air tubing - standard, 19 mm inner diameter (ResMed part #14961) Manometer (0-60 cm H2O range) RPS II and DC cable (Stellar DC cable #24959) or DC power source - 24 VDC, 3 A Nonin Xpod connector (ResMed part #22305)) O2 sensor (ResMed part #CAP008617)
• Calibrated flow meter with flow regulation valve Note:
The flow meter must be capable of measuring air flows ranging from 0 - 260 L/min with an accuracy of 3% or better over this range.
Note:
If you are using a flow analyser to complete the Stellar general inspection procedures ensure it is set to gas standard STPH.
• A computer running Windows 7 (32 & 64-bit) or XP.
3 General inspection and servicing
7
Control and function keys
Mains power External power supply
Monitoring menu
Internal battery Setup menu Alarm
Alarm mute button
LCD screen
Info menu
Push dial (rotate/click)
Therapy LED Start/Stop button
LCD screen Warm-up feature H4i Data storage device Mains power DC voltage* Internal battery Title bar
Settings
Ramp time Program Therapy mode
Patient mode Current screen/ number of screens within the menu
Scroll bar
Therapy status bar
*Only available when an external power supply is connected.
8
Stellar™ series Service Manual
1
Clean the flow generator Before servicing the unit it should be wiped down using a lint free cloth and an approved cleaning agent (Mikrozid® AF or CaviCide®).
Caution
!
When using a cleaning agent with a high alcohol content refer to the appropriate Material Safety Data Sheet to ensure safe handling of the cleaning agent. Remove any stains from the cases. When removing any stains from the device or mask system use soap or detergent-based cleaning solutions. Remove excess and wipe dry after use. Do not use thinners, trichlorethylene, bleach or other solvents. Do not apply oil to any component of the device.
2
Record clinical settings 1 With the unit disconnected from the power outlet, insert the USB adaptor into the rear of the device and the other end to the PC. Connecting to Type 1 Stellar
2 Connect the Stellar to the power outlet and turn it on. 3 Allow it to complete the self test. 4 Open the ResMed Service Software. The following window will appear:
XPlorer bar
Refresh button
3 General inspection and servicing
9
5 Press the Refresh button (as indicated on the previous page) to enable the service software to recognise the device. 6 The unit details will then be displayed at the bottom of the screen beside the Refresh button. The calibration and tests in the Xplorer bar at the left of the screen will also change to indicate the procedures specific for that product. 7 Select Device Settings in the XPlorer bar. Note:
It will take a few seconds for the device settings to be displayed.
8 The unit settings will be displayed as shown below:
9 Select Save to Database in the XPlorer bar. 10 The service history dialog will then be displayed if the unit has existing records in the application database. (If there are no existing records, proceed to step 11.) Click on the Create a new Service Setting Record icon to start a new session, or select an existing session from the service history displayed:
Create a new Service Setting Record icon
10
Stellar™ series Service Manual
11 The following window will then appear: Select service agent screen
12 At this point, you can select the name of the service agent handling the device and enter the Service Record (SR) and Repair numbers, so that this information will be included with the device settings details. Note:
To enter new service agent details, click on the image in the "Select service agent" window. A cursor will then appear in the "Service Agent" field, and the name can be entered. Once the service agent details are entered, any service agent names entered for that device will be available for selection in the drop down menu. If an existing session was selected, the "Select service agent" window will already be populated.
Warning
!
If the clinical settings cannot be recorded, select the appropriate product code for the product. In the XPlorer bar, click on "Read default settings", then click on "Reload to flow generator". Notify the patient, so they can have their settings reloaded. 13 Click on the Select button once the details have been entered. 14 The software will then return to the settings screen. 15 Close the settings screen Note:
3
Further device details can also be found in the service menu. To access the service menu hold down the dial, Monitor button and Info button on the Stellar device simultaneously for at least three seconds. Press the Monitor button to exit the service menu.
Internal battery remaining capacity test 1 Enter the Stellar service menu by holding down the dial, Monitor button and Info button simultaneously for at least three seconds. 2 Scroll down the screen to examine the Internal Battery Remaining Capacity. 3 Confirm the remaining battery capacity is > 80%. If the remaining battery capacity is < 80%, the battery must be replaced.
3 General inspection and servicing
11
4
Temperature sensor test 1 In the service software press the Start session button
.
2 The following screen will then appear, indicating the existing service records for the device.
3 The most recently created record (the device settings recorded earlier) will be highlighted. 4 Click on the Select button
to continue recording the service results to the same record.
5 The "Select service agent screen", as shown on page 11, will appear once again. 6 Select the name of the service agent and enter the SR number. 7 All calibration and tests, including tests completed without service software are then listed in the Xplorer bar. 8 Select Temperature sensor test in the XPlorer bar. 9 Set up the test equipment as instructed by the test software. 10 Select Next and follow the steps as instructed. 11 Once the test is complete, turn off the device and disconnect the USB cable. 12 If the device fails any part of the temperature sensor test (motor temperature, PCB temperature, PSU temperature, battery temperature) replace the faulty subassembly. Note:
5
At the top of the screen at the beginning of each procedure is an alert reminding you to reload the clinical settings to the unit after completing the necessary test and calibration procedure. Click the OK button once you have read the alert.
External examination 1 Visually examine the Stellar for external damage such as: • deformation or cracking of the upper or lower cases • damaged components such as the mains power inlet, oxygen inlet and SpO2 or FiO2 connectors • damage to the interface or bottom decal Where there is external damage, it is recommended that an internal examination is conducted after completing the following manual tests.
12
Stellar™ series Service Manual
6
O2 connector test 1 Lift the handle and pull the filter cover away in a horizontal direction. 2 Take the hold of the oxygen inlet and attempt to turn the oxygen inlet. 3 Confirm that there is no movement in the oxygen inlet.
4 If the oxygen inlet is loose, replace the inlet assembly and repeat all general inspection procedures.
7
Cooling fan test 1 With the unit turned off, turn over the unit while holding it off the work bench. 2 Locate the fan vent on the bottom case. 3 The edge of the fan blades should be visible through the fan vent.
Fan blade
4 Press the power button at the rear of the unit. 5 Confirm the fan runs for approximately 2 seconds then stops. The alarm will sound a test beep, then the fan will restart. 6 Turn off the unit.
3 General inspection and servicing
13
8 Caution
!
DC power test Disconnect the Stellar from mains power when it is connected to the RPS II. 1 With the unit already turned off, connect the RPS II to the DC power socket in the Stellar.
2 Set the DC switch on the RPS II to ON. 3 Turn on the Stellar and confirm: • the device powers up • the External power supply LED is lit • the alarm sounds and the Alarm LED is lit • the message "External DC power in use" is displayed at the top of the Stellar screen
External power supply LED
Alarm LED
4 Turn off the unit and disconnect the RPS II. 5 Reconnect the Stellar to mains power.
9 Caution
!
Internal examination (if necessary) The Stellar uses an isolated power supply, however, it is recommended that isolation transformers are also used for added safety while working with the cases opened up and power switched on. Remove the top case following the instructions given in Section 5 Replacing major subassemblies. Inspect the unit for the following, recording any irregularities:
• all mechanical components are seated correctly • all electrical components are mounted correctly and secured in position 14
Stellar™ series Service Manual
• there are no loose terminals, loose wires or incomplete insulation on electrical components or connections
• there are no loose pieces of wire or other objects trapped in the PCBs Use an antistatic cloth or brush to remove dust or dirt from components and from the insides of the device case. Repair or replace any missing or damaged components. Rectify any problems either identified by the or noted during servicing. Should any major components such as the motor, the main PCB or any part of the air path require replacement, the general inspection procedures should be repeated after the assembly has been replaced. Reassemble the device.
Caution
!
Printed circuit boards can be damaged by static electricity. Please read the instructions in Section 4 Operator safety and static precautions before attempting to replace any PCBs. Thread-forming screws are used throughout the device. When replacing a threadforming screw, turn the screw anti-clockwise until it fits into the previously cut thread. Otherwise the original thread may be stripped out.
10 Replace the air filter 1 Remove the filter cover and the filter from the rear of the device. 2 Replace the air filter. 3 Refit the filter cover.
Caution
!
Only use genuine ResMed spare parts, because the filter affects the flow characteristics of the device, which in turn affects the pressure supplied to the patient.
11 Pressure calibration test 1 Return to the service software and press the Start session button
.
2 The following screen will then appear, indicating the existing service records for the device.
3 The most recently created record (the device settings recorded earlier) will be highlighted. 4 Click on the Select button
to continue recording the service results to the same record.
5 The "Select service agent screen", as shown on page 11, will appear once again. 6 Select the name of the service agent and enter the SR number. 7 All calibration and tests, including tests completed without service software are then listed in the Xplorer bar. 3 General inspection and servicing
15
8 Select Pressure calibration test in the XPlorer bar. 9 Set up the test equipment as instructed by the test software. 10 Select Next and follow the steps as instructed. 11 If the device fails this test, follow the procedures outlined in Section 7 Calibration procedures to do a full recalibration of the device, ensuring the equipment set-up is correct. Note:
At the top of the screen at the beginning of each procedure is an alert reminding you to reload the clinical settings to the unit after completing the necessary test and calibration procedure. Click the OK button once you have read the alert.
12 Flow calibration test 1 Select Flow calibration test in the Xplorer bar . 2 Set up the test equipment as instructed by the test software. 3 Select Next and follow the steps as instructed. 4 If the device fails this test, follow the procedures outlined in Section 7 Calibration procedures to do a full recalibration of the device, ensuring the equipment set-up is correct.
13 Blower test 1 Select Blower test in the XPlorer bar. 2 Set up the test equipment as instructed by the test software. 3 Select Next and follow the steps as instructed. 4 If the device fails this test complete the Airpath leak test to determine if there is a leak in the airpath. If the device es the airpath leak test determine if the fault lies with the motor, the motor connector or the main PCB.
14 Humidifier test The Stellar is designed to integrate with the H4i heated humidifier to form a single device with humidification unit.
16
Stellar™ series Service Manual
1 If present, remove the H4i blind plug from the front of the device.
2 Select Humidifier test in the XPlorer bar. 3 Follow the prompts on screen to test the humidifier.
Warning
!
The H4i can reach a maximum of 85°C. 4 If the device fails this test, confirm that the humidifier being used for the test is functioning correctly. If the humifier is working properly examine the humidifier LEDs to see if they are damaged. If they are damaged replaced the Stellar main PCB. Otherwise, determine if there is an issue with the connection of the humidifer to the power supply.
15 Airpath leak test 1 Select Airpath leak test in the XPlorer bar . 2 Follow the steps as instructed. 3 If the Stellar fails this test, determine if there are leaks in the airpath. If there are no leaks in the airpath recalibrate the device.
16 USB port test 1 Select USB port test in the XPlorer bar. 2 Follow the steps as instructed. 3 If the Stellar fails this test, determine if the fault lies with the USB port itself (in the interface housing assembly), the flexible cable running from the interface housing assembly or the main PCB.
17 SpO2 port test 1 Select SpO2 port test in the XPlorer bar. 2 Follow the steps as instructed. 3 If the Stellar fails this test, determine if the fault lies with the SpO2 port itself (in the interface housing assembly), the flexible cable running from the interface housing assembly or the main PCB.
3 General inspection and servicing
17
18 FiO2 port test 1 Select FiO2 port test in the XPlorer bar. 2 Follow the steps as instructed. 3 If the Stellar fails this test, determine if the fault lies with the FiO2 port itself (in the interface housing assembly), the flexible cable running from the interface housing assembly or the main PCB.
19 Keypad test 1 Select Keypad test in the Xplorer bar. 2 Select Next and follow the steps as instructed. 3 If the Stellar fails this test, determine if the fault lies with the keypad (part of the top case), dial PCB or the connection from the top case to the main PCB.
20 LCD test 1 Select LCD test in the XPlorer bar. 2 Follow the steps as instructed. 3 If the Stellar fails this test, replace the main PCB (which includes the LCD).
21 LED test 1 Select LED test in the XPlorer bar. 2 Follow the steps as instructed. 3 If the Stellar fails this test, determine if the fault lies with the LEDs (part of the top case), dial PCB or the connection from the top case to the main PCB.
22 Audible alarm test Note:
The Remote alarm will also be tested as part of this procedure if testing a Type 2 device.
1 Select Audible alarm test in the XPlorer bar. 2 Follow the steps as instructed. 3 If testing a Type 1 unit and the test failed, determine if there is a fault with the interface housing assembly, the flexible cable running from the interface housing assembly or the main PCB. If testing a Type 2 unit and the buzzer failed, determine if the main PCB is faulty. If testing a Type 2 unit and the Remote Alarm failed, determine if there is a fault with the remote alarm or remote alarm cable, the interface assembly, the flexible cable running from the interface housing assembly or the main PCB.
23 Watchdog test 1 Select Watchdog test in the XPlorer bar. 2 Follow the steps as instructed. 3 If the Stellar fails this test replace the main PCB.
18
Stellar™ series Service Manual
24 Internal battery test 1 Power off the Stellar. 2 Select Internal battery test in the XPlorer bar . 3 Follow the steps as instructed to confirm the battery capacity displayed on the flow generator is within ±5 % of the capacity displayed in the Information and control .
4 If the battery capacity value displayed on the flow generator is less than 50% recharge the device to at least 50% before returning the device to the customer. 5 Turn off the Stellar. If the device fails this test, determine if there is a fault with the battery, the battery connection to the main PCB or with the main PCB itself.
25 Finalise manual check results In the XPlorer bar at the left of the screen, all tests that are completed without the service software are listed under the title "Manual Check".
1 Click on the name of each manual check. 2 For each manual check, indicate whether the unit ed or failed.
26 Set clock Note:
Ensure that the PC used to service the Stellar is set to the correct date and time prior to pressing the Set time and date icon.
1 With the device connected to mains power, turn on the Stellar. 2 Select Set time and date in the XPlorer bar.
3 General inspection and servicing
19
3 The following window will appear:
4 Select the appropriate time zone for the owner of the device, then press the Locale button. 5 Press the Select button to set the Stellar time and date.
Caution
!
If you reset the date to one that is earlier than currently displayed on the device, compliance data may be lost.
27 Reload clinical settings 1 Click on the Close session button to close the current session. 2 Select Device Settings in the XPlorer bar. 3 The Stellar settings will be displayed. 4 Select Read database, as shown below:
20
Stellar™ series Service Manual
5 All recorded sessions for the unit will be displayed. Ensure the most recent session (in which the clinical settings and results were recorded) is highlighted, then click the Select button
.
6 The screen will then be repopulated with the original settings. 7 Under Product Information, reset the Hours since last service to 0. 8 If the motor was replaced, reset the Motor run hours to 0. 9 Select Reload to flow generator in the Xplorer bar to load the settings back into the unit. 10 Once complete, exit the settings screen. 11 Once again, press the Start session button and ensure the most recent session (in which the clinical settings and results were recorded) is highlighted, then click on the Select button
.
12 Click on Reload settings at the bottom of the Xplorer bar. 13 Click on the Select button to indicate that the clinical settings were successfully reloaded into the Stellar. 14 Press the Start session button if you did not need to fill out the product problem report or print out the test results.
28 Fill out product problem report 1 If the Stellar needs to be returned to a ResMed service centre, fill out the “ResMed Service Request Form” on page 73 of this manual, and send it to your regional ResMed office along with the Stellar. 2 Once again, click on the Start session button and open the session just completed. 3 At the bottom of the Xplorer bar select Complete Problem Report and click on the button to indicate that problem report was completed. 4 Click the Close session button to finish the session.
3 General inspection and servicing
21
4
Operator safety and static precautions
Warning
!
Prior to disassembly or assembly, make sure that the power is not connected to the flow generator. Integrated circuits (ICs) within the various PCBs can be badly damaged by electrostatic discharge or transient voltages. The following procedures are recommended to avoid component damage: 1 Work benches where handling and repairs are done must have surfaces of suitable conducting material connected via a 1 Mresistor to an electrical ground. Note:
It is also recommended that the area under and also in front of the work bench be coated with a suitable conductive floor paint or covered with a conductive floor mat. Conductive paint coating or floor mat must be connected to an electrical ground.
2 Soldering irons or solder baths must be at the same reference (ground) potential as the work bench. 3 A wrist strap must be worn by service personnel working at the bench. The wrist strap must have a conductive lead (1 M) connected to the bench surface. Alternatively, a heel grounding strap to ground the operator to the floor may be used. (Such a wrist or heel strap should not create an electrical hazard for the wearer). 4 Handling of ICs should be kept to a minimum. If handling is required, avoid directly touching the leads. The recommended procedure is to first touch the container in which the ICs are stored, or the PCB in which they are mounted, before touching the ICs. Service personnel should take every precaution that the items will see the same reference potential when moved. 5 All ICs and PCB assemblies containing ICs should be stored in antistatic bags until use. 6 Service personnel should wear clothing which minimizes the build up of static charges. Cotton is preferable to wool or synthetic fibres. 7 Service personnel should avoid electrostatic build up through the movement of air over plastic material. 8 Plastic materials should wherever possible be kept away from the ICs as they develop and maintain high levels of static charge.
22
Stellar ™ series Service Manual
5
Replacing major subassemblies This section contains instructions and points to be aware of as you replace major subassemblies and reassemble the Stellar.
Equipment required • Torx T10 screwdriver • Adjustable wrench • Dial removal tool (ResMed part #R190-750) Caution
!
When a main PCB, motor or any part of the air path is replaced, the device must be recalibrated and tested. Repeat the tests in Section 3 General inspection and servicing. Printed circuit boards can be damages by static electricity. Please read the instructions in Section 4 Operator safety and static precautions before attempting to replace any PCBs. Thread-forming screws are used throughout the device. When replacing a threadforming screw, turn the screw anti-clockwise until it fits into the previously cut thread, otherwise the original thread may be stripped out.
Outer components of the device
Handle
LCD Control
AC connection for H4i humidifier
Air outlet
5 Replacing major subassemblies
23
Components at rear of Type 1 device
Air filter cover
Oxygen inlet AC power socket FiO2 sensor connection Power on/ stand-by switch
XPOD oximeter connection
Data communication ports
DC power socket
Components at rear of Type 2 device
Air filter cover
Oxygen inlet AC power socket
Remote alarm connection
Power on/ stand-by switch
XPOD oximeter connection
FiO2 sensor connection
24
Stellar™ series Service Manual
Data communication ports
DC power socket
Opening the Stellar 1 From the rear of the unit, lift the handle and pull the filter cover away in a horizontal direction.
2 Remove the filter. 3 Turn the unit over and remove the five screws circled below, using the Torx T10 screwdriver.
4 Turn the unit back over and gently lift up the top case.
5 Replacing major subassemblies
25
5 The dial PCB in the top case is connected to the main PCB via the flexible cable. Release the lock holding the cable on the main PCB:
Dial PCB
Flexible cable
Main PCB
Internal components - main PCB, power supply, battery With the top case removed, the main PCB, power supply and battery are visible.
Inlet assembly
Flexible cable from Interface housing assembly
Type 1 unit
LCD
Flow sensor cable harness
Battery
Pressure sensors Battery cable
Power supply cable Power supply
Main PCB
Note: Take care not to damage the humidifier LEDs when handling the main PCB.
26
Stellar™ series Service Manual
Inlet assembly
Flexible cable from Interface housing assembly
Type 2 unit
LCD
Pressure sensors
Battery Battery cable Power supply cable
Power supply
Flow sensor cable harness
Main PCB
Note: Take care not to damage the humidifier LEDs when handling the main PCB.
Replacing the main PCB 1 Disconnect the power supply cable harness and battery cable from the side of the main PCB. 2 Disconnect the motor cable harness from the front of the main PCB.
3 Near the top of the main PCB, disconnect the flow sensor cable harness and the two silicone tubes from the sensors. 5 Replacing major subassemblies
27
4 Pull up on the connector clip and disconnect the flexible cable sitting behind the LCD. 5 Disconnect the fan cable harness from under the rear of the LCD.
LCD
Battery
Fan cable harness
6 Remove the two screws attaching the main PCB to the chassis (circled below). Type 1 unit
7 Take the new PCB and fit it on the chassis, ensuring it is sitting correctly on the two locating posts. 8 Refit the two screws removed earlier. Note:
If using a pneumatic screwdriver, set the torque to 0.6 Nm ± 0.10 Nm.
9 Reconnect the battery cable and the power supply wiring harness to the main PCB. Ensure the power supply cables are routed beside the ferrite and are not overlapping. Flatten the wires on top of the power supply connector to prevent them touching the top case. Type 1 unit
Power supply cables beside ferrite
28
Stellar™ series Service Manual
10 Confirm the flexible cable between the LCD and main PCB is sitting under the LCD.
11 Reconnect the motor cable harness at the front of the main PCB. 12 On the other side of the PCB, reconnect the flow sensor cable harness. The cable should be oriented toward the back of the device. (For Type 1 units it should be routed behind the leg of the electronic chassis.) Push any excess cable into the bottom case. 13 Reconnect the flexible cable at the rear of the main PCB. Close the connector clips while holding the flexible cable in place. Type 1 unit
Flexible cable
Flow sensor cable harness
The flow sensor cable harness connector in a Type 2 unit is located further forwards from the pressure sensors.
Note:
Ensure that the flexible cable is inserted perpendicularly into the connector, not at an angle.
Flexible cable in Type 1 device
Thinner flexible cable in Type 2 device
5 Replacing major subassemblies
29
14 Reconnect the fan cable harness under the rear of the LCD. 15 For a Type 1 unit - refit the silicone tubes to the pressure sensors: • take the tube from on the left of the patient connector and insert it on the pressure sensor at the top of the main PCB. Tuck this tube under the bottom right hand corner of the LCD • fit the tube on the right of the patient connector and insert it on the remaining pressure sensor • route the tubes as shown below:
Tube route
Ensure the tubes are not pinched.
30
Stellar™ series Service Manual
For a Type2 unit - refit the silicone tubes to the pressure sensors: • take the tube from on the left of the patient connector and insert it on the pressure sensor at the top of the main PCB. Fit the tube on the right of the patient connector and insert it on the remaining pressure sensor • route the tubes as shown below: • Tuck both tubes under the bottom right hand corner of the LCD.
Ensure the tubes are not pinched.
5 Replacing major subassemblies
31
Installing the serial number and product code If the main PCB has been replaced the unit’s serial number and product code needs to be reinstalled.The following flow chart outlines this procedure.
Procedure 16 Connect the unit to the PC and open the service software. 17 Select Device Settings in the XPlorer bar
.
18 The flow generator settings screen will be displayed. 19 Enter the unit’s serial number (found on the base of the unit) and select the appropriate product code.
32
Stellar™ series Service Manual
20 Select Read Default Settings in the Xplorer bar. The default settings for that product code will be displayed on the settings screen. 21 Select Reload Device Settings to load the default settings to the device. 22 Exit the settings screen. 23 Click the Start session button
. Any existing records for the unit will be displayed on
screen. Ensure the most recent record is highlighted. Note:
If no previously recorded session exists for the unit enter the service record details as prompted.
24 Complete the calibrations and tests required when the main PCB has been replaced. 25 Finally, reload settings to the device (as outlined below). Reload settings 26 A device:
• which has had the clinical settings recorded can have those settings reloaded to the unit following the procedures from “27 Reload clinical settings” on page 20.
• A device without previously recorded settings requires the product code default settings to be reloaded. - Select Device Settings in the XPlorer bar. - Select the appropriate product code for the unit from the drop down menu, then click on Read Default Settings. - The screen will then be populated with the units default settings. - Click on Reload to flow generator to load them into the unit. - Exit the Settings screen. Recording the reloading of settings 27 Once again, press the Start session button and ensure the most recent session (in which the clinical settings and results were recorded) is highlighted, then click on the Select button
.
28 Click on Reload settings at the bottom of the Xplorer bar. 29 Click on the Select button to indicate that the clinical settings were successfully reloaded into the flow generator. Press the Stop session button print out the test results.
if you do not need to fill out the product problem report or
5 Replacing major subassemblies
33
Replacing the power supply 1 From the main PCB, disconnect the: • power supply wiring harness • motor cable harness • flow sensor cable harness • 2 silicone tubes from sensors • flexible cable behind the LCD • fan cable under the LCD 2 Disconnect the power supply wiring harness AC cable from the right side of the power supply. 3 Disconnect the main wiring harness DC cable from the left side of the power supply.
Power supply wiring harness
Main wiring harness DC cable
Main wiring harness AC cable
4 Gently lift the electronic chassis, with main PCB and power supply, up from the bottom case. 5 Remove the two screws which attach the power supply to the chassis. 6 Gently disconnect the power supply from the two snaps (circled) at the top and pull the power supply away from the chassis.
Screws
34
Stellar™ series Service Manual
7 Take the new power supply and slide it into the mounting slots at the base of the chassis and the bottom case, then click it into place.
Mounting slots
Mounting slots in chassis base
8 Refit the 2 screws. Note:
If using a pneumatic screwdriver, set the torque to 0.6 Nm ± 0.10 Nm.
9 Reconnect the main wiring harness DC cable and the AC cable to the power supply. Ensure the AC cable is inserted into the slots in the bottom case.
DC cable
AC cable
For Type 1 units, locate the ferrites towards the connector, as shown below:
Ferrites
10 Reconnect the battery cable and the power supply wiring harness to the main PCB. Ensure the power supply cables are routed beside the ferrite and are not overlapping. Flatten the wires on top of the power supply connector to prevent them touching the top case.
Power supply cables beside ferrite
5 Replacing major subassemblies
35
Replacing the battery Note:
If the remaining capacity of the internal battery is <80% (as described in “3 Internal battery remaining capacity test” on page 11) the battery must be replaced. After replacing the battery, repeat the tests in Section 3 General inspection and
servicing.
1 Disconnect the battery cable from the main PCB. 2 Push down on the catch at the top of the battery, then pull the battery cage away from the chassis.
3 Take the new battery and cage assembly and gently push it into the battery cage. The battery cables should be sticking out towards to top of the battery cage (which has the catch on top). 4 Slide the battery cage into the chassis and push forward on the 2 tabs at the top of the cage to engage the catch on the battery cage to the chassis.
5 Reconnect the battery cable to the main PCB.
36
Stellar™ series Service Manual
Recovering a deeply depleted battery When the battery is deeply depleted ( 5%) it can take several hours to charge it to a 15-20% charge level. To determine if a battery is deeply depleted complete the following steps: 1 Confirm the device fails to turn on using the internal battery. 2 Connect the device to AC mains (leave the device turned off) and confirm the Battery Charging yellow LED is not flashing. 3 While connect to AC mains turn on the device. After the device completed the self test confirm the Internal Battery Indicator on the Stellar screen has a yellow "X" displayed over the top, as shown below:
If these conditions are met, the internal battery is deeply depleted. Complete the procedure below to recharge the battery. 4 Turn off the device (if left on at step 3) and leave it connected to AC mains. 5 Confirm the Battery Charging yellow LED is flashing. Note:
If the yellow LED is not flashing the battery cannot be charged and should be replaced.
6 Leave the device on AC mains (though still turned off) for several hours to reach a charge level of 15-20%. Note:
To check the charge level turn on the device an examine the charge level on the Stellar screen. Turn off the device after checking.
7 Once a level of 15-20% charge is reached it should take approximately one hour to reach 100% charge. (The device should still be turned off during this time.)
5 Replacing major subassemblies
37
Accessing the airpath assembly The airpath assembly is located under the electronic chassis. To remove the electronic chassis, follow steps 1-4 of “Replacing the power supply” on page 34. Inlet assembly
Type 1 unit
Switch Flow sensor
Main wiring harness DC cable
Blower assembly
Fan
AC cable
Patient connector
Motor connector
1 Lift the airpath assembly away from the bottom case.
38
Stellar™ series Service Manual
The airpath assembly
Muffler housing Inlet assembly Blower housing
Flow sensor Motor cable Bump stops (circled) Patient connector Hose clamps
Replacing the motor Note:
After replacing the motor, ensure you reset the unit’s "motor run hours" to 0 when reloading the unit’s clinical settings. For further detail, refer to “27 Reload clinical settings” on page 20.
1 Pull the outlet seal and patient connector away from the blower housing.
2 Pull the inlet assembly away from the flow sensor. 3 Remove the three screws from the front of the blower housing.
5 Replacing major subassemblies
39
4 Separate the blower housing from the muffler housing.
5 The foam pieces in the muffler housing can be removed and replaced if required. 6 Remove the main seal from the motor housing.
Main seal
7 The motor, attached to the main seal, is now visible. 8 Pull the motor away from the main seal. Blower suspension
9 The motor suspension, sitting on top of the motor, can also be removed and replaced if needed. 10 Take the replacement motor and place it on the main seal. Align the openings on the motor with the corresponding holes in the main seal.
40
Stellar™ series Service Manual
11 Turn the main seal over and confirm that the silicone of the main seal is flush with the motor openings.
Motor openings
12 Gently push the motor cable harness into the channel on the main seal, ensuring there is some slack in the cable harness.
13 Place the blower housing over the motor, ensuring that the motor cable harness is sitting correctly in the locator of the blower housing.
14 If the flow sensor and muffler foam does not require replacement, proceed directly to step 25 on page 43.
5 Replacing major subassemblies
41
Replacing the muffler foam and the flow sensor 15 Remove the foam from the muffler housing.
16 Pull the flow sensor away from the muffler housing. 17 Remove the flow sensor seal from the sensor.
18 Take the new flow sensor and install it in the seal. 19 Take the flow sensor (in the seal) and align it to the muffler housing as shown below:
20 Push the flow sensor into the muffler housing. If needed, use a twisting action to fully insert the sensor into the housing.
42
Stellar™ series Service Manual
21 Ensure the flow sensor is inserted correctly, with the sensor visible, and the seal is completely through the housing and not pinched.
22 Take the replacement muffler foam, and insert the outlet muffler foam into the smaller section of the muffler housing. 23 Insert the inlet muffler foam over the flow sensor. 24 Ensure the muffler foam is inserted correctly, with the holes in the foam align to the corresponding holes in the muffler housing.
25 Fit the blower housing to the muffler housing. 26 Install the three screws removed earlier, in the following order:
2
3
1
Note:
If using a pneumatic screwdriver, set the torque to 1.5 Nm ± 0.05 Nm.
27 If removed earlier, refit the 3 bump stops to the housing.
5 Replacing major subassemblies
43
Note:
Ensure the bump stop (located on the long pin next to the flow sensor) is inserted all the way to the muffler housing.
28 Take the outlet seal and insert it over the outlet. 29 Take a hose clamp and place it over the rear channel in the seal. 30 Tighten the hose clamp. 31 Place the second hose clamp on the outlet seal (do not tighten!) and orient to the bottom left of the first hose clamp, as shown below:
Tightened hose clamp
Second hose clamp (do not tighten!)
32 Attach the pressure sensor tubing to the patient connector.
44
Stellar™ series Service Manual
33 Insert the patient connector, lining up the nozzles on the patient connector with the mating feature on the outlet seal (circled). Confirm that the patient outlet is aligned with the ridge on the blower outlet (see arrow).
34 Tighten the second hose clamp (sitting under the patient connector).
Second hose clamp
35 Take the inlet assembly and twist it onto the flow sensor seal, until it is fully inserted.
5 Replacing major subassemblies
45
Installing the airpath assembly 1 Take the airpath assembly and gently lower it into the bottom case. 2 Ensure the flexible cable from the interface housing and the fan cable is clear. 3 Ensure the screw bosses on the inlet assembly are sitting correctly on the locators on the bottom case. 4 Ensure the patient connector aligns to the front screw bosses on the bottom case. Type 1 unit Flexible cable clear of airpath assembly
Inlet assembly screw bosses
Fan cable clear of airpath assembly
Patient connector sitting on front screw bosses
The bottom case With the airpath assembly removed, the parts located in the bottom case are visible. 1 The airpath suspension can be replaced if required. Type 1 unit
Airpath suspension
46
Stellar™ series Service Manual
2 The fan assembly can also be replaced if required. When fitting a new fan assembly, ensure you orientate the assembly in the bottom case as shown below, with the fan cable routed under the retainer closest to the switch.
Caution
When handling the fan ensure you hold the frame. Do not push/press on the fan body.
!
Replacing the cable harness 1 Remove the main wiring harness DC cable harness from under the retainers, and the AC cable harness from the slots at the side of the bottom case. 2 Press the four clips at the top and bottom of the power connector to release it from the bottom case.
Clips
Clips
5 Replacing major subassemblies
47
3 Pull the power connector with cable harness forward to remove it from the bottom case.
4 Take the new cable harness and power connector and feed it through the hole in the bottom case. 5 Engage the power connector, ensuring the switch is sitting on the right side of the power connector, as shown below:
6 Route the cables in the bottom case as shown below.
For type 1 units locate the ferrite next to the screw boss.
Ferrite location and AC cables behind post
48
Stellar™ series Service Manual
Replacing the interface housing assembly 1 Pull back on the two clips holding the interface housing assembly, and pull the assembly up from the bottom case. Type 1 interface housing assembly
Type 2 interface housing assembly
2 Take the replacement interface housing assembly and gently install it in the bottom case. Insert the interface housing at a slight angle to ensure the FiO2 and SpO2 connectors are not damaged.
3 Click the assembly into place. Ensure the housing clip clicks into place, as shown below:
Type 1 unit
5 Replacing major subassemblies
49
The top case On the underside of the top case sits the dial PCB.
Dial PCB
Flexible cable which runs to main PCB
Replacing the dial PCB 1 Remove the dial from the top case, using the dial removal tool. 2 Release the lock and remove the flexible cable which connects to the main PCB.
3 Release the lock and remove the keypad flexible cable.
50
Stellar™ series Service Manual
4 Turn the top case over and unscrew the nut on the dial PCB encoder, using a torque-limited screwdriver including long nut. Note:
If using a pneumatic screwdriver, set the torque to 1.2 Nm ± 0.10 Nm.
5 Take the new dial PCB and remove the nut from the encoder. Note:
Ensure that the washer remains on the base of the encoder.
Washer
6 Fit the dial PCB to the top case, ensuring the PCB sits on the locating posts as shown below:
7 Turn the top case over and fix the nut (removed in step 5) to the encoder. 8 Place the dial on the encoder. 9 Once again, turn over the top case and insert the keypad flexible cable into the lock, then engage the lock. 10 Take the large flexible cable and insert it in the lock, with the metal s on the cable facing the PCB.
5 Replacing major subassemblies
51
Closing the unit 1 Place the top case beside the bottom case assembly. 2 Take the flexible cable from the top case and install it in the lock on the main PCB.
Note:
Ensure the flexible cable is not at an angle, and is inserted fully in the lock.
3 Place the top case on the bottom case.
4 Turn the unit over and install the five screws in the following order.
3
2
4
5 1
Note: 52
If using a pneumatic screwdriver, set the torque to 0.9 Nm ± 0.05 Nm.
Stellar™ series Service Manual
6
Replacement parts list Note:
Type 2 spare parts, except for the bottom case, cannot be used in Type 1 products.
Refer to the Technical Services website for the latest Stellar spare parts available.
External components Top case (including handle, membrane keypad and chrome frame)
Stellar 150 (ROW) Stellar 150 (Americas) Stellar 150 (Teijin) Stellar 100 (ROW) Stellar 100 (Americas) Stellar 100 (Fukuda)
19540 19547 19550 19544 19546 19658
Bottom case, Type 2 (Americas) 19593 Bottom case, Type 2 (ROW) 19594 Note: A Type 2 bottom case can be fitted to Type 1 units. Base pad & decal kit (ROW) 19517 Base pad & decal kit (Americas) 19549
Note: For instructions on replacing the decal and serial number, refer to tech note 1063224.
Dial
Screw (for case)
R360-775
Z2021
Type PT, Self tapping 3 x 25 mm, Torx pan head
6 Replacement parts list
53
Internal components Main PCB (with LCD)
Screw (for PCBs)
Stellar 150 (Type 1) Stellar 100 (Type 1) Stellar 150 (Type 2) Stellar 100 (Type 2) Stellar 150 (Type 2), Japan Stellar 100 (Type 2), Japan
19524 19518 19584 19585 19686 19687
Power supply
19521
Z2019
PT Type DG, Self tapping, 3 x 7 mm, pan head with Torx recess
Electronic chassis
19519
Sensor tube x 1 (Type 1) Sensor tube x 1 (Type 2)
54
Stellar™ series Service Manual
19522 19596
Battery (with cage) Battery cage
19520 R241-7038
Inlet assembly
19523
Air path components
Flow sensor 19300 Flow sensor cable harness R261-7146 Flow sensor seal (circled) 19525
Patient connector
R241-7025
Outlet seal
19528
Hose clamp
R241-7054
6 Replacement parts list
55
Motor enclosure assembly
19529
(including blower housing, muffler housing, inlet muffler foam, outlet muffler foam, bump stops, main seal, screws)
Motor with enclosure assembly
19530
(including motor, blower housing, muffler housing, inlet muffler foam, outlet muffler foam, bump stops, main seal, screws)
Muffler foam
Screw (for blower assembly)
19689
Z2032
Self tapping 3 x 20 mm, Torx pan head
Motor
Motor suspension
19531
19532
In the top case
56
Stellar™ series Service Manual
Dial PCB (Type 1) (with flexible cable)
19541
Dial PCB (Type 2) (with flexible cable)
19659
In the bottom case Cable harness with switch (Type 1) Cable harness with switch (Type 2)
Airpath suspension
19538 19587
19539
Interface PCB assembly, Type 1 19542 (with flexible cable) Interface PCB assembly, Type 2 (ROW) 19595 (with flexible cable) Interface PCB assembly, Type 2 (Americas) 19657 (with flexible cable)
Fan (with suspension)
Caution
19535
When handling the fan ensure you hold the frame. Do not push/press on the fan body.
!
6 Replacement parts list
57
Spare parts list Part number 19539
Airpath suspension
19517
Base pad and decal kit (ROW)
19549
Base pad and decal kit (Americas)
19520
Battery (with cage)
R241-7038
Battery cage
19593
Bottom case, Type 2 (Americas)
19594
Bottom case, Type 2 (ROW)
19538
Cable harness with switch (Type 1)
19587
Cable harness with switch (Type 2)
R360-775
Dial
19541
Dial PCB, Type 1 (with flexible cable)
19659
Dial PCB, Type 2 (with flexible cable)
19519
Electronic chassis
19535
Fan (with suspension)
19300
Flow sensor
R261-7146 19525 R241-7054
Flow sensor cable harness Flow sensor seal Hose clamp
19523
Inlet assembly
19542
Interface PCB assembly (with flexible cable), Type 1
19595
Interface PCB assembly, ROW (with flexible cable), Type 2
19657
Interface PCB assembly, Americas (with flexible cable), Type 2
19686
Main PCB, with LCD, Type 2, Japan (Stellar 150)
19687
Main PCB, with LCD, Type 2, Japan (Stellar 100)
19524
Main PCB, with LCD, Type 1 (Stellar 150)
19518
Main PCB, with LCD, Type 1 (Stellar 100)
19584
Main PCB, with LCD, Type 2 (Stellar 150)
19585
Main PCB, with LCD, Type 2 (Stellar 100)
19531
Motor
19529
Motor enclosure assembly
19530
Motor with enclosure assembly
19532
Motor suspension
19689
Muffler foam
19528
Outlet seal
R241-7025
58
Part description (in alphabetical order)
Patient connector
19521
Power supply
Z2032
Screw (for blower assembly) Self tapping 3 x 20 mm, Torx pan head
Stellar™ series Service Manual
Z2021
Screw (for case) Type PT, Self tapping 3 x 25 mm, Torx pan head
Z2019
Screw (for PCBs) PT Type DG, Self tapping 3 x 7 mm, pan head with Torx recess
19522
Sensor tube x 1, Type 1
19596
Sensor tube x 1, Type 2
19658
Top case (Stellar 100, Fukuda) - including handle, membrane keypad and chrome frame
19540
Top case (Stellar 150, ROW) - including handle, membrane keypad and chrome frame
19544
Top case (Stellar 100, ROW) - including handle, membrane keypad and chrome frame
19550
Top case (Stellar 150, Teijin) - including handle, membrane keypad and chrome frame
19547
Top case (Stellar 150, Americas) - including handle, membrane keypad and chrome frame
19546
Top case (Stellar 100, Americas) - including handle, membrane keypad and chrome frame
6 Replacement parts list
59
7
Calibration procedures All calibration procedures should be carried out whenever the main PCB, motor or any part of the air path is replaced.
Equipment required • ResMed Service Software, available on the Technical Services website. Note:
• • • •
Ensure you check the technical services website to confirm the latest version of service software available for use with this product.
USB cable (part of kit #36950) Oxygen side port connector (ResMed part #14915) Straight adaptor (ResMed part #19375) Calibration adaptor kit - contains calibration cap, air tubing connector and oxygen sideport connector (ResMed part #19911)
Note:
Service accessories kit #19919 contains - S9 USB adapter and cable, oxygen sideport connector, straight adapter, calibration cap and air tubing connector.
• 2m air tubing - standard, 19 mm inner diameter (ResMed part #14961) • Manometer (0-60 cm H2O range) • Calibrated flow meter with flow regulation valve Note:
The flow meter must be capable of measuring air flows ranging from 0 - 260 L/min with an accuracy of 3% or better over this range.
Note:
If you are using a flow analyser to complete the Stellar calibration procedures ensure it is set to gas standard STPH.
• A computer running Windows 7 (32 & 64-bit) or XP. Caution
!
1
The Stellar clinical settings must be recorded before any calibration procedure is performed. Refer to the instructions provided in Section 3 General inspection and servicing. If the clinical settings can not be recorded, reset the unit to the factory default settings, and notify the patient.
Pressure calibration 1 With the unit still switched off, connect the Stellar to the PC via the USB cable. 2 Turn on the unit and allow it to complete the self test. 3 Return to the service software and press the Start session button
.
4 The following screen will then appear, indicating the existing service records for the Stellar.
60
Stellar™ series Service Manual
5 The most recently created record (the Stellar settings recorded earlier) will be highlighted. 6 Click on the Select button
to continue recording the service results to the same record.
7 The “Select service agent screen”, as shown on page 11, will appear once again. 8 Select the name of the service agent and enter the SR number. 9 All calibration and tests, including tests completed without service software are then listed in the Xplorer bar. 10 Select Pressure calibration in the XPlorer bar. Note:
At the top of the screen at the beginning of each procedure is an alert reminding you to reload the clinical settings to the unit after completing the necessary test and calibration procedure. Click the OK button once you have read the alert.
11 Set up the test equipment as instructed by the test software. 12 Select Next and follow the steps as instructed until the calibration is complete.
2 Caution
!
Flow calibration The pressure calibration must be performed before the flow calibration. 1 Select Flow calibration in the XPlorer bar. 2 Set up the test equipment as instructed by the test software. 3 Select Next and follow the steps as instructed until the calibration is complete. Once the calibrations are complete, repeat the tests found in Section 3 General inspection and servicing. If the unit continually fails the calibration, check the following:
• the test set-ups are correct • the calibration cap is securely attached and there are no leaks in the air delivery system • the unit has no excess noise or vibration, which may be caused by a problem with the blower. If the unit continues to fail, send the device with service request form (found on page 73 of this manual) to ResMed for further servicing.
7 Calibration procedures
61
8
Troubleshooting guide Note:
Caution
!
The performance tests in the service software are a valuable tool in determining the possible cause of flow generator problems.
When the main PCB or motor is replaced, the flow generator must be recalibrated and tested. Repeat the tests found in Section 3 General inspection and servicing. If any other components are replaced, repeat the relevant test in Section 3 General inspection and servicing. Note:
Refer to the Technical Website for the latest Stellar troubleshooting information.
Problem/Cause
Action
The following message is displayed on the LCD: "Apnea!"
•
No inspiration detected for a set apnea interval
•
Check alarm settings
•
Unit out of calibration
•
Check calibration
The following message is displayed on the LCD: "Attention High Temp! [42]"
•
High motor temperature (> 100oC for 10 seconds)
•
Ensure ambient temperature conditions within specified operating range
•
Ensure unit not covered
•
Blocked filter
•
Replace filter
•
Blocked inlet or outlet
•
Check for blockages at inlet and outlet
•
Faulty motor temperature sensor
•
Replace motor
The following message is displayed on the LCD: "Attention High Temp! [43]"
•
High battery temperature (> 50oC for 10 seconds)
•
Ensure ambient temperature conditions within specified operating range
•
Ensure unit is not covered
•
Cooling fan fault
•
Check cooling fan
•
Faulty internal battery temperature sensor
•
Replace internal battery
The following message is displayed on the LCD: "Attention High Temp! [44]"
•
High PSU temperature (> 85oC for 10 seconds)
•
Ensure ambient temperature conditions within specified operating range
•
Ensure unit is not covered
•
Cooling fan fault
•
Check cooling fan
•
Faulty PSU temperature sensor
•
Replace PSU
The following message is displayed on the LCD: "Attention High Temp! [45]"
•
62
High PCB temperature (> 85oC for 10 seconds)
•
Ensure ambient temperature conditions within specified operating range
•
Ensure unit is not covered
•
Cooling fan fault
•
Check cooling fan
•
Faulty main PCB temperature sensor
•
Replace main PCB
Stellar™ series Service Manual
Problem/Cause
Action
The following message is displayed on the LCD: "Blocked Tube!"
•
Blocked hose or air path
•
Remove obstruction
•
Issue with flow sensor connection
•
Confirm flow sensor connected properly
•
Faulty flow sensor
•
Replace flow sensor
The following message is displayed on the LCD: "Circuit disconnected!"
•
Air tubing disconnected from device
• Unit out of calibration
• •
Flow sensor cable issue
Faulty flow sensor
•
Check air tubing connection
•
Check calibration
• •
Confirm flow sensor cable connected properly
•
Replace flow sensor
Check flow sensor cable function. Replace if faulty
The following message is displayed on the LCD: "Disconnected XPOD!"
•
XPOD disconnected during therapy
•
Check connection
The following message is displayed on the LCD: "Finger Sensor Failure!" • Improper sensor attachment
• Check sensor attachment on patient
• SpO2 and pulse outside of specified range
• Check alarms settings
•
Faulty sensor
•
Replace sensor
The following message is displayed on the LCD: "High FiO2 Level!"
•
Measured FiO2 level higher than set threshold
•
Check alarm settings
The following message is displayed on the LCD: "High Leak!"
• •
High mask leak (> 40 L/min)
Unit out of calibration
• •
Check mask fitting
•
Check calibration
Check air tubing connection
The following message is displayed on the LCD: "High Pressure!"
•
Mask pressure exceeds set threshold
•
Check alarm settings
•
Unit out of calibration
•
Recalibrate the unit
The following message is displayed on the LCD: "High Respiratory Rate!"
•
Patient breath rate exceeds set maximum threshold
•
Check alarm settings
•
Unit out of calibration
•
Check calibration
The following message is displayed on the LCD: "High Temperature! [10]" (continued over page)
•
High motor temperature (> 120oC for 10 seconds)
•
Ensure ambient temperature conditions within specified operating range
•
Ensure unit is not covered
•
Blocked filter
•
Replace filter
•
Blocked inlet or outlet
•
Check for blockages at inlet and outlet
8 Troubleshooting guide
63
Problem/Cause •
Faulty motor temperature sensor
Action •
Replace motor
The following message is displayed on the LCD: "High Temperature! [11]"
•
High battery temperature (> 59oC for 10 seconds)
•
Ensure ambient temperature conditions within specified operating range
•
Ensure unit is not covered
•
Cooling fan fault
•
Check cooling fan
•
Faulty internal battery temperature sensor
•
Replace internal battery
The following message is displayed on the LCD: "High Temperature! [12]"
•
High PSU temperature (> 90oC for 10 seconds)
•
Ensure ambient temperature conditions within specified operating range
•
Ensure unit is not covered
•
Cooling fan fault
•
Check cooling fan
•
Faulty PSU temperature sensor
•
Replace PSU
The following message is displayed on the LCD: "High Temperature! [23]"
•
High PCB temperature (> 90oC for 10 seconds)
•
Ensure ambient temperature conditions within specified operating range
•
Ensure unit is not covered
•
Cooling fan fault
•
Check cooling fan
•
Faulty main PCB temperature sensor
•
Replace main PCB
The following message is displayed on the LCD: "Humidifier Over Pressure!" Note: This alarm is only displayed in units with software versions earlier than SX483-0222.
•
H4i in use and IPAP or AP set to 25 cmH2O
•
Check settings - H4i cannot be used with treatment pressure set to25 cmH2O
•
Unit has software version earlier than SX483-0222
•
Upgrade device to latest software version
The following message is displayed on the LCD: "Internal Battery Empty!" • Battery in use with low charge state (< 15%)
•
Faulty battery
• Connect device to mains power
•
Replace internal battery
The following message is displayed on the LCD: "Internal Battery Low!"
•
Internal battery in use with low charge state (< 30%)
•
Connect device to mains power
The following message is displayed on the LCD: "Keypad Failure!" • Buttons on control pressed for longer than 10 seconds
• Ensure keypad buttons are not jammed • Check buttons function
• Faulty connection between main PCB and dial PCB
• • • •
Check flexible cable connected properly Replace flexible cable Replace main PCB Replace dial PCB
•
Replace top case (with keypad)
•
64
Faulty keypad
Stellar™ series Service Manual
Problem/Cause
Action
The following message is displayed on the LCD: "Low FiO2 Level!"
•
Measured FiO2 level lower than set threshold
•
Check alarm settings
The following message is displayed on the LCD: "Low Minute Ventilation!"
•
Minute ventilation lower than set threshold
•
Check alarm settings
•
Unit out of calibration
•
Check calibration
The following message is displayed on the LCD: "Low Pressure!"
• •
Calculated mask inspiratory pressure below IPAP/ AP setting
• •
Check air tubing connection
Unit out of calibration
•
Check calibration
Check alarm settings
The following message is displayed on the LCD: "Low Respiratory Rate!"
•
Patient breath rate below set minimum threshold
•
Check alarm settings
•
Unit out of calibration
•
Check calibration
The following message is displayed on the LCD: "Low SpO2 Level!" • Measure SpO2 level lower than set threshold
•
Improper sensor attachment
• Check alarm settings • Check sensor connections
•
Check sensor attachment on patient
The following message is displayed on the LCD: "Non-Vented Mask!"
•
Non-Vented mask in use
•
Ensure leak port included in circuit
•
Blocked leak port / mask vent
•
Ensure leak port / mask vent unobstructed
The following message is displayed on the LCD: "O2 Sensor Disconnected!" • FiO2 cell disconnected
•
Faulty FiO2 cell
• Check connection
•
Replace FiO2 monitoring sensor
The following message is displayed on the LCD: "Over Pressure!"
•
High mask pressure (> 59 cmH2O)
• •
Check air tubing Perform Learn Circuit
•
Pressure sensor tube not connected properly
•
Reconnect pressure sensor tube
•
Faulty pressure sensor tube
•
Replace pressure sensor tube
•
Blockage in air outlet
•
Remove blockage from air outlet
•
Check calibration
•
Replace main PCB
• Unit of out calibration
•
Sensor fault
The following message is displayed on the LCD: "System Failure! [6]" (continued over page)
• •
Motor fault
Pressure sensor tube not connected properly
• •
Check motor cable connections
•
Reconnect pressure sensor tube
Replace motor
8 Troubleshooting guide
65
Problem/Cause
Action
•
Faulty pressure sensor tube
•
Replace pressure sensor tube
•
Blockage in air outlet
•
Remove blockage from air outlet
•
Sensor fault
•
Replace main PCB
The following message is displayed on the LCD: "System Failure! [7]" • Faulty pressure sensor
• Check pressure sensor tube • Replace main PCB
The following message is displayed on the LCD: "System Failure! [8]"
•
Software system failure
• • •
Power cycle the device Check software version. Reinstall or update software Replace main PCB
The following message is displayed on the LCD: "System Failure! [9]"
•
Calibration data corrupted
•
Recalibrate the unit
The following message is displayed on the LCD: "System Failure! [21]"
•
Air inlet filter blocked
•
Remove blockage from air inlet filter
•
Blockage in air path between the motor and pressure measurement points
•
Remove blockage
•
Device internal temperature is too low for the device to start/deliver therapy
•
Ensure hat ambient temperature is above 5°C. If device has been stored below 5°C, allow sufficient time for device to acclimatise. Once acclimatised, power-cycle device.dx
•
Self test fail due to faulty internal components
• • •
Check RTC battery Check motor cable and connections Check backup battery
The following message is displayed on the LCD: "System Failure! [22]"
•
Faulty flow sensor
• •
Check flow sensor connection Replace flow sensor
The following message is displayed on the LCD: "System Failure! [25]" • Faulty cooling fan
• Check cooling fan
• Internal battery disconnected
• Check internal battery connections
•
Faulty internal battery
•
Replace battery
The following message is displayed on the LCD: "System Failure! [38]"
•
66
Software failure
Stellar™ series Service Manual
• • •
Power cycle the device Check software version. Reinstall or update software Replace main PCB
9
System specifications
Operating pressure range
• IPAP: 2 cm H2O to 40 cm H2O (in S, ST, T, PAC mode) • PS: 0 cm H2O to 38 cm H2O (in S, ST, T, PAC mode) • EPAP: 2 cm H2O to 25 cm H2O (in S, ST, T, iVAPS, PAC mode) • AP: 4 cm H2O to 20 cm H2O (in AP mode only) • Min PS: 0 cm H2O to 20 cm H2O (in iVAPS mode) • Max PS: 0 cm H2O to 30 cm H2O (in iVAPS mode) Note: iVAPS mode is only available in Stellar 150
Maximum single fault pressure
60 cm H2O (in all modes)
Maximum breathing resistance under single fault
2 cm H2O at 30 L/min; 7.2 cm H2O at 60 L/min
Therapy pressure tolerance
IPAP: ± 0.5 cm H2O ± 10% of set pressure (end of inspiration) EPAP/PEEP: ± 0.5 cm H2O ± 4% of set pressure AP: ± 0.5 cm H2O or ± 10% of set pressure Test condition: T mode, IPAP: 40 cm H2O, EPAP: 2 cm H2O, Rise Time: MIN, Fall Time: MIN, Ti: 4.0 sec, Respiratory Rate: 10 bpm, with ResMed calibration cap.
Flow accuracy
± 5 L/min or 20% measured value, whichever is greater Test condition: T mode, IPAP: 40 cm H2O, EPAP: 2 cm H2O, Rise Time: MIN, Fall Time: MIN, Ti: 4.0 sec, Respiratory Rate: 10 bpm, with ResMed calibration cap.
Maximum flow
>200 L/min at 20 cm H2O
Inspiratory trigger (nominal) characteristics
The minimum flow required to initiate IPAP by ASL5000 simulator with chronically weak efforts (R20, C20, BPM20): • For Very High setting: 2.4 L/min • For High setting: 4.2 L/min • For Medium setting: 6.0 L/min • For Low setting: 10.2 L/min • For Very Low setting: 15.0 L/min Accuracy ± 20% or +2.0-1.5 L/min whichever is greater. When test with IPAP = 15 cm H2O, EPAP = 5 cm H2O, Rise Time = Min, 2 m air tubing, Ultra Mirage mask, zero leak.
Expiratory trigger (nominal) characteristics
The expiratory cycle occurs at the following flow rates: • For Very High setting: 50% of peak inspiratory flow • For High setting: 35% of peak inspiratory flow • For Medium setting: 25% of peak inspiratory flow • For Low setting: 15% of peak inspiratory flow • For Very Low setting: 8% of peak inspiratory flow Accuracy ± 10%/-25% or ± 1.3 L/min whichever is greater. When test with IPAP = 15 cm H2O, EPAP = 5 cm H2O, Rise Time = Min, 2 m air tubing, Ultra Mirage mask, zero leak.
Sound pressure level
29 dB(A) as measured according to ISO 17510-1:2002. 32 dB(A) with uncertainty of 3 dB(A) as measured according to ISO 17510-1:2007.
Alarm volume range
45 dB - 85 dB at 1 metre (3 steps: low, medium, high)
9 System specifications
67
Data storage
7 days of respiratory flow, calculated therapy pressure, SpO2, pulse rate, breath-by-breath data (EPAP, pressure , minute ventilation, leak, respiratory rate, tidal volume, inspiration time, expiration time, spontaneously or machine triggered or cycled breaths) 365 days of 5th-, 50th-, 95th- percentile data (leak, SpO2, minute ventilation, tidal volume, respiratory rate, I:E, pressure , AHI, AI)
Dimensions (L X W x H)
230 mm x 170 mm x 120 mm
Weight
2.1 kg
Air outlet
22 mm taper, compatible with ISO 5356-1:2004 Anesthetist & Respiratory Equipment - Conical Connectors
Pressure measurement
Internally mounted pressure transducer
Flow measurement
Internally mounted flow transducer
Power supply
AC 100-240V, 50-60Hz, 2.2 A, max. 65 W
External DC Power Supply (isolated)
24V, 3 A
Internal Battery
Lithium-Ion battery, 14.4V, 1.6 Ah, 23 Wh Operating hours: 2 hrs. with a new battery under normal conditions (see below). Patient type: home chronic; pressure: IPAP/EPAP 15/5 cm H2O; mask type: Ultra Mirage; air tubing: 2 m; leak: 0; respiratory rate: 20 bpm; battery capacity: 100% Patient type: hospital acute; pressure: IPAP/EPAP 20/5 cm H2O; mask type: Ultra Mirage; air tubing: 2 m; leak: 0; respiratory rate: 45 bpm; battery capacity: 100%
Housing construction
Flame retardant engineering thermoplastic
Environmental conditions Stellar 100/150
• Operating temperature: 0°C to + 35°C • Operating humidity: 10%-95% non-condensing • Storage and transport temperature: -20°C to +60°C (+50°C*) • Storage and transport humidity: 10%-95% non-condensing • Air pressure; 680hPa to 1100hPa; Altitude: 3000 m Note: The performance may be limited below 800 hPa. *NONIN XPOD
Electromagnetic compatibility
Product complies with all applicable electromagnetic compatibility requirements (EMC) according to IEC60601-1-2, for residential, commercial and light industry environments.
Air filter
Electrostatic fibre mesh with TPE frame structure. Bacterial filtration efficiency of 99.540% on area weight 100g/m2
Air tubing
Flexible plastic, 2 m or 3 m length (22 mm diameter)
SlimLine air tubing
Flexible plastic, 1.83 m length (15 mm diameter)
IEC60601-1 classifications
• Class II (Clause 3.14 - double insulation). This adherence means the need for a protective earthing (ie, an earthed plug) is not necessary. • Type BF • Continuous operation
Air travel requirements
Medical-Portable Electronic Devices (M-PED) that meet the Federal Aviation istration (FAA) requirements of RTCA/DO-160 can be used during all phases of air travel without further testing or approval by the airline operator. ResMed confirms that the Stellar meets RTCA/ DO-160 requirements.
This device is not suitable for use in the presence of a flammable anesthetic mixture.
68
Stellar™ series Service Manual
Displayed values Value
Range
Accuracy
Display Resolution
Flow sensor in devicea Leakb,c
0-120 L/min
± 12 L/min or ± 20%, whichever is greater
1 L/min
Tidal volumeb,c
50-3000 mL
± 20% or 30 mL, whichever is greater
10 mL
Respiratory rate
5-60 bpm
± 1 bpmd
1 bpm
Minute ventilationb
0.6-60 L
± 0.5 L or 20%, whichever is greater
0.1L
Ti
0.0-4 sec
± 0.1 sec or ± 10%, whichever is greater
0.1 sec
Pressure
0-40 cm H2O
IPAP: ± 0.5 cm H2O ± 10% of set pressure (end of inspiration); EPAP or PEEP: ± 0.5 cm H2O ± 4% of set pressure; AP: ± 0.5 cm H2O ± 10% of set pressure
0.1 cm H2O
a. Results may be inaccurate in the presence of leaks and may be affected by vent characteristics. b. Results are expressed at STPH (Standard Temperature Pressure, ambient humidity) c. Results may be inaccurate in the presence of leak and supplemental oxygen > 10 L/min. If necessary for therapy, use external monitoring. d. Results may be inaccurate if the tidal volume is below 50 mL.
Note:
The manufacturer reserves the right to change these specifications without notice. Pressure may be displayed in cm H2O or hPA.
Symbols The following symbols may appear on the Stellar, power supply unit, air tubing or packaging. Follow instructions for use;
Class II equipment;
Type BF equipment;
Bell (Remote alarm);
IP31 Device is protected against solid foreign objects of 2.5 mm diameter and greater and vertically falling
water drops; device);
Caution;
General warning sign (see H4i connector plug and AC connection on the
Standby or preparatory state for a part of equipment;
max 30 l/min (max 30 l/min);
Data communication port;
Connection for oxygen supply; CE labeling in accordance with EC
+ 60 °C + 140 °F
directive 93/42/EEC, class II b; Maximum humidity; Serial number;
- 20 °C - 4 °F
Temperature limitation for storage and transport;
Keep dry;
Manufacturer;
Batch code;
Do not use if package is damaged;
Do not re-use; LATEX
Upside; Use by date;
Handle with care;
Catalogue number; Keep away from sunlight;
Latex-free
9 System specifications
69
Environmental information This device must be disposed of in accordance with the laws and regulations of the country in which disposal occurs. The crossed-out wheeled bin symbol indicates that the product bearing this symbol may not be disposed of together with general household waste, but instead requires separate disposal. This requirement for separate disposal is based on the European Directive 2002/96/EC for electrical and electronic equipment, and the European Directive 2006/66/EC for batteries. You can hand in the product at a municipal collection point, for example. This reduces the impact on natural resources and prevents contamination through the release of hazardous substances. Batteries containing more than 0.0005 percent of mercury by mass, more than 0.002 percent of cium by mass or more than 0.004 percent of lead by mass are marked below the crossed-bin symbol with the chemical symbols (Hg, Cd, Pb) of the metals for which the limit is exceeded. For further information regarding product disposal, please your local ResMed office or visit our website at www.resmed.com Dispose of used air filters and air tubing according to the directives in your country.
70
Stellar™ series Service Manual
10
Recommended maintenance schedule The Stellar series are intended to provide safe and reliable operation when operated in accordance with the instructions provided by ResMed. ResMed recommends that the device be inspected and serviced by an authorised ResMed Service Centre if there is any sign of wear or concern with device function. If the remaining capacity of the internal battery is <80% (as described in “3 Internal battery remaining capacity test” on page 11) the battery must be replaced, otherwise, service and inspection of the device generally should not be required during the five year design life of the unit. The air filter should be replaced at least every six months. Regular cleaning recommendations are provided in the Manual. All of these procedures can be carried out by the owner. Some countries require all medical equipment to have a periodic service to confirm that the equipment is in good working order. Section 3 General inspection and servicing may be used in this situation.
10 Recommended maintenance schedule
71
Appendix A: Service request form ResMed Service Request Report Today’s date:
Product description:
Flow generator
Date of awareness:
Mask
(ResMed only)
Other
Reported by: Product code:
Company name:
Product name:
Country:
Serial/Lot number:
details Email:
Quantity (Lot control items only)
Phone: Mask type: Equipment owner: Pressure settings: Patient: Hourmeter reading: Service centre: Additional owner information:
Date of product purchase:
Under warranty?
Yes
No
Humidifier?
Yes
No
SmartStart?
Yes
No
Date problem occurred?
If purchase date is unknown, please indicate below the time the product was used before the problem occurred: < 3 months
1 - 2years
3 - 6 months
2 - 5 years
6 - 12 months
> 5 years
When did the fault occur? Out of box failure with distributor Out of box failure with patient In use by distributor In use by patient
Is this device being returned to ResMed? Yes
No
Unknown Other Injury reported?
Yes
No
Death reported?
Yes
No
Problem description:
Effect on :
Service details ResMed reference number
Distributor reference number (if applicable)
Signature
AF305-009-01
72
Stellar™ series Service Manual
Appendix B: Operational diagram
Room air in
O2 FiO2 SpO2 USB ports Mains power
Flow sensor
Blower
To patient
Pressure sensor
Interface assembly and alarm
Humidifier
Safety Optical Pressure sensor sensor
Keypad
Power supply Controller Internal battery pack
LCD Dial
Cooling fan
Appendix B: Operational diagram
73
Related Documents c2h70
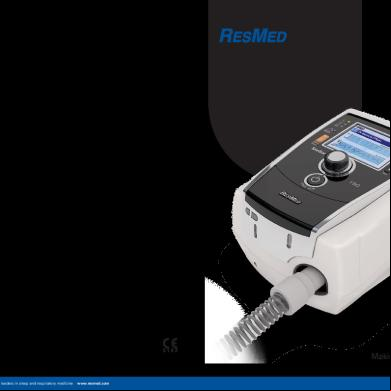
Stellar ap Service 3lx72
March 2023 0
ap 5j715a
April 2021 0
ap Zulybeth v3k1e
February 2021 0
ap Slides d2f8
April 2021 0
Stellar Assignment 2o2b1m
September 2021 0
Stellar Opacity 705e4o
August 2022 0More Documents from "abu" 445k3x

Iicm_u1_a3_erlj 6w5c6y
August 2020 0
Sop Air Bersih 4f4x6w
May 2020 54
Sop Ambulan Jenazah 192s6e
April 2020 56
Stellar ap Service 3lx72
March 2023 0
Contoh Rancangan Aktualisasi r40a
July 2020 0