Tally 9.2 Notes 1v1wq
This document was ed by and they confirmed that they have the permission to share it. If you are author or own the copyright of this book, please report to us by using this report form. Report 2z6p3t
Overview 5o1f4z
& View Tally 9.2 Notes as PDF for free.
More details 6z3438
- Words: 186,925
- Pages: 1,918
TallyHelp
Tally Solutions FZ-LLC Web site: www.tallysolutions.com E-mail: [email protected] ©Tally Solutions FZ-LLC, 1988-2007. All rights reserved. Tally, POWER OF SIMPLICITY is ed trademark of Tally Solutions FZ-LLC. All other trademarks are the property of their respective owners and are hereby recognised.
Using TallyHelp
TallyHelp file is structured in such a way that it provides easy navigation between topics and facilitates easy search. The comprehensive Online Help covers basic and advanced operations. It is context-sensitive and extracts help on topics related to the current screen in Tally. Use Alt + H from the keyboard or click the Help button to access the relevant topics in the Online Help. Here are some details on how to use this help file effectively. It is suggested to go through this topic to utilize the help file effectively. To handle the Left (navigation) pane To handle tool bar buttons To get to know some basics
What's new in this release?
The following links contain information on new features or areas that have been updated in Tally. New Features in Tally 9 New Features in Tally 8.1
New Features in Tally 9
Release 2.0 Release 1.31 Release 1.3 Release 1.21 Release 1.2 Release 1.11 Release 1.1 Release 1.0
Release 2.0 Tally 9 Release 2.0 unleashes the full power of the new engine built into it to give you superlative performance. The response time of the application can now be measured in seconds rather than minutes, even for high volume data. This percolates down to a tenfold increase in performance in several operations. It will improve the experience with the application and will substantially increase productivity.
Enhancements in overall performance Tally 9 Release 2.0 is incorporated with several advanced features which bring about an overall improved performance of the application. One of the most important advancements is the substantial increase in the speed of several operations like loading of company data, backup and restore, reports generation, etc., thus giving an improved and thrilling experience.
Export to Excel Export to Excel is a new feature that has been incorporated in this release of Tally 9. This feature enables the to export any report generated by Tally into Excel. Consequently the can generate graphical representations of his data for better visual presentation. It will considerably speed up and ease the process of filing e-VAT in the future. Note:
Export
to
Excel
is
compatible
with
Microsoft
Office’97
or
higher.
LAN for Tally 9 Silver A single company data can now be accessed simultaneously by more than one Tally 9 Silver (Single ) licenses.
Speed of Migration – reduction in memory usage, increase in speed Another development is the improved performance in Data migration. The application architecture has been designed to reduce the memory usage during the migration process. This results in an increase in the speed of the migration process and subsequent reduction in time required for the migration.
Rewrite speed – improved function
The rewrite function for data correction has been further enhanced in this latest release of Tally.
POS Invoice Modifications have been done to ensure the appropriate display of Multi Mode Payment details that appear at the bottom of the POS Invoice.
Printing Party Name and Address Earlier, printing ledgers using the Multi Printing option in Tally with Normal Ledger selected as the Style of Report, Format as Condensed, and with Start fresh page for each set to Yes in the Report Generation screen would print the Party’s Name only after the Party’s Address. Go to Gateway of Tally> Multi Printing> Books> Ledger> Group pf s> Select Sundry Debtors or Sundry Creditors However, modifications have been made to print the Party’s name prior to the party’s Address.
F4: Change Items Corrections have been made to enable selecting Cost Centres using the button F4: Change Items while at the Cost Centre Vouchers screen. Go to Gateway of Tally> Display> Statements of s> Cost Centres> Cost Centre Break-up> Select the Cost Centre and drill down to the Cost Centre Vouchers screen.
TDS The option Allow Alteration of TDS Rates in F12: Configure when clicked at the voucher level has been replaced with Allow Alteration of TDS Rates for Lower Deduction.
Selecting Invoice in Excise Purchase Invoice Earlier, on selection of an Excise Purchase Invoice from the List of Purchases that appears in the Supplier Details sub screen during an excise sales transaction, Tally would not allow you to trace back to the sub screen and select an invoice from the list in case of a misjudgment on selection. However, Tally 9 Release 2.0 is now made more flexible to accommodate such changes.
Excise Opening Stock By default, the date that appears in the As on field in the Excise Opening Stock Creation screen is the Current date specified. Earlier this field could not be modified. However, you now can enter the date of your choice in the As on field.
M: Manufacturer List Tally now offers the flexibility to select the details of a Manufacturer or Importer by clicking the M: Manufacturer List button during an Excise Purchase transaction. Toggling with the button allows you to select the Manufacturer or Importer from the List of Ledger s or enter details manually while at the Manufacturer/ Importer Details section in the Party Details screen.
Printing Excise Sales Invoice The title Name and Address of Supplier of Goods if he is a Manufacturer or Importer which appears in the excise sales invoice when Print Trader Supplier Info is set to Yes in the Invoice Print Configuration screen has been changed to Name and Address of the Manufacturer/Importer.
Printing State and PIN Code With Printing State and PIN Code set to Yes in F12: Configure> Printing> General, you can now print the Buyer’s State and PIN Code in Sales invoice, Purchase invoice, Credit note and Printing through Multi Printing, as entered at the time of Ledger creation.
Service Tax – Malaysia Corrections have been made to ensure that the Service Tax gets calculated for during sales transactions.
Printing Excise Sales Invoice Corrections have been made to ensure that Tally prints the titles for Excise Sales invoices as follows:
The original copy being marked as ORIGINAL FOR BUYER
The duplicate copy being marked as DUPLICATE FOR TRANSPORTER
The triplicate copy being marked as TRIPLICATE FOR ASSESSEE
The subsequent copies NOT FOR CENVAT PURPOSES
Modifications done now ensure that the excise duty amount gets printed in numbers in the Net Value Excise Amt field on sales invoices printed while Follow Excise rules for Invoicing in F11: Features> Statutory & Taxation is set to Yes.
Nature of Purchase in Excise Two new Nature of Purchase: Agent of Manufacturer and Purchase from Importer have been added in Master creation.
Excise Invoice Printing The option of Print Trader Import Declaration has been provided for in the Invoice Printing Configuration. Under F12 - Voucher Configuration, the earlier label “Allow Alteration of TCS Rate” has been changed to "Allow Alteration of TCS Rate for Lower Collection ". The earlier label name has been changed from "PLA RG 23 Sl. No." to "Seller RG23D No." in Excise Sales Invoice (Manufacturing Section)
Additional Description for Ledgers Additional description for ledgers has been provided for. This option can be activated in F-12 – Invoice Configuration screen.
TDS Report Retrieval of TDS computation reports has been enhanced.
UDFs migration Migrating data from Tally 7.2 to Tally 9 Release 1.3 would not capture values for and 2 as Index numbers for String Data type in TDL containing UDFs.
Ledger Object UDFs taking 1
Appropriate measures have been taken to ensure that the values are captured accurately.
Printing Bill wise Details Printing Bill wise details of ledgers using Multi Printing with Show Billwise Details also set to Yes and Start fresh page for each set to No would not display bill wise details in the report. The issue has been addressed. [Go to Gateway of Tally> Multi Printing> Books> Ledger> Group pf s> a Group]
select
Payroll Exporting Pay Sheet Earlier, exporting a Pay Sheet with a few empty columns in the ASCII format on to MS Excel and selecting Comma as the Delimiter would not be considered. The same has been addressed appropriately.
Date of Leaving for Employees While entering the Date of Leaving for an employee in the Employee Alteration screen, Tally used to accept dates prior to the Date of ing, specified in the master. This issue has been addressed.
Date for Despatch Document Create a Delivery note skipping the Despatch Doc. No. field in the Party's Supplementary Details screen. Now a Sales invoice and track the Delivery note. A print out of the sales invoice would not display the Date against the Despatch Doc. No. The issue has been addressed appropriately.
Tally Link Server Synchronization Synchronization initiated with Tally Link Server through certain Internet Service Providers displays the message Out of Memory and terminates the process immediately. The issue has been resolved.
Memory Access Violation Drilling down from the Statistic screen for a Group company to the vouchers gives MAV (Memory Access Violation) error. This issue has been resolved.
Stock Ageing Analysis The Stock Ageing Analysis does not display the combined total for the Group company. This problem has been appropriately addressed.
Physical Stock in FIFO method Physical stock voucher entry is not affecting the value of the stock items, when using the
FIFO valuation method
for stock item. Necessary action has been taken to affect the stock value when ing a physical stock entry.
Bank reconciliation Statement Printing The print option screen for printing the Bank Reconciliation Statement (BRS) displays Printing Ledger. This issue has been resolved and the option will now be displayed as “Printing Bank Reconciliation”.
Rejection Outward note Tally shows a Negative Stock warning when ing a Rejection Outward note, even when there is stock for the specific item. This has been rectified.
CST CST Pending List screen does not show the break-up of the gross invoice value. This problem has been rectified. Details of Gross amount are now being displayed in CST in the Form Receivables screen.
Multiple VAT Classification When there is a Multiple VAT Classification like "Inter- State Sales" and "Inter - State Sales - Spl. Category Sales" used in an invoice, the amount of CST displayed is incorrect in the VAT Computation Report. Appropriate steps have been taken and this issue has been resolved.
Cost Center budget report When we set the budget for Cost Centers and try to view the Cost Center budget break up report, the values re not displayed correctly. This issue has been resolved. The reports as per the Cost Center Budget are displayed correctly.
Location mismatch during re-write If a Purchase Order/Sales Order is created with the option Any selected under Godown, and then a Receipt Note/Delivery Note entry is ed linked to the PO, on re-writing the data, the PO ed with the above godown option, changes to Main Location. This has been rectified.
Sales Order/Purchase Order status mismatch On rewriting data, the Sales Order/Purchase Order outstanding report displays the Sales Order/Purchase Order as pending, even after they have been adjusted. Appropriate steps have been taken to resolve this issue.
Purchase Order status mismatch Already knocked off Purchase Order with the Receipt Note in Tally 7.2 is shown as “ Pending” after migration to Tally 9. This issue has been duly addressed and the problem has been resolved.
Retention of POS parameter While creating a voucher type for POS invoicing, the option Print after saving Voucher does not retain the parameter No. The parameter defined by the is now retained.
POS entry in Edit mode On opening a POS entry in the Alter mode, the credit Card number, Bank Name and Cheque Number were not displayed. Necessary steps have been taken to resolve this issue.
Distorted Alignment In the Alteration Mode of a POS Invoice, the alignment of the field name “Ledger” is distorted. This issue has been resolved.
Negative stock warning
While using multiple batches of purchase for a single item, in a Sales Invoice, Tally displays a negative stock warning.
On ing a stock journal for an item with balance stock, Tally displays a message saying “Negative Stock”.
These issues have been addressed.
FBT Helper When an expense amount is entered and then an FBT Payment is made using the FBT Helper, there is a difference between FBT Computation and the amount calculated by FBT Helper. Necessary steps have been taken and this issue has been resolved.
TCS TCS Party name does not change in the TCS details sub-screen when the party name is changed in the invoice. This issue has been resolved. The party name will change in accordance with the name on the invoice.
Release 1.31 TDS Earlier making an advance payment to a party through the single entry mode would not calculate the TDS amount. However, now the TDS amount appears appropriately.
Mismatch in Credit and Debit Balances Receipt vouchers created in the double entry mode using foreign currency used to display a mismatch in Credit and Debit balances in the alteration mode. The mismatch in balances has been resolved.
Negative Stock Warning in Journal Voucher Create a stock item with an opening balance of considerable units and a delivery note against it. Using a Journal Voucher to record a sales transaction tracking the delivery note would display a warning message of negative stock even though a considerable amount of stock was left over. The same has been addressed appropriately in Journal voucher.
Migrating € to Tally 9 Data migrated from Tally 7.2 used to display the Euro currency symbol modifications done will successfully migrate
€,
as a box in Tally 9. However,
€ to Tally 9 now.
Booking FBT Expenses Corrections have been made in the Ledgers of FBT Category report to display details of FBT expenses booked by means of a Memorandum voucher report.
Price lists and Stock Items with Negative or Zero Balance Set Allow Invoicing and Use Multiple Price levels to Yes and Allow Sales Order Processing to No in F11: Features> Inventory Features. In such circumstances, the Price Rate in Sales invoices created using Price Lists for Stock items having a Negative or Zero Balance used to appear late or would not appear at all. The error in displaying the Price Rate in such conditions has been resolved.
UDF Value left Blank With Maintain Multiple Godowns in F11:Features> Inventory Features set to Yes, Sales transactions for a stock item with UDF value at the Batch Allocation Level left Blank when viewed in the alteration mode, displayed the UDF value specified during the Purchase of the same item. The issue has been addressed.
Excise stock duty details after data rewrite With Dealer Excise enabled in F11: Features > Statutory & Taxation, the Excise duty details of Excise Stock Items available in hand, were getting deleted after a data rewrite. This issue has been fixed to retain the Excise Duty values.
Migrating String UDF value specified under Voucher Object Earlier, migrating data from Tally 7.2 to Tally 9 would not display the String UDF value specified under Voucher Object in Tally 9. However, modifications have been done to ensure successful migration of the same.
UDF Values specified under Company Object Modifications have been done to ensure that the values of String and Date UDFs specified under Company Object appear in Tally 9 on migration from Tally 7.2.
Release 1.3 Performance in Networking Environment In a networking environment, if the Server has Windows XP and Clients have Windows 98 as the operating system, Tally performs efficiently with improved data stability. The error Record Insertion Failure will not occur in Tally while working in a networking environment.
Day Book
Selecting Cost Centres in the option Alt+F12: Range from Day Book, lists the appropriate options.
Voucher Printing Set the option Print after saving voucher to Yes in the Voucher Type Alteration screen, to print a Rejection in/ Rejections Out voucher, after saving. Go to Gateway of Tally > s Info > Voucher Type > Alter
Interest calculation in Forex A Sales transaction created using Forex currency and Interest calculation, calculates the Outstanding Forex Interest accurately. Go to Gateway of Tally > Display > Statement of s > Interest Outstanding > Ledger > Customer
Ledger Tally now prints the address of the Sundry Debtor / Creditor ledgers, while printing a ledger . Go to Gateway of Tally > Display > Books > Ledger
Ratio Analysis If the Nett Profit is lesser than the Return on Investment% or Return on Working Capital, Tally displays the values with a negative sign.
Maintain balances bill by bill Altering a ledger created under Sundry Debtors or Sundry Creditors, by setting Maintain balances bill by bill to Yes affects only the selected ledger and not the Group.
Columnar Profit & Loss A/c Go to Gateway of Tally> Profit & Loss A/c > C: New Column Tally displays the Columnar Profit & Loss A/c report for any specified period and prints the report accurately.
Migration Tool Licensed s may now migrate data to Tally 9, using the Tally Data Migration Tool on Tablet PCs and Desktop computers of higher processor speed.
Multi Printing Go to Gateway of Tally> Multi Printing> Outstanding Statements> Ledger> Group of s> Select the Group Set Start fresh page for each in the Printing Ledger Outstanding screen to No and print the outstanding ledger s along with accurate On details.
Printing Invoice Tally prints with proper line spacing on Pre-Printed stationery
Printing List of s
While printing the List of s, pressing Enter in the Report Generation screen will not take the cursor to the Type of Masters field. Go to Gateway of Tally> Display> List of s> Alt+P
Actual – Billed Quantity Tally captures correct Actual and Billed quantities in Delivery Notes with any reference number and with Maintain Multiple Godowns in F11: Features > F2: Inventory set to Yes.
Titling While printing multiple vouchers using the Multi Voucher Printing option, use Alt+T: Titling and set Print page numbers in the report to No, in order to stop the printing of page numbers on all pages.
Designation of g Authority The Designation of g Authority appears in the print configuration screen and print preview, only if Confirmation of A/cs is selected as the Style of Report.
Interest Parameters Advanced Interest Parameters entered while creating a ledger appear accordingly at the time of voucher creation.
Interest Calculation Tally calculates interest rates appropriately for occasions where different rates have been specified for different periods.
Formal Receipt While creating Receipt vouchers, Tally displays the name of the Branch/Division or Capital A/c Ledgers in the field Name of Receipt, when Print Formal Receipt after saving is set to Yes in the voucher type
Cheque Printing Tally captures the name of the Branch/Division or Capital Ledgers in the field Name on Cheque while creating Payment vouchers.
Foreign Exchange A Purchase entry made in foreign exchange with Use Common Ledger A/c for Item Allocation in F12: Configure set to Yes, display appropriate values when viewed in the alteration mode.
Multi Column Cash/Bank You can use the Multi Column Cash/Bank option in Multi Printing to print Multi Column Cash/Bank with columns and get well-defined prints of the same.
Tracking Consignee Tracking of Purchase or Sales Orders, created with different Buyer and Consignee names in Receipt and Delivery notes displays accurate Consignee Details.
Godowns The address entered in the Godown creation screen appears legible.
Bank Reconciliation The Bank Reconciliation statement displays appropriate entries as configured in F12: Configure. Go to Gateway of Tally> Display> Books> Cash/Bank Book> Cash Bank Summary> Drill down to the Ledger Vouchers screen and press F5: Reconcile.
Stock Journal The value in the rate field of a Stock Journal (Transfer of Materials) appears appropriately.
Reference You can now print the Reference number entered in the Stock Journal entry.
Purchase/ Sales Order The list of Party or Customer ledgers is displayed appropriately, while creating a Purchase/ Sales order respectively.
Rejection In/ Out Vouchers The Rejection Inward/ Outward vouchers display the customer details as entered in the Mailing Details section of the Customer ledger creation.
Inventory Report The Godown – wise Inventory reports now displays accurate balance values whereas multiple Godowns are maintained.
Price Level Creating a Price Level, using Alt+C from the Price List screen will display the same in the Price Level field spontaneously.
Security Control Tally provides access to the features/ options as specified in the Security Levels screen.
Cost Centre Set the option Show Cost Centre Details also to Yes in the Multi Printing for Group of s to print the Cost Centre details. Go to Gateway of Tally > Multi Printing > Books > Ledger > Group of s
Payroll Configuring Payslip Tally allows you to configure the Payslip to define the Height & Width. Go to Gateway of Tally > Display > Payroll Reports > Statement of Payroll > Payslip>Alt+P and then press F12: Configure for the printing configuration
Authorised Signatory
You can now configure your Payslip to include the signature of an Authorised Signatory.
Pay Head Once you select a Pay Head from the List of Pay Heads in the Salary Details Creation screen, the Pay Head and its alias will not be displayed in the selection list.
Excise for Dealer Local Sales Tax Number The Excise Sales Invoice prints the Local Sales Tax Number, entered in F11: Features > Statutory & Taxation, if the VAT feature is not enabled.
Secondary Education Cess on CVD Tally now s the calculation of Secondary Education Cess on CVD on Excise Stock Items. The following new columns have been added to print the duty value in the sales section of Excise Sales Invoice Rate of Sec Ed Cess on CVD Sec Ed Cess on CVD Amount
The Sec Ed Cess Amount column in Purchase Section of Excise Sales Invoice will capture the duty value. The Excise Purchase Bill and Excise Stock will capture the value in the Total Cess Column
Range and Division in Excise Sales Invoice The Excise Sales Invoice captures the address of the Range and Division specified in F11: Features > Statutory & Taxation
Range and Division The field Range/ Code and Division/ Code in Excise Sales Invoice has been renamed to Range and Division respectively.
Excise Opening Stock You can enter Narration while creating the Excise Opening Stock in Tally.
Excise Purchase Invoice Tally allows you set different duty values for a single Excise Stock Item , which can be set to zero while creating different Types of Purchases.
Excise Sales Invoice The Excise Sales invoice now prints the title as follows: 1.
The original copy being marked as ORIGINAL FOR BUYER
2.
The duplicate copy being marked as DUPLICATE FOR TRANSPORTER
3.
1. 2. 3.
The triplicate copy being marked as TRIPLICATE FOR ASSESSEE
4.
The subsequent copies NOT FOR CENVAT PURPOSES
While printing a single copy of Excise Sales Invoice, the title will not be printed.
Excise Stock Item The Excise Stock Item alteration screen will now display the Tariff Classification below the field Excise details in the Tax information section, to identify the Excise Item.
Refreshing of Duty Value in alteration mode While creating an Excise Purchase Invoice, if the Duty Value is changed, Tally retains and displays the same when viewed in the Alteration mode.
Duty names in Excise Invoice The Excise Sales Invoice will capture the duty names of the Stock Item appropriately, as specified in the Excise Purchase creation (CVD name instead of BED).
TDS Surcharge Value Tally calculates accurate Surcharge Value on the total amount specified in the Party Payment Entry, if the field Ignore Surcharge Exemption Limit in the Party ledger is set to No.
TDS Ledgers While creating a voucher without using TDS ledgers, in a TDS enabled company, Tally displays all the fields appropriately.
POS POS Invoice Set the option Use Additional Description(s) for Item Name to Yes in the POS Invoice Printing configuration to print Additional Item Description in a POS Invoice.
Cancelled POS Invoice You can now preview a cancelled POS Invoice in the alteration mode.
Job Costing Job Work Analysis Use Alt+F1 to view the voucher details of the selected ledger in the Job/Project Monthly Summary report. Go to Gateway of Tally> Display> Statement of s> Job Work Analysis> Job/Project Monthly Summary
Release 1.21
Minor Enhancements Service Tax Secondary Education Cess Effective Date To comply with the Finance Act 2007, Tally provides the Additional Secondary and Higher Education Cess (SHEC) @ 1%, effective from May 11, 2007 N o t e : Secondary and Higher Education Cess @ 1% was effected in Stat version 53 April 1, 2007. You need to re-accept any voucher ed with SHEC (from 1.4.2007 10.5.2007) to update the SHEC calculation.
from to
New Service Categories The following new Service Categories have been provided: 1. Telecommunication service 2. Mining of mineral, oil or gas 3. Renting of immovable property service 4. Works contract Service 5. Development and supply of content 6. Asset management 7. Design Services
Tax Deducted at Source (TDS) Calculation of TDS Surcharge Surcharge is calculated appropriately in the alteration mode.
Form 16A Form 16A in TDS has been revised.
Change in TDS Tax Rate 1.
Effective April 1, 2007, the TDS Tax rate for Rent of land, building or furniture for deductee type Individual/HUF - Resident has changed to 15% and for all other deductee types the tax rate has been revised to 20%, effective from June 1, 2007.
2.
Effective June 1, 2007, the TDS Tax rates for deductee type Resident have changed with regard to the following Nature of Payments.
Commission or Brokerage to 10%
Fees for professional or technical services to 10%
New TDS Nature of payment The following new TDS Nature of payments have been provided: Rent of Plant, Machinery or Equipment at 10%, effective from June 1, 2007. Any Other Interest on Securities as per sec.193 for all Resident deductee types at 20%, effective from April 1, 2004.
TDS Nature of Payment Rent has been renamed to Rent of Land, Building or Furniture.
Tax Collected at Source (TCS) Calculation of TCS Surcharge Surcharge is calculated appropriately in the alteration mode.
Form 27D Form 27D in TCS has been revised.
Display of State Name Tally now displays Uttaranchal as Uttarakhand in accordance with its recent renaming. Tally also displays Chhattisgarh appropriately. To effect these changes in Tally, go to Gateway of Tally > Company Info. ( Alt + F3) > Alter. Select the appropriate state from the List of States and accept the Company Alteration screen to save the changes.
Tracking Delivery and Receipt Notes in a Journal Voucher Enable Use Tracking Numbers (Delivery/Receipt Notes) in F11: Features > Inventory Features to facilitate easy track of Delivery and Receipt Notes in a Journal Voucher.
Release 1.2
New Features Excise Opening Stock Tally allows you to record the Opening Stock Balance of Excise Stock Items. Refer to Excise for Dealers for more details on Creating an Excise Opening Stock.
Calculation of Secondary Education Cess With effect from 1st April, 2007, Secondary Education Cess displays accurate values when selected with other Types of Duties such as TDS, TCS, FBT and Service Tax.
Calculation of CVD (On Import)
Tally calculates CVD (On Import) on (Assessable Value + BED) appropriately in accordance with legal requirements.
Start of new Financial Year Tally displays a warning Change in Date may cause loss of Data if the financial year is altered in the Company Alteration screen.
VAT Payment Vouchers – For India Only You can record details such as Payment period, Challan No. and so on, for each transaction while creating the VAT Payment vouchers.
VAT Declaration in Excise Sales Invoice Tally displays a VAT Declaration in the Print Preview of an Excise Sales Invoice that has utilized VAT ledgers.
Education Cess on CVD in Excise Sales Invoice Tally now calculates Education Cess on CVD in an Excise Invoice.
Duty Heads for Customs and Excise Select the appropriate Duty Head for Excise from the Type of Duty/Tax list while creating Ledgers under Duties & Taxes.
Major Enhancements Speed of Data Transfer Tally now facilitates faster report generation.
Pending Purchase Order While entering a Purchase Voucher against a Purchase Order with different delivery schedules, the Item Allocations sub screen displays only the Pending Purchase Order quantities.
List of Delivery Note Vouchers Press F12: Value and enter the appropriate Range of Information in Report to view vouchers in the required format at the List of Delivery Note Vouchers report which is available in Statistics in Statement of s.
Excise for Dealers Self Importer details in Excise Tally now displays the Self Importer details in the Excise Sales Invoice.
Printout of an Excise Sales Invoice Tally allows you to print the Excise Sales Invoice with three stock items and three different tax ledgers on a single page.
Name and Address of Self Importer The print preview of the Excise Stock and Purchase Bill report includes the Name and Address of the Self Importer.
POS Editing a Cancelled POS Invoice You can edit a cancelled Single Pymt/Multi Mode Pymt POS Invoice and re-enter the Invoice.
POS Invoice Printing Set the option Print Batch Details to Yes in the POS Invoice Printing Configuration to print batch details in the POS Invoice.
Service Tax Sales Voucher Class You can use Voucher classes to create Sales invoices for Service Tax.
Switching the Service Tax Invoice to Voucher Mode You can now toggle from Invoice mode to Voucher mode using the Ctrl+V keys in the Service tax voucher.
Payroll Exporting Pay Heads Tally now offers you the flexibility to export Pay Heads from List of s report. Select Alt+E (Export) to bring up the Exporting List of Ledgers screen. Select Pay Heads from the Type of Masters list.
Tax Deducted at Source Amount in Formal Receipt The printout of a Formal Receipt Voucher with TDS Receivable deducted displays the accurate total amount.
Minor Enhancements VAT Registration Number in U.K. VAT Analysis Report The U.K. VAT Analysis report displays the VAT Registration number for all the Purchase and Sales entries.
Cost Centre Allocation in Payment/Receipt Voucher The Cost Centre allocation sub screen in Payment/Receipt vouchers appears appropriately.
Inventory Vouchers Use Alt + A from the Stock Vouchers screen of the Stock Item Monthly Summary for faster access to the Inventory/ing Voucher creation screen.
Stock Journal Details of a Stock Journal Voucher display appropriately after Printing.
Forex Transactions in Job Costing Set Show Forex Transactions only in F12: Configure to Yes to display the Forex transactions in the JobWork Vouchers report.
Interest Calculation using Multicurrency after Importing The Forex Rates appear accurately at the Voucher entry level, after import of data that contain Interest Calculation.
Foreign Exchange values in Ledger Vouchers report The ledger voucher report for Foreign Exchange transactions displays accurate Foreign Currency values for specified periods.
Closing Balance in Stock Summary The Stock Summary report displays the appropriate Stock Item Rate and Value for Items sold at a discount.
Payment Voucher A single Payment voucher inclusive of a discount created for multiple ledgers in the double entry mode using To/By during entry and later altered to Cr/Dr, displays accurate values.
Display of Multiple Ledgers and Groups The Name of Ledger and Name of Group are shown appropriately at the Multi Ledger and Multi Group display screen.
Multi Column Cash/Bank Book Printing a Multi Column Cash/Bank Book from s Book at Multi Printing shows accurate Opening Balances and Total values.
Forex Gain/Loss display after Splitting data Forex Gain/Loss adjusted previously does not reflect in the Balance Sheet following the split of Company Data.
Balance Sheet display after Splitting data The Balance Sheet displays accurately following the split of Company Data.
Multi Printing of Inventory Books Select All Items at Multi Printing and set Start Fresh Page for each is to No to display the Closing Value in the Item and the Quantity at Physical Stock Entry.
Cost Centre Allocation Set Show Cost Centre Details in F12: Configure to No while selecting Cash or Bank s during the entry of a Payment or Receipt voucher in the double entry mode to prevent the appearance of the Cost Centre Allocation screen.
Allocating Cost Centres Set Pre-Allocate Bills for Payment/Receipt to Yes in F12: Configure during the entry of a Payment or Receipt voucher in the double entry mode to facilitate the allocation of Cost Centres to ledgers.
Multi Voucher Printing You can use the Multi Voucher Printing option to print vouchers/invoices with details of Party Name, Item and values.
Columnar Alteration Drill down to the Voucher from the Sales , click F5: Columnar and select All Items (automatic columns) at Type of Column to view complete details of all the items at the Voucher .
Purchase Voucher Class Set Override Using Item Default to Yes during the creation of a Purchase Voucher Class and create a stock item with the option Set/Modify Default Ledgers for Invoicing to Yes and enter appropriate values for Quantity and Rate. These values will display appropriately during Purchase Voucher entry as well as in the alteration mode.
Stock Summary report with Show Profit Set Can Quantities of Items be Added to Yes when creating a Stock Item under Stock Groups to display appropriate values for transactions using the above mentioned Stock items in the Stock Summary report.
Tax Collected at Source Printing of TCS Invoice Set Print in Simple Format and Print TCS Details to Yes in F12: Invoice Printing Configuration to display the break up details of Income Tax, Surcharge and Cess in the TCS Invoice.
TCS Challan The breakup of TCS payment details is captured in the TCS Challan.
Gross Amount When you enable TCS and VAT for a company, the the Gross Amount inclusive of VAT.
TCS Details sub screen in Sales ing voucher displays
VAT – For India Voucher Number in VAT Classification Vouchers Report When you drill down from the VAT Computation report, the VAT Classification Voucher screen displays Voucher Reference Numbers for all Purchase and Sales vouchers.
Voucher Date in VAT Classification Vouchers Report The Voucher date in a VAT Classification Vouchers report appears in the numeric date format (e.g. 1-42007).
VAT – For Philippines
Invoice Printing Configuration for Philippines Set the option Print VAT Analysis of Items at the F12: Print Configuration screen to Yes/ No while printing invoices for Philippines.
Excise for Dealers Excise Sales Invoice The Excise Sales Invoice prints the appropriate declaration in the Declaration field.
VAT/Excise Details in Dealer Excise The Supplementary Details sub form displays VAT/Excise Details appropriately at Excise Sales Invoice creation.
POS POS Invoice The POS Invoice displays the appropriate details both in Single and Multi Payment modes.
Service Tax Printing Service Tax Enabled Sales and Purchase Voucher Types Set Print after saving Voucher? to Yes to print a Service Tax enabled Sales and Purchase Voucher Type.
Fringe Benefit Tax FBT Computation Report The FBT Computation report displays accurate tax values.
Central Sales Tax Display of Debit Note in Stock Vouchers Report The Stock Vouchers Report at Stock Summary displays accurate Closing Stock values as well as correct Item rates and CST Values in the Outward Column for a Debit Note ed in As Invoice/As Voucher mode.
Deactivation of Form D With effect from 1st April, 2007, Form D will no longer be tracked for CST in Tally to conform to Government regulations.
CST with/without C form The general rate of CST on all goods with the C form has now been set at 3%. The rate of CST on all goods without the C form has been modified to the Local VAT or Sales Tax rate.
Payroll
Payslip Title A Payslip printed for a defined period using the Multi Payslip Printing feature at Multi Printing displays the title Payslip for period ----- to -----.
Release 1.11
Major Enhancements Secondary Educational Cess in Excise for Dealers The budget for 2007 – 2008 has introduced a Secondary Educational Cess at the rate of 1% of the aggregate duties of custom and excise from March 1, 2007. To accommodate the same in Tally Excise for Dealers, we have incorporated a new type of duty Secondary Educational Cess. Incase of excise duties, Secondary Education Cess on excisable goods will be chargeable on the aggregate duties of excise (Excluding Education cess) levied on such goods. The method of calculation of the Secondary Education Cess will be the same as that of Education Cess, which was introduced in the 2004 budget. The Cess breakup will be displayed in the Dealer Excise Sales Invoice .
Rewrite of Existing Data Tally 9 Release 1.11 prompts you to rewrite the existing Tally 9 data automatically.
Minor Enhancements Multi- Environment in Educational Mode Tally 9 Release 1.11 works as a multi- even in the Educational Mode.
Printing Declaration While printing a Sales invoice, the option to set Print Declaration? to Yes or No appears in F12: Invoice Printing Configuration for all companies regardless of their Statutory Compliance for settings.
Declaration in Sales Invoice for s Only Company Set Print Declaration? to Yes or No in F12: Invoice Printing Configuration. The Declaration entered in the Sales Voucher Type Alteration of an s Only Company will display in the Sales Invoice.
Release 1.1
Major Enhancements New Attributes in Tally.ini Tally introduces three new attributes to the Tally.ini file .
OptimizeNetwork
LoadBuffering
FlushFile
Stat.900 Version 51 the new Stat.900 Version 51 from www.tallysolutions.com to use West Bengal and Chattisgarh VAT Returns and TDS Enhancements in Tally 9 Release 1.1
FIFO Perpetual Tally introduces a new method of inventory valuation FIFO Perpetual, which is similar to LIFO Perpetual. The Normal FIFO treats the opening balance of the financial year as the terminating rate to apply for residual stock. FIFO Perpetual takes all existing past data. Both LIFO and FIFO Perpetual are capable of changing the valuation when the company is split unlike their ‘Annual’ versions, which are consistent.
Abatement in Service Tax Tally now offers you the flexibility of entering the desired percentage of abatement in service tax.
Sales Invoice Printing You can now print any number of sales invoices, with the appropriate print title.
Option to Print Invoices as Excise or VAT Invoice Tally now offers you the option Print as Commercial Invoice at the Print Configuration screen. Set it to Yes/No to print an Invoice either in the Commercial (VAT) or Excise invoice format.
Performance and Data Migration in Tally 9 Tally 9 comes with enhanced performance and improved stability over the previous versions. The data migration tool has also been enhanced resulting in more accurate and speedier migration of data.
Minor Enhancements Show Godown-wise Details Use the option Show Godown-wise Details in Gateway of Tally > F12: Configure > Voucher Entry to obtain details of stocks in godowns during Voucher entry.
Display of Date and Buyer Name in Sales Sub-form Set the option Allow separate Buyer and Consignee names to Yes in F12: Configure > Configure Invoice / Orders Entry. On entering the order number manually in the supplementary sub form of the sales voucher, the date and the name of the buyer appears automatically.
Budget A Budget for an expenses ledger for which no transaction has been ed will display exact ledger wise values both in the Profit and Loss and the Trial Balance.
Calculation of Cess in an Excise Purchase entry Tally now calculates excise duty on the Assessable Value (Total purchases less Discount) as entered. Calculation of
Cess is based on the excise duty payable. For eg: Total Purchases = Rs.10000 Discount = Rs. 2000 Assessable Value= Rs. 8000 Excise duty = Rs. 1280 Cess = Rs. 26 Excise Duty:16% of Assessable Value = Rs. 1280 Cess: 2% of Excise duty = Rs. 26
details in Outstanding Statement The printout from Multi Printing of an Outstanding statement for a group (such as Sundry Debtors) will display the details for each debtor from whom bill amounts are pending.
Total Invoice Value in UK VAT The Total Invoice amount of a sales voucher ed in the Invoice mode displays in the column Total Invoice Value of the UK VAT Analysis Output Details Report.
Tax Invoice for Indonesia Set Enable VAT in F11: Company Features > Statutory & Taxation to Yes to display the field Is Tax Invoice? in a Sales Voucher Type Creation screen.
Bill-wise Details for Outstandings in Multi-Currency Transaction Tally displays accurate bill-wise details in the Ledger Outstandings Report for a ledger that has an opening balance in a currency other than the Base Currency.
VAT Classification – Date Range A VAT Classification that is applicable for a month, for example, from 1.4.07 to 30.4.07, does not appear for selection during master or voucher entry before 1.4.07 or after 30.4.07
Change in Name The field Appears in Payslip ? in the Pay Head Creation screen of Payroll is now changed to Affect Net Salary ?
Display of Attendance Vouchers instead of Payroll Vouchers at the Gateway of Tally The Gateway of Tally displays either Attendance Vouchers or Payroll Vouchers depending on the level of security assigned in favour of the at Alt+F3: Company Info. > Types of Security .
Address Details in Cancelled Voucher A cancelled sales voucher will still display the customer’s address details in the Buyer’s Details field of the supplementary sub-form.
Payroll Reports in Different Languages
Payroll Reports display PayHead, Attendance Type and the Primary Cost Category information, in the language of your preference. The Paysheet report can also be configured to display in the chosen language with correct total values.
Using Alt+C in Sales Voucher for an s Only company If you create a Sales Voucher Class in an s Only type of Company and if you select the voucher class while ing a Sales entry, you can navigate to the Ledger Creation (secondary) screen and create a Ledger by pressing Alt+C, from the Particulars field.
Display of Alternative Units If you a Sales entry using a Stock item, which has an Alternative Unit specified, the appropriate value and unit gets displayed in the Rate field for the next sales voucher entered.
Unadjusted Forex Gain/Loss in Balance Sheet Following a change in the Exchange Rate, the Balance Sheet displays the appropriate Unadjusted Forex Gain/Loss amount.
Position Index If you have created multiple voucher types under a Voucher Type and if you try to alter any of them, the Voucher Type Alteration screen will display accurate Position Index value.
Quantity Utilized in Excise Sales Invoice While creating an Excise Sales invoice after the Quantity Utilized in the Supplier Details For sub screen is specified, the cursor moves to the Rate field in the main screen.
Computation of Payhead with On Production Calculation Type A Payhead that uses the Calculation Type On Production shows exact values for an employee who s work on a date later than the first of the month when: Attendance is filled using the Auto-fill option Payroll voucher is ed for a period or Payroll voucher is ed for a month
TDS Challan Bifurcations The bifurcations of a TDS payment entry in the TDS challan agrees with its total.
Printing Daily Breakup When you drill down from the Daily Breakup of Ledger , the Printout of a ledger voucher for a particular day will show correct opening and closing balances.
Opening Balances in the Profit and Loss and Balance Sheet The Balance Sheet displays accurately the closing balance of the previous year as the current years opening balance.
Display of Additional Description for Ledgers and Items After Migration Additional descriptions configured for Ledger and Item names during Ledger entry display accurately along with their respective values after migration from Tally 7.2 to Tally 9.
Stock Valuation Calculation Data migrated from Tally 7.2 to Tally 9 that contains entries ed for Stock transfer from one godown to another utilizing FIFO or Average Cost as the Costing Method will show accurate quantities when you drill down from the Stock Summary Report to the Stock Voucher.
Job Costing Option While Creating the Cost Centre The option Use for Job Costing ? can be set to Yes/No in the Secondary Cost Centre creation screen.
Form 16 for a TDS Ledger You can generate Form 16A for a TDS Ledger even when it has been reconciled without specifying the Bank Name.
Additional Cost on a Stock Item Additional cost on a stock item is taken into consideration for Stock Item Inwards as well as for its Closing Value.
Migration of T Files UDF values, values set at each line level of the bill allocations sub form and Receivables display accurately after migration of a .t file from Tally 7.2 to Tally 9.
Migration of Data Migration of Data is successful on a computer having Internet Explorer 7. Data is successfully migrated in the following cases Data Migration into another machine Statutory Master Files migration Creating a new company
Synchronization Synchronization of data takes place successfully without duplication in Windows – 98 and Windows- ME Operating Systems.
Stock Summary Details View accurate and detailed Stock Summary particulars of two companies using the New Column button.
Display of Stock Journal Values After UDF Migration Default UDF values used in a Stock Journal display accurately after migration from Tally 7.2 to Tally 9.
Movement Analysis of Inventory
An Item Movement Analysis Report accurately displays Values for a stock item for the period selected.
Items in Stock Ageing Analysis In the Stock Ageing Analysis screen, if Primary is selected at the Items Under field, the Values in the Total Quantity and bifurcated quantity columns are appropriate.
Quantity in Stock Ageing Analysis (<90 days) In the Stock Ageing Analysis screen, the Quantity field in the (< 90 days) column displays the accurate values.
Column Titles in Columnar Sales Tally displays column titles in the Columnar Sales screen in the language of your choice.
Multi Form 27D Printing Form 27 D can be printed for a TCS ledger using Multi- Printing for a specified period.
Reorder Status The Re-order level column in the Inventory Reorder Status screen displays details of actual consumption.
Column Detail in Monthly Summary Report You can press Alt+N (Auto Column) and select any Column Detail from the list at any monthly summary report screen in Tally.
Tracking Delivery Notes If you create a Delivery Note with Tracking Numbers enabled, and later enter a Rejection In, Tally will display only the delivery note raised against the particular customer in the List of Tracking Numbers.
Migrating Marks to Tally 9 If you have specified Marks as Exporter options in Sales or Purchase vouchers in Tally 7.2, you can migrate the same to Tally 9.
Name on Receipt If you alter the name of a Sundry Debtor for which you have created a Receipt in the single entry mode, then the name specified in the Name on Receipt at the time of the voucher creation will be retained in the Name on Receipt field and can be altered if required when the receipt is viewed in the alteration mode.
Printing Sales voucher If you have ed a sales entry using a Sales Voucher class where set Print after saving Voucher to Yes and view the print preview of the same voucher in the alteration mode, the VAT% amount will appear in the invoice.
Decompiling T You can decompile the T, migrated from Tally 7.2, using the Tally Developer 2.7.
Viewing Columnar in a Windows XP and 98 Environment In a Client-Server environment, if the Server and one Client have Windows XP as the operating system and
another Client has Windows 98, the Columnar can be viewed at ease.
Group Summary You can specify a Period and view the Group Summary details.
Invoice Numbering If you have enabled the Print after saving Voucher option in the Purchase Voucher Types, the Invoice numbering will appear appropriately on the Print preview for those Purchase entries.
Bill Wise Reference If you a Purchase Voucher with Bill-wise Details, while Enter Purchases in Invoice Format is set to Yes in F11: Features, and later press the Page Up key, the appropriate Bill Reference and amounts are displayed.
Release 1.0 Tally 9 – The World’s Most Powerful Concurrent Multi-lingual Integrated Business ing Software is now enhanced with major new capabilities like Payroll, POS Invoicing, Service Tax for Malaysia, Sales Tax for Malaysia and VAT for Indonesia besides numerous minor functional improvements in the product.
New Features Payroll POS Invoicing Multilingual Statutory and Taxation
Payroll It has been integrated with s, in order to simplify Payroll processing. Payroll can be configured to suit the requirements of various types of organization. You can now configure, align and automate simple to complex payroll processes. You can print pay slips, maintain salary/wages and attendance/ leave/ overtime s, and generate Gratuity and Expat reports. You can also configure Payroll Data with cost centre reports for business analysis. The enhanced Payroll in Tally 9 is now simple and allows you to generate a Payslip four easy steps.
POS Invoicing POS Invoicing in Tally is equipped with ease of use and advanced capability to simplify your retail operations. It efficiently automates the ‘check-out’ process, and allows you to create invoices and collect payments from customers, in a matter of moments.
Multilingual Tally 9 now provides the language interface in Bahasa Melayu and Bahasa Indonesia.
Statutory Compliance and Taxation Tally 9 now provides you with compliance of VAT for different states in India. It also provides you Service Tax for Malaysia, Sales Tax for Malaysia and VAT for Indonesia.
Minor Enhancements in Tally 9 Display of TDS Bifurcations The TDS bifurcations are displayed when you book expenses for amounts in crores.
Display of Bank Reconciliation Date in Form 16A Form 16A displays the bank reconciliation date.
Gridlines in Printed Price List Tally 9 prints the price list with grid lines. When printed, all the pages of the price list appear with grid lines.
Cost Centres with Scenario Scenarios can be viewed in the Cost Centre Break-Up Report. For example, a Reversing Journal for a Cost Centre. Create a scenario and include the Reversing Journal. Go to Gateway of Tally > Display > Statement of s > Cost Centres > Cost Centre Break-up Select the cost centre from the list and press Alt + C (New Column) . Select the Type of Value (Scenario), and set Show variance to Yes, to view details of its variance.
Stock Item with Different Rates in Invoice When a stock item is repeated in an order with different rates, values and additional descriptions, the invoice displays the stock item individually, in separate lines.
Negative Quantity Warning During invoice entry, the negative quantity warning is provided, not just on the total closing quantity of an item, but also on the quantity of a selected batch/ godown/ location of that particular item.
Exclusion of Groups for Payment and Receipt Vouchers While creating a Class for Payment/ Receipt Vouchers, you can exclude Groups under the section, ‘Exclude these Groups,’ to prevent them from appearing during Voucher Entry. Sundry Debtors and Sundry Creditors are not included in the ‘Exclude’ list.
Report Title in Multi Printing To display the Group Name as a report title when using the Multi Printing option, Go to Gateway of Tally > Multi printing > Books > Ledger > Group of s Select the required Group.
Display of Credit Days While ing a Purchase entry in Voucher mode, the number of credit days specified in ‘Due Date’ displays in
the Voucher under Credit Days.
Altering Single Groups in Multi Group Alteration Mode You can alter a Single Group in Multi Group alteration mode.
Altering a Forex Purchase Transaction When altering a Purchase invoice of a Forex transaction with Use Common Ledger A/c for Item Allocation set to Yes in F12: Configure, the Item Allocation sub-screen retains the currency selected.
Display of Surcharge in Credit Note The surcharge paid on TCS is displayed in the Credit Note.
Period-wise VAT Forms Enhanced memory makes it possible to open VAT Forms for any period, including the fourth quarter.
Order of Ledgers in Purchase Invoice Set Use Common Ledger A/c for Item Allocation and Accept Supplementary Details to Yes in F12: Configure, to retain the order of additional ledgers entered in a Purchase Invoice even when you are in the alteration mode.
Invoice against Sales Orders with Additional Ledgers You can now enter an invoice, with Use Common Ledger A/c for Item Allocation set to Yes in F12: Configure, against the sales order with additional ledgers.
Purchase Vouchers All Purchase Vouchers with/ without VAT selected, or Purchase Voucher types, with Print after Saving Voucher set to Yes, are error-free after they are saved.
Staggered Delivery In Tally 9, an order containing different due dates can be tracked, using a single delivery note.
Interest on Loans to Sundry Debtors/Creditors Interest received on loans given to Sundry Debtors/ Creditors is ed with a Debit Note/ Credit Note using a Voucher Class. The Interest Receivable Report displays only the pending interest receivable and not that for which a Debit Note/ Credit Note has been raised.
Period in TR-6 Challan Tally 9 gives you the option of specifying the period for Service Tax payable, which is captured in the TR-6 Challan.
Setting Off Excise Duty Credit Against Service Tax Payable Tally 9 allows you to set off Excise Duty Credit against Service Tax Payable. This excise duty credit can be availed for inputs as well as capital goods.
Display of Date of Deposit/ Payment in Form 16A After TDS Reconciliation in Tally 9, the date of Deposit/ Payment is appropriately displayed in the TDS Form 16A.
Inclusion of New ST3 Form Tally 9 includes the new ST3 Form of Service Tax.
TCS Surcharge Rounding Off The TCS Surcharge Rounding Off is accurately displayed in Tally 9.
Printing Cheques in Foreign Currency This is a significant enhancement. Tally 9 allows you to print a cheque in a foreign currency, Go to F12: Configuration > Printing > Payment Voucher Set Print Foreign Currency Symbol to Yes.
Performance Enhancements Import of Statutory Masters The speed at which Statutory Masters can be imported has been greatly enhanced.
Display of VAT Computation Report The VAT Computation Report now displays at a greatly enhanced speed.
Display of VAT Return Report The VAT Return Report now displays at a greatly enhanced speed.
Export of E-TDS Report The E-TDS Report can be exported at a greatly enhanced speed.
Important tasks to be performed by existing customers Statutory Compliance For s, who have upgraded from Tally 8.1 to Tally 9, have to select a country from the List of Countries at the Statutory compliance For field, to enable the statutory features of the required country in Tally 9. Go to Gateway of Tally > Cmp Info (Alt + F3) > Alter
Using Ts Migrated to Tally 8.1 in Tally 9 Tally 9 will rewrite the format of the Ts migrated from Tally 7.2 to Tally 8.1 and creates a backup file with the extension .BAK For example, if you migrate the Emp.t file to Tally 8.1, it will appear as Emp9.t. When the same .t file is loaded on Tally 9, the backup file created will appear as Emp9.BAK N o t e : You need to rename the . B A K file to . t c p, if files in Tally 8.1.
Budgets in Tally 9
you
wish
to
use
the
migrated
.t
Budgets created for different periods in Tally 8.1 are combined in the First budget period itself, after migration of Tally 8.1 data to Tally 9. Hence, you are advised to manually recreate the budget in Tally 9 after migration, to avoid any possible loss of data.
New Features in Tally 8.1
Release 1.0 Release 1.1
Release 1.0 Tally 8.1 - A Multilingual Business ing & Inventory Management Software provides for Fringe Benefit Tax computation and VAT Composition returns generation in addition to its language capabilities.
New Features Multilingual Fringe Benefit Tax VAT Composition Returns Excise for Dealers
Multilingual Tally 8.1 is so technologically advanced that it can operate in all Indian languages concurrently! That means, you maintain s in any Indian language view it in another and print it in yet another language of your choice…. at the same time! With Tally 8.1 capture multiple language-specific aliases for all Masters and print Reports, Vouchers and Invoices in the language of your choice. What’s more, Tally 8.1 s transliteration of data for Indic family of languages.
Fringe Benefit Tax FBT (Fringe Benefit Tax) is a one time, easy to enable configuration. Tally provides the complete tracking of expenses covered under FBT. It computes FBT based on the eligibility criterion and generates FBT Challan and returns.
VAT Composition Returns VAT Composition Returns provides fast and error-free voucher entry with complete tracking of each transaction. The Composition Rate of VAT is automatically recognised based on the turnover. It prints VAT Composition Returns for VAT enabled states. The tax payable is calculated automatically and displays in the Return Form.
Excise for Dealers Excise for Dealers provides complete tracking of duty credit availed and ed on. It s printing of excise invoice and generates the required statutory reports.
Enhanced functionalities and features in Tally 8.1 Tally 8.1 is performance driven. Its enhanced features include: Language directory Ability to restore Tally 7.2 data within minutes Easy import and export of data interface colours that are even more pleasing to the eye Speed of operation with extensive reduction of the Stat.900 file size Choice of multilingual options Multi-language printing options Ability to copy text from Tally to windows and vice versa Miscellaneous features
Language Directory Language files (.dct) reside in the Language Directory . Specify this path at the time of installation or in the Tally.ini file. To change the Language directory path in the Tally.ini Open Tally.ini file from the Tally installed folder.
Enter the path where the language files are present.
Save and close the file.
Restore Process of 7.2 Data Tally 8.1 does not recognise Tally 7.2 data backup files. You can restore Tally 7.2 data by clicking the
tally72migration icon in the Tally 8.1 folder. Specify the destination and source files in Select Companies to Restore. The Migrate Data option completes the process. The 4 digit number 7.2 number is prefixed by 0, making it a 5 digit 8.1-compatible number. Refer to Restore 7.2 backup in Tally Data Migration tool section for more details.
Import of Masters and Vouchers Tally now s only the XML format to import Masters and Vouchers.
Export If you select Multilingual from the language list during export, then Tally allows you to Export in three formats ASCII (Comma-delimited), HTML (Web-publishing) and XML (Data-interchange) . If you select English from the language list, then Tally allows you to Export in two formats - ASCII (Commadelimited) and XML (Data-interchange) . N o t e : By default, Tally does SDF format, you can
not the
SDF format. However, if S D F E x p o r t I m p o r t . T C P utility
you wish from the
to use the Tally website.
Stat.900 Tally 8.1 has now been enhanced with features that speed up your operations. The Stat.900 file size has now reduced extensively. This improves the performing speed while creating or importing a company.
Colours The interface has now changed to more appealing colours aimed at enhancing your use of Tally. By default, Tally 8.1 screens display in a new colour as the colour quality is set to Highest (32 bit). However, to retain the usual display of Tally: Go to Desktop > Display properties> Settings > Set the Color quality to Medium (16 bit) > Restart Tally
Tally’s Phonetic Keyboards Tally’s Phonetic keyboard is useful for those who speak the language but do not know how to type it using the operating system keyboard. It is friendly with the same layout as that of the English characters. You can spell the term based on its sound and the data is transliterated in the language selected.
Print language You can print documents and reports in the language of your choice in Tally. For instance, while printing the following voucher, select Alt+ L to bring up the Print Language Configuration prompt.
Select the language of your choice. The printed document displays as shown.
Major Changes and Enhancements There may be minor variation in reports during migration of data from Tally 7.2 to Tally 8.1 due to the changes listed below:
LIFO and FIFO valuation method Sales and Purchase vouchers ed on a single day now display in the Stock vouchers report in the order of their entry thus ensuring effective functioning of LIFO and FIFO Stock valuation methods. For example, In Tally 7.2, A purchase invoice followed by a sales invoice and then again a purchase invoice will display in the stock vouchers report with all the sales entries listed first followed by all the purchase entries. Tally 8.1, however, displays the vouchers in the order of their entry –Purchase – Sales – Purchase.
Std Cost and Std Price Valuation method If you have not set Set Standard Rates? in Stock Item masters but have set Costing Method to Std Cost and Market Valuation Method to Std. Price. In Tally 7.2, the First Purchase cost was taken into consideration for the Std Cost Valuation and the First Sale price for Std Price valuation methods. However, Tally 8.1 accurately considers the Last Purchase cost for Std Cost Valuation and the Last Sale Price for Std Price valuation
Average Cost When Multiple Sales and Purchases are made against Receipt and Delivery Notes at a rate different from that specified in the Receipt and Delivery notes For Example: Let us assume you have ed a Receipt Note for 100 nos. of an item @ Rs. 100 per item. Subsequently you a Purchase Invoice for 30 nos of the item @ Rs. 120 against the above Receipt Note. This means that some items are still pending against the tracking number. In Tally 7.2, the difference in the rates would be incorrectly included in the original value The balance sheet viewed with Avg. Cost valuation method displays closing stock values at Rs. 10,600. This has been resolved in the new Tally 8.1, which accurately displays the Avg. Cost closing stock valuation in the balance sheet as Rs. 10,000.
On values were being taken as 'overdue' in Ratio Analysis in 7.2 In Tally 7.2, On values were taken into consideration while calculating values for Due till today in Ratio Analysis. Tally 8.1 has resolved this and displays only the outstanding values in Due till today. (for Sundry Debtors and Creditors)
Pending Tracking number values were approximate, even though quantities were accurate (causing few Paise difference depending on context) Tally 7.2 used to display pending Delivery/Receipt with approximate values, causing a small difference in the values. Tally 8.1 has resolved this and displays the pending Delivery/Receipt Notes values accurately.
Miscellaneous Changes and Enhancements Tallysav.dat file The Tallysav.dat file in the tally folder is now Tallysav.tsf.
Tally_req.slk and Tally_resp.slk files The tally_req.slk file, which is generated while activating the Tally license, is now tally_req.lic.
Similarly, the tally_resp.slk file, which is generated as a response from the Tally Internet Services server, is now tally_resp.lic .
Tally Data files The Tally 8.1 data file now consists of 5 digits. The numbering of a company created in Tally 8.1 starts with 10000. Additional companies created will be suffixed with 10001, 10002, 10003 and so on. However, when you migrate Tally 7.2 data to Tally 8.1, the 4 digit-data file in the 7.2 folder is converted to a 5 digit-data file with 0 prefixed. Example: 00001, 00002 and so on…..
Loading Icon
The Tally Clock
is now replaced with the Windows Wait icon
Close Button To quit any Tally screen, you now have an option apart from the
Esc key on the keyboard. The following button
displays on the right of every screen in Tally. Click the Close
button to quit the current screen.
Copying Text From Tally to Windows Copying text to and from Tally to Windows is now a simple process. Use Ctrl+Alt+V to paste text into Tally.
Ctrl+Alt+C to copy text from Tally and
Release 1.1 E-Mail Authentication While mailing reports in Tally, the E-Mail Server now accepts the Authentication Name and .
Multi-ing Allocation When you rewrite a company, the vouchers with multiple ing allocations will be retained if Use Common Ledger A/c for Item Allocation is set to No.
Synchronization of Altered Transactions Synchronization is possible even when data migrated from Tally 7.2 consists of cancelled vouchers.
Cost Centre Class in Stock Journal In Tally 8.1 you cannot select Cost centre class while creating Stock Journals as it is not applicable.
Migration The process of Migrating Data to Tally 8.1 is now effectively enhanced.
Migrating Currencies Multiple currencies can now be easily migrated to Tally 8.1.
Forex Gain Loss Calculations Tally 8.1 displays accurate Debit and Credit amounts in the Ledger Forex Gain/Loss report unlike Tally 7.2 in which Debit amounts were displayed as Credit and vice versa.
Introduction
When you install Tally, a folder named Tally is created by default, where the program files will reside. You can specify a different folder name, if you wish.
System Requirements To install Tally, your system must meet the following minimum requirements.
Configuration
System Requirements
Intel Pentium IV and higher or equivalent Processor 256 MB RAM or more Memory 40 MB Minimum (excluding the data) Free Hard Disk Space Recommended 1024 x 768 or higher Monitor Resolution N o t e : For better performance Free Hard Disk Space)
Tally
Multilingual
needs
more
memory
Operating System Requirements for Tally Multilingual
Operating System
for Indian Scripts in Windows version
Windows 95 Windows 98 Windows ME
Does not Unicode
Windows NT
s Unicode but not Indic languages
Windows 2000
s Unicode and the following Indic languages:
Hindi
(about
40MB
of
Marathi
Tamil
Windows XP
s Unicode and the following Indic languages:
Hindi
Marathi
Tamil
Telugu
Kannada
Punjabi
Gujarati
Windows 2003
s Unicode and the following Indic languages:
Hindi
Marathi
Tamil
Telugu
Kannada
Punjabi
Gujarati
Windows XP SP2
s Unicode and the following Indic languages:
Hindi
Marathi
Tamil
Telugu
Kannada
Punjabi
Gujarati
Bengali
Malayalam
Pre-Installation
To install Tally in Windows NT/2000/XP/2003/XP SP2 Workstation, 1.
You need to have /all rights (to create, write, update, modify and delete) on the Application, Data, Configuration and Language directory.
2.
Ensure that the Operating System you use s Tally for Multilingual .
Installing Tally
You can install Tally using one of the given methods.
Method 1: Double click install.exe from the CD.
Method 2: Click START from Windows. Select RUN. TYPE
:\INSTALL. Press ENTER key.
Follow the instructions on your screen to install Tally. 1.
2.
The Tally Setup Wizard is displayed.
1.
2.
Click Next to continue
3.
The Installation wizard displays the License Agreement. Read the license agreement before you proceed. Click I Agree to continue. Click I Decline to stop setup or click Back to go to the previous screen.
3.
4.
In the Installation screen, you may accept the suggested directories. Else click Change Application Directory or Change data Directory or Change Configuration Directory or Change Language Directory to change the respective directory paths. Use Tab or the mouse to change the path in any of the directories.
Application Directory The Tally program files reside in this directory.
Data Directory The Tally data resides in Data directory. The default directory where data is stored is C:\Tally\Data. To change click on Change Data Directory button and enter the new directory. When Tally is installed in a directory with an earlier version, it detects and retains the data configuration path of the previous installation.
Configuration Directory Tally configuration files reside in this directory. Specify the path of the directory where configuration files should be saved. It is usually the same path as that of the Application directory.
Language Directory Tally Language files (.dct) reside in this directory. Specify the path of the directory where the Language files will be maintained. It is usually the same path as that of the Application Directory. Note:
If
you
are
a
Multi-License
,
select
the
Run
Tally
License
Server
at
Windows
Startup
check
box.
During installation, you are prompted to specify the path and the OS files to install the Indic languages. 5.
Click Install Operating System Language to enable Language .
6.
Select your Country name in Country Selection.
7.
Select the Initial Startup Language from the list. When you start Tally for the first time, Tally will appear in the language selected as the Initial Startup Language (screen).
8.
Once you select the Initial Startup Language, Click Install to proceed with the installation.
9.
The installation progress status is displayed as shown below.
9.
10.
Insert Windows CD to install language or Browse for the i386 folder in your system.
N o t e: You will be available in your
prompted system
to
install
the
i386
language
folder
only
if
it
is
not
11.
Click Finish to complete Setup.
After completing installation, double click Tally icon on the desktop to start working on Tally.
Tally.ini
The Installation program loads the Tally.ini file in the Tally programs or applications directory. This is a CONFIGURATION SETTINGS file, which Tally refers to, for some basic settings when starting. The file content appears as shown:
1.
The Data, Configuration and Language directories appear in the Tally.ini file as specified at the time of installation. However, you can change the respective directory paths by specifying it in the Tally.ini .
2.
If you want to load a company automatically on starting Tally, enter the number in the line Load as per the information available in the data directory.
3.
2.
3.
You can specify the name or path of the T(s) (Tally Compliant Product), if any, after the TDL field.
4.
You can set Color to NO, if you do not want to view the screens with the default colours of Tally.
N o t e : The lines in the T a l l y . i n i file prefixed by two semi-colons indicate that features are not enabled. The only way to override these defaults is removing colons in the T a l l y . i n i .
those the semi-
Tally introduces three attributes to the .ini file.
OptimizeNetwork
LoadBuffering
FlushFile
OptimizeNetwork in Tally.ini Setting OptimizeNetwork to No in Tally.ini reduces memory requirements and prevents the system from going into a virtual memory mode although it slows down the generation of reports. However, for s with a large volume of data, it is advised to use more than 500 MB of free memory and set OptimizeNetwork to Yes . This increases load speed dramatically and generates reports faster. The settings can be changed in accordance with client memory available. By default, Optimize Network in Tally.ini is set to No.
LoadBuffering in Tally.ini Certain types of data (such as, a large number of Batches, Godowns and Tracking numbers) very quickly exhaust the available memory, when information is cached during loading. Set LoadBuffering in the Tally.ini to No , to reduce this buffering, although it will result in a marked increase in network traffic. For a lower volume of data (such as, a large number of masters and stock items, but a smaller number of batches, Godowns and Tracking numbers), it is advised to set LoadBuffering to Yes By default, LoadBuffering in Tally.ini is set to Yes.
FlushFile in Tally.ini For both Single and Multi s of Tally, it is practical to set FlushFile to No to facilitate Faster acceptance of Masters and Vouchers as well as a marked improvement in accessing network data. However, this could be risky in places with frequent power problems and without Power Backups. In which case, it is advised to continue with the Tally.ini default setting FlushFile to Yes By default, FlushFile in Tally.ini is set to Yes .
Shortcut keys in Tally
The shortcut keys appear in button names in the button bar (right side of the Tally screen). You can either click the button from the button bar or press the relevant function key or character underlined/double-underlined. The buttons have a function key before the button names ( Eg: F1 key (Function Key) to select the 'Select Company' screen
F1: Select Cmp) which means you need to press
The buttons have an underlined character ( Eg: F3: Cmp Info), which means you need to press ALT + F3 to select the 'Company Info' screen. Some buttons have a double-underlined character (Eg: V: As Voucher) which means you need to press CTRL + V to select the 'Voucher' in voucher mode.
More: Function Key Combination Special Key Combination Special Function Key Combination Key Combination used for navigation
Function Key Combination
Windows
Functionality
Availability
F1
To select a company
At all masters menu screen
F1
To select the s Button
At the ing alteration screen
F1 (ALT+F1)
To select the Inventory Button
At the Inventory/Payroll Voucher creation and alteration screen
F1 (CTRL F1)
To select Payroll Vouchers to alter
At the ing/Inventory voucher creation or alteration screen.
To change the current date
At almost all screens in TALLY
To select company inventory features
At the F11: Features screen
To select the company
At almost all screens in TALLY
To select Company Statutory & Taxation features
At F11: Features screen
F4
To select the Contra voucher
At ing / Inventory Voucher creation and alteration screen
F5
To select the Payment voucher
At ing / Inventory Voucher creation and alteration screen
F6
To select the Receipt voucher
At ing / Inventory Voucher creation and alteration screen
F7
To select the Journal voucher
At ing / Inventory Voucher creation and alteration screen
F8
To select the Sales voucher
At ing / Inventory Voucher creation and alteration screen
F8 (CTRL+F8)
To select the Credit Note voucher
At ing / Inventory Voucher creation and alteration screen
+
F2
F3
Voucher
creation
and
F9
To select the Purchase voucher
At ing / Inventory Voucher creation and alteration screen
F9 (CTRL+F9)
To select the Debit Note voucher
At ing / Inventory Voucher creation and alteration screen
F10
To select the Reversing Journal voucher
At ing / Inventory Voucher creation and alteration screen
To select the Memorandum voucher
At ing / Inventory Voucher creation and alteration screen
F11
To select screen
At almost all screens in TALLY
F12
To select the Configure screen
F10 (Ctrl F10)
+
the
Functions
and
Features
At almost all screens in TALLY
Special Key Combination
Windows
Functionality
Availability
ALT + 2
To Duplicate a voucher
At List of Vouchers – creates a voucher similar to the one where you positioned the cursor and used this key combination
ALT + A
To Add a voucher
At List of Vouchers – adds a voucher after the one where you positioned the cursor and used this key combination.
To Alter the column in columnar report
Alters the column in all the reports which can be viewed in columnar format
To create a master at a voucher screen (if it has not been already assigned a different function, as in reports like Balance Sheet, where it adds a new column to the report)
At voucher entry and alteration screens, at a field where you have to select a master from a list. If the necessary has not been created already, use this key combination to create the master without quitting from the voucher screen.
To access Auto Value Calculator in the amount field during voucher entry
At all voucher entry screens in the Amount field
To delete a voucher
At Voucher and Master (Single) alteration screens. Masters can be deleted subject to conditions, as explained in the manual.
ALT + C
ALT + D
To delete a master To delete a column in any columnar report
All the reports screen which can be viewed in columnar format
(if it has not been already assigned a different function, as explained above) ALT + E
To export the report in ASCII, Excel, HTML OR XML format
At all reports screens in TALLY
ALT + I
To insert a voucher
At List of Vouchers – inserts a voucher before the one where you positioned the cursor and used this key combination.
To toggle between Item and ing invoice
At creation of sales and purchase invoice
ALT + L
To select the Language Configuration
At almost all screens in TALLY.
ALT + K
To select the Keyboard Configuration
At almost all screens in TALLY.
ALT + O
To the report at your website
At all reports screens in TALLY
ALT + L
To select language for Tally Interface
At almost all screens of TALLY
ALT + M
To Email the report
At all reports screens in TALLY
ALT + N
To view the report in automatic columns
At all the reports where columns can be added
ALT + P
To print the report
At all reports screens in TALLY
ALT + R
To remove a line in a report
At all reports screens in TALLY
ALT + S
To bring back a line you removed using ALT + R
At all reports screens in TALLY
ALT + U
To retrieve the last line which is deleted using Alt + R
At all reports screens in Tally
ALT+ V
From Invoice Journal screen
At Invoice screen à Quantity Field à Press Alt + V to select the Stock Journal.
ALT + W
To view the Tally Web browser.
At all reports screens in TALLY
ALT + X
To cancel a voucher in Day Book/List of Vouchers
At all voucher screens in TALLY
ALT + R
To Tally
At almost all screens in TALLY.
CTRL + A
To accept a form – wherever you use this key combination, that screen or report gets accepted as it is.
At almost all screens in TALLY, except where a specific detail has to be given before accepting.
CTRL + B
To select the Budget
At Groups/Ledgers/Cost Centres/ Budgets/Scenarios/Voucher Types/ Currencies (s Info) creation and alteration screen
CTRL + ALT +B
To check the Company Statutory details
At all the menu screens
CTRL + C
To select the Cost Centre
At Groups/Ledgers/Cost Centres/ Budgets/Scenarios/Voucher Types/ Currencies (s Info) creation and alteration screen
To select the Cost Category
At Stock Groups/ Stock Categories/ Stock Items/ Reorder Levels/ Godowns/ Voucher Types / Units of Measure ( Inventory Info) creation/alteration screen
To select the Currencies
At Groups/Ledgers/Cost Centres/ Budgets/Scenarios/Voucher Types/ Currencies (s Info) creation and alteration screen
CTRL+ E
screen
to
bring
Stock
CTRL + G
To select the Group
At Groups/Ledgers/Cost Centres/ Budgets/Scenarios/Voucher Types/ Currencies (s Info) creation and alteration screen
CTRL + I
To select the Stock Items
At Stock Group/ Stock Categories/ Stock Items/ Reorder Levels/ Godowns/ Voucher Types / Units of Measure ( Inventory Info) creation/alteration screen
Ctrl + Alt + I
To import statutory masters
At all menu screens
CTRL + L
To select the Ledger
At Groups/Ledgers/Cost Centres/ Budgets/Scenarios/Voucher Types/ Currencies (s Info) creation and alteration screen
To mark a Voucher as Optional
At the creation and alteration of Vouchers
CTRL + O
To select the Godowns
At Stock Group/ Stock Categories/ Stock Items/ Reorder Levels/ Godowns/ Voucher Types / Units of Measure ( Inventory Info) creation/alteration screen
CTRL + Q
To abandon a form – wherever you use this key combination, it quits that screen without making any changes to it.
At almost all screens in TALLY.
CTRL + R
To repeat narration in the same voucher type
At creation/alteration of voucher screen
CTRL + Alt +R
Rewrite data for a Company
From Gateway of Tally screen
CTRL + S
Allows you to alter Stock Item master
At Stock Voucher Report and Godown Voucher Report
CTRL + U
To select the Units
At Stock Groups/ Stock Categories/ Stock Items/ Reorder Levels/ Godowns/ Voucher Types / Units of Measure ( Inventory Info) creation/alteration screen
CTRL + V
To select the Voucher Types
At Groups/Ledgers/Cost Centres/ Budgets/Scenarios/Voucher Types/ Currencies (s Info) creation and alteration screen
To toggle between Invoice and Voucher
At creation of Sales/Purchase Voucher screen
Special Function Key Combination
Windows
Functionality
Availability
ALT + F1
To close a company
At all menu screens
To view detailed report
At almost all report screens
To explode a line into its details
At almost all screens in TALLY
To select Inventory vouchers to alter
At the Inventory/ Payroll voucher creation or alteration screen.
ALT + F2
To change the period
At almost all screens in TALLY
ALT + F3
To select the company info menu
At Gateway of Tally screen
To create/alter/shut a Company ALT + F4
To select the Purchase Order Voucher Type
At ing / Inventory Voucher creation and alteration screens
ALT + F5
To select the Sales Order Voucher Type
At ing / Inventory Voucher creation and alteration screens
To view monthly and quarterly report At almost all report screens in TALLY ALT + F6
To select the Rejection Out Voucher Type
At ing / Inventory Voucher creation and alteration screens
To change the Sales Order Voucher Type ALT + F7
To select the Stock Journal Voucher Type
At ing / Inventory Voucher creation and alteration screens
To accept all the Audit lists At TallyAudit Listing screen ALT + F8
To select the Delivery Note Voucher Type
At ing / Inventory Voucher creation and alteration screens
To view the Columnar report At Ledger Voucher screen ALT + F9
To select the Receipt Note Voucher Type
At ing / Inventory Voucher creation and alteration screens
ALT + F10
To select the Physical Stock Voucher Type
At ing / Inventory Voucher creation and alteration screens
ALT + F12
To filter the information monetary value
At almost all report screens
based
on
Ctrl + F1
To select payroll vouchers for alteration
At the ing/Inventory Voucher creation or alteration screen
CTRL + ALT + F12
Advanced Config
At Gateway of Tally
Key Combination used for navigation
Windows
Functionality
Availability
PgUp
Display previous voucher during voucher entry/alter
At voucher entry and alteration screens
PgDn
Display next entry/alter
At voucher entry and alteration screens
ENTER
To accept anything you type into a field.
You have to use this key at most areas in TALLY
To accept a voucher or master To get a report with further details of an item in a report.
At the receivables report – press Enter at a pending bill to get transactions relating to this bill (e.g., original sale bill, receipts and payments against this bill, etc)
To remove what you typed into a field
At almost all screens in TALLY.
ESC
voucher
during
voucher
To come out of a screen To indicate you do not want to accept a voucher or master. SHIFT ENTER
+
Collapse next level details
At Voucher screen and Trial Balance report
SHIFT ENTER
+
To explode a line into its details
In almost all Reports: At a Group/Stock Group/Cost Category/Godown/Stock Category – displays Sub Groups and Ledgers/Stock Items/Cost Centres/Secondary Godowns/Secondary Stock Categories At a Voucher – displays its entries and narration At a Stock Item- displays its godowns and batch details At Voucher screen – displays the next level details At Trial Balance report - displays the next level details
CTRL ENTER
+
To alter a master while making an entry or viewing a report
At voucher entry and alteration screens At all reports
Licensing
Introduction Tally provides you with two types of licensing options:
Single- Licensing
Multi- Licensing
TallySilver for Single- Single- Licensing allows the deployment of Tally on a SINGLE computer with an option of activating it Online or Offline. You can also choose to use the same Tally license on another computer, by surrendering the license activated on a computer and reactivating it on the other. An Offline takes the request file generated by Tally, to a computer, which has Internet connectivity, and activates the license.
TallyGold for Multi- Multi- Licensing feature facilitates the use of Tally on ANY NUMBER of computers connected to a local area network (LAN). The method of activation is similar to that of a Single- License Once a Multi- license is successfully installed on computer designated as the License Server, you can start up Tally when Windows starts and run as a service in the background. The other computers, designated as License clients can install Tally, and set the parameter TallyLicenseServer (E.g Servername:Port Number) in the configuration file also known as the Tally.ini file. Note: 1. If you work on Windows XP and have a firewall installed, ensure that the firewall allows license clients access to the Server Port. 2. On the Client computer, there are few significant parameters set by default in Tally.ini file viz., TallyLicense = Connect and T a l l y L i c e n s e S e r v e r = server:port
Activation Form
The Activation Form is displayed, when you run Tally after installation for both Single and Multi licensing systems.
Enter the Serial, Key and E-mail, if you are connected to Internet. Else, press Esc or Ctrl+Q to quit this form. More: For s Connected to the Internet For s not Connected to the Internet
Licensing Menu
To view the licensing menu, Go to Gateway of Tally > F12: Configure > Licensing
Single- The License menu displays as shown
List Add-ons To view additional features enabled in Tally. Go to Gateway of Tally > F12: Configure > Licensing > Add-ons
Online This option allows you to activate Tally License Online. The term online indicates that your computer is connected to the Internet.
Offline This option allows you to activate Tally License Offline. The term Offline indicates that your computer is not connected to the Internet.
Quit This option enables you to quit the licensing menu.
Multi-
In multi- environment, the License menu on the License server displays all the options available to a single. On the License client computers, the options Online and Offline do not exist, as shown:
To view the licensing menu Go to Gateway of Tally > F12: Configure > Licensing
Activating Tally
This section explains how to activate Tally for Single- and Multi- systems: Activating Tally for Single- Activating Tally for Multi-
Activating Tally for Single-
For s Connected to the Internet Activate your license by using the Online option available in F12: Configure > Licensing > Online> Activate To activate your license: 1.
Start Tally. Tally displays Online Activation Form with three fields.
2.
Enter the correct Serial and Key, and Email - ID in the Activation form that displays and press Enter to proceed.
3.
Tally connects to the Tally Internet Services Server to validate your registration information.
4.
On entering the correct Serial and Key, a message displays indicating that your license is activated.
Once the license is activated, go to F12: Configure > Licensing > Online to view the Online Menu
The Online menu has two options: Update: This option helps you to update new features of Tally and validate your Tally License. Surrender: This option helps you to surrender the Tally License.
For s not Connected to the Internet
If your computer does not have an Internet connection, you can activate your Tally license using the Offline option. Go to F12: Configure > Licensing > Offline > Activate
To activate your license: 1.
When you start Tally, an Activation Form dialog window will be displayed. As you do not have an Internet connection, press Esc or Ctrl+Q to quit this form.
2.
Press F12: Configure > Licensing > Offline> Activate
3.
Tally displays the Offline Activate Form with three fields. If the Serial, Key and Email Id are correct, a message displays indicating that the tally_req.lic file has been successfully generated.
4.
Copy the tally_req.lic file in the Tally folder on a floppy/CD and take it to any computer with Internet connectivity.
Important: Tally must be installed in the computer with Internet Connectivity. 5.
Paste the tally_req.lic file to the Tally folder on this computer, start Tally and go to F12: Configure > Licensing > Offline
6.
Click on the Send External Request option to send the request to Tally Internet Services server. The response will be saved in a new file called tally_resp.lic, which will be generated in the Tally folder.
7.
Copy the tally_resp.lic file into a floppy or CD, from the Internet connected computer and paste the file into the Tally folder of your computer.
8.
Start Tally, Tally will display the below screen:
8.
You are now ready to use Tally. Important: If you desire to make any changes to your Hardware, such as Hard Disk or Removable Storage Devices, it is recommended that you surrender the License from your computer, before initiating these changes. Else, Tally will switch to Educational mode.
Activating Tally for Multi-
The method of activation is similar to that of a single . The license is first installed and activated on the computer designated as the License Server and later on other computers on the network designated as License Clients.
Setting Tally License Server During the installation of Tally, select the Run Tally License Server at Windows Startup (For TallyGold s) check box. This will enable the to have Tally start when Windows starts and run as a service in the background on the server computer. If you fail to select the Run Tally License Server at Windows Startup (For TallyGold s) check box, you can use this alternative method to activate Tally: 1.
Double-click TallyLicServer.exe found in Tally directory. A dialog box appears which comprises the following elements:
Install
To install the multi- license on the server, press Install button
Uninstall
To uninstall the multi- license previously installed, if any, press Uninstall button. 2.
Click on Install button
3.
After installation of Tally on the client computer, open Tally.ini file found in Tally directory and set the following parameters:
TallyLicenseServer = Name of the License Server Computer or IP Address of the Server . Important: If you desire to make any changes to your Hardware, such as Hard Disk or Removable Storage Devices, it is recommended that you surrender the License from your computer, before initiating these changes. Else, Tally will switch to Educational mode.
Converting Tally Hard Lock to Tally Soft Lock
This section provides information on how Hard Lock s of Tally can convert to the more secure environment of Tally Soft Lock. It is applicable for both Single- and Multi- licenses. Pre-requisites for conversion: In a multi- environment, the Hard Lock should be present on the computer where you want to run Tally License. If Tally Hard Lock is not connected to the Computer on which you want a Soft Lock, the following message displays:
Warning: The process of conversion of Hard Lock to Soft Lock is a one-time activity and cannot be reversed.
Single- Hard Lock Conversion
Single- with Internet Connection (online): Conversion Form: The Conversion Form is displayed when Tally starts. Tally looks for the Soft Lock in the system. If it is not found and if TallyLicense = Connect is not present or commented out in tally.ini file, it runs lockconverter.exe , which is present in Tally Installation folder.
Enter only the Email-ID and accept the screen. The Serial Number displayed on this screen is same as the Hard Lock Serial Number. The response goes to the TSPL server and the Hard Lock gets converted to a new Soft Lock . A Conversion Details screen is displayed showing the successful conversion with a new Serial Number and Activation Code .
N o t e : The Information regarding the newly generated Soft Lock can also Installation folder. If any error occurs file named Converter.Log, which can
Serial Number and the Activation Code of the be found in Conversion.txt file in the Tally during the process, it will be captured in a log be found in the Tally Installation folder.
Single without Internet Connection (Offline): The Conversion Form is displayed. Press Esc or CTRL + Q to quit this form and follow the steps given. Go to F12: Configure > Licensing > Offline > Convert 1.
An Offline conversion form is displayed prompting you to enter the Email ID . The serial number displayed on the form is the serial number of Hard Lock, which is connected to your machine and cannot be edited. Enter the Email ID and accept the form.
2.
If your Serial and Email are found correct, a message displays indicating your generated. This file available in the Tally folder.
3.
Copy the tally_req.lic file from the Tally Folder on to a floppy/CD and take it to any computer with Internet connection and having Tally installed on it.
4.
Paste the tally_req.lic file in the Tally folder on this computer, start Tally and go to F12: Configure > Licensing > Offline .
5.
Click on the Send External Request option to send the request to Tally Internet Services server. The response will be saved in a new file called tally_resp.lic .
6.
Copy the tally_resp.lic file into a floppy/CD and paste the file into the Tally folder of your computer.
7.
When you start Tally, a Conversion Details screen displays indicating successful conversion of Hard Lock to new Soft Lock with Serial Number and the Activation code.
tally_req.lic is successfully
Multi- Hard Lock Conversion
The Conversion procedure for Multi- environment is similar to Single- Conversion. The License Clients need to connect to the License Server to get the Soft Lock, once conversion is complete on the License Server.
ing Tally
To get , service and regular updates, s of Tally need to be ed. The procedure for ing Tally is the same for single and multi- systems. Tally provides you an option to later as well. Go to F12 > Licensing and click Yourself button from the button bar. The following screen is displayed on successful activation.
You can also set a reminder for registration for a later time. Set the optional field Remind me later to Yes and Tally will remind you to at periodic intervals. If you set this to No, reminders will not be generated. More: ing Tally-if you have an Internet connection ing Tally-if you do not have an Internet connection
If you have an Internet Connection
To Tally, Go to Gateway of Tally > F12: Configure > Licensing > Click Yourself button The screen displays 1.
Enter the Serial number printed on the CD cover.
2.
Enter the Key printed inside the CD cover.
3.
Click to proceed.
4.
The Registration screen is displayed. Enter your details in the form.
5.
Click Save.
You will get a message confirming your registration. You can also your Tally by clicking on the Yourself link at www.tallysolutions.com.
If you do not have an Internet connection
If your computer does not have an Internet connection, Tally from a computer connected to the Internet by clicking on the Tally link at www.tallysolutions.com. 1.
Enter the Serial number and Key in the screen
2.
Click the button
3.
The Registration screen displays. Enter your details in the form and click on Save
4.
A message displays confirming your registration
Validating Tally
The procedure for validating Tally is the same for single- and multi- systems. The license has to be validated within 45 days of activation. Tally will prompt you to validate the license, before the expiry period. More: Validating Tally-if you have an Internet connection Validating Tally-if you do not have an Internet connection
If you have an Internet connection
If you are an Online who connects to the Internet occasionally, Tally will display the message Your License is about to expire! Please re-activate. Connect to the Internet and validate the license manually using F12: Configure > Licensing > Online > Update
This is a one-time process.
If you do not validate within the time period, Tally will switch to Educational mode.
If you do not have an Internet connection
If you are not connected to the Internet, Tally will display Your License is about to expire! Please re-activate message. You can validate the license on any computer with an Internet connection. Follow the procedure explained in the section on If you do not have an internet connection in Activating TallySilver for Single-. Once the procedure is complete validate the license manually on your computer using F12: Configure > Licensing > Offline > Update License .
This is a one-time process.
If you do not validate within the time period, Tally will switch to Educational mode.
Note: T a l l y.
The
Offline
needs
to
use
a
computer
connected
to
the
Internet
to
Surrendering Tally License
If you want to use Tally on another computer, surrender the license activated on your computer using the option Surrender from F12 > Licensing > Online/Offline. Important: If you desire to make any changes to your Hardware, such as Hard Disk or Removable Storage Devices, it is recommended that you surrender the License from your computer, before initiating these changes. Else, Tally will switch to Educational mode. The procedure followed for surrendering the license is the same for both single- and multi- systems.
For Online s 1.
Go to F12: Configure > Licensing > Online > Surrender
2.
The surrender License request is sent to Tally Internet Services Server. If it gets a valid response, the license file in the Tally folder is deleted
3.
On surrendering the license, Tally will function in Educational mode
4.
You can now activate the same license on a different computer
For Offline s 1.
Go to F12: Configure > Licensing > Offline > Surrender
2.
Press Enter to proceed
3.
A message displays Offline Surrender Request tally_req.lic file is successfully generated
4.
Copy the tally_req.lic file that is available in the Tally folder to a floppy/CD and take it to any computer with Internet connectivity, having Tally installed on it
5.
Paste the tally_req.lic file to the Tally folder on this computer, start Tally and go to F12: Configure > Licensing > Offline
5.
6.
Click on the Send External Request option to send the surrender request to Tally Internet Services server
7.
Your Tally License is successfully surrendered and is ready for use on another computer.
Note: If you Surrender the license activated on Tally 9, both switch to Educational mode. You need to activate the license activating the license on Tally 7.2.
Tally 7.2 on Tally
and 8.1
Tally 9 before
will
Upgrading from Tally 8.1 to 9
Single Upgrade Process 1.
Install Tally 9 in a new folder on your computer
2.
Start Tally 9
3.
An Activation Form displays as shown
4.
Enter your Serial, Key, Email and Accept
5.
A Congratulations message displays as shown
6.
5.
6.
You are now ready to use Tally 9 in the licensed mode
Multi Upgrade process On the Server Computer 1.
Install Tally 9 in a new folder on the server computer
2.
Execute Tally 9
3.
An Activation Form appears as shown below
4.
Enter your Serial, Key, Email and Accept
5.
A Congratulations message appears as shown
5.
6.
You are now ready to use Tally 9 in the licensed mode.
On the Client Computer: 1.
Install Tally 9 into a new folder on your computer
2.
Open Tally.ini file found in Tally folder and set the following parameter
TallyLicenseServer = server : port (Where server is the Name or IP of License Server Computer and port is the being 9000) 3.
You are now ready to use Tally 9 in the licensed mode
Port Number, default port
Upgrading Hardlock s from Tally 6.3 / 7.2 to Tally 9
Hardlock s need to ensure that the TallyLock is connected to the computer, when upgrading to Tally 9 .
Single Upgrade Process 1.
Install Tally 9 in a new folder on your computer
2.
Edit TallyLicense parameter by placing two semicolons and specify the TallyLock path in Tally.ini file as shown
3.
Save the changes made in the Tally.ini file
4.
Start Tally 9 and the conversion form appears as shown
5.
If you wish to convert your license to SoftLock, enter your Email-ID and accept to display a Congratulations message.
6.
You are now ready to use Tally 9 in the licensed mode
Multi Upgrade process On the Server Computer to convert from Hardlock to Softlock 1.
1.
Install Tally 9 in a new folder on the server computer
2.
Edit TallyLicense parameter by placing two semicolons and specify the TallyLock path in Tally.ini file as shown
3.
Save the changes made in the Tally.ini file and start Tally 9 .
4.
A Conversion Form displays as shown
5.
If you wish to convert your license to SoftLock, enter your Email-ID and accept.
6.
A Congratulations message displays
7.
You are now ready to use Tally 9 in the licensed mode
On the Client Computer: 1.
Install Tally 9 in a new folder on your computer.
2.
Open Tally.ini file from the Tally folder and edit the following parameters.
TallyLicenseServer = server : port (Enter the Name or IP address of License Server Computer instead of server and the Port Number instead of port (default port being 9000)) 3. 4.
Save the changes made in Tally.ini file.
3. 4.
You are now ready to use Tally 9 in the licensed mode
Upgrading Softlock s from Tally 6.3 / 7.2 to Tally 9
Single Upgrade Process 1.
Install Tally 9 in a new folder on your computer
2.
Start Tally 9
3.
An Activation Form displays as shown
4.
Enter your serial, Key, email-ID and accept
5.
A Congratulations message displays as shown
6.
5.
6.
You are now ready to use Tally 9 in the licensed mode
Multi Upgrade process On the Server Computer 1.
Install Tally 9 in a new folder on the server computer
2.
Execute Tally 9
3.
An Activation Form appears as shown below
4.
Enter your Serial, Key, Email and Accept
5.
A Congratulations message appears as shown
5.
6.
You are now ready to use Tally 9 in the licensed mode.
On the Client Computer: 1.
Install Tally 9 into a new folder on your computer
2.
Open Tally.ini file found in Tally folder and set the following parameter
TallyLicenseServer = server : port (Where server is the Name or IP of License Server Computer and port is the being 9000) 3.
You are now ready to use Tally 9 in the licensed mode
Port Number, default port
Co-existence of Tally 7.2 and Tally 8.1 along with Tally 9
Single Upgrade Process 1.
Install Tally 9 in a new folder on your computer
2.
Start Tally 9
3.
An Activation Form displays as shown
4.
Enter the Serial , Key , Email and Accept
5.
A Congratulations message displays as shown
6.
5.
6.
You can now use Tally 9 , Tally 8.1 and Tally 7.2 in the licensed mode.
Multi Upgrade process On the Server Computer 1.
Install Tally 9 in a new folder on your computer
2.
Execute Tally 9
3.
An Activation Form appears as shown below
4.
Enter the Serial , Key , Email and Accept
5.
A Congratulations message appears as shown
5.
If you wish to run Tally 7.2 and Tally 8.1 services in the background as license servers along with Tally 9 license server on the same computer: tally72lic9xserver.exe and tally72licserver.exe from www.tallysolutions.com and paste it in the folder of the server computer where Tally 7.2. exe resides. Edit the Tally.ini in the Tally 7.2 folder, in order to run the license server for both versions. Server port = 9090 Depending on the Operating System, double click the license server and Install the service. This enables you to run Tally 7.2 and Tally 8.1 in the licensed mode to run as a service in the background on the server computer along with Tally 9 license server on the same computer.
You can now use Tally 9, Tally 8.1 and Tally 7.2 in the licensed mode.
On the Client Computer: 1.
Install Tally 9 into a new folder on your computer
2.
Open Tally.ini file found in Tally folder and set the following parameter
TallyLicenseServer = server : port (Where server is the Name or IP of License Server Computer and port is the Port Number, default port being 9000) You can now use Tally 9 , Tally 8.1 and Tally 7.2 in the licensed mode.
Note : If your Operating System is of a Windows 2000 or higher version, tally72licserver.exe from www.tallysolutions.com to run as a service in the background on the server computer. This enables you to run Tally 7.2 in the licensed mode. If your Operating System is of a version lower than Windows 2000, tally72lic9xserver.exe from www.tallysolutions.com to run as a service in the background on the server computer. This enables you to run Tally 7.2 in the licensed mode. It is advisable to remove the existing tallylicserver.exe from the folder where the Tally 7.2 exe resides, before ing tally72lic9xserver.exe and tally72licserver.exe from www.tallysolutions.com.
Additional Information In order to use Tally 7.2 and Tally 8.1 along with 9 on the same computer, it is mandatory that Tally 9 is active on the computer
For s who wish to run Tally 8.1 and Tally 7.2 along with Tally 9 1.
Both Tally 8.1 and Tally 7.2 s can Activate and Tally 9 . On successful upgrade or activation, you can run all three versions on the same computer, in the licensed mode. Tally 8.1 and Tally 7.2 will co-exist with Tally 9 for 90 days from the date of activation.
2.
If you try to Surrender the license from Tally 8.1 or 7.2, all three versions will switch to Educational mode and Tally will display the message Surrender successful . All versions of Tally running on your system will turn into educational.
3.
If you re-activate the license on Tally 8.1 or Tally 7.2, Tally 9 will be activated automatically.
4.
But if you choose to activate the license on Tally 9 first, you need to re-activate Tally 8.1 and 7.2
3. 4. individually for the co-existence of the three versions.
N o t e : You cannot activate the license on surrendered the license from Tally 9.
Tally
8.1 or Tally
7.2 , if you have
For s who Update from Tally 8.1 to Tally 9 Tally 8.1 s can Activate and Tally 9 . On successful upgrade or activation, you can run both versions on the same computer, in the licensed mode. Tally 8.1 will co-exist with Tally 9 for 90 days from the date of activation.
For Softlock s who migrate from Tally 7.2 to Tally 9 Tally 7.2 Softlock s can Activate and Tally 9 . On successful upgrade or activation, you can run both versions on the same computer, in the licensed mode. Tally 7.2 will co-exist with Tally 9 for 90 days from the date of activation.
For Hardlock s who migrate from Tally 7.2 to Tally 9 On migration to Tally 9 , the Hardlock becomes defunct. To run Tally 7.2 , you need to activate the license on Tally 7.2 in the Softlock mode. For additional information on activating the license click here.. N o t e : In case you are connected to the Tally 8.1 resides, Tally will update the
internet license
and install Tally automatically.
9
in
the
same
folder
where
Introduction
The Tally Data Migration Tool helps you upgrade from Tally 7.2 to Tally 9 , by migrating Data and T (Tally Compliant Product ) files. It also restores 7.2 backup files . Using the Tally Data migration Tool, you can migrate Payroll data also Tally 7.2 Data and T files cannot be used on Tally 9 unless you migrate them, for which you need to be a licensed of Tally 9. Tally 6.3 s can also use the migration tool, which will rewrite the version to Tally 7.2 and then migrate the data to Tally 9.
Tally Data Migration Tool The Tally Data Migration Tool works with the t ally 9. exe and helps you migrate Tally 7.2 company data. It also helps you migrate Tally 7.2 T files. A brief explanation on Tally Data Migration and Tally 9 screen follows, as both screens open simultaneously during migration.
Migrate Company Menu The Migrate Company menu displays the following: Migrate Data
Migrate T Restore 7.2 Backup
Migration Messages Pane The migration status displays in the Migration Messages Pane when the migration is in progress.
Calculator Pane If errors occur during migration, then an error message displays in the Calculator Pane. N o t e : The Data Migration Tool is resource intensive. It all other applications when you migrate Data or T during the migration process, the migrated or partially and you have to repeat migration for the same.
is recommended that you close files. If an interruption occurs migrated data will be deleted
Migrating Data
If you have enabled and used Payroll in Tally 7.2, before migrating data, ensure that the Payroll process for the previous month is complete and processed because Payroll in Tally 9 will be effective from the date of migration. Migrating Data from Tally 7.2 to Tally 9 Migrating Group company data from Tally 7.2 to Tally 9 Post Migration Steps for Payroll data in Tally 9
Advantages of Migrating Payroll data from Tally 7.2 to 9 1.
Processing Payroll in Tally 9 has now become so easy that you can generate a Pay slip in four steps.
2.
Pay Head and Salary details creation has become -friendly and can be defined at the master level.
3.
Though there is a hierarchy change in Pay Heads, after migration to Tally 9 the migration tool allows you migrate the calculation type specified in Tally 7.2, thus allowing you to continue generating Payroll reports.
4.
A simple re-configuration of the Pay Heads after migration allows you to continue with the Payroll processing in Tally 9.
Migrating Data from Tally 7.2 to Tally 9
For an existing 7.2 customer, the migration process takes place as explained below. 1.
Click the tallymigration icon to start the migration.
2.
Tally Data Migration and Tally 9 start simultaneously, in separate screens.
3.
As soon as Tally 9 is loaded, the message ‘Ready for Migration ’ displays in the Migration Messages Pane .
3.
4.
Click the Migrate Data option to select the company whose data is to be migrated from Tally 7.2 to Tally 9 .
5.
Specify the data path in the Directory field.
5.
6. On selecting the company, the company is loaded.
N o t e : If you have placed the data to be migrated from Tally 7.2 to Tally 9 in the T a l l y 9 folder, you have to only specify the path and need not select the company. 7. If the company selected has Payroll data, the following screen appears.
8. To continue with the migration, press Enter .
9. Accept to migrate the selected company.
9.
10. In the Migration Information screen on the left hand side, you can view the to be migrated from Tally 7.2 .
Types of Masters and Vouchers
11. During the migration from Tally 7.2 to 9 , the status of the migration appears in the screen on the right hand side, which displays the number of Masters and Vouchers that have migrated to Tally 9 .
11.
Note: As certain voucher be a difference of 3 in of Unit Masters. 12.
types and units the total number
have been of Voucher
removed from Tally Type Masters and 1
9 , there will in the number
12. When the migration is complete, an Information pop-up message appears as shown below.
13. On pressing any key, a Congratulations message appears as shown below.
13.
14. If errors occur during migration, they are displayed in red in the Migration Messages Pane as shown in the following screen.
14.
N o t e : If an error “The Cost Centre 'ABC' during migration, rewrite Tally 7.2 data with R and then migrate the data to 9.
does Tally
not belong to Data Migration
the Category 'XYZ' appears Tool using Ctrl + Alt +
15.
The migrated companies are saved in the Tally 7.2 data folder. The migrated data is prefixed with a ‘0’ and appears as a 5 digit number as shown.
16.
Now you can work on Tally 9 with the migrated data.
Note
:
The
migrated
data
will
reside
in
the
folder
where
it
was
at
the
time
of
migration.
Caution: If you try to migrate a company that has already been migrated from as shown below.
7.2 to 9 , you will get a warning message
Changes that occur after successful migration process are: The Payroll Deduction ledgers created under the group Duties and Taxes in Tally 7.2 , after migration
will become a Pay Head grouped under Current Liabilities in Tally 9 . The Payroll Deduction ledgers created under the group Direct or Indirect Expenses in Tally 7.2 , after migration will become a Pay Head grouped under Current Liabilities in Tally 9 . The Payroll Deduction ledgers created under the group Loans & Advances (Assets) in Tally 7.2 , after migration will become a Pay Head grouped under the Pay Head Type Loans and Advances in Tally 9 . Any Attendance Type created with unit Mth will appear prefixed with ATTD- followed by the name of the Attendance Type. If you have migrated data containing attendance entries for the current month, whose Payroll is yet to be processed, those entries will become Production Type Entries. So it is suggested that you re-enter the attendance entries for the current month after migration and then process the Payroll. After migration, by default the Attendance Types will change to Production Types and therefore the YTD details will not be retained. All migrated Attendance types will be pre-fixed by ATTD-
Follow the procedure to display the accurate YTD details in the Payslip : 1.
To generate a Payslip with YTD Details for any of the earlier months:
Create/Alter the Attendance Voucher for the respective month Select the Employee To Nullify YTD details , select the ATTD- prefixed Attendance Type and enter the Cur Bal value with a negative sign in the Value field. Select the Employee and the Attendance type Enter the Cur Bal amount as the Value and Accept the Voucher
2.
To generate a Payslip with YTD Details from the Current month onwards:
Create/Alter the Attendance Voucher for the previous month Select the Employee To Nullify YTD details, select the ATTD- prefixed Attendance Type and enter the Cur Bal value with a negative sign in the Value field. Select the Employee and the Attendance type Enter the Cur Bal amount as the Value and Accept the Voucher.
Migrating Group company data from Tally 7.2 to Tally 9
To migrate Group companies: 1.
Migrate each member individually from Tally 7.2 to 9
2.
On successful migration of the companies, re-create the Group company in Tally 9
Post Migration Steps for Payroll data in Tally 9
After migrating Payroll data from Tally 7.2 to Tally 9, you have to re-configure the Pay Heads and enter the Rates against the respective Pay Heads in the salary details screen for the Employees/Employee Groups in Tally 9. By default after migration, the Calculation type for all the Pay Heads migrated to Tally 9 will change to As Defined Value . Follow the steps given below: Go to Gateway of Tally> Payroll Info.> Salary Details> Alter> Select the Employee/Employee Group from the List of Groups/Employees .
In the Salary Details Alteration screen, move the cursor to the Pay Head field and press Ctrl + Enter to reconfigure the Pay Heads as in Tally 7.2 Consider an example where ABC Company migrates its Payroll data from Tally 7.2 to Tally 9. The Payroll is completed and processed for the previous month. To migrate data refer to Migrating Data from Tally 7.2 to 9 1.
Before migration, Salary Details for Employee A in Tally 7.2 appears as shown below. (Go to Gateway of Tally> Payroll Info.> Employees> Alter> Employee A )
1.
2.
After migration the Salary Details screen in Tally 9 for Employee A will appear displaying As Defined Value as the Calculation Type for all the Pay Heads specified. (Go to Gateway of Tally> Payroll Info.> Salary Details> Alter> Select Employee A from the List of Groups/Employees)
3.
In the Salary Details Alteration screen, change the Effective From date if required
4.
To alter the Pay head Basic Salary from the same screen, move the cursor to the Pay head and press Ctrl + Enter
5.
In the Pay Head Alteration (Secondary) screen, select the Calculation Type from the list as provided in Tally 7.2
5.
6.
A ccept to save the Pay Head
7.
Enter the Rate in the Salary Details Alteration screen, if applicable
8.
Similarly you can modify the remaining Pay Heads
9.
Accept to save the changes made
10.
The Salary Details Alteration screen for Employee A with the changes made in Tally 9 will appear as shown below
10.
N o t e : As the number of Pay Heads will increase is retained as provided in Tally 7.2, the Pay Heads Calculation Type As Defined Value
after migration, if the are migrated to Tally
Calculation 9 with
Type
Migrating T
Migrating T from Tally 7.2 to Tally 9 1.
Click the Migrate T option to migrate the T files from Tally 7.2 to Tally 9
1.
2.
A window displays as shown. Accept to Migrate T
2.
3.
In the Migration Messages Pane, messages display, indicating that the T files are in the process of migration
4.
Once the process of migration ends, a message appears as shown below
4.
5. The migrated T files are saved in the folder where Tally 7.2 T files reside. The migrated T files are suffixed with 9 as shown and appear with the 9 suffixed in the Tally.ini.file also
5.
6.
Now, you can work on Tally 9 with the migrated T files
N o t e : During migration, only those T files mentioned in the Tally.ini migrated from Tally 7.2 to 9. The migrated T will reside in the folder the time of migration.
file will where it
be was
at
Restoring 7.2 Backup
Follow the below steps to Restore 7.2 backup data to 9 . 1.
Click Restore 7.2 Backup option to migrate 7.2 Backup data
1.
2.
In Select Companies to Restore screen specify the Destination and Source path. Select the company from the List of Companies as shown
2.
Note folder,
: If you
you have placed the data to be migrated from Tally 7.2 to have to only specify the path and need not select the
3.
Click Migrate Data to migrate the 7.2 data to 9. Refer to Migrate Data
4.
Select the company to be migrated from the list of companies provided
5.
Click Yes to continue the migration process
6.
Click Quit to close the Tally Data Migration Tool
Tally 9 in company.
the
Tally
9
The migrated companies are saved in the Tally 7.2 data folder. The migrated data is prefixed with a ‘0 ’ and appears as a 5 digit number You can now work on Tally 9 with the restored and migrated 7.2 backup data
Additional Information Once the migration of Data or T files from Tally 7.2 to 9 is complete, two important log files display in the folder containing the tally migration exe .
migration.err The migration.err file displays the errors if any occur during migration
migration.log The migration.log file provides the following details: Migrating Data
1.
Date of Migration
2.
The Name of the company opened for migration
3.
Migration Start time
4.
Time taken and the Migrate data information, i.e., Masters, Vouchers and Reports from Tally 7.2 to 9
5.
3. 4. 5.
Lists the number of errors, if any
6.
Migration End time
7.
The Migration tool closing 7.2 company ABC Company and Closed information of the migrated company
Migrating T files
1.
Date and Start Time to migrate the T files from Tally 7.2 to 9
2.
Migrate T information
3.
Migrating T files End details
Error Occurrence during Migration Error Occurrence during Migration of Masters If an error occurs during the migration of Masters, the migration process stops immediately and an importerror.log file is created in the folder where the tally72migration. exe resides. The XML tags of those masters, which did not migrate, appear in the importerror.log file.
Error Occurrence during Migration of Transactions If an error occurs during the migration of transactions, the migration continues and the XML tags of those transactions, which did not migrate, appear in an importerror.log file. Rectify the transactions and copy the XML tags into a file with an .XML extension . Now, import the .XML file to Tally 9 . N o t e : As alter these
manually importing transactions again
transactions create new Alter after Synchronization .
ID
s,
you
have
to
create
or
Introduction
Tally comes with the World’s First Concurrent Multilingual Business ing & Inventory Management Software for small and medium businesses. The interface for the software is available in Hindi, Marathi, Gujarati, Bengali, Kannada, Tamil, Telugu, Malayalam, Hinglish (colloquial English) and Punjabi, and in Bahasa Melayu and Bahasa Indonesia allowing you to interact with Tally, in a language of your choice. Thus, Tally gives you tremendous freedom to maintain s, as well as view and print in any of the above mentioned Indian languages. Tally enables you to enter data in one language and have it transliterated into different languages. You can generate invoices, purchase orders or delivery notes in different languages after entering data for the same in a different language.
Features of Tally Multilingual
Tally is a concurrent Multilingual software that Can display Tally in any language that the chooses from any screen in Tally. s Translation of Pre-Defined Masters s Transliteration for the allowed languages Can capture data entered using the phonetic language or system language. Can capture language specific Names and Aliases. Can print and display Reports, Vouchers and Invoices in any language. Can copy text from Tally to Windows and vice versa. Use Ctrl +Alt +C to copy and Ctrl +Alt +V to paste.
Operating System Requirements for Tally Multilingual
Operating System
for Indian Scripts in Windows version
Windows 95 Windows 98 Windows ME
Does not Unicode
Windows NT
s Unicode but not Indic languages
Windows 2000
s Unicode and the following Indic languages:
Hindi
Marathi
Tamil
Windows XP
s Unicode and the following Indic languages:
Hindi
Marathi
Tamil
Telugu
Kannada
Punjabi
Gujarati
Windows 2003
s Unicode and the following Indic languages:
Hindi
Marathi
Tamil
Telugu
Kannada
Punjabi
Gujarati
Windows XP SP2
s Unicode and the following Indic languages:
Hindi
Marathi
Tamil
Telugu
Kannada
Punjabi
Gujarati
Bengali
Malayalam
Interface in Tally
The Tally interface displays in the language selected as Initial Startup Language , at the time of installation. For example, if you have selected Hindi as Initial Startup Language , the Tally interface displays as shown.
Configuring F12: Configure for Multilingual
Configuring F12 for Multilingual Go to Gateway of Tally > F12:Configure > General
Show tables with Masters only in Current Language If this option is set to Yes , Tally displays the Pre-defined and defined Masters in the Language selected. If this option is set to No , Tally displays the Pre-defined and defined Masters in English and in the selected Language , along with Aliases created in other languages, if any.
C reating a Company in any language Create your company in any language. The Company Creation screen, if Hindi is selected as your language, displays as shown.
N o t e : The Name of or transliterated but
the will
Company , Unit appear in the
of Measure and C u r r e n c y Language created.
cannot
be
translated
Language Configuration in Tally
Configure your language as given. 1.
Click L: Language from the horizontal toolbar or press ALT + L
2.
In Language Configuration screen, select the language from the List of Languages.
3.
The interface displays in the language selected.
Keyboard Configuration in Tally
Tally provides the exceptional option of choosing between multiple keyboards. 1.
Tally’s Phonetic Keyboard
2.
Operating System Keyboard
Tally's Phonetic Keyboard
Tally’s Phonetic keyboard is useful for those who speak the language but do not know how to type the same using the keyboard. This keyboard will allow you to spell the term phonetically based on how it sounds and Tally will display the data in the language selected after transliteration. The keyboard layout is the same as that of the English characters, which makes it friendly and comfortable. With a phonetically enabled keyboard, you can enter the information or data in any Indian language to generate bills, invoices and other reports. A few examples using Tally’s Phonetic Keyboard are given below:
Word in English
Purchase Sales Item Inventory Conveyance Salary Postage & Telegram Commission Discount Debtors Creditors Capital Ledger Ramjilal Cash Shyamlal Godown Branch Loan Customer Supplier Company s
Keys for Phonetic Representation of Indic Languages parachej sels AiiTam inventrii Kanveyns selarii posTej end Teligram kmiishiin DiskaunT DeTaras kreDiiTars kaipiTal lejar rAmajiilAl kaish shyAmalAl goDAun braAnch lon kasTamar saplAyar kampanii EkAunTas
Key Combinations for Hindi
Vowel Signs
Symbols
Special / Accent Keys
Key Combinations for Bengali
Vowel Signs
Symbols
Key Combinations for Punjabi
Vowel Signs
Symbols
Key Combinations for Gujarati
Vowel Signs
Symbols
Key Combinations for Tamil
Vowel Signs
Symbols
Key Combinations for Telugu
Vowel Signs
Symbols
Key Combinations for Kannada
Vowel Signs
Symbols
Key Combinations for Malayalam
Vowel Signs
Symbols
The Character
is presently not ed in Tally.
Key Combinations for Marathi
Vowel Signs
Symbols
Special / Accent Keys
Configuring Masters in F12
Go to Gateway of Tally> F12: Configure> Accts/Inv Info.
Allow Language ALIASES along with Names This option has a significant value when creating masters like Ledgers and Stock Items , as it enables you to enter aliases in Indic languages along with the Name , as well as the Interface Language . For example, create a Stock Item (Cement) in Hindi and Name it in different languages with Aliases . The screen displays as shown.
Masters created with more than one Indic language as Name Masters created in more than one Indic language, when viewed in a Report or Master will display based on the Language Precedence order allotted in Tally. The default Language Precedence order is English , Hindi , Bengali, Punjabi , Gujarati , Tamil , Telugu, Kannada , Malayalam and Marathi . For example say you have created the Master in Hindi , Kannada and Gujarati . You can view it in any of the three languages, but if you choose to view it in a Report or Master in any other language, then the transliteration of the Name will appear in Hindi. This is on of the fact that Hindi appears before Kannada and Gujarati in the Language Precedence .
Creating, Displaying and Printing in Multi Language
Consider a scenario where a firm based in Maharashtra creates a Sales Invoice in Hindi on 16-6-2006 and issues the same Sales Invoice in Kannada to his customer (e.g. Royal Group ) , which is based in Karnataka . The Sales Voucher entered in Hindi appears as shown.
To print the Sales Invoice in Hindi . 1.
Press Alt+P to print the voucher.
2.
Press Alt+L to get the List of Languages in the Print Language Configuration screen.
3.
Select Hindi from the List of Languages .
4.
2. 3. 4.
Accept to print the voucher.
Preview of Sales Invoice in Hindi will be as shown.
N o t e : You can view the data in any of the Indic languages in Tally, provided the Masters are made in any one of the Indic languages. Similarly, to view a Master in English, it must be created in English also apart from the Indic languages.
To preview the Sales Invoice in Kannada: Go to Gateway of Tally > Display > Daybook > Select the Sales invoice dated 16-6-2006 from the list. 1.
Press Alt+P to print the voucher.
2.
Press Alt+L to get the List of Languages in the Print Language Configuration screen.
3.
Select Kannada from the List of Languages .
3.
4. Accept to print the voucher.
The Sales invoice Print Preview in Kannada displays as shown.
View the Stock Summary of the Stock Items sold to Royal Group in Karnataka , in Kannada. The Stock Summary screen displays as shown.
To Manually Setup Language
Windows needs to be manually configured for the language that you want to use. All versions of Windows 2000, Windows XP and Windows 2003 operating systems have built-in for Indic languages. However, if you have not selected Language at the time of installation, you will not be able to use the multilingual feature in Tally. 1.
Click Control from the Start menu or click on My Computer.
2.
Double-click the icon Regional and Language Options.
3.
In the Regional and Language Options window, select Languages tab.
4.
Select Install files for complex script and right-to-left languages (including Thai) under Supplemental language .
5.
Click Details to display Text Services and Input Languages window.
5.
6.
Click Add from Settings to display Add Input language dialog box.
7.
Select the language from the Input language drop-down list. Select Hindi as an example.
8.
Select Hindi Traditional from the Keyboard layout/IME drop-down list and click OK.
9.
Click Apply and OK in Text Services and Input Languages window.
10.
8. 9. 10.
Click Apply and OK in Regional and Language Options window.
11.
Change Regional Options dialog box is displayed with a prompt to Restart the computer for the changes to take effect.
12.
Click Yes to restart.
Windows has now been configured to enter text in Hindi.
Operating System Keyboard
The Operating System Keyboard is used by those who know to read and write in the language of their choice. Entering data in Tally using the Operating System Keyboard is different from using the phonetic keyboard as the keyboard layout differs. To configure the Keyboard for an Operating System Keyboard. 1.
Click K : Keyboard from the horizontal toolbar or press ALT +K
2.
In Keyboard Configuration screen, select Hindi Traditional (System) from the List of Languages .
Note : depends
The upon
Languages Operating
displayed System.
in
the
List
of
Languages
for
Keyboard
Configuration
Using On-Screen Keyboard in Tally The On-Screen keyboard is a virtual keyboard which displays on the computer screen. Using the On-Screen keyboard will familiarise you with the Operating System keyboard’s layout. Configuring On-Screen Keyboard 1.
Go to Start > Programs > Accessories > Accessibility
2.
Select Onscreen Keyboard
2.
3.
The On-Screen Keyboard will appear as shown below.
4.
Use Alt + Shift to configure the language of choice. For example, if you wish to enter data in Hindi, select Hindi using Alt + Shift or select the same from the Language bar as shown.
5.
The On-Screen Keyboard will appear in Hindi as shown, as you place the cursor on it.
5.
Tally Value Pack
Tally Value Pack (TVP) is an annual Product Upgrade Assurance offer for licensed Tally customers. The TVP is available only for the current version of Tally being sold in the market. Tally Value Pack has a validity period of 12 months. When you buy a Tally Value Pack, you will get: 1.
Free the next version of Tally
2.
Free Major Release Update to new release of Tally
3.
Up to 50% discount on Add-On purchases
All the above are subject to availability during the validity period of your TVP. N o t e: Tally Value Pack www.tallysolutions.com
benefits are subject for latest benefits.
to
change:
please
visit
For a TVP customer purchasing Add-ons
View Price List View Price List screen displays the Add-Ons , TVP Customer Price and Your price details of a specific serial number It is a display screen and cannot be modified.
Buy You can make the purchase as per the instructions given for online s and Accept the purchase. For a TVP customer, Tally displays a text in green as Since you are a TVP customer, you have saved: along with an amount. As you are a TVP customer , your purchase is billed at Your Price . The difference between MRP and Your Price is the amount displayed in Since you are a TVP customer, you have saved: field. The MRP is the actual price and the Your Price is the discounted price for purchasing the Add-on. For a TVP customer, the Shop screen displays as shown:
Shop
The Shop option in Tally is an interface between Tally and its customer. It allows you to select and purchase Tally Add-Ons using the Online/Offline options. You can purchase the currencies to buy the Add-Ons from Tally Resellers, distribution partners or Tally Authorised Service Centres. The Add-Ons include paid modules of Tally, Tally Value Pack, Upgrades and Updates. To locate your nearest Tally vendor, visit www.tallysolutions.com The procedure for using Shop is different for Online and Offline s. Go to Gateway of Tally > F12: Configure > Shop The Shop menu appears as shown.
Online Offline
Online
If you are an Online , Go to Gateway of Tally > F12: Configure > Shop > Online
The Online menu displays the following options: 1. View Price List 2. Buy
View Price List View Price List screen displays the Add-Ons and price details for a specific serial number that you have selected. It is a display screen and cannot be modified.
Buy When you select the Buy option, the serial number that you are shopping for displays at the top of the screen as You are shopping for Serial Number: Your Serial Number. To shop for Add-Ons: 1. Select the currency in the Select Currency field. 2. Select the name of the Category from the list in the Category field. N o t e : If you are not sure of from the List of Category, all displayed Category-wise.
the Category of Add-ons, select A n y. When you select A n y the A d d - O n s will be displayed at once instead of being
3. Select the Add-On that you wish to purchase from the list, Name of Add-on. The Add-ons for the selected category are displayed in the list. Note:
1. If you are shopping for Tally Value Pack first from the list needed for shopping.
Value Pack along with other A d d - O n s ,, select Tally of Add-Ons. Then you will know the exact currency value
2. When you select the Name of Add-On and Your Price of the A d d - O n s will be fields. These fields cannot be modified.
from the list, the Qty, displayed automatically
TVP Customer Price against the respective
4. Select End of List once you finish selecting Add-Ons 5. For a non TVP customer, Tally displays a text in red as If you were a TVP customer, you could have saved along with the amount. As you are a non TVP customer, your purchase is billed at Your Price. The difference between Your Price and TVP Customer Price is the amount displayed in If you were a TVP customer, you could have saved field. 6. The TVP Customer Price is the discounted price for the Add-on applicable for a TVP Customer. Your Price is the price that you need to pay for the Add-on. 7. After selecting all the Add-Ons, enter the TallyCurrency key No. (that is displayed on the currency card) in the TallyCurrency key No. field and press Enter. 8. Select Yes to accept the transaction. To cancel, select No. 9.A Congratulations message is displayed to confirm your purchase. N o t e : The TallyCurrency Key No. used and the along with the C o n g r a t u l a t i o n s note. If there is TallyCurrency Key No. has been fully consumed
remaining amount (if any) is displayed an inadequate balance, you will get message.
10. Press any key to proceed. 11. The license gets automatically updated (for an Online ) in the background and a License Updated Successfully message is displayed.
Offline
If you are an offline , you need to first generate a request file. Go to Gateway of Tally > F12: Configure > Shop > Offline
Buy 1.
Selecting the Buy option displays a message tally_req.lic is generated successfully. This generates a tally_req.lic and stores it in the Tally folder.
2.
Copy the tally_req.lic into a floppy or a CD. Paste tally_req.lic file into the Tally folder of a computer connected to the Internet.
3.
Run Tally. Go to Gateway of Tally > F12: Configure > Shop > Offline
The Offline menu is displayed.
4. Once tally_req.lic is copied in the Tally folder in a computer connected to the Internet, two additional menus, View Price List and Send External Shopping Request are displayed in the Offline menu.
View Price List View Price List screen displays the Add-On and price details (i.e., TVP Customer Price and Your Price) for your selection. It is a display screen and cannot be modified.
Send External Shopping Request To shop for the Add-ons, select Send External Shopping Request The Shop screen is displayed, showing the Serial Number of the Tally license for which the tally_req.lic is generated at the top of the screen. Make the purchase as per the instructions given for Online s and Accept it. Note: 1. You can Shop Offline even if T a l l y runs on Educational Mode. 2. If you are shopping for Tally Value Pack along with other A d d - O n s, select Tally Value Pack first from the list of A d d - O n s. Then you will know the exact currency value needed for shopping.
To update the license Go to Gateway of Tally > F12: Configure > Licensing > Offline > Send External Request 1.
You get a message indicating Offline Response file tally_resp.lic is generated successfully. This generates a tally_resp.lic in the Tally folder.
2.
Copy the tally_resp.lic file to the computer, which has generated the request file (tally_req.lic).
3.
Run Tally. Tally will read the response file (tally_resp.lic) from the Tally folder and a message License Updated Successfully is displayed.
3.
List Add-Ons
To view the Add-Ons purchased: Go to Gateway of Tally > F12: Configure> Licensing > List Add-Ons By default, Tally will list the Add-Ons enabled for the Serial Number and also displays the Add-Ons purchased using the Shop feature. The Name column displays the names of the Add-Ons and the Add-On Expiry column displays the expiry date of the Add-Ons.
Operations Configuration
Configuring has to be done before creating and starting work on the company. Click F12: Configure button or press F12, which will bring up the operations configuration menu:
General
Go to Gateway of Tally > F12:Configure > General
The Configuration settings of Country Details, Style of Names, Style of Dates and Configuration of Numbers are self-explanatory. Other configuration options are explained.
Show Monthly reports with Graphs This option is set to Yes by default. The reports are configured to display the Graphs in accordance with the numeric information. The graphs in reports will not be displayed if this option is set to No.
Use separate Menu for Final A/c Statements By default, this option is set to No. If you set this to No, Tally displays the final statements of Balance Sheet and Profit & Loss A/c directly on the Gateway of Tally menu. However, if you set this option to Yes, the final statements of Balance Sheet and Profit & Loss A/c can be accessed from Gateway of Tally > Final s instead of directly from the Gateway of Tally menu
Ignore errors & continue during data import
By default, this option is set to No. Set this option to Yes, to import even if an error is reported.
Export Base Currency Symbol along with Amount This facilitates the to export the currency symbol along with the amount while exporting in XML format.
Show tables with Masters only in Current Language If this option is set to Yes, Tally displays all the Masters ( Default Masters and Defined) in the language selected in the L: Language configuration. Setting this option to No, Tally displays the default list of Masters in English and in any of the Indian languages selected in the L: Language configuration. Note: * For further
details
on
* International s can C o u n t r i e s in the Use
Multilingual
Feature,
refer
enable Indian VAT by ing terminology
to
selecting field.
Using
Multilingual
Feature
in
I n d i a / S A A R C from the List
Tally. of
Numeric Symbols
This enables you to set the number styles. The default styles and symbols are specified. However, you have the option of overwriting them in the respective fields according to your preference. For example, change negative sign from (-) to (+).
Accts/ Inventory Info.
Go to Gateway of Tally > F12: Configure > Accts/Inventory Info. This allows you to configure the details you want in the masters over and above those provided. You can access the F12: Configure screen from s Masters and Inventory Masters when required.
Master Configuration This section allows you to set the multilingual features in the Masters Creation screen.
Allow Aliases along with Names Set this option to Yes to enter the Alias names in the Master Creation screen.
Allow Language Aliases along with Names Set this option to Yes to enter the Alias Names in any of the Indic Languages.
s Masters
This section allows you to set the ing features in the Masters Creation screen.
Allow Advanced Entries in Masters Set this option to Yes, to enter some of the advanced information in the Ledger Master creation and the Group Creation screens. This information will reflect in the reports.
Add Notes to Ledger s Set this option to Yes and a new field to enter Notes appears in the Ledger creation screen. This field allows you to enter any additional information about the ledger you are creating.
Use Addresses for Ledger s Set this option to Yes to enter the Mailing Details in the ledger Creation Screen. It is useful if you are creating a Customer ledger, a Party ledgers or Bank s. Mailing Details like Name, Address, State, PIN Code and PAN / IT No. is entered in this section. These details will appear in the reports, when they are printed.
Use Details for Ledger s Set this option to Yes to specify the details of person (if any) in the ledger creation screen. You can specify the details like the Name of the Person, Telephone Number, Fax Number and the EMail Id. N o t e: The Details A c c o u n t s is set to Y e s
for
the
ledgers
appear
only
if
Use
Addresses
for
Ledger
Inventory Masters This section allows you to specify the required Inventory features in the Masters Creation screen.
Allow Advanced entries in Masters Set this option to Yes to specify the Behaviour of the Stock Item, in the Stock Item Creation screen. For further details, please refer the section Stock Items.
Use Part Numbers for Stock Items Set this option to Yes, to enter the Part Numbers of the Stock Item.
Use Description for Stock Items Set this option to Yes to enter any Description about the Stock Item in the Stock Item Creation screen.
Use Remarks for Stock Items Set this option to Yes to enter your remarks or comments about the stock Item.
Specify Default Ledger Allocation for Invoicing Set this option to Yes, to Set or Modify Default Ledgers for Invoicing for the Stock Item.
This allows you to allocate default Sales/Purchase Ledgers which will be credited when a Stock Item is invoiced.
Use Alternate Units for Stock Items Set this option to Yes to define an Alternate Unit for the Stock Item.
Allow Std. Rates for Stock Items Set this option to Yes, to specify the Standard Purchase Cost and Standard Sales Price of the Stock Item.
Allow Component list details (Bill of Materials) Set this option to Yes, to define the Components (BOM) for the Stock Item. For further details, refer to the section Bill of Material.
Use addresses for Godowns Set this option to Yes, to enter the godown address in the Godown Creation Screen.
Voucher Entry
Go to Gateway of Tally > F12: Configure > Voucher Entry Configure different features of your voucher entry screen.
Other features of convenience, e.g., Use Payment/Receipt as Contra are enabled to effect transactions for funds transfer. Tally allows such transactions only through Contra Vouchers. Take another instance where, you are not permitted to use Journal Vouchers for Cash or Bank transactions. However, recognising exceptional needs, you can override that restriction by enabling the facility here. Refer Allow Alteration of TDS Rates and Values for more information.
Invoice/Orders Entry
Configure details for Invoices, Sales and Purchase Order entry. The options are country specific to International. The options are in the form of questions to which you need to state Yes or No. They have also been explained in detail at the relevant invoice entry sections.
For India/SAARC, the options would automatically change to Use Excise Format instead of Use Intrastat Details provided you have set your General Configuration accordingly.
The option to Use Excise Duty or British Style VAT depends on the General configuration. Go to F12: Configure > General Set Use ing Terminology of to International to British Style VAT handling apart from Asian countries. F11: Features > F2: Inventory will now display the option Prepare and Follow British Style VAT Returns . Select India/SAARC in F12: Configure > General for Excise Duty handling. F11: Features> F3: Statutory & Taxation displays an option Follow Excise Rules for Invoicing . For additional information on setting up Excise Duty/British Style VAT refer to Activate Company Features (F11)
Printing
The printing option allows you to configure the printing of Voucher, Invoice and Statement layouts before printing. Go to Gateway of Tally > F12: Configure > Printing
General
This configuration is applicable for all print reports.
Print Date & Time of Report This option enables printing of system date and time on each report. These are printed on the top right corner of the report as a control mechanism. It should not be confused with the date range of the report. Note:
Vouchers
and
Invoices
are
not
reports.
Print State and PIN Code with Address By default, this option is set to No. Set this option to Yes, to print the reports with State and PIN Code details entered in the company Creation screen. N o t e : If you already have a company created then you need to set this option to N o.
with
State
and
PIN
Code
in
the
address
field,
Stop printing Vertical Lines/Borders: Set this to Yes to avoid printing of vertical lines and borders in dotmatrix printer. This helps in faster printing. Standard Space on Top of pages (Inches): This field is set to 0.5 inch by default. However, you can change it as per your requirement.
Settings for ‘Quick Format’ Tally prints in two formats – Neat and Quick. Neat printing takes advantage of fonts of the printer and is the default. It also compresses long data like long names and amounts and auto-fits them according to space. Quick printing is suitable for Dot Matrix printers where speed is an issue. Hence, quick printing does not print fancy fonts. The auto-fit facility is, thus, not possible in quick printing. Therefore, it will truncate data longer than the allotted space. To prevent this, set the two fields under for ‘Quick Format’ to Yes.
Settings
Purchase Voucher/Invoice and Purchase Order
Purchase voucher/Invoice, Receipt Note and Purchase Order are printed to maintain continuity in voucher numbers and to provide a document to record a transaction. To configure, select Purchase Transactions under Printing.
Purchase Voucher/Invoice
Purchase Orders Purchase Orders are required to be printed and sent to suppliers.
Receipt Notes Receipt Notes are entered in the same format as Delivery Notes, and if Purchase Orders are enabled, the details of the order would automatically get filled-up. Further, Purchase Invoices would also auto-fill with the Receipt Note or Purchase Order details as relevant.
Payment /Receipt/Journal Vouchers, Credit Note/Debit Note
Configure the dimensions and details as per your requirements to print
The above options pertain to Payment Vouchers. The options for Receipt vouchers, Journal/Contra, Debit/Credit Note are similar.
Amount in words To print the amount in words on the Payment, Receipt, Journal, Credit Note/ Debit Note voucher in any language apart from the language selected as Interface: Select the Output Language at the Report Generation screen from the voucher Click F12: Configure and set Print Amount in Words to Yes and Print Amount in Words in English to No for the amount to appear in the selected Output Language
N o t e: If you set Print Amount Y e s, the amount will appear in
in Words and Print E n g l i s h only.
Amount
in
Words
in
English to
Sales Invoice, POS Invoice, Delivery Note and Sale Order/Quotation
Printing configuration for all Sales vouchers like Sales Invoices, POS Invoice, Delivery notes and Sales Orders/Quotations are accessible through Sales Transactions under Printing menu. Each transaction type can separately configured and selected from the sub-menu.
The different configuration screens are as given:
Sales Invoice This is the configuration for the Sales invoice. You can change the setting as per your requirement.
Details of the above configuration options have been discussed in Invoice Entry section.
POS Invoice The Print Configuration for a POS Invoice displays as shown. You can configure the options as per your requirement.
Delivery Note Delivery Note appears similar to Invoices. Fields like Rate and Amount may be required by some companies to be printed out on Delivery Notes. Select the options as relevant to your company.
Sales Order/Quotation Sales Orders, if marked Optional, during voucher entry, are printed as Quotations.
Reminder Letters
The Reminder Letters feature in Tally can be used to remind any customer or supplier of their overdue bills.
Space to leave on top (default 0.5 inch) and Space to leave on left (default 0.5 inch) : These fields are set to 0.5 inch by default. However, you can change it as per your requirement. Information in First Paragraph and Information in Second Paragraph: The information provided in these two fields can be used as such, modified or extended.
Confirmation Statements
Confirmation Statements are not the same as Reminder Letters. They serve to confirm the balances with customers, suppliers, lenders and borrowers. This is used mostly at the end of a period but can be produced at anytime.
Space to leave on top (default 0.5 inch): This field is set to 0.5 inch by default. However, you can change it as per your requirement. Titling for ‘Subject’ in Letter: The default text is Confirmation of s. You have the option of changing it as per your requirement. Information in First Paragraph and Information in Second Paragraph: The information provided in these two fields can be used as such or modified or extended. Sign-off used for the Letter: The default text can be changed in this field also.
Introduction
Go to Gateway of Tally > F12: Configure > Connectivity The Connectivity menu consists of three options.
Sync Configuration Proxy Configuration Auto-dial Configuration
Sync Configuration
This configuration is usually done when data from different locations needs to be synchronized. For detailed information, refer to Synchronization section. N o t e : Sync Configuration option in F 1 2 : C o n f i g u r e screen clientserver=client or clientserver=server in Tally.ini file.
will
appear
only
if
you
enter
Proxy Configuration
This configuration is usually done when data from different locations needs to be synchronized and while activating the License. Proxy configuration is required for those s who are behind a proxy server and use Synchronization feature of Tally as a Client. If TallyClient accesses a TallyServer through a proxy server, then proxy server details must be provided.
If your computer is on a network and connected to the Internet. Use HTTP Proxy Server: Select Yes if your computer is connected to a proxy server URL: Enter the IP address and port number of the proxy server used. Ensure that the IP address and Port is separated by a colon. For eg. 198.162.2.1:8080 Authentication Required: Set this to Yes if you want authentication. Specify a name and in the respective fields.
Auto-Dial Configuration
Auto Dial configuration feature can be enabled, when you are in need of any of the Internet Services while working on Tally, like Licensing or Synchronization. Gateway of Tally> F12: Configure> Connectivity > Auto-Dial Configuration
Set Use Specific Dial-Up Connection to Yes. In the field Dial-Up Connection, select the appropriate Dial-Up Connection from the List of Dial-Up Connections.
Once when this configuration is enabled, you get connected to the internet spontaneously. Note:
The
Auto
Dial
Configuration
is
only
for
those
s
who
have
Dial-Up
Connections.
Licensing
This option allows you to activate your Tally License Online or Offline Go to Gateway of Tally > F12: Configure > Licensing The screen appears as shown:
List Add-ons allows you to view the additional features enabled in Tally. Online option allows you to activate Tally License Online. The term online indicates that your computer is connected to the Internet. Offline option allows you to activate Tally License Offline. The term Offline indicates that your computer is not connected to the Internet.
Shop
This option allows you to Shop for Tally Add Ons Online or Offline Go to Gateway of Tally > F12: Configure > Shop The screen appears as shown:
Company Information
The first step to get started in Tally, is to Create a Company . The initial screen appears as shown:
The Gateway of Tally screen is separated into six sections, namely Title Area , Horizontal Button Bar , Main Area (Ctrl+M) , Calculator Area (Ctrl+N) , Button Bar and the Bottom Pane . The elements of the Gateway of Tally screen are explained below:
Title Area Title Area contains the Tally Copyright and Tally website link . You can access the Tally website directly from the Tally screen. You must have access to the Internet and Internet Explorer Web browser installed on your computer. Click on the http://www.tallysolutions.com link on the top frame of the screen to enter our website. The link appears in all screens of Tally. Tally logo is displayed at the centre of the Title Area. The Product type (Tally Gold, Tally Silver, Tally Bronze or Educational) and Tally Serial Number appears on the upper-right corner. The software serial number is usually a unique number.
Horizontal Button Bar The Buttons, Print (Alt+P), Export (Alt+E), E-mail (Alt+M), (Alt+O), Language (Ctrl+L), Keyboard (Ctrl+K) and Help (Alt+H) can be seen in the Horizontal Button Bar .
Bottom Pane The Bottom Pane contains the Version number, Release details (every time a new release of Tally is made, it is identified with a different release name like Release 3.14) and the Current Date (the date configured in the computer). The name of the day, date, month and year is displayed in DD , MM and YYYY format on the righthand side. System time (the time configured in the computer) appears on the lower-right corner in Hour: Seconds: Minutes (HH/MM/SS) format. The Path appears in the lower left corner in the Bottom pane.
Close Button The Close Button in the upper right corner functions similar to the use of ‘Esc’ in Tally. It brings you to back to the Gateway of Tally from any screen.
Minimise Button The Minimise button performs the standard Windows Operating System’s function (Windows 95 onwards),
allowing you to minimize Tally and work on other applications. To restore Tally, click on the Tally icon on the taskbar.
Main Area (Gateway of Tally) The Main Area is separated into two: 1.
Left-hand side area
2.
Right-hand side area
The left-hand side provides information on Current Period , Current Date and List of Selected Companies (Name of the company and the date when last entry has been made). The right-hand side displays the Company Information menu such as Select a Company, Create a Company, Backup a Company or Restore a Company and so on.
Hot Keys Hot keys are capitalized and are red in colour on all the menu screens. Using the Hot Keys in the Screen will take you to that particular screen or display the sub - menus within that Option.
Company Info
Calculator Area Press [Ctrl + N ] to activate the calculator. Calculator Area is used for calculator functions. Any type of independent calculation can also be done using the calculator.
Button Bar The buttons are designed to make the work easier and faster and vary from one screen to another based on the screen functionality. They appear on the right hand side of the Tally screen and the inactive buttons are greyed out. You can either click these buttons or press the shortcut keys to access the relevant screen. The following are some of the buttons and their functions: Help (Alt+H) – To access Tally's online context-sensitive help F1: Select Cmp – To select the company from the List of Companies and access data from other data directories on the local system or through the network. You can also access the Directory field by pressing [Backspace]. F12: Configure – To access the configuration settings to manage the information entered in Tally. For example, you can access the General Configuration to set country specific defaults, before creating a company. Buttons where a character or function key is underlined indicates that you have to press underlined character or the function key along with [ALT ] key. Buttons where a character or function key is double underlined indicates, you have to press the character or the function key along with [CTRL ] key.
F1: Press the shortcut function key [F1] to select a company
F1 : Press [ALT+F1] to shut a company
F8 : Press [CTRL+F8] to select the Credit Note voucher
Ctrl+M: Press Ctrl+M to access the Gateway of Tally.
Ctrl+N: Press Ctrl+N to access the Calculator/ODBC Server frame
Country Specific Configuration
The options available are Country Details, Style of Names, Style of Dates, Configuration of Numbers and Other Options. Go to Gateway of Tally > F12:Configure > General
The Configuration settings of Country Details, Style of Names, Style of Dates and Configuration of Numbers are self-explanatory. The prime differences are in the use of like VAT in Europe and Sales Tax in Asia and America that have to be configured before creating a company. Refer the section Operations Configuration for details on the other fields.
Creating a Company
C reating a Company involves providing basic information about the company whose books of s are to be maintained in Tally. Go to Gateway of Tally > (Alt+F3) Company Info. > Create Company
Above is displayed an International Company Creation Screen. Note that the State and PIN Code fields are not available. The screen for India/SAARC would be:
A detailed explanation on each field is given: Directory T he data path where you want the company to be created is specified in the Directory field. This field is skipped by default when you create the company in the data path given in the want to change it, use the backspace key and modify it to the path required.
Tally.INI file. If you
This is referred to as the TallyAnywhere concept – which is the ability to create/load companies in separate directories. The Directory field is displayed while selecting Select , Create , Backup , Restore and Rewrite options for a company. By default, the cursor will skip the field, presuming that you wish to use the default data directory for your work. You may press Backspace to give a new path and work from there. For example, the default Tally data directory could be C:\TALLY\DATA . You may now wish to create a new company on C:\TALLY\PERSONAL , and some other companies on C:\TALLY\BRANCHES . The next time, the default directory displays C:\TALLY\DATA , and if you wish to work on the data of your branches, press Backspace and enter C:\TALLY\BRANCHES for the directory name. This displays the companies whose data is stored in that location in the List of Companies . You can even give the path of a network server or any other storage device. Name
Enter the name of the company whose books are being opened. If you are a professional ant and are maintaining the books of your clients, give the Client Company's name. Mailing Name and Address In addition to the Company Name, Tally provides the facility to enter the Mailing Name field. It displays the Company Name by default. You may change it as required, if the mailing name is different from the Company Name. The mailing name and address details are picked up for inclusion in any report that needs the company name and address as heading. For example:Balance Sheets, Statement of s, and so on.
Tally's reports print the mailing name and address as given:
T ally does NOT restrict the number of lines for the address details. Tally accommodates all the entered information and vertically compresses the same. Note: 1. In the space provided for the A d d r e s s details, observe the vertical compression as compared to the Mailing Name field where there is horizontal compression. 2. You can specify any length for the mailing name and you are permitted to give any number of lines for the address. The information is completely visible. 3. Tally handles compressed information correctly while printing. It adjusts the reports accordingly. Statutory compliance for Select the Country from the List of Countries . The Statutory Features and Base Currency Symbol are enabled in accordance with the country selected. For example, if the s belong to a company in India, the base currency would be Indian Rupees. The Base Currency will appear with respect to the Country selected. Selecting India from the List of Countrie s brings up a State , Pin Code and Telephone No . field. State You can select the appropriate state from the predefined list. PIN Code Specify the PIN Code (Postal Index Number) of the specified address. Telephone Enter the Telephon e number. E-mail Address Enter the E-mail address that will be used to e-mail documents, reports and data from Tally.
Currency Currency symbol is the symbol of the base currency, that is, the currency that will be used to maintain the books of . The symbol Rs. appears by default for India/SAARC Companies and the field is left blank for International Companies. Maintain Tally displays a drop down for the Type of Company with two options s only and s with Inventory Select s only if you do not have any inventory transactions (suitable for professionals and corporate offices). However, at a later date (if required) you can choose to alter the information as s-with-Inventory . Select s-with-Inventory , to maintain both financial s and inventory. Financial Year From In most countries, the books of s of a company are maintained for a stipulated period like, 12 months, 15 months, and so on. This stipulated period is referred to as the Financial Year . The stipulated period of the financial year is 12 months in most countries. Tally automatically considers 12 months from the date you give here as the Financial Year. For example, if you enter April 1, 2005 as the date, the Financial Year will be from April to March ending with March 31, 2006. If you enter October 1, 2005 as the Financial Year From then the financial year will be from October 2005 to September 2006 ending with 30th of September every year. Tally allows you to maintain data for multiple years by changing the period ( Alt+F2 ) at the Gateway of Tally . In addition, you can also specify the date of actual establishment of the company (date of incorporation) Books Beginning From Tally presumes that you wish to maintain books from the beginning of the financial year. Hence, Tally displays the date given in Financial Year From field automatically. The date for Books beginning from can be changed, in case of companies, which are incorporated in the middle of the year. If your company is new, you can opt to start the books of s from the date of actual establishment of the company (date of incorporation) but close books according to the Financial Year as specified by you. Tally provides the required flexibility in such a case by allowing you to give the date when the books of s actually began. Tally will open books from this date and close as on the last day of the Financial Year. For example, if your company is established on August 19, 2005, the opening balances for all the s can be given as on August 19, 2005 even though the Financial Year given is April 1, 2005 (April to March financial year). The company's books will begin on August 19, 2005 and close on March 31, 2006, which ensures smooth transition to the next year. This concept can be applied even when you are migrating to Tally from any other system or from a manual ing system on any day during the Financial Year. Close books in that other system on the previous day and start books on Tally from this day. You are allowed to give opening balances of all Ledger s including Revenue s. TallyVault TallyVault is an enhanced security system, which allows for encryption of the company data. Encryption involves converting normally accessible Tally information into unrecognisable information, which can only be reconverted by authorised persons. Give a here and repeat the same in the Repeat field. This basically results in the creation of an encrypted company whose information is not accessible to s other than the holder.
Use Security Control? Set this to Yes , if you want to initiate a -protected system to control access to Tally data. Else, set this to No . If you opt for security control, Tally offers a comprehensive based access control to different features of Tally based on authority lists created by the . (The section on Security Control under ister Tally contains details on authority lists)
Name of , , Repeat Assuming the Tally Vault and Use Security Control is set to Yes enter the Name of , and Repeat in the respective fields. Use TallyAudit Features Tally Audit allows the or an auditor profile to track changes in ing information. If you wish to use this facility, select Yes . Tally Audit will be available only to the /auditor, through Display of Statements of s . It will be discussed in greater detail under the Security Control section in ister Tally. On accepting the company creation screen, if you have specified Tally Vault , Tally prompts you to enter the TallyVault as appears:
Then Tally prompts you to enter the Name of and (if any) .
After verification Tally imports the latest statutory masters. Wait till the screen shows that 100% of import is complete.
This completes the Company Creation process in Tally. An explanation on the fields on the bottom of the Company creation screen follows: Base Currency Information The Base Currency Information is found in the bottom frame of the Company creation Screen. Base Currency is the currency in which your s would be maintained. Financial statements are prepared in the base currency by default and these are normally required to be submitted to local statutory authorities. The Base Currency information in Tally varies with the country selected for Statutory Compliance. You can record transactions and raise invoices in foreign currency; and also maintain bank s or ledgers in foreign exchange, when required.
Base Currency Symbol The currency symbol given earlier in the Company Creation screen is displayed here automatically. Tally uses this currency symbol in reports, wherever necessary.
Formal Name Formal Name is the full name of the currency specified. The Formal Name for the base currency is set to Indian Rupees for Indian Companies .
Number of decimal places The number of decimal places for the base currency is set to 2 by default. However, you have the option of specifying up to 4 decimal places. Indian currency has 2 decimal places whereas certain other countries require 3 decimal places and so on.
Show Amounts in Millions This is useful for companies, which require reporting the financial statements in millions. This is possible only if Allow Multi-Currency is enabled in F11: Features .
Is Symbol Suffixed to Amounts For countries, which specify the symbol after the amount (value) – this facility is provided. For example, Yen is specified after the amount (5000 Yen) unlike in India where the symbol is specified before the amount (Rs.5000)
Put a space between Amounts and Symbol This facility is provided to s who require a space between the amount and the symbol. However, putting a space between the amount and symbol could give an opportunity for misuse incase of cheque printing. Hence, the flexibility to turn this option on and off as required is provided.
Symbol for Decimal Portion Enter the symbol for decimal portion.
Decimal Places for Printing Amounts in Words You can specify the number of decimal places for printing the amount in words. This number should be equal to or lesser than the number specified in Number of Decimal places field in company creation or currency master screen which will appear in Invoice and Cheque printing screen. For example, if the currency is expressed upto 3 decimal places, the numeric to be printed in words can be restricted to 2 decimal places N o t e : The Name
of
the
Company
,
cannot
be
translated
or
transliterated
but
will
appear
in
the
Language
created.
Loading a company
A newly created company loads automatically. However, for subsequent working, you must load or select the company you want to work with from the List of Companies. (Select and Load are synonymous). A company can be loaded in two ways: 1.
Automatically by Tally.
2.
Using the Select Company option
Tally Loading the Company Automatically
When creating a company, Tally creates a sub-directory under its \DATA directory for the company. The directory is allotted a number in serial order starting with 0001 (example – 10001, 10002…10009...10020, etc these are system generated codes for the company). In order to automatically load a company, Tally has to be configured appropriately by setting the Tally.ini file (available in the Tally directory). Ensure that Default Companies is set to Yes and specify the company number which has to be loaded automatically, for example, Load = 10000 N o t e : You can specify any number ( 1 0 0 0 0 or 1 0 0 0 2 or 1 0 0 0 3, e t c )
here
as
per
the
information
Example of sub-directories created by Tally for different companies:
available
in
the
data
directory
Loading a Company using the Select Company option
In order to load a company using the Select Company option, disable the default loading of a company in Tally.ini file. Set Default Companies to No OR place a semi-colon before Load = 0001 (company number placing a semicolon means that the words following it in that line would not be executed. Each line is a separate command). On double-clicking the Tally icon, the screen appears as:
You can use the Select Company option in two ways, from the Company Info. Menu OR by using the button F1: Select Cmp (available on the Gateway of Tally screen).
Select Company
Press Enter on Select Company or use the button F1: Select Cmp. Tally displays this screen
Tally displays 1.
Company Name (All the companies created are displayed)
2.
System-generated code for each company displayed
3.
The Financial Year information relating to the number of years data present in the company
N o t e : The system-generated code for each company is displayed to identifying which company you wish to work on in case you have the same name (as displayed in the above screen). Select the required company to go to the Gateway of Tally for that company.
assist you in multiple companies
with
Gateway of Tally
Gateway of Tally is the screen that appears on selecting a company. The Gateway of Tally menu differs based on the type of company selected. An s Only Company has a different Gateway of Tally menu from that of an s-with-Inventory Company.
Gateway of Tally of an s Only Company
The Gateway of Tally menu of an s Only company appears as shown below:
The Gateway of Tally screen is separated into four sections – Title Area , Main Area (Ctrl+M) , Calculator Area (Ctrl+N) and the Button Bar .
Main Area The left side of the Main Area gives information on: 1.
Current Period – which is the currently loaded company's ing period.
2.
Current Date – This is the date of the last Voucher Entry for the selected company.
3.
1. 2. 3.
List of Selected Companies – This displays the name of the loaded company.
The Main Area gives information on: 1.
Creation of ing Masters and Importing Master information
2.
Creation of ing Vouchers and Importing transaction information
3.
Viewing and printing financial reports using the information given in Masters and Transactions.
Button Bar The Button Bar displays the following buttons (keys): 1.
Help (Alt + H) – To access Tally's online context-sensitive help
2.
F1: Select Cmp – To select a company
3.
F1 : Shut Cmp – To shut or close the company
4.
F2: Date – To change the current date
5.
F2 : Period – To change the period
6.
F3: Company – To select a different company.
7.
F3 : Cmp Info – To access the Company Info. Menu
8.
F11: Features – To access the Company features for a company
9.
F12: Configure – To access the configuration settings
Note: You cannot load companies with the same name at the selected company will have to be shut first in order to load
same time. The loaded the other company.
or
Gateway of Tally of an s-with-Inventory Company
The Gateway of Tally menu of an s-with-Inventory company appears as shown below:
The Gateway of Tally screen is separated into four sections - Title Area , Main Area (Ctrl+M) , Calculator Area (Ctrl+N) and the Button Bar .
Main Area The left-hand side of the Main Area gives information of 1.
Current Period – The currently loaded or selected company's ing period.
2.
Current Date – The date of the last Voucher Entry of the selected company (this is NOT the calendar date).
3.
1. 2. 3.
List of Selected Companies – This displays the name of the loaded or selected company.
4.
Masters – This is for creation of ing Masters and Inventory Masters and Importing Master information.
5.
Transactions/Vouchers - This is for creation of ing Vouchers and Inventory Vouchers and Importing transaction information.
6.
Reports – This is for viewing and printing financial and inventory reports using the information given in Masters and Transactions.
Button Bar The Buttons on this screen and their function: 1.
Help (Alt + H) – To access Tally's online context-sensitive help
2.
F1: Select Cmp – To select a company
3.
F1 : Shut Cmp – To shut or close the company
4.
F2: Date – To change the current date
5.
F2 : Period – To change the period
6.
F3: Company – To select a different company
7.
F3 : Cmp Info – To access the Company Information Menu
8.
F11: Features – To access the Company features for a company
9.
F12: Configure – To access the configuration settings to manage the information in Tally.
N o t e : You cannot load more than one company at one company will be shut first and then the other company
time. The is loaded.
loaded
or
selected
Company Info. Menu
The Company Info.(Information) menu appears as shown below::
The menu options in the Company Info. are as follows
Select Company Allows you to Select or load a company.
Shut Company Allows you to shut a company.
Create Company Allows you to create a Company.
Alter Allows you to alter a company.
Change TallyVault Allows you to secure the data by providing a TallyVault .
Backup Allows you to take a backup of the company data.
Restore Allows you to restore a data backup.
Shut a Company
Shut a Company is to unload it. It does not mean that you have deleted it. Simply select it again to load and work on it again. You can shut a company in two ways – either using the button Shut Company menu option on the Company Info. Menu.
F1 : Shut Cmp (Alt + F1) or pressing Enter on
The screen appears as shown below:
Select the company to be shut from the List of Primary Companies .
Alter a Company
You can modify any information at any time that is set while creating a company. 1.
Go to Gateway of Tally
2.
Select F3 : Cmp Info. (ALT+F3) from the button bar
3.
Select Alter and press Enter and the screen appears as shown below:
Make the necessary changes in the required fields. To change the if Use Security Control is set to Yes : 4.
Enter the Name of .
5.
Enter the new .
6.
Re-enter the in the Repeat field to confirm.
7.
Enter the Old and Accept the screen to alter the company.
Delete a Company
To delete a company, you have to load the company first. 1.
Select F3: Cmp Info. (ALT+F3) from the Gateway of Tally to proceed to the Company Information menu.
2.
Select Alter and press Enter.
3.
Select the company to be deleted. The Company Alteration screen is displayed.
4.
Use Alt + D to delete. Tally will prompt for a confirmation on deleting the company.
5.
Press enter to delete the company.
N o t e : Deletion the system.
of
a
company
is
irreversible.
The
company
is
permanently
deleted
from
Group Company
The books of of different companies belonging to the same management or owners are required to be consolidated to present the financial position of the group of companies as a whole. This is mandatory in many developed countries and currently shareholders would rather know the performance of the group as a whole and not the performance of individual constituent companies. Tally makes consolidation of s a simple task. You can consolidate the s of any number of companies as well as keep them separate. You also have the option of bringing the companies into the group and separating them at will. The first step is to create a Group Company, which is simply a name and identity given to the merged s of constituent (member) companies of the group. A group company may also include other group companies. N o t e : Do not confuse the contains the consolidated
word Group to refer to s of member
a member companies.
of
the
group!
It
simply
Assume that yours is a global, trans-national organisation (or a 'group') headquartered in the UK having subsidiary companies in countries around the world. The group has different lines of business. Let's say the businesses are Thread, Fashion Retail, Home Fabrics and Accessories. You would prefer to present your group s in groups according to their line of businesses, which in turn are grouped s of the individual companies around the world. The s structure would look something like this:
Creating a Group Company
A group company can be created only for companies that have already been loaded. The first step is to load the companies whose s are to be grouped. The companies can be loaded automatically if specified in the Tally.ini file. Alternatively, select the companies using F1: Select Cmp button, as shown:
Press
+F3 or click the button [F3 : Create Cmp ] and select Create Group Company Enter the name of the Group Company (which is mandatory), address and tax details and select the of the group company from List of Companies. Say, you have selected the two as shown. Select End of List to complete the selection process
The Group company Thread will be created and loaded. It also becomes the active company. Notice that the constituent companies are given below the group company and are slightly indented to distinguish the Group company.
You can now display and print Group s through the Thread Company.
Altering a Group Company
Use Alter to change/modify the details of a Group Company.
A Group Company is marked with an asterisk. You can select or reject using the Alter Mode. Any change will come in to effect only on shutting the group company and then reloading it.
The Group Company must contain at least two .
It is possible to combine s of different companies.
Create as many Group companies as you need.
A constituent company can be a member of more than one group.
A group company can also be a constituent of another group company.
Note: * It is advisable * If the member Company cannot
not to delete the member company, which belongs to Group company has a then without entering the be opened.
Company the Group
For example, by selecting the two group companies Thread and Fashion Retail, the new group company The World-wide Textiles Inc. becomes the overall holding company, as shown.
Security Control
In an ideal company scenario, there will be more than one person working on Tally. In such a case, not every person needs to be given the full access. The head of the department/ should be able to create different s and assign their rights to them. Tally has a very customisable security system. You can set up Security Levels and s who are placed at these levels. The authority levels or Types of Security decides the rights of the s while using Tally.
To create Security Levels 1.
Go to Gateway of Tally, select F3: Cmp Info. > Create/Alter Company
2.
In the Company Creation screen set Use Security Control to Yes.
3.
Enter the Name of the .
4.
Enter your and reenter the for verification. The is not displayed for security reasons.
5.
Accept Yes to save the changes made.
More: Types of Security (security or authority levels)
Types of Security (security or authority levels)
Tally has two default Security Levels. One is Owner and the other Data Entry. Owner has full access and rights to all features of Tally, except Tally Audit & Company Alteration screen, which are reserved for the alone. Data Entry has restricted rights. You are allowed to create other security levels based on these pre-defined types and allow or restrict rights as required.
Create a New Security Level
You can create New Security Levels and define task wise access rights. To create New Security Level: Go to Gateway of Tally, select F3: Cmp Info. > Security Control> Types of Security The Security Levels screen is displayed as shown below:
1.
Type the New Security Level, e.g. Manager
2.
Press [Enter] to display the Level Definition screen
More: The level definition screen
The Level Definition Screen
A brief description on all the fields in the Level Definition screen follows:
Name of security level This defaults to the name you have created.
Use Basic Facilities of The default is Owner . You can select the other option Data Entry from the Security List . If the company has other defined Security Levels, these are also displayed in the Security List . The new level created will be available in the Security List the next time you create a Security Level.
Days allowed for Backdated vouchers This is the number of days the s of this Level are allowed to create backdated vouchers. Specifying 0 will indicate that back-dated vouchers are not allowed, and 7 will allow the at this level to insert vouchers going back 7 days.
Cut-off date for Backdated vouchers. Specify the date before which s of this Security Level may not create or alter vouchers. This is additional control over and above the previous Days allowed for Backdated vouchers . This is useful in cases where you have completed your Tax Assessment for a period and no changes are desired in the data for that period.
Disallow the following facilities/Allow the following facilities The screen is now divided into two broad columns each having two sub-columns. The left side of the screen is to disallow access to the various options of Tally. The right side allows the Security Level access for the different options. When the cursor is on an access rights filed, the Type of Access list is displayed. Select an option from the list. The options sought to be controlled like s Masters, Balance Sheet etc. are on the right (the second column from the left)
To disallow access to different options, first select the type of access from the Type of Access list. Then select the reports for which the access rights are restricted from the List of Reports . Repeat the procedure till you have set access rights for different reports. When you select a type of access, this type of access would be restricted for the corresponding report selected. For E.g if you select Full Access for Balance Sheet , the will not have any access to Balance Sheet by this security level. Conversely, under Allow the following facilities , if you select Full Access for Balance Sheet , the will have full access. Select [End of List] at the Type of Access field to complete the process. You are taken back to the screen Security Levels for Company at a blank field following the one you just created. To create the next level, type the name and follow the same procedure. Otherwise press Enter key at the blank field and Accept , Yes to save.
s and s
To create different s who belong to one or more different Security Levels or Types of Security Go to Gateway of Tally, select F3: Cmp Info > Security Control > s and s The List of s for Company screen is displayed.
A brief description of all the fields in the List of s for Company screen follows: Name: The selected company name is displayed here automatically. Name of : Enter the name of the . (if any): Enter the if required. Security Level: Select the security level from the Security List. N o t e : You need to create Security Levels before levels available viz. Owner and Data Entry.
creating
s
or
the
default
security
Altering/Displaying s and s and Types of Security There is no separate menu option to alter or display s and s and Types of Security options. Use the same menu to display or alter or security level set-up. To delete a , delete the Name of and and Accept, Yes to save. Do the same for deleting a security level. If you have defined a under a security level, then the security level cannot be deleted before deleting the s under it.
Tally Audit
Tally Audit provides the capability to the /auditor to track changes in the s following his previous review. Changes of two areas are very important – changes in Transactions or Vouchers and changes in Ledger Masters. Only changes that affect the integrity of a transaction are considered. For e.g. a change in the narration does not affect the integrity of a transaction and will not be considered as a change. Any material change in a voucher is logged. The name of a ledger if changed is material and hence it would be tracked. Tally Audit feature should be enabled while creating the Company and creating Security levels. Only a designated as an auditor or the can view the audit list and act upon it.
To enable Tally Audit: 1.
Go to Gateway of Tally
2.
Select F3: Cmp Info. from the button bar
3.
In the Company Creation/Alteration screen set Use Tally Audit Features to Yes.
You are not required to make any additional input of data. The authorised needs to just display Tally Audit lists and may print out the lists. If he is satisfied with the authenticity of the changes, he accepts the changes either selectively or all of them (by clicking on the relevant button). Once the changes are accepted, they are removed from the audit list and will not be displayed again. More: Viewing TallyAudit Lists
Viewing Tally Audit Lists
Go to Gateway of Tally > Display > Statements of s >Tally Audit
You can view changes made to Vouchers and Ledgers. More: Displaying Audit List for Vouchers Displaying Audit List for Ledgers
Displaying Audit List for Vouchers
T his option tracks changes in vouchers, which are more than 30 days old. Go to Gateway of Tally > Display > Statements of s > TallyAudit > Vouchers The Tally Audit Listing screen is displayed as shown below
The three buttons relevant to the audit list. 1.
F7: Accept one
2.
F7 : Accept All
3.
F12: Configure
F 12: Configure Select F12: Configure or press [F12] from the Tally Audit Listing screen
Set Show Entered/Altered By to Yes . The listing now incorporates the 's name.
Print the list if necessary. Assess each of the entries for authenticity and accept. To accept the entries one by one, place the cursor bar on the relevant voucher and press F7: Accept One button. This accepts the voucher as valid and removes from Tally Audit List. To accept all the vouchers at a time, press F7 : Accept All . N o t e : Do a disciplined verification of the list so that it is periodically cleared and vouchers that are of concern remains. Once you accept an entry it is not available listing. Hence it is recommended that you take a print before acceptance.
only for
Displaying Audit List for Ledgers
To display the changes made to Ledger Masters : Go to Gateway of Tally> display> Statements of s> Tally Audit> Ledgers The Audit Ledgers screen is displayed. The listing here differs from the vouchers by two ways: 1.
It allows you to display all Ledger s and toggle between the ones that have been changed – (by pressing the toggle button F6:All Accts/Audit List )
2.
The F12: Configure button is not available; but the list displays names if available. (If you activate Tally Audit sometime after you are well through the s, the names will not be displayed. In such cases, accept the list after verification. Any changes henceforth, would give the names).
The modification could be in the Name or in the Opening Balance of the Ledger. The name is considered important as a creditor's name could be changed to some other name with malafide intentions. Please note that you need to identify a change even in cases where two names are interchanged. This would enable identification of fraudulent transfer of balances. You can identify the Ledger by the ID assigned to each of them. You must first take a print of all the Ledger s with their original ID with which you can match subsequent audit lists.
Introduction
The security of data, financial or otherwise, has always been a matter of concern. Most business depend on the confidentiality of information. Tally Vault is an enhanced security system, which allows for encryption of the company data with the most secure method of encryption being used. Tally Vault ensures that under no circumstances, the original information is available in any form to anyone other than the . The technique could be likened to "encryption-decryption-on-the-fly", and the decrypted form of data is never stored in the system. Apart from this, it uses the "non-stored " mechanism and highly advanced mechanisms to validate a new without any prior knowledge of the original . The combination of these facilities ensures that Tally Vault becomes one of the most secure means of information storage.
Enabling Tally Vault for Existing Companies
Tally Vault can be given in the Company Creation screen at the time of creating a company. For existing companies, which do not have a Tally Vault , the procedure is: 1.
Load the desired company
2.
From Gateway of Tally , select F3 : Cmp Info > Change Tally Vault .
3.
The Change TallyVault screen is displayed prompting you to select the company from the List of Simple Companies in the Name field. Select the company from the list.
4.
Enter the new Tally Vault in the New field.
5.
Re-enter the in the Repeat New field.
6.
Once you encrypt the data, the company name no longer becomes visible to anyone and appears as shown below:
7.
7.
Now if you select the company, Tally will prompt you for the Tally Vault .
8.
By following the above procedure, one can ensure that data is kept confidential and is available only to (initiator of the Tally Vault! ).
Changing Tally Vault To change the Tally Vault of a company: Go to Gateway of Tally , select F3 : Cmp Info > Change Tally Vault The procedure is the same as described in Enabling Tally Vault for Existing Companies . An additional field Current is displayed. Enter the existing in this field. Enter the new in the Repeat and Repeat New fields and save the changes.
Backup
Tally has a flexible backup mechanism where in you can take a backup of the data from virtually any storage medium into any other medium. The more commonly used media are floppy drive, hard disk drive, zip drive, tape drive, etc - installed either locally or on a network. In the backup screen, the source of the backup and the destination of where it has to be stored have to be given and Tally will do as required. More: Taking a Backup Backup Precautions
Taking a Backup
T he procedure for taking a backup is as follows 1.
Go to Gateway of Tally , select F3 : Cmp Info > Backup
2.
The Backup Companies on Disk screen is displayed.
3.
To change either the Source or the Destination paths, use the [Backspace ] key and change the path as required. Specify the paths of the Source and Destination drives. Incase we want to take a backup onto another system on the network the Destination path will be \\machinename\drivename\directoryname. The process of backing up data begins when at least one company is selected for the same from the List of Companies . To stop selecting companies, select the option End of List , which appears at the top of the selection list.
4.
The backup file is stored as TBK900.001 . If the backup is taken in a medium likely to extend more than one – for example, floppy, then the extension digits (10001, 10002 and so on) will be stored accordingly.
The Backup screen appears as:
N o t e : If TallyVault only one company at a time
is enabled for a company, from the list for a backup.
Tally
will
allow
you
to
select
Backup Precautions
Data on a computer is vulnerable to all types of difficulties. Considering the same, it is important that we do not overlook the importance of regular backing-up of data regardless of the stability of the database. With a little planning and forethought, we can ensure that maintenance of the important data is continuous and hassle-free. Depending on the volume of data entry, an appropriate backup mechanism will have to be devised. One method of achieving it will be by maintaining a backup directory in the local hard disk or the server (external storage media such as the floppy disk, zip diskette can also be used). We can have sub-directories for every day of the week under the main backup directory and regularly take data backups in the following manner depending on the day of the week. Monday – C:\TallyBackup\Monday Tuesday - C:\TallyBackup\Tuesday and so on till Saturday. N o t e : Tally backup facility is not limited data onto other storage devices also
to
the
Hard
Disk
drive
alone.
You
can
backup
The above procedure ensures that there exists a reliable data backup at any given time. In order to use that reliable data backup or bring back the data from that existing data backup you have to use the Restore option. Important: It is preferable NOT to restore a backup onto the original data directory primarily to ensure that No data is overwritten unintentionally.
Restore
Restore literally means to bring back. Similar to backing up of data, Tally allows restoring of data from any medium into any other storage medium. The Restore Companies on Disk screen is displayed as shown below:
More: Restoring Data: Restore Precautions
Restoring Data
The procedure for restoring data is as follows 1.
Go to Gateway of Tally, select F3: Cmp Info > Restore
2.
The Restore Companies on Disk screen appears.
3.
The Source and Destination paths displayed in the screen are those that were used last.
4.
The Source field has to have the appropriate path. It is the path from which you intend to bring back the previous data. Accepting the path will read the contents of the particular file and will then display the list of companies available.
5.
Select as required and restore the data accordingly.
Restore Precautions
It is preferable NOT to restore a backup onto the original data directory primarily to ensure that No data is overwritten unintentionally.
Split Financial Years
Tally's flexible period less ing permits entry of data for any number of years. This in itself has tremendous benefits. However, presence of old data in cases where they are voluminous causes greater overhead on the system. Splitting financial years enables you to retain most benefits while overcoming this overhead. When you split the data, two things happen: 1.
New companies are created for the respective split periods.
2.
Full data is retained in the original company.
Important pre-split activity Note:
Not
carrying
out
these
will
result
in
mismatched
information.
Before you split data, ensure that: 1.
All unadjusted Forex gains/losses have been fully adjusted by journal entries. that the item does not appear in the Balance Sheet.
2.
There are no Purchase Bills/Sales Bills due. Check the Profit & Loss and Inventory Statements – Purchase/Sales Bills Pending. You may them to the respective party s or to respective 'Bills Pending' .
3.
Ensure that a backup of the data exists.
N o t e : For s of Sales/Purchase Order not carried forward, you should not split data the outstanding orders afresh More: Splitting Financial Years
Processing if you do,
features: Since be aware that
open orders are you have to enter
Splitting Financial Years
The procedure for splitting financial years is as follows: 1.
Go to Gateway of Tally, select F3: Cmp Info
2.
Select Split Company Data.
3.
Select the Company whose data is to be split from the List of Simple companies .
4.
Tally recommends the split-off date based on the data existing. It is recommended that the Split from date is set as the beginning of the latest financial year though Tally permits any date.
5.
Splits occur in sets of two periods. Hence, start with the latest. For example to split three year’s data of a company from 1-1-2003 to 31-12-2005 into three separate 'companies' each with a financial year select the beginning of the latest financial year (this is what Tally prompts you to do).
6.
On confirming the activity, two new companies will be created – one with data from 1-1-2003 to 31-122004, i.e., two years, and the other for 1-1-2005 to 31-12-2005.
Typically, this is all you need to do. Your historical data, whether of 1 or more financial years, will be preserved as one company, and your current financial year, as the other. There is normally no reason or benefit to split the prior years again into separate years. However, should you wish to do so, repeat the above steps for the prior period. All the companies are full companies in their own right. Data can be entered, displayed and altered. Please display or print the key financial reports (Trial Balance, Balance Sheet, Profit & Loss, Stock Summary etc.) from each of the companies for the relevant periods and compare them for accuracy. Once you are satisfied that you have a successful split, it is advisable to backup the original company onto diskettes and permanently delete its data from your hard-disk. This will ensure that you do not accidentally use it to enter fresh data. To delete a company, press Alt+F3 at the Gateway of Tally, select to Alter it, and at the point where you can modify the Company Information, press Alt+D. You will also need to alter the names of the two freshly created companies to suit you.
Activate Company Features (F11: Features)
The different features of a company can be selected or modified by F11: Features button. This button is available in almost all screens of Tally as you might wish to modify it as your requirements change. Unlike F12: Configure , F11: Company Features is specific to the current company only. Therefore, each company may have different features active. For example, a company in your group may need multi-currency whereas another company may not. Configuration options, on the other hand, affect all companies maintained in the same Tally directory and setting configuration for one company will affect other companies in that data directory. Note: Certain features like multi-currency and multi-locations, once set to Y e s , cannot be modified if the feature has been used. However, other features like Cost Centres and Bill-wise details can be modified even if they are used. If you reset the option after having used the feature in transactions, it is advisable to rewrite the company by using CTRL + ALT + R . Go to Gateway of Tally > F11: Features The F11: Features menu displays as shown
The menu consists of the following options. ing Features Inventory Features Statutory & Taxation
There are various settings available under ing Features , Inventory Features and Statutory & Taxation Features in Company Operations Alteration screen, which determine the information to be keyed in during transaction entries. A discussion on each of the options follows.
ing Features
This feature enables you to set the various ing Features required for the transaction entries. Go to Gateway of Tally > F11: Features > F1: s
General Integrate s and Inventory This option has a significant effect on the Balance Sheet and Profit & Loss . If set to Yes , it brings the stock/inventory balance figures from the inventory records and provides a drill down to the Stock s from the Balance Sheet. If set to No , it ignores the inventory books figures and picks up manually entered closing stock balances from the ledger created. This provides the facility to maintain s separately and inventory separately. Stock records often contain compensating errors caused by wrong allocation to items and the like. This feature enables finalisation of financial books without waiting for reconciliation of stocks that may take time.
Income/Expense Stmt Instead of P & L Enable this option if you need an Income & Expenditure Statement for Non-Trading s. Profit & Loss statements are generally used for trading s.
Allow Multi-Currency Set this option to Yes , if you want to create multiple currencies. The option Currencies is displayed in Gateway of Tally > s Info. menu only if you set this option to Yes .
Outstandings Management Maintain Bill wise Details The Bill-wise facility is turned on by setting this option to Yes . By activating the Billwise feature in F11: Features , the ledger masters under Sundry Debtors and Sundry Creditors automatically displays an additional option called Maintain balances bill-by-bil l. On setting this option to Yes , you get an additional option Default Credit Period . When you enter details of sales and purchases with Bill-wise turned on, Tally prompts you to identify the invoice with an appropriate reference number. The reference can then be used to allocate payments to the correct invoice to maintain an accurate of outstanding.
(For Non-Trading A/cs also)
If you want to maintain bill wise details for Non-Trading s also, set this option to Yes . Bill wise Details for Non-Trading s is useful in those cases where one needs to track either an installment to be paid or a loan amount to be received over a certain period of time.
Activate Interest calculation Set this option to Yes to enable Tally to calculate interest automatically based on the interest rate and style of calculation specified. Enabling this option allows interest calculation on outstanding balances for any ledger or on each invoice for the period it is outstanding completely or partly.
Use advanced parameters
The advanced parameters are particularly useful where interest rates change from time to time. Set this option to Yes to enable this.
Cost/Profit Centres Management Maintain Cost Centres A Cost Center can be defined as a unit of an organization to which transactions can be allocated. When only costs or expenses are allocated to these units, they are referred to as Cost Centres . The Cost Centre feature is activated by setting this option to Yes .
Use Cost Center for Job Costing
To track all income and expenses for a project, set this option to Yes.
More than ONE Cost category
To create more than one Payroll or Cost Category, set this option to Yes.
Use Pre-defined Cost Centre Allocations during Entry
Set this option to Yes to define Cost Centre Allocations. Refer Set up Cost Centre Classes for more details
Invoicing Allow Invoicing Set this option to Yes , to create Sales and Purchase vouchers in invoice format. The advantage of using the invoice format for sales invoice entry is that it enables automatic calculations of Duties and Taxes s.
Enter Purchases in Invoice Format
Set this option to Yes , to make the invoice mode as the default voucher mode for purchase vouchers.
Use Debit/Credit Notes The Debit Note and Credit Note voucher types are made available only if this feature is set to Yes.
Use Invoice Mode for Credit Notes
Set this option to Yes to create Credit Notes in Invoice Mode.
Use Invoice Mode for Debit Notes
Set this option to Yes to create Debit Notes in Invoice Mode.
Budgets & Scenario Management Maintain Budgets and Controls Set this option to Yes, to create multiple budgets. The Budgets menu option is displayed in Gateway of Tally > Masters Info. > s Info. menu only if this option is set to Yes .
Use Reversing Journals & Optional Vouchers Setting this option to Yes displays the Scenario option in s Info menu. You will now be able to create and alter Scenarios. You can enter the Reversing Journal and make it to Optional for entries not to affect the books.
Other Features Enable Cheque Printing Set this option to Yes , to enable Cheque Printing. Refer Cheque Printing for details.
Set/Alter Cheque Printing Configuration
Setting this option to Yes , Tally will allow you to Alter the Cheque Printing Configuration
Allow Zero Valued Entries in Vouchers Set this option to Yes , to allow Zero valued entries in vouchers. N o t e : You using F1, F2
can toggle between the s, and F3 keys or using the options
Inventory on the
and the Statutory features Button Bar respectively.
Inventory Features This feature enables you to set the Inventory Features required for the transactions. Go to Gateway of Tally > F11: Features > F2: Inventory
screen
General I ntegrate s and Inventory This field performs the same function as explained in ing Features .
Allow Zero Valued Entries in Vouchers Set this option to Yes , to allow zero valued entries in vouchers.
Storage & Classification Maintain Multiple Godowns Set this option to Yes , if you have more than one stock point/storage Locations/ Godowns, and you want to track stock movement in these Locations. You can create any number of Stock Locations/Godowns. The Godowns/Locations option is displayed in Gateway of Tally > Inventory Info. menu only if you set this option to Yes. You will be able to know your stocks at each location as well as assign stock movement to one or more
locations during voucher entry.
Maintain Stock Categories Set this option to Yes , if you wish to create and maintain Stock Categories. This creates a new field Category in the Stock Item Creation screen.
Maintain Batch-Wise Details Set this option to Yes , to maintain batch information pertaining to Stock Items. A new field Maintain in Batches is displayed in the Stock Item Creation screen. N o t e : Batches should be used where they are small in number and remain constant. Do not use the batch option for tracking of lots through manufacturing processes. If that is done, you will soon have a large number of batches that are not deleted. You will not be able to assign costs to particular lots, as may be the intention.
Set Expiry Dates for Batches
Set this option to Yes , if you want to set expiry dates for the batches. This displays an additional field Use Expiry Dates in the Stock Item Creation screen. This is useful for businesses that deal in goods that have expiry dates like medicines, food and other perishables. During voucher entry, date of manufacture of the product by default takes the date of the voucher. This date can be changed, but not to a date later than the voucher date. Expiry date cannot be a date prior to the voucher date.
Use different Actual & Billed Quantity Set this option to Yes , if you want to specify quantities, that are different from that delivered/ received, when invoicing. For example, you have delivered goods but some of them are in disagreement. So, your customer wants to be invoiced only for the undisputed quantity. He/She might consider the rest later and would then like to be invoiced. On the other hand, the rest might be so bad that it is useless even for you to take it back. Hence, you can record the fact while raising the invoice without altering the delivery note or ing a rejection entry.
Order Processing Allow Purchase Order Processing Set this option to Yes , to create Purchase Orders.
Allow Sales Order Processing Set this option to Yes , to create Sales Orders.
Invoicing Allow Invoicing This field performs the same function as explained in
ing Features .
Enter Purchases in Invoice Format
This field performs the same function as explained in
ing Features .
Use Debit/Credit Notes This field performs the same function as explained in
ing Features .
Use Invoice Mode for Credit Notes
This field performs the same function as explained in ing Features .
Use Invoice Mode for Debit Notes
This field performs the same function as explained in ing Features .
Separate Discount Column on Invoices This option is active only if Allow invoicing is set to Yes . Set this option to Yes , if you want a separate column for discount in invoices.
Purchase Management Track Additional Costs of Purchase Set this option to Yes , to obtain a break-up of purchase costs, without the need to separately debit ledger s for expenses. Typically, on purchases, one is interested in total costs and the breakup is of interest while doing analysis (except for expenses like VAT or Modvat, which can be claimed). In such cases, ing of ing entries for expenses will have no consequences other than lengthening your ledgers. Example : Purchases from ABC & Co: 10 Pcs of [email protected] = Rs.200. Expenses incurred= Tax-Rs.20, Packing charges – Rs.15.40, Total purchase cost – Rs.235. If you activate Track additional costs , you can the entry in any of the following methods:
From an ing perspective, both entries are identical. The ledger s Purchase Tax and Packing charges are not debited with the amounts. Hence these figures are reflected only as breakup or analysis figures of Purchases . The Actuals figure reveals the total cost incurred on the Purchase and will also affect the stock value. You may also allocate additional costs on Purchases through subsequent entries or vouchers. The rules for including subsequent vouchers in purchase costs that Tally follows are: Basic Cost + Additional costs allocated (if any) + All costs in subsequent vouchers that have zero quantity, up to the first voucher that has a non-zero quantity.
Sales Management Use Multiple Price Levels Set this option to Yes to create Multiple Price Levels. Refer Enable and Create Price Lists for more details.
Additional Inventory Vouchers Use Tracking Numbers (Delivery/Receipt Notes) Set this option to Yes , if you want to use tracking numbers to maintain the relation between delivery notes and invoices/bills. This is available for both purchases as well as sales. Hence, if your business is affected by this situation either for goods received or goods sold, set this option to Yes . If you set it to No , you will not need the facility of separate delivery notes recording, as your Purchase and Sales Vouchers would double up as delivery notes.
Use Rejection Inward/Outward Notes Set this option to Yes , if you wish to record rejection of goods separately and not through a common Debit Note or Credit Note.
Prepare and Follow British Style VAT Returns If the Country Specific Configuration is set to International in the F12 Configure , then an additional field Prepare and Follow British Style VAT Returns is displayed. Set this option to Yes , to follow British Style VAT Returns. Unlike Excise Duty, this option simply controls the VAT Return preparation. More ledger level set up may be required, which is discussed under UK VAT Analysis .
The Company VAT Returns screen is displayed.
If you deal with EEC countries, select a group for the fields Group Name under which ‘EEC Debtors’ are Classified and Group Name under which ‘EEC Creditors’ are classified from the list. It is advisable to group your EEC Customers separately under a sub-group under Sundry Debtors. Likewise, group EEC Suppliers under a separate sub-group of Sundry Creditors. Take care to group only VAT ed companies in these groups as they would affect Box 8 and 9 as well as the EC Sales List. Uned companies or individuals (Distance Sales) should be grouped separately and treated like UK companies.) If you do not deal with EEC countries, Select Not Applicable .
Statutory & Taxation This feature enables you to set the Statutory Features required for the Company Operations. This option is enabled only if a country is selected from the list of countries under the field Statutory Compliance for in the Company Creation screen .. Go to Gateway of Tally > F11: Features > F3: Statutory & Taxation
Note: The different features are available in the Company Creation screen.
depending
on
the
country
you
have
selected
The following features are available on selecting India in the Company Creation screen.
Enable Dealer – Excise (Set/Alter Dealer – Excise Details) Set these options to Yes , to enable/alter the Excise for Dealers feature. Refer Excise for Dealers for further information.
Follow Excise rules for Invoicing Set this option to Yes , to follow Excise rules for invoicing. The shown:
Company Excise Details screen is displayed as
Provide the above Excise information, for it to be printed on invoices and Accept , Yes to save.
Enable Value Added Tax (VAT) Set/Alter VAT Details Set these option to Yes , to enable the VAT features for the company. Refer Value Added Tax for more details.
Enable Service Tax Set/Alter Service Tax Details Set these option to Yes to enable the Service Tax features for the company. Refer Service Tax for further details.
Enable Tax Deducted at Source (TDS) Set/ Alter TDS Details Set these option to Yes to enable the TDS features for the company. Refer TDS for further details.
Enable Tax Collected at Source (TCS) Set/Alter TCS Details Set these option to Yes to enable the TCS features for the company. Refer TCS for further details.
Enable Fringe Benefit Tax (FBT) Set/Alter FBT Details Set these option to Yes to enable the FBT features for the company. Refer FBT for further details.
Tax Information Set this option to Yes to enter the Tax details of the Company.
Local Sales Tax Number The Local Sales Tax Number entered during the Company Creation is automatically displayed in this field.
Inter-State Sales Tax Number The details given here comprises of a number and date of registration (in India). This information, if given, can be printed on invoices. It is not compulsory to give this information and you may leave it blank.
PAN/ Income – Tax Number The PAN/ Income Tax Number is the number allotted by the Income Tax Authorities. This number comprises of 10 digits and may be alphanumerical. The information entered here will appear in Confirmation Statements. It is NOT compulsory to provide this information – this field can also be left blank.
Introduction
s Info menu lists the masters through which you can provide Tally the details of your company’s s. Go to Gateway of Tally > s Info.
More: Main functions in Masters menu
Configuring F12: Configure and Setting F11: Features
F12: Configure and F11: Features > ing Features help you to organize the information and the level of details as per requirement. You can modify/alter the settings in F12: Configure and F11: Features at any point of time.
F12: Configure To set F12: Configure for s and Inventory Masters Go to Gateway of Tally > F12: Configure > Accts/Inv Info. By default, s/Inventory Masters settings are set to No. You can set the features that you may require to Yes. Typically, they are additional fields that appear during Masters creation which enable you to obtain more information and detailed analysis.
Refer Accts/Inv Info Configuration for more details.
F11: Features
There are various settings available under ing/Inventory/Statutory Features, which determine the information that needs to be entered in transaction entries. Refer Activate Company Features for more details
Main Functions in Masters Menu
s Information contains the masters. Each master has create, alter and display functions. Single Group option is useful when you wish to work on one Group at a time. Multiple Group option is very useful when you are working on many sub-groups at a time and saves a lot of time. Once a sub-group is created, it behaves exactly like a Group.
Create The Create option is used to create new masters. Any modification to the masters can be done only through Alter mode.
Display The Display option is used to view the Master information. Master information cannot be modified in Display mode.
Alter The Alter option allows you to view and make the necessary changes to the master information. This does not allow creation of masters.
Introduction
Tally follows the modern way of managing s called 'Single Ledger' concept of ing. This is in direct contrast to Subsidiary Ledger ing. All financial entries are made using ledgers or heads. Ledger s are created to identify transactions. The single ledger concept avoids the need for sub-ledgers and corresponding control s in General Ledger. Tally allows you to group ledger information to generate meaningful reports that are compliant with laws. Groups in Tally classify and identify heads according to their nature. This helps in presenting summarized information. Gateway of Tally > s Info. > Groups
Classification of Heads Usually, grouping of s is done only when reports are needed. This may result in delay in preparing the reports. Tally allows you set up chart of s. You can group the ledger s while creating them. This will enable your reports and statements to reflect the desired classification at any point. In Tally, you can also re-group the ledgers (with some minimal restrictions) if re-classification is necessary. Re-grouping becomes necessary whenever there is a change in the nature of information. However, re-grouping can be done only by s who have authorised rights. At the highest level of grouping, s are classified into capital or revenue — specifically into assets, liabilities, income and expenditure. Based on mercantile ing principles, Tally provides a set of reserved groups and allows you to modify their names or create sub-groups.
Sub-Groups A Sub-Group behaves exactly like a group and is created under a group.
Concept of Sub-Groups Groups have a hierarchical structure. The main group of s that determine the entire ing and their presentation are the asset, liability, income or the expenditure. These main groups ascertain whether a ledger affects Profit & Loss as a revenue item or if it affects the Balance Sheet. The Reserved Primary Groups and subgroups are: Primary Groups of Capital Nature 1. Capital a) Reserves and Surplus [Retained Earnings] 2. Current Assets a) Bank s b) Cash-in hand c) Deposits (Asset) d) Loans & Advances (Asset) e) Stock-in-hand f) Sundry Debtors 3. Current Liabilities a) Duties and Taxes b) Provisions c) Sundry Creditors d) Fixed Assets 4. Investments 5. Loans (Liability) Bank OD s [Bank OCC s]
a) Secured Loans b) Unsecured Loans 6. Suspense 7. Miscellaneous Expenses (Asset) 8. Branch/Divisions 9. Sales 10. Purchase 11. Direct Income [Income Direct] 12. Indirect Income [Income Indirect]
13. Direct Expenses [Expenses Direct] 14. Indirect Expenses [Expenses Indirect] Note:
Aliases
for
the
groups
are
given
in
square
More: A discussion on each of the reserved groups: Common and possible errors in Grouping and classification
brackets
[
].
Common and Possible Errors in Grouping and Classification
Debtor/Creditor classification Placing individual party s under Sales or Purchase s groups s of parties with whom your company is trading should be opened under any of the following groups (or sub-groups under them): Sundry Debtors Sundry Creditors Branch/Divisions
Sales and Purchase groups are meant for revenue s and are reflected in the Profit & Loss . If you open party s under these groups, it becomes difficult to sales or purchase voucher transactions. For example, in a sales voucher transaction entry, you must debit an , which can be sundry debtor, branch/division or even a sundry creditor. Moreover, other facilities like bill-wise allocation and tracking will not be available unless the s belong to one of these groups.
Opening two s of the same party Tally classifies debtors, creditors and branch/divisions for convenience. This helps in the purpose of keeping the s of a particular group together during displays and analysis. Thus you can both sales and purchase entries for a party placed under Sundry Debtors. Use the classification depending on the most natural group for the party. For example, parties from whom you buy more frequently then you sell them can be placed under Sundry Creditors, as that is the natural place to look for their . Tally does not restrict the s from having obverse balances. Thus, a Sundry Debtor can have a credit balance depending on the state of his . Therefore, you need not open two s for the same party - one under Sundry Debtors and another under Sundry Creditors. Tally restricts opening of two identical ledger s. In such cases, you may decide to circumvent by marking one as "A & Co - S/Dr" and another "A & Co - S/Cr". This will allow you to have two s of the same party under two groups, but you will lose the advantage of analysing net position at one place. It is always better to maintain a single to obtain best benefits. Expenditure items are entered under Liabilities group. For example, the expenditure item Rates & Taxes under the group Duties and Taxes. The group Duties and Taxes is specifically meant to handle taxation liabilities of your company. Rates & Taxes and other statutory expenses should be placed under Indirect Expenses. Simply adhering to the reserved groups may be sufficient for many organisations. For greater diversity, Tally allows you to create your own groups, either as sub-groups or primary groups. Groups can be sub-classified to practically an unlimited level, to give a virtual ing tree. At the lowest level, of course, would be the ledger . An example of sub-groups would help illustrate the power of this facility, the group Indirect Expenses can be subclassified under ledgers (given in italics) as shown below.
During voucher entry, only the ledger s are used and the group structure remains transparent, irrespective of the use of sub-classification. The same principle can be applied to Sundry Debtors, Sales s, Purchase s and so on. You can classify Debtors and Creditors according to geographical areas as shown below. You can classify creditors according to their tax status as shown below. You can create unlimited levels of sub-groups (like branches) or ledgers only if they are two or more in number. You can simply create ledgers directly under Marketing Expenses as shown below.
Note: While it is necessary to assign every ledger to a group/sub-group, it is not essential to have your own sub-classification of s; you may simply use the reserved groups for grouping your ledger s.
A Discussion on Each of the Reserved Groups
1. Capital This records the Capital and Reserves of the company. The ledgers that belong to Capital s are Share Capital, Partners' Capital A/c, Proprietor's Capital and so on. Reserves and Surplus [Retained Earnings] This contains ledgers like Capital Reserve, General Reserve, Reserve for Depreciation and so on.
2. Current Assets Current Assets record the assets that do not belong to either Bank s or Cash-in-Hand sub-groups.
Bank s Current , savings , short term deposit s and so on.
Cash-in hand Tally automatically creates Cash A/c in this group. You can open more than one cash , if necessary. N o t e : An under Cash-in-hand group or printed as separate Cash Book in the traditional part of the Ledger.
Bank Cash
s/Bank Book format
OCC A/c and does
group is not form
Deposits (Asset) Deposits contain Fixed Deposits, Security Deposits or any deposit made by the company (not received by the company, which is a liability).
Loans & Advances (Asset) This records all loans given by the company and advances of a non-trading nature (example: advance against salaries) or even for purchase of Fixed Assets. We do not recommend you to open Advances to Suppliers’ under this Group. For further details, please refer to the section on Common Errors.
Stock-in-hand This group contains s like Raw Materials, Work-in-Progress and Finished Goods. The balance control depends on whether you have selected Integrated -cum-Inventory option while creating the company. (refer to Company creation section for more details) Let's consider the options:
Integrated s-cum-Inventory This option has a significant effect on the Balance Sheet and Profit & Loss . If set to Yes, it brings the stock/inventory balance figures from the inventory records and provides a drill down to the Stock s from the Balance Sheet. You are not allowed to directly change the closing balance of an under this group. You are allowed to
transactions in Inventory records and the balances are automatically reflected in the Balance Sheet as Closing Stock.
Non-integrated s-cum-Inventory If Integrated -cum-Inventory option is set to No, it ignores the inventory books figures and picks up manually entered closing stock balances from the ledger created. This provides the facility to maintain s separately and inventory separately. You are not allowed to transactions if your s that come under this Group. It allows you to hold opening and closing balances only. Since no vouchers can be ed for these s, they are the only s for which the closing balances can be directly altered (by an authorised only).
Sundry Debtors For customer s refer to common and possible errors in grouping of s section.
3. Current Liabilities s like Outstanding Liabilities, Statutory Liabilities and other minor liabilities can be created directly under this group. Sub-groups under Current Liabilities are Duties and Taxes, Provisions and Sundry Creditors
Duties and Taxes Duties and Taxes contain all tax s like VAT, MODVAT, Excise, Sales and other trade taxes and the total liability (or asset in case of advances paid) and the break-up of individual items.
Provisions s like Provision for Taxation, Provision for Depreciation and so on are recorded under Provisions.
Sundry Creditors For trade creditors, refer to common and possible errors in grouping of s section.
4. Investments Group your investment s like Investment in Shares, Bonds, Govt. securities, long term Bank deposit s and so on. This allows you to view the total investments made by the company.
5. Loans (Liability) Loans that a company has borrowed, typically long- loans.
Bank OD s [Bank OCC s] Tally provides you with distinct types of Bank s,
Bank OCC A/c To record the company's overdraft s with banks. For example, Bill Discounted A/cs and Hypothecation A/cs etc. Note:
An
under
Bank
OCC
A/c
group
is
printed
as
separate
Cash
Book
in
the
traditional
Cash
Book
format
and
does
not
form
part
of
the
Ledger.
Secured Loans Term loans or other long/medium term loans, which are obtained against security of some asset. Tally does not the existence of the security. Typical s are Debentures, Term Loans, and so on.
Unsecured Loans Loans obtained without any security. Example: Loans from Directors/partners or outside parties.
6. Suspense In modern ing, many large corporations use Suspense Ledger to track the money paid or recovered, the nature of which is not yet known. The most common example is money paid for Traveling Advance whose details will be known only upon submission of the TA bill. Some companies may prefer to open such s under Suspense .
Loans and Advances (Asset) group. The Suspense is a Balance Sheet item. Any expense even if it has 'suspense' in its name, it should be opened under Revenue group like Indirect Expenses and not under Suspense group.
7. Miscellaneous Expenses (Asset) This group is typically used for legal disclosure requirements such as Schedule VI of the Indian Companies Act. It should hold incorporation and pre-operative expenses. Companies would write off a permissible portion of the every year. A balance remains to an extent that cannot be written off in Profit & Loss . Tally does not show loss, carried forward in the Profit & Loss , under this group. The Profit & Loss balance is displayed separately in the Balance Sheet.
8. Branch/Divisions This maintains ledger s of all your company's branches, divisions, s, sister concerns, subsidiaries and so on. Tally permits Sales and Purchase transactions to take place with s opened here. , these are their s in your books and not their books of s. Just treat them as any other party . If you wish to maintain the books of a branch/division on your computer, you must open a separate company. (Tally allows maintenance of multiple company s).
Revenue — Primary Groups 9. Sales You can classify your sales s based on Tax slabs or type of sales. This also becomes a simple mechanism for preparation of Tax returns. Examples: Domestic Sales Export Sales
Now under Domestic Sales open the following ledgers:
Sales (10%) Sales (5%) Sales (exempt)
You can even open an as Sales Returns under the group Domestic Sales to view your net sales after returns (or the returns may be directly ed through Journal against the specific Sales ). N o t e : Do not open common and possible
customer s under errors in grouping of
this group. For more s section.
details,
refer
to
10. Purchase This is similar to sales s, except for the type of transactions.
11. Direct Income [Income Direct] These are Non-trade income s that affect Gross Profit. All trade income s fall under Sales s. You may also use this group for s like Servicing, Contract Charges that follow sales of equipment. For a professional services company, you may not use Sales group at all. Instead, open s like Professional Fees under this group.
12. Indirect Income [Income Indirect] These are miscellaneous non-sale income s. Example: Rent Received and Interest Received.
13. Direct Expenses [Expenses Direct] These are Manufacturing or direct trading expenses. These s determine the Gross Profit of the company.
14. Indirect Expenses [Expenses Indirect] All istrative, selling or non-direct expenses. Profit & Loss is a reserved primary in Tally. You can use this to adjustment entries through journal vouchers. For example, transfer of profit or loss to Capital or Reserve .
Creating a Group
Go to Gateway of Tally > s Info. > Groups > Create (under Single Group) The Group Creation screen displays
Name of Group Enter the name of the Group to be created. For example, istrative Expenses.
Alias Enter an alias name to allow access to the group using the Alias in addition to its name or leave it blank. For example, for istrative expenses, you can enter Office Expense or even an alphanumeric code, say E001, as an alias
Under Specify under which existing (Parent) group the sub-classification is required. If it is a new primary group, select Primary (requirement of a new primary group is very rare, but the option exists). You can also create a new Parent Group by using Alt+C. N o t e : Creation of new P r i m a r y Group is not M a s t e r s is set to N o in F12: Configure.
allowed
if
Allow
Advanced
entries
in
Additional Information If a group (e.g Printing) is created under Primary, you must select the appropriate option from the list whether it is an asset, liability, income or expenses. If you select an income or expenses you should specify whether it will affect the gross profits or not by suitably setting the option Does it affect Gross Profits? to Yes/No.
You can use this concept when you wish to segregate your profits into Operative Profit and Net Profit. This helps you when you want to consider other revenue s in addition to Direct instead of Gross and Net Profit). Normally, Tally calculates Gross Profit using Opening Stock, Purchase s, Direct Expenses, Sales s, Direct Incomes and Closing Stock only. To make other s contribute to this, without classifying under these reserved heads, set this option to Yes.
Group behaves like sub-ledger? This option is applicable to Sundry Debtors group, you can set this to Yes to display Sundry Debtors without Ledger break-up in statements. Normally, Sundry Debtors will have a large number of ledger s under it and it can be expanded during display to show ledger balances. To disable this detailed display set this option to No.
Nett Debit/Credit Balances for Reporting? Setting this option to Yes will display either the net debit or credit balance in the report (whichever is higher). If this is set to No, both debit and credit balances will displayed in the report.
Used for Calculation (e.g. taxes, discounts)? Set this option to Yes if ledgers under this group would have percentages for discounts/taxes to be used for invoice entry. This gets reflected while ing voucher entry in Invoice mode, it uses the automatic calculation capability.
Method to allocate when used in purchase invoice Select the appropriate allocation method from the list. This is used to allocate the expense of the Item in the ratio of the quantity or value.
Buttons in single group screens F3: Company
This button helps you to open a different company. In the creation mode, you can create groups in the other company. In alter mode, you can copy the information by accepting the screen (enter or Ctrl+A). The old company's information remains. This feature is not available in Display mode.
Groups, Ledgers, Cost Categories, Cost Centres, Voucher Types, Currency, Budgets This button enables you to switch to the appropriate area without quitting from the current screen.
F11: Features This allows you to set or modify the company features.
F12: Configure This enables you to set or modify configuration of the master screen. Note: only
Configuration the current
changes company.
affect
all
companies
and
changes
made
in
Features
affect
Creating Multiple Groups
In multiple group creation, the sub-groups will automatically inherit the characteristics of their parent groups. Go to Gateway of Tally > s Info. > Groups > Create (under Multiple Groups)
Select the parent group under which you want the new groups to be created from the List of Groups . The group selected is displayed in the Under Group field.
Name of Group Enter the name of the Group.
Under If you select any group other than All Items in the Under Group field, then this column is filled in automatically with the selected Group name and the cursor skips this column. This speeds up data entry. If you select All Items in the Under Group field, the cursor does not skip this field and allows you to enter the parent group of each of them. Note: To group/alter'
change individual option.
group
behaviour
created
using
multiple
groups,
use
'single
Buttons in Multiple mode Group creation F3: Company This button helps you to open a different company. In the creation mode, you can create groups in the other company. In alter mode, you can copy the information by accepting the screen (enter or Ctrl+A ). The old company's information remains. This feature is not available in Display mode.
Groups, Ledgers, Cost Categories, Cost Centres, Voucher Types, Currency, Budgets: This button enables you to switch to the appropriate area without quitting from the current screen.
F4: Change Parent To change parent of the selected group, select the group from Names of Groups list. For example, you are currently altering groups classified under Loans Liability and wish them all to be re-classified
under 'Bank OCC A/c'. Instead of altering individual name, you can achieve this using F4:Chg Parent.
F4: Parent This allows you to quit from the current screen and modify a different group (relevant in Alteration/Display mode only). For example, you are currently altering groups classified under Loans Liability and now wish to ABANDON the current activity and alter groups under Bank OCC instead
F6: Skip Names/Edit Names It is used for faster data entry when you need to alter only the Group and the Parent Group, but not the names. When you skip names, you might change the Group or the Parent Group to one, which belongs to another Group. Since this violates categorization rules, Tally displays an error message after you accept the screen.
F7: Skip Parent/Edit Parent This button is used for faster data entry when there is no need to alter the parent of sub-groups.
F10: Edit Sort/Skip Sort You can use this button to toggle for altering the Sort Position
F11: Features This enables you to change any company features.
Creating a Group - Advanced Usage
This section assumes that you have configured all advanced features of the s Master in F12: Configure and enabled advanced F11: Features . It deals with the additional fields that you would require while creating a Group. N o t e : Use F12: Configure and F11: Feature entire setup according to your preferences.
to
add/remove
fields
and
configure
the
Go to Gateway of Tally > s Info. > Group > Alter (under Single Group)
Position index in reports Position index is the primary key for sorting groups and ledgers for reports; the group name being the secondary key. It determines the position of the group in relation to other groups in a report. It is the default sorting method in most reports. At the time of its creation, a group is automatically assigned the position of its parent (or 500 if it is a new primary group) and hence there is no need to give the index field while creating a group. All reports are sorted according to the position index in increasing order. This may not be in alphabetic order. The positions have been ascribed for the Balance Sheet and Profit & Loss , which is based roughly on the liquidity concept and company law. These indices may be changed to effect a shift in the location of an , as illustrated in the following example. IF a same index number can be assigned to more than one group, they will appear one after another in alphabetic order (sorted on the secondary key). Create a Group My Own Group under Primary as an Asset. By default, index will be 500. Using single alteration of the group My Own Group the index can be verified.
Create a ledger My Own Ledger under this group with opening balance of 10,000. The group's position in the Balance Sheet would be thus:
Now, alter the Position Index (sort position) of the group "My Own Group" to 45. (You may do this quickly by positioning the cursor on 'My Own Group' and pressing Ctrl+Enter). The Balance Sheet gets rearranged and you can decide the position of an item in your reports.
Though position indices can be altered, it is not advisable to do this without being absolutely sure of its effect. Please that the change affects all reports. If you do not want the changed index, you may revert to the default settings through group alteration. N o t e : Press F12: change the sorting
Configure and select method while viewing
the appropriate the report.
sorting
method
from
the
list
to
Displaying and Altering Group
You can display and alter the Groups in Single mode or Multiple mode.
Displaying a Single Group Go to Gateway of Tally > s Info. > Group > Display (under Single Group) Select the name of the Group from the List of Items. You cannot make any changes in Display mode.
Altering a Single Group Go to Gateway of Tally > s Info. > Group > Alter (under Single Group) Select the Group that you wish to alter from the List of Groups. Make the necessary changes and click Yes to save the changes.
Displaying Multiple Groups Go to Gateway of Tally > s Info > Group > Display (under Multiple Group) Select the Group from the List of Groups to display all the Groups under the selected Group or select All Items to display all Groups. The Multi Group Display screen lists Groups and the corresponding details of the Groups.
Altering Multiple Group Go to Gateway of Tally > s Info. > Group > Alter (under Multi Group) Select the Group for which you want to alter from the List of Groups. In Multi Group Alteration screen, make the necessary changes and click Yes to save changes.
Deleting a Group Gateway of Tally > s Info > Groups > Single/Alter The Delete function is performed through the single alteration mode. You cannot delete groups from the Multiple Alteration mode. 1.
Select the group to be deleted.
2.
Press Alt+D to delete.
Note: ledgers
You cannot in it.
delete
a
group
if
it
is
Note: A new group created under primary masters/transactions for that group
a
will
reserved
not
group
reflect
or
in
a
group
reports
has
until
sub-groups
you
or
Managing Groups in multiple companies
Copy masters from one company to another Master information is the same for most group companies and it is certainly beneficial to maintain same group structure and ledgers. This becomes necessary if you have a parent company with subsidiaries or branches. This ensures uniformity of reports in all companies and proper consolidation of s. To avoid the tedious task of re-creating masters in other companies, Tally enables you to copy the groups created in one company to another. The companies must be selected to allow switching of companies. Gateway of Tally > Select Company A Gateway of Tally > Select Company B
Copy a single group from one company to another First select the source company F1. Gateway of Tally > Select Company A Gateway of Tally > s Info. > Groups > Single Group > Alter Select a particular group, for example select Southern Debtors created under Sundry Debtors F3: Change to destination company (Company B) > Accept the screen, after making alterations, if any. If the parent of the group does not exist, you will not be able to accept the screen without selecting a parent in the destination company. Once you accept the screen, you are returned to the source company list of groups. The same group now exists in the destination company also.
Copy multiple groups from one company to another 1.
Click on F1: Select Company to select the source company (Company A)
2.
Gateway of Tally > s Info > Groups > Multiple Groups or All Items from the list
3.
Click on F3: Company button or press F3 key to change to the current company i.e switch over to the destination company > Accept the screen, after making additions/alterations, if any.
4.
Once you accept the screen, you are returned to the source company List of Groups. The same group now exists in the destination company. The above method of copying masters is possible only if the books of s are maintained on the same computer.
> Alter > Select a particular Group
The above methods can be used for copying other masters like ledgers, cost categories and cost centres. Note: The alternate mechanism to transfer information between the Export of Data and Import of Data. Export/import is more
companies is to flexible where
use
export/import allows incoming information from companies, system. For example, you can export your Masters and branches for their initial master creation.
which do not exist on send the resultant files to
your your
Introduction
A Ledger is the actual head to which you identify a transaction. In Tally, you all ing vouchers using Ledgers. However, all Ledgers have to be classified into Groups. Hence a thorough understanding of classification is important for working with Ledgers. The creation and usage of Groups in Tally has been explained earlier. Now you will learn how Tally works with Ledgers. Go to Gateway of Tally > s Info. > Ledgers
Creating a Ledger
Ledgers can be created in single and multiple modes. In multiple mode you can create multiple ledgers at a time.
Creating a Single Ledger The creation of Ledger depends on the features you opt for in the F11: Features of your company and F12: Configure. It is advisable to set F11: Features and configure the F12: Configure screen before creating any Ledgers. You may configure or set your Ledgers to enable or disable advanced mode. Click here for details on Creating Ledgers in Advanced Mode. Tally automatically creates two Ledger s namely, Cash (Under Cash-in- Hand) and Profit and Loss (direct Primary ). You need to create all other s heads. There are no restrictions in Ledger creation except that you cannot create another Profit & Loss A/c . Any number of Cash s may be created in any other name like Petty Cash. Creating a Ledger with minimal information: Go to Gateway of Tally> s Info. > Ledgers> Create (under Single Ledger)
Name Enter the Name of the . You can provide the full name of the . Tally fits it all in. Press Enter to move to the next field. Tally does not allow entry of duplicate names. The uniqueness check is made here itself. Note that punctuation and other non-relevant information are ignored by Tally in its recognition of a name. Thus, CST, C.S.T. and C. S. T. are all considered as same. Tally converts the first letter of all relevant words to upper case, which helps you; speed up data entry. You need not bother about changing the case every time it is a different word.
Alias Enter an alias name if required. You can access the Ledgers using the original name or the alias name.
Under All s must be classified under their appropriate Groups. Select the Group under which the Ledger is created from the List of Groups. To create a new Group from this field press [ATL + C]
A Group is not important by itself, but because it controls the usage of Ledger s. A wrong classification would affect the treatment of the Ledger in final statements and during voucher entry. You can, alter a Ledger to change its group classification at any time. Refer in Grouping and classification for more details in Grouping.
Common and possible errors
Opening Balance If yours is an existing company whose books you are entering onto Tally, Opening Balance would be applicable in circumstances such as when the Ledger is an asset or a liability and if it has a balance in the as on the date of beginning of books in Tally. Tally recognises normal ing principles of debit balances for Assets and credit balances for Liabilities. It accepts the reverse for obverse balances. Revenue s normally do not have balances. Tally, however, permits you to give balances even for such s - You may be transferring your books on to Tally in the middle of the year and may not have closed them in your earlier system. Hence, you may specify whether the balance is Debit or Credit. Simply D or C also would suffice. N o t e: Use Ctrl be changed.
+A
at
the
field
following
which
the
information
More: Common and possible errors in Grouping and classification Groups - a revisit
in
other
fields
do
not
need
to
Creating Multiple Ledgers
You can create multiple Ledgers at a time in this mode. You can first create a Ledger under each group in single Ledger mode and then the rest of the Ledgers in multiple mode. Tally will set the settings of the Ledger created as default for other Ledger to be created in multiple mode. Go to Gateway of Tally> s Info > Ledgers > Create (under Multiple Ledgers)
The Multiple Ledger Creation screen is displayed. A brief description on each of the fields in the Multiple Ledger Creation screen follows:
Under Group Select the name of the group under which you want to create the Ledgers from the List of Groups . Below this field, the other fields are arranged in a table. The cursor rests at the field Name of Ledger . The other fields in the column are:
S.No This is auto generated.
Name of Ledger Enter the name of the Ledger.
Under This field defaults to the parent group selected in Under Group . The selected group in Under Group gets displayed here automatically and the cursor skips this column. However, if you select All Items in Under Group field, the cursor does not skip this column and you have the option to select the group. You can even create a new group from this field by pressing Alt +C .
Opening Balance This is the balance remaining when you first enter your books on Tally, i.e., the date of beginning of books. If you have opted to maintain balances bill-by-bill, you must give the bill details. (Refer Creating a Ledger- Advanced
Usage for more details on this)
Dr Specify whether the Opening Balance is Debit or Credit . Tally follows the normal ing principals of ing. (Refer Creating a Ledger - Advanced Usage for more details on this). N o t e : While creating Ledgers in multiple mode, the field Cost Centres are applicable, is set to Y e s for Revenue s and N o for Non-Revenue s by default. The field Inventory values are affected is set to Y e s for Sales and Purchase s and N o for the o t h e r s by default.
Creating a Ledger - Advanced Usage
The information required for creating Ledgers depends on the features opted by you in the F11: Features and F12: Configure . The Ledger Creation screen will have additional fields depending on your feature settings for your company. If you set the field Allow ADVANCED entries in Masters in F12: Configure as Yes , you can work in Advanced Mode. Set the company features in F11: Features> F1: s as shown in the screen below to enable advanced features.
After configuring F12: Configure and enabling F11: Features as described in the above sections, the Ledger Creation screen will appear with the following additional fields.
An explanation on each of the additional field follows. For explanation on the default fields refer Creating a Single Ledger
Currency of Ledger Tally allows you to maintain Ledgers in any currency and the amount will reflect in the selected currency. But it is strongly advisable that you maintain the currency of the Ledger as the Base currency. Only foreign currency bank s are maintained in foreign currency and other ledgers are maintained in Base Currency. Nevertheless you can enter transactions in any other currency. To create/maintain ledgers in multiple currency, set Allow Multi Currencies to Yes in F11: Features. You can always create a new currency from this field by pressing Alt+C For more information on Currencies, refer Currency N o t e : The Advanced currency. The relevant
Information is applicable ONLY if the options should be enabled in the
ledger is maintained company features.
in
base
Maintain Balances Bill-by-Bill Set this option to Yes , if you wish to give a Bill-by-Bill break-up of the Ledger balance for Sundry Debtors and Sundry Creditors group including the opening balance. You may allot any number of bills. The option here would also determine the ability to track transactions according to Bill references. The Bill-by-Bill concept in transactions would be discussed in detail in the Vouchers chapter. If you set this option to Yes , while entering the opening balance in the Opening Balance field at the end of Ledger Creation screen and pressing Enter , the Bill-wise Breakup screen of the Ledger created is displayed.
A brief explanation on each of the fields in the Bill-wise breakup screen follows: The following information for all pending bills of the previous ing period would be required.
Date Since you are giving the break-up of the Opening Balance, the date of the bill would naturally be prior to the ing period. Tally defaults to the last date of your previous ing period, e.g., 31 March 2006. Change it, if necessary, to the actual date. To end your list of entries, leave the Date or Name blank.
Name Enter a Name to which you can later refer when adjusting the bill. Typically, you can enter the Bill number or Document number. The purpose of the break-up is to enable you to adjust it later when the relevant transaction is squared off.
Due date (or credit days) For the Ledgers under Sundry Debtors and Creditors, give the credit period or the date when the bill is due. Tally automatically calculates the other.
N o t e : During transaction entry, there would opt for "using effective dates" instead of "bill accordingly.
be another dates" the
concept-that of effective date. If due date would be calculated
you
Amount For the amount of the bill due, you will give particulars of all the pending bills one by one. Tally fills in the difference between your Opening Balance, and the sum of the Bills, and reflects it as On at the bottom of the screen. If all your bills cover the Opening Balance , the On becomes NIL. You may have Bills totaling beyond the Opening Balance , in which case the On will accumulate adversely. In the screen given below, we have shown two bills 50,000, 25,000. Now, if the balance brought forward is 1,00,000/- , the On amount will reflect 25,000/-. If you obtain the bill particulars at a later date, you can always alter the ledger to put in the details, which will nullify the On .
Inventory values affected This is applicable only if your s are integrated with inventory. s like sales and purchases would normally affect inventory values in which case set Inventory values affected to Yes . For other s, set it to No . Tally does not restrict you to particular s as you may have the need to affect inventory with s like Customs Duty, and perhaps, direct expenses related to purchases such as Freight Inwards.
Cost Centres are applicable Tally's concept of Cost Centres allows an additional dimension to a transaction. This field is displayed in the Ledger Creation screen only if you have enabled Cost-Centres in F11 > ing Features . Set this field to Yes in Ledger creation screen to enable Cost centres. Tally will presume that you want Cost Centers for Revenue s and not for non-revenue s like Assets and Liabilities.
Activate Interest calculation Set this option to Yes to enable Tally to calculate interest automatically based on the interest rate and style of calculation specified. Use advanced parameters The advanced parameters are particularly useful where interest rates change from time to time. Set this option to Yes to enable this.
Statutory Information This option is available only if you have enabled at least one the options in F11: Features> F3: Statutory & Taxation . Based on the options enabled in F3: Statutory & Taxation , the respective fields will appear in the Statutory Information section.
Mailing Details Mailing Details is applicable only for party s like Sundry Debtors , Creditors and Branch Divisions . This is also available for loan s. Enter the party's particulars here. These are used in mailing outputs like statement of s.
Tax Information The Tax Information consists of the default fields PAN/IT No. and the TIN/SALES Tax No. Based on the features you enable in F11: Features> F3: Statutory & Taxation , additional fields will appear under Taxation.
Percentage of Calculation This field is applicable only for Ledgers created under the Group Duties and Taxes , or for Ledgers created under any Group for which Used for Calculation is enabled in Group Creation screen. The Group Duties and Taxes is used for automatic tax calculation. . You need to specify the rate of tax e.g. 5, 10, 12.5 etc. as a percentage. Do not give the percent symbol. You may use an automatic Discount calculation facility by specifying a negative percentage in this field. On entering a percentage, a new field Method of Calculation is displayed.
Method of Calculation
There are four methods of calculating a duty. 1.
Duty Based on Items – Tax based on Item Rate
2.
Additional Duty
3.
On Total Sales
4.
Surcharge on Tax
Tax or Duty Based on Items Rate (or Excise Duty) This type of is suitable in cases where there are differential rates of duty/tax on items. In India, excise duty s would normally adopt this method. In the UK, VAT s would do likewise. When creating your Inventory item masters, you might specify Rate of Duty for each item. In your books, you would open a ledger for the duty, possibly by the name VAT 17.5% or Excise Duty 12.5%. You will select this method to instruct Tally to pick up the Rate of Duty specified in your Inventory item master during invoice entry. If one or more items exist with the same rate of duty, then the amount is calculated using the total. Otherwise, it is calculated on total sales. For example, Your invoice lists: Item A (Rate 10%) for 10000/Item B (Rate 12%) for 15000/Item C (Rate 10%) for 18000/Duty (VAT or Excise) will be calculated as follows:
10% on 28000/-
2800/- (Item A & C)
12% on 15000/-
1800/- (Item B)
Total Duty
4600/-
Additional Duty When excise duty is not enabled for invoicing purposes in Company Features [F11] (as applicable for many products in India), Additional Duty and Surcharge function alike. In case it is enabled, then Additional Duty is added to the 'Duty Based on Items' in the invoice to reflect the 'Total Duty payable'. Its method of calculation is explained under 'Surcharge'.
On Total Sales As the type suggests, duty will be calculated on the total of individual values of the items. It does not consider the Rate of Duty specified for each item in your inventory masters. It does not calculate duty on the current sub-total unless you have specifically opted for it in the company features. Hence, the two scenarios could be as follows:
When you have not opted for calculation on current sub-total: Assuming that there are two items in the invoice: Item A 10000/Item B 15000/Tax 2% will be calculated at 2% on total sales of 25000/- = 500/- tax amount following which you obtain a current sub-total of 25500/-. If you now add another line, Tax 4%, it will calculate 4% also on 25000/- (on total sales) giving another 1000/- as tax.
If you opt for calculating on current sub-total: The above Tax 4% will be calculated on 25500/- (25000+500) giving 1020/- .
Surcharge on Tax Surcharge and Additional Duty are charged on the immediately preceding entry. A surcharge is treated as a percentage of the duty levied. Tally expects the preceding line in the invoice to be the duty on which surcharge is to be calculated. Hence, in the above example if you have added a line Surcharge 10% it will appear as:
Item A
10000/-
Item B
15000/25000/-
Tax 2%
500/-
Surcharge 10%
50/- (10% of 500)
If your invoice is as below:
Item A
10000/-
Item B
15000/25000/-
Tax 2%
500/-
Surcharge 10%
50/- (10% of 500)
Addl.Surcharge8%
4/- (8% of 50)
During invoice creation, this figure is used to calculate tax amount based on the method of calculation as well as specified in invoicing configuration. ( [F12] configure > Invoice Entry > Calculate tax on current sub-total?). Though invoicing has been discussed separately in greater detail, we shall touch upon relevant aspects here.
Calculate tax on current sub-total: (Yes/No) Tax here refers to VAT or sales tax. During voucher entry in Invoicing mode, you may enter additional ledger s after giving the list of items in the invoice. Typically, the ledgers would pertain to duties, taxes, delivery charges, other charges and discounts. Sales Tax may be calculated on the total of item values, viz., Inventory sub-total, or you may specify it to calculate on the immediately preceding sub-total. In the latter case, the immediately preceding sub-total could include any entry that you may have ed, e.g. Delivery Charges. Tally
does not make any presumptions and would not its appropriateness or otherwise. Normally, you would not answer Yes to this option. The facility of Surcharge being available, the need to calculate on current sub-total is fulfilled by it. Hence, use it sparingly, maybe only when you have both Excise Duty and Sales Tax (on Excise Duty) applicable on an item.
Display or Alter a Ledger
Information in display and alter is the same, hence only alter is discussed. Display option does not permit any modification. Alter option is accessible only to authorised s. Gateway of Tally > s Info. > Ledgers > Single Alter > select ledger
You are allowed to alter any information of the ledger master with the exception of the Closing Balance of a ledger , if any, other than closing balance of s under the group 'Stock-in-hand'. Please refer to Advanced Usage for specifying closing stock values.
Deleting a ledger You can delete a ledger from the alteration mode by pressing
+
. Tally does not allow deletion of
s that have transactions. Therefore, should you wish to delete an , which has transactions, you must first delete all its voucher entries.
Interest Calculations
Tally allows you to obtain reports on interest calculated by Tally based on the instructions you furnish. Interest figures are typically desired in the following situations: 1.
On outstanding balance amounts
2.
On outstanding bills/invoices/transactions (Receivable and payable)
Tally gives you an exhaustive capability to obtain interest implications on both.
Activate Interest Calculations Interest is a legitimate return on money invested and chargeable in the business world on loans and also on delayed payments. Interest can be calculated on the basis of Simple or Compound Interest. Tally allows you to obtain reports on interest calculated based on the instructions you furnish. Interest figures are typically desired in the following situations: On Outstanding Balance amounts. Outstanding Bills /Invoices/Transactions (Receivables and Payables)
The Activate Interest Calculation field is displayed in the Ledger Creation screen only if Activate Interest Calculations is set to Yes in F11: Features. Set this field to Yes for each specific ledger for which interest is to be calculated. More: Simple Mode - where advanced parameters are not applicable Advanced Mode Interest Calculation Reports Interest calculation on Ledger Balances (e.g. Loans) Statement of Interest due on invoices Group Interest Calculation
Simple Mode (Where advanced parameters are not applicable)
To calculate Interest in the Simple Mode: 1.
Go to Gateway of Tally> F11: Features > Set Activate Interest Calculation to Yes. > Set Use Advanced Parameters to No.
2.
In the Ledger Creation screen set Activate Interest Calculation to Yes.
3.
The Interest Parameters sub screen is displayed. Enter the Rate and select the interest style from the list.
Interest calculations on outstanding balances Enter Interest details in Vouchers (only in case of transaction by transaction/Bill-by-bill). View Interest reports. You will have to alter existing ledger s to permit interest calculations on them. The same operation will apply when creating a new ledger . Interest calculation on outstanding balances is allowed for any ledger . You simply specify the interest rate and style of calculation. Nothing is required to be done for interest during voucher entry. Let's take an example: Interest calculated on Outstanding Balances. 1.
Go to Gateway of Tally> s Info.> Ledgers> Alter (Single)> Bank Ltd (bank )
2.
Set Activate interest Calculation to Yes.
3.
On activation, the Interest Parameters must be set. It is the basis on which interest will be calculated for this Ledger .
4.
Rate: This is the rate at which the interest has to be calculated. In this case, specify 15%.
5.
Interest Style: It is the basis on which the rate is applied. Of the four options, select 365-Day Year.
6.
Accept the screen.
You can now view the amount of interest that could be charged by the Bank.
Report on Interest Calculated on outstanding balances The Interest Calculations Report can be displayed and printed. Go to Gateway of Tally> Display> Statements of s> Interest Calculations> Ledger> Bank
Interest calculation transaction by transaction
Activate and specify interest calculations in ledger masters. Transaction by transaction or Bill-by-Bill interest calculation is permitted for 'Party' s like s falling under the groups Sundry Debtors and Sundry Creditors. For example: 1.
Alter a Customer (under the group Sundry Debtors or one of its sub-groups).
2.
Set Activate Interest Calculation to Yes. In the Interest Parameters now you have three lines to answer.
3.
Set Calculate Interest Transaction-by-transaction to Yes.
4.
Set Over-ride Parameters for each transaction to No.
If set to No, you are not allowed to change interest parameters in voucher/invoice entry. If set to Yes, you can change the interest parameters during entry.
Report on Interest Calculated on outstanding transactions/bills To view the Interest calculated Go to Gateway of Tally> Display> Statements of s> Interest Calculations> Ledger> Ltd The report is similar to the Bill-wise Outstanding Statement. The last column gives the interest amount on the transaction. Select the line to be viewed in detail for its calculations.
Advanced Mode
The advanced parameters are particularly useful where interest rates change from time to time. 1.
Go to Gateway of Tally> F11: Features > ing Features > Set Activate Interest Calculation to Yes. > Set Use Advanced Parameters to Yes.
2.
The Interest Parameters sub-screen is displayed For Ledgers created under the Group Sundry Debtors/Sundry Creditors, the Interest Parameters subscreen is displayed as shown below:
3.
Set Calculate Interest Transaction-by-Transaction to Yes , if you want to calculate interest for each transaction.
4.
Set Override Parameters for each Transaction to Yes , if you want to override the interest rates and parameters set here during voucher entry.
5.
Enter the interest rate in the Rate field.
6.
Select the interest rate calculation period from the Interest Style list in the Per field.
7.
Select the choice of balances for which the interest has to be calculated from the Interest Balances list in the On field. The balances are All Balances, Credit Balances only and Debit balances only. Interest can be calculated on all outstanding balances, whether debit or credit. You would like to select only credit balances in case of s like Bank s, if you want to know the interest that the bank might charge on overdrawn balances.
8.
8.
Select the rounding method applicable from the Rounding Methods list. The amount can be rounded off normally or upward or downward. If you do not want any rounding method, select Not Applicable .
For Ledgers created under the Group Bank s , or if the option Calculate Interest Transaction by Transaction is set to No , then the Interest Parameters sub-screen is displayed as shown below.
1.
Enter the interest rate in the Rate field.
2.
Select the interest rate calculation period from the Interest Style list in the Per field.
3.
Select the choice of balances for which the interest has to be calculated from the Interest Balances list in the On field. The balances are All Balances, Credit Balances only and Debit balances only. Interest can be calculated on all outstanding balances, whether debit or credit. You would like to select only credit balances in case of s like Bank s, if you want to know the interest that the bank might charge on overdrawn balances.
4.
Specify the interest rate applicable period from the Applicable From: and To: fields.
5.
Select the rounding method applicable from the Rounding Methods list. The amount can be rounded off normally or upward or downward. If you do not want any rounding method, select Not Applicable .
Display Report – Interest on Outstanding Balances To view the report on Outstanding balances: Go to Gateway of Tally> Display> Statements of s.> Interest Calculations> Ledgers> Bank Ltd.
Advanced Parameters - Interest calculation transaction by transaction A ctivate and specify interest calculations in ledger masters. The following extra options now become available: 1.
You can now have Multiple Rates of Interest .
2.
You can Override Advanced Parameters during voucher entry. Hence, each entry could have different parameters.
3.
Choice of Balances – All Balances , Credit Balances only, Debit Balances only.
4.
Applicability - This actually applies to the viewing of the statement and not the levy of interest.
5.
Calculate from - You can decide whether interest is to be levied from the Due Date or from the Effective Date of the transaction (or the voucher date if effective date is not activated) or even Date ranges specified during Voucher Entry.
6.
5.
6.
Choice of methods for Rounding off of interest amounts .
Note: * To obtain the option 'Calculate from Date Specified during Entry', you must have Override advanced parameters set to Yes. The option is required if you want to specify interest to be calculated at different rates for different periods. * If you choose to override parameters then information would be asked during voucher/invoice entry. The interest information is required after the bill-wise details have been entered.
Report on Interest Calculated on outstanding transactions/bills Go to Gateway of Tally> Display> Statements of s> Interest Calculations> Ledger> Ltd Press the button F1: Detailed on the Button bar to see the calculation and the period. Previous transactions are calculated from Effective date of Transaction as default. Date Specified during Entry has not been used. N o t e : Part balance.
monies
received
have
been
ed
for
and
interest
calculated
on
the
A look at Calculate From Dates Specified during Voucher Entry You have set up the Interest Parameters for Ltd to calculate on Dates specified during Voucher Entry. We will take one invoice and put in the interest information.
Display> Statements of s> Interest Calculations> Ledger> Ltd
Book Entries and adjustment of interest We have seen the reports on interest amounts calculated in different ways but these have not been brought into books! They simply give you the interest implications. You must book them now.
How to enter the calculated interest amounts? Use Debit Notes and Credit Notes with Voucher Classes Use Debit notes for Interest receivable and Credit Notes for Interest Payable . Interest is calculated on Simple or Compound basis and separate classes should be used for them.
Set-up Debit/Credit Note Classes for interest entries Set up Debit Notes . Credit Notes will behave the same way. Go to Gateway of Tally> s Info.> Voucher Types> Create/Alter 1. 2.
1.
Alter the Voucher Type Debit Note.
2.
Tab down to the field Class .
3.
Type the name of the Class .
4.
Type Simple Interest .
Likewise, create a Class – Compound Interest and set Yes to Amounts to be treated as Compound Interest . Accept the Voucher Type and return to the Gateway of Tally . Create a ledger Interest Received under Group Indirect Income.
Voucher Entry for booking Interest 1.
Go to Gateway of Tally> ing Voucher> Voucher Entry
2.
Select F7:Journal > Debit Note
3.
A Cost Centre Class is also selected if required. Marketing Expenses Class has been selected here.
4.
There are two situations for interest adjustment:-
Billwise interest Simple Interest – Interest amounts are not debited onto the same bills. Create a fresh reference for it. Compound Interest – Amounts are auto-debited to the selected bills. Bill-wise details will not appear in this case.
5.
Interest on balances only
Bill-wise interest entry Debit Ltd Credit Interest Received When you debit the party , a list of bills for which interest is applicable pops up. Select the bills to adjust. Note that even cleared bills appear.
Select the respective interest bills from the list . The debit amount is filled up with the total. Select New Ref in the bill-wise allocation. In the interest sub-screen, ensure that the rate of interest is 0. Now Credit Interest Received. The amount is already filled in. Your voucher will resemble the one below:
Entries for compound interest are exactly the same as for Simple Interest where all you do is select the Voucher Class Compound Interest. Also the Bill-wise details popup sub-screen does not come up as the amounts are added onto the bills. Select Demo from the list and complete a Debit Note.
Now display Outstandings for Ltd Note the contents:
The Bill references Demo/28/01 and Demo/31/01 are invoices onto which interest has been compounded. A new Reference no 2 has been created for Simple Interest due from Ltd.
Entries for Interest on Balances only Again, the issues are Simple and Compound Interest
Compound Interest Make the following entries in a Debit note with Compound Interest Voucher Class Debit Bank Ltd the amount is automatically filled up with the calculated interest Credit Interest Received And nothing needs to be done! The Bank has been increased by the amount of interest due and the Income of Interest Received also credited.
Simple Interest Make the same entry as above. However, since it has the effect of increasing the Bank Ltd with the amount due (compound effect), you must make a journal entry to reverse it. The reversal entry would be something like this: Debit Interest Receivable (a current asset ) Credit Bank Ltd Use a normal Journal voucher for this entry. We have to necessary go this route to take advantage of the auto filling of the interest amount which can appear only when we use the Bank Ltd in Debit Note in the first place.
Interest Calculation Reports
Interest Calculation reports are automatically produced if the feature is activated In F11: Features and the parameters are set for individual ledger s. There are two types of reports, one pertaining to interest on balances of s like loans, and the other interest on overdue invoices. Interest reports are available for individual ledger s as well as for Groups
Interest Calculation on Ledger Balances (e.g. Loans)
You can get a report on the Ledger balances for the interest calculated. Go to Gateway of Tally> Display> Statements of s> Interest Calculations> Ledger Select E.g. Bank Loan . Interest is re-calculated with every change in balance outstanding. The Cr in the interest amount should not be confused to resemble an Income. It only means that it is payable and is a Liability. To ease interest recording, Tally has an interest template, a special voucher class in Debit Note and Credit Notes. The interest screen will appear similar to the one below: Interest calculation on Bank Loan
Statement of Interest Due on Invoices
You can calculate interest on each invoice for the period it is outstanding, wholly or partly. Transaction by transaction or bill-by-bill interest calculation is permitted for 'Party' s like s falling under the groups Sundry Debtors and Sundry Creditors. Bill-wise details should be active for the company and the party. The report is similar to the Bill-wise Outstandings Statement. The last column gives the interest amount on the transaction. Press F1: Detailed to see the calculation. Go to Gateway of Tally > Display > Statements of s > Interest Calculations > Ledger Select the ledger Peutronics Bangalore
Interest is re-calculated with every change in balance outstanding. The Cr in the interest amount should not be confused to mean an Income. It only means that it is payable and is a liability. The figure is illustrative only and you will need to for the interest expense and liability through a journal entry.
To ease interest recording, Tally has an interest template, a special voucher class in Debit Note and Credit Notes.
Group Interest Calculation
The Group Interest Calculation statement is a list of all s and sub-groups belonging to the selected group that displays the current balance in each or sub-group and the total interest. Go to Gateway of Tally> Display > Statements of s > Interest Calculations > Group Select a Group, Eg. Loans (Liability)
The Cr in the interest amount should not be confused to mean an Income. It only means that it is payable and is a liability. To ease interest recording, Tally has an interest template, a special voucher class in Debit Note and Credit Notes. Drill down to the Ledger level Interest report.
Specifying Closing Stock Values
Closing stock values have to be specified when s and inventory are not integrated. Tally allows you to specify closing stock values even if your books are integrated. It would simply ignore the specified figure so long as you maintain the integration. If and when you select to separate the books, the specified values would automatically be considered. To enter the closing stock as on a specific date, you must alter the ledger . Simply follow the ledger alteration procedure or go from the Balance Sheet via Current Assets. Go to Gateway of Tally> Balance Sheet> Current Assets> Group Summary (or) Go to Gateway of Tally> Info.> Ledgers> Alter (Single) Assuming that you had a ledger 'Stock ' under the group Stock-in-hand the information would be as follows
You are allowed to alter the opening balance as well as specify/alter closing balances on different dates. You would typically specify Balance Sheet dates so that the Balance Sheet reflects the amount of that date.
Effective Date for Reconciliation (Bank s only)
The Effective Date for Reconciliation is given for s falling under the OCC a/c). By default it is the books beginning date.
Bank s Group (or Bank
This is the date from which you can reconcile your bank in your books with the bank statements. Normally, it would be the books beginning date. However, you can import data from a previous version of Tally or from any other system (where the reconciliation process was not available or was different). In that case, you may not need to reconcile the bank with your bank statements from the very beginning. Give the date from which you want the reconciliation facility to be activated. Then, previous entries will not appear for reconciliation.
Position Index in Reports
This is viewed when you press F10: Chg Sort when the ledger is in the alteration mode. If this is done, it remains so till you deactivate it by pressing F10: Skip Sort. The topic has been discussed under the chapter "Groups" under Advanced Usage. The default setting is 1000 for all ledgers. Please note that the index is relative to other ledgers and groups within a parent group. Hence, the position of a ledger may be changed within the Group, to which it belongs, by changing the number 1000. Any change would not position the ledger outside the parent group. If a group comprises of many groups (subgroups) and ledgers, the position index would determine their position within the parent group. For example: Prior to any change in their indices, the ledgers and the sole group 'Communication Expenses' under the group 'Indirect Expenses' are displayed as below. (Ledgers are directly under the group Indirect Expenses and not under Communication Expenses sub-group): Gateway of Tally > Display> Books> Group Summary> Indirect Expenses
The position index of Communication Expenses (it is a group as indicated by its bold font) is 290 and all ledgers 1000. You would notice that because of this, Communication Expenses is at the top, and the others sorted alphabetically as they have the same index of 1000.
We now change the index of General Maintenance to 280 and of Staff Welfare to 900. We now see General Maintenance at the top, followed by Communication Expenses and Staff Welfare. Then the rest with 1000 would be in alphabetic order. You can change the index from the display screen itself by positioning the cursor on the particular and pressing Ctrl+Enter to bring up its master to alter.
Indirect Expenses
Displaying and Altering Ledgers
Displaying and Altering Ledgers can be done in Single mode and Multiple mode. The Multiple mode allows you to display and alter multiple Ledgers at a time.
Displaying and Altering a Single Ledger You can view the details of the Ledger Masters in Display mode. Display does not permit any modification. However you can make changes to Ledger Masters in Alter mode.
Displaying a Single Ledger Go to Gateway of Tally > s Info. > Ledgers > Display (under Single Ledger). Select the Ledger from the List of Ledgers. The Ledger Display screen is displayed. You will be able to view the details of the selected Ledger Master.
Altering a Single Ledger Go to Gateway of Tally > s Info. > Ledgers > Alter (under Single Ledger) Select the Ledger from the List of Ledgers. The Ledger Alteration screen is displayed. You are allowed to alter any information. Make the necessary changes and Accept Yes to save. Specifying Closing Stock Values of a Ledger under the group Stock in Hand This is possible only in Ledger alteration mode. Closing stock values have to be specified when s and inventory are not integrated. Tally allows you to specify closing stock values even if your books are integrated. It would simply ignore the specified figure so long as you maintain the integration. If and when you select to separate the books, the specified values would automatically be considered. To enter the closing stock as on a specific date, you must alter the ledger . Simply follow the ledger alteration procedure or go from the Balance Sheet via Current Assets. Go to Gateway of Tally> Info.> Ledgers> Alter (under Single Ledger) (Or) Go to Gateway of Tally> Balance Sheet> Current Assets> Group Summary Assuming that you had a ledger Stock under the group Stock-in-hand the information would be as follows:
You are allowed to alter the opening balance as well as specify closing balances on different dates. You would typically specify Balance Sheet dates so that the Balance Sheet reflects the amount of that date.
Deleting a Single Ledger You can delete a Ledger from the Ledger Alteration screen by pressing ATL + D. Tally does not allow deletion of s that have transactions. Therefore, should you wish to delete an , which has transactions, you must first delete all its voucher entries.
Displaying and Altering Multiple Ledgers
Displaying Multiple Ledgers Go to Gateway of Tally > s Info. > Ledgers > Display (under Multiple Ledgers) Select All Items from the List of Groups to view the details of all the Ledgers in Tally. If you want to view the details of all the Ledgers created under a Group select the Group from the List of Groups. The Multiple Ledger Display screen is displayed.
Altering Ledgers in Multiple Mode Go to Gateway of Tally > s Info. > Ledgers > Alter (under Multiple Ledgers) Select any Group or All Items from the List of Groups. The Multi Ledger Alteration screen is displayed. Make the necessary changes and Accept Yes to save. N o t e : You to delete.
are
not
allowed
to
delete
a
ledger
from
this
mode.
Select
single
alter
mode
Explanation on Buttons F3:Company: To work with a different company. In the creation mode, you can create cost categories in the other company. In alter mode, you can copy the information by accepting the screen (<enter> or
+
). The old company's information remains. Not available in Display mode. F3: New Cmp: To work on the same report of another company. Available only in display mode. F4: Parent: To move the cursor to the field 'Under Group' F4: New Parent: To bring up the list of Groups to select a new parent Group. Zero Op Bal: To nullify (change to zero) all opening balances in this group. F6: Skip names: For faster data entry when you do not need to the names of ledgers. The cursor will not go to that column. Toggle to 'Edit names'. F7:Skip Parent: For faster data entry when you do not need to alter the parent Group. The cursor will not go to the column 'Under'. Toggle to 'Edit Parent'. F8:Skip Details: The cursor will not go to the columns Opening Balance and Dr/Cr. Toggle to 'Edit Details'. F9:Show Closing: Closing Balances replace Opening Balances. This is available only in alter mode. Closing balance is not alterable and the cursor skips the field. F10:Chg Sort: To display a column of sorting position indices. Toggle to 'Skip Sort'. You may change display positions of ledger s under the group. (refer to the discussion on the subject in Advanced Usage). Groups, Ledgers, Cost Categories, Cost Centres: To enable you to switch to these areas without having to quit from the current screen.
Credit Limits
Credit Limits can be specified for any falling under the groups Sundry Debtors and Sundry Creditors. s under Sundry Creditors are permitted because there can be a two-way trade with a party even if it is classified as a creditor or debtor. Classification is done on the basis of the major role. More: Setting Credit Limits Effect of setting credit limits Exceeding Credit Limits
Setting Credit Limits
If you do not set credit limits, you can still make invoices and give credit periods at the time of invoicing. However, that may not be desirable, especially in a decentralized environment. Therefore, to minimise errors during invoicing, you might prefer to set these important beforehand. To set credit limits: Go to F11 Features > ing Features > Set Maintain Budgets and Controls to Yes Go to Gateway of Tally> s Info> Ledgers> Credit Limits (under Multiple Ledgers) Select the group of ledgers from the List of Groups for which to set credit . The Multi Ledger Limit Alteration screen is displayed. The list of ledger s is displayed. You can set credit limits for both amounts and periods here.
Credit Limit Specify the amount of credit limit against the ledger in this field. You can set the amount limits in foreign currency if you wish, for customers who are usually invoiced in foreign currency.
Credit Period Credit Periods are in days only and are calculated from the effective date. If a separate effective date field appears in your voucher, the credit period is from the effective date, which might differ from the voucher date. If the voucher date is the only date field in the voucher, then it is also the effective date and the credit period is from this date.
Effect of Setting Credit Limits
The effect of setting credit limits is that during voucher entry (also invoice entry), the credit are filled up by the pre-set figures. If the voucher configuration (through F12: Configure) is set to disallow modifications of all fields during voucher entry, the cursor skips these fields and modification is not permitted. However, the configuration is set to permit modifications to all fields - alteration of the pre-filled fields is allowed. The current balance and the credit limit of the party are displayed in the order and invoice entry forms, which is helpful to assess the amount acceptable.
Exceeding Credit Limits
During invoice or order entry, if the credit amount limit is exceeded, the voucher entry does not proceed further. You have two choices at this stage: 1.
Enter a lower value so that the entry can be completed.
2.
Abandon the current entry and obtain authorization to increase the credit amount limit in the Multi Ledger Limit Alteration screen.
This is a controlled activity and will depend on the security permissions for altering credit limits.
Cost Centres
A Cost Centre is any unit of an organisation to which transactions (generally, revenue) can be allocated. When only costs or expenses are allocated to these units, they are referred to as Cost Centres. When profits are also allocated to these units, they become Profit Centres. You can now obtain a Profit and Loss of each such Profit Centre. Cost Centre in Tally allows an additional dimension to a transaction where a Ledger indicates the nature of the transaction. It does not readily disclose, except in the narration field, which part of the organisation was involved in the transaction. By providing Cost Centres, a transaction can be allocated to it, which would then enable extraction of all transactions for a Cost Centre. Tally gives you the Cost Centre break-up of each transaction as well as details of transactions for each Cost Centre. Some examples of Cost Centres are
Departments of an organisation - Finance, Manufacturing, Marketing, and so on.
Products of a company.
Individuals such as Salesman A, Salesman B.
Use of Cost Centres You can classify Cost Centres just as how you classified Group/Ledger s. You can have Primary Cost Centres and several levels of Cost Centres under each Primary Cost Centre. Consider the following example. Primary Cost Centres - Finance, Manufacturing, Marketing. Under Marketing, classify the company's sales executives as Cost Centres. This will help you track a sales executive's performance, in of cost and revenue generated. You will then have the following Cost Centre structure (shown here only for the Marketing Department): Primary Cost Centre - Marketing Under Marketing: Salesman A Salesman B Salesman C Allocate expenditure incurred on sales by the salesmen, as well as the sales generated by them, directly to their Cost Centres. The allocation is done online at the time of transaction entry. This prevents allocation problems at the end of the period, when you find a large number of transactions not allocated. By allocating expenses and sales transactions to the salesmen, you are setting up a valuable information system that tracks the performance of your salesmen.
More: Creating a Single Cost Centres Altering a Cost Centre
Creating a Single Cost Centre
To create a Cost Centre, set Maintain Cost Centres to Yes in F11: Features. It is advisable not to set More than ONE Payroll/Cost Category to Yes, unless required. By default, Tally activates the Cost Centre feature for Ledger s under Sales s, Purchase s, Expense and Income groups. Go to Gateway of Tally> s Info.> Cost Centres> Create (Single Cost Centre) The Cost Centre Creation screen displays.
A brief explanation on each of the fields in the Cost Centre Creation screen follows.
Name Enter the name of the Cost Centre in this field. For example, Bangalore.
alias Enter an alternative name, if required. For example, the Cost Centre Bangalore can be referred to as Head Office or by a code number.
Under Select the parent Cost Centre under which the Cost Centre needs to be created from the List of Cost Centres. If you want the Cost Centre to be a Primary Cost Centre, select Primary from the list. Refer Creating Cost Centres for Job Costing for details on using Cost Centres for Job Costing. Note: Unlike Groups, you can allocate transactions to Primary Cost Centres. However, you should do so when you do not have Sub Cost Centres under the Primary Cost Centre. It is suggested that you allocate transactions to the lowest levels (similar to ledgers).
Displaying a Single Cost Centre To display the details of Cost Centre masters
Go to Gateway of Tally > s Info. > Cost Centres > Display (under Single Cost Centre) The Cost Centre Display screen appears. It is not possible to make any modifications to the Cost Centre master in the Display mode. You can only view the details in this mode.
Altering a Cost Centre
To alter an existing Cost Centre Go to Gateway of Tally> s Info.> Cost Centres> Alter (under Single Cost Centre) The Cost Centre Alteration screen appears. Make the necessary changes and Accept to save.
Deleting a Cost Centre You can delete a Cost Centre from the Cost Centre Alteration screen by pressing ALT+D. You can delete a Cost Centre only if
It does not have any Cost Centres created under it.
It is not used in any transactions.
Explanation on Buttons for Cost Centres in Single Mode Groups, Ledgers, Voucher Types It enables you to switch to these areas without having to quit from the current screen. F11: Features To change company features. Refer Activate Company Features [F11] for more details. F12: Configure To change the configuration of master information. Note: Features
Configuration changes changes affect the
affect all companies in current company only.
the
data
directory,
whereas
Creating Multiple Cost Centres
You can create multiple Cost Centres in this mode. Go to Gateway of Tally> s Info.> Cost Centres> Create (under Multiple Ledgers) The Multi Cost Centre Creation screen displays.
A brief explanation on each of the fields in the Multi Cost Centre Creation screen follows.
Under Cost Centre Select a particular Cost Centre as the parent Cost Centre if you wish to create a number of cost centres under it. If you do not want to be limited/ restricted to one parent Cost Centre while creating Cost Centres, choose All Items .
Name of Cost Centre Enter the name of the Cost Centre to be created. The alias option is not available in this mode. Select single alter to give aliases to Cost Centres created in multiple mode.
Under The Parent Cost Centre selected from Under Cost Category field displays automatically. If All Items is selected from Under Cost Category , you have the option of selecting the Cost Centre from the List of Cost Centres . Refer Cost Category for further details
Displaying Cost Centres in Multiple Mode You can display the details of multiple Cost Centres at a time in this mode. Go to Gateway of Tally> s Info.> Cost Centres> Display (under Multiple Cost Centres) Select a Cost Centre or All Items to display the details of all the Cost Centres under it. It is not possible to make changes to any of the fields in the Display mode.
More: Altering Cost Centres in multiple mode
Altering Cost Centres in Multiple Mode
F11: Features: To change Company features, refer Activate Company Features [F11] for more details.
Cost Category
Cost Categories are useful for organisations that require allocation of resources to parallel sets of Cost Centres. Such organisations would usually be project oriented. Most organisations would not need Cost Categories. The proper use of Cost Centres itself would offer the same benefits. Cost Categories could increase data entry work and make it more complicated. Hence, before opting for Cost Categories, evaluate whether you actually need this option. Always attempt to first use Cost Centres.
Use of Cost Categories By using Cost Categories you may allocate, in parallel, a transaction to more than one set of Cost Centres. The following example illustrates the use of Cost Categories. The Primary Cost Centres such as Marketing, Finance and Manufacturing can now belong to a category Departments. The Salesmen A, B and C can be Cost Centres under a Category - Executives. Similarly, you can create a new Cost Category 'Projects' under which Cost Centres such as Airport construction, Road construction and Buildings may be created. The classification appears as in the following matrix.
Specify a Cost Category to allow allocation of only revenue items or items of both revenue and capital nature. In this example, allow both for Departments and Projects Categories and only revenue for Executives. Salesman A incurs conveyance expenses of Rs. 1000. If he has incurred it for marketing, allocate this amount to the Cost Centre - Marketing and his own Cost Centre - Salesman A. (Allocate this while entering a payment voucher debiting Conveyance and crediting Cash.) If the salesman now incurs expense for the project Buildings, allocate to the Cost Centres - Salesman A and Buildings. Allocate an expense to one or more Cost Centres. It is not essential to always allocate expenses to all Cost Centres. If you did not create Cost Categories, you would have been able to allocate the expense to either the Project Buildings cost centre or Salesman A, not to both. You can obtain details of conveyance expenses incurred by Salesman A on Marketing as well as on the Buildings project when you have Cost Categories. You cannot, however, extract a single report giving details of marketing expenses incurred by Salesman A on the Project Buildings. These are different Cost Categories and cannot be merged. If such reports are required, you must create ledgers such as Conveyance - Marketing which will help you generate the desired report. By allocating expenses to parallel Cost Centres under different categories, you are simply asg the amounts to them; the amount does not increase. In the above example, the conveyance of Rs. 1000 remains an expense of Rs. 1000 only. Tally performs an automatic reconciliation on real-time basis, saving you the effort of reconciling Ledgers and Cost Centres. Note:
Transactions
are
not
allocated
to
Cost
Categories
but
to
Cost
Centres
only.
Creating a Single Cost Category
To create a Cost Category, set Maintain Cost Centres to Yes in F11: Features and then set More than ONE Payroll/Cost Category to Yes.
By default, it is set to No. Tally creates a single Cost Category called Primary Cost Category and allocates all Cost Centres created, prior to enabling this feature, to this category. You can create new cost categories, and alter the existing Cost Centres to allocate them under required Cost Categories. To create a Cost Category Go to Gateway of Tally > s Info. > Cost Categories > Create (under Single Cost Category) The Cost Category Creation screen displays.
A brief description on each of the fields in the Cost Category Creation screen follows.
Name Enter the name of the Cost Category. For example, Products. N o t e: There is no sub-classification of Cost Categories and U n d e r option. Though there is a Primary Cost Category, it categories.
hence you do not is not a parent of
find an other
(alias) Enter an alias if you wish to call the Category by another name or even by a code number. This field displays only if you set Allow ADVANCED entries in Masters in Gateway of Tally >F12: Configure> Accts/Inv Info. to Yes.
Allocate Revenue Items Set this option to Yes, to allocate all sales, purchase, expenses and income related transactions to Cost Centres
that you create under the Cost Category. Normally, you would enable this option. However, should you need to allocate only capital/non-revenue items only to Cost Centres in that cost category, set this to No.
Allocate Non-Revenue Items You would, usually, disable this option by setting it to No as most Cost Centres need only revenue allocation. However, should you wish to allocate items of non-revenue (capital) or Balance Sheet items, you may set it to Yes. Organisations increasingly require allocation of capital items to Cost Centres. They wish to monitor the capital expenditure incurred on Cost Centres and measure them against revenue earned. Recognising this trend, Tally has provided this option. N o t e : Enable sets Yes, by
either revenue or non-revenue items, or default, for revenue items and No for
both. Do not disable Non-revenue items.
both.
Displaying a Single Cost Category To view the details of the selected Cost Category masters from this mode Go to Gateway of Tally> s Info.> Cost Categories> Display (under Single Cost Category) Select a Cost Category from the List of Categories. The Cost Category Display screen displays. You cannot make any changes to the fields in the Display mode.
Tally
Altering a Single Cost Category
To alter an existing Cost Category Go to Gateway of Tally> s Info.> Cost Categories> Alter (under Single Cost Category) Select the Cost Category from the List of Categories. The Cost Category Alteration screen displays. Make the changes in the required fields and Accept to save.
Deleting a Cost Category You may delete a Cost Category that does not have any cost centre under it from the Cost Category Alteration screen. Use ALT+D to delete it. Tally does not allow deletion of a Cost Category that has Cost Centres.
Buttons in Single Cost Category screens Groups, Ledgers, Vch Types It enables you to switch to these areas without having to quit from the current screen.
F11: Features To change company features. A detailed explanation on features has been given in the earlier section under Gateway of Tally. Note: Configuration changes only the current company.
affect
all
companies,
whereas
Features
changes
affect
Creating Multiple Cost Categories
You can create multiple Cost Categories at a time using the multiple mode. Go to Gateway of Tally > s Info. > Cost Categories > Create (under Multiple Cost categories) The Multi Cost Category Creation screen displays.
An explanation on each of the fields in Multi Cost Category Creation screen follows.
S. No. This is an auto-generated serial number.
Name of Category Enter the name of the Cost Category.
Allocations for Revenue Items This is set to Yes , by default. However, you have the option of altering it. This denotes whether you want to allocate revenue items to Cost Centres under it.
Non-revenue Items This is set to No , by default. You can alter it if you want to allocate non-revenue items to Cost Centres under it. N o t e : There is Categories have
no Under field Cost Centres
as as
you cannot sub-classify their sub-classification.
Cost
Categories.
Cost
Displaying Cost Categories in multiple mode You can display multiple Cost Categories at a time in this mode. To display Cost Categories in the multiple mode Go to Gateway of Tally> s Info.> Cost Categories > Display (under Multiple Cost Categories) The Multi Cost Category Display screen appears. View the details of all the Cost Categories created. It is not possible to make any changes in this mode.
Altering Cost Categories in multiple mode
You can alter multiple Cost Categories at a time in this mode. To alter Cost Categories in the multiple mode Go to Gateway of Tally> s Info.> Cost Categories > Alter (under Multiple Cost Categories) The Multi Cost Category Alteration screen displays. Make the necessary changes and Accept to save.
Note:
You
cannot
delete
a
Cost
Category
in
multiple
mode.
Buttons in Single Multiple Cost Category screens F6: Skip names It is used for quicker data entry when you need to alter only the Allocation details and not the names of the Cost Categories.
F8: Skip Details It is used for faster data entry when you do not need to alter the Allocation (Revenue and Non- revenue) details. You need to give only the names and the default allocations of Yes for Revenue and No for Non-revenue display automatically when you are creating Cost Categories. If you are in alter mode, the allocations that you opted for when creating the Categories are retained.
Groups, Ledgers It enables you to switch to these areas, without having to quit from the current screen.
F11: Features It is used to change company features. A detailed explanation on features has been given in the earlier section under Gateway of Tally . Note: Configuration changes only the current company.
affect
all
companies,
whereas
Features
changes
affect
Creating Cost Centres under Cost Categories
To create a Cost Centre under a Cost Category, set More than ONE Payroll/Cost Category to Yes Go to Gateway of Tally > s Info. > Cost Centre > Create (under Single Cost Centres)
Category This field appears only when you have opted for More than ONE Payroll/Cost Category in F11: Features. Else, Tally automatically creates a Primary Cost Category to which all cost centres are assigned. You will usually not need more than one cost category and should not use it until you are absolutely sure that the same information is not available in Cost Centres. Create a primary cost centre, Bangalore. All the other fields are described in detail in the section Creating Cost Centres in Single mode Displaying and Altering Cost Centres under Cost Categories in Single mode is similar to Displaying and Altering Cost Centres in Single mode explained previously. The only additional field is Category.
Creating Multiple Cost Centres under Cost Categories
Go to Gateway of Tally> s Info.> Cost Centres> Create (under Multiple Cost Centres)
This is a quick way to create a number of Cost Centres at a time.
Under Cost Centre Select a particular Cost Centre as the parent cost centre if you wish to create a number of Cost Centres under it. In the above screen, Finance has been selected and the cost centres Taxation, Management s and Treasury are created under it. If you do not want to be restricted to one parent cost centre while creating cost centres, choose All Items . The table Under Cost Centre has the columns Category, Name of Cost Centre and Under. If the parent Cost Centre (the field 'Under Cost Centre') is not 'All Items', the cursor skips the Under field.
Category Select the Category under which the Cost Centre will be created from the List of Categories or create a new category by pressing [Alt+C]
Name of Cost Centre Enter the name of the new cost centre. The alias facility is not available in this mode. Select aliases to Cost Centres created in multiple mode.
single alter to give
Under Select the parent Cost Centre from the List of Cost Centres . The list displays only the Cost Centres that belong to the selected Category.
Displaying and Altering Cost Centres under Cost Categories in Multiple mode is similar to Displaying and Altering Cost Centres in Multiple mode explained in the respective chapters. The only additional field is Category.
Error in Categorisation of Cost Centres: PARENT BELONGS TO ANOTHER CATEGORY! This error occurs when you try to assign a cost centre to a parent cost centre belonging to a different category. In most places, Tally prevents you from making this error, by not displaying a cost centre belonging to a different category. However, this action is not possible when you are altering a cost centre in multiple mode, selecting 'All Items' from Under Cost Centre (You may have chosen to skip either or both). You would have changed the Category without changing the name and the parent. However, Tally is able to ascertain this error only when you accept the screen.
Budgets
A budget is a plan prepared for the flow of funds in an organisation. It contains financial guidelines for the future plan of action for a selected period of time. A budget helps to refine goals and use funds efficiently. It provides accurate information for evaluation of financial activities, aids in decision making and provides a reference for future planning.
Multiple budgets can be created for specific purposes in Tally. Budgets for Banks, Head offices, Optimistic budgets, Realistic budgets, Pessimistic budgets, and so on can be created. Departmental budgets like Marketing Budgets, Finance Budgets, and so on, can also be created. Budget figures can be used in Tally to compare actuals and variances.
In Tally, you can create, alter and delete a budget.
Activating Budgets Feature To activate the Budgets feature in Tally:
Select F11: Features > ing Features
Set Maintain Budgets and Controls? to Yes.
Accept to save.
More: Creating a Budget Alter a Budget
Creating a Budget
To create a Budget in Tally
Go to Gateway of Tally > s Info > Budgets > Create
In the Budget Creation screen enter a Name for your budget.
Select from the List of Budgets for Under field. You can have a hierarchical setup for budgets. In the List of Budgets, Primary is at the top of the hierarchy and you can create more primary budgets. Sub-budgets can be created under Primary budgets.
Enter the period of the budget in the From and To fields. The period entered can be a month, a year or any other period.
In Set/Alter Budgets of, select
Groups - To create a budget for a Group of ledger s. Ledgers - To create a budget for Ledgers. Cost Centres - To create a budget for Cost Centres.
Accept to save.
More: Budget for Groups Budget for Ledger s
Budgets for Cost Centres
Budget for Groups
Set Yes in the Groups field in the Budget Creation/Alteration screen to set budgets for a group or group of ledgers. In the Group Budget screen, select a Group from the List of Groups and enter Name . Enter the cost centre for a group in Cost Centre . Select Not Applicable , if the budget is not for a particular cost centre, but for the company. In Type of Budget , select from the following two types. 1.
On Nett Transactions
Select this option to monitor the transaction amounts, not the balances. Nett is net of debits and credits for the specified period. For example, Nett transactions for Indirect Expenses are the debit amount for the specified period after reducing the credits for the same period. Opening and closing balances are not considered. 2.
On Closing Balance
Select this option to monitor the balance of the s, not the transactions. For example, balances of bank s, balances of debtors. Enter the budget amount in the Amount field.
Budget for Ledger s
Group Budgets do not get apportioned. Hence, Budget for Current Assets does not automatically flow to sub-groups.
Closing Balances Budget: Each month will have the same budget value except that the actual Opening Balance is taken into .
Nett transactions Budgets specified for a period get equally apportioned over the period.
Enter the budget amount for the specific ledger.
You can set the Budget for as many ledger s as required and accept to save.
Use Columns and Variance options to compare budget figures with actuals in most statements.
Budgets for Cost Centres
The purpose of a budget is to control expenditure. You can create multiple budgets in Tally, each for a specific purpose such as for the Bank, for the Head Office, Marketing budgets, Finance budgets, and so on.
Set Yes in the Cost Centres field in the Budget Creation/Alteration screen to set budgets for cost centres.
In the Cost Centre Budget screen, select a Cost Centre from the List of Cost Centres and enter Cost Centre .
Enter a budget figure in Expenses for the cost centre.
Enter a budget figure in Income for the cost centre.
Enter Closing Balance.
Enter more cost centres, if required, and accept to save.
Alter a Budget
You can modify a budget, using the alter option.
Go to Gateway of Tally > s Info > Budgets > Alter
In the Budget Alteration screen, modify the fields as required. Change the period or change budgets of Groups, Ledgers and Cost Centres.
Note:
Set/Alter
Budgets
is
set
to
No
by
default.
Set
Deleting a Budget To delete a budget
Go to Gateway of Tally > s Info > Budgets > Alter
Press Alt+D.
this
option
to
Yes
to
alter.
Budget Variance
Trial Balance and Group Summary have a feature called Budget Variance. The Budget Variance button (Alt+B) is active if Budgets feature is enabled and at least one budget created. Budget Variance displays Budgets, Actuals with percentage and Variance from the budget with percentage. 1.
Budget Variance can be accessed from:
Gateway of Tally > Display > Trial Balance to display the Trial Balance screen. Gateway of Tally > Display > Books > Group Summary and select a group from List of Groups to display the Group Summary screen.
2.
Click on Budget Variance (Alt+B) from the toolbar to display the Budget Analysis screen.
3.
Select from the List of Budgets for Budgets/Scenario.
4.
Three columns display Budget, Actuals and Budget Variance, respectively.
Introduction
A voucher is the primary online document for recording transactions. Transaction recording and analysis are greatly facilitated by having specific formats for different types of transactions. Tally provides 16 different predefined voucher formats or what it calls predefined types of vouchers. These are used for recording various transactions. A payment voucher is used for all types of payments, a receipt voucher for all types of money receipts, a sales voucher for recording sales transactions, and so on. These predefined vouchers fulfil your normal transaction needs. They pertain to both ing and inventory. Some of these vouchers can also be used differently according to the situation, e.g., sales vouchers can be used as invoices, vouchers can be post-dated, etc. Such use can be decided at the time of voucher entry by selecting the appropriate button. The predefined voucher types can be displayed as follows: Gateway of Tally > Display > List of s >
+
[Voucher Types]
Tally acknowledges the special requirements of some s for more voucher types. These arise in cases like when you need the same voucher but in different names or separate series of numbers. Examples include Cash Payment Vouchers and Bank Payment vouchers where the relevant predefined voucher is Payment Voucher. You may have two or more sets of Sales Vouchers for different kinds of sales transactions e.g. Credit Sales, Cash Sales, etc. You would need to alter a voucher type to change default settings for different information appearing in vouchers. Using F12: Configure, you can further configure a voucher.
Alter a predefined voucher type
Even if you do not need extra voucher types, you would normally alter the predefined voucher types to customise them according to your needs, e.g., to control their numbers. Display or alter each voucher type (by pressing enter or double clicking) after Gateway of Tally > Display > List of s > Ctrl+V Voucher Types We shall create a new voucher type to explain the different features. It would also be applicable to alteration of voucher types including predefined types. More: Create a Voucher Type
Creating a Voucher Type
Go to Gateway of Tally > s Info. > Voucher Type > Create N
ote :
A
new
voucher
type
must
assume
the
functions
of
a
predefined
voucher
The Voucher Type creation screen is divided into three sections depending on the various settings.
Name Give the name of the new voucher type, e.g., Sales Invoice.
General Type of Voucher
type
The type of voucher should be any one of the predefined voucher types (already listed in introduction). The new voucher type would inherit the properties of this predefined voucher type. It would function exactly like the predefined voucher.
Abbreviation A n abbreviation is required particularly for unformatted reports, which do not use compressing techniques. (Tally allows printing of both formatted and unformatted reports). Even if the Abbreviation is not specified, Tally automatically sets a default name to the Voucher. In this example, give ‘Purch’ as the abbreviation. Though there is no restriction on the length of the abbreviation, it should preferably be five characters or less.
Method of Voucher Numbering This is, perhaps, one reason for your opting for a new voucher type. There are three methods available: None This will disable numbering of such vouchers. If you select this method, no further information is required. Manual This method will allow you to number vouchers of this type yourself. It does not check for sequence of the numbers and permits you to specify anything you wish in the voucher number field. However, you may choose to prevent entry of duplicate numbers. If you do, enable the next field 'Prevent Duplicates'. 1. Prevention of Duplicates is possible if you enable the option at the time of creation. You may enable it later (by alteration) only if there are no transactions of this voucher type. 2. If you face difficulty because transactions now exist, simply create another voucher type for preventing duplicates of subsequent voucher numbers. No further information is required for manual numbering method. Automatic This method is both flexible and exhaustive. Use it carefully to give you your desired numbering system. Select this option to let Tally number the vouchers automatically for you.
Use Advance Configuration If the Method of Voucher Numbering is set to Automatic, then an additional field to set the advanced configuration for the Voucher type appears. Setting this field to Yes , Voucher Type Creation (Secondary) screen appears. Refer to Use Advance Configuration for more details. A further discussion on these options is necessary.
Use EFFECTIVE dates for vouchers? Select Yes if you want to enter effective dates for vouchers. You would opt for this if you have instances where a transaction under consideration for overdue/ageing analysis is recorded currently but will take effect from another date. If effective date is entered, the overdue/ageing will be considered from the effective date and not from voucher date.
Make Optional as Default Setting this option to Yes , will set your Voucher to Optional Voucher by default. Refer to Optional Vouchers for further details.
Use common narration? Select Yes to give a common narration for the entire voucher. Tally vouchers can have multiple entries. Hence,
you may wish to give a common narration for all the entries of the voucher or a separate narration for each entry or both. Select Yes even when you want both. Select No if you do not want a common narration. Example of common narration in a voucher:
Narrations for each entry Select Yes if you want to give a separate narration for each entry of a voucher. This would be applicable for a multiple entry voucher where you want separate details for each entry. Select No if you do not want separate narration for each entry.
Note Excise
:
The feature
option to create is enabled in
an Excise Voucher F11 features.
type
appears
in
the
General
section
if,
the
Printing Print after saving voucher? If you want to print every voucher after entering it, select Yes , else select No . This is suitable for an online environment where you use the Tally printed voucher as the formal voucher. , however, that the transaction is already recorded and posted and should you wish to make corrections to the printed voucher, you must alter the Tally voucher online and print it out again. N o t e : Depending on the printing features appear in
Type this
of Voucher field.
you
have
selected
to
create
or
alter,
different
Name of Class You can create classes by entering the class name in this section. A detailed discussion on Voucher class creation
is covered in Voucher Classes .
Use Advance Configuration
I f the Method of Voucher Numbering is set to Automatic, then an additional field to set the advanced configuration for the Voucher type appears. Setting this field to Yes, Voucher Type Creation (Secondary) screen appears.
Starting number Give the number for the first voucher. Usually it is 1. You can set it to any number you want. Tally will autoincrement from this number for subsequent vouchers. However, the numbering of vouchers also depends on other variables supplied by you, which follow hereafter.
Width of Numerical Part You may leave it blank to let Tally automatically adjust the width according to the number. However, for more aesthetically aligned look in reports, you may keep a fixed width, e.g., 3.
Prefill with ZERO? When the width is specified, the digits before the number is blank if 'No' and zeroes if 'Yes'. E.g. 001 1 010 10 PEU/001/06-07 PEU/1/06-07 PEU/ 1/06-07
Restart Numbering Voucher Numbering may be restarted with the starting number (as specified) at intervals selected by you - Daily, Monthly, Never, Weekly or Yearly. You must give the date whence numbering should restart under the field Applicable from. The date must be the first day of the month. You may specify more than one Restart dates. For example, should you wish to renumber your vouchers from 01 June 06 on yearly basis, you must specify it in the next field. This would retain the numbering system in the prior period. If, however, you want to change the numbers from the beginning from monthly to yearly basis, simply alter the first field itself.
Prefix Details If you want the voucher numbers to be prefixed with some fixed information, give the information here. Examples of prefix details are: 1.
month of the voucher as given above- 'April/'
2.
company info like 'TSPL/'
3.
even fixed number series like '1000'
Note: The numeric portion begins immediately after the prefix information. Therefore, be sure to give a space or a slash '/' or some such character should you want a separation, e.g. we have specified April/. The slash would cause the voucher number to appear as April/001, otherwise it would be April001. This facilitates simple usage for fixed number series appearing as 200100001 where 2001 is the prefix, and 00001 is the starting number with a width of 5, and with leading zeros. You can choose different prefix information for different periods or let one continue. The prefix continues from the date you mention under 'Applicable from' till the next date that you may give under 'Applicable from'. Hence, we have chosen to change the prefix from April to May when the month changes. Please note, however, that if we omit to change the prefix for the subsequent months (i.e. do not give 'Applicable from' date for the month), your voucher numbers for even June, July etc would contain the prefix 'May/'.
Suffix Details You can also give fixed suffix information for the voucher number. The same rules and effects as for Prefix Details apply.
Voucher Classes
Voucher Classes are available for all major voucher types and the Cost Centres can be allocated if classes are used. Automation of cost centre allocation has met the need of 'percentage allocation' based on predefined figures. Cost centre classes affect all voucher types. For further details refer to Cost Centre Classes.
Voucher Classes for Payment, Receipt and Contra Vouchers The primary intention of using classes for payment, receipt and contra vouchers is to enable data input in 'single entry' or list mode rather than in Tally's traditional double entry mode. You can also use it to have a separate form for each cash and bank . Let us take an example of a Payment Voucher. You can either alter the existing Payment Voucher Type or create a new voucher type based on it. (From Gateway of Tally > s Info > Voucher Types ) The item Name of Class is below Effective Dates for Vouchers and above the Numbering Table. Give a name to the class by simply typing it, e.g. Barclays Bank Payment. You may create more than one class. Hence, you might want to have one more for Cash Payment.
The Class Table
Exclude these Groups Groups other than Bank or Cash groups should not be selected. This is used to exclude Cash or Bank Groups that are not to be used in this class to pay out the money. In our example, we want to exclude Cash and Credit Cards.
Include these Groups Groups other than Bank or Cash groups should not be selected. You might exclude a top level group but include its sub-group.
Ledger Name Selecting the ledger that will be used to pay out the money will eliminate the need to select it during entry. In this case, it is BarcSlays Bank. In a receipt voucher, you will select the ledger into which monies will be received. You may even select 'Not Applicable'. The purpose of selecting 'Not Applicable' will be to permit Single Entry mode and at the same time retaining the option of selecting the during entry. Note: Exclude which the class
or is
Include Groups are irrelevant when you specify a Ledger Name created. They are useful when you select 'Not Applicable' .
for
In case you do not require split payments, you could create only one class with nothing in include/exclude Groups and without any ledger Name. A single class does not require class selection and is a rapid way of using Single Entry mode with full functionality of all ledgers available. Accept the class table and the voucher type alteration. You may use [CTRL]+[A] combination. More: Payment Voucher Entry with Classes Purchase Entries in Invoice mode (without classes) Purchase Voucher Classes Additional ing Entries Voucher Classes for Journals
Payment Voucher Entry with Classes
Select Voucher Entry at the Gateway of Tally. Press F5:Payment . You have to select a class or Not Applicable if no class is desired for this entry. If Cost Centre Class has been set, it can be selected too.
The entries will be made as follows:
The Voucher Class is Barclays Bank Payment. We have selected a Cost Centre Class called Departments too. That will be discussed later. Note that you do not have to select the bank and the entries are not in the regular Dr/Cr format. Data entry in Tally was already very rapid. It is now faster than before!
Purchase Entries in Invoice mode (without classes)
Purchase Vouchers can now be created in Invoice mode. You can enter the suppliers' invoices in the same way as they physically appear.
Set-up Invoice Mode entry for Purchase transactions 1.
Select F11:Company Features .
2.
Select F1: ing Features
3.
Set the option 'Allow Invoicing' to Yes
4.
Enter Purchases in Invoice Format? Set it to Yes
5.
Accept the screen using Ctrl+A.
Entry of Purchase vouchers in Invoice mode Select F9:Purchases . Select As Invoice button or use CTRL+V . This button is a toggle for Invoice and Voucher modes. You may want to use the voucher mode for more complex entries. Entries are exactly like sales invoices and hence are not discussed.
The treatment of additional cost of purchases needs elaborating.
Additional Cost of Purchases If it is desired to add the other purchase expenses like freight and import duty to the cost of the item, you would have activated the option in F11:Company Features 'Track Additional Costs of Purchases'. In voucher mode, the additional cost details have to be filled in after the allocation of each purchase item. In Invoice mode, the treatment of additional costs on stock items is automated by altering the parent group master details of the expenses. In many situations, more than one item is purchased where the expense that is incurred for them is charged as a lump-sum. However, to give an effective cost including the expense to each purchased item, you would earlier give additional costs of purchase for each item. That method though very flexible and practical could be tedious. That process is now automated and allocation of the expense to stock item can be done on a predefined basis. The following set-up activity is required to be carried out: 1.
Alter the Parent Group of the expense ledger s, e.g. Direct Expenses. You will find a new option Method to Allocate when used in Purchase Invoice. If you want to appropriate the ledger s under
1. this group to stock items by either Quantity or value, you must select the option. Select Appropriate by Qty for our example.
Now if freight belongs to the group Direct Expenses, the amount will be apportioned by quantity, i.e., in the ratio of 1:5. If however, the parent group does not have an allocation method or is set to No Appropriation or Not Applicable, the amount of freight will not be apportioned to the items and will simply remain in the financial books as expense. N o t e : In Invoice mode, Purchases can be allocated to Cost Centres only when Cost Centre classes are used, i.e., you have to auto-allocate purchases to cost centres if you are using the Invoice mode of entry. Using the voucher mode of entry for purchases allows manual allocation of purchases to cost centres.
Purchase Voucher Classes
Purchase Voucher Classes are templates where you can restrict s to be used in entries as well as automate ing entries for items and expenses. You can either alter the existing Purchase Voucher Type or create a new voucher type based on it. From Gateway of Tally > s Info > Voucher Types The item Name of Class is below Effective Dates for Vouchers and above the Numbering Table. Give a name to the class by simply typing it, e.g. Imports. You may create more than one class. The class table is now to be completed.
Exclude and Include Groups have been discussed before and do not require further elaboration.
Default ing Allocations Each Stock Item in the invoice can be allocated to the financial (nominal) mentioned here. Hence, all the stock items that will be entered in this class will automatically affect the Nominal ledger Purchase – Imports. Of course, the stock item record remains as it is and can be viewed separately. The allocation cannot be split up at present but in future releases you will be able to split this to cater to Tax inclusive prices.
Additional ing Entries
Expenses and other charges like Import Duty, Freight, VAT, Sales Tax can be specified here which will be calculated automatically on the Type of Calculation and Value basis. For explanation on each Type of Calculation , refer the Appendix. We have selected Freight which is an under the group Direct Expenses.
Type of Calculation We select defined value as we would like to input the amount of freight charged on the invoice.
However, we would like Freight expenses to be apportioned to each stock item based quantity and we want the apportionment done automatically.
Auto-allocation of Additional Entries to Stock Items Purchased (This method is not applicable for sales invoices) The Group Direct Expenses had been altered earlier to allocate by quantity. Hence, the allocation will be done automatically based on quantity. Your purchase voucher class has been set-up. You can have more than one additional ing entries. You can also have more than one Class.
Voucher Classes for Journals
Classes allow Journals to handle Forex Gain Loss Adjustments for companies having Multi-Currency s. You would create a 'class' in the normal way (s Info > Voucher Types > Alter > Journal). And having selected the class during Voucher Entry, will find only those Ledger s appearing which have a Gain/Loss to be adjusted as of the date of voucher and auto-calculation of these amounts.
Voucher Classes for Debit Notes and Credit Notes Voucher classes for Credit Notes are similar to sales invoices except for one important inclusion. You can set the class for interest entries to enable adjustment of interest payable. If the Interest option is selected, the other sales invoice-like options will not be available. A separate class may to be created for entries like Sales Returns. Since Sales and Purchase Invoice classes have already been dealt with, we shall not elaborate on this behavior anymore. Debit Note classes can be set for interest entries only. Classes for other entries are not available as the invoice mode of entry is not possible for Debit Notes. Classes for interest entries are covered under Interest Calculations.
Voucher Classes for Stock Journal
Stock Journal classes allow you to handle transfers from one location (Godown) to another, for companies having Multi-Location Inventory and at least two location/Godowns created. Once the class is selected, you will need to specify the Destination and simply provide the list of items to be transferred. Through this class all items/batches thus selected will be exactly mirrored to the destination, including Batch Number, Rate and Value. Go to s Info > Voucher Types > Create Select the Stock Journal Voucher from the List of Voucher Types. Enter all the fields as per your requirement. Refer Creating a Voucher Type for more details. To create a Stock Journal Voucher Class , enter a name in the Name of Class field. (Eg: Transfer)
The Class: Transfer screen is displayed. To create a class for inter-godown transfer set the option Use Class for Inter-Godown Transfer to Yes.
Additional Information Refer Voucher Classes for Stock Journals in Job Costing for more details.
Cost Centre Classes
The purpose of Cost Centre Classes is to facilitate predetermined allocation of ledger s (like expenses and incomes) to cost centres during voucher entry. Allocation to cost centres can be made while using voucher classes and the cost centres can be 'classed' too.
How does it work? Automation of cost centre allocation involves 'percentage allocation' based on predefined figures. Cost Centre Classes are defined where percentages at which allocation is to be made are given. Cost centre classes affect all voucher types. In voucher entry, depending upon the cost centre class, the allocation will be carried out in the background without the allocation screen appearing at all. More: Set up required for Cost Centre Classes Voucher Entry with Cost Classes An explanation of 'Types of Calculation'
Set up Required for Cost Centre Classes
Before you select classes, it is advisable to create the cost centre structure. Hence, create your cost categories and cost centres before creating classes. Draw out on paper the Classes required and indicate which cost centres will be affected for each class. For example, You might have the following structure:
Divisions 1.
Export
2.
Wholesale
3.
Retail Departments -
4.
Finance
5.
Marketing Where Divisions and Departments are Cost Categories the others are cost centres. Now, you want to allocate sales to the following Cost Centre Classes:
6.
Export - to allocate 100% of Export sales to the cost centre Export
7.
Wholesale - to allocate 100% of wholesale sales to the cost centre Wholesale
8.
Retail - to allocate 100% of retail sales to the cost centre Retail You also want to allocate all the sales to the Marketing Department You want to allocate Marketing Expenses pro-rata in the following manner : 1.
Export – 60%
2.
Wholesale – 25%
3.
Retail-15%
100% to Marketing Department With this structure, let us now set up the classes.
Set up Cost Centre Classes At the Gateway of Tally, select F11: Features > ing Features
Set Use Pre-defined Cost Centre Allocations during Entry to Yes
(The other options can remain as previously set and are not discussed here.) You now bring up the Cost Centre Classes creation screen. Type in the Class names and select the Categories and the respective cost centres. Specify the percentage of allocation. After entry, your auto-cost allocation screen will appear as follows :
We have created the Cost Classes as Export, Wholesale, Retail and Marketing Expenses. Divisions and Departments are cost categories. Export, Wholesale and Retail are cost centres under Divisions. Marketing Group is a cost centre under Departments. Although the names of the class and the cost centres are the same in the example, you need not have them with same names.
Voucher Entry with Cost Classes
Each voucher now contains the Cost Class option at its head. Select Not Applicable in case you want to allocate manually. Select a cost class to auto-allocate according to the predefined percentages set in that class. We will take two examples, sales and payment. In sales, we will select Export as the Cost Class. Go to the Voucher Entry Screen Select F8: Sales You have the following options:
Your voucher type : Sales. You could select another voucher type if required.
Class This is the Voucher Class which automates ledger allocation and additional ing entries
Cost Centre Class Select one of the classes created earlier, Export in this case. Now enter the sales invoice as usual. The cost centre allocation sub-screen will not come up and the allocation will be done automatically in the background. After accepting the entry, check the cost centre displays to whether the allocation was done correctly. Similarly, when you press F5:Payment , you are presented with similar options. Select Marketing Expenses in that case. The cost centre allocation sub-screen will not come up and the allocation will be done automatically in the background. Check the cost centre reports for allocation. You may even use PgUp or alter the voucher to display the allocation made. It would show the allocation in the voucher. Example
You could combine Voucher Class and Cost centre class to maximize automation!
An Explanation of Types of Calculation
As Additional Excise In the Indian sub-continent, a manufacturing tax, or Excise is levied. For some products, a supplementary levy on the 'Basic Excise Duty' is charged, or 'Additional Excise Duty'. This is a surcharge calculation. For example, an Additional Excise Duty of 10% on the Basic Duty. While the calculation method is identical to 'As Surcharge' (see below), the result is to provide a 'Total Excise Payable' calculation accurately during Invoice printing.
As a Flat Rate When you wish to specify a standard mark-up/down on an invoice. For example, 100.00 for every invoice, independent of the qty/value of the invoice.
As Surcharge When you wish to calculate the value based on the immediately preceding figure. For example, a Sales Tax of 10% is applicable on an invoice, which would be calculated on the value of goods sold. On this, a 'Surcharge' of 5% - i.e. 5% of the Sales Tax value is applicable.
As Total Amount Rounding Typically, the last line in an invoice. You would need to create an which would carry the 'rounding difference'. Now, as the other values of the invoice are calculated, this would automatically get adjusted to keep the Total Invoice Value to the desired rounding limits. Normally, you would also mark this invoice as 'Remove if Zero ? Yes', so that the head is not retained in the invoice print-outs if no rounding was applicable.
As Defined Value This allows you to specify a value while creating the invoice itself. Normally, you would use this when the basis of calculation is neither Value nor Qty dependent, and therefore, needs to be entered every time you create an invoice.
Based on Quantity In case of calculations based on the 'Total Qty' supplied. For example, you may have Freight or Forwarding charges as 2.00/Kg, and if the total qty supplied in the invoice is 200.000 Kg, then the amount should become 400.00. The 'Value Basis' will also need to be provided as '2.00/Kg' or '0.50/Pc' as the case may be.
On Current Sub Total In certain environments, taxes are applicable on the Total Goods Value as well as supplementary charges such as 'Excise Duty', 'Packing Charges' etc. Normally, when the tax calculation method is specified as 'On Total Sales' (see below), the calculations are based on the Total Goods Value only. When you wish the supplementary charges to be included, then you would set 'On Current Sub Total' as the type of calculation.
On Item Rate
Typically used for both VAT as well as Excise Duty style calculations. Here, you would have specified the Rate of Tax applicable for each Stock Item, and you would want only those items to be used for calculation purposes which equals this Rate of Tax. The advantage is to be able to mix multiple Tax Rate products in the same Invoice, and yet get the correct ones picked up for each Tax bracket.
On Total Sales The most common basis of Tax Calculation is on the total value of goods/services. This method would calculate using the sum of Stock Items used in the invoice.
Currencies (Multiple currencies and foreign exchange)
Many Organisations have transactions in more than one currency. Such transactions have to be recorded either in the base (home) currency or in the foreign currency. If the transactions are recorded in home currency, the rate at which the foreign currency is exchanged should be recorded as well. At times you need to record the transaction in the foreign currency itself when you maintain the balance of the concerned in foreign currency. Tally uses the term base currency for the currency in which your books are kept. Foreign Exchange is used interchangeably with foreign currency. The base currency is specified while creating the company. Tally makes it easy to manage multiple currencies, automatic calculations of exchange rates, automatic conversion of any currency used to record a transaction to the currency of the , etc. The Balance Sheet and Profit & Loss of the company is maintained in the base currency. Conversion of foreign currency balances is done as per rules set by you. More: Enabling Multiple Currency in Tally
Enabling multiple currency in Tally
Enable Multi-Currency feature to view and enter transactions in multiple currencies. 1.
Go to Gateway of Tally
2.
Select F11: Features > ing Features > to display the Company Operations Alteration screen
3.
Set Allow Multi-Currency? to Yes
4.
Accept to Save.
Multi Currency feature is now enabled.
Currencies menu View the Currencies menu from Gateway of Tally > s Info > Currencies .
More: Create a Currency Alter Currency Rates of Exchange
Creating a Currency
Use ASCII Special Characters with [Alt] key combination if your keyboard does not have the symbol. Utilities like Character Map (Start > All Programs > Accessories > System Tools) in Windows shows the key combination for most symbols. This might be different on some notebook computers, refer to the computer's manual or the vendor. You cannot assign a duplicate currency symbol for a company in Tally. The Key combinations for a few currency symbols are given below: 1.
Alt + 156 –Pound Sterling - £
2.
Alt + 0165 – Japanese Yen - ¥
3.
Alt + 0128 – Euro - €
4.
Use the Dollar and the Rs. Symbol from the keyboard
To create a foreign currency 1.
Go to Gateway of Tally > s Info. > Currencies > Create
2.
Enter the currency symbol in Symbol. This symbol appears in your reports wherever applicable.
3.
Enter the name of the currency in Formal Name.
A formal name is required to distinguish different currencies with the same symbols. For e.g. you have created two companies (ABC and PQR) in Tally. ABC and PQR have different set of currencies. ABC uses symbol $ for Australian Dollars and PQR uses the symbol $ for U.S. Dollars. The formal name distinguishes
two different currencies with the same symbol when you compare s of two companies. The company that is loaded first retains the original symbol for display purposes. The other company's currency symbol will be prefixed with the first letter/first few letters (to make it unique) of the formal name. Here, if ABC is loaded first then the symbol $ is for Australian Dollars and in PQR (loaded next) the symbol $ is prefixed with the letter U (first letter of its formal name). e.g., US Dollars, Pound Sterling, Indian Rupees, Omani Rial, etc. Note:
You
cannot
assign
a
duplicate
Formal
Name
for
a
company
in
Tally.
4.
Enter the number of decimal places for the currency in Number of Decimal Places. E.g. Currencies with 2 decimal places like paisa and currencies with three decimal places like dinar. There are currencies that do not have decimal places, e.g., Vietnamese Dong.
5.
Tally has two formats for displaying an amount, viz., in millions and in lakhs. 1000000 (one followed by six zeroes) in millions format would appear as 1,000,000 and lakhs would appear as 10,00,000.
Selecting No means you want amounts to appear in lakhs. N o t e: You can always specify the Loss display, press [F12]:
appearance Configure
of to
numbers in specific reports, e.g. In change scale factors for values.
Profit
&
6.
Set Is Symbol SUFFIXED to Amounts? to Yes for the symbol to appear after the amount. Set to No for the symbol to be prefixed to the amount.
7.
Set Put a SPACE between Amounts and symbol? to Yes to apply a space between amounts and symbol.
8.
Enter the symbol for decimal portion of currency in Symbol for Decimal Portion of Amount. E.g. Ps. for Paisa.
9.
Enter the number of decimal places for printing the amounts in words in Decimal Places for Printing Amounts in Words. This number should be equal to or lesser than the number specified in Number of Decimal Places field.
N o t e : The C u r r e n c y Language created.
cannot
be
translated
or
transliterated
but
will
appear
in
the
Alter Currency
You can modify or delete a currency master using the Alter option. Rates of Exchange can also be altered from here. To alter a currency master: 1.
Go to Gateway of Tally > s Info. > Currencies > Alter
2.
Select a C urrency from the Currencies list (displayed if there is more than 1 currency)
3.
In the Currency Alteration screen alter details as required. For details see Creating a Currency Master
Displaying a Currency The Currency Display screen displays the details and rates of exchange for a selected currency. To display the Currency screen: 1. Go to Gateway of Tally > s Info. > Currencies > Display 2. Select a C urrency from Currencies list (displayed if there is more than 1 currency) 3. Enter to view the details
Deleting a Currency
1.
To delete a Currency: 1.
Go to Gateway of Tally > s Info. > Currencies > Alter
2.
Select a currency from the Currencies list (displayed if there is more than 1 currency)
3.
Press Alt + D in the Currency Alteration screen to delete
Note
:
You
cannot
delete
a
Currency
that
has
been
used
in
a
voucher
transaction.
Rates of Exchange
Rates of Exchange is a feature wherein you can enter the rate of foreign currency for a specific date. Foreign exchange variations occur every day with different selling and buying rates. Rates of Exchange helps you apply the rate for the given date in your transactions.
To open Rates of Exchange : 1.
Go to Gateway of Tally > s Info. > Currencies > Rates of Exchange
2.
The Multi-Currency Alteration screen is displayed
3.
Enter the date for which the exchange rate is applicable
4.
Enter the Standard Rate (optional) which is used to calculate variances from the actual transaction rates
5.
Enter the Selling Rate (your selling rate)
6.
Enter the Buying Rate (your buying rate)
7.
Accept to Save
N
ote
:
Last
Voucher
Rate
is
displayed
if
any
voucher
has
been
entered
earlier.
S elling Rate – Specified Rate Selling rate is your selling rate (as opposed to bank's selling rate) used for receipt voucher entry where you receive foreign exchange.
This is the rate obtained from the daily newspaper or your banker. If you input this rate before any transaction entry, while entering a foreign exchange transaction, this rate will be brought up by default. (You can still change the actual rate). The actual rate at which the currency was last used is displayed and cannot be changed. The specified rate is used for calculating foreign exchange variances only in case there is no standard rate.
Buying Rate – Specified Rate Buying Rate is your buying rate (as opposed to bank's buying rate) used in payment vouchers. The actual rate at which the currency was last used is displayed and cannot be changed. The specified rate is used for calculating foreign exchange variances only in case there is no standard rate. N ote: Tally the standard
calculates Gain or Loss rates, specified rates
in foreign and actual
exchange transaction
transactions rates.
automatically
using
Inventory Information
The Inventory Info menu lists the masters, through which you can provide Tally the details of your company’s inventory. Go to Gateway of Tally > Inventory Info. N o t e: The Inventory Maintain s Creation screen.
Info with
menu is displayed in Gateway of Tally, only if you select Inventory from the Type of Company list in the C o m p a n y
Configuring F12:Configure and Setting F11: Features
You can organise the type of information and the level of details that you require, using F12: Configure and F11: Features. You can enable the desired settings. Tally allows you to alter most of the settings at any point of time.
F12: Configure To configure the settings for Inventory Masters Go to Gateway of Tally > F12: Configure > Accts/Inv Info. The settings pertaining to Inventory Masters are set to No, by default. If you reset them to Yes, the features would become available. Typically, they are additional fields that appear during Masters creation which enable you to obtain more information and detailed analyses. Refer Accts/Inv Info Configuration for more details.
F11: Features There are various settings available under Inventory Features, which determine the information to be entered during transaction entries. Refer Activate Company Features for more details.
Stock Groups
Stock Groups in Inventory are similar to Groups in ing Masters. They are helpful in the classification of Stock Items. Classification is based on some common behaviour. Stock Groups enable easy identification and reporting of Stock Items in statements. You can group Stock Items under different Stock Groups to reflect their classification based on some common functionality. Grouping enables you to locate Stock Items easily and report their details in statements. You can group the items of a particular brand to extract stock of all items of that brand. Consider that the Stock Items in your inventory are Sony 3.5" disks, Maxell 3.5" disks, Sony tapes, Maxell tapes, and so on. Create Stock Groups, Sony and Maxell, and classify Sony products under the group Sony and Maxell products under Maxell. You now have ready details of all Sony and Maxell products, duly classified. Create sub-groups under Stock Groups for deeper analysis. Go to Gateway of Tally > Inventory Info. > Stock Groups More: Creating a Stock Group Creating Multiple Stock Groups Displaying or Altering a Stock Groups
Creating a Stock Group
Go to Gateway of Tally > Inventory Info. > Stock Groups > Create (under Single Stock Group) The Stock Group Creation screen displays.
A brief description on each of the fields in the Stock Group Creation screen follows.
Name Enter the name of the Stock Group to be created. For example, Building Materials.
Under Specify whether it is a primary group or a sub-group of another group, by selecting from the list. For example, Primary. Press Alt + C to create a parent group, if you do not have it in the list.
Can quantities of items be ADDED? This field pertains to information on measuring the units of the Stock Items that you would categorise under the Stock Group. The Stock Items categorised under the group should have similar units for them to be added up. You cannot add quantities in Kgs to quantities in Pcs. N o t e : You can always items in the group.
go
back
and
reset
this
option
after
assessing
the
units
of
Buttons in single mode stock group creation From the Stock Group Creation screen, you can create any of the Masters listed below with a single click.
Category
Items
the
Units
Godown
Vch Types
The buttons. F e a t u r e s.
C u r r e n c y and B u d g e t, a r e
available
only
if
you
opted
for
the
same
in
F11:
Creating Multiple Stock Groups
Go to Gateway of Tally > Inventory Info. > Stock Groups > Create (under Multiple Stock Groups )
Select the parent group under which you want the new groups to be created from the List of Groups . The group selected is displayed in the Under Group field. A brief description on each of the fields in the Multi Stock Group Creation screen follows.
Name of Stock Group Enter the name of the Stock Group.
Under If you select any group other than All Items in the Under Group field, then this column is filled in automatically with the selected Group name and the cursor skips this column. This speeds up data entry. If you select All Items in the Under Group field, the cursor does not skip this field and allows you to enter the parent group of each of them.
Items are Addable? (Y/N) This pertains to information on the Stock Items that you would create under this Stock Group. The Stock Items created under the group should have similar units to be 'addable'.
Buttons specific to Multi Stock Group Creation screen F4:Parent To change the parent entered in the field Under Group when you have sub-groups created under it. The change affects all the sub-groups created under the parent, meaning, they would now belong to the new parent.
F8:Skip Details If Items are addable is to remain the default, that is, remain the same as specified for the parent Stock Group, use this button. The cursor skips that column which speeds up data entry.
From the Multi Stock Group Creation screen, you can create any of the Masters listed below with a single click.
C ategory
I tems
Go down
More: Displaying and Altering Stock Groups
Displaying and Altering Stock Groups
You can display and alter Stock Group in Single mode and Multiple mode.
Displaying Single Stock Group Go to Gateway of Tally > Inventory Info. > Stock Groups > Display (under Single Stock Group) Select the Stock Group whose particulars you want to display from the List of Groups. The Stock Group Display screen is displayed. This gives information only on the Stock Group Master and not on any of the balances.
Altering Single Stock Group Go to Gateway of Tally > Inventory Info. > Stock Groups > Alter (under Single Stock Group) Select the Stock Group from the List of Groups. The Stock Group Alteration screen displays. Make the necessary changes and accept Yes to save. You can delete a Stock Group only from the Stock Group Alteration screen. Select a stock group from the list and press ALT+D to delete it. N o t e : You cannot delete a Stock under it. You need to first delete Group.
Group if the sub
it has any sub groups groups and Stock Items
or to
Stock Items created delete the Stock
Displaying Multiple Stock Groups Go to Gateway of Tally > Inventory Info. > Stock Groups > Display (under Multiple Stock Groups) Select the Stock Group from the List of Groups. The Multi Stock Group Display screen displays. It displays the entire sub groups of the selected Group. If you select All Items from the List of Groups, all the groups and sub Groups created are displayed.
Altering Multiple Stock Groups Go to Gateway of Tally > Inventory Info. > Stock Groups > Alter (under Multiple Stock Groups) The Multi Stock Group Alteration screen displays. Make the necessary changes and accept Yes to save. Note:
You
cannot
delete
a
Stock
Group
from
multiple
mode.
Stock Categories
The concept of Stock Categories is similar to that of Cost Categories. Refer the section on Cost Categories to understand the similarity/differences. N o t e : This option Maintain Stock
becomes available in the Categories to Y e s in F11:
Inventory Info. Features.
menu
only
if
you
Se t
Stock Categories offers a parallel classification of Stock Items. You can create Stock Categories like Floppy Disks and Floppy Drives. Consider the example given in the Stock Groups. You would know how many 3.5" floppies of Sony and Maxell are in stock. To know the total stock of floppy disks or any alternative item that could be used, Stock Categories would be the best option to use. Create a Stock Category called Floppy Disks and classify both Sony 3.5" diskettes as well as Maxell 3.5" diskettes under the same. Since the items are substitutes of each other, if one is out of stock, you can offer the other of the same category. Stock Query option available under Statements of Inventory (Gateway of Tally > Display) reveals the strength of Stock Categories. Note: features
While configuring F12: that you do not need.
Configure
and
setting
F11:
Features
do
not
enable
Go to Gateway of Tally > Inventory Info > Stock Categories Note: Cost
This option is displayed in Categories to Y e s in F11:
More: Creating a Stock Category Creating Multiple Stock Categories Display or Alter a Stock Category
the Inventory Features.
Info. menu only if you set M a i n t a i n
Creating a Stock Category
You can create Stock Categories and sub categories of Stock Categories to organise your information. Gateway of Tally > Inventory Info. > Stock Categories > Create (under Single Stock Category) The Stock Category Creation screen displays.
A brief description on each of the fields in the Stock Category Creation screen follows.
Name Enter the name of the Stock Category. Eg: Tablets.
Under Specify whether it is a primary category or a sub-category of another category. Select Primary from the list, if you do not have a parent group. Use ALT + C to create a parent if you do not have the required category in the list.
Buttons in single mode stock category creation
Groups
Items
Godown
Budget
Vch Types
Units
Currency
From the Stock Categories Creation screen, you can create any of the Masters listed above with a single click. Note: The features in
buttons F11:
for Currency Features.
Displaying and Altering Stock Categories
and
Budget,
only
if
you
have
enabled
the
respective
Creating Multiple Stock Categories
Go to Gateway of Tally > Inventory Info. > Stock Categories > Create (under Single Stock Category )
A brief description on each of the fields in the Multi Stock Category Creation screen follows.
Under Category Select the parent category under which you want the new categories to be created. If you select any category other than All Items , all the new categories being created will be created under the selected category. The column Under is filled in automatically with the selected category and the cursor skips this column, which in turn speeds up data entry. Selecting All Items gives you the flexibility of specifying the parent of each new category created.
S No. The serial number of the stock category is auto generated.
Name of the category Specify the name of the Stock Category.
Under If you have selected All Items in Under Category , you must specify a parent category in this column.
Buttons specific to Multi Stock Category screen F4:Parent To change the parent entered in the field Under Category when you have sub-categories created under it. The change affects all the sub-categories created under the parent, meaning they would now belong to the new parent.
F8:Skip Details If the field Under is to remain the same as specified for the parent Stock Category, use this button. The cursor will skip that column, which speeds up data entry.
From the Multi Stock Category Creation screen, you can create any of the Masters listed below with a single click.
G roups
I tems
Go down
More: Displaying and Altering Stock Categories
Displaying and Altering Stock Categories
You can display and alter Stock categories from Single and Multiple mode.
Displaying Single Stock Category Go to Gateway of Tally > Inventory Info. > Stock Categories > Display (under Single Stock Group) Select the Category for which you want to view the display details from the List of Categories. The Stock Category Display screen displays for you to view the details entered in Stock Category Master.
Altering Single Stock Category Go to Gateway of Tally > Inventory Info. > Stock Categories > Alter (under Single Stock Category) Select the Category for which you want to alter from the List of Categories. The Stock Category Alteration screen displays. Make the necessary changes and accept Yes to save.
Deleting a Stock Category You can delete a Stock Category only if it does not have any sub categories or Stock Items under it. Select a Stock Category from the list and press ALT + D to delete it.
Displaying Multiple Stock Categories Go to Gateway of Tally > Inventory Info. > Stock categories > Display (under Multiple Stock Categories) Select the Category for which you want to view the details or select All Items to view the details of all the Categories created, from the List of Categories. The Multi Stock Category screen displays. You can view the entire details of the Category and that of sub categories if any, in this screen.
Altering Multiple Stock Categories Go to Gateway of Tally > Inventory Info. > Stock Categories > Alter (under Multiple Stock Categories) Select the Category for which you want to alter from the List of Categories. The Multi Stock Category Alteration screen displays. You can make changes in the Masters of the selected Category and also of the sub categories. Select All Item to make changes in any desired Category Masters as all the Categories created are displayed in this screen. Note:
You
cannot
delete
a
Stock
Category
from
multiple
mode.
Delete a Stock Category You can delete a stock category only if it does not have any children under it. The children could be stock category or stock item or both.
Gateway of Tally > Inventory Info > Stock Categories > Single Alter Press [ALT]+[D] to delete the stock category Note:
You
cannot
delete
a
stock
category
from
multiple
mode.
Stock Items
Stock Item refers to goods that you manufacture or trade. It is the primary inventory entity and the lowest level of information on your inventory. You have to create a Stock Item in Tally for each inventory item that you want to for. In other words, you have to create a stock ledger for each item and Tally calls it Stock Item. Go to Gateway of Tally > Inventory Info. > Stock Items More: Creating a Stock Item Creating Multiple Stock Items Creating a Stock Item - Advanced Usage Displaying and Altering Stock Items
Creating a Stock Item
If you are creating Stock Items for the first time, it is advisable to configure the F12: Configure screen before creating any items. You may configure your groups to enable/disable advanced mode. Click here for details on Creating Stock Items in Advanced Mode. Go to Gateway of Tally > Inventory Info > Stock Item > Single Create (under Single Stock Item)
A brief description on each of the fields in the Stock Category Creation screen follows
Name Specify the name of the Stock Item.
Under Select the group from the List of Groups. If you do not want to categorise it under any particular group that you created, choose Primary. Press Alt + C to create a parent Group from this field.
Units Give the unit of measurement of the item in this field. You would normally use this unit for trading this item. Use Alt + C to create a new unit, if you do not have one in the list. Refer the section on
Units for an explanation
on how to create and alter units of measurement.
Opening Balance If you already have stock of this item at the time of creating its in Tally, specify its balance particulars, i.e., quantity, rate and value.
Buttons in single mode stock item creation F3:Companies To switch to another loaded company to create Stock Item.
Groups
Category
Godown
Budget
Vch Types
Units
Currency
You may choose to create any of the masters listed above with a single click of the buttons. Note: The buttons the same in F11:
Category, Currency Features.
More: Displaying and Altering Stock Item
and
Budget
are
available,
only
if
you
opted
for
Creating Multiple Stock Items
You can create multiple Stock Items at a time using this option. Go to Gateway of Tally > Inventory Info > Stock Items > Multi Create (under Multiple Stock Items )
Under Group Select the parent group under which you want the new items to be created. If you select any category other than All Items, then all the new items being created, will be created under this Group. Selecting All Items gives you the flexibility of specifying the parent of each new item created.
S No. The serial number is auto generated.
Name of Item Specify the name of the stock item. For example, HP Laserjet
Under If you select All Items in Under Group field, you must specify a parent group here. Use Alt + C to create a new parent from this field. If you select a Group in Under Group field, that group displays automatically in this column.
Opening Balance If you already have stock of this item at the time of creating its in Tally, specify the balance particulars, i.e., quantity, rate and value.
Buttons in Multi Stock Item Creation screen
F4:Parent To change the parent entered in the field Under Group when you have items categorised under it. The change affects all the items created under the parent, meaning they would now belong to the new parent.
F8:Skip Details To avoid the cursor entering the field Opening Qty , use this button. It toggles with Edit Details , which allows you to enter the opening details.
F9:Skip Category Use this button to avoid the cursor entering the Category field. It toggles with Edit Category , which allows entry of Category details. From the Multi Stock Item Creation screen, choosing to create any of the masters listed below is just a single click away.
G roups
C ategory (if activated)
G o down
More: Creating a Stock Item - Advanced Usage Displaying and Altering Stock Items
Creating a Stock Item - Advanced Usage
This section assumes that you have configured all advanced features of the inventory in F12: Configure and enabled advanced F11: Features . It deals with the additional fields that you would require while creating a Stock Item. N o t e : Use F12: Configure and F11: Features entire setup according to your preferences.
to
add/remove
fields
and
configure
the
Go to Gateway of Tally > Inventory Info > Stock Items > Create (under Single Stock Item )
A brief description on each of the additional fields in Stock Item Creation screen follows.
Name Specify the name of the Stock Item.
Alias You can give aliases for the part number. There may be situations where, the manufacturer specifies his Part No., but you understand it better by its Bin Card number allotted to it.
Part No. This is optional. Enter the Part No. of the item being created, for easy identification. (In certain industries, (e.g. Automobiles), various parts are better identified by their part numbers). You can alternatively use this field for Bin Card No., Code No., etc. Description Enter the description of the Stock Item that would appear in your invoices. This is optional.
Remarks Remarks help to identify the product and its applications. You can give some particulars of the Stock Item created. When you post a query for the stock of this item, remarks help to decide if the item is suitable for a particular requirement.
Set /Modify Default Ledgers for Invoicing You can define the default ledger (usually the sales ), during alteration or creation of a Stock Item that will automatically be credited when you invoice the item.
Under Select the group from the List of Groups . If you do not want to categorize it under any particular group that you created, choose Primary . Press Alt + C to create a parent Group from this field.
Units Give the unit of measurement of the item here. The item would be traded using this unit of measurement.
Alternate Units This is another unit, apart from the main unit, which you can use for the Stock Item. This is particularly useful when you need to handle different units at different times. For example, you buy Data Cables in pieces but sell in packets of 5 pieces each. For alternate units, you are asked to give a conversion factor (e.g. 5) so that a link is maintained between the two. What you give here is simply a conversion factor that comes up as default during voucher entry. You may specify a different factor during voucher entry.
Maintain in Batches? Set this option to Yes if you want to maintain the batch information of Stock Items. The batch does not destroy itself after it is disposed; it remains on records and is quite like a Ledger in behavior. For example, Stock Item – Cloth, Batches – red, white, and blue. You can extract all sales of blue cloth at any given point of time.
Use Components BoM? This has been dealt with in Bill of Materials section under Voucher Entry. It is however pertinent to mention here that BoM should be used only for items that have sub-assemblies or are manufactured.
Set Standard Rates? Set this to Yes , if you want to specify standard purchase and sales rates for the item. Standard rates enable the valuation of inventory at standard purchase or standard sales price. Moreover, these prices come up by default during voucher entry (you may choose to override them if required). The standards are effective from the
specified dates and they continue to be used at these rates until the next date, where the standard rate changes.
In the screen that appears above set the Standard Cost/Standard Selling Price against the date in the Applicable From column respectively.
Rate column and the
Suppose you value your inventory based on standard cost or the market valuation based on standard price. For valuation on any date between the specified date, only the rate specified against Applicable From column is considered. This rate will be brought up by default during voucher entry on any day during this period. Use the Standard Selling Price as simple pricelist.
Tax Information Rate of Duty Rate of VAT/Duty (Sales Tax/ Duty) (e.g. 17.5 or 5) Give the rate of tax applicable for the item. The rate specified here would be picked up when invoicing, if you selected the method of calculation as Tax Based on Item Rate for your relevant ing ledger . Typically, this ing ledger would be 'VAT ' under the Group Duties & Taxes . In such cases, the VAT or duty in invoice entry will be automatically calculated. Specify the rate of duty.
Behaviour Costing Method Select the method of valuation for the inventory. Tally provides you with different valuation methods for different items, from which you can select the appropriate one. You may, of course, choose to use the market valuation
method to value the inventory. It would be interesting to know the value of your stock, both on cost as well as sale basis. The different costing methods are:
At Zero Cost Tally considers at Zero Cost Valuation for this particular item for all sales. Avg. Cost (Price) Tally recalculates the value after each purchase or sale. FIFO (First In First Out) Tally assumes the sale of the oldest goods first. Last Purchase Cost / Sale Price The stock is valued at the latest price. LIFO Annual (Last In First Out Annual) Tally assumes the sale of the newest goods, first taking into the current financial year. LIFO Perpetual (Last In First Out Perpetual) This works like LIFO Annual except that the last purchase starts from the previous financial year. Monthly Avg. Cost Tally calculates the average price based on the purchase of item in that particular month. Std. Cost / Price
A pre-determined value which you entered.
Market Valuation Methods There are four market valuation methods, At Zero Price, Avg. Price, Last Sale Price, Std. Price. Select whichever is applicable from the Valuation Methods list.
Ignore Diff. due to Physical Counting? In Tally, you can record the physical stock as counted, using a physical stock voucher. There is, usually, a difference between physically counted stock and the one appearing in the records. If you wish to ignore the difference and continue with the stock as per books, set this option to Yes. It is, however, advisable not to ignore the difference and let Tally consider stocks as per physical count for subsequent transactions.
Ignore Negative Balances (Y/N)? If you set this to Yes , Tally ignores the item in the stock reports, in case it has a negative balance.
Treat all Sales as New Manufacture? Set this to Yes , if you want to avoid the need of ing entries for manufacture of goods and have them automatically done when goods are sold. This way, you also avoid negative balances in the stock records. It is particularly useful for smaller manufacturing companies that make things but do not want the problem of receipting stocks.
Treat all Purchases as Consumed? This is quite the reverse of the previous option. If you set this to Yes, issues are automatically raised for all goods purchased. This is particularly useful in case of consumables. The book stock of this item would always be nil.
Treat all Rejections inward as Scrap? Set this to Yes , if you do not want to take the rejected goods back into stock. Otherwise, rejected goods, though recorded separately through a Rejection Note, would be taken back into stock.
Displaying and Altering Stock Items
You can display and alter Stock Items in Single mode and Multiple mode.
Displaying a Single Stock Item Go to Gateway of Tally > Inventory Info. > Stock Items > Display (under Single Stock Item) Select the name of the Stock Item from the List of Items. The Stock Item Display screen displays. You cannot make any changes in this screen.
Displaying Multiple Stock Items Go to Gateway of Tally > Inventory Info > Stock Items > Display (under Multiple Stock Items) Select a Group from the List of Groups to display all the Stock Items under the selected Group, or select All Items to display all the Stock Items, as the case may be. The Multi Stock Item Display screen displays, listing the Stock Items and the corresponding details of the Stock Items.
Altering a Single Stock Item Go to Gateway of Tally > Inventory Info > Stock Items > Alter (under Single Stock Item) Select the Stock Item you want to alter from the List of Items. The Stock Item Alteration screen displays. Make the necessary changes and accept Yes to save. You can delete a Stock Item only if you have not used it in any transaction entry. Press ALT + D from the Stock Item Alteration screen to delete the Stock Item.
Altering Multiple Stock Items Go to Gateway of Tally > Inventory Info > Stock Items > Alter (under Single Stock Item) Select a Group to alter the Stock Item under the selected group. The Multi Stock Item Alteration screen displays. Make the necessary changes and accept Yes to save. N ote:
You
cannot
delete
a
Stock
Item
from
multiple
mode.
Reorder Levels
Reorder Level signifies the quantity of a Stock Item in hand, after reaching which you must place orders for your supplies. The importance of Reorder Level arises from the desire to have sufficient stocks to service customer orders and, at the same time, not to unnecessarily accumulate stock. Therefore, the points to be considered while deciding the reorder levels are as follows.
The lead-time for suppliers to deliver the stock.
The delivery time specified by the customer.
The stock-in-hand to satisfy orders in the meantime.
In simple mode, Tally accepts the quantities that you specify. In advanced mode, it considers the past consumption patterns to suggest reorder levels. You can however, choose to define your own reorder levels. You may also specify the minimum quantity of the item to be ordered, either in simple or advanced mode. The purpose of specifying reorder levels is to obtain a report that indicates the quantity of a Stock Item that you must order. More: Specifying Reorder Levels Alter Reorder Levels and minimum quantities Obtain Reorder Status and Quantities to order
Specifying Reorder Levels
Go to Gateway of Tally > Inventory Info > Reorder Levels Select a group of Stock Items from the List of Groups , to specify Reorder Levels for the Stock Items in the Specify Reorder Levels screen. For each item in stock, you can define a Reorder Level and the Minimum Order Quantity. If you click Simple R eorder button, the consumption alternatives will not be available and hence you have to input the quantities. N o t e : The option Purchase Order
Reorder Levels is displayed in Processing is enabled in F11:
the Inventory Features .
Info. menu only if A l l o w
The Reorder level screen appears as follows:
The options that you have while defining Reorder Level and Minimum Order Quantity for individual stock items are
as follows.
Reorder Level/Quantity Enter the level/quantity in this field.
Advance Parameter for Reorder Level (Consumption for the Last) This field lets Tally calculate the reorder level/order quantity based on the total consumption in the past for a chosen period.
Period The choices for periods are: Days, Weeks, Months and Years. Note that it is not the average consumption for the period but the total consumption. Enter zero (0), if you do not want Tally to calculate the reorder level based on the consumption of the item in the past.
Criteria Choose whether you want the higher/lower of the two, i.e., input/calculated level/quantity.
Rounding Method Specify whether the calculated level/quantity must be rounded and also the method of rounding.
Minimum order quantity You can specify the minimum order quantity required.
Altering Reorder Levels and Minimum Quantities
There are two ways of altering the Reorder Levels and the Minimum Order Quantities defined earlier. 1.
Go to Gateway of Tally > Inventory Info > Reorder Levels
Select the Group of the Stock Items from the List of Groups to display the Specify Reorder Levels screen. Make the necessary changes and accept Yes to save. OR 2.
Go to Gateway of Tally > Display > Statements of Inventory > Reorder Status
Select the Group of the Stock Items for which you want to make changes to display the Inventory Reorder Status screen. Drill down the fields Reorder Level/Minimum Order Quantity to display the Specify Reorder Levels screen. Make the necessary changes and accept Yes to save.
Obtain Reorder Status and Quantities to Order
G o to Gateway of Tally > Display > Statements of Inventory > Reorder Status Select a Group of Stock Items from the List of Groups. The Inventory Reorder Status screen displays.
This report gives you the reorder status of Stock Items categorised under the selected Group. Click the button A : Reorder On l y to remove those items for which there are no orders to be placed. Apart from identifying the quantity to be ordered, you can move your cursor on the fields and drill down for more information.
Name of Item Press Enter on this field for information on suppliers of this Stock Item and the details of their previous supplies.
Closing Stock Drill down for Item Monthly Summary (Inwards and Outwards) and other details.
Purc Orders Pending Press Enter on this field for details on the pending purchase orders.
Sales Orders Due
Drill down to know the details on the sales orders, which are due, in other words, free stock available for sale.
Reorder Level Drill down by pressing [Enter] to display the Reorder Level Specification screen for the Stock Item.
Short fall Tally calculates this value.
Min Reorder Quantity Drill down by pressing [Enter] to display the Reorder Level Specification screen for the Stock Item.
Locations/Godowns
Locations/Godowns are places where Stock Items are stored. You can specify names where Stock Items are stored such as warehouse, shelf, and so on. In a business, it always becomes necessary to distinguish between the stock held onsite and in the warehouse. You can do this by creating two separate godowns. Tally had a default Godown named Main Location. You may even alter Tally's default godown and create a new one. Tally permits creating any number of godowns, which you can group and subgroup to match the structure you need. Go to Gateway of Tally > Inventory Info. > Locations/Godowns N o t e 1 : The term Locations is displayed in the Inventory selected in Use ing Terminology of in Gateway screen. If I n d i a / S A A R C is selected, the term G o d o w n s N o t e 2 : You can enabled in F11:
Info. menu if I n t e r n a t i o n a l is of Tally > F12:Configure displays.
create L o c a t i o n s / G o d o w n s only if Maintain Features.
More: Creating Locations/Godowns Displaying and Altering Stock Locations/Godowns
Multiple
Godowns is
Creating Locations/Godowns
You can create Locations/Godowns in Single mode and Multiple mode
Creating a Single Location/Godown G o to Gateway of Tally > Inventory Info. > Locations/Godowns > Create (under Single Godown ) The Location/Godown Creation screen displays:
A brief explanation on each of the fields in Location/Godown Creation screen follows.
Name Specify the name of the Location/Godown.
Alias Enter an alias name for the Location/Godown name, if required.
Under Specify the Location/Godown under which the Location/Godown is to be categorised. Use Alt + C to create the parent Location/Godown if it is not in the list. Select Primary , if it is not a sub Location/Godown of any Location/Godown.
Allow Storage of Materials Tally permits you to create a Location/Godown, where you may not store materials but treat it as a virtual Location/Godown. Virtual Location/Godown is useful in cases like Head Office, which may have many different stock points under it that store materials. Hence, Head Office acts like a primary Godown. For instance, designate London as a virtual Godown with Wimbledon Warehouse, Harrow Warehouse and Brixton Warehouse as subGodowns. These sub-Godowns will allow storage of materials.
Creating Multiple Locations/Godowns G o to Gateway of Tally > Inventory Info. > Locations/Godowns > Create (under Multiple Godowns )
The Multi Godown Creation screen displays:
Under Select the parent group under which you want the new Godowns to be created. If you select any Godown other than All Items , then all the new Godowns being created, will be created under this Godown. Selecting All Items gives you the flexibility of specifying the parent of each new Godown created.
S No. The serial number is auto generated.
Name Specify the name of the Godown.
Under If you select All Items in Under field at the top, you must specify a parent Godown here. Use Alt + C to create a new parent from this field. If you select a Godown in Under field, that Godown displays automatically in this column.
Displaying and Altering Stock Locations
You can display/alter the Godowns in single and multiple modes. It is similar to Displaying/Altering Stock Groups in single and multiple modes. Refer Displaying/Altering Stock Groups for more details.
To display a single stock Location/Godown Go to Gateway of Location/Godown)
Tally
>
Inventory
Info.
>
Locations/Godowns
>
Display
(under
Single
To display multiple stock Locations/Godowns at a time Go to Gateway of Tally > Inventory Info. > Locations/Godowns > Display (under Multiple Locations/Godowns)
To alter a single stock Location/Godown Go to Gateway of Location/Godown)
Tally
>
Inventory
Info.
>
Locations/Godowns
>
Alter
(under
Single
To alter multiple stock Locations/Godowns at a time Go to Gateway of Tally Locations/Godowns)
>
Inventory
Info.
>
Locations/Godowns
>
Alter
(under
Multiple
You can delete a stock location via Single Location Alter by pressing [Alt]+[D]. However, you cannot delete a stock location with sub-locations. The lower levels must be deleted first.
Voucher Types
Refer the section on Voucher Types in ing Information because the voucher types available in inventory are similar to the ones in ing. You may alter the existing inventory voucher types or create new ones based on the existing ones. Go to Gateway of Tally > Inventory Info. > Voucher Types > Create/Display/Alter Note: Refer
You can use the Stock the chapter on Bill of
Journal voucher type to create Materials for more details.
a
Manufacturing
Journal.
Units of Measure
Stock Items are purchased or sold on the basis of quantity. The quantity is measured by Units. Hence, it is necessary to create Units of Measure. You need to create Units of Measure for all the Stock Items. You can have simple units such as numbers, meters, kilograms, and pieces or compound units like box, where, say, one box equals ten pieces. Go to Gateway of Tally > Inventory Info. > Units of Measure
More: Creating a Unit of Measure Compound Units
Creating a Unit of Measure
Go to Gateway of Tally > Inventory Info > Units of Measure > Create The Unit Creation screen displays.
A brief explanation on each of the fields in Unit Creation screen follows.
Type Symbols are of two types: Simple and Compound. Simple units are considered as specified by you; Tally just checks for duplication. Tally defaults to Simple, and if you want to change to Compound, use [Backspace] to go back and select Compound from the Types of Units list.
Symbol Define the symbol of the unit, e.g., Nos. This symbol is used in all displays and printouts.
Formal Name Specify the formal name of the symbol, e.g. Numbers. This explains the symbol, which is also used during the consolidation of data of different companies, where the symbols might be the same but are assigned to different units. The formal name will be used to match them.
Number of decimal places If you want to use the unit in fractions, say for a kilogram you may have to use grams as well, specify the number of decimal places. For kilograms, you would give three decimal places to accommodate up to 999 grams. You do not normally want a decimal place for units like numbers; you can specify 0 in such cases. N o t e : You can specify 0 to 4 decimal places. The Unit of Measure or transliterated but will appear in the Language created.
cannot
be
translated
Compound Units
A Compound Unit is a relation between two Simple Units. Hence, before you create a Compound Unit, ensure that you have already created two Simple Units. For example, there are two Simple Units Nos (Numbers) and Doz (Dozen). Now define the relation between Nos and Doz, as one dozen equals twelve numbers. N o t e : Use the U p arrow or C o m p o u n d from the popup
Backspace menu.
key
to
highlight
the
Type
field.
Select
Select Compound from the Types of Units in the Type field. Select Doz in the First Unit from the Units list. Enter 12 in the Conversion field and select Nos in the Second Unit field. Accept Yes to save. More: Displaying and Altering Units of Measure
Displaying and Altering Units of Measure
To display Units of Measure, Go to Gateway of Tally > Inventory Info. > Units of Measure > Display Select the Unit of Measure you would like to view from the Units list. You can select a compound unit or a simple unit from the list. The Unit Display screen displays. In display mode it is not possible to make any changes. To alter Units of Measure Go to Gateway of Tally > Inventory Info. > Units of Measure > Alter Select the Unit of Measure you want to alter from the necessary changes and accept Yes to save.
Units list. The Unit Alteration screen displays. Make the
You can delete a Unit of Measure from this screen by pressing Alt + D. However, you cannot delete a Unit of Measure that is part of a compound measure. You must delete the compound measure first.
Price List
Price Lists are useful for orders and invoices. An up-to-date price list helps in decision-making even at the lower levels of the organisation and quickens the sales process. Tally assists in creating quantity based pricing with complex discount structure. Price Lists are available only for inventory items and hence the feature is available only if inventory and invoicing are activated for the company. You can have one or more price lists. You require more than one price list, when you have different price structures/levels for different purposes, usually, different groups of customers requiring different discounts or dealing in different products.
Price Levels
In Tally, you can assign specific price lists called Price Levels to customers, so that only the relevant prices are used during entry of orders and invoices. Before you begin to create Price Lists, you should decide whether you want different price levels. You might want different price levels for various purposes, such as different types of customers like wholesale customers, retail customers, export customers and so on. Each customer type could have a different discount structure.
Creating Price Levels
Ensure that you have set the company for s with Inventory. Set the following fields to Yes in F11: Features > F2: Inventory screen. 1.
Allow Invoicing (If you do not set this field to Yes, the options for Price Lists will not be available.)
2.
Set Use Multiple Price Levels to Yes.
3.
Type out the price levels, one by one, in the Company Price Levels screen.
4.
Press CTRL+A to accept the screen and return to the Company Operations Alteration screen (F11: Features). Set the other options as required and accept Yes to save.
Alter Price Level names Follow the same procedure to alter the name of a price level. You can simply overwrite the names you specified previously and save the changes.
Asg Ledger s to Price Levels
Creating Price Lists in Tally provides an option in party (debtor and creditor) ledger s, with the help of which you can assign/tag a specific Price Level to the . You can assign only one Price Level to an . You can choose the Price Level that you want to assign to the Ledger by selecting the Price Level from the Price Levels list in the Pricing Level Applicable field. Select Not Applicable if you do not want to assign any Price Levels to the Ledger. If you want to assign Price Levels to ledgers created earlier, alter the ledger , tab down to Applicable field and select the applicable price level from the list.
Pricing Level
Tab down to Pricing Level Applicable and select Export. Set the other options required. Accept Yes to save. The Pricing Level can be changed to reflect the current circumstances. For this, simply alter the ledger and select a different Pricing Level option.
Creating and Using Price Lists
The Price List option appears in the Inventory Info. menu only if you have already created Price Levels . Go to Gateway of Tally > Inventory Info > Price List Select a group from the List of Groups .
Under Group This is the stock group of the Stock Items for which you want to define the Price Lists.
Price Level Select a Price Level to assign to the Stock Group.
Applicable From Specify the date from which the Price List is applicable.
The columns you see are as follows.
Sl. No This column has auto-generated serial numbers to track the number of items in the Price List.
Name of Item This column has the name of the Stock Item. You can define the Price List for each item.
Quantities - From & Less Than These fields are repeated for an item and begin with a blank for 0 items and end with a blank for any number of items. This is useful for quantity based pricing and discounts. You can create a staggered quantity price structure, if required. If you do not require quantity based pricing, leave From and Less Than fields blank.
Rate & Discount (if any) For each quantity band, give a specific price or maintain the same price for all bands, but define different discounts. You can use different methods for different items.
Historical Details (Rate and Disc%) If you have a different Price List on a date before the Applicable From date, Tally displays it here.
Cost Price In this column, the Cost Price (based on the Costing Method set for it) of the item is displayed to help decide the prices.
Price Levels in Voucher Entry - Invoicing
The price levels that you define automate the invoice pricing and help to avoid errors. You can configure the entry so as to prevent the usage of a different price list than the one that is set. To configure for preventing changes made to the price level settings in a voucher Go to Gateway of Tally > F12: Configure > Invoice/Orders Entry
Set Allow modification of ALL fields during entry to No to prevent changes made to prices. If you set it to Yes , you can override the prices already defined. Consider the following example 1.
Go to Gateway of Tally > ing Vouchers > F8: Sales
2.
Select As Invoice
2.
During voucher creation, there is an additional field Price Level and it is already set for the selected party on the basis of assignment made earlier (the cursor skips the field). If you had not assigned any Price Level for the ledger earlier, the cursor moves to this field, allowing you to make a choice. On selecting the stock item and the quantity, the price is filled in automatically and the cursor skips the Rate and Amount fields also.
Voucher Entry
A Voucher is a document that contains details of a financial transaction. For every transaction, you can use appropriate Tally Voucher to enter the details into the ledgers and update the financial position of the company. Mainly there are two types of Voucher Entry:
ing Vouchers
Inventory Vouchers
You can set the configuration for entry to allow only those features, which you require while entering vouchers. In the Voucher entry configuration, Selectively set only those features to Yes. (This is further explained under advanced usage). Go to Gateway of Tally > F12: Configure > Voucher Entry
More:
The Voucher Creation screen Special keys for voucher narration field
Voucher Creation Screen
This screen is divided into three parts Main Voucher Entry Area Button Bar Area Calculator Area
Main Voucher Entry Area The Main Voucher Entry Area is where you enter all your transactions. This area provides fields for Date, Ledger Name and Amount as well as additional pop-up screens that are dependent on your voucher configuration and the nature of transactions you make.
Button Bar Area The Button Bar area displays buttons that provide quick interaction with Tally. Buttons that are relevant to the current task are enabled and the other buttons are disabled.
Calculator Area The Calculator area provides the calculator functions where you can enter any number of mathematical formulae for complex calculations.
Mouse conventions
Command Click
Action Press the left mouse button
Double-click
Press and release the left mouse button twice, without moving the mouse pointer off the item
Choose
Position the mouse pointer on the item and click the left mouse button.
Select
Position the mouse pointer on the item and double-click the left mouse button.
Switching between Screen Areas
Press
Use the keys on the keyboard in the combination shown.
Switching between Screen Areas The Main Voucher Entry Area is the active area by default on the Voucher Creation screen. Press Ctrl+N to navigate to the Calculator Area and press Ctrl+M to toggle back to Main Voucher Entry Area . A green bar highlights the active area of the screen. N o t e : Press A l t + C
to
use
calculator
when
at
amount
field.
Special Keys for Voucher Narration Field
ALT+R: Recalls the Last narration saved for the first ledger in the voucher, irrespective of the voucher type. CTRL+R: Recalls the Last narration saved for a specific voucher type, irrespective of the ledger.
Checking the accuracy of the vouchers To check the accuracy of the vouchers that you have entered: 1. Go to Gateway of Tally > Display > Day Book 2. Select F2: Period from Button Bar and enter the period for which you want to view Vouchers. N o t e : It particular
defaults to period.
the
current
date
only
but
you
may
display
all
the
transactions
for
a
3. Select F1: Detailed You can check the vouchers for correctness. To correct a mistake, position the cursor on the item where you have found the error and press Enter. Tally displays the voucher details for alteration. The alteration facility is subject to security and access rights. All alterations are available for audit.
Types of Vouchers
Tally is pre-programmed with a variety of ing vouchers, each designed to perform a different job. The standard vouchers are: 1.
Payment Voucher
2.
Receipt Voucher
3.
Contra Voucher
4.
Sales voucher
Sales Orders Sales Vouchers/Invoices Delivery Notes Rejection In
5.
Purchase Voucher
Purchase Orders Purchase Vouchers Goods Receipt Notes Rejection Out
6.
Journal Voucher
Credit Notes Debit Notes Journal Memo Voucher Reversing Journal
Stock Journal Physical Stock
You can alter these vouchers to suit your requirement and also create new vouchers. For example, if you wish to distinguish between cash and bank payments you can create vouchers to do this. The function of each voucher type is explained.
More: Contra Entry (F4) Payment Entry (F5) Receipt Entry (F6) Journal Entry (F7) Sales Entry (F8) Sales and Purchase Voucher Entry Unconventional Vouchers Creating ing Vouchers in Tally Sales and Purchase Voucher Entry
Contra Entry (F4)
According to ing rules, Contra Entry is a transaction indicating transfer of funds from: Cash to Bank Bank to Cash Bank to Bank
To view the Contra Voucher Entry Screen: 1. Go to Gateway of Tally > ing Vouchers 2. Select F4: Contra from the button bar or press F4 More: Contra Entry - Single Entry Mode Contra Entry - Double Entry Mode Note: 1. Use the buttons on the right-hand side of the Tally. 2. Press [Enter] wherever the cursor is placed to
screen know
to the
Explore Depth
the of
Potential
Tally!
of
Contra Entry - Single Entry Mode
Contra Voucher creation screen appears in Single Entry Mode by default. You are prompted to choose the , which will receive the amount (the ledger that has to be debited). To view Contra Voucher creation screen in Single Entry mode Go to Gateway of Tally > ing Vouchers > Select F4: Contra For example, to transfer funds from Cash to Bank : 1.
Debit the Bank
2.
Credit the Cash
The entry appears as shown.
The ledger selected in State Bank of India is the destination ledger and it is debited Advantages of Single Entry Mode: 1.
Faster data entry.
2.
Selection of:
Multiple Ledgers (to be credited) with a Single Ledger (to be Debited) OR Multiple Ledgers (to be debited) with a Single Ledger (to be Credited) - depending on the nature of transaction.
Contra Entry - Double Entry Mode
To select multiple Debit and Credit ledgers in the Double entry mode, set Use Single Entry Mode for Payment/Receipt/Contra to No in F12: Configure . Entering in Double Entry Mode 1.
Go to Gateway of Tally > ing Vouchers
2.
Select F4: Contra from the Button Bar or press F4 .
The entry displayed in Single Mode appears as follows in Double entry mode: Here cash is transferred from Cash to Bank .
Use F2: Date to change the date of the voucher. If you require Dr/Cr instead of To/By –> as explained in the Configuration section, activate the required feature in F12: Configure .
1.
In the above example, we have changed the date to 2nd April 2001 and we have Dr/Cr instead of To/By .
2.
As the Contra voucher is active, the Buttons of the other voucher types of Payment, Receipt, Journal, Sales and Purchase are visible.
Payment Entry (F5)
To view the Payment Voucher entry screen: 1.
Go to Gateway of Tally > ing Vouchers
2.
Select F5: Payment from the Button Bar or press F5
By Default, the Payment Entry screen appears in Single Entry Mode (The option Use Single Entry mode for Pymt/Rt/Contra is set to Yes in F12: Configure). For example, the company settles expenses of conveyance, staff welfare, postage and stationery through cash all in one voucher. The entry appears as shown below.
You are prompted to choose the cash or bank ledger, which will pay the amount (the credit ledger). More: Payment Entry - Double Mode Payment Entry – Single Narration Payment / Receipt as Contra Warn on Negative Cash Balance Cheque Printing How to print Cheques Trouble-shooting Cheque printing TDS Payment
Payment Entry - Double Mode
If you want the payment entries to be entered in double entry mode, then set Use Single Entry Mode for Payment/Receipt/Contra to No in F12: Configure To enter the payment entry in Double Entry Mode, Go to Gateway of Tally > ing Vouchers > F5: Payment A Payment entry entered in double entry mode appears as shown,
Advantages of Double Entry Mode You can select any number of ledgers to be debited and credited in the payment voucher. You can view on the screen whether a ledger is debited or credited thus allowing you to cross-.
Payment Entry – Single Narration
If you want the narration details for every ledger you debit or credit (Single narration), you can configure Tally's Narration details accordingly. To do so, 1.
Go to Gateway of Tally > s Information > Voucher Types > Alter
2.
Select the required Voucher Type .
3.
Enable the option Narrations for each Entry and accept the details.
4.
Return to ing Vouchers on Gateway of Tally and enter a payment voucher as required.
Given below is an example of a Payment transaction with narrations for each entry:
The entry consists of both common narration and narrations for each entry. In case of multiple debit/credit entries, you can give single line narration separately for every ledger selected.
Payment / Receipt as Contra
The Contra Voucher is used to indicate transfer of funds from Bank to Cash Bank to Bank Cash to Bank .
However, for s who wish to use the Payment and Receipt vouchers for this nature of transaction, Tally has the flexibility of defining Payment and Receipt behaviour as per Contra voucher. 1.
Go to Gateway of Tally > ing Vouchers
2.
Select F5: Payment from the Button Bar or press F5 .
3.
Activate the option Use Payment/Receipt as Contra to Yes in F12: Configuration screen.
4.
Accept the screen and save.
The Screen appears as shown.
If Use Payment/Receipt as Contra option is set to No in F12: Configure screen, the cash and bank s will not be displayed.
Warn on Negative Cash Balance
You can configure Tally to prompt you with a warning when the Cash ledger reaches a negative balance. To activate Warning on Negative Cash Balance : 1.
Go to Gateway of Tally > ing Vouchers
2.
Activate the option Warn on Negative Cash Balance to Yes on the F12: Configure screen.
3.
Accept the screen to save.
Example: Let us assume a cash balance of Rs.54000 and you need to make a payment of Rs.55000 towards advertising expenses. This results in a negative balance. The entry is displayed as:
Tally prompts you with a box that displays the warning and also the credit cash balance in RED colour. This will help you decide whether to proceed with the entry or not.
Cheque Printing
You can choose to print cheques directly from Tally. Cheques will be printed while printing a Payment Voucher.
Enabling Cheque Printing 1.
Go to Gateway of Tally > F11: Features > ing Features
2.
Set Enable Cheque Printing and Set/Alter Cheque Printing Configuration to Yes.
Company Operations Alteration screen appears as shown.
Once the option Set/Alter Cheque Printing Configuration is activated to Yes, you will get the following screen.
Company Name on Cheque: To print the company name on the cheque for signature purposes, mention the name of the Company (for example, ABC Company). If you do not want Tally to print the name, you can leave it blank. Many banks give cheques with your company name printed. Name of Banks Select the Bank from the Bank s list. You will have to fill in the dimensions of the cheque. Tally accepts defined cheque dimensions. Take the bank’s cheque book and measure the dimensions of a cheque leaf carefully in millimeters and fill in the above form. You may need to correct it after trying out a couple of cheques so that the positioning is accurate. The placing of the cheque in the printer also determines the printing. To avoid mistakes trial could be made on photocopies of a cheque before using an actual cheque leaf.
N o t e : Salutation fields example, Director) Note:
All
dimensions
are
must
for
be
signatures
more
than
and
0
for
naturally
cheques
follow
to
the
be
Company
successfully
name
(for
printed.
For ABC & Company Director If your cheque has two signatories, both can be specified. Both could be the same salutation or different. For example, one could be Director, the other could be Secretary. Give details of whatever you are using currently. Many banks will pre-print both the company name and the salutation in their cheques, in which case you can leave them blank. You are now ready to print the cheque. that this option is available only for the banks for which you have Ledger .
Printing Cheques
A fter making the desired settings to print the cheque, Go to Gateway of Tally > Voucher Entry > F5: Payment Note:
Cheque
Printing
option
is
available
only
from
Payment
Voucher.
Name on the Cheque You debit the party and give the bill reference details if any. Credit the bank for which the cheque dimensions were set up. In this example it is the State Bank of India. The name of the Debited party appears next to the field Name on the cheque by default. You can change the name on the cheque if necessary. Cross Cheque using This is filled in by the most common words used - payee. You may change it if required.
Enter the Cheque Number (Ch. No.) and save the Voucher. Then, you will get the Cheque Printing sub-screen appears as shown below:
Select Yes to print the cheque.
Trouble-shooting Cheque Printing
1.
Go to Gateway of Tally
2.
Select F11: Features and check the dimensions.
3.
Ensure that you have not left any field blank other than the salutation fields.
Trial and error is the only way to get the printing in the right positions. Therefore do not panic if some words do not get printed in the correct positions. Change the set-up a couple of times to set it right. This is necessary to be able to print correctly on different cheque styles used by different banks.
Receipt Entry (F6)
Transactions ing for money received are entered into Tally through the receipt voucher. To view the Receipt Entry screen: 1.
Go to Gateway of Tally > ing Vouchers
2.
Select F6: Receipt from the button bar or press F6
Similar to Payment and Contra vouchers, the Single Entry Mode appears for Receipt Entry as well. For example, if your company receives money from a customer for an earlier transaction: Credit the customer and debit the Cash , if you receive cash or Debit the Bank where you need to deposit the money, if you receive cheque.
The entry in double-entry mode is displayed as shown below:
More: Printing Receipt Voucher and Formal Receipt
Printing Receipt Voucher and Formal Receipt
For example, the company receives a certain amount from the customer against a particular invoice and a Formal Receipt has to be issued acknowledging receipt for the same. If you want the Receipt voucher to be printed: 1.
Go to Gateway of Tally > s Info > Voucher Types > Alter
2.
Select the Voucher Type Receipt
3.
Set the option Print after saving voucher to Yes.
The voucher prints as:
Note: Print
The information Command.
required
can
be
configured
in
F12:
Configure
after
giving
the
When you enter a receipt voucher, Tally prompts you to print the Formal Receipt (to be issued). Tally's Formal Receipt printing fulfils this requirement. To activate this facility: 1.
Go to Gateway of Tally > s Info > Voucher Types > Alter
2.
Select the Voucher Type Receipt
3.
Set the option Print Formal Receipt after saving to Yes
4.
3. 4.
Accept the same
The Formal Receipt prints as
N o t e : An additional field Name on Receipt appears in the Receipt The receipt will be printed either with the Ledger Name or the name on Receipt field.
Voucher screen. given in the N a m e
Journal Entry (F7)
Journal entries are used to adjust the debit and credit amounts without involving the cash or bank s. Hence, they are referred to as adjustment entries. To go to the Journal Entry Screen: 1.
Go to Gateway of Tally > ing Vouchers
2.
Click on F7: Journal on the Button Bar or press F7 key
For example, there may be entries made for interest accrued or interest to be paid. If a party is involved in such a transaction the entry will be: 1.
Debit the Party
2.
Credit the Interest
The entry appears as shown below:
Note:
Journal
More: Cash s in Journals TDS Deduction in Journals VAT in Journal
entries
are
usually
used
for
finalization
of
s.
Cash s in Journals
Journals are adjustment entries, which do not involve Cash and Bank . However in many cases companies use journals to for day-to-day transactions where Cash or Bank s are required. 1.
Set Allow Cash s in Journals to Yes in F12: Configuration .
2.
Go to Gateway of Tally > ing Vouchers > Select F7: Journal
3.
Press the spacebar at the Debit or Credit fields.
N o t e : All Cash s and Bank s. Accordingly the journal entry
s has to
are be
displayed made.
in
the
List
of
Ledger
Sales Entry (F8)
Sales vouchers are used when the company sells some goods to customers. To view the Sales Voucher Creation Screen: Go to Gateway of Tally > ing Vouchers > Select F8: Sales. For example, the company sells some software on credit. In this case, the company has to for Sales and Sales Tax separately, if tax has been collected on the transaction. The screen appears as shown below:
When a sales transaction is made, a document detailing the transaction (item name, tax, etc) has to be given to the buyer or debtor as proof of purchase by him. This document is called "Invoice" or "Bill" or "Cash Memo". Tally provides the option of creating Invoices.
Enabling Invoicing 1.
Set Allow Invoicing to Yes in F11: Features
2.
The Sales Voucher Creation Screen appears as Invoice by default.
3.
Go to Gateway of Tally > ing Vouchers > select F8: Sales
Sales entries can be made in the Voucher as well as Invoice Formats. Invoicing and sales invoicing are almost the same as sales voucher entry. The advantage of using the invoice format for sales entry is that it allows automatic calculations of taxes and duties (ledger s classified under the group 'Duties & Taxes').
To enable automatic calculations of taxes and duties: 1.
Set Calculate Tax on Current Sub-total to Yes in F12: Configure on the sales invoice screen
2.
Accept the screen to save the voucher.
The default Sales Invoice screen appears as shown below.
When you start entering the voucher, Tally prompts for the Sales Ledger to be allocated. Any number of stock items or ledgers can be selected one after another to enable faster data entry. To activate this: 1.
Set Use Common Ledger A/c for Item Allocation to Yes in F12: Configure on the invoice entry screen.
2.
Accept the screen to save the voucher.
Types of Invoice There are two types of Invoices: Sales Item Invoice - allows you to select Items for invoicing Sales Invoice - allows you to select Ledgers for invoicing
Sales Item Invoice
Invoicing is generally used for sale of stock where the details of the items sold are listed. Selecting the Item Invoice allows you to select the stock items that need to be invoiced. Trading and manufacturing organisations commonly use this format. On the Sales invoice screen, click on the button Item Invoice which is displayed on the Button Bar on the right side of the screen and the Sales Item Invoice appears as shown below:
Tally's Item Invoice mode displays the list of stock items, which can be invoiced as required. N o t e : The Item
Invoice
button
toggles
with
Invoice .
Sales Invoice
Sales Invoice is generally used by professionals such as doctors and consultants who require to invoice for certain services provided such as consultancy charges, professional fees. Trading and manufacturing organisations also use the Invoice for invoicing service charges. On the Sales entry screen, click on Acct Invoice button which is displayed on the Button Bar on the right-hand side of the screen to display the Sales Invoice screen as shown.
T ally's Invoice mode displays the list of ledger s, which can be invoiced as required. This is unlike Item Invoice where Tally displays the list of stock items. N o t e : The Acct
Invoice
button
toggles
with
Item
Invoice.
Sales and Purchase Voucher Entry
In s-with-Inventory Companies where Tracking Numbers is NOT activated You do not get the voucher types Receipt Note and Delivery Note in the Sales and Purchase Voucher submenus. In addition to the above particulars that are applicable for all types of vouchers, sales and purchase vouchers have special inventory considerations for s-with inventory companies. Sales and Purchase ledger s must have the option Are Inventory Values Affected set to Yes for this section. Unless this option is set to Yes in the Ledger creation screen, it is not possible to make a Sales entry or a Purchase entry. Similarly, Sales and Purchase s affect inventory. Hence, when you enter a Sales or a Purchase Voucher, an Inventory Allocations for sub-screen pops up as soon as you enter the ledger requiring you to give inventory item details. The inventory details that you mention in an ing voucher (like Sales and Purchase Voucher), affects stocks by immediately updating them, only if Tracking Numbers are not activated in [F11]: Features. The information that you need to give in the inventory allocation sub-screen depends upon the features enabled for the company. More: Inventory allocations VAT
Inventory allocations
Inventory items need to be considered in financial vouchers if you are using ledger heads that have the option Are Inventory Values affected set to Yes. The inventory details that you give in an ing voucher (like Sales and Purchase Voucher), affects stocks by immediately updating them, only if Tracking Numbers are not activated in F11: Features. The information that you need to give in the inventory allocation sub-screen depends on the features enabled for the company. A typical inventory allocation sub-screen appears as shown.
Name of Item Select item from the list of items or create a new item by pressing Alt+C Location If you have more than one location you must specify the location to which this item relates. 1.
Set Maintain Multiple Godowns to Yes in the F11: Features.
2.
Specify the Godown, Quantity, Rate and Amount for the item.
You can have different Godown locations.
Quantity
Enable the option Actual and Billed Quantities to Yes. The actual quantity updates stock and the billed quantity affects the s. Give the quantity either in the main unit or the alternate unit. You may even specify quantities in both units, for example 100 bars=150 Kgs. Rate Enter the rate for the Stock Item. If you have entered Standard Rate for the item (Standard Cost and Standard Selling Price – see Item Master), the voucher will select the relevant standard rate for that date by default. You can modify it while entering the voucher. Per Enter the unit of measure for the quantity of the item here. This can be the main unit or even the alternate unit. Amount The quantity multiplied by the rate per unit is the amount. End of List In all multiple allocations or selections, you have to select the option End of List or press Enter at the first blank field. This would accept the multiple allocations and take you back to the parent screen. For example, Multiple Locations, Batches or Items. Batch Wise Details If you wish to maintain the Inventory in Batches, you need to set the option Maintain Batch-wise Details to Yes in F11: Features. If required, you can also set the option Set Expiry Dates for Batches to Yes. Once you do this, you will see the option Maintain in Batches in the Stock Item Creation Screen. If you set this to Yes, you will find the following in the Item Allocation screen: Track Date of Mfg Use expiry dates
Batch Number Select a batch number from the list of existing batch numbers, or create a new number for a new batch. Mfg. Date Mfg Date appears only if it is activated. Enter the date of manufacture. This enables you to set expiry date for the
batch as a period from the date of manufacturing. For example, three months from the date of manufacture. Expires on This field appears only if it is activated. Enter the date of expiry or a period from the date of manufacture. If you have set Allow Use of Expired Batches to Yes for an item, you cannot issue them after the expiry date.
Additional Information Manufacturers and traders, who deal in perishable products, need to maintain batch-wise details of stock items. The manufacturing date and expiry date options are entered in Tally to maintain batch-wise details. To ensure that the expired items do not appear in your Stock Journals and Sales Invoices, set Honor Expiry Dates usage for Batches to Yes in F12: Configure of the Sales Invoice screen. This keeps track of the batches. If you have two batches of the same product in stock, and one batch has crossed the date of expiry, the sales invoice will not display the balance amount of the expired stock, thus honouring the expiry dates which you have set for your stock items. Refer Activating batch-wise details, Setting manufacturing date and Expiry dates for more details.
Unconventional Vouchers
Unconventional Vouchers are the special vouchers that are used to record provisional or non-ing transactions. Use unconventional vouchers to remove unnecessary entries from the main books of s and make information available. These vouchers enable valuable reports in of provisional s and forecasting. Refer to Scenario Management for more information. More: Memo Voucher Memorandum Voucher Optional Voucher Optional Vouchers Reversing Journals Reversing Journal Post-dated Vouchers Post-dated Vouchers
Memo Voucher
This is a non-ing voucher and the entries made using memo voucher will not affect your s. In other words, Tally does not post these entries to ledgers but stores them in a separate Memorandum .
Uses of Memo Vouchers Making suspense payments Consider a company gives its employee cash to buy office supplies, the exact nature and cost of which are unknown. For this transaction you can enter a voucher for the petty cash advance, a voucher to record the actual expenditure details when they are known, and another voucher to record the return of surplus cash. However, a simpler way of doing it is to enter a Memo voucher when the cash is advanced, and then turn it into a Payment voucher for the actual amount spent, when the details are known. Consider the following Example. The Company pays its employee Rs. 500 as petty cash advance for Office Expenses. The following entry has to be ed. 1.
Enter Date
2.
Debit office supplies
2.
Vouchers not verified at the time of entry If you do not understand the details of a voucher you are entering, you can enter it as a Memo voucher and amend it later when the details are available.
Items given on approval Generally completed sales are entered into books. Incase items are given on approval , use a Memo voucher to track and convert it into a proper Sales voucher. You can delete the memo voucher if the sale is not made.
Memorandum Voucher
To view all the memorandum vouchers: Go to Gateway of Tally > Display > Exception Reports > Memorandum Vouchers.
Note:
You
can
also
view
memorandum
vouchers
from
the
Day
Book.
You can alter and convert a Memo voucher into a regular voucher when you decide to consider the entry into your books. Use Scenarios to see the effect of Memo entries on reports and statements.
Optional Voucher
This is also a non-ing voucher. Unlike a Memo voucher, this is not a separate voucher type. You can mark an existing voucher (for example, a payment voucher or a receipt voucher) as Optional . Press CTRL + L or click on Optional from the Button Bar. This button toggles with Regular . By marking a voucher Optional , the voucher does not get posted anywhere but remains in the Optional . You can make a voucher type default to Optional if you need to create a new voucher type or alter an existing voucher type. Go to Gateway of Tally > s Info > Voucher Types> select a Voucher Type > Set Make Optional as default to Yes .
Enabling Optional Vouchers 1.
Go to Gateway of Tally
2.
Select F11:Features > ing Features to display Company Operations Alteration screen
3.
Set Use Rev. Journals & Optional Vouchers? to Yes .
4.
Accept the screen to save.
Use of Optional Vouchers If you do not want a transaction that is incomplete to affect the s, you can mark this as an Optional Voucher. Once the transaction is complete, modify the voucher and post it as Regular Voucher. For example, Performa sales invoice. In fact, an optional sales invoice prints as a Performa Invoice. Optional Vouchers allow you to see the impact of transactions without actually posting them. Optional Vouchers can be used to forecast future sales. For example, create a New Voucher Type - Sales Forecast. Record future sales projections using this voucher type.
Let us consider the following example. On 30th June you want to view the Balance Sheet as of today but June rent is not due for payment until the first week of July. This liability is not reflected in the Balance Sheet. To overcome this, enter an Optional Voucher dated 30th June. The above entry is made as shown below 1.
Enter Date
2.
Select Optional from the button bar
3.
Debit Rent
3.
When you view the Balance Sheet, generate a report with the Optional Voucher included. The Optional Voucher should be already defined as a Scenario (Refer section on Scenario Management for more details). The voucher affects the report temporarily. Once you quit the report, Tally does not retain the Scenario details. The next time you view the balance sheet, it will not include the effect of the Optional Voucher unless you include it. N o t e : Use S c e n a r i o s statements
to
see
the
effect
of
Optional
voucher
entries
on
reports
and
Optional Vouchers
You can view all optional vouchers in the Optional Vouchers Go to Gateway of Tally > Display > Exception Reports > Optional Vouchers. Note:
You
can
view
them
from
the
Day
Book
as
well.
Reversing Journals
Reversing Journals are special journals that are automatically reversed after a specified date. They exist only till that date and are effective only when they are included in reports like the Balance Sheet . These are used in interim reporting in the course of the financial year where accruals are to be reported. These accruals are usually short term and are cleared in the subsequent period. However, to get a proper perspective, decision makers require the reports with full impact of all aspects and transactions.
Activating Reversing Journals To activate Reversing Journals 1.
Go to Gateway of Tally
2.
Select F11: Features > ing Features to display Company Operations Alteration screen
3.
Set Yes in Use Rev. Journals & Optional Vouchers?
4.
Accept the screen to save.
An example is - the provision for depreciation. Depreciation is usually provided for at the end of the year. However, including it for monthly reporting would give a more accurate status. Let us take another example: On 30th June you want to view the Balance Sheet as of today but June salaries are not paid until the first week of July. There is, therefore, a large liability, which would not be reflected in the Balance Sheet. To overcome this, you enter a Reversing Journal Voucher dated 30th June, which would look like this:
When you view the Balance Sheet, Tally displays the report with the reversing journals included. The voucher affects the report only for that day, 30th June.
Applicable up to This is the date up to which the Reversing Journal is available for inclusion in a scenario report . The Reversing Journal can be created as of a particular date and made Applicable up to a different date. For example the depreciation entry could be dated October 1, 2005 and applicable up to October 31, 2005. The journal will be available for inclusion in a scenario for any day from October 1, 2000 till October 31, 2000. It will not exist before 1st Oct and will be reversed automatically after 31st Oct and consequently unavailable.
Reversing Journal
All vouchers are maintained in a Reversing Journal . These are not posted to any books of s and cannot be included in regular reports. They can only be seen through a scenario. Go to Gateway of Tally> Display> Exception Reports> Reversing Journals
Post-dated Vouchers
While entering vouchers, you can mark them as post dated. Tally will not update the vouchers in ledgers until the specified date is approached. This is useful to enter transactions that take place on a regular basis. For example, if you pay for something by installments, you can set up the payments in advance, and Tally will only enter them in the ledgers as they fall due. Mark vouchers Post Dated by using CTRL + T or click on Post dated button from the Button Bar. This button toggles with Current.
Post-dated Vouchers
All Post-dated vouchers are maintained in a Post-dated voucher . Go to Gateway of Tally> Display> Exception Reports> Post-Dated Vouchers
Difference in the treatment of Post-dated Vouchers and other Unconventional Vouchers The major difference between post dated vouchers and other Unconventional vouchers is that post dated Vouchers affect regular books of s on the date of the voucher. Post-dated vouchers are not available for selection in Scenarios.
Creating ing Vouchers in Tally
To view the ing Vouchers screen: Go to Gateway of Tally > ing Vouchers Note : Company
The Voucher Features and
Entry the
screen Voucher
display Type
depends settings.
on
the
Voucher
Configuration,
The default voucher entry screen that is displayed is the Payment Voucher screen. To go to the next voucher screen you can simply switch the vouchers using the buttons from the Button Bar or by using the Function keys. Consider a simple payment voucher screen.
More:
Type of Voucher Voucher Number Reference Date of Voucher Particulars – To /By or Dr/Cr Narrations Particulars – Ledger name and amount Buttons in a typical Voucher Entry screen
Type of Voucher
You need to check whether you are using the right voucher for the transaction. You change the voucher type by selecting the new type from the Button Bar. In some cases, Sales, Purchase and Journal, as well as where you have created your own voucher types. For example, under Payment, Tally will display a List of Vouchers for the type you select, from which you make a further choice.
Voucher Number
If you have set Method of Voucher Numbering to Automatic in Voucher Type screen, Tally will automatically enter the voucher number and if you have set Method of Voucher Numbering to Manual, Tally allows you to enter the voucher number manually.
Reference
You can enter a reference such as Purchase Order Number or Invoice Number in the Ref: Field. Note:
Reference
is
not
available
for
receipt
and
payment
vouchers.
Date of Voucher
The date of the voucher you enter is displayed at the top-right of the Voucher Creation screen. The date is taken initially from the Current Date in the Gateway of Tally. However, you can change the date to ensure vouchers are entered with the appropriate date using the F2: Date button.
Note:
You
change
the
date
using
the
F2:
Date
button
from
the
button
bar.
Narrations
You can type any comment that is appropriate for the transaction in Narrations. You can configure Tally's Narration details as per the type of narration for the transaction. The types of Narrations are: Common Narration – Common narration details for the entire Voucher at the end. Single Narration – Narration details for every debit or credit transactions made.
Enabling Narrations Common Narration is enabled by default in Tally. To activate Narrations on the voucher screen 1.
Go to Gateway of Tally > s Information > Voucher Types > Alter
2.
Select the required Voucher
3.
Set the option Narrations for each Entry to Yes
4.
Accept the details.
5.
Return to ing Vouchers on Gateway of Tally and make a payment voucher entry as required.
Following examples demonstrate a Payment transaction that has both common narration and narrations for each entry. The advantage of this being that you can give single line narration separately for every ledger selected in case of multiple debit/credit entries.
Particulars To/By or Dr/Cr
To/By or Dr/Cr By default Tally displays To/By which can be changed to Dr/Cr. 1.
Set Use Cr/Dr instead of To/By during entry to Yes in F12:Configure
2.
Accept to Save
Each voucher line displays a prompt of Dr/By for debit entries or Cr/To for credits. N o t e : Depending on the voucher type, Tally selects either D r or Cr/ Thereafter, you can change the prompt (if required) by typing over it or B .
To or B y. with a D or C / T
Particulars – Ledger name and amount
Ledger name and amount After To/By or Dr/Cr, you enter the ledger names that are already created and the debit and credit amounts. To select a ledger, type the first letter of its name and Tally displays a List of Ledger s. The ledgers starting with the typed letter are highlighted. Only ledgers suitable for the voucher type are displayed. As you continue typing, the highlights reduce until a match is found. The first ledger name prompt depends upon the voucher type. For example, in a Payment Voucher you have to first debit a personal like a creditor or a nominal like Rent. Hence you are not allowed to enter Cash or Bank as that would determine money received. N o t e : In special case where as C o n t r a in the Voucher
in you have activated the option Allow Configuration you are permitted to do so.
Payment/Receipt
Likewise, in a Sales Voucher, you must first debit a personal name like a customer and not a nominal name. When you select the ledger, the current balance is displayed (only if F12: Configure is configured). When you enter the amount, the revised current balance is shown. After selecting the next ledger, Tally suggests the balancing amount as the value to enter, which may be accepted or typed over. You cannot complete the voucher entry until the debit is equal to the credit. More: Buttons in a typical Voucher Entry screen
Buttons in a Typical Voucher Entry screen
F2: Date - You can use this button to change the date of the voucher. F3: Company - This would allow you to switch to another loaded company and enter a voucher in it. Therefore, you can, almost simultaneously enter vouchers for more than one company.
ing Vouchers F4: Contra F5: Payment F6: Receipt F7: Journal F8: Sales F9: Purchase F10: Memos F7: Stock Journal F10: Phys Stock - This allows recording of physical stock in hand as distinct from computed stock figures.
Other Buttons As Voucher/As Invoice: This button is available only for Sales/Purchase Vouchers and invoices. Post Dated -To mark the current voucher post dated. Toggles with Current Optional - To mark the current voucher optional. Toggles with Regular F11: Features - The different features of a company can be selected or modified by using the F11: Features button. This button is available in almost all screens of Tally. You can modify it as and when based on the requirements. F12: Configure - The F12: Configure button allows you define and enable the report-specific options which are required. For example, depending on the report that you are viewing, you can specify whether it should be in horizontal or vertical format, show percentages, show gross profit, show opening and/or closing balances, change the periodicity, change the sorting method. N o t e : To check the accuracy of the vouchers entered, select Day Book from the Display Menu. Then Select F2: Period from the Button Bar and enter the period of display (it defaults to the current date only, but you may display all the transactions for a particular period). Select F1: Detailed. Check the vouchers against what you were asked to do. If you find a mistake, position the highlight bar over the incorrect item and press E n t e r for Tally to display the voucher details for alteration. N o t e: The alteration available for audit.
facility
is
subject
to
security
and
access
rights.
All
alterations
are
Voucher Classes
Voucher Class is a method of automating ing allocations during Invoice entry. It is a table for predefining the entries to make invoice entry a simple task. This is particularly useful in sales invoicing where the nominal ledger , to be credited for each item of sale is defined once. During voucher entry, the ing credits for items sold are done automatically. Additional ing entries like Tax, Freight and other charges can also be predefined to be brought up during actual invoicing. This will have restriction on a data entry operator to alter or modify the vouchers. The total control rests with senior management to set the class parameters. It also reduces chances of errors during voucher entry. You can still continue to use Tally as before without classes if you do not require it. Classes can also be used to automate the rounding off the values. The rounding-off method can be preset when defining a class for a single line or for the entire voucher or invoice. Voucher Class permits: 1.
Automation of entries to predefined ledger s.
2.
Automatic rounding off to preset value limits.
Another additional feature is the ability to define default sales ledger to be affected for each Stock Item. This capability is available for companies maintaining s with inventory. 1. Go to Gateway of Tally 2. Select the Button F12: Configure 3. Select the option Accts/Inv Info. 4. Set Specify Default Ledgers for Invoicing to Yes Now, when you alter or create a Stock Item, you can define the nominal ledger (usually the sales ), which should automatically be credited when you invoice this item. Example: You might have Sales Ledgers broken up as Sale of Finished Goods and Sale of Intermediates. Let us assume that your finished goods are Computers and intermediate goods are CD ROM drives. Against the Stock Item Computers, specify Sale of Finished Goods as the default Sales Ledger to be affected. Against CD ROM drive specify Sale of Intermediates as the default Sales Ledger . These will be the default sales ledger s that will be affected only when invoicing. They can be overridden by the that you set in the Class table. The dual facility of ledger allocation with Stock Item and ledger allocation defined in a Class provides the flexibility to permit allocation of different Stock Items to different sales s as set up in the Class table. You can either alter the existing Sales Voucher Type or create a new Voucher Type based on Sales. 1.
Go to Gateway of Tally > s Info > Voucher Types > Alter
2.
Select any Voucher Type from the list, say, Sales.
3.
Go to the field Name of Class and enter a name
3.
This displays a sub screen where you can define the Default ing Allocations for Sales Invoice and the Default ing Allocations for Purchase Invoice. You can specify the Ledger Name, the Percentage (%) of the amount to go into the ledger and the Rounding Method and the Rounding Limit if any. The Type Class screen appears as shown below.
The Class Table is split horizontally for ing allocations and additional ing entries. More: Default ing Allocations Type of Calculation An explanation of 'Types of Calculation' VAT
Default ing Allocations
Ledger Name Select the ledger to be credited for each Stock Item sold in the invoice. More than one ledger may be affected for each item. For example, for Tax-inclusive items, the ledgers to be credited will be Sales and Tax in a definite proportion. This is where percentage helps.
Percentage % This is useful in tax-inclusive price cases. You can allocate say 82.5% for the sales ledger and the balance can be allocated for Tax . Normally, for tax-exclusive prices, you will give 100% for the Sales . The percentage (%) symbol has to be mentioned. While creating or altering classes for the Voucher Types Credit Note, Delivery Note, Sales and Sales order in the Voucher Type Class screen, for the Column Percentage % under Default ing Allocations for each Item in Invoice, the number of decimal places allowed for the numbers input in this column has been increased from two to three irrespective of the number of decimal places defined for the company.
Rounding Method The Rounding Method may be used only where the sales is NOT 100%. The amounts that are calculated may be required to be rounded off either under Upward Rounding or Downward Rounding or Normal Rounding. Normal Rounding is rounding to the number of decimal places specified for the currency based on the less than 5 and greater than 5 rules. You can set your own rounding off rule. For example, round off to the next whole number. In such cases, you can round off Upwards.
Rounding Limit When any of the rounding method is selected from the list, you can round off (Upwards/Downwards/Normal). For example: set it to 1 to obtain the amount to the next whole number. To round off upwards to the nearest 50P, set it to 0.50.
Override using Item Default? Select Yes or No. Item default refers to the Default Ledger that you had set for a Stock Item. For example, Computers – Sale of Finished Goods. If in the Class Table, you mention Sales –Local, and set No to this question, then Sales –Local will be the affected and not Sale of Finished Goods. Setting it to Yes will affect Sale of Finished Goods. The advantage of this is that you can use different classes to affect different sales s.
Additional ing Entries This part is relevant for Tax and other charges like freight and insurance. Ledger Name - Select other Additional Ledgers if any, one by one. Type of Calculation - Select the suitable method of calculation from the drop-down menu. The Value Basis that you will provide in the next column will calculate using the type of calculation specified. For more details refer Type of Calculation. Value Basis - Enter the amount, which is to be used for the Type of Calculation. For percentage, you can use the symbol %. In the example, 17.5% is specified for Tax on Sales on Item Rate, to use the rate given in the Stock Item. Remove if Zero? - Enter Yes for Tally to ignore the and not to make any entry in it if its value is zero. If
Yes, ensure that Allow 0 valued entries in vouchers in F11: Features is set to No. On Setting No Tally will record the invoice in the ledger with nil amounts. Under normal circumstances, you will probably wish to set this value to Yes. However, in cases such as 'Zero Rated VAT', you may wish to retain the Ledger line, even though the calculation yields a nil amount. Additional Information Effect on Cost Centres - Cost Centres will remain un-allocated when Classes are used to allocate entries. Cost centres can also be predefined under Cost Centre Classes. Refer to Cost Centre Classes for further information.
Types of Calculation
As Additional Excise In the Indian sub-continent, a manufacturing tax or Excise is levied. For some products, a supplementary levy on the Basic Excise Duty is charged or Additional Excise Duty. This is a surcharge calculation. For example, an Additional Excise Duty of 10% on the Basic Duty. While the calculation method is identical to Surcharge, the result is to provide a Total Excise Payable calculation accurately during Invoice printing.
As
As a Flat Rate This is helpful when you wish to specify a standard mark-up/down on an invoice - say 100 for every invoice, independent of the quantity/value of the invoice.
As Surcharge This helps you to calculate the value based on the immediately preceding figure. For example, a Sales Tax of 10% is applicable on an invoice, which would be calculated on the value of goods sold. On this, a 'Surcharge' of 5% i.e. 5% of the Sales Tax value is applicable.
As Total Amount Rounding This is the last line in an invoice. You will have to create an , which would carry the rounding difference. As the other values of the invoice are calculated, this would automatically get adjusted to keep the Total Invoice Value to the desired rounding limits. You have to mark this invoice as Remove if Zero? Yes so that the head is not retained in the invoice printouts if no rounding is applicable.
As Defined Value This allows you to specify a value while creating the invoice. You will use this when the basis of calculation is neither Value nor Quantity dependent and therefore needs to be entered every time you create an invoice.
Based on Quantity Use this for calculations that are based on the 'Total Qty' supplied. For example, you may have Freight or Forwarding charges as 2.00 per Kg, and if the total qty supplied in the invoice is 200.000 Kg, then the amount should become 400.00. The Value Basis also needs to be provided as '2.00/Kg' or '0.50/Pc' as the case may be.
On Current Sub Total In certain environments, taxes are applicable on the Total Goods Value as well as supplementary charges like Excise Duty, Packing Charges. Normally, when the tax calculation method is specified as On Total Sales the calculations are based on the Total Goods Value only. If you want to include supplementary charges, then set On Current Sub Total as the type of calculation.
On Item Rate This is used for both VAT as well as Excise Duty style calculations. You can specify the Rate of Tax applicable for each Stock Item. The advantage is that it enables you to combine multiple Tax Rate products in the same Invoice and yet get the correct ones picked up for each Tax bracket.
On Total Sales The most common basis of Tax Calculation is on the total value of goods/services. This method uses the sum of Stock Items used in the invoice for calculations.
Inventory Vouchers
Inventory Vouchers perform the same function in the inventory system just as ing vouchers do in the ing system. Inventory Vouchers are also means of entering transactions. Inventory vouchers record the receipt and issue of goods/stock, the transfer of stock between locations and physical stock adjustments. If you have not integrated s with inventory, inventory vouchers will not have any impact on the Balance Sheet stock figures. They will maintain the stock balances separately. To view Inventory Vouchers: Go to Gateway of Tally > Inventory Vouchers
Configuration on Tally Set the option Integrate s and Inventory to Yes in F11: Features. You can trace an entire transaction from the beginning i.e., goods transfer stage to the financial ing irrespective of integration status. For example, the purchase of stock can be tracked from the purchase voucher through the receipt note, through invoice from the supplier and also through eventual payment. More: Types of Inventory Vouchers How to enter pure Inventory Vouchers How to create a Stock Journal
Types of Inventory Vouchers
Tally is pre-programmed with Inventory Vouchers of various natures, each designed to perform a different task. The following table displays the standard ing Vouchers provided in Tally and their corresponding activation key combination and buttons. You can either use the key combination given in the table below or the buttons on the Button Bar. Key Combination
Buttons
Voucher Type
ALT+F9
F9: Rt Note
Receipt Note Voucher
ALT+F8
F8: Dely Note
Delivery Note
ALT+F6
F6: Rej.Out
Rejections Out
CTRL+F6
F6: Rej.In
Rejections In
ALT+F7
F7: Stk Jrnl
Stock Journal Voucher
Alt+F10
F10:Phys Stk
ALT+F5
F5: Sales Order
ALT+F4
F4: Purc. Order
Physical Stock Sales Order Purchase Order
Set the option Use Tracking Numbers to Yes in F11: Company Features to activate Goods In Receipt Note and Goods Out Delivery Note vouchers. Tally will assume that goods are received along with Purchase Vouchers and Goods are delivered along with Sales Vouchers/Invoices. Activating Tracking Numbers denote that you may receive goods that are not accompanied by a Supplier's invoice, i.e. the invoice will arrive separately and that you may not deliver the goods along with the invoice but will invoice it later. N o t e : In a voucher you are allowed to select Not Applicable when the Tracking Number sub-screen appears. This would update inventory immediately without ing a separate inventory voucher and vice-versa. For more details refer Advanced voucher entry. You can alter these vouchers to suit company requirements as well as create new Inventory Vouchers. For example, if you wish to distinguish between delivery notes for stock delivered from different locations you can create vouchers to do this. More: Receipt note Voucher Rejections-in Voucher Delivery note Voucher Rejections-out Voucher
Stock Journal Voucher Physical Stock Voucher
Receipt Note Voucher
This voucher type is used for recording goods received. To view the Receipt Note Voucher: 1.
Go to Gateway of Tally > Inventory Vouchers
2.
Press the button Alt+F9 or Select the button F9: Rt Note from the button bar.
For example, consider the company receives new stock items from a supplier. If a Purchase Order exists for that Supplier, select the Order Number from the List of Orders pop up menu to bring up the order particulars automatically. Receipt Note Description Details Recorded
Records receipt of new stock from suppliers Reference, Ledger , Supplier’s Name, Address and Despatch Details (If Accept Supplementary Details option is set to Yes in F12: Configure), Name of Stock Item, Tracking Details, Godown, Quantity, Rate (Optional), Amount (Optional), Narration
Rejections-In Voucher (Sales Returns)
A Rejections In Voucher is used to record goods that are rejected and returned back by the customer. To view the Rejections In Voucher 1.
Go to Gateway of Tally > Inventory Vouchers
2.
Press the Ctrl+F6
Rejections In Voucher Description Details Recorded
Records return of goods from customers. Ledger , Customer’s Name, Address (If Accept Supplementary Details option is set to Yes in F12: Configure), Name of Stock Item, Tracking Details, Order details, Godown, batch details, Quantity, Rate (Optional),Amount (Optional), Narration.
Delivery Note Voucher
The Delivery Note voucher is used for recording goods delivered to a customer. To view the Delivery Note Voucher 1.
Go to Gateway of Tally > Inventory Vouchers
2.
Press Alt+F8 or select the button F8: Dely Note from the button bar.
For example, the company delivers goods from Stock to a customer. If a Sales Order exists for that customer, selecting the appropriate Order Number from the List of Orders pop-up menu will automatically bring up the relevant particulars. Delivery Note Description
Records the delivery of goods to customers
Details Recorded
Reference, Ledger , Customer’s Name, Address and Despatch Details (If Accept Supplementary Details option is set to Yes in F12: Configure), Name of Stock Item, Tracking Details, Godown, Quantity, Rate (Optional), Amount (Optional), Narration
Rejections-Out Voucher (Purchase Returns)
The Rejections Out Voucher records goods that are rejected and returned to a supplier. To view Rejections Out Voucher: 1.
Go to Gateway of Tally > Inventory Vouchers
2.
Press Alt+F6 or Select the button F6: Rej. Out from the Button Bar
For example, the company returns items that had previously been taken into stock from the supplier Rejections Out Voucher Description
Records return of goods to suppliers
Details Recorded
Ledger , Supplier’s Name, Address and Despatch (If Accept Supplementary Details option is set to Yes in F12:Configure), Name of Stock Item, Tracking Details, Order details, Godown, Quantity, Rate (Optional), Amount (Optional), Narration
Stock Journal Voucher
Stock Journal Voucher is used to record stock transfers from one location to another. To view the Stock Journal Voucher: 1.
Go to Gateway of Tally > Inventory Vouchers
2.
Press the buttons Alt + F7 or Select the button F7: Stk Jrnl from the Button Bar
For example, the company transfers items of stock from the warehouse to the shop. Stock Journal Voucher Description
Records the transfer of stock from one Location to another
Details Recorded
Reference, Name of Source and Destination Locations, Name of Stock Item, Godown, Batch, Quantity, Rate, Amount, Narration
More: How to Create a Stock Journal?
Physical Stock Voucher
Physical Stock Voucher is used for recording actual stock physically verified or counted. To view the Physical Stock Voucher 1.
Go to Gateway of Tally > Inventory Vouchers
2.
Select the button F10: Phys Stk from Button Bar or press Alt+F10
For example, Physical Stock is the stock found on conducting a stock check. It is not unusual that the company finds a discrepancy between actual stock and computer stock figure. Physical vouchers will be useful for recording purposes only if you have configured inventory vouchers to ignore physical stock differences. If you have configured the vouchers so that physical stock difference is not ignored, then all transactions subsequent to the physical stock voucher will use the balance as mentioned in that voucher. Physical Stock Voucher Description
Records the physical stock count as the new stock balance
Details Recorded
Stock Item, Location, Batch details and Quantity.
Entering Pure Inventory Vouchers in Tally
Selecting and Entering the Voucher There are five kinds of inventory vouchers: Receipt Notes and Delivery Notes Rejections - in and Rejections - out Sales Order and Purchase Order Stock journal Physical stock
Note: Vouchers involving pop-up be assumed that these settings
screens depend upon have been activated.
configuration
settings
and
it
will
The basic procedure to enter each voucher is: 1.
Go to Gateway of Tally >Inventory Vouchers
2.
Change the date if necessary.
3.
Select the V oucher type from the Button Bar
Enabling F11: Features Set Use Tracking Numbers to Yes to activate Delivery Note and Receipt Note vouchers. Set Use Rejection Notes to Yes to activate Rejections In and Rejections Out vouchers. Set Allow Purchase Order Processing and Allow Sales Order Processing to Yes to activate Purchase Order and Sales Order vouchers.
A typical Receipt Note inventory voucher screen appears as shown below:
The screen is divided into three sections: 1.
The Type, Reference and Date of the Voucher.
2.
Party's Particulars and Ledger .
3.
Inventory Item Details.
You can change the voucher type by selecting the required type from the Button Bar. N o t e : In some notes in F11 ) More: Type of Voucher Tracking Number
cases such as Receipt you will see a pop-up
Notes (where you screen from which
have opted for Use you select the right
rejection voucher.
Default Voucher number Order Details (in case Purchase Order Processing is active)
Type of Voucher
Select the Voucher required form the Button bar. Prior to making a voucher entry, ensure that you are using the right voucher. You can change the voucher type by selecting the new type from the Button Bar. In some cases, like receipt notes (where you have opted for Use Rejection notes in F11: Features) you will see a pop-up screen from which you can select the appropriate voucher.
Voucher number Voucher numbering by default is automatic. It can be entered manually by setting it in Voucher Types.
Reference number This is optional. You can enter a reference such as Purchase Order Number or Supplier's Delivery Note Number.
Date of voucher The date of the voucher you are entering is displayed at the top-right of the Voucher Creation screen. By default, this will be the Current Date. You can change the date to the transaction date. Note:
You
can
change
the
date
using
the
F2:
Date
button
on
the
Button
Bar.
Ledger There are no To/By or Dr/Cr in inventory vouchers. To select a ledger, type the first letter of its name and Tally will display a List of Ledger s. As you continue typing, the highlights reduce until a match is found. Here you usually need a supplier's ledger .
Supplier's name and address Enter details of the supplier's name and address. This can be different from the ledger name or can be the same. This information is useful when printing out the Goods Receipt Note.
Name of the Item From the pop-up list of Stock Item, select the Stock Item that is being received. If it is not in the list, create it using ALT+C.
Tracking Number
Set Use Tracking Numbers to Yes in F11: Features > Inventory Features
The Tracking number is used to link the Receipt Note with the Supplier's Invoice that will be received later. (Supplier's Invoice is recorded through the Purchase Voucher). Hence, select the number which helps maintain the link. Tally gives the Receipt note number and the Reference number as default. However; you may opt to give your own number, in which case select New Number. If you do not wish to give a tracking number at all, select Not Applicable. Tracking numbers link the different ing vouchers with the inventory vouchers as follows: 1.
Receipt Note/Goods In vouchers are linked to Purchase Vouchers
2.
Goods Out /Delivery Note are linked to Sales Voucher/Invoice.
3.
Rejections-In is linked to Credit Note
4.
Rejections-Out is linked to Debit Note
New number Enter a new number that is not in the list. You can use this number to reconcile, while making a Purchase Voucher entry.
Not applicable You can select Not applicable if you do not want tracking number. This may be resorted in cases where you want to update stocks immediately with this entry and no goods inward entry is needed. If you select Not Applicable in an inventory voucher, it will update stocks and you need not make a separate ing/invoice entry.
Uses of the option Not Applicable If you need to raise a sales voucher/invoice that accompanies the goods and do not want to Goods Out entry, Not Applicable will update stocks without the Goods Out entry. When you record a purchase voucher and wish to update inventory without a separate Goods In entry, select Not Applicable for the tracking number.
The same applies to Debit Notes-Rejection Out and Credit Note-Rejection In. When you send out samples for approval, where you do not want to raise an invoice. When you receive samples, but no invoice will be forthcoming.
Default Voucher number
Reference number Tally lists the voucher number and the reference number of the current voucher for selection. Select the one that is easy to track later.
Pending tracking number If you have a pending tracking number from a previous voucher, it will be listed here together with details like location, quantity, rate and amount. Select a pending tracking number to adjust that with the current voucher entry. This could be a Purchase Voucher received and recorded, for which the goods are now being received.
Order Details (in case Purchase Order Processing is active)
If Purchase Order Processing is activated in F11: Features, an order field will be available. Select Not Applicable if there are no order particulars to adjust or record.
If the order exists, the fields are automatically filled up once you select the order number from the pop-up list. These are available for editing (can alternatively be set so that editing is not permitted through F12: Configure). Otherwise, select a new number to input order details at this point.
Location If you have more than one location, you must specify the location to which this item relates. The List of Locations will pop up to enable you to specify the location quantity, rate and amount for the item. You can give multiple locations.
Batch Number If batch number is enabled in F11: Features, the batch number can be given in the locations sub-screen. Select a batch number from the List of Active batches batch numbers, or give a new number for a new batch.
Mfg. Date The Manufacturing Date appears only if it has been activated. Specify the date of manufacture. This enables you to set expiry date for the batch as a period from the date of manufacture. For example, three months from the date of manufacture.
Expires on This field appears only if it is enabled. Enter the date of expiry or a period from the date of manufacture. If you have disallowed the use of expired goods for the Item, you cannot issue them after the expiry date.
Quantity You can set Company Features to allow Actual and Billed Quantities. You have to enter both quantities here. The actual quantity updates stock and the billed quantity affects the s. Give the quantity either in the main unit or the alternate unit. You may even specify quantities in both units. For example, 100 bars=150 Kgs.
Rate Specify the rate for the stock item. If you have entered Standard Rate for the item, the voucher will pick the relevant standard rate for that date by default. You can modify it while entering the voucher.
Per In this field, you can enter the unit of measure for the quantity of the item. This can be the main unit or even the alternate unit.
Amount The quantity multiplied by the rate per unit will be the amount.
End of List In all multiple allocations or selections, you should either select the option End of List or press Enter at the first blank field. This will accept the multiple allocations and take you back to the parent screen. For example, Multiple locations, batches or items.
Narration Here, you can type appropriate information for the transaction.
Creating a Stock Journal
A Stock Journal is used to transfer materials or stock from one location to another location. Stocks can also be shown as consumed. It can only be produced without consumption and production. Hence, it is not like other journals where debits and credits match. You can specify quantities that are moved, their rates and amounts. If standard rates are entered in the Stock Item masters, they will appear. In the target location, you can specify additional costs incurred without actually affecting ing at all. Only the stock value goes up. Hence, it is technically correct where an expense incurred on production or inward has been ing for in the cost of that item. To create a Stock Journal Voucher 1. Go to Gateway of Tally >Inventory Vouchers 2. Select the button
1.
F7 : Stk Jrnl from the button bar or press Alt+F7
The Stock Journal Screen has three parts 1.
The part at the top accepts general information.
2.
The left-hand side accepts the Source Godown or Consumption Part.
3.
The right-hand side accepts the Destination Godown or the Production Part.
You must furnish the common information required in the field that appears at the top. You may elect to give information for only the left or the right part or both. More: Common Information
Common Information
Reference, date and voucher number Reference field will be displayed if this is option is activated for the voucher. Give a reference number, if required. Voucher number depends upon the settings in Voucher Type.
Source (Consumption) Select the name of the Stock Item and the Godown from which it moves or where it is consumed as well as the Quantity, rate and amount. If the rate is specified in the Stock Item master, it will be displayed when you indicate the Item name. Note:
The
effect
of
entry
in
this
part
is
to
reduce
stock
of
the
Items
specified.
Destination (Production) Mention the name of the item and the Godown to which the item is moved. It is not necessary that the Item names should match the names in the source part. This is because a totally new Item could be produced out of the materials consumed. You can specify the rate of the Item, Quantity and amount. If the rate is specified in the Stock Item master, it will be brought up when you indicate the Item name. N o t e : The specified in
effect this
of entry part.
in
the
Destination
Part
is
of
increasing
the
stock
of
the
Items
Additional cost details This is another interesting facility is available for the Destination Godown (Production). You can specify what additional costs were incurred in moving goods to the Godown or for producing them. Though these costs are strictly ing heads, they do not get posted in the relevant nominal ledger s but add to the cost of the Item. In the target Godown, you can specify additional costs incurred without actually affecting ing. Only the stock value goes up. Hence, it is technically correct where an expense incurred on production or inward has been ed for in the cost of that item. After entering the amount for an Item, the following Additional Cost Details entry box pops up.
You may specify additional costs for transferring or producing the item. The typically additional costs are wages, power, freight and so on. Ensure that you have ledger s opened for the additional costs. Moreover, additional costs entered for the ledgers, do not reflect in the relevant ledger with the amount but only add to the cost of the item.
Percentage (%-age)
You can specify the additional cost in percentage of the cost of the item, in which case enter the number, for example, 2 for 2% of the cost of the item. You may, alternatively, skip the percentage field and input an amount directly.
Actuals This displays the total additional cost for the item and the effective cost per unit of item/product produced.
Bill of Materials
A Bill of Materials is a list of constituent items along with quantity details that can be allotted towards manufacturing a certain product, by-product or likewise. This facilitates immediate reduction in stock of the item automatically. This process of listing the items that make up another item is made possible in Tally by enabling the Bill of Materials Facility.
Enabling Bill of Materials This is useful for manufacturing organisations and can be set up through F12: Configure. The Bill of Materials option now appears in the Stock Item Creation screen only after entering a unit of measure in the Units field. 1.
Go to Gateway of Tally > F12: Configure
2.
Select Accts/Inv Info from the Configuration Menu
3.
Set Allow Component List Details (Bill of Materials) to Yes
A Bill of Material should be available while manufacturing an item. This is done through a stock journal. It is advisable to create a new voucher type, say, Mfg Journal which is based on Stock Journal.
More: Stock Journal as Manufacturing Journal Creating a new Manufacturing Journal Creating a Bill of Material Input fields Advanced Usage
Stock Journal as Manufacturing Journal
Stock Journal vouchers have an option Use as a Manufacturing Journal, in the Voucher Type Creation screen which has to be set to Yes . 1.
Go to Gateway of Tally
2.
Select s Info. > Voucher Types > Alter
3.
Select the Stock Journal Voucher from the Voucher Types
4.
Set the option Use as a Manufacturing Journal to Yes
When you use a Stock Journal as a Manufacturing Journal, the Stock Journal voucher entry screen will be modified to accept Name and Quantity of the product being manufactured, its list of components and additional costs of
manufacture associated with it. For an end-product item, if you have specified a bill of material that contains the list of components, this list will be brought up automatically and filled in for the quantity of the end product.
Creating a New Manufacturing Journal
T o create a new Manufacturing Journal 1. Go to Gateway of Tally 2. Select Inventory. Info > Voucher Type > Create
Name Give a new name to the voucher type, for example, Manufacturing Journal.
Type of Voucher This must be Stock Journal. Select it from the pop-up list.
Abbr. Enter a suitable abbreviation. For example, Mfg Jrnl. This is the abbreviation to the voucher type name.
Use as a Manufacturing Journal Set this option to Yes . For more details on voucher type refer Create a Voucher Type .
Creating a Bill of Material
Bill of Material (BoM) is created only for those items that are being assembled in-house. For trading items, you do not need a BoM. Therefore, you need to specify a BoM at the time of creating a Stock Item or when altering its master. Let us create a new Stock Item Television Flatron and specify its BoM. Go to Gateway of Tally > Inventory Info. > Stock Items > Create The Stock Item Creation screen is displayed below.
Some information like Batches, Alt. Units etc. depend upon the company features, configuration and invoicing setup. For details on fields other than Set Components (BoM) refer to the Stock Item Creation section under Inventory Information. The difference for India/SAARC would be in the field Rate of VAT and MRP/Marginal.
Set the option Allow Component list details (Bill of Materials) to Yes in F12: Configure . A pop-up list for the components appears which has to be entered as shown below.
Unit of Manufacture Specify the appropriate number of the finished product items that will be made. While manufacturing and recording through a stock/manufacturing journal, record the item in multiples of this unit of manufacture. The components are multiplied by the same factor automatically. You are allowed to alter the components to reflect actual consumption, if there is a change from BoM. N o t e : Under certain circumstances, it is example, per 1000 Pcs of nails, as raw insignificant.
better to give a larger unit material consumed for 1 piece
of of
manufacture, nail is
for
Item, Godown (Location) and Quantity Enter the component name and quantity. If there are multiple Godowns or Locations, specify the storage location for the item. Enter the options for all appropriate fields for the stock item and accept the screen.
Manufacturing Journal Entry 1.
Go to Gateway of Tally > Inventory Vouchers
2.
Select the button F7 : Stk. Jrnl or press Alt + F7
1. 2.
If you are creating a new voucher type Manufacturing Journal, a pop-up menu is displayed with the options default Stock Journal and Manufacturing Journal.
Select Manufacturing Journal and the following screen will be displayed.
Input Fields
Reference Number Enter a reference number, if required.
Name of Product Enter the name of the Stock Item to be manufactured.
Location Enter the location where the Item is manufactured. This location will show the stock.
Qty Enter the quantity of the item to be manufactured.
Component (Consumption) The component list for manufacturing the product and the proportionate quantity of each component (based on the quantity specified for the product in BOM) is produced. For each component, the default location is given as specified in the BoM. The entire component list can be altered, components added or removed and locations amended. N o t e : Any this product. Stock Item
change If you master
made during this entry will not affect the original Bill of Material for want to make permanent change to the Bill of Material, alter the information of the product.
Cost of components The base cost of the components are automatically added and displayed on the screen.
Additional cost components Specify additional costs for producing an item. These are typically wages, power, and freight. Creating ledger s for the additional costs is a must. Moreover, additional costs entered for the ledgers are not reflected in the relevant ledger with the amount, but these additional costs only add to the cost of the item.
% age Additional costs can be entered in of percentage of cost of components, for example, 2 for 2% of the cost of components. You can also skip the percentage field and enter an amount directly.
Total additional cost This field displays the total additional cost for an Item.
Effective cost This is the sum of the total cost of components and additional costs.
Effective rate Effective cost per unit of item/product produced.
Advanced Usage
Stock Journal or Manufacturing Journal can be created directly while creating a sales invoice. This is very helpful in situations where the manufacture has not been recorded but the invoice is prepared. While creating an invoice, place cursor at the quantity field of the Stock Item (manufactured product), press ALT+V to bring up the Manufacturing Journal screen for the product/item. Once the details are entered, you are brought back to the next field in the invoice screen. The manufactured product is invoiced and the corresponding list of components reduced from stock in a single transaction entry. Thus, the item would be manufactured, its components reduced from stock, and also invoiced in a single transaction entry. ALT+V creates a new Stock Journal or Manufacturing Journal transaction voucher and is not to be used for allocation. If ALT+V is pressed again during alteration of the invoice, one more Manufacturing/Stock Journal will be created and it will not alter the previous Manufacturing Journal.
Alteration of Manufacturing/Stock Journal To alter the Manufacturing/Stock Journal 1.
Go to Gateway of Tally > Display
2.
Select Inventory Books from the Display Menu
3.
Select Stock Item
4.
Select the required Manufacturing Journal screen
Or 1.
Go to Gateway of Tally > Display
2.
Select Statement of s from the Display Menu
3.
Select Statistics > Mfg or Stock Journal
4.
Select the required Manufacturing Journal screen. Make necessary changes and accept the screen.
Checking the Vouchers Entered To check the accuracy of the vouchers entered: 1.
Select Day Book from the Display Menu.
2.
Select F2: Period from the button bar and enter the period of display
3.
Select F1: Detailed from the button bar or press the keys Alt + F1
4.
3. 4.
Check the vouchers and if you find any error, position the highlight bar over the error and press Tally to display the voucher details for alteration.
Note: * It defaults to the current particular period. * The alteration facility is available for audit.
date subject
only to
but
you
may
display
security
and
access
all
the
rights.
transactions All
Enter for
for
alterations
a are
Purchase and Sales Orders
Order Processing Order processing is the placing of orders with suppliers for purchase to be made from them or receive orders from customers for the purpose of selling. In Tally, Order Processing is linked to Inventories. This allows tracking of the order position for a Stock Item. Using this you can track arrival of goods ordered and also whether the ordered Stock Item are delivered on time etc. You can create Purchase and Sales Orders in Tally. Purchase Orders (PO) can be created, printed and sent to suppliers. Goods received are linked with the POs and Invoices. Outstanding Purchase Orders should be monitored. Stock Summary displays order position of any item. The Purchase Order Book lists out all the Purchase Orders placed. Likewise, Sales Orders received are recorded in Sales Order Entry screen. These details will be available during Delivery Note and Invoicing. The order position in the Stock Summary can be viewed. The Sales Order Book lists all Sales Order received.
Enabling Purchase and Sales Orders To enable Sales Order and Purchase Order vouchers, activate the following in F11: Features 1.
Set Allow Purchase Order Processing and Allow Sales Order Processing to Yes.
2.
Enable Use Tracking Numbers
More: Creating a Purchase Order Altering a Purchase Order Creating Sales Orders Altering a Sales Order View order position
Creating a Purchase Order
Purchase Order details depend on configuration settings. To create a Purchase Order : Go to Gateway of Tally> Inventory Vouchers> F4 : Purc. Order
Party's A/c Name Select the Supplier’s name from the List of Ledger s . Use Alt+C to create a new .
Order No Enter the purchase order number. Configure the voucher type through s Info > Voucher Types to set prefixes and suffixes for Purchase Orders. This particular Order No. field is an additional field to record order
number if it is different from the voucher number. The voucher number is automatically displayed here; it is also possible to change this number if needed.
Name of the Item Select the Stock Item that needs to be purchased from the List of Stock Items . The Item Allocations subscreen is displayed. Enter the details as shown below.
Due on Enter the due date for delivery of the item. This monitors outstanding deliveries. The order can be split for delivery on different dates. If the order is split, give the due date of the first lot to be delivered. After selecting the respective Godown and entering the Quantity, Rate and Amount , specify the due date for the second lot. If the whole lot is delivered at a time, press Enter in the Due on field to return to the Voucher Creation screen. The cursor then returns to the Item field once again. Now enter another item. If no other item is required, press Enter in the blank field to navigate to the next field. Press the space bar to display the List of Ledger s. You can also specify other expenses like freight, tax to be charged if any in the Purchase Order. The Tax and Expense has to exist as a ledger or it may be created using Alt +C
Location This field should be entered with required details if multiple-location feature is enabled, otherwise it does not appear.
Quantity, Rate and Amount Enter the quantity of the item required and its rate. The amount is calculated, but it can be modified to enable rounding off.
Additional Cost Details E nter any additional cost incurred on the item here. This can be either entered as a percentage of the item cost or a fixed amount. If not, select End of List. Additional costs increase the value of the item, but they do not appear independently in the nominal ledger or expense.
Next Item The cursor comes to the Item field once again and you can enter another item to order. If no other item is required, press Enter on the blank field to take the cursor to the tax/expense field.
Expense/Tax Once the item details have been entered, specify tax to be charged and other expenses like freight, if any. The tax
or expense has to exist as a ledger if they do not exist, create it using Alt+C. Here, consider tax @ 17.5% that is charged on the item values. The order entry screen appears as shown below.
Narration This field is optional. Enter necessary particulars about the order.
Altering a Purchase Order
To alter a Purchase Order Go to Gateway of Tally > Display > Day Book
Or Go to Gateway of Tally > Display > Inventory Books > Purchase Orders Book
Make the necessary alterations and save.
Delete a Purchase Order To delete a Purchase Order press Alt+D in the Purchase Order alteration screen.
Creating Sales Orders
Sales order entry is exactly like the Purchase Order Entry. Sales Order details will also depend on configuration settings. To create a Sales Order: Go to Gateway of Tally > Inventory Vouchers > F5 : Sales Order
Party's A/c Name Select the Customer’s name. Press Alt+C to create a new .
Order No The voucher number is automatically displayed. You can change this number if required. Enter the sales order number.
Name of the Item Select the Item for which the order is to be placed from the sub-screen is displayed. Enter the details as shown below.
List of Stock Items . Here, the Item Allocations
Due on Enter the due date for delivery of the item. This enables monitoring of outstanding deliveries. The order can be split for delivery on different dates. If the order is split, give the due date of the first lot to be delivered and after selecting the respective Godown and entering the Quantity, Rate and Amount specify the due date of the second lot. If the whole lot is delivered at a time, press Enter in the next Due on field to return back to the Voucher Creation screen. The cursor returns to the Item field once again and you can enter another item to be sold. Press Enter on the blank field to take the cursor to the next field if no more items are to be entered. Press the space bar to display the List of Ledger s . You can specify if there are any other expenses like freight or tax in the Sales Order. The Tax and Expense has to exist as a ledger (if not, press Alt+C to create them). Select the respective ledgers to make the entries and save the voucher.
Location In case multiple location features are active this field has to be mentioned. Otherwise it does not appear.
Quantity, Rate and Amount Enter the quantity of the item required, and also its rate. The amount is calculated and can be modified to round it off.
Additional Cost Details There are no additional cost details for sales orders. They exist only for Purchases as the values are added to the cost price. In case of sales, additional cost needs to be entered below the line along with tax.
Next Item After completion of entering the first item, the cursor comes to Item field once again and you can enter another item to order. If there is no other item, press Enter in the blank field to take the cursor to the tax/expense field.
Expense/Tax Once the item details have been entered, specify the tax to be charged and other expenses like freight, if any. The tax or expense has to exist as a ledger or it may be created using Alt+C . Let us consider tax @ 17.5% to be charged on the item values. The Sales order entry screen appears as shown below.
Narration T his field is optional. You can give some particulars about the order.
Altering a Sales Order
To alter a Sales Order Go to Gateway of Tally > Display > Day Book
Or Go to Gateway of Tally > Display > Inventory Books >Sales Orders Book
Make the necessary alterations and save.
Deleting a Sales Order To delete a Sales order press Alt + D in the Sales Order alteration screen.
View Order Position
View the order position in Stock Summary. 1.
Go to Gateway of Tally
2.
Select Stock Summary
3.
Select the button
F1 : Detailed from the button bar
The screen shows the Particulars, Quantity, Rate, Value and Period . However, you do not know how much stock is on order both inward and outward. 1.
Press Alt+ N or Auto-Column from the Button bar.
1.
You get the following menu.
2. Select Orders & Stock Details . Note:
Set
Remove
Rate
and
Value
to
3 . This will enable all columns to fit in one screen.
N o in F12:
Configure
4. You may further drill down each column to view further the details. 5. In the Stock Summary screen, you can even bring up a new column using Alt+C.
6. Sales Order Reports can be accessed through Alt+F7 or Alt+C of the stock Summary. Note: reports
Inventory Reports & ing Reports can also be accessed by pressing F9 or F10 (ing/Inventory Reports).
through
ALL
other
Invoice Entry
Invoicing or sales invoicing is almost similar to sales voucher entry. You will use the same voucher but select As Invoice option to turn it into a sales invoice. Purchase invoices are recorded through normal Purchase Voucher entry and it does not have the provision of being converted into an invoice format for entry purposes. Similarly, you can print the Purchase voucher as a Purchase Invoice or even a Purchase Order. The advantage of using the invoice format for sales and purchase voucher entry is that it enables automatic calculations of taxes and duties. This is possible for only those groups for which Used for Calculation is enabled under the group Duties and Taxes. This is also possible for other groups for which the field Used for Calculation is enabled in the Group Creation screen. In recording both sales and purchase invoice details, you can adjust ing and inventory balances and for Taxes simultaneously. The default invoice formats has various configuration options. Use them to print your invoices as per requirements. It is not necessary to create new invoice formats. It is recommended that you configure the default invoice as per requirements. You can also design a new invoice using Tally's Definition Language (TDL) Report Designer. TDL is quite an advanced language with which you can create new reports and screens. You can even modify existing reports and screens.
Settings for creating Sales and Purchase Invoice 1.
Ensure that Allow Invoicing is set to Yes in F11: Features to create sales invoice. This brings up another option. Set Separate Discount Column on Invoices to Yes if you want a separate column for discounts in invoices.
2.
To create purchase invoices, ensure that Allow Invoicing is set to Yes and also Enter Purchases in Invoice Format is set to Yes in F11: Features. If you want a separate column for discounts in invoices, follow the procedure described above.
3.
Go to Gateway of Tally > ing Vouchers. Select either sales or purchase voucher. If you set Show Inventory Details to Yes in F12: Configure, all inventory details will be displayed on voucher screen.
4.
While creating Ledgers under the group Sales and Purchase s, ensure that the option Inventory values are affected is set to Yes.
5.
If you want tax s (under the group Duties & Taxes ) to use automatic calculation, ensure that the Percentage of Calculation is entered (For example, 17.5) and the appropriate Method of Calculation is selected from the pop-up menu in the Ledger Creation screen. If it is to use Tax based on Item Rate, then the Stock Item must have the rate specified. For more details refer Ledgers.
More: Configuring the Invoice Printing Invoices and Vouchers
Configuring the Invoice
Before creating the invoice, you need to configure the invoice. 1.
Go to Gateway of Tally > ing Vouchers> F8: Sales/F9: Purchases (As Invoice)
2.
Select F12: Configure
Set the options as required. 1.
Complete ing Allocations in Order/Delivery notes? ing allocations are not normally made during order recording or delivery notes. Yet you can set it to Yes if necessary.
2.
Allow modification of ALL fields during entry: Default order/delivery note entries appearing in the invoice can be changed during invoice entry. Set this to Yes to permit modification of all fields.
Further, you can configure its printing as follows:
Go to Gateway of Tally > F12: Configure > Printing > Sales Transactions > Sales Invoice Invoice Printing Configuration appears as shown.
Set the print options as desired. You can configure the invoice as per your requirement. The options depend on the various F11: Features and F12: Configure options that have been set for your company and for the voucher either by you or by the . In the above screen, the options are tuned to International settings. These will change if you opt for India/SAARC in the basic company settings. The details that you give during invoice entry depend very much on the configuration settings. Likewise, the details that you give during invoice entry depend very much on the configuration settings. Consider a typical invoice entry screen.
During invoice entry, some of the information will be selected from the separate pop-up screens. The invoice format is different from the normal sales voucher where the ing information is the primary information and the stock information is secondary. In the invoice format, stock information is primary information and ing information is the secondary.
Sales Voucher number This number is controlled by the settings in the voucher type masters.
Date Change date using [F2], when you need to.
Reference This is an optional field. Give any reference particulars that can be later picked up using the range or filter mechanism. This has, traditionally, been used for tracking missing tax forms. Party's A/c name
Select the customer's ledger . This will be debited by the total invoice amount. You may select a party ledger (under the groups Sundry Debtors or Sundry Creditors) or even Cash or Bank (for cash sales). Party's other details This information is to be filled up in the secondary screen that pops up. You may have a different consignee name and address than the buyer (if configured for).
Delivery Note No(s) Select the Delivery Note number if there was any for the shipment, from the Pop-up List of Tracking numbers. This way you reconcile goods despatched with the invoice and financial records. Select Not Applicable if no separate delivery exists. The choice is required only if Tracking Numbers are active. More: Despatch, Order and Buyer Details VAT
Despatch, Order and Buyer Details
Enter the despatch details. These are printed on the invoice.
Order Details The order particulars are entered here. If a prior order is recorded for the customer, a pop-up list of pending orders appears. Select the relevant order or orders. Raise an invoice against a single order or even multiple orders. Select New Number if no prior order exists for this invoice, but you want to record the order particulars. Select Not Applicable if not applicable. Select End of List to move to the next item.
Buyer's Details The Buyer's Address as per the master records appears as default, but you may alter it. If you have configured to have the Consignee address as well as Buyer address, these details are also displayed. Accept or modify them as required. N o t e : The F e a t u r e s.
location
column
appears
only
if
Multiple
Location is enabled in F 1 1 :
Inventory allocations Enter the inventory items that need to be invoiced. Once you have selected the first item and the tracking number and you have multiple locations set up, a secondary screen appears for the item particulars.
Enter the quantity, rate and unit particulars. You can select more than one location from where the goods have been despatched. Press Enter at the first blank location field to accept the first item's allocation of location and other details. You now have to give the ing ledger that will be affected for the sale of this item.
ing details Enter this information in the secondary screen that pops up after allocation of each item. Select the relevant sales to be debited for the first item.
Where you have more than one Stock Item Each item will require item allocation and ing allocation. You must repeat the procedure till you have completed all the items for that invoice. Press Enter on blank item or select End of list to complete the cycle.
VAT/Tax or other expenses These s are entered after the total value of stock items. Select relevant ledgers for the list. These are ledger s and will affect ing ledgers. For s like VAT/Sales Tax that are under the group Duties & Taxes (or are otherwise specified as Calculate in invoice entry in their masters), the amounts are calculated automatically. Press Enter on blank item or select End of list when you have completed.
Bill Details You must give bill-wise particulars, if the feature is activated for this particular party ledger. After you give the narration, accept the invoice.
Printing Invoices and Vouchers
To print any voucher or invoice, press ALT+P or click on the button Print. You can configure the voucher type to print automatically after saving the voucher.
N o t e : You can configure the can give additional information, settings.
printing change
options titles,
by selecting the appropriate buttons. You print additional pages, change printer
The buttons Pre-Printed and Quick Format toggles for Plain Paper and Neat Format respectively. These are print specifications that you set. Pre-printed is for pre-printed stationery. Quick Format does not give fonts or other niceties but is ideal for fast printing. Select copies and give the number of copies to be printed, by default this is set to one copy. You can set the number of copies in Invoice Printing Configuration Go to Gateway of Tally > F12: Configure > Printing
View invoice as voucher and vice-versa Once you create the invoice, you can view it as a voucher by simply displaying it and clicking on the toggle button [As invoice] / [As Voucher] or pressing CTRL+V. The same can be done with a sales voucher to be brought up as an invoice
Display/Alter a Voucher/Invoice You can display a voucher or alter it (subject to authority), by simply drilling down any display screen. For example, from the Balance Sheet, press Enter on the group Sundry Debtors, then on the particular ledger, which brings up its monthly summary. Continue the selection process till you see the list of vouchers and then the voucher itself. You may to alter a voucher by going through the ledger display screen or the Day Book. N o t e : If you do not up for display only.
have
the
authority
to
alter
a
voucher,
the
voucher
would
be
brought
Advanced Voucher Entry
Advanced ing Vouchers Advanced usage in voucher entry involves using more features of Tally. This would mean entering of data in various pop-up and sub-screens depending on the context and configuration (both F12 and F11) settings.
Bill-wise details Bill-wise details are pertinent only for party s, viz., ledger s classified under Sundry Debtors, Sundry Creditors and Branch/Divisions. Activate Bill-wise details if you wish to track each invoice and adjust the bills and payments bill-by-bill. When you make a sales or purchase voucher with Bill-wise turned on, Tally prompts you to identify the invoice with an appropriate reference number. The reference can then be used to allocate payments to the correct invoice to maintain an accurate of outstanding. Hence, Bill-wise details sub-screen comes up for party s during receipt/payment voucher entry or purchase/sale voucher entry or debit note/credit note entry. To activate Bill-wise details: 1.
Set Maintain Bill-wise details to Yes in F11: Features
2.
Set Maintain Bill-wise details to Yes while creating the respective Ledger Masters. Setting this option to Yes displays an additional option Default Credit Period. Credit Period is the number of days allowed to the Sundry Debtor to pay back or assigned to the Sundry Creditor to remind us of our payables. Specifying the period here is automatically reflected in the transaction. However it can be altered during Voucher Entry.
Note: relevant
Bill-wise details sub-screen does not only for ing purposes.
appear
for
pure
inventory
vouchers.
It
is
Let us take an example of a Purchase Voucher where we credit the supplier XYZ Supplier with Rs. 2000. After the amount field, the Bill-wise sub-screen pops up. The sub-screen appears as shown below.
Type of Ref Bill reference can be of four types: 1. 2.
1.
Advance
2.
New Ref
3.
Against Ref
4.
On
You must select one or more of these to adjust the amount. The amount can be broken up and given different Reference Numbers and different Due Dates. For example, the Rs.2000 can be split into two parts say Rs.500 and Rs.1500. Give Reference Numbers 5 and 6 respectively and specify Due Date as 31st May and 15th June 2005. Thus you have the option of adjusting the amounts with different reference numbers and different Due Dates.
Advance This is relevant when the money is received or paid in advance. You can adjust this advance amount while making the sale or purchase entry.
New Reference You select this for new transactions. For example, for a new bill raised on your customer or raised on you by your supplier. If you mark the bill as a new reference, it is added to the list of outstanding. In the field, you can give the voucher number, the reference number, or any alphanumeric set of characters that would identify the reference and help set it off later using against reference. You are not allowed to give the same name for two new references. In other words, new references must be unique.
Against Reference Select this when adjusting against a previous reference, i.e., adjusting against a bill marked new reference. Mark a bill as new reference and adjust its payment by marking the payment against reference. When selecting against reference, a list of pending references (bills) for the party comes up from which you select. You may adjust the whole bill or part of it. The rest of the bill remains unadjusted. You can use Against Reference even to adjust advance with an invoice. You can do this when entering a purchase or sales voucher. If there are no pending bills, the option will not be available.
On On is selected when you are unable to mark a payment or a receipt against specific pending references. You need to do this in cases of lump sum payments where a number of bills are pending but you are not instructed against which bill the money should be adjusted. However, the can alter the payment/receipt voucher and select the relevant Agst references Name In this field you can give the voucher number, the reference number, or any alphanumeric set of characters that would identify the reference and help set it off later using against reference. You are not allowed to give the same name for two new references. In other words, new references must be unique. Due date or credit days This is applicable for new reference. Give the credit period for the bill or the date when it is due for payment. Give either one of them and Tally will calculate the other. Amount This is the amount for adjustment. The amount given in the voucher automatically appears here. You can break up the amount and adjust it in several installments giving different references.
Dr/Cr Specify whether the adjustment is debit or credit. It is usually Dr for sales New References and Cr for Purchase New references. It is usually the same as the voucher entry. Maintaining Bill-wise details helps you to obtain information on Pending Bills, Bills Due, Overdue Bills etc and reports such as Outstanding Analysis and Ageing Analysis. To get these reports Go to Gateway of Tally > Display > Statement of s > Outstandings Cost centre allocations Cost centre allocations will be relevant if you have opted for Cost Centres in F11: Features. To display relevant ledgers Go to Gateway of Tally > s Info. > Ledgers. By allocating ledgers to Cost Centres at the time of voucher entry, you do away with the need to reconcile them. They are reconciled from that very moment. Hence, you save time and effort when you need to use the information for analysis. Cost Centre analysis is a powerful tool that enables you to know the performance of the Cost Centres. To display Cost Centre information Go to Gateway of Tally > Display > Statement of s > Cost Centres. More: Cost Categories Inventory allocations Tracking Number Default voucher number and reference number Foreign Exchange transactions Zero Valued entries in vouchers
Cost Categories
Let us take an example: 1.
Create three Cost Categories named Departments, Executives and Projects.
2.
Create three Cost Centres named Marketing, Manufacturing and Finance under the Cost Category Departments. Create three Cost Centres Salesman A, Salesman B and Salesman C under the Cost Category Executives. Create three Cost Centres Airports, Roads and Buildings under the Cost Category Projects.
The structure for creating Cost Categories and Cost Centres are shown below:
Cost Categories:
Departments
Executives
Projects
Cost Centres:
Marketing
Salesman A
Airports
Manufacturing
Salesman B
Roads
Finance
Salesman C
Buildings
You can specify a Cost Category to allow allocation of only revenue items or items of both revenue and capital nature. In this example, allow allocation of items of both revenue and capital in nature for both Departments and Projects categories and items of only revenue in nature for Executives. Now, Salesman A incurs conveyance expenses. If he has incurred it for marketing, allocate this amount to the cost centres Marketing and his own cost centre Salesman A. (You would do it while entering a payment voucher debiting Conveyance and crediting Cash). If the salesman now incurs expense for the project Buildings, you would allocate to the Cost Centres Salesman A and Buildings. You may allocate an expense to one or more Cost Centres and it is not essential to always allocate to all Cost Centres. An expense can remain unallocated to other Cost Centres. In case Cost Categories are not enabled, you will be able to allocate the expense to either Buildings Cost Centre under Projects or Salesman A under Executives and not to both. In such a case, you would not obtain the third dimension. You may not have Cost Categories activated if you do not need to. Without Cost Categories, you will allocate the ledger amount to only one set of Cost Centres, and not to parallel sets. Hence, you would allocate the conveyance expense to Salesman A only and not to both Salesman A and Project Buildings. You can allocate the expense partly to Salesman A and partly to Project Buildings that adds up to the total amount. This information will not enable you to know how much Salesman A spent for the Project Buildings. Note: centres
You do not allocate only. The concept
transactions to cost categories is like group/ledger
you allocate them classification.
to
cost
Cost Centre allocations have to be done in pop-up sub-screens in the main voucher entry screen. The sub-screen pops up after the amount field pertaining to the ledger for which cost centres have been activated. Hence, the following is the sub-screen for the ledger Conveyance amount in a payment voucher:
Applying Cost Centres to Ledger s Activate Cost Centre for the Ledger s that are used in voucher entry. In this example, make a payment voucher for the amount Rs. 1, 00,500. Hence, enable Cost Centres for the ledger Conveyance. 1.
Go to Gateway of Tally
2.
Select s Info > Ledgers>Alter
3.
Select the ledger Conveyance from the List of Ledgers . Set Cost Centres are Applicable to Yes. If the ledger Conveyance is not available create a new one with Cost Centres enabled.
3.
Cost Centre Allocation in Voucher Entry The entire objective of creating Cost Centres is to allocate expenses and revenues to Cost Centres. Allocation is dynamic and done at one stage only, at the time of making voucher entries. For example, make a payment voucher for conveyance Go to Gateway of Tally > ing Vouchers > F5: Payment The voucher entry screen appears. Debit the amount to the Conveyance ledger. Cost Centre allocations have to be done in pop-up sub-screens in the main voucher entry screen. A sub-screen pops up after the amount field pertaining to the ledger for which cost centres have been activated. The sub-screen for the ledger Conveyance and in a payment voucher appears as shown below.
Inventory allocations
Inventory items need to be considered in financial vouchers where you use ledger heads that have the option Are Inventory Values affected? set to Yes. Similarly you will have the s of the type Sales and Purchases affecting inventory. When you enter a voucher (usually a Sales or a Purchase Voucher) a sub-screen pops up after the concerned ledger head and amount asking you to enter inventory item details. The inventory details that you give in an ing voucher (like Sales and Purchase Voucher) affects stocks by immediately updating them only if Tracking Numbers are not activated in F11: Features. Otherwise, the inventory allocation tracks against Goods In or Goods Out notes through tracking numbers. The information that you need to give in the inventory allocation sub-screen depends upon the features enabled for the company. A typical inventory allocation sub-screen appears as shown below.
Name of Item Select the item from the list of items or press ALT+C to create a new item.
Tracking Number
The tracking number pop-up list appears after you have entered the name of the item. A default list will contain the following:
1.
New number – Enter a number, which is not in the list. You will use this number to reconcile, when making goods inward entry.
2.
Not applicable – If you do not want a tracking number. This may be resorted to in cases where you want to update stocks immediately with this entry and no goods inward entry will be needed. Not Applicable option is important and the cases where you would use it are:
When you raise a sales voucher/invoice that accompanies the goods and you do not want to Goods Out entry. Not Applicable will update stocks without the Goods Out entry. When you send out samples for approval, where you do not want to raise an invoice. Likewise when you receive samples but no invoice will be forthcoming.
Default Voucher Number and Reference Number
The voucher number and the reference number of the current voucher are also listed and available for selection. Select the one that is easy to track later. By default the reference no. and the Delivery note number are highlighted in the receipt note and delivery note for tracking.
Pending Tracking Number If you have a pending tracking number from a previous voucher, it will be listed here together with details like location, quantity, rate and amount. Select a pending tracking number to adjust that with the current voucher entry. This helps in the following situations. 1.
When you a purchase voucher for an invoice that is towards a Goods Receipt Note that you had previously ed. (You would have given a new tracking number then).
2.
Likewise for a sales voucher/invoice.
Location If there is more than one location, you must specify the location to which the item relates. Hence, a sub-screen appears after the tracking number, to enable you to specify the location quantity, rate and amount for the item. You can give multiple locations. Batch Number In the locations sub-screen itself, the batch number can be given if batch numbers are activated in Company Features. Select a batch number from the list of existing batch numbers or give a new number for a new batch.
Mfg. Date This appears only if it is activated. Give the date of manufacture. This enables you to set expiry date for the batch as a period from the date of manufacture such as “three months from the date of manufacture”.
Expires on It appears only if it is activated. Give the date of expiry or a period from the date of manufacture. If, for the item, you had disallowed the use of expired goods; you cannot issue them after the expiry date. More: Quantity
Quantity
You have to enable the option Use different Actual & Billed Qty? to Yes in F11: Features to allow Actual and Billed Quantities. Then, you have to give both quantities here. The actual quantity updates stock and the billed quantity affects the s. Give the quantity either in the main unit or the alternate unit. You can even specify quantities in both units. For example, 100 bars=150 Kgs.
Rate Enter the rate for the stock item. If you have entered Standard Rate for the item (Standard Cost and Standard Selling Price – see item master), the voucher will pick the relevant standard rate for that date by default. This can be modified while entering the voucher.
Per Enter the unit of measure for the quantity of the item here. This can be the main unit or even the alternate unit.
Amount The quantity multiplied by the rate per unit is the amount.
End of List In all multiple allocations or selections, you must either be required to select the option End of List or press Enter at the first blank field. This would accept the multiple allocations and take you back to the parent screen. For example, Multiple locations, batches or items.
Foreign Exchange transactions
Enabling Foreign Currency To enable Foreign Currency Set the option Allow Multi-Currency to Yes in F11: Features
N o t e : Only genuine bank s that are maintained in foreign have their currency set up in that foreign currency otherwise all preferably be set to home/base currency only.
currencies need to other ledgers should
Based on the above settings, consider a Purchase Voucher entry of an import transaction in foreign exchange and then a payment entry made from a Forex Bank . More: Example 1: Foreign exchange transaction of an import transaction. Example 2: Voucher entry of a forex bank payment
Example 1: Foreign Exchange Transaction of an Import Transaction.
In the purchase voucher 1.
Enter the date, voucher number and reference.
2.
Ensure that you have created a supplier under Sundry Creditors with the foreign currency specified in the Currency of the Ledger field.
3.
Credit the supplier.
4.
In the Amount field, start with the foreign currency symbol to inform Tally that it is a forex transaction. In this case, type $ (base currency is £) and continue with the amount. $25000.
5.
A forex sub-screen displays. Enter the exchange rate as per the bank or as mentioned on the purchase invoice. (Tally gives the default exchange rate mentioned in the foreign currency master). You can change the rate, if required. Alternatively, change the amount and the rate will be adjusted automatically. If you want to give only the base currency, clear the Forex field and Rate of Exchange field and mention the Value in base currency. The exchange rate will then be ineffective.
6.
In inventory item allocation, consider a purchase of 50 rolls of paper. You can give the rate of the item in base currency or foreign currency. To mention it in foreign currency, start the rate entry with the forex symbol. Tally converts it to the base currency at the exchange rate previously mentioned.
N o t e : If you want to give only the base currency, clear the forex field and Rate of Exchange field and simply enter the Value in base currency. The exchange rate would then be ineffective. Of course, if you do not enter a foreign currency in the amount field, the amount is assumed to be in home/base currency.
Example 2: Voucher Entry of a Forex Bank Payment
It is assumed that the bank ledger is maintained in foreign currency. In a payment voucher (bank payment): 1.
Enter the date and voucher number.
2.
Debit the supplier
3.
In the amount field, begin with the forex symbol
4.
You can debit the supplier with the same amount and exchange the rate as before or even change the rate to the current rate. Here, the rate is changed to the current rate. Notice the display of pending bills in foreign exchange when you are asked to adjust the payment against previous reference (it would come up if you have bill-wise outstandings activated).
5.
The forex gain or loss in the transaction is automatically calculated and is shown as unadjusted Forex gain/loss in the Balance Sheet. You can a journal entry affecting the profit and loss with the forex gain/loss figure to bring it into the books.
When you display ledger of the supplier, you will notice that its has balanced out but a forex gain has accrued on the transaction due to a rise in the exchange rate for the dollar.
Advanced inventory vouchers There is no separate section on this. Normal inventory voucher entry includes a discussion on the advanced issues.
Zero Valued Entries in Vouchers
T o use zero values in vouchers, Set the option Allow 0 Valued entries in Vouchers to Yes in F11: Company Features > Inventory Features
There is no point in having a voucher that is totally without value. Zero values are required in the following situations: 1.
One of the entries may not have a value but yet needs to be shown in the records.
Example : Zero-rated VAT or Exempt from Tax . You are permitted to make such an entry. The Exempt Ledger can be viewed for all Exempt Sales. 2.
Zero valued vouchers are possible for sales and purchase vouchers as these permit invoicing for free samples. A whole Voucher could be of zero value in only sales and purchase vouchers but this is not possible in receipt, payment vouchers and journal vouchers.
Example 2 - Invoice for Free Samples
Display – Tally's Forte
Tally's Display of information is designed to allow a get the maximum benefit of the data that is entered. A gets a holistic picture of the data and is also able to present information using different options. The purpose of compiling data is to present it in comprehensible ing reports. On entering the vouchers, Tally uses the same data and provides you with the management control reports in addition to all books and statements. The display screens of Tally are dynamic and interactive. They are not spooled print files but are specially designed for the screen. Whatever you see on the screen can be printed as well depending upon your printer’s capabilities. To view the Display Menu: Go to Gateway of Tally > Display The following screen displays
Gateway of Tally displays only the Balance Sheet and Profit & Loss directly as these statements are considered the most important. All the other Tally reports are classified into two broad categories, namely. ing reports and Inventory reports conforming to the two major areas of operations. Each area is further grouped into books and statements. The Cash and Funds Flow display too has not been grouped under Statements of s. Trial Balance provides you a report on the balances sorted by groups, for all the s of the selected company. In other words, the Trial balance displays a collection of main groups and their closing balances. The Stock Summary is a statement of stock-in-hand on a particular date and gets updated every transaction so as to provide the current stock position.
The Ratio Analysis Statement is a single sheet report indicating the company’s performance based on values and key indicators, over a selected period. This report gives a manager an idea of the company's financial condition and where it is going in the short-term. The Day Book contains all vouchers for the day, including inventory vouchers. Its purpose is to show you a day's transactions, though you can display a report for any period using Change period option. The List of s gives the tree structure of all your masters, namely, Groups, Ledgers, Stock items, Cost Centers, Currencies, etc. Exception Reports are those reports that track unusual transactions or balances. More: Basic features of displaying reports Modifying reports
Basic Features of Displaying Reports
Tally creates the books of s and the financial statements based on the vouchers entered till date. You can then customise the appearance of reports as required. For example, you can compare different companies, periods of the financial year, groups and ledgers. Press Enter after highlighting the item in a report, to navigate to the next level of detail till you reach an individual voucher. Similarly, you can navigate back to higher levels by pressing Esc. The special features available for a displayed report are indicated on the button bar, which can be operated by a single- click of the mouse.
Accessing reports The Gateway of Tally menu provides access to all the financial reports listed in the Display Menu. For example, if you want to view the Sales , Go to Gateway of Tally > Display > Books > Sales . Tally will display the report for the currently selected period.
Modifying Reports
On selecting a report, the screen displays. Modify the display to suit your requirements using the appropriate buttons from the button bar. If you select the buttons using the keyboard, the conventions are: F (n) : - Press the F (n) key F (n) : - Press Alt + F (n) F (n) : - Press Ctrl + F (n) N o t e : Here n
is
used
as
an
example
of
a
function
key
(Eg:
F1,F2
and
so
on).
(Alt + F1) F1 : - Detailed/Condensed Adds a further level of detail to the report, or condenses the report.
F2: Period You can change the period of the report by specifying From/To dates.
F3: Company If you have more than one company selected, this button enables you to switch among them to display the new company data in the current screen format.
F4: to F10: The functions performed by these buttons vary from report to report.
F11: Company Features This button is not related to displaying reports but to setting the options that affect the voucher entry.
F12: Configure This button is very relevant to displaying reports and enables you to define the report-specific options. For example, depending on the report displayed you can specify whether it should be in horizontal or vertical
format, show percentages, show gross profit, show opening and/or closing balances, change the periodicity, change the sorting method, and so on. For instance, if you want to view graphs with monthly reports: 1.
Select the F12: Configure Button while in the Gateway of Tally screen and you will be taken to the Configuration menu.
2.
Select General and by default Show Monthly Reports with Graphs under Other Options is set to Yes . If this option is No set it to Yes .
(Alt + F12) F12 : Range This button enables you to filter the information displayed based on monetary values. For example, you can specify that you want Tally to display only Vouchers having Batch Names greater than $5,000 in a Day Book.
(Ctrl + F12) F12 : Value This button enables you to filter vouchers. For example, you can specify that you want vouchers having Employee-Attendance Entries with their Designation containing all the details about the employee.
New C olumn (Alt + C) This button enables you to add and display another column in the report to compare information.
A lter Column (Alt + a) This button enables you to alter the details of a new column added previously, for example, the date range. Select the column to be altered by positioning the cursor on it.
D el Column (Alt + d) Use this button to delete the columns, which you no longer wish to have in the report.
Auto Column (Alt + n) Use this button to add multiple columns to a report. For example, add columns for each month, or to accommodate other companies if more than one company has been selected. You can also have a total column.
Report specific options Report specific options, if any are displayed at the bottom-half of the screen and can be amended as per requirements.
Display Books and Statements
B ooks of Books of record the transaction details as entered. Although items are posted too many different ledgers, Tally brings all the transactions of a particular category together into a book of for viewing and printing. For example, Cash Book records all the transactions affecting cash and the Sales Book records all sales transactions.
Statements of s These pertain to cost centres and outstanding analysis . The Statements of s are derived from individual transactions but are not statutory requirements.
Financial Statements Financial Statements though derived from individual transactions tend to show summary totals, ratios and statistics, analyzing a company's financial data in a wide variety of ways. Financial statements include Balance Sheet , Profit & Loss A/c ,and Cash Flow Analysis and form part of the statutory requirements in most countries. 1.
All books are displayed as a monthly summary with opening and closing balances.
2.
Select a month and press Enter to display all transactions for the month. The opening and closing balances as well as the total of all transactions are displayed.
3.
Select a transaction to bring up the voucher. The voucher displays either in alteration mode or simply displays depending on your access rights.
3.
Let us see some typical examples of how to display the books of and financial statements. You will then be able to experiment with other statements for yourself. More: Viewing Cash/Bank Books Display Balance Sheet Display Profit & Loss Display Trial Balance Day Book Books and s Group Summary List of Vouchers Ratio Analysis
Cost Centre Reports Outstandings and Credit Control
Viewing Cash/Bank Books
T o view the Cash/Bank Summary 1.
Go to Gateway of Tally > Display > Books > Cash/Bank Book(s)
2.
If you have more than one bank , select one bank . Press Enter to display the Ledger Monthly Summary .
3.
Select F12: Configuration and activate the option Show with Graph to Yes .
3.
4.
5.
Highlight a month, press Enter and the Ledger Vouchers screen displays.
4.
5.
All the vouchers for the selected month are listed. Press Esc to return to the Ledger Monthly Summary screen.
6.
Select F12 : Value to bring up the Value to Calculate in Report screen. a.
Select Voucher Type from the Particulars menu.
b.
In the Particulars menu, select Narration .
c.
In the Range of Info. Menu select equal to .
d.
Type Contra in the next field and press Enter .
e.
In the Condition menu select End of List and press Enter twice.
e.
7.
In the display of the Ledger Monthly Summary the figures are now reduced as they show only Contra vouchers. To check this, position the highlight bar over the July figures and press Enter to display the details.
8.
Press Esc until you return to the Gateway of Tally menu.
Display Balance Sheet
The Balance Sheet is a report on the status of the financial affairs of a company at a given date. To view Balance Sheet: 1.
Go to Gateway of Tally > Balance Sheet
2.
Press F12: Configuration and set the required parameters to display the Balance Sheet according to your preferences.
Note: entered
Balance Sheet and saved.
gets
updated
instantly
with
every
transaction
voucher
that
is
Horizontal Form of Balance Sheet The Balance Sheet screen is displayed in the Horizontal form. See it in a Vertical form by activating Show Vertical Balance Sheet to Yes in F12: Configuration .
Extract information from the Balance sheet using options available in the Button Bar. 1.
Select F1: - Detailed/Condensed to explode the summarized information.
2.
Change the date of the Balance Sheet using F2: Period .
3.
Add up new columns and
Display a Balance Sheet for a different date to compare with current one
Display the Balance Sheet in a different currency
Display Budget figures and analyse the variances or
See the effect of different Stock Valuations on the Balance Sheet.
More: Configuring the Balance Sheet Integrate s with Inventory
Configuring the Balance Sheet
Show Vertical Balance Sheet? Setting this field to Yes displays the Balance Sheet in Vertical form. In the British/Europe configuration, the Vertical Balance Sheet has Liabilities and Assets , whereas the Indian/Asian configuration , it displays Sources of Funds and Application of Funds .
Profit or Loss, both as Liability? Set this to No , to move the Profit & Loss to the Asset side of the Balance Sheet. Note:
This
is
applicable
only
in
the
horizontal
form.
Show Percentages? Each line will be expressed as a percentage of the total in the Balance Sheet.
Show Working Capital figures? Set to Yes , to display Current Assets, less -Current Liabilities as shown
Method of Showing the Balance Sheet The options are
Liabilities/Assets
Assets/Liabilities.
Format of the Balance Sheet:
For Horizontal Balance Sheet: Left Hand Side/Right Hand Side
For Vertical Balance Sheet: Top/Bottom.
Vertical Form of Balance Sheet 1.
Set Show Vertical Balance Sheet to Yes in F12: Configuration .
2.
Go to Gateway of Tally > F12: Configuration > General
Set Use ing terminology of to India/SAARC or International under the Country Details to Yes .
If you have activated India/SAARC the Balance Sheet will display Sources of Funds and Application of Funds .
If you have activated International the Balance Sheet will display Assets and Liabilities
Columnar Balance Sheets
Select a Balance Sheet for a different date to compare alongside the current one
Press N ew Column on the Button bar or ALT+C and change the period.
The following is a comparison of Balance Sheet dated 1st October and Balance Sheet dated 2nd October.
Press N ew Column on the button bars or ALT+C and change only the currency to display the Balance Sheet with figures in a different currency.
Show Quarterly Balance Sheet To view a Quarterly Balance Sheet
Press Auto-column on the button bar or use the key ALT+N .
Select Quarterly from the list of periods.
The following screen displays
Integrate s with Inventory
Effect on Balance Sheet and Profit & Loss Integrate s with Inventory in F11: Features has a significant effect on the Balance Sheet and Profit & Loss .
If s with Inventory is set to Yes in F11: Features, it the stock/inventory balance figures are updated from the inventory records, which in turn enables you to drill down to the Stock s from the Balance Sheet.
If the option s with Inventory is set to No in F11: Features, the inventory books figures are ignored and closing stock balances are entered manually.
Note: Stock records often contain compensating errors caused by wrong allocation to items. This feature of Tally enables the finalisation of financial books without waiting for reconciliation of stocks that might take time.
Display Profit & Loss
The Profit and Loss shows the operational results over a given period. It lists out the Incomes and Expenditures based on the Primary Groups of Tally and the Profit & Loss in Tally is updated instantly with every transaction voucher that is entered and saved. To view the Profit & Loss Go to Gateway of Tally > Profit & Loss
N o t e : The it in F12:
Profit & Loss Configure.
Horizontal Form of Profit & Loss
is
displayed
according
to
the
configuration
set
up
for
The sample screen shown is in horizontal form which is the default display. You can also set it up to display in vertical form.
Using options in the Button Bar 1.
Select F1: - Detailed/Condensed to display more information or condense.
2.
Change the date of the Profit & Loss using F2: Period .
3.
Add new columns to
Display a Profit & Loss for a different period to compare with the current one
Display the Profit & Loss in a different currency
Display a column with Budget figures and analyse variances
See the effect of different Stock Valuations on the Profit/Loss .
Select and compare Profit & Loss of different companies.
More: Configuring the Profit & Loss Income/Expense Stmt instead of P&L?
Configuring the Profit & Loss
Show Vertical Profit & Loss?
The Profit and Loss will be displayed in the Horizontal (default) form if you set the option Show Vertical Profit & Loss? to No .
Set to Yes to display in the Vertical form.
The Vertical Form shows the Trading and the Income Statements separately.
Show Percentages? Each line is expressed as a percentage of Sales s , i.e., if you consider Sales s to be 100%, the rest of the lines would be a percentage of Sales s.
Show With Gross Profit? If the option Show With Gross Profit? Is set to Yes the Profit & Loss Statement is split to show Trading Profit, which considers only the Cost of Sales and Direct Expenses., Indirect Expenses are deducted from the Gross Profit to show the Nett Profit.
Note:
This
field
is
applicable
only
to
Horizontal
Form
of
Profit
and
Loss
.
Columnar Profit & Loss : Some Examples Select a column to display the Profit & Loss in a different currency.
Press New C olumn on the button bar or the keys ALT+C and change only the Currency and give the closing Exchange Rate.
The Profit & Loss figures are converted at this rate.
Select a column to display the Profit & Loss with a different stock valuation method.
Press New C olumn on the button bar or the keys ALT+C and change only the Stock Valuation Method to Last Purchase Cost.
The Profit and Loss screen will be displayed as shown
Show Quarterly Profit & Loss Press Auto-column on the button bar or the keys ALT+N . Select Quarterly from the list of periods. The Profit and Loss screen will be displayed as shown:
Income/Expense Stmt instead of P&L?
A ccount statements for Non-Trading Organisations For Non-Trading s (e.g. s of Charitable Organizations), the Trading and Profit & Loss Statement are inappropriate. In such cases, you may use Income & Expenditure by setting to Yes in F11:Features . The Income & Expenditure Statement displays as shown.
Income/Expense Stmt instead of P&L
Display Trial Balance
Trial Balance is a report of all balances for the company sorted by groups, i.e., it is displayed in a grouped form, comprising main groups and their closing balances. You can see that the debit and credit balances match. In Tally, the matching of the Trial Balance is a foregone conclusion since all voucher entries are in Debit - Credit format and must balance at the entry point. To view the Trial Balance Go to Gateway of Tally > Display>Trial Balance Note:
As
per
ing
principles,
the
Trial
Balance
does
not
list
Closing
Stock.
Select F1 : Detailed to break down the grouped information or simply drill down a Group for further detail.
The screen appears as shown
Select F5: Led-wise to list all ledgers and their closing balances.
The screen appears as shown
Select New C olumn to bring up the closing balances for another date.
The screen appears as shown
More: Reconciliation Statement
Reconciliation Statement
This report shows the flow of the s from Opening Balance to the effect of transactions on Closing Balance.
Select F12: Configure and set parameters as shown
The Trial Balance Reconciliation Statement is as shown
The Trial Balance can also be configured to show only Opening and Closing Balances.
Day Book
To view the Day Book Go to Gateway of Tally > Display>Daybook The Day Book lists all transactions made over a particular day and by default displays the last voucher entry date of a regular voucher. It could also be set up to list all the transactions made over a period. Press F2 : Period on the button bar or press the keys Alt+F2 . All the transactions include all financial vouchers, reversing and memorandum journals as well as inventory vouchers. Consider an example:
Day Book for current date
Day Book for a period
You can also filter the list so as to display the transactions of a particular voucher type using F4: Chg Vch button from the button bar. The screen appears as shown:
Books and s
The objective of having books and s in Tally is to pile up similar entries into a single entity so that they are meaningful, e.g., all cash entries in the Cash Book, all sales entries in the Sales Day Book (called Sales ).
The Tally transaction flow Apart from the subsidiary books, entries are also filed under each Voucher Type. Therefore, there will be as many s as there are voucher types. More: Journals, Day Books and s Sales (Sales Day Book) Invoice Profitability Columnar Sales s from Statistics Monthly Summary
Journals, Day Books and s
Journal, Sales , Purchase , Debit Note , Credit Note , Payment , Receipts , etc. are the different kinds of s. There are three ways to view various types of s: 1.
From the Display menu
2.
By changing the type of voucher from within a
3.
From the Statistics page
Consider the Sales which includes most of the options.
Sales (Sales Day Book)
Go to Gateway of Tally > Display > books > Sales The following screen displays.
By default, all s display Monthly Summary with transactions and closing balances. For Balance Sheet s, opening balance is displayed at the top of the screen. Select a month and press Enter to see the Sales Voucher . A list of all sales vouchers pertaining to the month you selected displays. You can use the options in the button bar to change the display according to your preferences. You can change the period of the report as well as the depth of information. Use F12: Configure to see the report with some or all of the following information, namely Narrations, Bill-wise details, Cost Centre details and Inventory details.
Click on F1 : Detailed to view the reports in detailed format.
Invoice Profitability
Display the Sales Voucher for a period by drilling down a month and change the period if required. Select F7: Show Profit or activate the option Show Gross profit estimates to Yes in F12: Configure
The report now displays each invoice with Transaction Value - Invoice value including taxes Gross Revenue – Actual sale value minus taxes Cost – Book cost of the product Gross Profit – Amount of profit or loss on the sale
Extract of Sales When you are in the Sales Voucher , select F6: Extract from the button bar. The following screen displays.
The Extract gives a break-down of the sales vouchers and groups them to provide totals for each group and ledger used in all sales vouchers for the period. The information is useful, when you want to know how much each group of customers bought, what is the tax component or what is the total value of each sales ledger.
Inventory-wise Extract of Sales
In the Sales Voucher select F6: Extract from the button bar
Go to F12: Configure .
Set Show Inventory-wise Extract to Yes to view the report of the stock items sold along with the details
on quantity and value.
The following screen displays.
Columnar Sales
Select the option F5: Columnar from the button bar, in the Sales Voucher screen. The following screen displays.
Set the options listed to Yes or No depending on how you want the Sales to display
Type of Column Select the type of column from the screen.
If you select Ledger or Group as Type of Column, you are provided with one more list for choosing the ledger/group. Your choice is displayed under Name of .
All Items (automatic columns) If this option is set, every ledger will use a column space
All Item (in one col.) If this option is set, all the ledger s are displayed in one column.
Group You can also select a group of ledger s to be displayed together in one column, e.g., Sales s. For other columns, you can use the additional options, namely Related s (automatic columns) or Related Items (in one col.).
Ledger Select a specific ledger e.g., VAT/Sales Tax. All other s can be put in one or more columns.
Related Items (automatic columns or in one column) Related items means all the ledger s used in a voucher. Hence, the report will be similar to All Items (automatic columns). This option is helpful when used in conjunction with a Group or a specific ledger in the first column.
Chg Vch Use this button to view a different from within an existing . E.g. If you are in Sales and want to view the Payment , press F4: Chg Vch and select Payment .
Payment
s from Statistics
To access the Voucher s from the Statistics page: Go to Gateway of Tally > Display >Statements of > Statistics The following screen displays.
Drill down a specific type of voucher to view the details.
Monthly Summary
When drilling down from a statement into any Group, Ledger, Stock item or Cost centre the screen displayed first is the Monthly summary. Monthly Summary can also be accessed from a voucher level screen with the help of the button Monthly . The monthly summary shows the opening balance for the year, and then lists each month's total transactions, inclusive of both debit (inwards for stocks) and credit (outwards for stocks) and finally each month's closing balance. Below the monthly summary, is a bar chart showing the movement of . Use F12: Configure to display the monthly summary according to your requirements. The options available on the button bar are very useful for configuring managerial reports. E.g. Use the New Column button to bring up the Monthly Summary of another ledger or object or the same object in another company. Press the button F5 : Quarterly , to view the summarized quarterly figures. Use the options in F12: Configure to view the details on percentages, averages and so on.
Ledger Voucher Monthly Summary The Ledger Voucher Monthly summary screen is displayed as shown.
Cost Category Monthly Summary The cost category monthly summary is displayed as shown. You can place the cursor on any particular month, say October and drill down for more details.
Stock Item Monthly Summary The screen will be displays as follows. If you want to view the details for any particular month you have to place the cursor on the month and drill down.
Group Summary
Go to Gateway of Tally > Display > Books > Group Summary> Group name for e.g. Duties and Taxes The following screen displays.
The Group Summary Statement shows the closing balances of the s falling under the selected group over a period. Using the buttons provided on the button bar, you can change the view to any of the following: Detailed, Individual Ledger listing for the selected group, monthly summary, columnar display for comparison and analysis. An example is given below:
Led-wise Display of Group Summary To view the Led-wise Display of Group Summary select F5: Led-wise from the button. This toggles with the button Grouped .
List of Vouchers
Vouchers or transactions of a similar nature or type entered over a period are collated and listed together to present meaningful information. There are different types of voucher lists, e.g., Group Vouchers, Ledger Vouchers, Stock Vouchers, Godown/Location Vouchers, etc... More: Group Vouchers Ledger Vouchers
Group Vouchers
To view the Group Vouchers Go to Gateway of Tally > Display > Books > Group Vouchers> Group Name e.g. Current Assets The following screen displays.
Group Vouchers is a list of all vouchers having at least one ledger entry belonging to the group selected. This statement is useful when you want to list all transactions for a particular group.
Ledger Vouchers
To view the Ledger Vouchers Go to Gateway of Tally > Display > Books > Ledger > Ledger e.g. Machinery The list of vouchers for the current month is displayed. You may also access Ledger Vouchers by drilling down from different statements, such as Group Summary and Monthly Summary.
Ratio Analysis
The Ratio Analysis Statement is a single sheet performance report for a selected period. It provides you with important values and key performance indicators. It is one report that top management needs to look at periodically to assess the company's financial health and where it is going in the short term. To view the Ratio Analysis screen Go to Gateway of Tally> Ratio Analysis The following screen displays.
The Ratio Analysis screen is divided into two parts:
Principal Groups
Principal Ratios
The Principal Groups are the key figures that give perspective to the ratios. Principal Ratios relate two pieces of financial data to obtain a comparison that is meaningful. More: Principal Groups and key figures Principal Ratios Payment Performance of Sundry Debtors
Principal Groups and Key Figures
Working Capital The Net Working Capital is calculated by subtracting Current Liabilities from Current Assets. Financial Analysts often consider the total Current Assets as the Working Capital. This serves as a measure of how far the firm is protected from liquidity problems.
Cash in Hand and Bank Balances This data presents another perspective on the liquidity position
Sundry Debtors (due till today) The total debtors and debtors that are due as on the date of the statement, are displayed
Sundry Creditors (due till today) The total creditors and creditors that are due as on the date of the statement are displayed.
Sales and Purchase s The Sales and Purchase s, which collate the trading activity for the period, are displayed.
Stock in Hand This field displays the stock in hand as on the date of the report and together with Cash and Bank Balances and Debtors, complete the Current Assets aspect of the Working Capital.
Nett Profit This is derived from the Profit & Loss and is the profit after direct and indirect expenses.
Wkg. Capital Turnover (Sales s/Working Capital) This is an activity or efficiency ratio that shows the number of times the working capital has been rolled over during a particular period. It depicts how effectively the firm is using its working capital.
Inventory Turnover (Sales s/Closing Stock) This is an activity or efficiency ratio that shows the number of times the stock has been rolled over during the period of the report. It depicts how effectively the firm is using its inventories.
Principal Ratios
You can compare Principal Ratios of your company over a period with industry averages as well as with ratios pertaining to other periods to assess current performance.
Current Ratio (Current Assets: Current Liabilities) Known as the liquidity or solvency ratio, this is the most frequently used for assessing the company’s capability of meeting its short-term obligations. More specifically, it elucidates a firm's ability to cover its current assets with current liabilities.
Quick Ratio (Current Assets-Stock in Hand: Current Liabilities) Known as Acid-Test Ratio it concentrates on the liquid part of the current assets, leaving out the closing stock. It used to measure a firm's ability to meet its current obligations. Stocks and inventories are the least liquid of all current assets and if current assets comprise a high proportion of inventories, a firm may be considered less solvent.
Debt-Equity Ratio (Loans (Liability): Capital + Nett Profit) This is a gearing ratio that shows the extent to which long-term debt is helpful in financing the firm and shows the proportion of borrowed funds to owners' equity. The lower the ratio, the greater the amount of funds invested by the owners. If the ratio is high it indicates that the borrowed funds are more than the own funds of the firm, which makes the firm less credit-worthy.
Gross Profit % This represents the trading profit exclusive of indirect expenses and tax deductions, expressed as a percentage of total sales. It measures the efficiency of a firm's operations and indicates how products are priced.
Nett Profit % This is the profit inclusive of all expenses (direct and indirect) except tax deductions, expressed as a percentage of total sales. It is a more specific measure of the efficiency of a firm's operations. Both Gross Profit % and Nett Profit % put together provide an insight into a firm's operations and the role played by direct and indirect expenses.
Operating Cost % (as percentage of Sales s) This is the total cost inclusive of direct and indirect expenses except for tax deductions, expressed as a percentage of sales. A high ratio shows that even a slight rise in costs would be risky and might necessitate increase in price.
Receivable. Turnover in Days (payment performance of Debtors) It is an efficiency ratio that measures the quality of a firm's receivables and determines how successfully the firm collects its debts. Receivable Turnover days is a figure that gives us the average number of days for which the receivables are outstanding. It must be compared with the average credit policy of the firm.
Computation of Receivable. Turnover Recv. Turnover in Days = (Closing Balance of debtors/Total Sales)*Number of Days
Return on Investment % (Nett Profit/Capital +Nett Profit) % Nett Profit is the profit after all expenses but before deduction of taxes. This is a profitability ratio that an investor is most interested in. The investor needs to know how much is earned on each dollar invested. If the investor finds other avenues that give better returns, he will move his money out of the firm.
Return on Wkg. Capital % (Nett Profit/Working Capital)% This is another profitability ratio that ignores sunk costs in Fixed Assets and assesses how profitably a firm uses its net current assets.
Payment Performance of Sundry Debtors
the invoice was paid, how long it was due and what was the delay in payment. At the bottom, the customer's average performance is indicated.
Cost Centre Reports
For conceptual information on Cost Centres and Cost Categories, please look up the relevant chapters under s Information. Cost Centre Reports are primarily performance reports that throw a different perspective on transactions. To access Cost Centre Reports Go to Gateway of Tally> Display > Statement of s> Cost Centres N o t e : Set Maintain Categories a n d Job
Cost Centres Costing for
More: Cost Category Summary Cost Centre Vouchers Cost Centre Break-up Ledger Break-up of a Cost Centre Group Break-up of a Cost Centre Job Work Analysis
to Yes more
in F11: Features. information.
Refer
Cost
Centres , Cost
Cost Category Summary
Go to Gateway of Tally > Display > Statements of s > Cost centers > Category Summary Cost Category Summary displays the information on all cost categories to which you have allocated the voucher transactions.
You can create any number of cost categories apart from the Primary one, which is the default. Each Cost Category has cost centres listed under it. The names in italics are cost centres that do not have any sub-cost centres. The names that are in normal fonts are cost centres that have sub-cost centres under them. The debit and credit transaction totals and the closing balance for each cost category are displayed together with their breakdown consisting of cost centre summaries.
Cost Centre Vouchers
From the Cost Category Summary, drill down into a cost centre for monthly breakup of the figures.
Select a month to display the Cost Centre Vouchers pertaining to that month.
In the Cost Centre Vouchers use F2: Period to expand the date range if required and F1 : Detailed option to drill down to access the original voucher.
To display more detailed cost centre vouchers, set the required options in F12: Configure .
The Cost Centre Vouchers screen is also accessible from all other Cost Centre Reports but the vouchers
displayed are only those that relate to the currently selected cost centre.
Cost Centre Break-up
Cost centre Break-up shows the ledger s that are used in vouchers, the cost centre they were allocated to, their total transaction values and the balance. If you consider only the revenue s, the Cost Centre breakup becomes the Profit or Loss statement of activities for the cost centre, and hence a powerful performance statement. To access the Cost Centre Break-up screen 1.
Go to Gateway of Tally > Display > Statements of s > Cost Centers > Cost Center Breakup
2.
Select a cost centre, e.g. Octroi & Freight Expense (which belongs to the Primary Cost Category).
3.
Click F1 : Detailed to see the ledgers.
The report will look as shown
Use the buttons on the button bar to view the report in the alphabetic order of ledger s. A columnar Cost-centre breakup enables comparison of two or more cost centres and assessment of their relative performance. Use New Column to bring up the data of another cost centre for comparison alongside. Drill down for further details.
Ledger Break-up of a Cost Centre
This provides you with another view of a cost centre report. It enables you to analyse the distribution of a ledger across different cost centres. If you want to know the Conveyance Expenses incurred by different cost centres you need to view the Ledger wise break up of cost centres. 1.
Go to Gateway of Tally > Display > Statement of s > Cost Centers > Ledger Break-up
2.
Select a ledger , say for e.g. conveyance
The following screen displays.
The total Conveyance Expenses allocated to different Cost Centres under Primary cost category are listed. If you have more than one category it will also be listed. Use the buttons on the button bar to view the report in alphabetic order. The columnar Cost-Break up of Ledger allows you to compare how different cost centres makes use of two or more ledgers (e.g. expense s). Use New C olumn to bring up another ledger , say, Sales . The report will give you how much each executive sold and how much he spent on running the motorcar. You will be able to judge their relative performance or even compare the data with that of another company.
Group Break-up of a Cost Centre
The Group break-up of cost centre gives you another view of a cost centre report by enabling you to analyse the distribution of a group (of ledger s) across different cost centres. If you want to know how Indirect Expenses were incurred by different cost centres, this is the report that you need to look at. 1.
Go to Gateway of Tally > Display > Statements of s > Cost Centers > Group Break -up
2.
Select a group , say for e.g. Indirect Expenses
The following screen displays.
The total Indirect Expenses allocated to different Cost Centres under the Primary cost category is given. If you have more than one category it will also be listed. Use the buttons on the button bar to view the report in alphabetic order of group s. The columnar Cost-Break up of group s allows you to compare how different cost centres make use of two or more group s (e.g. expense s). Use New Column to bring up another group of ledger , say, Sales . The report will give you how much each executive sold and how much was spent on running the motorcar. You will be able to judge their relative performance or even compare the data with that of another company.
Outstandings and Credit Control
Receivables and Payables Receivables and payables are the two key components of any company's working capital as well as its business activity. Receivables are part of current assets, whereas payables are of current liabilities. Both influence the short-term liquidity and financing of the company considerably. Effective control of these outstandings is necessary for the company to be financially sound. To view the Receivables and Payables screen Go to Gateway of Tally> Display > Statement of s > Outstandings The following screen displays.
More: Receivables (Bills Receivable) F12: Configure Bill-wise Outstandings report Payables (Bills Payable) Outstandings Report of a Single Ledger Age-wise Analysis of a Single Ledger Outstanding Report for a Group Age-wise Analysis for a Group Reminder Letters Reminder letters to a Group of ledgers
Receivables (Bills Receivable)
Reference Number This is the Bill reference number that was entered in the Bill-wise Details.
Party's Name The ledger name appears in this field.
Pending Amount This is the outstanding balance on a particular invoice. To see the breakup, press SHIFT + ENTER . If you want to see the breakup of all the bills, select the Condensed .
F1 : Detailed button. This toggles with the button F1 :
Due On This is the due date of the bill (with reference to the Effective date) specified during voucher entry.
Overdue by days This is the period in days from the due date to the end date of the report. In the above example, the end date is 2-Apr-2005.
Drill-down You can drill down any invoice for further details.
Buttons Print the report or e-mail it or use other buttons to configure, make a query or change the format of the report.
F12: Configure Bill-wise Outstandings report
The F12: Configuration screen for Bill-wise Outstanding Report appears as shown below.
Include Post-Dated Transactions? Post-dated transactions are those, whose voucher dates are after the end date of the period of display. If you set this option to Yes , you can have the post-dated transactions listed in the Outstandings report and learn their effect.
In the above example, note that there is an additional column for Post-Dated Amount .
Show Bills in Foreign Exchange? If this option is set Yes , the Bills Outstanding report will show only those bills raised in foreign currency. The bills raised in base currency will be excluded.
Show Over dues using Bill dates? Set this option to Yes if you want to use the invoice dates instead of due dates for calculating overdue days.
The Age of Bill in days column shows the age of the invoices in number of days.
Age-wise Analysis Select F6: Age wise from the button bar in the receivables screen. Select either the option Ageing by Bill Date or Ageing by Due Date for Methods of Ageing.
Set the age periods required for the report. You can drill down to query the individual invoices.
Age-wise analysis for a ledger or group of s is discussed separately.
Payables (Bills Payable)
To view the Bills Payable screen Go to Gateway of Tally > Display > Statements of s > Outstandings > Payables Note:
Payables
are
treated
exactly
the
same
way
as
R e c e i v a b l e s.
F4: Payable in the Receivables screen helps you switch to Bills Payable report.
Outstandings Report of a Single Ledger
If you want to know the outstanding status of the bills of a particular party , use the Ledger Outstandings Report. To view the Outstanding Ledger 1.
Go to Gateway of Tally > Display > Statements of s > Outstandings > Ledger
2.
Select a ledger from the list. The Ledger Outstandings report displays
Detailed functionality available in this report, including F12: Configure and Age-wise Analysis is the same as that available in Receivables . You can produce Reminder Letters from the ledger Outstandings report.
Use the C ontact button on the button bar to view the address and other details.
Age-wise Analysis of a Single Ledger
1.
Go to Gateway of Tally > Display > Statements of s > Outstandings > Ledger
2.
Select the ledger .
3.
Select F6: Age-wise and one of the two methods of Ageing.
Ageing by Bill Date
Ageing by Due Date 4.
Set the age periods required for the report.
The aged bills report is produced accordingly. Drill down for more details on the individual invoices.
Outstanding Report for a Group
1.
Go to Gateway of Tally > Display > Statements of s > Outstandings > Group
2.
Select a group from the list, e.g. Sundry Debtors. The report displays the outstandings for the selected group.
You can tab down further into each and configure the report using F12: Configure . You can view net amounts in this case to see the net balance outstanding for each ledger. For a group that contains sub-groups the button F5: Led-wise is useful. Note:
The
button
F5:
Led-wise
toggles
with
Group-wise.
Age-wise Analysis for a Group
1.
Go to Gateway of Tally > Display > Statements of s > Outstandings > Group
2.
Select a group, e.g. Sundry Debtors.
3.
Select F1 : Detailed from the button bar.
4.
Click Age-wise and select one of the two Methods of Ageing: Ageing by Bill Date or Ageing by Due Date . Set the age periods required for the report.
5.
The aged bills report is produced accordingly. You can drill down for further details on the individual invoices.
6.
Set the appropriate parameter in F12: Configure to view the Nett Balances.
6.
N o t e : You cannot print Reminder P r i n t i n g available in Gateway of
letters to a group from here. Use Tally .
Multi-
Reminder Letters
1.
Go to Gateway of Tally > Display > Statements of s > Outstandings > Ledger
2.
Select a ledger from the list.
3.
Click the buttons Print from the button bar.
The following screen displays
Print Reminder Letter Set this option to Yes . In the Company Ageing Alteration screen that appears set, accept or modify the ageing period as the case may be.
Show Bills in Foreign Exchange Here you can type Yes or No and accept. When you are in the Print screen, press F12: Configure to change the contents of the reminder letter.
If you want to print Reminder Letters to a group of ledgers, you must use the Multi- printing option available in Gateway of Tally .
Reminder letters to a Group of ledgers
Go to Gateway of Tally > Multi- Printing > Outstanding Statements > Ledger > Group of s Select the group for which reminder letters are required, e.g. Sundry Debtors. The following screen displays
This report is a Bill-wise details report that lists the outstanding bills for each ledger in the group.
Statutory Reports
To view the Statutory Reports: Go to Gateway of Tally > Display > Statutory Reports The following screen displays.
Note: enabled
The Statutory Reports menu will appear depending in F11:Features > Statutory and Taxation.
on
the
Statutory
features
Cash and Funds Flow
Cash management is essential for any business. Many companies, as they go into liquidation, continue to make profits because of insolvency. Businesses shut down because of lack of cash despite being profitable. Cash and Fund Flow Statements aid in cash management and are an important component of the management s. More: Cash Flow Funds Flow
Cash Flow
Cash Flow Statement is a chronological of the movement of cash in and out of the business and includes all cash transactions made with banks also. When used with the Balance Sheet and Profit & Loss , the Cash Flow Statement helps to assess the reasons for the differences between net income and net cash flow as well as the effect of cash/non-cash investing and financing transactions. To access the Cash Flow: 1.
Go to Gateway of Tally > Display > Cash/Funds Flow > Cash Flow
2.
A Monthly Cash Flow Summary that shows the Cash Movement – inflow and outflow for each month and the Nett Flow, displays.
3.
3.
Select a month and press Enter to drill down. Select the button F1 : Detailed from the button bar to see the cash flow for that month.
For Quarterly Cash Flow:
Change Period by pressing F2: Period and set the period, e.g., 1-4-05 to 1-12-05.
Select the option Auto Column from the button bar.
You can also select Quarterly (or Monthly or any other period) from the list
Columnar Cash Flow Statement
Funds Flow
While Cash Flow Statement is concerned only with cash, Funds Flow takes into , the movement of the entire working capital. It includes rise and fall in inventories, creditors and debtors apart from cash and bank. The statement reveals the Sources of Funds and how they were applied. To access the Funds Flow: 1.
Go to Gateway of Tally > Display > Cash/Funds Flow > Funds Flow
2.
A Monthly Funds Flow Summary with the movement of working capital for each month displays. It shows the Opening and Closing Balances of each month with a column for Funds Flow.
3.
Select a month and press Enter to drill down.
4.
3. 4.
Select F1 : Detailed to see the funds flow for the selected month.
5.
The bottom of the screen displays the movement in Working Capital.
You can drill down any line for further detail.
For Quarterly Funds Flow: 1.
Change the period by pressing F2: Period
2.
Set the period e.g., 1.1.04 to 1.5.04.
3.
Select the button Auto Column from the button bar.
4.
3. 4.
Else Select Quarterly (or Monthly or any other period) from the list
Reconciliation of Bank s
Reconciling the company's bank s with the banker's statement is a regular task of ing. In Tally, Reconciliation of Bank s facilitates the following:
Ability to ‘check back’ the correctness of reconciliation Tally uses Bank Date to mark against the voucher. For instance, if you issue a cheque on 8th April and your bank clears it on 19th April, you would set the Bank Date for the voucher as 19th April. This means that when you need to 'check back' later, whether the entry made by you is correct, you will only need to the bank statement of the 19th.
Recovering the reconciliation of any date This is of crucial importance in Auditing . The Bank Reconciliation is one of the pre-requisites of auditing and verification of the correctness of s at the year end. However, it is not a 'real-time' task, meaning auditors do not do it on the first day of the next year. For e.g., the reconciliation made on 31st March, should be 'viewable' even in August, by when almost all the cheques would have subsequently been marked Reconciled . Tally provides you with a facility of achieving this also. Bank s may have a different Starting Date for reconciliation purposes. When you create a bank , you are prompted to give an Effective Date for Reconciliation . Normally, this would be the Books Beginning from date itself. However, you could have imported data from a previous version of Tally or from any other system (where the reconciliation process was not available or was different). In that case, you may not want to reconcile the bank with your bank statements from the very beginning. Give the date from which you want the reconciliation facility to be active. Once you do this, previous entries would not appear for reconciliation, but would be taken as a reconciled Opening Balance. A quick experiment with Reconciliation will show you what it all means. Here is how you go about it: 1.
Bring up the monthly summary of any bankbook.
(You can choose a bank book from any of the following: Balance Sheet, Trial Balance, Display > Books > Cash/Bank Books).
2.
Bring the cursor to the first month (typically April), and press Enter . This brings up the vouchers for the month of April. Since this is a bank , you can see an additional button F5: Reconcile on the button bar to the right. Press F5 .
3.
The display goes to the Reconciliation mode, which can be edited. The primary component of the current screen is the column for Bankers Date .
4.
The Reconciliation found at the bottom of the screen shows:
Balance as per Company Books
Amounts not reflected in Bank
Balance as per Bank
The Balance as per Company Books reflects the balance as on the last date (in the example, it is 30th April). The Amounts not reflected in Bank are the debit and credit sums of all those vouchers, whose Bank Date is either BLANK , or LATER than 30-Apr (i.e. these vouchers have not yet been reflected in the bank statement). The Balance as per Bank is the net effect of the Book Balance offset by the amounts not reflected in the Bank – which must equal the balance in the bank statement N o t e : Some discrepancies may persist due to entries which you have not yet entered in your books. You print your reconciliation.
made would
in the bank statement, reconcile these manually,
and
As you mark the individual vouchers by setting the Bank Date , you will notice that the Reconciliation at the bottom of the screen keeps updating the changes. Once this process is complete, press Ctrl + A or Enter as many times as necessary to skip over the unmarked vouchers and accept the screen. The next time you opt for reconciliation, the screen displays only those vouchers that remain unreconciled. You can also display vouchers that are already marked as reconciled, in case you need to edit the marking, by using F12: Configure
Set Show Reconciled Vouchers also to Yes to see the reconciled vouchers. N o t e : It available
is not possible to reconcile physical transactions.
opening
balance
and
can
be
done
only
with
Set Allow back dated Reconciliation to Yes to enter bank dates which are lesser than the Voucher date. Press Alt+P or click on the Print button to print your reconciliation report.
Display Inventory Reports & Statements
Inventory in Tally operates in the same way as ing with regard to displaying, modifying and printing reports. Tally generates inventory reports based on the vouchers entered to date. You can use the customised reports to compare inventory data between different companies, periods of the financial year, and so on. Highlight the item and press Enter to step down to the next level of detail in a report. Repeat this process till you reach an individual voucher. Similarly, step back to higher levels by pressing Esc. The special features available for the currently displayed report are indicated on the button bar and can be selected with a single click of the mouse. This section highlights some special inventory screens and illustrates a basic level of customisation. More: Viewing Stock Summary Viewing stock items Making a Stock Query Analysis of Inventory Movements Godown Summary (Location Summary) Sales Bills Pending Purchase Bills Pending
Viewing Stock Summary
Stock Summary is a statement of stock-in-hand as on a particular date. It is updated with every transaction in real time and provides the current stock position. The statement can be drilled-down, as with all Tally reports, and configured to enable you to view different details, for instance, the total flow of stock can be viewed with a single report. Tally treats Stock Summary as one of the primary statements and makes it accessible directly from the Gateway of Tally. To view Stock Summary 1.
Go to Gateway of Tally > Stock Summary
2.
The default display is of Stock Group balances.
3.
Select Detailed to show another level of detail.
The detailed report will include sub-groups or Stock Items (in cases where there are no sub-groups), displays as shown:
In the above illustration the stock groups Hardware and Software contain stock items and have closing balances. The Stock Groups displays total quantities, as the unit of measure is the same for all the stock items added. A grand total is also available as there is a single unit of measure for all 'addable' items. If there were different units of measure, then the grand total would not be calculated and displayed. More: Stock Flow (reconciliation) Gross Profits – (Item and stock group profitability) Stock Valuation Methods Stock Group Summary Stock Category Summary
Stock Flow (reconciliation)
You can configure the Stock Summary Statement to display the flow of goods. 1.
Select F12: Configure while on the Stock Summary screen.
2.
Set the configuration as shown.
The Stock Summary displays the flow of stock, i.e. Opening Stock, Goods Inwards, Goods Outward and Closing Stock, as shown.
The report is quantitatively reconciled, i.e., Opening quantity + Inward Quantity – Outward Quantity = Closing Stock Quantity . However, this is incorrect for the values as the Outward Value displays Sale Values, not Cost. The Closing Stock Value is, however, based on Cost and the Cost Method adopted for each item. Value Reconciliation is possible if you are using Consumption figures instead of Sales Values..
Gross Profits – (Item and stock group profitability)
Stock Summary can also be expanded to show consumption and gross profits for each stock item. 1.
Select F7: Show Profits or F12: Configure while on the Stock Summary screen.
2.
Set Show Consumption and Gross Profits to Yes.
The Stock Summary report displays as shown.
The Outward Column shows Cost of Goods Outwards termed as Consumption and Gross Profit value and percentage is displayed. This statement is useful to analyse:
Profitability Analysis of Sales (Outwards) Value Reconciliation of Stock
Stock Valuation Methods
The Stock Summary report with stock valuation methods can be used to view the effects of different methods on the value of stock. Each stock item can be set up to have a different stock valuation method. In some instances, a particular method of valuation may be required, for example, to assess the replacement value or saleable value of stock. Tally displays stocks in any or all the valuation methods dynamically and simultaneously, without any complicated procedure. Suppose you want to use Last Purchase Cost method to assess the replacement value and the Last Sale Price method for realizable (saleable) value. In the Stock Summary screen, select the New Column button on the button bar or press Alt+C. The screen appears as shown below. Select Last Sale Price from the Stock Valuation Methods list.
The Stock Summary report with Last Sale Price column displays as shown:
More: To view Ageing Analysis
Stock Group Summary
This report is available when Integrate s and Inventory is set to Yes in the Company Features screen. It displays Opening and Closing Stock figures from the ledger master, rather than the inventory records. Hence, it is possible that Stock Summary and the Stock Group Summary report display different figures. Drill-down from Stock Group Summary to view the Stock Ledger where you can manually key in the closing balance for a given date. You can input closing stock figures for different dates. To view Stock Group Summary: 1.
Go to Gateway of Tally > Profit & Loss > Opening Stock (or Closing Stock)
2. Drill-down to the ledger to enter Closing Stock figures.
The date for the closing balance is the beginning from date and till date. If there is no date that follows the last, then that Closing Balance continues. A blank against a date signifies zero balance.
Stock Category Summary
To view Stock Category Summary: 1.
Go to Gateway of Tally > Display > Statements of Inventory > Categories
2.
Select a Category, for example, Spreadsheets.
The Stock Category Summary lists the Closing Balances of all items belonging to the selected category. Drill-down for Item Monthly Summary and Stock Voucher list. Use Show Profit for profitability analysis for the Items in the Category.
Viewing Stock Items
1.
Go to Gateway of Tally > Display > Inventory Books > Stock Item
You can also use the Stock Summary to view Stock Items. Place the cursor on the item and press Enter. 2. Select an item from the List of Items . 3. Select F12: Configure . Tab down the Configuration menu to Show with Graph? Type y and press Enter . Select Bar and No . The particulars display with a graph of Goods Inwards and Outwards (red for inwards, blue for outwards).
More: Stock Vouchers
Stock Vouchers
1.
Go to Gateway of Tally > Display > Inventory Books > Stock Items
2.
Select Item .
3.
Select and drill-down for any month.
The list of stock vouchers for the current month displays as shown
This list of vouchers for a stock item is the lowest level of collated data. If you drill-down any further, you can view the actual voucher. You can also access Stock Vouchers by drilling-down from statements such as Stock Summary.
Stock Query
Stock Query report provides you all the information about a particular item. To create Stock Query : 1.
Go to Gateway of Tally > Display > Statements of Inventory > Stock Query
2.
Select an Item from the List of Items. Tally uses the Stock Category to display Items of the same Category. This feature helps you to ascertain the availability and location of alternative products to offer your customer.
3. Select F4:Item to switch to another item.
Additional Information: 1.
Go to the Group Summary , select Software and press F12: Range to limit the display to Stock Groups having Closing Balance greater than 3000 .
2.
Explore the Locations report. Select On-site , click F1: Detailed , change the period: 1-5-05 to 31-7-05, and use Auto Column to bring up the month-by-month figures.
3.
Auto Column feature gives you the facility to check the stock status using different periods.
4.
Bring up the initial display of each report and use and back again.
Enter and Esc to drill-down through the levels of detail
Analysis of Inventory Movements
The Analysis of Inventory Movements is generated for ed transactions only, unlike Stock Summaries and other statements, where Goods Received but Bills not Received and Goods Dispatched but Bills not Raised are also considered. Thus Analysis statements, are used generally for a comparative study, and not considered authentic for s or Inventory records. Go to Gateway of Tally > Display > Inventory Books > Movement Analysis
Analyse stock movements by stock groups, categories, financial group or ledger. More: Movement Analysis (Stock Group Analysis) Item Movement Analysis Item Voucher Analysis Stock Category Analysis - Movement Analysis Ledger Analysis Transfer Analysis
Movement Analysis (Stock Group Analysis)
Movement Analysis of a selected stock group displays the Total Inward and Outward movement of all the items in a selected Stock Group . The quantities displayed are Actual Quantities of movement (which, in some cases, may be different from the Billed Qty in the transactions.) The 'Inward' detail displays the Effective Rate or Final Landed Cost of the materials, after considering all overhead costs (see 'Valuation of Purchases'). If the Effective Rate varies from the Basic Invoice Rate of the materials, it is highlighted. The Outward detail displays the Basic Invoice Rate and Value of goods sold/transferred out.
Item Movement Analysis
Gateway of Tally > Display-Inventory Books > Movement Analysis > Stock Item Analysis Item Movement Analysis is the next level of information (press Enter on the Stock Item or Display Inventory Books Stock Item Analysis ). This brings up the Party-wise/Transfer-wise detail of Movements. The Inward detail displays the Basic Invoice Rate and Effective Rate.
This report helps you compare Purchase Costs across different suppliers. For example, Supplier A may have a lower Basic Invoice Rate as compared to Supplier B , though the Effective Rate may be higher (perhaps due to differences in Taxes, Packing Costs, Freight Costs etc). Suppose a material is manufactured in-house as well as purchased, the difference in Purchase Costs and In-house Costs can be checked. Select multiple columns for different periods, to view the changes in the Effective Rate for purchases. Press Enter on the Party Name or Stock Journal Name to display the transaction-level details on Date of goods received/sold, Quantities, Basic Rates, Addl. Costs, and Effective Rate for each transaction..
The default screen displays the Addl.Costs (if any), in a single column. To view the spread of costs, press F12: Configure and select to view Show Addl. Costs . This brings up the bifurcation of all Additional Costs .
Item Voucher Analysis
This report gives the value details of all transactions for a selected stock item from a particular supplier or to a particular customer. It is obtained from Movement Analysis Report of a stock item. 1.
Go to Gateway of Tally > Display > Inventory Books > Movement Analysis
2.
Select Item from List.
3.
Select a Supplier (or Customer) from the Item Movement Analysis .
The report displays every purchase from Tally Solutions, Bangalore during the period specified with break-down of Basic Value and Additional Cost . To view full details of Additional Cost , press F12: Configure and set the option. The Item Voucher Analysis considers only billed transactions, not ones for which invoices have not been raised. Use F12: Configure for more details.
Stock Category Analysis - Movement Analysis
1.
Go to Gateway of Tally > Display > Inventory Books > Movement Analysis > Category Analysis
2.
Select a category , for example, Spreadsheets.
3.
Change period , if necessary.
The Stock Category Analysis statement displays the movement of Stock Items of a selected Stock Category. The Inward and Outward movement of these two items are summarised in the Summary. Drill-down to bring up the Item Movement Analysis for the selected item.
Ledger Analysis
Ledger Analysis is similar to Movement Analysis, except that you can view movements of the items for the selected Ledger (Party). Thus, you get an 'analysis' of all purchases made from a supplier, or all items sold to a customer. The next level of information brings up the transaction-level details.
Transfer Analysis
When using different Stock Journals for each transaction, Transfer Analysis gives the movement details for each type of Stock Journal. This is a very useful costing and waste analysis tool. In non-manufacturing set ups, which have Multiple Godowns, this report becomes a quick check to that all transfer entries have been entered correctly.
Godown / Location Summary
The Godown/Location Summary statement displays the Stock Summary for different Godowns/Locations . While the main Stock Summary shows the stock position for the entire company on a given date, the Godown/Location Summary is a statement of stock-in-hand at each location on a particular date. The Godown/Location Summary is updated with every transaction and it provides the current stock position for any Godown/Location at any time. This report can be drilled-down, as with all Tally reports, and configured to view different details. It is also possible to view the total flow of stock for each location in a single report. Experiment with the different buttons for this purpose. 1.
Go to Gateway of Tally > Display > Statements of Inventory > Godown/Location
2.
Select Primary to view the summary for all Godowns/Locations . Alternatively, select a specific Godown/Location to limit information to that Location/Godown.
3.
The default display is that of Godown/Location Group godowns/locations, quite like sub-groups of stock items.
4.
Select Detailed for second level of detail.
balances.
You
can
have
sub-groups
of
4.
Place the cursor on Software and press Shift+Enter to expand the group
More: Godown/Location Stock Flow/Reconciliation Godown/Location Vouchers Batch information in Summary Statements
Godown/Location Stock Flow/Reconciliation
The reconciled flow of goods at each location is available. Select F12:Configure while in the Godown/Location Summary Screen
The Godown Summary statement displays the flow of stock: Opening Stock, Goods Inwards, Goods Outward and Closing Stock, at each location.
The statement is quantitatively reconciled, not monetarily, i.e., Opening quantity + Inward Quantity – Outward Quantity = Closing Stock Quantity. However, this is not true of values because values do not add up in this manner. The Outwards value displays Sale Values, not Cost. The Closing Stock Value is, however, based on Cost and the Cost Method adopted for each item. Value reconciliation is possible using Consumption figures, instead of Outward Values. Press F:7 Show Profits to expand the Outwards Column for Consumption and Profit figures. Value Reconciliation is now possible using: Opening Value + Inward Value – Consumption Value = Closing Stock Value .
Columns Use Columns to view stock balances of the Godowns/Locations on different dates/periods or other options listed in the Auto Columns options. Even though you have selected a specific Godown/Location for display, you can still bring up information of the other godown(s)/location(s) in columns. Select New Column or Auto-Column for such a display.
The above report is obtained by selecting: New Column Various reports are available from the Stock Item Monthly Summary , including different periodicity and Average stocks. Drill-down an item in the Stock or Godown/Location Summary level to the Item Monthly Summary and use F12: Configure options. Refer F12: Configure for Material Consumption Summary Report in Job Costing
Godown/Location Vouchers
1. Go to Gateway of Tally > Display > Statements of Inventory > Godowns/ Locations 2. Select a Godown/Location . 3. Select Item.
Drill down through the entries for the Godown/Location Vouchers screen to appear. Godown/Location Vouchers is a list of all vouchers for a selected item that are related to the selected Godown/Location during the period of display. The relationship could be stock in/out of the particular location. This statement helps you to list all transactions for a particular Godown/Location .
Batch Information in Summary Statements
To view the stock of batches of an item: 1.
Go to Gateway of Tally > Stock Summary
2.
This could even be the Godown/Location Summary.
3.
Expand the Stock Group using Detailed or Shift+Enter till all the Items display.
4.
Use Shift+Enter to reveal the Batches and their stock position.
5.
Use F12: Configure to use Opening Balances, Goods Inwards and Goods Outwards.
Sales Bills Pending
Sales Bills Pending Report is generated when the option Tracking Numbers is set to Yes . It lists out all instances of incomplete sales, where goods may have been delivered but not invoiced. It also lists instances of invoices raised, but for which goods have not been delivered Go to Gateway of Tally > Display > Statements of Inventory > Sales Bills Pending The default report displays as shown.
Use Detailed to view the transactions. Use F12: Configure to view the Initial Quantity.
Note:
To
drill
down,
bring
the
cursor
on
the
voucher
detail
line
and
press
Enter .
Purchase Bills Pending
Purchase Bills Pending Report is created when the option Tracking Numbers is set to Yes. It lists all instances of incomplete purchases where goods may have been received, but not fully invoiced. It also lists instances of invoices received, but for which goods have not been received Go to Gateway of Tally > Display > Statements of Inventory > Purchase Bills Pending The default report displays as shown.
For variations in the report, refer Sales Bills Pending .
Aged Stock Analysis (Ageing Analysis)
A very important function of Working Capital management is monitoring stocks. Money locked up in stocks can adversely affect the liquidity of a company and every company strives or should strive to reduce stock levels to the optimum. Every business (except perhaps the liquor and antiques dealers) would prefer to dispose of older stocks as they might deteriorate with time, go out of fashion, or simply get forgotten. Tally's aged stock analysis or Stock ageing enables you to know the age of stocks in hand according to when they were received and the purchase value. More: How to view Ageing Analysis
How to View Ageing Analysis?
1.
Go to Gateway of Tally > Display > Inventory Books > Ageing Analysis
2.
Select the Group of Stock Items .
The Ageing Analysis report produces a default ageing period of <45 days, 45-90 days, 90-180 days and >180 days. You can change the setting by using F6 . The default report displays stock values based on Actual Purchase invoice . Use Hide Amount to view the report without values as has been done above. As Negative Stocks cannot be aged, they are shown in a separate column. More: Item Inward Details
Item Inward Details
Age Analysis is done for stock-in-hand based on when it was purchased. The Item Inwards details statement provides further information of aged stock such as date of purchase and supplier, and allows drill-down to the actual transaction voucher. Go to Gateway of Tally > Display > Inventory Books > Ageing Analysis Move the cursor to any of the age-wise columns (i.e., < 30 days, 30 to 60 Days, > 60 Days) for an press Enter.
item and
Scenario Management
Scenario management is a management tool that enables different displays of s and inventory related information, by selectively including certain types of vouchers without affecting the source data. It is useful in generating provisional reports, where entries are not actually made in the main books. It is also a useful forecasting tool i.e. you can forecast the expenses using provisional Vouchers and include them in your reports. The vouchers that are used in Scenario Management are: Optional Vouchers Memorandum Vouchers Reversing Journals This section shows you how to use the above-mentioned vouchers in Reports. You can create a number of scenarios each including and/or excluding one or more types of voucher entry. More: Create a Scenario Alter or Display Scenario Information How to use Scenarios List of s (Chart of s) Exception Reports
Creating a Scenario
Set Use Reversing Journals & Optional Vouchers in F11:Company Features to Yes. Go to Gateway of Tally > s Info. > Scenario > Create
1.
Give a suitable name to the scenario. In this case, it is Provisional.
2.
Set Include Actuals to Yes
3.
Set Exclude Forex Gains/Losses Calculations to Yes if you do not want the Unadjusted Forex Gain/Loss element to appear in the scenario
4.
Set Exclude Inventory Tracking Calculations to Yes if you do not want the Sales/Purchase Bills Pending
3.
4. element to appear in the scenario
5.
Include
From the list of vouchers, include the type of vouchers required. Notice that it picks up the Voucher Types created for this company. Provisional Vouchers and Regular vouchers that are marked Optional are permitted for selection. 6. Exclude Exclude from the list of vouchers already included in the type of vouchers that you do not want to affect this scenario. This option is used in Alter mode and hence is discussed under Alter/Display Scenario Information. 7. Accept to create this scenario.
Alter or Display Scenario Information
1. Go to Gateway of Tally > s Info > Scenario > Alter 2. Select the scenario to alter from the List of Scenarios The information given while creating the scenario displays and you can alter it. Exclude Use the Alter mode when you do not want a selected included voucher to affect the scenario, anymore. It is easier to put the selected voucher in the Exclude List, rather than to remove it from the Include List.
Using Scenarios
5. 6.
Accept the Voucher.
More: Display/Alter a Reversing Journal Using Scenarios in Statements and Reports
Display/Alter a Reversing Journal
View or alter the reversing journal through the Reversing Journals Book under Exceptional Reports. 1.
Go to Gateway of Tally > Display > Exception Reports > Reversing Journals
2.
Select a month to list all the reversing journals for that month. Drill-down to view/alter the entry.
Using Scenarios in Statements and Reports
You can use scenarios in statements (not s) that have the New Column button active. 1.
Display the Balance Sheet .
2.
Select New Column .
3.
In the column details, tab down to Types of Values to Show .
4.
Select the scenario named Provisional .
The Balance sheet displays as shown with two columns for the same date.
Note the Provision for Depreciation figures in both the columns. The actual column shows –18250 while the Provisional column shows –33250. This is on of the reversing journal entry in the Scenario. To view, go through the Exceptional Reports Display Menu. Use the same procedure to create another scenario for Sales Forecasts. 1.
Create a new Scenario and call it Sales Forecasts .
2.
Include Sales Vouchers Optional Only .
3.
Create 12 Sales Vouchers, one in each month. to mark them Optional .
4.
View the Sales s by drilling-down the Profit & Loss A/c .
5.
Bring up New Columns and limit each column date range to the following month.
The Sales forecast figures must display. N o t e : You could even use Memorandum v o u c h e r s . Memorandum Voucher s
is
Vouchers for this purpose, instead discussed in the next section.
of
the
Optional
List of s (Chart of s)
A chart of s is created from an s menu. To view an existing chart: Go to Gateway of Tally > Display > List of s
The List of Ledgers displays in alphabetical order of the main groups. Hence, Branch/Divisions is listed first, not the name Anil, which is under the group Capital. Note the indentation and change in font. The groups are in bold and begin on the extreme left; sub-groups are slightly indented towards the right and still in bold, while at the lowest level it is the ledger which is in italics. Drill-down a ledger name to alter its details or use Shift+Enter to view the details. Use the buttons to switch to their respective lists (these are all lists of different Masters):
List of Groups
List of Cost Categories
List of Cost Centres
List of Budgets
List of Locations
List of Stock Groups
List of Stock Items
List of Currencies
List of Units
List of Voucher Types
Exception Reports
Exception Reports track unusual transactions or balances. Go to Gateway of Tally > Display > Exception Reports The different kinds of Exception Reports are as shown.
More: Negative Stock Negative Ledgers Overdue Receivables Overdue Payables List of Memorandum Vouchers List of Reversing Journals List of Optional Vouchers Post-dated Vouchers TDS Not Deducted
Negative Stock
Go to Gateway of Tally > Display > Exception Reports > Negative Stock This report displays a list of all stock items that have a negative closing balance at the end of a specified period.
If a negative balance occurs it is adjusted by a purchase so that the balance is not negative at the end of the display period. You can change the period using the Period button or use the auto column button to view the negative stock items You can use the drill-down feature or view Stock Item display for further details.
Negative Ledgers
This is a list of ledger s that have obverse balances, i.e., balances that are opposite to the nature of the . For example, a creditor with a debit balance and an asset with a credit balance. Go to Gateway of Tally > Display > Exception Reports > Negative Ledgers
Bank of Paris is a Bank and is expected to have a debit balance. British Telecom is a Creditor/Supplier and should normally have a credit balance.
Overdue Receivables
T his is a list of all invoices that are overdue as on current date. Go to Gateway of Tally > Display > Exception Reports > Overdue Receivables
Ageing - use the Age-wise button. Overdue Payables – use the Payable button.
Overdue Payables
T his is a list of all purchase bills that are overdue as on current date Go to Gateway of Tally > Display > Exception Reports > Overdue Payables
List of Memorandum Vouchers
Go to Gateway of Tally > Display > Exception Reports > Memorandum Vouchers This is a list of Memorandum Vouchers entered during a period. Change the period as required.
List of Reversing Journals
Go to Gateway of Tally > Display > Exception Reports > Reversing Journals This is a list of Reversing Journals entered during a period. Change the period as required.
List of Optional Vouchers
Go to Gateway of Tally > Display > Exception Reports > Optional Vouchers This is a list of all types of vouchers marked as 'Optional' during a period.
Post-dated Vouchers
Go to Gateway of Tally > Display > Exception Reports > Post-dated Vouchers This is a list of all types of vouchers that are marked 'Post-dated' within a given period.
Printing Reports
Reports and documents generated through Tally's extensive display capabilities can also be printed. Printing is possible in two ways: 1.
Using the Print (Alt + P ) button and
2.
Multi- Printing
Using the Print (Alt + P) button You can choose to print directly from the screen currently displayed by selecting the button PRINT (top-most button on the right-hand side of the screen). This brings up the Print Configuration screen for the report and new button options on the right-hand side of the screen. You can change and alter the settings in the print configuration screen Printer – Click Alt + S (Select Printer) to change printer settings. This also displays the default paper size that you have set for the printer. No. of Copies – Click Alt + C (Copies) to specify the number of copies to be printed. Print Language – Set Enable Multilingual to Yes in F12: Configure and click Alt + L (Print Language) to print in the language of your choice. Method - Click Alt + F (Print Format) to select the print format. A pop-up list displaying the printing formats available in Tally. The formats provided are, Dot-Matrix Format, Neat Format and Quick (Draft) Format. Here you can select either the pre-printed or plain paper to print out your reports
Pre-Printed / Plain Paper: By default, the Printing Configuration screen is set to print on plain paper. The print-out displays as shown.
To print on a pre- printed invoice/ report, select Pre-printed (Alt+R ) and the Print Preview screen displays as shown.
Tally enables you to print the company details on the invoice/ report. You can toggle between the two options to
print using either method. Page Range - Click Alt + G (Page Nos) to select the starting page number and the page number range. Paper Type - The paper Type can be set after you select the printer. Paper Size - By default, the paper size in Tally is set at 8.50 X 10.98 or 216mm X To alter the paper size to your requirements, select Alt+S (Select Printer) . A list of printers displays.
More: Print Format Draft Mode Printing (Quick Format) Printing TDS Form16A Exporting eTDS Form Printing TDSForm27A
279mm .
Print Format
The Print Format button appears on the Print screen (after you press Alt+P or on clicking the Print button). Click the Print Format button and Tally displays a list of Print formats as shown.
Neat Mode and Quick/Draft print formats are compatible with most printer drivers installed on the Windows Operating System. Dot Matrix Format in Tally is a special print format that allows you to print Tally reports in text format using the speed of Dot Matrix printers. Most GUI-based software’s do not provide Dot Matrix printing capabilities. However, Tally being a Windows-based software has a print format compatible with dot matrix printers. This makes printing reports from Tally as quick as its real-time report generation. Select Dot Matrix Format. The screen displays as shown.
By default, Epson printer drivers are defined. Install Epson Printer drivers in Windows for any Dot Matrix printer and use this format to print reports quickly. N o t e: Any should be
Dot Matrix printer may be used, but ONLY Epson used for Dot Matrix Format printing in Tally.
printer
drivers
(LQ
and
FX
series)
Multi- Printing
This option enables the printing of the primary Books of s, like the Cash and Bank Books, Ledgers, Sales and Purchase s etc, without having to select the s one at a time and printing them . Go to Gateway of Tally > Multi Printing. Choose between the options – Books, Inventory Books, Day Book and Multi Voucher Printing . You can select the date and other selections before printing.
Drill-down to s Books, Outstanding Statements and Inventory Books and select the appropriate reports to print. Change the common printing options by selecting the appropriate buttons on the right side of the screen.
For details , click Printing Reports .
Printing All s Go to Gateway of Tally > Multi- Printing > Outstanding Statements > Ledger > All s
When Printing the Ledger Outstanding screen, if Show Details is set to Yes , and Start Fresh Page for each is set to No , the Person and the Tel. No. fields are displayed below each Ledger in the same page.
If Show Details is set to Yes , and Start Fresh Page for each is also set to Yes , each Ledger displays on a fresh page, with the address appearing below the Ledger Name. N o t e : The for them to
Person, be displayed.
Tel.
No.
and
the
address
should
be
entered
in
the
Ledger
Masters
Draft Mode Printing (Quick Format)
Almost every report (except Cheques) can be printed in Draft Mode. The default behaviour of Tally is to print in Neat Mode. To alter this, press Alt+F and all subsequent reports will be printed in Quick Format until Alt+F is pressed again at the Printing screen. (The button equivalent for this is Quick Format). Draft Mode imposes additional restrictions in printing, which you will quickly learn by experimentation. After selecting Draft Mode or Quick Format, click Alt+S to select the option Print to a File. Specify the name of the File to output the data and select the Printer whose dimensions are to be used.
Collaborative Tally
Collaborative Technology in Tally extends the ability of a company to manage information across different software applications, offices, business partners and managers-on-the-move. The integration of other technologies in Tally gives the the benefit of exchanging data with other systems. Collaboration enables the company to arrive at decisions quickly through faster exchange of data in a computer network and related environment. A higher profit is one of the advantages of using such technology in business.
Export of Data
Use Export option to export reports and statements from Tally. The exported reports can be viewed in a spreadsheet, published on the web or exported to another company using Tally.
Open a report or a statement and click the Export button or use ALT+E . The export screen displays Export? Yes or No .
Press Backspace or Esc or No to navigate through the fields and alter the parameters. Language
This option enables you to export your reports in English or any Indian language.
On selecting Default (All Languages) you can export your reports in any of the Indian languages. However, the display language has to be set to the respective Indian language. On Selecting Restricted (ASCII Only) you can export your reports in English. N o t e : If you have used company created in any with question marks.
the of
option Restricted (ASCII Only) to export reports of the Indian languages, then the exported values will
a appear
Format
Tally has four formats for export of data:
ASCII (Comma delimited)
Excel (Spreadsheet)
HTML (web-publishing)
XML (data interchange)
By default, the exported file will be saved in the Tally folder on your computer. To export to a different folder enter the path of the drive and folder in Output File Name . Another program can be used to import the content from the exported file or it can be used as is.
More:
Export Master Data
Export Formats
Tally has four formats for export of data.
ASCII (Comma delimited)
Excel (Spreadsheet)
HTML (web-publishing)
XML (data interchange)
ASCII (Comma delimited) In Tally all reports can be exported to ASCII by selecting ASCII (Comma delimited) format from the export Format screen. This feature enables the to export any report generated by Tally into plain text format with values separated by commas. This format is commonly used for email and several other programs.
Excel (Spreadsheet) In Tally all reports can be exported to Microsoft Excel spreadsheet by selecting Excel (Spreadsheet) option from the export Format screen. This feature enables the to export any report generated by Tally into Excel. Consequently, the can generate graphical representations of the data for better visual presentation. Note:
Export
to
Excel
is
compatible
with
Microsoft
Office
97
or
higher.
Export with Formatting/ Colour (Only in Excel format) Reports can be exported from Tally to Excel with or without all the formatting and background colour as it appears in Tally. These options can be defined on the Report Generation screen.
N o t e : If Excel with background Tips:
Export
(Spreadsheet) colour. to
Excel
works
Formatting is set to N o, the
faster
if
formatting
is
not
report
included
cannot
for
be
exported
export.
HTML (web-publishing) In Tally all reports can be exported to HTML format by selecting HTML (web-publishing) from the export Format screen. Reports in Hyper Text Markup Language (HTML) format retain their formatting and fonts. They can be read using an HTML-enabled mail program, or using browsers such as Microsoft Internet Explorer. Resolution (Only in HTML format) Resolution is based on the pixels used to format the report. A higher resolution gives a better quality of output. The Resolution option is available only in HTML format in Tally.
XML (data interchange) In Tally all reports can be exported to XML format by selecting XML (data interchange) from the export Format screen. Extensible Markup Language (XML) is an extension of HTML, but the data can be imported by other XMLaware systems. Using XML, Tally allows the to exchange information even with systems that do not run Tally. An XML file from Tally has an XML envelope and is formatted with XML tags, to enable import into other systems. The destination system requires re-formatting of XML Style Sheets (XSLT), based on the inherent style used in Tally before importing the data. When two systems are running different versions of Tally, XML data can be directly imported using the import menu option, without any re-formatting.
Export Master Data
Master Data from Tally can be exported to standard formats like ASCII, Excel, HTML and XML using the export feature. The exported data can be used by other programs.
1. To export Masters from Tally, go to Gateway of Tally > Display > List of s 2. Use Alt+E or click Export on the button bar. This displays the Report Generation screen. Press Backspace or Esc or No to change the default values.
Language Select the language in which you would like the data to be exported. Format
Select from the four formats available.
ASCII (Comma delimited)
Excel (Spreadsheet)
HTML (web-publishing)
XML (data interchange)
Output File Name Enter the name of the file in which the exported master will be saved. By default the file will be saved in the Tally folder in your computer. To export to a different folder, enter the path in Output File Name (Example: C:\differentfolder\filename). Type of Masters Select the Masters from the list.
Import of Data
Data can be imported to Tally from other s of Tally. Tally can also be programmed to import data from other systems to be used as an integrated system. For example, a Customer Management Program, with details such as status of an order and last established, can be imported to Tally. This imported data can be merged into a report containing outstanding balances. When data is changed in the other system, the change is also reflected in Tally. To import data, Go to Gateway of Tally > Import of Data
More: Masters Vouchers Synchronization
Import Formats
Only the Tally XML format is ed for import of Data in Tally.
Tally (XML) Format This option imports data in XML format. More on XML.
Import of Masters
Masters from another company can be imported to Tally and merged with the data of the current company. Note: * Load * Export
and the
activate Company before importing data from another company before
data. importing
it.
To import masters, 1.
Go to Gateway of Tally > Import Masters.
The Import of Data screen is displayed. 2.
Enter the full path of the file in the Import File Name field. Example: C:\tallyrel1.11\DayBook.xml .
3.
Select the appropriate option in the Treatment of entries already existing field from the Behaviour menu.
Combine Opening Balances – Select this to combine the opening balance of the imported masters with the opening balance of the current company.
Ignore Duplicates — Select this to ignore duplicate entries from the imported data. When imported entries are the exact replicas of entries in the current company, they are called duplicate entries.
Modify with new data — Select this to add new data from the imported master to the current company data.
4.
Enter to Accept .
5.
Open Tally.imp file located in the Tally folder in Notepad to view log of import activities.
5.
Import of Vouchers
This feature allows the import of vouchers from earlier versions of Tally and other s of Tally. Voucher data can be imported from other programs using XML. To import vouchers, 1.
Go to Gateway of Tally > Import Transaction > Vouchers.
Only the Tally XML format is ed for import of Vouchers in Tally.
2.
Import File Name – Enter the path of the drive and folder where the file to be imported exists.
Synchronization
Synchronization is the replication of data between two or more locations that use Tally. Data can be sent over the Internet, or in a private network system. Tally offers control over the frequency of replication. Data can be replicated after each transaction or updated at specific intervals. Synchronization takes place in a Client-Server environment and can be initiated only by the client. Data from the client is transferred to the server and from the server to the client. Replicating data is a single-click activity in Tally once Synchronization is set up between a server and its clients. More:
Tally Link Server
Direct Synchronization
Synchronization Using Tally Link Server
Tally Link Server is a service under Tally Internet Services that allows you to synchronize data without worrying about the Fixed IP. In a network environment, The Tally Server instance connects to the Tally Link Server, available on a public IP on a predefined port. The Tally Client instance connects to the Tally Link Server and communicates with the target Tally Server instance as long as the Tally server remains connected to the Tally Link Server The destination Tally Server instance is identified using its unique TallyLinkId. Thus, even if you have a dynamic IP on the Tally Server, you don’t need to change anything on the Client. Just log on to the Tally Link Server and stay connected. The figure below depicts the complete picture:
Set Up for Synchronization
On Client Computer 1.
Open Tally.ini file in the client computer and insert this line: clientserver=client
2. Execute Tally 3. F12: Configure> Connectivity> Sync Configuration.
TallySync Configuration
Ignore Server’s modified Voucher Type Masters? To modify the client’s Voucher Type Masters during synchronization set this field to Yes. TallyLink Configuration Use TallyLink? The field, Use TallyLink? , is set to No by default. If using the Tally Link Server, set this field to Yes. TallyLink ID Enter TallyLink ID to against your serial number. This Id is required for the identification on the TallyLink Server (TallyLink id can be a Tally Serial Number of the client machine or any name which will be ed against the serial number).
On Server Computer 1.
Open Tally.ini file on server computer and insert the following line: clientserver=server
1. Serverport = 20000 (any port between 1 to 64000, whichever is open. Note that the first 1000 to 1500 ports are standard ports, which must be avoided). 2.
Execute Tally .
3.
From Gateway of Tally> F12: Configure> Connectivity> Sync Configuration
TallySync Configuration Ignore Client's modified Voucher Type master? To modify the server’s Voucher Type Masters by the client after synchronization set this field to Yes . Enable Sync Logging (SockReq.log) To log all requests and responses in a file called sockreq.log set this field to Yes . This will help when debugging the sync process. Truncate previous log before Syncing This field appears only on setting Enable Sync Logging (Sockreq.log) to Yes . Setting Truncate previous log before Syncing to Yes will delete the previous logs before logging in to the current session. TallyLink Configuration Use TallyLink? Set to Yes to select Tally Link Server for syncing type TallyLink ID Enter TallyLink ID to against your serial number. Connect to TallyLink Server Set to Yes to establish a connection between the TallyLink Server and the remote Tally clients. (The Connect Button appears in the button bar. On opening the same screen next time use the Connect Button to connect to TallyLink Server) Connect on Startup Set to Yes to connect to the TallyLink server on startup
Accept the Tally Sync Configuration screen. Click on Connect button on the button bar or press ALT+N to connect to TallyLink server. If TallySync and TallyLink information are found correct, the following message displays in the calculator pane:
TallyLink ID
For both the server and client, who want to use the Sync feature through Tally Link Server, it is mandatory that they a TallyLink ID (Alias name) for their copy of Tally. TallyLink ID is a unique identifier used by Tally Link Server to identify all the connected Tally instances. To connect to the Tally Link Server for the first time, specify a TallyLink ID and send it to the server. The Link Server checks for the TallyLink Id in its database. If available, assigns the TallyLinkId to that particular Tally instance. This TallyLink ID is stored against the Tally Serial No. If the TallyLink ID is not available (the specified TallyLink ID has already been assigned to someone else.), a TallyLink ID already exists message displays. On all subsequent connections /requests, the TallyLink ID is verified against the Tally Serial No, authenticated and authorized.
Creating a Rule
Select the company whose vouchers are to be synchronized. Ensure that the company is kept open on both the client and the server computer. Create a new Client Rule on the client computer and specify the following: Company name on the server, Server details Synchronization details.
Gateway of Tally > Import of Data > Synchronization > Client Rules > Create
The details of the screen are mentioned below :
Name of Rule
Specifies the name for the client rule. Any name can be entered as long as such rule does not exist in the company.
Use TallyLinkServer Specifies if Tally Link Server is used for synchronizing. Type Yes to select Tally Link Server.
Server TallyLink Id Enter the Server TallyLink Id specified on the server computer.
Type of Rule This indicates the type of operation to be performed; the available options are Synchronize and Transaction. If Tally Link Server is selected, this option defaults to Synchronize and cannot be changed.
Company Name on Server Enter the name of company on the server computer with whom the sync is to be performed.
Synchronize Altered Transactions To send altered transactions to remote clients set this option to Yes.
Sync over slow connection If this option is set to Yes, Tally will send the vouchers in multiple small batches rather than in one big batch and will not time out if the connectivity is poor. This option must be set to Yes in most cases. If this option is set to No, the sync process takes a longer time as data are sent in multiple batches.
Company GUID on Server (Read-Only) Displays Company's Globally Unique ID
Current TID (Read-Only) Displays the creation ID of the last synchronized voucher of the remote company. This id is generated to identify new transactions created at the remote end.
Altered TID (Read-Only) Displays the altered ID of the last synchronized voucher of the remote company. This ID is generated to identify altered transactions at the remote end.
Is Active (Read-Only) Displays Yes if the Client Rule has been activated by the server.
Remote Alter State (Read-Only) Specifies whether Synchronize Altered Transactions is Yes or No on the server side for that particular client rule.
Creating a Server Rule
Go to Gateway of Tally > Import of Data > Synchronization > Synchronize. A request is sent to the server from the client computer to create a Server Rule corresponding to the Client Rule. A Server Rule is created implicitly whenever a Client Rule synchronizes with the server. Note:
You
cannot
create
a
Server
Rule
manually.
You can see the status of synchronization in the Calculator pane in Tally on the client machine. If you do not receive an error message in this pane, the Server Rule has been created successfully Note:
The
Server
Rule
is
in
encrypted
form.
Activating Server Rule Once the Server Rule is created it has to be activated on the server computer. Go to Gateway of Tally > Import of Data> Synchronization > Server Rules > Activate
You can now Sync from the client computer to transfer your vouchers.
Altering the Server Rule Go to Gateway of Tally > Import of Data > Synchronization > Server Rules > Alter
A List of Rules is displayed. Select the relevant rule. This will display the Server Rule Alteration screen.
The fields displayed in this screen will be in a read only mode except for Is Active and Synchronize Altered Transactions? .
Process of Synchronization
Ensure that the client computer and the server computer are connected to the Internet during the synchronization process. On the server computer : Start Tally > select the company (into which vouchers are to be synchronized from the client machine) > F12: Configuration > Sync configuration > Press the Connect Button. On the client computer: Start Tally > Select the company from which vouchers are to be synchronized > Gateway of Tally > Import of Transactions > Synchronization > Synchronize.
While synchronizing from the client computer the following message displays in the Calculator : Sync. Start at (time) and Sync End at (time). This ensures that the Client Rule has been synchronized successfully.
Activate server rule on the server computer : Ensure that the company is kept open in the server computer.
From Gateway of Tally > Import of Transactions > Synchronisation > Server Rules > Activate
This displays the name of the Client Company and link ID. Set Is Activate and Synchronize Altered Transactions to Yes .
Is Active? Displays the status of the client rule at the server end.
Synchronize Altered Transaction? Specifies if synchronization of altered transactions is to be done. On the client computer: Start Tally > Select the Company (from which vouchers are to be synchronized to the server machine) > Import of Transactions from Gateway of Tally > Synchronisation > Synchronize. On the client computer, a message displays on the Calculator : Sync. Start at (time) and Sync End at (time) .
This completes the synchronization process.
View Synchronized Vouchers
To view the synchronized vouchers, select Display > Day Book from computers.
Server Computer:
Gateway of Tally in both server and client
Client Computer:
All the vouchers from the client replicates to the server. Next time, on opting for Sync , the synchronized vouchers will not be posted. However, the new and the altered vouchers from both the client and server will get updated on the respective computers. Ensure that the vouchers are not deleted after synchronisation. In case of deletion, ensure that it is done on both the sides (i.e., server and client computers). On canceling the voucher, the change is updated accordingly at both the ends.
Direct Synchronization
Direct Sync is synchronization between a server and a client. Direct Synchronization can be over a LAN, WAN, the Internet or between two instances of Tally running on the same machine. It is usually done using a separate server The Tally Link Server is not used for Direct Synchronization. To enable this feature any of the nearest Tally Offices or send an email to [email protected] The server version of Tally must be installed on the server computer and client version on the client computer, before proceeding. Note:
Synchronization
can
be
initiated
only
by
the
client.
Direct Synchronization between Client and Server Direct Synchronization can be between two different entities/organizations or between the head-office and branches of an organization. Assume that ABC Company maintains your s. You can Transfer data from your company to ABC Company using Direct Sync, provided ABC Company has a server version of Tally installed and can connect over a network. Other clients of ABC Company can also connect and transfer their Tally data. Here, ABC Company is the server and other entities that are synchronizing their data, are clients. Direct Synchronization can also be implemented between the Head Office and Branches of an Organization. Thus, when synchronizing between the Head office and Branches, the Head office must have a server version of Tally installed and connect over a network to the Branches. The Branches must have client versions of Tally installed.
Enable Direct Synchronization
To check whether Direct Sync is Enabled? Go to Gateway of Tally> F12: Configure > Licensing > Add-ons If you have installed a client copy of Tally and have enabled Direct Sync, then you will see Direct Client displayed. If you have installed a server copy of Tally then both Direct Client and Direct Server are displayed.
Configuring Tally.ini file for Direct Sync
Open the Tally.ini file in notepad from the Tally installed folder.
For Client:
Enter Clientserver = client in the file and save. This specifies that Tally is to be run in client mode.
For Server:
Enter Clientserver = server in the file. This specifies that Tally is to be run in server mode.
Enter the T/IP Port number of the server and save.
Configuring Synchronization
On Client Computer
Open Tally and select a company.
Go to Gateway of Tally> F12: Configure > Connectivity> Sync Configuration to display the Tally Sync Configuration screen.
Set Yes in Ignore Server’s modified Voucher Type Masters? field if you do not want to replace the original transaction after synchronization. Set No if you want the transaction to be replaced by the modified transaction from the server.
By default, Use TallyLink? field is set to No .
On Server Computer
Open Tally on the server and select a company. Go to Gateway of Tally > F12: Configure > Connectivity> Sync Configuration to display the Tally Sync Configuration screen. Set Yes in Ignore Client’s modified Voucher Type Masters? field if you do not want to replace the original transaction after synchronization. Set No if you want the transaction to be replaced by the modified transaction By default, Use TallyLink? field is set to No .
Creating a Rule
Creating a Client Rule Go to Gateway of Tally> Import of Data > Synchronization > Client Rules > Create
Name of Rule - In this field, enter a name for the rule you are creating. You cannot enter an existing ClientRule name. Note:
By
default,
the
Use
TallyLinkServer
?
field
is
skipped
when
you
use
Direct
Sync
. Server URL - Enter the uniform resource locator (URL) of the server. This is the IP address/Name of the Tally server. Example: (192.168.1.206/ Localhost). Enter the T/IP port number of the server preceded by a colon after the URL. Note: Tally.ini
By file
default, the to change
synchronization port the port number
in
Tally
is
9000.
Change
the
parameters
in
Secure Server? - Enter Yes in this field if you are synchronizing to a secure server. Entering Yes here gives you the option to enter your name and . Name - Enter the name you use to connect to the server. - Enter the for the specified name. Use Compression? - Enter Yes in this field to compress the data that you send to the server. Use this option to reduce the size of data files which synchronize and transfer data. Type of Rule - Select Synchronize from the Rule Types menu.
Company Name on Server – Enter the name of the company on the server that you want to synchronize. Synchronize Altered Transactions? – Set this option to Yes to synchronize back dated/altered transactions with the server. Sync over slow connection? – If you have a slow speed Internet connection like a dial-up connection, set this option to Yes . The time taken to transfer data could be more but data transfer will be efficient.
The following fields are Read Only: Company GUID on Server – When you synchronize, Tally creates a Globally Unique Identifier (GUID) on the server. This GUID is displayed here. Current TID – This is the Current Transaction Identifier field and it displays the number of vouchers transferred. Altered TID – This is the Altered Transaction Identifier field and it displays the number of vouchers altered and transferred from the server to the client. Is Active – This field shows if synchronization is activated on the server. Remote Alter State – This field displays only if the Synchronize Altered Transactions field is set to Yes on the server for a particular Client Rule.
Creating a Server Rule Refer Creating a Server Rule for more details.
Synchronization Completed
Go to Gateway of Tally > Import Transactions > Synchronization > Synchronize from the Client machine to start the synchronization process.
The Calculator pane displays Sync. Start at and Sync. End at message.
View Synchronized Vouchers
You can view the synchronized vouchers from Gateway of Tally > Display > Daybook or Gateway of Tally >Display > Statements of s > Statistics Synchronization transfers vouchers along with the masters from the client computer to the server computer. Vouchers in the server computer will be replaced by modified vouchers from the client computer if the Ignore Client’s modified Voucher Type Masters? field is set to No on the server. Vouchers for the company in the server computer will be transferred back to the client computer in another instance of synchronization by the client.
Here, the vouchers in the client computer will be replaced by modified vouchers from the server if the Ignore Client’s modified Voucher Type Masters? field is set to No on the client machine.
Tally ODBC
Data can be accessed from any application using Open Database Connectivity (ODBC). Tally uses ODBC to connect to other programs and exchange data dynamically. Ensure that MS-Query is installed in the system in which you will be installing Tally. This enables as Tally is installed. The ODBC server automatically displays on the Calculator pane. More: Outward Connectivity Inward Connectivity
ODBC as soon
Outward Connectivity
Outward Connectivity is to connect directly to send data from one program to another, without any programming. It allows the to extract data from Tally and send it to other programs such as Microsoft Word or Excel. Outward Connectivity features:
Print labels for greeting cards from ledger addresses stored in Tally.
Create templates for report and forms such as audit reports and Schedule VI forms and plug in data from Tally.
Use popular programs in Tally’s open database, thereby giving you the flexibility to create your reports with up-to-date data from Tally.
More: Tally ODBC with Microsoft Word Tally ODBC with Microsoft Excel
Tally ODBC with Microsoft Word
Consider the following scenario. A company wants to send greeting cards to its customers. It can use the names and addresses of customers, stored in the Tally database to print labels. The steps to be followed are:
Start Tally and keep it open till the Mail Merge process is completed.
Ensure ODBC Server is displayed on Tally’s calculator pane.
Open MS Word.
Click on Tools > Mail Merge from the Menu bar.
From Main Document, click Create > Mailing Labels.
Click on Active Window.
In the Mail Merge Helper dialog box, click on Get Data > Create Data Source. Click on MS Query …from the Create Data Source dialog box.
Select TallyODBC from the Microsoft Query screen.
Query Wizard displays fields from Tally. Select Ledger and click the “>” button to select fields required in the query.
The screen appears as:
Use the Filter Data dialog box to limit the data to suit your requirement.
Sort the data in ascending or descending order in the Sort Order dialog box.
Click on Finish to complete the Query process.
Click on Set Up Main Document.
In Create Label dialog box, click on Insert Merge Field to insert the fields and click OK.
The screen appears as:
Click on Merge from Mail Merge Helper dialog box to create mailing labels in a new document.
The screen appears as:
Tally ODBC with Microsoft Excel
Tally ODBC extracts data from Tally and designs the reports in MS Excel. The steps to be followed are:
Start Tally and keep it open till the Mail Merge process is completed.
Ensure ODBC Server is displayed on Tally’s calculator pane.
Open MS Excel.
Click on Data > Get External Data > New Database Query from the Menu.
Select TallyODBC from the Choose Data Source dialog box.
The screen appears as:
Query Wizard displays fields from Tally. Select and click the “>” button to select fields required in your query.
The screen appears as:
Use the Filter Data dialog box to limit the data to suit your requirement.
Sort your data in ascending or descending order in the Sort Order dialog box.
Click on Finish to complete the Query process.
Click on OK from the Returning External Data to Microsoft Excel dialog box to display the selected columns on the Excel sheet.
The screen appears as:
Inward Connectivity
Inward connectivity integrates other systems with Tally to use data in them. Tally can be programmed for inward connectivity. This allows using data from other systems in Tally by creating an integrated system. For example, a customer management program containing details like status of an order and last made can be brought in Tally and merged in a report containing outstanding balances. Changes in the data in the program is immediately reflected in Tally. To connect to other programs and use external data in Tally, you can any of the nearest Tally Offices or send an email to [email protected]
E-capabilities
Exchange of data in a network is the order of the day in the world today. Import and export of data over a LAN or the Internet is a common feature in most organizations. E-Capablities is the ability of a software application/program to exchange data over a network. Tally has a broad range of E-Capabilites that allows you to E-mail data and publish reports and documents on the web.
E-Capabilities requirements: 1.
An Internet connection. It can be a dial-up, cable, ISDN, DSL or satellite connection.
2.
An E-mail to use the E-mail feature in Tally.
3.
A Uniform Resource Locator (URL) address to publish on the web, as well as the rights to files.
More: E-mail Web Publishing
E-mail (Electronic mail)
The E-mail is the most widely used facility on the Internet. It saves time and cost of postage. Use the email feature in Tally to:
E-mail any Tally report or document like invoices or purchase orders
Post reminder letters and statement of s
The following example illustrates the use of this feature in Tally:
E-mail a Reminder Letter To send a reminder letter to a customer by email: 1.
Go to Gateway of Tally > Display > Statements of s > Outstandings > Ledger
2.
Select the customer’s/company’s ledger from the List of Ledgers
3.
Click on Email from the button bar or press Alt+M
3.
4.
The fields on the Mailing Ledger Outstanding form are automatically completed if you have given the required information during creation of the master records. Select No or press Backspace to change/modify the entries. Select Yes to accept.
5.
The E-mail Server field is highlighted next. This is a mandatory field. The first time you use this feature in Tally, enter the name of your SMTP server, example: mail.btinternet.com. Subsequently, Tally will automatically display the SMTP server name. Refer to your Internet Service Provider (ISP) or network for further queries.
6.
The From field displays the name of your company entered in the Company Creation screen and stored in the Company Information Master records. You can also modify the default information. Press Enter.
7.
The From E-mail Address field displays the e-mail address entered in the Company Information Master data. Enter your email address, if you have not done so while creating a company, or if you want to change the id.
8.
Enter the name and in Authentication Name (Only if required) and field respectively if the mail server requires authentication.
9.
In the Format field a pop-up screen lists the three formats in which you can generate your email:
9.
ASCII (Comma delimited)
HTML (web-publishing)
XML (data interchange)
Select the type that suits your recipient. 10.
To E-mail Address field is a mandatory field.
It displays the recipient's email address as entered in the Mailing and Related details during ledger creation. Enter the address if you have not done so while creating the ledger or if you want to modify the information. 11.
Type the email address of another recipient to whom you want to send a carbon copy of the email in the CC (if any) field.
12.
The Subject field is filled by default and displays the subject of your mail. You can change it to a subject of your choice.
13.
Any text you enter in the Additional Text field precedes the report in the recipient’s mail program. You can use this field to type a message to the recipient.
14.
Additional Options provided in the form are:
Include Post-Dated transactions.
Transactions?- Set
this
option
to Yes to include post-dated
Show overdue using Bill Date?- Set this option to Yes to show bill date in report.
Range of Bills to show:- Select all bills or overdue bills to display.
Format:- Select condensed or detailed format for your reminder letter.
Show Qty Info in Detailed Format?- This option is selected for the detailed format mode and displays quantity.
Show bills of the following type:- Select the types of bills from all, credit or debit bills.
Note: 15.
Additional
Options
may
vary
depending
upon
the
type
of
report
you
want
to
email.
Print Preview: Use the Print Preview screen to view the document before emailing. This shows how the document appears in the recipient’s email.
Web Publishing
All reports and documents generated in Tally can be published on your website. Tally can create reports in HTML format and the same directly to your website. For example, use this feature to inform your customers about the new price-range and stocks available for sale on your website. Tally uses the highest standard of data encryption methods to ensure security of data.
ing Reports on the Website A website is a specific directory space allotted to you on that server. Protocols are set of rules and specifications on how data and files are transferred over a network. They cover all aspects of communication between computers including content, formatting and error control. To publish a report, statement or data generated in Tally, it to an Internet Server that has been configured to accept files in the specific protocols. Example: To publish your company’s balance sheet on your website: 1.
Go to Gateway of Tally > Balance Sheet .
2.
Click the button from the button bar or press Alt+O.
3.
The first time you , you will have to enter the required information on the screen displayed. The field to has two options:
3.
FTP Site
Web Page (HTTP/HTTPS)
FTP Site
This site accepts files transfers in File Transfer Protocol (FTP). FTP is a common choice for data or file transfer to a website. Select this option unless your site accepts HTTP or HTTPS s.
Web Page – HTTP/HTTPS
Hyper Text Transfer Protocol (HTTP) is the standard for transferring HTML files over the Internet. HTTP Servers are pre-programmed to accept HTTP connections. HTTPS sites are servers configured to accept secure connections. They conform to standard security protocols (example: SSL and SET) to ensure that your data and files are not tampered during an . Use this if your server is set up for HTTP/HTTPS or else select FTP. 4.
URL: Universal Resource Locator (URL) is the server address where you want to publish your report. For FTP, you will need to know the FTP server name and directory path. The FTP server name is the domain name of the Web server (example: ftp.server.com). The directory path is the folder on the server where the report is stored (example: /public_html). For a web page, an URL is typically in the form www.myweb.com/.
5.
Secure Server: This option displays when you select Web Page in to field. Use a secure connection when the data is sensitive and your server is configured for it. A secure site is one that has alphabet s following http (https) and the URL in the address bar of your browser displays https://www.______.com.
6.
Name (if any): Enter the -name you need to access the server for ing.
7.
(if any): Enter the
N o t e : Internet servers authenticate your identity before you can put data and files on the site. If you are unsure about your name, , or FTP location, your Internet Service Provider (ISP). 8.
Format: You can generate your reports in four formats. To know more about these formats, click on the links given below:
ASCII (Comma delimited)
HTML (web-publishing)
XML (data interchange)
Select the type that suits your requirement. 9.
Destination File: This option displays on selecting an FTP Site in to field. The default names are displayed. Modify if necessary.
Note: 10.
Additional
options
may
vary
depending
on
the
type
of
report
you
want
to
.
Print Preview: Use the Print Preview screen through the Print option to view the document before you .
Tax Deducted at Source (TDS)
Tax Deducted at Source (TDS) is one of the modes of collecting income tax. The buyer (Deductor) deducts the tax from the payment made to the seller (Deductee) and remits the tax to the Income Tax Department within the stipulated time. The buyers (Corporate and Non-Corporate) make payments (such as Salary, Rent, Interest on securities, Dividends, Insurance Commission, Professional Fees, Commission on Brokerage, Commission on Lottery Tickets, etc) to the sellers (Services) and deduct the requisite amount from such payments towards tax. The buyer files the TDS returns containing details of the seller and the bank, where the TDS amount is deposited to the Income Tax Department (ITD). The Income Tax Department has prescribed the formats for filing these returns electronically, which the buyer does in a CD/floppy. For additional details you can visit the Income Tax Website at http://www.incometaxindia.gov.in
Flowchart of TDS
A seller (Deductee) provides services to the buyer (Deductor). The buyer deducts the amount towards TDS prior to the services or the bills received. The buyer issues Form No.16A to the Deductee and deposits the deducted amount to the Authorised Bank (Treasury). The buyer files annual returns electronically to the Income Tax department.
Electronic TDS (e-TDS)
The Income Tax Department has made it mandatory for all Corporate companies like private limited and public limited to file their TDS returns in electronic media (i.e. e-TDS returns). However, the Non - Corporate like individuals, proprietary firms and partnership firms can furnish their returns in physical form to their respective Income Tax Offices. They can also furnish their returns in electronic form through TIN facilitation centers established by NSDL. Filing of e-TDS return to Non- Corporate deductors is optional.
Filing of e-TDS Returns
The Buyer (Deductor) has to furnish the TDS returns in electronic form and Form 27A in physical form along with the e-TDS return CD/floppy. Form 27A must be furnished separately for each return (Form 24, 26 or 27). NSDL has developed a utility called File Validation Utility (FVU) to whether the e-TDS return file prepared by the Buyer (deductors) conforms to the prescribed format.
Transaction Flow in Tax Deducted at Source
Example 1: Indirect Expenses (Fees for Professional or Technical Services (Section 194J) Manohar is a technical consultant for automobiles. He inspects used cars and prepares a report. Manohar (seller of the service) receives per car, Rs.500 for inspections. He inspects five cars in January 2005. So he has to receive Rs.2500 as service charges. Company 'A' pays him Rs.2250 towards service charges and pays Rs.250 to any Bank or IT counter towards TDS. The following diagram explains the transaction flow in TDS:
TDS in Tally
TDS (Tax Deducted at Source) in Tally provides an easy-to-use and flexible interface. It helps you to handle intricate cases and calculate the tax payable to the Income Tax Department. Tally calculates the tax of all parties/ suppliers where TDS deduction is mandatory. It calculates the TDS automatically and prints Form16A certificates, Forms 26Q, 26, 27 and 27A (Cover Note) for Quarterly/ Annual Returns as per statutory requirement. It allows the to view and print various TDS reports, Challans and TDS Outstanding statements.
Features of TDS in Tally The TDS functionality in Tally s the following features:
1. Simple and -friendly 2. Quick and easy to set up and use 3. ing for tax on partial/full payment of bills 4. Flexibility for auto and manual calculation of TDS 5. Complete tracking of each transaction from deduction to payment 6. Challan management and printing for prompt and accurate filing of tax 7. The Auto allocation feature prevents error-prone data entry and helps track the transactions faster. 8. Form 16A management: Can be printed for a transaction
Can be printed for a period
Can be printed yearly
9. Allows multi-party printing 10. Exporting of data in NSDL compliant TDS file format. 11. Electronic format (e-TDS return) with Form 26Q, Form 26 , Form 27 and Form 27A which will be validated by the utility, provided by the government. 12. Generates Form 16A, TDS Challan, TDS Computation and TDS Payable reports.
Company Creation
Company Creation means providing basic information about the company whose books of s you want to maintain in Tally. Gateway of Tally > Alt + F3 > Create Company
Statutory Compliance for Select the Country from the list of countries.
State Select the appropriate State from the list.
PIN Code Enter the Postal Index Number , which is numerical and of six digits
Enabling TDS in Tally
To enable TDS in Tally, Go to Gateway of Tally> F11: Features> Statutory & Taxation In the Company Operations Alteration screen, 1.
2.
Set Enable Tax Deducted at Source and Set/Alter TDS Details to Yes
Enter the TDS Deductor details in Company TDS Deductor Details screen
2.
A brief description on the fields that appear in the Company TDS Deductor Details screen is given below.
Tax Assessment Number Enter the Tax Assessment Number (TAN) in this field. The Tax Assessment Number (TAN) is a ten-digit alphanumeric number, issued by the Income Tax Department (ITD) to the deductors. One Tax Assessment Number is adequate for different types of deductions. TAN must be quoted properly on all Challans, Payment for TDS, Returns, All Certificates - Issue in Form No.16/16A, All Returns and in all documents and other correspondences with Income-tax Department.
Income Tax Circle/Ward (TDS) Enter the Income Tax Circle/Ward (TDS) issued by the Income Tax Department
Deductor Type According to the nature of the organisation, select the Deductor Type (Government or Others) from the list.
Name of person responsible Enter the name of the person authorised to file the TDS returns of your company.
Note: If Tally has the name.
a
security
feature
enabled
then
Designation Enter the designation of the authorised person filing the TDS returns.
this
field
is
automatically
filled
with
Statutory Info.
The Statutory Info. comprises Deductee Type and TDS Nature of Pymts reports. Go to Gateway of Tally > Display > Statutory Info.
The Statutory Info. displays the following options: 1.
TDS Nature of Pymt
2.
Deductee Type
TDS Nature of Pymt
To view TDS Nature of payment: Go to Gateway of Tally > Display > Statutory Info. > TDS Nature of Pymt 1.
Select any desired type from the list of various nature of payments to go to TDS Nature of Pymt Display
2.
The display window comprises of the fields, Name, Section and Payment Code. There is also a table, where you have details such as Deductee Type, Applicable from, Exemption Limit and Rate.
Deductee Type
To view Deductee Types Go to Gateway of Tally > Display > Statutory Info. > Deductee Types 1.
Select the Deductee Type from the List of Deductee Types
2.
The Deductee Type Display screen comprises Name of the Deductee Type, Residential Status and Deductee status. There is also a table for Deductee TDS Details with columns for Applicable from, Surcharge Exemption Limit, Surcharge, Additional Surcharge (Cess) and Additional Education (Cess).
Creating TDS Masters
You can create TDS Ledgers under any of these main group heads:
1. Duties and Taxes 2. Sundry Creditors 3. Sundry Debtors 4. All Current Assets (except Bank, Cash-in-hand and Stock-in-hand), Misc. Expenses (Assets), Loans and Advances (Assets) group or sub groups of these main groups 5. Unsecured Loans 6. Loans (Liability) (except Bank OD A/c, Bank OCC A/c ) 7. Secured Loans 8. Unsecured Loans 9. Branches/Division 10. Reserves & Surplus 11. Capital 12. Fixed Assets N o t e:For Sundry and For
ledgers created under Groups besides Duties & Taxes, Sundry Creditors and Debtors, to obtain the field Is TDS Applicable, set Maintain Bill-wise Details Non-Trading A/cs in F11: Features to Yes.
Creating a Tax Ledger
Create the Tax ledger under the group Duties and Taxes to calculate TDS at voucher entry levels. You can specify the Type of Duty/Tax only for Ledgers created under Duties and Taxes. To create a Tax Ledger for TDS on Rent, Go to Gateway of Tally> s Info.> Ledgers> Create
1.
Enter the Name of the ledger
2.
Select Duties & Taxes from the List of Groups in the Under field. On selecting Duties & Taxes, you will get a field Type of Duty/ Tax
3.
Select TDS from the Types of Duty/Tax list
4.
3. 4.
Select the appropriate TDS Nature of Payment from the List of TDS Nature of Payment
5.
If the total transaction limit exceeds the actual limit, set Ignore TDS Exemption Limit to Yes
6.
Accept to save the Ledger
Similarly, you can create different Tax Ledgers. N o t e: You will find different categories under Tax Nature of Payment from the List of TDS Nature of company.
Deduction. Select the relevant Payment that applies to your
TDS
Creating a Party Ledger
T o create a Party ledger grouped under Sundry Debtors or Sundry Creditors , Go to Gateway of Tally> s Info.> Ledgers> Create 1.
Enter the Name of the Ledger
2.
Select Sundry Debtors or Sundry Creditors from the List of Groups in the Under field
3.
If required, set Maintain balances bill-by-bill to Yes
4.
Set Is TDS Applicable to Yes
In the TDS Details screen:
Select the Deductee Type from the List of Deductee Types
Set Is Lower/No Deduction Applicable to No if not applicable
To ignore the exemption limit for surcharge and to calculate the surcharge on the amount specified, set Ignore Surcharge Exemption Limit to Yes
5.
Enter the Mailing Details and Tax Information
5.
6.
Accept to save the Ledger
Note: While creating ledgers under Sundry Creditors or Maintain Bill-wise Details is set to Yes. If the party is then PIN Code, State and the Sales Tax Number fields
Sundry Debtors, ensure a Non Resident Deductee are not applicable.
type,
Creating a Party where Lower/No Deduction is Applicable
To create a TDS Party where Lower/No Deduction is applicable, Go to Gateway of Tally> s Info.> Ledgers> Create 1.
Enter the Name of the Party
2.
Select the Group from the List of Groups at the Under field
3.
By default Maintain balances bill by bill is set to Yes
4.
Set Is TDS Applicable to Yes
In the TDS Details Screen, Select the Deductee Type from the List Of Deductee types Set Is Lower/No Deduction Applicable to Yes Select the Section number from the list. If 197 is selected, the cursor skips to the TDS Lower Rate field and you can enter the TDS Lower Rate in this field. If the section number 197A is selected, the cursor skips to Ignore Surcharge Exemption Limit? in the Ledger Creation screen and the TDS rate is taken as zero .
5.
Enter the Mailing Details and Tax Information
6.
Accept to save the ledger
Creating a Journal Voucher to book the TDS Expense
U sing the Journal, you can book expenses, deduct the TDS and pay the amount to the party for their s ervices. To book TDS expenses, Go to Gateway of Tally> ing Vouchers> Journal Vouchers 1.
Debit the ledger Rent grouped under Indirect Expenses from the List of Ledger s and enter the amount
2.
Select Smart Enterprises from the list and the amount to be credited appears in the Credit column
3.
In the Bill-wise Details for screen: 3.
Select New Ref as the Type of Ref
4.
Select the TDS ledger from the List of TDS Ledgers and the Amount appears automatically
5.
Enter a Narration if required and Accept to save the journal
Note : Tally.
Booking
the
TDS
Expense
can
be
done
using
Deduction of TDS using Journal voucher with TDS Deduction Button
the
Purchase
voucher
available
in
You can create a Journal using the TDS Deduction button, to record all the TDS deductions for parties who provide services. The List of Ledger s displays only those ledger s which are enabled for TDS and transaction ed where deduction of due. Go to Gateway of Tally> ing Vouchers> F7: Journal 1.
Click the TDS Deduction Button or press ALT+S . You will get a list of TDS Ledgers for the party selected
2.
Select the TDS Party Ledger from the list
3.
In the TDS Details for screen, select the TDS Ledger from the list (TDS on Rent). The system calculates the Net TDS to Deduct amount
4.
Select the TDS Applicable Bills from the list
5.
Accepting the TDS details sub form will post the Net TDS to Deduct amount in the Debit column of the Journal Voucher screen
6.
5.
6.
Press the Enter key to credit the Tax Ledger (TDS on Rent). You may enter the for identification and accept the screen to save the Journal Voucher
New Reference number
Creating a Journal Voucher to book the TDS Expense for a Lower/No Deduction party
To book TDS Expenses for a Lower/No Deduction Party , Go to Gateway of Tally> ing Vouchers> Journal Vouchers 1.
Debit the ledger Rent grouped under Indirect Expenses from the List of Ledger s and enter the amount
2.
Select ABB Enterprises from the list and the amount to be credited appears in the Credit column
In the Bill-wise Details for screen, 3.
3.
Select New Ref as the Type of Ref
4.
Select the TDS ledger from the List of TDS Ledgers and details in Is Lower/No Deduction , Section Number and Amount will appear automatically.
If you have created the Party and set Is Lower/No Deduction Applicable to Yes , you can still override the specified TDS rates and make changes to the percentage of Income Tax at the voucher entry level by setting Allow Alteration of TDS Rates and Values in F12: Configure to Yes .
5.
Enter a Narration if required and Accept to save the journal
5.
TDS deduction using the TDS Deduction button Go to Gateway of Tally> ing Vouchers> F7: Journal 1.
Click the TDS Deduction Button or press ALT+S . You will get a list of TDS Ledgers for the party selected
2.
Select the TDS Party Ledger from the list
3.
In the TDS Details for screen, select the TDS Ledger from the list (TDS on Rent). The system calculates the Net TDS to Deduct amount
4.
Select the TDS Applicable Bills from the list
4.
5.
Accepting the TDS details sub form will post the Net TDS to Deduct amount in the Debit column of the Journal Voucher screen
6.
Press Enter to credit the Tax Ledger (TDS on Rent). You may enter the New Reference number for identification and accept the screen to save the Journal Voucher
6.
7.
Accept the screen to save the Journal voucher
Payment Voucher
You can pay the TDS pending bills for the selected TDS ledger via the Payment voucher, either by using the Helper Button or by entering details manually.
TDS Challan Payment
Payment to the Party ( While Paying the Advance)
TDS
Creating a Payment Voucher using the TDS Helper button
3.
4.
Accept to save the voucher
5.
To print this voucher as a TDS Challan, click on the Print button or press ALT+P from the payment voucher. It will display the Voucher Printing dialog window. You can configure the payment voucher as depicted in the screen below. If you wish to view the challan in a preview mode, click on With Preview button or press ALT+I
6.
Set Print as TDS Challan to Yes . Accepting the Voucher Printing sub form will display the TDS Challan in Print Preview mode. Click Zoom or press Alt+Z to view the TDS Challan
7.
Click on Print to print the TDS Challan
Creating a Payment Voucher
5.
6.
Accept to save the Payment voucher
Advance to a Party
Assume ABC Company has decided to pay an advance of Rs.1 50 000 to a party (Apt ment) for their service on advertising for this year. The Total taxable amount on Rs.1 50 000 will be 1% as Tax, 10% as surcharge and 2% as Additional surcharge. After deducting the TDS from your Total Amount Paid/Payable, the Net TDS to deduct would be Rs.1, 683.00.
Creating a Payment Voucher (To Party )
To make a Payment to the Party, Go to Gateway of Tally > ing Vouchers > Payment 1.
Select the Bank from the list
2.
Select the Party from the list and enter the advance amount that you wish to pay to the party
3.
You will get the Bill wise Details sub form, select the type of reference as Advance and enter a name. Select the appropriate TDS ledger (TDS on ment) from the list. (If the TDS Ledger is selected as Not Applicable then such transactions are considered as Payments for which TDS will not be deducted)
4.
The amount entered in the debit amount is displayed in the Amount column
5.
4.
5.
After entering the Bill-wise Details , the TDS Details for the selected TDS ledger (TDS on ment) appears. This sub form displays the party , Type of Deductee , Amount, total taxable amount , income tax , Surcharge and Additional Surcharge . The total taxable amount is calculated till date in this sub form. Enter the name of the reference
6.
The TDS Details for the selected TDS ledger (TDS on ment) appears. This sub form displays the party , type of deductee , amount , total taxable amount , income tax , surcharge and additional surcharge . The total taxable amount is calculated till date in this sub form. Enter the name of the reference
7.
The Net TDS to Deduct on the Tax ledger is calculated according to percentages. Accept the TDS details sub form. The Taxable amount for TDS on ment appears as credit in the Payment voucher screen
7.
8.
Accept the Payment voucher screen to save the entry
Creating a TDS Challan
The TDS challan payment voucher can be entered using the TDS Helper button available in Tally. Go to Gateway of Tally > ing Vouchers > F5: Payment Voucher 1.
Click the TDS Deduction Button or press ALT+S
2.
In the TDS Filters screen, select the TDS Ledger , Deductee Status and enter the To Date
3.
Select the (Bank) from the list
4.
Accept the Payment voucher screen to save the entry
4.
TDS Challan Reconciliation
R econciliation of Challan Payments made to Bank for TDS s is done in the Ledger Voucher report. Go to Gateway of Tally > Display > s Book > Ledger > Select the TDS ledger from the list
The Ledger Vouchers Report provides a list of vouchers for the current month. You may view the Ledger Vouchers by drilling down. 1.
Click on the F5 : Challan Reconcile button or press ALT+F5 to view the Challan Reconciliation report
2.
Enter the Bank Challan Number , Challan Date , Cheque/DD Number , Bank Name and the Bank Branch Code OR use Set Challan Details (Alt +S) button from the Toolbar to reconcile challans from the TDS Challan Reconciliation screen for a selected period which has to be specified in the Ledgers Vouchers screen
3.
Enter the Bank Challan Number , Challan Date , Bank Name and BSR Code . Accept to Save and the details are entered are applicable to the selected vouchers
4.
Enter the Cheque/DD number and accept the Challan Reconciliation report to save the entry
TDS Reports
TDS Reports in Tally display the tax amount of the concerned party/supplier. Tally generates Form 16A and Form 27A and also provides the printing option to print these forms. You can export the e-TDS forms (Form 26/Form27/Form 26Q/Form 27Q) from Tally. The exported file will be saved in the defined path specified in the Output file name. You can get the e-TDS file validated through NSDL freely able utility, File Validation Utility (FVU) to whether the e-TDS return file prepared by the deductors conform to the prescribed format. Go to Gateway of Tally > Display > Statutory Reports > TDS Reports Click on the TDS Reports option to display the following
Print Form16A
Print Form 16A option provides the facility to preview and print Form 16A. Go to Gateway of Tally > Display > Statutory Reports > TDS Reports > Print Form 16A
1. On selecting the TDS Party Ledger from the List Of TDS Party Ledgers , Tally generates Form 16A report in preview mode 2. Use the buttons from the button bar to set printing options such as selecting the printer, number of copies, method, page range, paper type, paper size and print area
2.
3. Select TDS ledger from the list and enter the From , To and Challan Till date 4. Select the Type of Copy . Enter the Certificate No , Place and Date 5. Click on Yes to view Form 16A in print preview mode. Click on Zoom or press ALT+Z from the print preview screen to display the report as below
6.
6.
Click the Print button or press ALT+P to print Form 16A
ETDS Forms
ETDS Forms enable you to export the eTDS Forms for the specific period. Go to Gateway of Tally > Display > Statutory Reports > ETDS Forms
Format Tally exports the data in SDF format. NSDL’s File Validation Utility (FVU) accepts only .txt files. Set the output filename with .txt extension .
Output File Name Enter a name for the file with .txt extension to be exported. By default the file will be saved as Tally.txt in the Tally folder in your computer. To export to a different folder enter the path in Output File Name. For example,
C:\differentfolder\eTDS.txt).
Person Responsible Details The Person Responsible Details will capture the information provided at the time of Company Creation. But if you wish to modify, press the Backspace key to navigate to any field.
Form Name Select the required Form (Form 26/Form 27/Form 26Q/Form 27Q) from the Form type pop up.
Other Details From (blank for beginning) Enter the From date
To (blank for beginning) Enter the To date
Challan Till Date This field is provided to enter the date of the next quarter/next Year depending on the Quarterly (Form 26Q/Form 27Q) or Annual (Form 26/Form 27) returns. For example, if the Expense booking & TDS (deduction) vouchers are done in the first quarter (5.4.2007) and its payment is done on 7.07.2007, then the From date will be 1.4.2007 , To Date will be 30.6.2007 and Challan Till Date will be 7.07.2007 .
Type type has two options - Regular and Corrected Returns 1.
Regular : Select Regular type if you are filing returns for the first time.
2.
Corrected Returns : Select Corrected Returns type if you have made any corrections from the previous returns.
Is Change in Address of TAN since last Return? If you have changed your company address in company alteration screen since last return, set this option to Yes . Else set it to No . Click on Yes to Export the file (Form 26/Form27/Form 26Q/Form 27Q) from Tally. The exported file will be saved in the defined path specified in the Output file name. You can get the file validated through NSDL freely able utility File Validation Utility (FVU) to whether the e-TDS return file prepared by the deductors conform to the prescribed format. Note: Depending on From and To date, the return annually. For example, 01-04-2005 to 30-6-2005 is 31-3-2006, Yearly.
periodicity the First
is set quarter
as quarterly or and 01-04-2005
to
After preparation of the electronic return, entities have to the electronic return through the latest version of File Validation Utility (FVU) provided by NSDL which can be freely ed from the TIN-NSDL web-site.
To the file in File Validation Utility, you may refer to this link http://www.tinnsdl.com/onlineupproc.asp To view the exported file, open the folder where Tally is installed. The file is created in this folder by default.
Print Form 27A
Form 27A is a physical form with the summary of TDS return (Form 26/Form27/Form 26Q/Form 27Q), which contains control totals of Amount Paid and Income tax deducted at source in addition to other basic details along with CD/Floppy containing the e-TDS return data file. The control totals mentioned on Form 27A should match with the corresponding control totals in e-TDS return file. It should be submitted along with e-TDS returns. Clicking TDS Form 27A provides you with the facility to set the report titles and preview Form 27A . Go to Gateway of Tally > Display > Statutory Reports > TDS Reports > Print Form 27A Use the buttons provided on the Button Bar to set the printing option such as to select the printer, set the number of copies, method, page range, paper type, paper size and print area
Person Responsible Details
The Person Responsible Details will capture the information provided at the time of Company Creation. But if you wish to modify, press the Backspace key to navigate to any field.
Other Details 1.
Enter the From date
2.
Enter the To date
3.
Enter the Challan Date
4.
Select the Form type from the list at the field, Enclosed Form Type
5.
Enter the Previous Receipt No if applicable
6.
Enter the total number of annexure enclosed.
7.
Enter Other Information , if any.
8.
Enter the Place and Date
Click Yes to view Form 27A in print preview mode Click Zoom or press ALT+Z from the print preview screen to display the report as below:
Reconciliation Reports
The Reconciliation reports for TDS are as given below 1.
TDS Challan Reconciliation
2.
Form 16A Reconciliation
Form16A Reconciliation
This Report helps you to record the issue date of Form 16A Go to Gateway of Tally > Display > Books > Ledger 1.
Select the TDS party ledger from the list
2.
Click on F5: Form16A Reconcile button to reconcile Form 16A for the selected TDS party. Enter the Form 16A issue date and accept the screen
2.
Display Reports
To view TDS Statutory Information reports and MIS Reports, click on the links provided below 1.
Statutory Info
2.
MIS Reports
MIS Reports
The MIS Reports provide you with the TDS Outstandings. To view the TDS Outstandings, Go to Gateway of Tally > Display> Statement of s > TDS Outstandings
TDS Computation
To view the TDS Computation report, Go to Gateway of Tally > Display > Statements of s > TDS Outstandings >TDS Computations
1.
The Particulars column provides you with the Name of the Party and its TDS ledger names
2.
Amount Paid/Payable Till Date column displays the total amount of the Bills ed or payment made to the party
3.
The Tax column provides the amount of TDS computed as per the rate specified in the tax column, which is displayed below the TDS amount
4.
Surcharge is the total surcharge value computed as per the rate specified in this column, which is displayed below the Surcharge amount
5.
Addl. Surcharge (Cess) column displays the amount of Education Cess applicable as per the rate specified in this column, which is displayed below the Education Cess amount
6.
Addl. Education Cess column displays the amount of Additional Education Cess @ 1% as computed
7.
Total TDS column displays the total TDS amount including all additional taxes
8.
Less: TDS Deducted Till Date column provides the TDS amount deducted till date
9.
8. 9.
Net TDS to Deduct column displays the TDS amount yet to be deducted from the bills ed or payment made. If TDS is deducted using TDS journal and if the complete amount of TDS due is deducted. This column will not display any balance. Partial amount deducted will display the balance amount of TDS to be deducted in this column
Press F12 or click on the F12: Configure button.
In Show Party TDS PAN Number field enter Yes , to display the party’s PAN number in the report.
Click on the Print button or use ALT+P to print the TDS Computation report. This brings up the Printing TDS Computation configuration sub-form by which the can customise the appearance of the Ledger report. Accept the TDS Computation configuration sub-form to view the TDS Computations report in print preview mode.
If the TDS payment is made to the government then such payment will not be displayed in TDS Computation drill down report.
TDS Payables
TDS Payables report gives you information on the status of TDS payable (pending) amounts for a particular TDS Ledger . Go to Gateway of Tally > Display > Statements of s > TDS Outstanding > TDS Payables The TDS Payables report provides the Outstandings for a Tax ledger s.
Note: If Enter.
you
wish
to
know
more
details
on
the
voucher
drill
down
further
by
pressing
1.
Date : Date of creation as entered in the Payment/Journal/Purchase voucher
2.
Ref No : The payment Reference number
3.
TDS Ledger Name displays the TDS Ledgers created under Duties and Taxes
4.
Pending Amount : The pending amount that needs to paid by your company to the bank/party appears in this column
5.
Due on : The last date for the payment (Due date).
6.
Overdue by days : The number of days ed from the date of payment
Click on the Print button or use ALT+P to print the TDS Payable report. In the Printing TDS Outstanding screen, you can customise the Condensed or Detailed appearance of the TDS Payable by using the Backspace key to navigate to the fields. Accept the sub form to view the report in print preview mode.
TDS Ledger Outstandings
To find out the outstanding status of a particular tax ledger , Go to Gateway of Tally > Display > Statements of s > TDS Outstandings > Ledger Select the Tax ledger created under Duties and Taxes from the List of TDS Ledgers .
1.
The selected Tax L edger name appears at the top left corner of the screen
2.
The date of creation appears in the Date column as entered in the Payment/Journal/Purchase voucher
3.
The payment Reference number appears in the Ref No. column
4.
The Opening Amount appears in the Opening Amount column, if any
5.
The Pending Amount that needs to be paid by your company to the bank/party appears in the Pending Amount column
6.
The last date for the payment appears in the Due on column
7.
The number of days ed from the date of payment appears in the Overdue by days column
TDS Not Deducted
To view the TDS Not Deducted report, Go to Gateway of Tally > Exception Reports >TDS Not Deducted Press F12 or click on F12: Configure button
Set the field Show Party TDS PAN Number to Yes to display the PAN number in the report
This report will display only those transactions, for which TDS is not deducted or partially deducted. This is an exceptional report for non deduction or lesser deduction of TDS for the bills ed or payment made. Click the Print button or use ALT+P to print the TDS Not Deducted report.
Multi-Form16A Printing
Form 16A can be printed for a selected TDS ledger with details of all the parties/suppliers associated with the selected ledger. Go to Gateway of Tally > Multi ing Printing > Multi-Form 16A Printing
1.
Select TDS ledger from the list and enter the From and To date, Place and Date and accept the screen
1.
2.
Click the Print button or press ALT+P to print Multi-Form 16A
TCS Introduction
TCS is the Tax Collected at Source by the seller (collector) from the buyer/ lessee (collectee/ payee). The goods are as specified under section 206C of the Income Tax Act, 1961. If the purchase value of goods is X, the amount payable by the buyer is X+Y, where Y is the value of tax at source. The seller deposits Y (tax collected at source) at any designated branch of banks authorised to receive the payment. The seller, lessor or licensor, is responsible for the collection of tax from the buyer, lessee or licensee. The tax is collected for sale of goods, on transactions, receipt of amount from the buyer in cash or issue of cheque, draft or any other mode, whichever is earlier.
Classification of Seller for TCS
Under TCS, a seller is defined as any of the following:
Central Government
State Government
Any Local Authority
Any Statutory Corporation or Authority
Any Company
Any Partnership Firm
Any Co-operative Society
Any individual/HUF whose total sales or gross receipts exceed the prescribed monetary limits as specified under section 44AB during the previous year
Classification of Buyer for TCS
A buyer is classified as a person who obtains goods or the right to receive goods in any sale, auction, tender or any other mode. The following are not included:
Public Sector Companies
Central Government
State Government
Embassy of High Commission, Consulate and other Trade Representation of a Foreign State
Any Club, such as social clubs, sports clubs and the like
Goods and Transactions classified under TCS
Goods and transactions classified under TCS are listed below:
Alcoholic liquor for human consumption including Indian Made Foreign Liquor (IMFL)
Tendu leaves
Timber obtained under a forest lease
Timber obtained by any mode other than under a forest lease
Any other forest produce not being Timber or Tendu
Scrap (Scrap means waste and scrap from the manufacture or mechanical working of materials which is usable as such because of breakage, cutting up, wear and tear and other reasons)
Licensing or leasing of Parking Lot, Toll Plaza
Mining and quarrying
Note:
The
rate
of
surcharge
is
the
same
as
applicable
to
TDS
Certificate of TCS
The certificate of collection of tax at source has to be submitted in Form No-27D by persons collecting tax at source within a week from the last day of the month in which the tax was collected. If there is more than one certificate to be issued to a buyer for tax collected at source with respect to the period ending September 30 and March 31 in the financial year, then the person collecting the tax on request from the buyer can issue a consolidated certificate within one month from the end of such period. If an issued TCS certificate is lost, the person collecting tax at source may issue a duplicate certificate on plain paper, with necessary details as contained in Form-27D. The Assessing Officer (AO), before giving credit for the tax collected at source on the basis of the duplicate certificate, has to get the payment certified and obtain an Indemnity Bond from the assessee.
TCS Exemptions
TCS can be totally exempted or fixed at a lower rate under some circumstances.
Total Exemption: No TCS Collection A declaration by the buyer in Form Number 27C (in duplicate) has to be made for total exemption. The declaration is if the goods listed are to be used for the purpose of manufacturing or processing and not trading. A copy of the declaration has to be given to the person collecting tax. The person collecting this declaration form has to submit the copy to the authorities concerned on or before the seventh day of the following month.
Lower Rate of TCS The buyer (Collectee) can apply to the Assessing Officer (AO) for a lower rate, using Form No.13, subject to the condition that the AO is convinced that the total income of the buyer (Collectee) justifies the lower rate. The AO may issue a certificate, specifying the rate of collection.
Payment of TCS to the Government
The tax collected is to be paid to the Central Government within one week of the last day of the month in which the tax was collected. This payment is made in any branch of Reserve Bank of India (RBI), State Bank of India (SBI), or any other authorised bank. The payment is made accompanied by income tax challan 281. If the tax is collected on behalf of the Government, then the amount can be paid without the income tax challan.
Electronic TCS (e-TCS)
e-TCS is the filing of TCS returns using electronic media. It is mandatory for corporate and government collectors to furnish TCS returns in electronic form, from financial year 2004-2005. Collectors (other than government and corporates) may file TCS returns in electronic or physical form. NSDL collects the e-TCS returns from the Collectors on behalf of the Income Tax Department.
TCS returns on computer media for e-TCS TCS returns filed using computers should be in TCS specific form formats and must contain all the information, details and particulars specified in such forms. Computer media specifications are as follows (any of these):
CD ROM of capacity 650 MB or more
4mm 2GB/4GB (90M/120M) DAT Cartridge
3.5 Inches, 1.44 MB floppy diskette.
The returns must be accompanied by Form No.27B and verified.
Filing of TCS Returns
TCS returns are to be filed quarterly, in addition to annual returns.
The quarterly returns are to be filed in Form Number 27EQ on or before July 15, October 15 and January 15, respectively for the first three quarters of the financial year. For the last quarter, the returns are to be filed on or before April 30.
Annual returns are to be filed in Form Number 27E on or before June 30 of the following financial year.
TCS in Tally
Tally s TCS and is a simple and easy-to-use feature. The complexities of TCS are handled by Tally making it easier for you to maintain records and file TCS returns. Tally calculates TCS in transactions, where ever applicable. Tally also generates Print and File TCS forms and reports (Statutory and MIS).
Features of TCS in Tally TCS in Tally has the following features:
Simple and easy-to-use.
Maintain TCS records.
Lower/No Collection of TCS and Exemption Limit on Surcharge.
TCS Helper facility to pay TCS.
Print TCS Challan from Tally.
Generate TCS returns automatically from Tally and file.
E-TCS (electronic format) filing facility provided in Tally.
Generate Statutory Reports from Tally: Form 27D, E-TCS filing and Form 27B.
TCS Reconciliation Reports: TCS Challan Reconciliation and Form 27D Reconciliation
TCS Display Reports:
Statutory Masters: Collectee Types and TCS Nature of Goods MIS Reports: TCS Payables and TCS Ledger Outstandings
Enabling TCS in Tally
To enable TCS in Tally: 1.
Go to Gateway of Tally
2.
Press F11 or click F11: Features > Statutory & Taxation to display the Company Operations Alteration screen.
3.
Enter Yes in Enable TCS and Set/Alter TCS Details
4.
Enter the Company TCS Collector Details .
4.
5.
Enter the Tax Assessment Number . The Tax Assessment Number (TAN) is a 10-digit alphanumeric number, issued by the Income Tax Department (ITD) to the collectors.
6.
Enter the Income Tax Circle/Ward (TCS) . This is issued by the Income Tax Department
7.
Select the Collector Type from the List of Company Type .
8.
Enter the Name of person responsible for filing the TCS returns.
9.
Enter the Designation of the person responsible for filing of the TCS returns.
10.
Press Enter and Accept to save.
More: Enabling TDS in Tally
Statutory Info.
TCS Statutory Info. display goods under TCS and Collectee types and related details. Go to Gateway of Tally > Display > Statutory Info.
TCS Nature of Goods
Collectee Types
TCS Nature of Goods
To view TCS Nature of Goods 1.
Go to Gateway of Tally > Display > Statutory Info. > TCS Nature of Goods
2.
Select from the List of TCS Types to display the TCS Nature of Goods Display
Collectee Types
To view Collectee Types 1.
Go to Gateway of Tally > Display > Statutory Info. > Collectee Types
2.
Select from the List of Collectee Types to display the Collectee Type Display
C reating Party Ledgers for Sundry Debtors/ Sundry Creditors
To create Party Ledgers for Sundry Debtors/ Sundry Creditors 1.
Go to Gateway of Tally > s Info > Ledgers > Create
2.
In the Ledger Creation screen, enter the name of the buyer company in the Name field
3.
In the Under field, select Sundry Debtors/Sundry Creditors option from the List of Groups
4.
If required, set Maintain balances bill-by-bill? to Yes . Enter details in the Default Credit Period , if applicable. By default, the Inventory Values are affected? field is set to No
5.
Set Yes for Is TCS Applicable ?
6.
Select from the List of Collectee Types for Buyer/Lessee
7.
Set Yes in Is Lower/No Collection Applicable? if lower or no collection is applicable. Press Enter to display the Lower/No Collection Details screen. The existing Section Number is 206C by default. Enter the TCS Lower Rate (%) and press Enter
8.
Set Yes in Ignore Surcharge Exemption Limit? to ignore the exemption limit for surcharge and calculate
8. surcharge on the amount specified. If Ignore Surcharge Exemption Limit? is set to No , then surcharge is calculated only if the amount is above the exemption limit.
Note: Ignore Surcharge Exemption applicable to categories from the List 9.
Accept Yes to save
Limit? field is of Collectee
displayed in Party Master if Types in B u y e r / L e s s e e field.
C reating Sales Ledgers for TCS
To create ledgers under Sales s group 1.
Go to Gateway of Tally > s Info > Ledgers > Create
2.
Enter a name for the sales ledger in the Name field
3.
In the Under field, select Sales s from the List of Groups
4.
Set the Inventory Values are affected? to Yes if you are maintaining inventory
5.
Accept to save
5.
Creating TCS Ledger under Duties and Taxes
To create a TCS Ledger under Duties and Taxes for TCS on Sales 1.
Go to Gateway of Tally > s Info > Ledgers > Create
2.
In the Ledger Creation screen, enter the name of the TCS ledger in the Name field
3.
In the Under field, select the Duties & Taxes from List of Groups
4.
Select TCS from Types of Duty/Tax in the Type of Duty/Tax field
5.
Select from the List of TCS Types in the Nature of Goods/ Contract/ License/ Lease : field
6.
Set Inventory Values are affected? to No
7.
Accept to save
7.
Creating a Sales Voucher
To create Sales Voucher with TCS details 1.
Go to Gateway of Tally > ing Vouchers > F8: Sales
2.
Select As Invoice mode
3.
Enter the date and reference
4.
Select the Party to be credited from the List of Ledger s and enter Party’s A/c Name
5.
In the Party Details screen, check/ modify details
6.
Select Sales Ledger from the List of Ledger s
7.
Select the item from the List of Items in Name of Item
Note: 9.
To
create
an
Item,
refer
to
the
topic,
Stock
Items
Enter the Quantity and the Rate to get the amount in the Amount field
10.
Select the TCS ledger (Under Duties & Taxes ) for sales
11.
By default, the gross amount is displayed in TCS Details in TCS Computations screen . The gross amount can be changed if required.
12.
Enter new reference (New Ref ) and Due Date, or Credit Days (By default, 7th of the following month).
12.
12.
Select any other expense ledger, if applicable,from the List of Ledger s
13.
Enter narration, if required, and Accept to save
13.
Note: 1. When you create a Credit ( Agst Ref. ) from the List of 2. When you create a Credit applied in the selected bill.
Note TCS
against a Payable .
sales
bill
Note
against
sales
bill,
a
select
the
surcharge
respective
is
tax
considered
bill
as
Creating a Payment Voucher
You can create entries for payment of TCS in a normal payment voucher and manually pay TCS as shown here or you can create a TCS Payment voucher using the TCS Helper button from the button bar. This is an automatic feature which allows payment of TCS for all entries from a TCS ledger.
To create a TCS payment voucher manually 1.
Go to Gateway of Tally > ing Vouchers
2.
In the ing Voucher Creation screen select F5: Payment
3.
Enter the date
4.
Select and debit the TCS Ledger in Particulars from the List of Ledger s and enter the amount
5.
In the Tax Details screen, select from List of TCS Payable and enter the amount
6.
Select and credit the Bank authorised to receive TCS in Particulars from the List of Ledger s and enter the amount
7.
Enter Narration, if required,
8.
Print the TCS Challan , if required,
9.
Accept to save
9.
Creating a Payment Voucher using the TCS Helper button
Create a Payment voucher using the TCS Helper button from the button bar. This is an automatic feature which allows payment of TCS for all entries from a TCS ledger. You can use TCS Helper to pay TCS in one shot. Note: TCS Helper feature is available only P y m t / R c p t / C o n t r a ? from F12: Configure
if Use Single Entry mode for (Voucher Configuration) is set to Y e s .
To create a TCS payment voucher using the TCS Helper button 1.
Go to Gateway of Tally > ing Vouchers
2.
In the ing Voucher Creation screen select F5: Payment
3.
Press [Alt + R] or click the TCS Helper from the button bar to view the TCS Filters screen
4.
Select from the List of TCS Ledgers and enter
5.
Select Buyer/Lessee Status from Deductee/Collectee Status and enter. This lets you prepare separate challans as it is mandatory for different types of Collectees
6.
Enter the To Date to select the period for generation of TCS challan
7.
Enter the date
8.
Select the Bank ledger from the List of Ledger s in
9.
Select the TCS Ledger in Particulars from the List of Ledger s and enter the amount
10.
In the Tax Details screen, select from List of TCS Payable and enter the amount
11.
Enter Narration, if required,
12.
Print the TCS Challan , if required,
13.
Accept to save
12. 13.
Printing TCS Challan
You can print TCS Challans for a TCS payment voucher created manually or created using the TCS Helper button.
To Print a TCS Challan 1.
Press [Alt + P] or click on Print from the button bar in the Payment Voucher screen to view the Voucher Printing screen
2.
Press Backspace to navigate from Print Yes or No? and move the cursor to Print a TCS Challan?
3.
2. 3.
Set Yes for Print a TCS Challan?
4.
Set Yes for TCS Regular Assessment (Raised by I.T. Deptt.): if challans are for submission to the Income tax department
5.
Press Enter and Select Yes to Print
Note:
Use
the
Print
Preview
Print Preview for TCS tax challan
[Alt
+
I]
option
to
preview
the
challan
to
be
printed.
TCS Reports
TCS reports in Tally are extensive. Statutory reports are integrated, making it convenient to print and file reports in government prescribed formats. Additionally, a wide of range reports such as reconciliation reports and display reports are available. These reports provide information at a glance and help in managing TCS issues with ease.
TCS Reports in Tally There are three types of TCS reports in Tally.
Statutory Reports
Reconciliation Reports
Display Reports
Statutory Reports
Statutory Reports are reports required in government prescribed formats for the purpose of filing returns. TCS statutory reports in Tally are dynamically generated. Print and file a report. E-Filing TCS returns is ed using the export feature. There are three types of TCS Statutory Reports.
Print Form 27D
E-TCS Forms
Print Form 27B
To view Statutory Reports 1.
Go to Gateway of Tally > Display > Statutory Reports > TCS Reports
2.
TCS Reports menu displays the following options.
2.
Print Form 27D
Form 27 D can be printed for a party by selecting a party ledger or multiple parties using Multi-form printing.
To print Form 27D 1.
Go to Gateway of Tally > Display > Statutory Reports > TCS Reports > Print Form 27D
2.
Select ledger from the List of TCS Party Ledgers
3.
In the Report Generation screen, press Backspace in the Print? Yes or No dialog box
4.
Select TCS ledger from the List of TCS Ledgers
5.
Enter the From and To date
6.
Enter the period for which the challan is required in Challan Date Till
7.
Enter the Type of Copy
8.
Enter the Certificate No
9.
Enter the Place and Date
10.
Select Yes to print
10.
Note:
Use
the
Print
Preview
Form 27D is displayed as shown.
option
to
view
the
form.
Multi-Form 27D Printing Form 27D can be printed for a TCS ledger with TCS details for all the parties associated with the ledger. 1. 2.
1.
Go to Gateway of Tally > Multi- ing Printing
2.
Set period using Alt + F2
3.
Select on Multi-Form 27D Printing
4.
Press Backspace in Print? Yes or No from the Report Generation screen
5.
Select TCS Ledger
6.
Enter the From and To date, Place and Date of report generation
7.
Accept to Save
8.
Using PgUp and PgDn links to navigate in Print Preview screen
9.
Click Print or press ALT+P for printing multiple Form 27D
E-TCS Forms
To export TCS form for electronic filing 1.
Go to Gateway of Tally > Display > Statutory Reports > TCS Reports > ETCS Forms
2.
Select Restricted (ASCII only) from the language list.
3.
In the Report Generation screen, press Backspace in Export? Yes or No dialog box
4.
The cursor goes to the Output File Name . Enter a file name.
5.
Tally exports the data in SDF format. NSDL’s File Validation Utility (FVU) accepts only .txt files. Set the output filename with .txt extension.
6.
Enter Person Responsible Details
7.
Enter Yes or No for change in address since last return
8.
Enter the From and To date in Other Details
9.
Enter the period for which the challan is required in Challan Date Till
10.
Select the Form Name from Form Types
11.
Enter the Place and Date
12.
Select Type from Types menu
13.
Enter Yes or No for change in address of TAN
14.
Select Yes to export
15.
To view the file open the folder where Tally is installed. The file is created in this folder, by default
15.
Printing Form 27B
To print Form 27B 1.
Go to Gateway of Tally > Display > Statutory Reports > TCS Reports > Print Form 27B
2.
In the Report Generation screen, press Backspace in the Print? Yes or No dialog box
3.
Enter Person Responsible Details
4.
Enter the From and To date in Other Details
5.
Enter the period for which the challan is required in Challan Date Till
6.
Enter the Enclosed Form Type
7.
Enter the Previous Receipt No
8.
Enter the No. of Annexures enclosed
9.
Enter Other Information , if applicable
10.
Enter the Place and Date
11.
Select Yes to print
11.
Note:
Use
the
Print
Form 27B is displayed as shown.
Preview
option
to
view
the
form.
TCS Reconciliation Reports
Reconciliation reports are for TCS challan reconciliation and Form 27D reconciliation. TCS Challan Reconciliation Form 27D Reconciliation
TCS Challan Reconciliation
Reconciliation of Challan Payments to the assigned Bank for TCS is done in the Ledger Voucher report. 1.
Go to Gateway of Tally > Display > s Book > Ledger
2.
Select TCS ledger from the List of Ledgers
3.
Ledger Vouchers report is displayed with a list of receipt/payment vouchers
4.
Click F5: Challan Reconcile or press Alt+F5 to display TCS Challan Reconciliation report
5.
Enter the Bank Challan Number , Challan Date , Cheque/DD Number , Bank Name and BSR Code
6.
Accept to save
6.
N o t e : Use Set Challan Details (Alt +S) button from the Toolbar to reconcile challans at once from the TCS Challan Reconciliation screen for a selected period (Set period in the Ledgers Vouchers screen). Enter the Bank Challan Number, Challan Date, Bank Name and BSR Code. Accept to Save and the details are applicable to the selected vouchers.
Form 27D Reconciliation
Reconciliation of Form 27D TCS for a party is done in the Ledger Voucher report. 1.
Go to Gateway of Tally > Display > s Book > Ledger
2.
Select the Party ledger from the List of Ledgers
3.
Ledger Vouchers report is displayed with a list of the Party’s receipt vouchers
4.
Click on F5: Challan Reconcile or press Ctrl+F5 to display Form 27D Reconciliation report
5.
Enter the date of issue of Form 27D in Form 27D Issue Date
6.
Accept to save
6.
N o t e : Use Set all Dates (Alt + S) button from the Toolbar in Form to set the dates at once for all vouchers displayed for a selected
27 D period.
Reconciliation
Display Reports
Display reports are to view TCS statutory information reports and MIS Reports. The types of display reports are as follows.
Statutory Masters
MIS Reports
MIS Reports
These reports provide information on TCS outstandings.
To view TCS Outstandings 1.
Go to Gateway of Tally > Display > Statements of s > TCS Outstandings
2.
Select from
TCS Payables
Ledger
TCS Payables
To view TCS Payables 1.
Go to Gateway of Tally > Display >Statements of s > TCS Outstandings > TCS Payables
2.
TCS Outstanding screen is displayed.
TCS Ledger Outstandings
To view TCS Ledger Outstandings 1.
Go to Gateway of Tally > Display > Statements of s > TCS Outstandings > Ledger
2.
Select from the List of TCS Ledgers to display the TCS Ledger Outstanding screen.
Introduction
VAT is a system of indirect taxation, which has been introduced in lieu of sales tax. It is the tax paid by the producers, manufacturers, retailers or any other dealer who add value to the goods and that is ultimately ed on to the consumer. VAT has been introduced in India to ensure a fair and uniform system of taxation. It is an efficient, transparent, revenue-neutral, globally acceptable and easy to ister taxation system. It benefits the common man (consumer), businessman and the Government. VAT enhances competitiveness by removing the cascading effect of taxes on goods and makes the levy of tax simple and self-regulatory, ensuring flexibility to generate large revenues. The cascading effect is brought about by the existing structure of taxation where inputs are taxed before a commodity is produced and the output is taxed after it is produced. This causes an unfair double-taxation. However, in VAT, a set-off is given for input tax (tax paid on purchases). This results in the overall tax burden being rationalized and a fall in prices of goods. VAT makes the tax structure simple, hassle-free and export-oriented. The integration of VAT with Tally will help you in the smooth functioning of your business and eliminate the complications that might otherwise arise in VAT.
Concept of VAT
The essence of VAT is in providing set-off for input tax and this is applied through the concept of input credit/rebate. This input credit in relation to any period means setting off the amount of input tax by a ed dealer against the amount of his output tax. Value Added Tax (VAT) is based on the value addition to the goods, and the related VAT liability of the dealer is calculated by deducting the input credit from the tax collected on sales during the payment period. This concept is explained with an example, in the Computation of VAT section. VAT works in two different ways: 1.
If VAT-ed business receives more output tax than the taxes paid as input, they will need to pay the difference to the Commissioner of Taxes (State).
2.
If the input tax paid is more than the output tax collected,
You can carry forward the Input credit and adjust it against the output tax in the subsequent months.
You can have the Input Credit refunded to you by the Government at the end of the current or following year.
You can receive refunds for Input Credit on exports within a period of three months.
General terminologies used in VAT
Term
Description
Input tax
This is a tax paid on purchases
Output tax
This is a tax charged on sales
The amount of Input tax that is permitted to be set off against Output tax. Input Credit
Composite Dealers
Dealers with annual gross turnover not exceeding a certain threshold (threshold decided by the respective State Governments) can opt for a composition scheme whereby they will pay tax as a small percentage of their gross turnover. However, retailers opting for this composition scheme will not be entitled to Input Credit. The State Governments fix the periods and the procedures for the payment of the lump sum.
Justification of VAT
VAT was adopted because the Sales Tax system is complex and induces non-compliance. It has been found to be a hindrance in the economic growth of Industry, State and the Country. This causes a huge loss of revenue to the government. VAT also helps in eliminating the dreaded cascading effect of Tax. For instance, in the existing structure, inputs are taxed before a commodity is produced and the output is taxed after it is produced. This causes an unfair double taxation with cascading effects. However, in VAT, as a set-off is given for input tax as well as tax paid on previous purchases, overall tax burden will be rationalized and prices in general will fall. VAT thus makes the tax system simple and transparent.
Advantages of VAT over Sales Tax
As VAT is a multi-point tax with set-off for tax paid on purchases, it prevents repeated taxation of the same product.
Simple and Transparent: In the Sales tax system the amount of tax levied on the goods at all stages is not known. However, in VAT, the amount of tax would be known at each and every stage of goods sale or purchase.
VAT has the flexibility to generate large and buoyant revenues, as it levies tax on value additions.
Zero rating of tax on exports is possible in case of VAT.
Fair and Equitable: VAT introduces uniform tax rates across the state so that unfair advantage cannot be taken while levying the tax.
Procedure of simplification: Procedures related to filing of returns, payment of tax, furnishing declaration and assessment are simplified under the VAT system so as to minimize any interface between the tax payer and the tax collector.
Ability to provide same revenue to the Government with lower rates of tax.
Tax does not become a cost of doing business.
VAT Rates
According to the White Paper, there are 550 categories of goods under the VAT system. They are classified into the following four groups, depending on the VAT rate:
VAT @ 4% The largest number of goods (270) comprising of basic necessity items such as drugs and medicines, agricultural and industrial inputs, capital goods and declared goods are under 4% VAT rate.
Exempted from VAT There are about 46 commodities under the exempted category. This includes a maximum of 10 commodities that each state would be allowed to select, from a broader approved list for VAT exemption. The exempted commodities include natural and unprocessed products in unorganized sector as well as items, which are legally barred from taxation.
VAT @ 1% This is for a specific category of goods like gold, silver, etc.
[email protected]% The remaining commodities are under the general VAT rate of 12.5%. N o t e : The few goods lottery tickets, petroleum determined. These items respective states.
that are outside VAT as a matter of policy would include liquor, products, as the prices of these items are not fully marketwill continue to be taxed under the sales tax act of the
Computation of VAT and Profit
The above diagram depicts computation of (10 %) VAT at each stage of business. Hence, it is not the manufacturers and retailers but only the consumer who has paid 10% VAT to the government. The profits for
manufacturers and retailers thus remain unaffected.
VAT in Tally
Features of VAT in Tally VAT is completely integrated with Tally. The VAT functionality in Tally s the following features, making it easier for computation:
Quick & easy setup
Fast & error-free voucher entry
Pre-defined list of sales & purchase classifications
Complete tracking of each transaction till annual returns
Printing of Tax invoice
VAT computation report
Better VAT-returns management
Monthly Return
Enabling VAT
Go to Gateway of Tally> s info. > F11: Features > Statutory & Taxation . Set Enable Value Added Tax (VAT) and Set/Alter VAT Details to Yes
On enabling Set/Alter VAT Details to Yes, Tally will prompt with VAT Details Screen.
VAT Details Select the State name. Set Type of Dealer? to Regular Enter the Regular VAT Applicable From date Accept the screen to save.
Note: State
All Classifications Model.
and
Statutory
forms
shown
here
are
based
on
the
Karnataka
Configuring Ledger for VAT Reporting
VAT Classification The VAT Classification is a list of VAT rates, which describes the nature of the Business Activity and the type of transaction. These are in-built in the system and will be updated if and when any statutory changes take place. Some of the VAT classifications are:
Input VAT @ 4%
Input VAT @ 1%
Input VAT @ 12.5%
Output VAT @ 1%
Output VAT @ 4%
Output VAT @ 12.5%
Purchases - Capital Goods
Purchases - Exempt
Purchases from uned dealers
Depending on the type of the business, type of transaction, and the statutory requirements of your State, you will need to select the appropriate classifications from the list during Ledger creations, voucher entries, etc. The Sales and Purchase transactions are segregated based upon the classification selected during voucher entry and shown in the VAT computation. In the VAT Computation you can view the classification-wise VAT and Nett Values.
Ledger Masters The VAT Classification will be displayed as a drop down list in the Ledger Masters. Tally gives the flexibility to the , to either have the classification selected in the Ledger Master tagged to all transactions, Or, select different classifications each time during voucher entries. This is explained in detail in the Vouchers and Transactions section. The Ledgers that are affected by VAT are:
Purchase Ledger
Sales Ledger
Duties and Taxes Ledger
Direct Expenses/Income
Creating a Purchase Ledger for VAT
The following additional fields pertaining to VAT can be seen in the Ledger entry screen. Go to Gateway of Tally > s Info > Ledger > Create/Alter
Used in VAT Return Set this to Yes if you wish to select VAT/Tax class for this Ledger. Note: Tally the Ledger time during
gives the flexibility to the to either have the classification selected in Master tagged to all transactions Or select different classifications each voucher entries. For more details refer Vouchers and Transactions.
The rest of the Ledger creation process is the same as in default Tally.
In the above example we have selected a VAT classification of 4%.
VAT classification - Purchase-Exempt Let us take an example of a VAT exempted transaction below.
Used in VAT Returns Set this to Yes and select Purchases - Exempt from VAT/Tax class for this Ledger.
Accept the screen to save.
Creating a Supplier ledger Create a ledger for the Supplier from whom you are buying the VAT exempted item:
Note: entered
The TIN or Sales in the Ledger.
Tax
number
of
the
creditor
whichever
applicable
needs
to
If VAT is not enabled for your company, the TIN/Sales Tax No. field will be replaced by Sales Tax No. To learn about the actual transaction, refer to Creating Purchase Voucher (As Invoice) for VAT section.
be
Creating a Sales Ledger for VAT
Like in the Purchase Ledger screen, select the required VAT/Tax classification in the Sales Ledger as well. Go to Gateway of Tally > s Info > Ledger > Create/Alter
Used in VAT Return Set this to Yes if you wish to select VAT/Tax class for this Ledger. Note: Tally the Ledger time during
gives the flexibility to the to either have the classification selected in Master tagged to all transactions Or select different classifications each voucher entries. For more details refer Vouchers and Transactions.
The rest of the Ledger creation process is the same as in default Tally.
In the above example we have selected a VAT class of 4%. The rest of the settings are the same as in default Tally.
Creating a VAT Ledger under Duties and Taxes
The ledger for Input VAT is shown below:
Type of Duty/Tax On the selection of group Duties and Taxes, the list of Tax Types CST, others and VAT, is displayed. Select VAT for VAT related transactions. N o t e : If you have V A T and T D S
enabled,
the
list
will
also
include
TDS.
VAT/Tax Class Like in the Purchase and Sales Ledger, this is a drop down list containing the VAT classifications. Select the appropriate classification or select Not Applicable if you wish to select the classifications at the Voucher level.
Percentage of calculation This field will display the VAT rate that you selected in the VAT/Tax class field.
Method of calculation This will display On VAT Rate if you have selected VAT under Type of Duty/Tax.
Output VAT
On selection of CST
Type of Duty/Tax On selection of CST for Type of Duty/Tax , you can select either Inter-State Purchases or Inter-State Sales for Tax Class . Once you select this, you need to manually enter the Percentage of Calculation.
Method of Calculation Once you enter the Percentage of calculation, select the Type of Duty from the drop down list.
Creating a VAT ledger under Direct Expenses/Income
Direct Expenses/Income The VAT/Tax Classification is selected in the same manner as for the Sales and Purchase Ledger screen.
The VAT related fields in the Direct Expense ledger is the same as for Purchase and Sales Ledgers.
The VAT related fields are same for Direct Income Ledger as well.
Vouchers and Transactions
The entire Data entry and Reporting architecture is based upon VAT Classifications selected during voucher entry. The Vouchers that are affected by VAT are as follows:
Purchase
Sales
Debit Note
Credit Note
Journals
Creating a Purchase Voucher (As Invoice) for VAT
Invoice can be classified into As Item Invoice and As s Invoice . The VAT functionality though, is the same for both. Given below are examples of transactions in Item Invoice with implementation of VAT.
As Item Invoice The selection and display of the VAT classifications in the vouchers differ according to the settings in the F12: Configuration screen.
F12: Configuration screen
Use Common Ledger A/c for Item Allocation - NO If you wish to use more than one ledger during a voucher transaction, you have to set this to No . This way, you need to select a ledger for every item during voucher entry. When you set this to No , you can see the VAT/Tax
Class at the header region of the screen if the Yes .
Allow Selection of VAT/Tax Class during entry field is set to
Allow Selection of VAT/Tax Class during entry?-YES Once you select Yes , you have the option to select the VAT classifications in the field VAT/Tax Class which is in header region of the Voucher screen. If it is set to No, the VAT/Tax Class will not be displayed in the voucher screen and the classifications will be taken from the Ledgers. Consider the following examples
Example 1: Purchase@4%
The following is the entry for the purchase of item1 when VAT classification is Purchase @ 4%. This classification is selected from a drop down list at the header region of the screen as shown below.
N o t e : In the VAT/Tax select this option if entry.
Class field, there is an option you need different classifications
called Not for each
Applicable . You can item during voucher
You will need to select the Duties and Taxes ledger after you are done with the entry of all items.
It will now calculate the VAT amount and add it to the Amount to give you the total. F12: Configuration screen
U se Common Ledger A/c for Item Allocation-YES When you wish to use the same Ledger for all items in a transaction, you can set this to Yes . Thus, you need not select a Ledger each time you enter an item during the voucher transaction. The following example to demonstrate the functioning of Assessable Value is shown by setting this field to Yes . Assessable Value : It is the value on which VAT is to be calculated. The value is arrived at after making proper deductions towards Trade discounts if any, and adjustments towards Excise/ED Cess payable. It is up to the to calculate this and enter it under the Assessable Value column. This manual entry gives flexibility to the to make the calculations as per the local statutory requirements. As this example does not include discount or Excise/ED Cess taxes, the Assessable Value will be Rs. 5000, which is retrieved from the Amount column. Let us assume we have:
A discount of Rs.200 on purchases
Excise tax of Rs.800 (16% of 5000)
ED Cess of Rs.16 (2% of 800)
1. Subtracting the discount amount: 5000 -200 = 4800 2. Adding the Excise tax amount : 4800+800= 5600 3. Adding the ED Cess amount : 5600+16= 5616 Therefore, our Assessable Value amount is Rs.5616. VAT is now calculated on this amount automatically on the selection of the tax ledger (Rs.224), as shown below.
The entries are to be ed similarly for Sales Voucher and Credit/Debit notes.
Example 2: Purchase-Exempt
This example is to demonstrate the working of Tally in the VAT exempted transactions and also to show the type and patterns of reports generated for such transactions. We are ing the following entry for the purchase of the VAT exempted item.
As it is exempt from VAT, this particular transaction does not affect the VAT amount in any way. Similarly for Inter-state Sales/Purchases . N o t e : In the Voucher mode the header region. Therefore, always.
there is no option for selection the VAT classification selected
of in
the the
VAT classification at Ledgers will apply
Creating a Sales Vouchers (As Invoice) for VAT
Functionality of Sales Voucher is similar to that explained in the Purchase Voucher. understand the calculation of VAT, let us take the following example:
Assessable Value: The calculation is similar to that explained in Purchase voucher.
Printing Configuration The Printing Configuration screen after the addition of new features will appear as follows:
However, in order to
Tax Invoice You will see the following new sections pertaining to VAT in the Invoice:
Title of Document This field prints the title entered in the Voucher Type Master .
E-mail The e-mail address of your Company (as specified in the Company Master) will also be printed in the Sales Invoice, just below the address.
VAT % This column can be enabled by setting Print VAT % to Yes in the Printing Configuration screen. The rate of VAT from the VAT classification selected during voucher entry is printed in this column.
VAT Analysis This field prints the VAT amount on the total Net Value. That is, Rate of VAT, Assessable Value and VAT Amount is printed at the bottom right of the screen.
V AT Amount (In words)
Prints the VAT amount in words.
Company's TIN/LST No. Prints the Company's TIN or LST number.
Company's CST No. Prints the CST number entered in the Company master.
Buyer's TIN/Sales Tax No. Prints the buyer's TIN or Sales Tax number, as the case may be.
Date & Time The field Print Date & Time in the Printing Configuration screen needs to be set to Yes in order to print the date. However, in case Excise details are enabled the Date & Time is printed regardless of the setting in the Printing Configuration screen.
Declaration The declaration entered in the Sales Voucher type Master will be printed. If it is not entered in the Sales Voucher type, Tally will print the following line by default: "We declare that this invoice shows the actual price of the goods described and that all particulars are true and correct". If you do not require this, you can set Print declaration to No in the Printing Configuration screen shown above.
Generated by By default the Generated by field will display This is a Computer Generated Invoice . However, you can change it if required. This is printed at the bottom of the Invoice.
Copies of the Invoice For five or more copies of the Invoice, each copy will be marked as follows: Original - Original Buyer's Copy Duplicate - Duplicate Seller's Copy Triplicate - Triplicate Transporter's Copy Quadraplicate - Extra copy Fifth and above - Extra Copy
Creating / Altering Sales Voucher Type Master for VAT
New Fields The following are the new fields added in the Sales Voucher Type Master. Go to Gateway of Tally > s Info > Voucher Types > Alter
Default Print Title You can set the title for the Tax Invoice in the Default Print Title field. This is helpful since you need not change the title in Print Configuration each time you use different voucher types. For example, you can set it as Tax Invoice for Local Sales and Bill of Sale for Retail Invoice.
Is Tax Invoice If Is Tax Invoice is set to Yes and the number of copies to be printed is more than one then the copy type is printed as follows: 1.Original – Buyer’s Copy 2. Duplicate – Seller’s Copy 3. Triplicate – Transporter’s Copy 4. Quadruplicate – Extra Copy 5. Extra Copy If Is Tax Invoice is set to No , and the number of copies to be printed is more than one, then the copy type is printed as follows: 1. Original 2. Duplicate 3. Triplicate 4. Quadruplicate – Extra Copy 5. Extra copy
Declaration Provision is made to enter the Statutory declaration if applicable. The same will be printed in the Tax Invoice.
Note: printed
If in
the declaration the Invoice.
field
is
left
blank,
Tally's
default
declaration
will
get
Voucher Class Given here is an example of how a Tax Invoice having items with multiple tax rates can be generated using Voucher Class. If you press Enter on Name of Class in the screen displayed above you will see the following screen: You can make the entries as required.
Override using Item default It is possible to enter a Tax Invoice having multiple items with different VAT Rates. Item default refers to the Sales Ledger that you may have set for a stock item. If you set Override using Item default to Yes and specify a Sales Ledger in the Class Table the sales Ledgers set in the item masters will still be considered.
Setting Sales Ledger in the Item Master Consider the Item Masters shown below:
Set Set/Modify Default Ledgers for Invoicing to Yes . The following screen displays.
If you do not see the field Set/Modify Default Ledgers in the Item Master, 1.
Go to Gateway of Tally > F12: Configuration > Accts/Inv Info
2.
Set Specify Default Ledger Allocation for Invoicing to Yes
1.
2.
Using the Sales Class in a Sales Invoice 1.
Go to Gateway of Tally > ing Vouchers
2.
Select F8: Sales Invoice
3.
Select the Voucher Class Sales Class and make the entries
When entering Sales Invoices with the Voucher class, note that you will not be able to edit Assessable Value Field. If you have an additional ledger say, Discount Ledger there is a facility to edit the Assessable Value manually in the sub screen that pops up when you press Enter on the Output VAT Ledgers. In the above example, the discount has been deducted from the assessable value.
Payment of VAT in Tally
The Journal and Payment Voucher entries for the payment of VAT can be demonstrated with the example shown below.
As shown in the screen above, the Output Tax is Rs.700.00 and Input Tax is Rs.424.64. The VAT payable is Rs.275.36.
Journal entry
Note:
The
Payment Voucher Entry
VAT
payable
Ledger
is
under
the
group
Duties
and
Taxes.
The VAT payable Rs.275.36 is transferred to the Cash or Bank .
Creating Debit Note / Credit Note for VAT
Purchase Returns - Debit Note This is a Purchase Returns entry and you have to use the Debit Note Voucher.
Sales Returns - Credit Note Let us take the example of a Sales Return. Here you have to use the Credit Note voucher.
Creating a Journal Voucher for VAT
If you need the Journal transactions for VAT Computation (for example, adjustment of Input credit, output tax, etc) you will need to make the following settings: Go to Gateway of Tally > s Info > Voucher type > Create/Alter The following screen is displayed
Name of Class You have to name the voucher class. In the above example, we have named it as VAT Adjustment Class. Once you press Enter , the following screen is displayed.
Use Class for VAT Adjustments Enable the option Use Class for VAT Adjustments to Yes , if you want the journal entries to be included in VAT Computation.
Journal Entries Let us consider a Purchase transaction and then a reverse entry for adjustment of Input credit. The following screen displays a typical Purchase Transaction.
Typical Purchase transaction
Reversal of Input Credit 1.
Go to Journal voucher screen by selecting the button F7: Journal from the button bar, which is on the right side of the screen or by pressing the F7 key.
2.
You will see the following screen where you need to select the Voucher class created before.
3.
Once you select this you can the typical reversal entry as displayed below.
3.
Once you have selected this, you can the typical reversal entry as shown below:
VAT Computation Report The VAT Computation report will be displayed as shown below.
N o t e : Rs.50 claimed.
of
the
Input
credit
is
reversed
and
only
the
balance
of
Rs.
50
can
be
Input Credit Adjustment for Capital Goods
Input Credit for capital goods is available over a maximum period of 36 monthly installments (States have the option to reduce the number of installments). The entry for the Purchase of Capital Goods is the same as in default Tally. Let us consider the following example for the adjustment of the Input credit. Purchase of Capital Goods for Rs. 5,00,000. The Input Credit is Rs. 20,000, which will be available over a period of 36 monthly installments. That is, (20,000/36) = 555.56 Hence, Rs. 555.56 can be claimed in the first installment as Input credit. The Journal entry for this is ed as shown below.
The Drill down report will be displayed as follows.
Further Drill down report will be displayed as follows:
Input Credit Adjustment for Opening Stock
Sales Tax paid on unsold stock at the end of financial year, i.e. prior to commencement of VAT, is eligible to receive input credit on submission of the required documents by the dealer. For this, a claim is to be made to the VAT/ sub-VAT officer within 30 days of implementation of the Act. Once the assessing officer verifies it, the credit may be adjusted or refunded in equal installments over six months.
Journal Entries In order to write off the Sales Tax incurred on closing stock in the next financial year, it is necessary to eliminate the tax charge from the stock value of the current year. Assuming the local purchases amount to Rs. 57 000 where Purchases @ 4% and Purchases @ 12.5% are Rs. 20 000 and Rs. 37 500 respectively, the transaction can be journalized as follows, selecting VAT Adjustment Class. (For more details on VAT adjustment class refer Journal )
Debit the Current Assets Tax Recoverable A/c and credit the purchase s. Following the grant of relief by the Assessing officer, you can a journal entry every month in the next financial (VAT) year, to adjust the sales tax paid in the previous year. To claim the installment credit at the end of each month, a journal entry upon selecting VAT Adjustment Class .
The amount of Rs. 57 500 is broken into six equal installments of Rs.9 583.33 and claimed at the end of each month.
Enabling MRP Feature
To enable the Maximum Retail Price (MRP) feature in Tally, 1. Go to Gateway of Tally > F12: Configure > Accts/Inv Info 2. Set the option Calculate VAT on MRP/Marginal to Yes
MRP in Stock Item Master Once MRP is enabled, two new fields, MRP and MRP Incl. of VAT will appear in the Stock Item Master Creation/Alteration. If MRP is inclusive of VAT, enter the MRP value in the MRP field and select Yes in the MRP Incl. of VAT field.
Single Stock Item Creation
Multiple Stock Item Creation
Creating Sales Invoice for VAT on MRP
Given below are few examples to show the calculation of VAT based on MRP (inclusive and non-inclusive of taxes).
VAT Rate 4% MRP Inclusive of Tax Consider the sale of Item 1 , which attracts 4% VAT:
Item Name Item 1
Item Vatable @ % 4.0
MRP Incl. of Tax Yes
VAT %
MRP
QTY
3.85
200
10
VAT On
VAT Amount
2000
76.92
Calculations: 1. As MRP is inclusive of Tax, the actual VAT% is calculated as (100*Rate of VAT)/ (100+Rate of VAT) 2. VAT amount = (VAT % * VAT On )/100. 3. VAT On = MRP * Qty
MRP not Inclusive of Tax Consider the sale of Item 2 , which also attracts 4% VAT:
Item Name Item 2
Item Vatable @ % 4.0
MRP Incl. of Tax No
VAT %
MRP
QTY
VAT On
VAT Amount
4
115
10
1150
46
As MRP is not inclusive of tax, VAT is calculated on MRP as (MRP * QTY)/100.
VAT Rate 12.5% MRP Inclusive of Tax Consider sale of Item 3 , which attracts 12.5% VAT:
Item Name Item 3
Item Vatable @ % 12.5.%
MRP Incl. of Tax Yes
VAT %
MRP
QTY
VAT On
VAT Amount
11.11
55
10
550
61.11
Calculations: 1. As MRP is inclusive of Tax, the actual VAT% is calculated as (100*Rate of VAT)/ (100+Rate of VAT) 2. VAT amount = (VAT % * VAT On )/100.
3. VAT On = MRP * Qty .
MRP not Inclusive of Tax Consider the sale of Item 4 , which also attracts 12.5% VAT.
Item Name Item 4
Item Vatable @ % 12.5
MRP Incl. of Tax No
VAT %
MRP
QTY
VAT On
VAT Amount
12.5
215
10
1075
268.75
As MRP is not inclusive of tax, VAT is calculated on MRP as (MRP * QTY )/100.
Sales Invoice Entry
Calculate VAT on MRP/Marginal Price for Actual and Billed Quantity If the option Calculate VAT on MRP/Marginal is activated in F12: Configure while creating Stock Item Masters, VAT is calculated automatically as follows:
Percentage of VAT (MRP x Actual Quantity)
If it is not enabled i.e. MRP=0, VAT is calculated automatically as follows: Percentage of VAT (MRP x Billed Quantity) This is in the case when Use Actual & Billed Qty is set to Yes in the F11: Features screen.
Creating Purchase Invoice for VAT on MRP
All calculations are the same as explained in the Sales Invoice .
Tax Invoice with MRP details
Printing Configuration A new field is included in the Printing Configuration screen called Print MRP/Marginal Column . Set to Yes in order to have the MRP printed on the Invoice.
The Tax Invoice for the transaction shown:
N o t e : The VAT amount
VAT Computation screen as in the default case.
will
show
the
original
Assessable
value
and
the
VAT Reports
As per VAT Act, every ed dealer is required to maintain proper Books of s and records for all sale, purchase and production. And also VAT -containing details of Input and Output tax.
VAT Reports in Tally VAT reports in Tally
Statutory Reports
Sales
Sales reports provides complete information on sales turnover achieved for a specific period. To view the Sales screen Go to Gateway of Tally > Display > Books > Sales Click on Columnar button or press the F5 key to re-define the columns and set the required parameters of reports, ledgers or groups to be shown individually or in a common column.
Set Show Partys' Tax Regn. No . to Yes. The Columnar Sales displays as below:
TIN/Sales Tax No. The TIN Or the Sales Tax No. (Central or Local) of the Party is displayed here. As there is only a need to enter either the TIN or the Sales Tax No.(Central or Local) at any point of the transaction, and not both, one single field serves the purpose for all transactions (with or without VAT) . Thus, the TIN or Sales Tax number, whichever applicable, is entered in the TIN/Sales Tax No. (Central or Local) field in the Party Ledger Master. This is picked up in the Tax Invoice and displayed as shown above in the Sales Columnar . If VAT is not enabled for your company, the TIN/Sales Tax No . column will be replaced by Sales Tax No .
Statutory Reports
Statutory Reports are reports required in government prescribed formats for the purpose of filing . VAT statutory reports in Tally generates and prints state specific monthly, quarterly or annual VAT Returns. There are two types of VAT Statutory Reports.
Vat Computation
VAT Forms
To view Statutory Reports 1.
Go to Gateway of Tally > Display > Statutory Reports > VAT Reports
1.
VAT Reports menu displays the following options
1.
Important: A stat.900 file containing updated statutory VAT Return forms and amendments made as and when by the respective states, is ed on the Tally website. The same can be ed for immediate access.
VAT Computation
VAT Computation report displays various types of Input VAT Tax and Output VAT tax ledgers employed and transacted during voucher entry. Tally provides a clear-cut presentation on how VAT is computed for a given period. It also provides a bird's eye view of all transaction related to VAT.
To view the VAT Computation report Go to Gateway of Tally > Display > Statutory Reports > VAT Reports > VAT Computation . VAT Calculations Let us consider the following that we made, for VAT Computation: 1. Purchased from Creditor-1, 100 quantities of item1 at the rate of Rs.50 each. The Input VAT@4% for this amount is Rs.200. 2. Purchased from Creditor, 100 quantities of item2 at the rate of Rs.50 each. However we applied a discount of Rs.200 here. Also, Excise tax of Rs.800 and Educational Cess of Rs.16 were levied on this. Therefore we applied the InputVAT@4% on the Assessable value of Rs.5616, which is Rs.224.64. Therefore total Input VAT = Rs.200 + Rs.224.64 = Rs.424.64 3. Sale of 50 quantities of [email protected] to Debtor-1 . OutputVAT@4% = Rs.600. 4. Sale of 100 quantities of item @ Rs.100 each. Output VAT@1%= 100 Therefore total Output VAT = Rs.600 + Rs.100 = Rs. 700 Therefore VAT Payable-> Output VAT - Input VAT = Rs.275.36 This is calculated automatically by Tally and the VAT Computation screen will be displayed as shown below.
The Reports for the two Purchases and one Sales transaction is shown below respectively:
For VAT exempted or zero rated transactions If you have transactions that are exempted from VAT but however want to have it displayed in the VAT Computation screen, you have to click on the F12: Configure button and set the Show all VAT classifications to Yes .
For example, in the case of Inter-State Sales, the Tax Amount column will show as NIL in the Computation screen.
Learn the effect of Purchase and Sales returns transactions in the VAT Computation and VAT Reports Screens
VAT Computation after Purchase/Sales returns
The following example is demonstrated assuming that you have gone through the VAT Computation section .
Purchase Returns - Debit Note Let us consider the following Purchase Returns entry:
Once this is done, the VAT Computation is displayed as shown below.
In the Purchases section, Rs. 500 is reduced from the Assessable Value and Rs. 20 is reduced from the Tax amount (while comparing with the VAT Computation before Purchase Returns). Therefore the VAT Payable is now Rs. 295.36 The VAT Computation Report will now show as follows:
Sales Returns - Credit Note Let us take the example of a Sales Return.
The VAT Computation screen will now show as follows:
The Assessable Value under Sales has reduced from Rs. 25,000 to Rs. 23,500 and the Tax Amount to Rs. 640.00. This will show in the Reports as follows:
has reduced
Therefore the VAT Computation and Reports are updated automatically as you the entries. Back to VAT Computation
VAT Forms
The VAT Forms Report is a statutory report. This report displays the VAT Return Form in the government prescribed format.
To view the VAT Forms 1. Go to Gateway of Tally > Display > Statutory Reports > VAT Reports >VAT Forms 2. Use the keys Alt + P key or click on Print option to print your report. This will display the VAT Return Form screen. Example: Under Karnataka VAT laws, Form No. 100 is the statutory form used for filing monthly returns by a ed dealer. Form No.100 contains different columns and indicate the turnover at different rates and the taxes applicable to them as per VAT definitions. Explanation on each column (i.e. Box)
Additional information: For explanation on each column in the VAT Form (i.e. Box), Refer to Statutory Help which is available at www.tallysolutions.com
Introduction
Value Added Tax (VAT) is an indirect tax on goods, introduced in lieu of sales tax, to ensure transparency and greater compliance. The basic premise of VAT is to tax the “true value” added to the goods, at each stage of the transaction chain. This ultimately reduces: 1. Tax paid to the government. 2. Cost/tax ed onto the consumer.
VAT is a multi-point tax as against sales tax, which is a single-point tax. VAT removes the cascading effect of tax on tax, by allowing a set off for input tax, i.e. tax paid at earlier stage on purchases. It is an efficient, globally acceptable and easy to ister taxation system.
VAT Composition In order to relieve some small businesses of the need to keep detailed records, the law has made provision for a simpler method of ing for VAT. The method of calculating, VAT payable is also made easier. Such a method is called a VAT Composition Returns. The VAT Composition Returns states that “Small dealers with an annual gross turnover not exceeding 5 to 50 lakhs and subject to respective state act and rules, who are otherwise liable to pay VAT, shall however have the option for a composition scheme with payment of tax at a small percentage of gross turnover. The dealers opting for this composition scheme will not be entitled to input tax credit.” This scheme is a special method of determining the tax liability for specified dealers whose turnover in the year before April 1, 2005 or in the current year exceeds Rs. 5 lakhs but does not exceed Rs.50 lakhs and subject to respective state act and rules.
Types of Dealers
There are two types of Dealers. ed Dealers Uned Dealers
ed Dealers A dealer whose gross annual turnover is above the VAT threshold limit is required to under VAT. This is mandatory. A new dealer will be allowed 30 days time from the date of liability to get ed. A VAT ed dealer will be eligible for input tax credit. All ed Dealers must follow the VAT law, irrespective of the size of the business. A ed Dealer may sell to both Consumers and Non- Consumers. A ed dealer can opt for compositions scheme.
Uned Dealers A dealer whose annual turnover is less than Rs.5 lakhs is an Uned Dealer and has been granted the status of a Consumer. So, the VAT paid by an Uned Dealer is treated as his cost and is charged no further VAT on his sale. It is assumed that such small dealers will not be supplying other industries or dealers. Therefore they are not included into the VAT chain. But if the small dealer is in the business of actually supplying to others besides consumers, then he can optionally choose to and gain the benefits of a ed Dealer. The ed dealer pays VAT on goods purchased from uned dealer.
Criteria for Registration under VAT Composition Returns
Dealers eligible to be ed under VAT Composition Returns The VAT Composition Returns is available to Dealers who: Resell goods in retail Run a Restaurant, Eating house, Club, Hotel (Other than Star Hotels), Refreshment rooms or Boarding Establishments Cater and serve food with non-alcoholic drinks Run Bakeries Dealers in second hand motor vehicles Engage in executing works contracts
The rate of tax payable under VAT Composition Returns for small dealers and other category of dealers is different. N o t e: Dealers who make Inter-state purchases are not eligible for the VAT Composition R e t u r n s scheme. This provision applies to VAT implied in most of the states.
Dealers not eligible to be ed under VAT Composition Returns The VAT Composition Returns is not available to: Manufacturers Importers Dealers who purchase any goods from a ed dealer on high seas basis Dealers who sell in retail Foreign Liquor and Country Liquor Dealers who sell in retail Drugs covered by Entry C-29 Dealers who sell in retail notified Motor Spirits
Procedure for Opting VAT Composition
1.
A Dealer, who is applying for a new VAT registration can opt to the Vat Composition Returns by indicating the same in the appropriate box of the Application form.
2.
A Dealer, who is already ed under VAT, can opt to the VAT Composition Returns scheme, by submitting the duly completed prescribed Form to the jurisdictional VAT officer.
Restrictions: If you have selected to pay Tax under the VAT Composition Returns scheme: You will not be allowed to claim any credits for input tax paid on your purchases You will not be entitled to issue any tax invoices You will not be allowed to charge and collect tax from your customers You have to retain tax invoices and retail invoices for all purchases
Filing VAT Composition Returns
The periodicity to file Composition Returns for small dealers and other category of dealers is different. Small traders in some states are required to file the returns on quarterly basis as prescribed under the Karnataka VAT Rules and in some other states like Maharashtra they are required to file the returns half yearly. For other category of composition dealer’s, returns are required to be filed monthly. However, some states have again linked this obligation of filing return based on their tax liability.
Advantages of VAT Composition Returns The Dealers ed under VAT Composition Returns need not issue Tax Invoice under the VAT Act. The Dealers under VAT Composition Returns are required to pay flat rate of tax on their turnover. Any dealer can opt for this scheme after doing the Cost Benefit Analysis under the VAT Composition Returns as well as the regular scheme of VAT if he is eligible for the scheme. VAT Composition Returns is very simple.
Disadvantages of VAT Composition Returns It is not possible to claim set off of any VAT paid on purchases Tax invoices cannot be issued to customers.
Enabling VAT Returns
Company Creation To create a company, provide basic information about the company whose books of s are to be maintained in Tally Go to Gateway of Tally > Alt + F3 > Create Company
State Select West Bengal from the List of States.
Enabling VAT Composition Returns
Go to Gateway of Tally> s info. > F11: Features > Statutory and Taxation. Set Enable Value Added Tax (VAT) and Set/Alter VAT Details to Yes
On enabling Set/Alter VAT Details to Yes, Tally will prompt with VAT Details Screen.
VAT Details
Select the State name.
Set Type of Dealer? to Composition and enter the Composition Scheme Applicable From date
Enter the applicable Tax Information detail in the Statutory and Taxation Screen
Accept to Save the changes
Note: State
All Classifications Model.
and
Statutory
forms
shown
here
are
based
on
the
West
Bengal
Creating a Customer ledger
To create a Party ledger , 1.
Go to Gateway of Tally > s Info > Ledger > Create
2.
Enter the Name of the party ledger you wish to create.
3.
Select the group under which you are creating the party ledger.
4.
Enable Maintain balance bill-by-bill? to Yes , enter details in the Default Credit Period if applicable. By default the Inventory Values are affected ? field is set to No .
5.
Enter the Mailing Details and Tax Information
6.
Accept to save .
6.
Creating a Supplier Ledger
Creating a Supplier ledger is similar to creating the Party/Customer Ledger but it should be created under Sundry Creditors.
Creating a Tax Ledger
To create a Tax Ledger Master, 1.
Go to Gateway of Tally > s Info > Ledger > Create
2.
Enter the Name of the Tax ledger you wish to create.
3.
Select the group Duties and Taxes from the list in the field Under.
4.
On the selection of group Duties and Taxes , you will get the option to select Type of Duty/Tax . Select Others from the list.
5.
Accept to save the changes.
5.
Creating a Sales Ledger
To create a Sales Ledger, 1.
Go to Gateway of Tally > s Info > Ledger > Create
2.
Enter the Name of the sales ledger you wish to create.
3.
Select the group under which you are creating the sales ledger .
4.
Set the option Used in VAT Returns to Yes , if you want to select VAT classifications for this Ledger.
5.
Once you set this to Yes , Tally prompts with VAT/Tax Class screen.
6.
Select the required classification from the drop down list under the field VAT/Tax Class . The drop down list consists of the Sales classifications pertaining to West Bengal state. If you do not wish to select a classification at the Ledger level , select Not Applicable .
Creating an Expense Ledger
To create an Expense ledger,
1. Go to Gateway of Tally > s Info > Ledger > Create 2. Enter the Name of the expense ledger you wish to create 3. Select the group under which you are creating the expense ledger 4. Accept to save the changes
Creating a TDS Ledger
To create an Expense ledger, 1.
Go to Gateway of Tally > s Info > Ledger > Create
2.
Enter the Name of the TDS ledger you wish to create
3.
Select the Group under which you are creating the TDS ledger
4.
Accept to save the changes
Create/Alter a Voucher Type
To create/Alter a Voucher Type, e.g. Journal 1.
Go to s Info. > Voucher Types > Create/Alter > Journal
2.
In the Voucher Type Alteration Screen, Type the Name of Class e.g. VAT Adjustment .
Set Use Class for VAT Adjustments to Yes and accept the screen.
Creating a Purchase Voucher
To create a Purchase Voucher, 1.
Go to Gateway of Tally > ing Vouchers > F9: Purchases
2.
Select As Invoice .
3.
Enter the Reference in the Ref field , if required.
4.
Select the Party’s A/c Name from the List of Ledger s.
5.
Select the required VAT/Tax Class from the drop down list.
6.
Select the Name of Item from the List of Items
7.
Enter the Quantity and Rate . The amount is automatically displayed in the Amount field.
8.
Enter Narration , if required.
9.
Accept to save the voucher.
Similarly you can create Purchases Vouchers for Purchases from URDs- Exempt goods (Composition) , Purchases from URDs- MRP Bases (Composition) , Purchases from URDs- Taxable goods (Composition) , Purchases- Taxable Goods (Composition) and Purchases- MRP Based (Composition) .
Creating a Sales Voucher
To create a Sales Voucher, 1.
Go to Gateway of Tally > ing Vouchers > F8: Sales
2.
Select As Invoice .
3.
Enter the Reference in the Ref field, if required.
4.
Select the Party’s A/c Name from the List of Ledger s.
5.
Select the required VAT/Tax Class from the drop down list.
6.
Select the Name of Item from the List of Items
7.
Enter the Quantity and Rate . The amount is automatically displayed in the Amount field.
8.
Enter Narration , if required.
9.
Accept to save the voucher
Similarly you can create Sales Vouchers for Sales-MRP Based (Composition) and Works ContractComposition Tax @ 0.25%.
Creating a Sales Return Voucher
To create a Sales Voucher, 1.
Go to Gateway of Tally > ing Vouchers > F8: Sales
2.
Select As Voucher .
3.
Enter the Reference in the Ref field , if required.
4.
Select the Party’s A/c Name from the List of Ledger s .
5.
Select Return of Taxable Goods in the Used for field
6.
Select the required VAT/Tax Class from the drop down list.
6.
6.
Select the Name of Item from the List of Items
7.
Enter the Quantity and Rate . The amount is automatically displayed in the Amount field.
8.
Enter Narration , if required.
9.
Accept to save the voucher.
Creating a Journal Voucher
To create a Journal entry using a Voucher Class , 1.
Go to Gateway of Tally > ing Vouchers > F7: Journal
2.
Select the class as VAT Adjustment from the list Class Table.
3.
Select the required flag from the VAT Composition Adjustments list under the field Used For.
Advance Tax Paid 1.
Select VAT Adjustment Class as the Voucher Class
2.
Select Advance Tax Paid in Used for field
2.
3.
Debit Composite Tax created under Duties and taxes (Type of duty – Others ) from the List of Ledger s
4.
Select the Ledger Advance Tax Paid created under Current Liabilities to be Credited
5.
The Amount is automatically entered
6.
Enter Narration if required
7.
Accept to save the voucher
Interest Payable 1.
Select the Voucher Type as VAT Adjustment Class from the Voucher Class list.
1.
2.
Select Interest Payable Under Section 33 in Used for field
3.
Debit Interest created under Indirect Expenses
4.
Select the Ledger Interest Payable created under Current Liabilities to be Credited.
5.
The Amount is automatically entered
6.
Enter Narration if required
7.
Accept to save the voucher.
TDS Adjustment 1. 2. 3.
Select VAT Adjustment Class as the Voucher Class
1. 2.
Select TDS Adjustment in Used for field
3.
Debit Total Tax Payable created under Duties and Taxes (Type of duty – Others ) from the List of Ledger s
4.
Select the Ledger Tax Deducted at Source created under Current Liabilities to be Credited
5.
The Amount is automatically entered
6.
Enter Narration if required
7.
Accept to save the voucher
Purchase Tax Adjustments 1. 2.
Select VAT Adjustment Class as the Voucher Class
1. 2.
Select Purchase Tax Adjustment in Used for field
3.
Debit Purchase Tax Expenses created under Direct Expenses
4.
Select the Ledger Purchases Tax Payable created under Duties and Taxes to be Credited
5.
The Amount is automatically entered
6.
Enter Narration if required
7.
Accept to save the voucher
VAT Returns Reports
To view the VAT Composition Reports, Go to Gateway of Tally > Display > Statutory Reports
VAT Returns Computation Reports
Go to Gateway of Tally > Display > Statutory Reports>VAT Composition Reports VAT Composition Reports menu displays the following options.
VAT Composition Computation The VAT Composition Computation screen displays as shown below.
Assessable Value The Assessable Value is the total value of the transactions made with the respective VAT/Tax Classification. Rate (%) The percentage rate of tax is displayed here. Tax Amount The rate of percentage value of the Assessable Value is the Tax Amount. VAT Composition Forms The VAT Composition Form for Delhi is displayed in the government prescribed format. Use Alt + P or click on Print option to print your report.
Show all VAT Classifications Enable the option Show all VAT Classifications? to Yes in F12: Configure
The computation screen displays as shown below.
VAT Composition Form
Go to Gateway of Tally > Display > Statutory Reports > VAT Composition Reports > VAT Composition Forms
VAT Composition Forms The VAT Composition Forms option will display the Report Generation screen as shown below.
The form displays as shown below.
RETURN FORM-15
The West Bengal Value Added Tax Rules 2005 Section A (General Information) Return Period The Return Period is the period specified while giving printing command.
Registration No The VAT TIN (Composition) as entered in F11: Features > F3: Statutory and Taxation> Tax Information screen is displayed here.
Name and Style of Business This Field appears as entered in the Company Creation screen is displayed here.
Address of the principal place of Business The Address of the Dealer as entered in the Company Creation screen is displayed here. Section B: (Statement of Sales)
1. Aggregate of Sales Price [Section 2(41)] The gross sales turnover (Total Sales less Works Contract) is displayed in this box.
2. Sales Price of goods tax on which has been paid on the maximum retail price at the time of purchase This Total sales transaction made using the VAT/Tax Class Sales MRP Based (Composition) less Sales Returns is displayed in this column.
3. Sales Return within six months from the date of sale The Sales Return Transaction made using the VAT Composition Adjustment Return of Taxable Goods is displayed in this column.
4. Turnover of Sales (01-02-03) [Section 2(55)] The Total of (Box 01 –02- 03) is displayed in this column.
5. Tax Payable under sub section (3) of section 16 @ 0.25 per centum on 04. The Sales Tax amount paid on Total Sales Turnover at 0.25% is printed in this Box. Section C:
(Works Contract)
6. Contractual transfer price (Total amount received or receivable during the period for execution of works contract. The Sales Transaction made using the VAT/Tax Class Works Contract –Composition Tax at 0.25% is displayed in this column
7. Number of Tax invoices raised This field is blank and entered manually.
8. Tax Payable under sub section (4) of section 18 @ 0.25 per centum on 06 The Sales Tax amount paid on Works Contract Composition Tax at 0.25% is printed in this Box. Section D: (Statement of Purchase)
9. Aggregate of Purchase Price [Section 2(35)] The Total Purchase turnover [Box 10 (a +b)] is displayed in this Box.
10. Break up of Purchase Price (a) Purchases made from ed dealers in West Bengal. (i) on goods on which tax has been paid on maximum retail price The Purchase Transaction made using the VAT/Tax Class Purchases- MRP Based (Composition) is displayed in this column. (ii) of taxable goods The Purchase Transaction made using the VAT/Tax Class Purchases-Taxable Goods (Composition) is displayed in this column. (iii) of other goods The Purchase Transaction made using the VAT/Tax Class Exempt Purchases is displayed in this column.
(b) Purchases made from ed dealers in West Bengal. (i) on goods on which tax has been paid on maximum retail price The Purchase Transaction made using the VAT/Tax Class Purchases From URDs- MRP Based (Composition) is displayed in this column (ii) of taxable goods The Purchase Transaction made using the VAT/Tax Class Purchases From URDs -Taxable Goods (Composition) is displayed in this column.
(iii) of other goods The Purchase Transaction made using the VAT/Tax Class Purchases From URDs -Exempt Goods (Composition) is displayed in this column.
Total (i) + (ii)+ (iii) Total of (i) + (ii)+ (iii) is printed in this Box.
Grand Total (a) + (b) Total of 10 (a) and 10 (b) is displayed in this Box.
11. Purchases tax payable on 10 (b) (ii) [ Refer to section 17] The entry made using Journal Voucher with the Vat Adjustment Class and Used for as Purchase Tax Adjustment is printed in this Box Below is the sample entry given: Flag: Purchase Tax Adjustment Dr. Purchase tax expenses A/c (under: Direct expenses) Cr. Purchases Tax Payable (under: Duties and Taxes A/c)
12. Output Tax [05+08+11] [Section 2(26)] The total of (Box 05+08+11) is displayed in this box.
13. Less Tax Deducted at Source (enclose Form 18) The entry made using Journal Voucher with the Vat Adjustment Class and Used for as TDS Adjustment is printed in this Box Below is the sample entry given: Flag: TDS Adjustment Dr. Total Tax Payable (under: Duties and Taxes) Cr. Tax Deducted at Source (Under: Current Assets)
14. Less Tax Paid (Other than 13) The entry made using Journal Voucher with the Vat Adjustment Class and Used for as Advance Tax Paid is printed in this Box
Below is the sample entry given: Flag: Advance Tax Paid Dr. Total Output Tax A/c (under: Duties and Taxes) Cr. Advance Tax Paid (under: Current Liabilities)
15. Add: Interest Payable under section 33 The entry made using Journal Voucher with the Vat Adjustment Class and Used for as Interest Payable is printed in this Box Below is the sample entry given: Flag: Interest Payable Dr. Interest (under: Indirect Expenses) Cr. Interest Payable (Under: Current Liabilities)
16. Amount due (12+15-13-14) The balancing figure is captured in this Box.
24. Payment Details This field is entered manually
Declaration This field is entered manually
Introduction
Service tax is an indirect tax levied on certain category of services provided by a person, firm, agency, etc. The Government of India has marked a set of services as taxable under the service tax structure. The seller provides a service and the responsibility of paying the service tax to the government rests with the seller.
Information on service tax
Currently, the rate of service tax on all the taxable services is 12%. Presently, service tax is applicable on 97 categories of services. A few of the listed services have an abatement facility. Service tax returns are to be filed to the Commissionerate of Service Tax for the fiscal half-year. Information on the registration, rules, list of services, rate of service tax, forms, etc can be found on the official website for service tax-http://www.servicetax.gov.in/
Service Tax Flow
When you buy and sell services? A person/firm providing a service that comes under the service tax category has to pay service tax. Service tax is to be shown separately in the invoice and is payable based on the payment realized and not on the total amount shown in the invoice. Similarly, when you buy a service that falls under service tax category, you avail service tax credit based on the payment made. So, you pay service tax on the services that you sell and get credit on the service tax payable when you buy a service.
Adjusting credit? While you pay service tax on sale of services that come under the service tax category, you can adjust service tax credit availed on purchase of services (Buyer). This deduction is called adjusting credit against service tax . The difference between the service tax that you have to pay for selling services and the service tax credit on purchases that can be adjusted is the payable service tax . Service tax (sales) that is adjustable against service tax credit (purchases) is also called availing input credit . Let us look at an example.
Adjusting 100% credit & 20% credit
If your input service (Purchase) can be directly related to the output service (Sales) then you can use 100% credit adjustment on the service tax payable. For example: If you are providing a consultancy service over the phone, then you can use the input credit from the telephone charges to adjust against 100% of the service tax payable on your consultancy service. If the input service is not solely used for the output service, then 20% credit adjustment is applicable. Input service tax credit can be adjusted to both output service tax and output cess (surcharge on tax). But input cess credit can be adjusted only towards output cess.
Assessable value Service tax is calculated on the assessable value. The assessable value is the service charge value minus abatement and expenses.
Abatement The government has given a deduction on the value to be considered for service tax on a few categories of services. For example, some categories of services include material value. A caterer has to procure materials to prepare food products and sell services. Service tax is charged on the total amount for the service and does not include the rate of the materials procured. Hence a deduction is provided. This deduction from the service charges to be considered for service tax is called abatement . Abatement is either a percentage of the service charges or a lump sum value. Example: a. Charge on Service
Rs.10, 000/-
b. If an abatement of 30% is applied, then abatement
Rs.3, 000/-
c. Here, the assessable value is (a-b)
Rs.7, 000/-
Therefore, service tax @ 12 % on Rs.7, 000/-
Rs.840/-
Expenses Expenses can be deducted from the total service charge to get the taxable amount. E.g. A technical consultant might travel to different locations with respect to work. The invoice is prepared as ‘consultancy’ and the travel expenses are included in the total service charges. If ed by records, you can deduct the travel expenses from the total service charge to derive the assessable value on which service tax is applicable.
Payment of Service Tax
How much do I pay? A seller provides a service to a buyer and bills the buyer for the service. The bill is inclusive of the service tax. The seller does not have to pay service tax on the total bill amount but only on the payment received. Example: Charge on service
Rs. 10, 000/-
Service tax @ 12%
Rs. 1, 200/-
Cess on Service Tax @ 2%
Rs. 24/-
Secondary Cess @ 1%
Rs. 12/-
Total bill
Rs. 11, 236/-
Here, the service-tax calculated turns out to be
Service Tax @ 12%
Rs. 1, 200/-
Cess on Service Tax @ 2%
Rs. 24/-
Secondary Cess @ 1%
Rs. 12/-
Total
Rs. 1, 236/-
Assuming, the buyer pays the seller Rs.5, 000/- as part payment, the service-tax payable for the payment received is calculated as given below. Charge paid on service
(10,000 x 5,000)/11,236
Rs. 4449.98
Service tax on Rs.5000/- is
(1,200 x 5,000)/11,236
Rs. 533.99
Cess on service tax is
(24 x 5,000)/11,236
Rs. 10.67
Secondary Cess on Service Tax is
(12 x 5,000)/11,236
Rs. 533
Hence, service tax is payable only on the value of payment received by the seller and not on the gross amount charged or billed (invoice value). Another case is when you receive an advance payment on services to be provided. Service tax is not applicable on advances paid until it is adjusted against the invoice.
Where do I pay? The service tax amount is to be paid in Form GAR – 7 Challan in a bank designated by the Commissionerate of Service Tax. For a particular area there is a Focal bank, with branch and code. This is the designated bank. Service tax payments will be accepted in all the branches of the bank, which are connected with the focal branch. The list of the banks and their branches accepting service tax payments is available with the Commissionerate of Service Tax. If your company is a corporate company, service tax is payable on a monthly basis by the 5th of the following month. For example, Service tax has to be paid by 5th January for the month of December. Non-corporate like individuals, proprietary firms, partnership firms and so on, have to pay service tax for the fiscal quarter. The payment is to be made by the 5th day of the month following the quarter. For example, service tax for the quarter ending 30th June is to be paid by 5th July. For the corporate and non-corporate bodies, service tax for the month of March is payable by 31st of March.
Filing returns Corporate and non–corporate organizations have to file service tax half-yearly with details in Form ST-3 and Input Credit Form (Form 5) to the Commissionerate of Service Tax. The filing of returns should be within 5 days from the last day of the fiscal half-year. For the fiscal half-year ending-date of 30th September, the last day for filing service-tax returns is 5th October. Copies of all GAR – 7 issued during the period must be attached.
Service Tax in Tally Features of Service Tax in Tally
Service tax integrated in Tally takes care of your service tax transactions. It eliminates error-prone information, incorrect remittance, penalties, interests, compliance issues, etc. Service Tax in Tally needs a one-time configuration for service tax features to be activated.
Tally tracks bill-wise (bill-by-bill) detail and automatically calculates service tax payable and input credit with the flexibility to make adjustments later.
Service tax is part of a regular transaction. Information on service tax is maintained and produced categorywise, which is mandatory in service tax returns.
Adjusts input credit towards service tax payable.
s for abatement and expenses.
Provision for exemption notification details.
Built-in assessable value feature on which service tax is calculated.
Transfer earlier pending service tax payable and available service tax input credit in to Tally
Reports are generated as per government suggested format. Print and file reports: G.A.R.-7 Challans, Input Credit Form, ST3 Report and ST3-A Report.
Management Information Services (MIS) reports: Service Tax Payable Report and Input Credit Form
Enabling Service Tax in Tally
To enable Service Tax , Go to Gateway of Tally > F11: Features > Statutory & Taxation Set Enable Service Tax to Yes
Set Set/Alter Service Tax Details to Yes to enter the Company Service Tax Details .
Company Service Tax Details The Company Service Tax Details screen is where you will enter the service tax details. The name of the company is displayed at the top followed by different fields.
Company Service Tax Details Service Tax Registration No . – Enter the registration number allotted to you by the Service Tax Department. Date of Registration – Enter the date of registration of Service Tax for your service. Assessee Code - Enter the code given to your company by the Service Tax Department . Type of Organization – In this field select the type of your organization from the List of Organisations menu.
Major Service Category Name - Here you will find options for different categories that come under the service tax net. You might be providing two or more services in a company. In such a situation, select the service category that is the mainstay or forms the major part of your business.
Select the relevant option from the List of Service Categories that applies to your company.
Credit Adjustment (%) – By default this field is set to 20. Enter the percentage of credit adjustment that you would like to avail.
Division Code - Enter the code of the division in which your company falls. Name - Enter name of the division under which your company falls.
Range Code - Enter the code of the range of your company. Name - Enter the name of the range under which your company falls.
Commissionerate Code - This is the code of the Commissionerate of Service Tax under which the address of your ed
premise is located. Name - This is the name of the Commissionerate of Service Tax under whose range the address of your ed premise falls.
Focal Bank Details Focal Bank Code -The Commissionerate of Service Tax allots a code to banks nominated for payment of service tax in a particular area. This code is available with the Commissionerate of Service Tax. Focal Bank Name - This is the name of the bank nominated by the Commissionerate of Service Tax to receive service tax payments in a particular area. This information is available with the Commissionerate of Service Tax . Focal Bank Address- Enter the address of the branch of the focal bank .
Display of Service Categories in Statutory Info.
Tally provides you with predefined set of Service Categories. You can view the values of each of the Service Category. Go to Gateway of Tally > Display > Statutory Info > Service Categories
Select the service category which you want to view. The Service Category screen has a Name field showing the category. This is followed by the fields Applicable to Country, Code, ing Code and Category fields. The Applicable From column displays the period for which the Cess Rate (%) and Secondary Cess Rate are applicable. Note:
Any
changes
to
the
values
will
be
Abatement (%), Service Tax Rate (%), and
updated
on
the
Tally
website.
Creating Sales Ledgers for Services
Go to Gateway of Tally > s Info > Ledgers > Create 1.
Enter the Name of the Sales ledger
2.
Select the Group Sales s in the field Under
3.
Set Inventory Values are affected to Yes
N o t e : Set the Inventory Values are affected field to Y e s , if service as item. For example: You sell consultancy charged by 4.
Set Is Service Tax Applicable to Yes
you the
are maintaining number of hours.
4.
6.
Select the Category Name from the List of Service Categories .
6.
7.
Accept the screen to Save .
N o t e : Create a Service Tax ledger for purchase services in two categories and service tax ledgers
each sell
service category. For example, if you services in three categories, create five
Creating Output Service Tax ledger
To create an Output Service Tax ledger: Go to Gateway of Tally > s Info > Ledgers > Create 1.
Enter the Name of the ledger
2.
Select Duties & Taxes in the field Under
3.
Select the Type of Duty from the List of Types of Duty/Tax
4.
Select the Category Name from the List of Service Categories
5.
Set Inventory Values are affected to No
5.
6.
Accept the screen to Save
Similarly, you can create ledgers for Input Service Tax
Creating a Customer Ledger
To create a Customer ledger: Go to Gateway of Tally > s Info > Ledgers > Create 1.
Enter the Name of the ledger
2.
Select the group from the List of Groups
3.
Set Maintain Balances Bill by Bill to Yes. Enter the Default Credit Period , if any
4.
Set Inventory Values are affected to No
5.
Set Is Service Tax Applicable to Yes
5.
6.
Select the Type of Classification in the Exemption Details screen
6.
N o t e : If Exempt classification is selected, then the Notification number has entered. The number will appear in the ST3 Half Yearly return of exempt 7.
Enter the Mailing Details
to be section
7.
8.
Accept the screen to save
Creating Party Ledgers for Service Tax
Creating Party Ledgers for Service Tax To create a Party Ledger for Service Tax, Go to Gateway of Tally > s Info > Ledgers > Create 1.
Enter the Name of ledger
2.
Select the Group from the List of Groups in the field Under
3.
Set Maintain Balances Bill by Bill to Yes. Enter the Default Credit Period , if any
4.
Set Inventory values are affected to No
5.
Set Is Service Tax Applicable to Yes
6.
Select the Type of Classification from the List of Classification
6.
7.
Accept the screen to save
7.
Creating Ledgers for Excise
To create a Ledger for Excise: Go to Gateway of Tally > s Info > Ledgers > Create 1.
Enter the Name of the ledger
2.
Select the Group Duties & Taxes from the List of Groups
3.
Select the Type of Duty/Tax from Types of Duty/Tax to Excise
4.
Select the appropriate Duty Head from the list
5.
Set Inventory Values are affected to No.
6.
Set the Percentage of Calculation to 16%
7.
Select the appropriate Method of Calculation from the list of Type of Duty
7.
7.
Accept the screen to save.
Similarly, you can create ledger for Education Cess – Excise and Secondary Education Cess, by selecting Duty Head as Cess on Duty and the Method of Calculation as Surcharge on Duty
Creating a Sales Voucher
To create a Sales voucher for Sale of Services , Go to Gateway of Tally > ing Vouchers > F8: Sales 1.
Select I : Acct. Invoice on the right hand side of the screen.
N o t e : A Sales 2.
Item
Invoice
can
also
be
ed
with
Inventory
allocations.
Enter the reference number in the Ref field if required.
N o t e : Set Use
Common
Ledger
A/c
for
Item
Allocation to No in the F12:
Configure
3.
Select the Party’s A/c Name from the List of Ledger s
4.
Select the Service ledger from the List of Ledger s
5.
Enter the Amount
6.
Select the Service Tax ledgers from the List of Ledger s for the Service Tax Details sub form to appear.
6.
7.
You can allocate the Expenses amount if any, in above screen, else leave the field blank and tab down to accept the above screen.
In the above example, Rs. 5000 is allocated to Expenses . 8.
Tab down through the Voucher entry screen for the Bill Wise Details sub form to appear.
8.
9. 10.
Select New Ref from Method of Adj. and accept the Bill-wise Details sub screen. Enter Narration if any in the Voucher entry screen.
10.
12.
Accept the screen to save .
Creating a Receipt Voucher
Creating Receipt Voucher Tally calculates the Service Tax liability on the payment received . If a part payment of Rs.50, 000 is received for the above Sales made, then Tally calculates the Service Tax liability for Rs. 50, 000 . To create a Receipt voucher, Go to Gateway of Tally > ing Vouchers > F6: Receipt 1.
Select the customer ledger from the List of Ledger s
2.
The Bill Wise Details sub form appears as shown
2.
3.
Select the Type of Ref from the list of Method of Adj .
4.
Select the Sales Voucher from the List of Pending Bills
5.
Enter the amount received and Accept the Bill-wise details sub screen
6.
Debit the Bank
7.
Enter Narration, if any
7.
8.
Accept the screen to Save .
Creating a Sales Voucher for Services Exempt from Service Tax
To create sales vouchers for Services exempted from Service Tax , Create a Customer ledger and select the Type of Classification as Exempt in the Exemption Notification Detail sub form.
Go to Gateway of Tally > ing Vouchers > F8: Sales ( as Invoice ) 1.
Enter the reference number in the Ref field if required.
2.
Select the Party’s A/c Name from the List of Ledger s .
3.
Select the Service Ledger from the List of Ledger s.
4.
3. 4.
Enter the Amount
5.
Select New Ref for Type of Ref in the Bill-wise Details sub form
6.
Select Service Tax ledger as Not Applicable
7.
Accept the Bill Wise Details sub screen to accept and save the voucher
7.
On receipt of the payment for the sale of the above service, the value is displayed in ST3 report.
Section 4(A) row 4 of the
Similarly, you can entries for an Export customer. The entry value will be displayed in Section 4(A) row 5 of the ST3 report.
Service Tax Payable Report
Go to Gateway of Tally > Display > Statutory Reports > Service Tax Reports > Service Tax Payables The screen display the details of the Service Tax Payable
Date - The date of the sales invoice is displayed. Ref No. - The reference number given to the sales invoice. Partys' Name – The name of the customer to whom the sale is made. Category Name – Name of the category of service is displayed.
Bill Value:
This column displays the total invoice amount . Assessable Value – The assessable value for the service. Service Tax - The total service tax calculated on the assessable value . Cess - The sum of Education Cess and Secondary Education Cess (Applicable from 1-4-2007 ) calculated on Service Tax.
Realised Value: This column displays the amount received on the invoice value. Assessable Value – The assessable value based on the realised value . Service Tax Payable - The amount of service tax payable based on the realised value. Cess Payable – The Total Cess (Education Cess and Secondary Education Cess) on the Service Tax Payable based on the realised value. Total Payable – The amount of Service Tax Payable inclusive of Educational Cess and Secondary Education Cess is displayed in this field. This value is calculated on receipt of payment. Use the Alt+P key or click on Print option to print your report.
Creating a Purchase Voucher
You can create a Purchase voucher to record the purchase of services. Go to Gateway of Tally > ing Vouchers > F9: Purchase ( as Invoice ) 1.
Enter the reference number in the Ref field if any
2.
Select the Party’s A/c Name from the List of Ledger s
3.
Select the Service Ledger (created under purchase group) from the List of Ledgers
4.
Enter the Amount
5.
Select the Input Service Tax ledger from the List of Ledger s
The Service Tax Details sub form appears as shown
6.
Accept the above screen for the Bill wise details sub form to appear
6.
7.
Select the Type of Ref from the list of Method of Adj.
8.
Select the Input Service Tax ledger from the List of Service Tax Ledgers and accept the Bill- wise Details sub form
9.
Enter Narration , if any in the Voucher entry screen
9.
10.
Accept the screen to save
Payment Voucher Let us now create a Payment voucher for the above purchase. Go to Gateway of Tally > ing Vouchers > F5: Payment 1.
Select the Party’s A/c Name from the List of Ledger s
The Bill-wise Details sub form for the Party ledger appears as shown
2.
Select the Type of Ref from the list of Method of Adj.
3.
Select the Purchase bill from the List of Pending Bills and accept the above screen
4.
Select the Bank to be credited in the Voucher Entry screen
5.
Enter Narration , if any
5.
6.
Accept the screen to save
Input Credit Form
The Input Credit Form report displays the details of Service Tax Input Credit available with the company as on a specified date. The same can be set off against Output service tax liability depending on the method of adjustment you have opted. If the rate of adjustment selected is 100%, then the entire available Input Service Tax can be set off, or if 20% is selected then to the extent of 20% of the Output Service Tax liability can be set off for the current period. The balance can be carried over for the next period. Go to Gateway of Tally > Display > Statutory Reports > Service Tax Reports > Input Credit Form The Input Credit Form appears as shown.
Date - Date of the purchase invoice Ref No - The reference number of the purchase invoice. Partys' Name/Service Tax No. - Name and Service Tax Registration number of the service provider.
Party Address – Address of the service provider Category Name - Name of the category of service purchased. Bill Value: This column displays Assessable value , Service Tax and Cess amount (Education Cess and Secondary Education Cess) as per the invoice Assessable Value – The net assessable value for the service purchased. Service Tax - Service tax payable as per the purchase invoice. Cess - Cess (Education Cess + Secondary Education Cess) on the service tax as per the purchase invoice Realised Value: This column displays the Assessable value, Service Tax and total Cess (Education Cess and Secondary Education Cess) calculated on the payment made against the invoice value. Assessable Value – The realised assessable value based on the payment made. Service Tax Credit - The realised amount of service tax credit based on the payment made. Cess Credit – Realised cess (Education Cess and Secondary Education Cess) on the Service Tax credit based on the payment made. Total Credit – Available Service Tax Credit inclusive of Educational Cess and Secondary Educational Cess . Use the Alt+P key or click on Print option to print your report.
Payment of Service Tax
To create a voucher for payment of Service Tax , Go to Gateway of Tally > s Info > F5: Payment 1.
Select the Output Service Tax ledger to be debited from the List of Ledger s
2.
On selecting the above, the Service Tax Bill Details sub form appears as shown
3.
Select the Type of Ref
4.
Select the Sales Bill from the List of Service Tax Bills and accept the Service Tax Bill Details sub form
3. 4.
N o t e : The Service
Tax
Payable
is
calculated
on
the
5.
Credit the Bank
6.
Set Payment Period to Yes and enter the From and To dates.
Note 7.
8.
:
The
period
Enter Narration, if any.
for
which
the
payment
is
made
is
payment
specified
received,
in
the
i.e.
above
50,
000 .
screen.
7.
8.
Accept the screen to save
Note 9.
: You can make separate payment
a
payment vouchers
for for
a
single multiple
Press Alt + P and set Print GAR-7 Challan to Yes
category in categories
one
payment
voucher.
You
can
9.
10.
Use the Print Preview Option (ALT+I) to view the challan on the screen. The challan will print in government prescribed format and can be used to remit service tax.
The print preview of GAR-7 Challan appears as shown
Full Name : The name of the company is printed in this field. Company Address: The address of the company is printed in this field. Telephone No. The telephone number of the company is printed in this field. Assessee Code No. The Assessee Code No. entered as in F11: Features is printed in this field. Commissionerate Name The Commissionerate Name as entered in F11: Features is printed in this field. Commissionerate Code, Division Code, Range Code The details entered in F11: Features are printed in this field ing Code of the Service and Amount Tendered in Rupees The ing Code of the service and amount charged is displayed in this field. The first row displays the code and the amount for Service Tax The second row displays the code and the amount for Cess The third row displays the code and the amount for Secondary Education Cess The fourth row displays the code and the amount for Interest The fifth row displays the code and the amount for Penalty The sixth row displays the code and the amount for Other Expenses Total The total of all the services provided is printed in this field. (In Words) Rupees The total amount is printed in words. Cash/ Cheque/Draft/Pay Order No. The Cash/ Cheque/Draft/Pay Order No. is entered manually in this field Dated The payment date is entered in this field. Drawn On The name of the bank is entered manually in this field. Signature of the Tenderer with date The Tax Payer signs in the above field.
Tax Payer’s Counterfoil This section prints the same details as mentioned above and would be issued to the Tax Payer.
Credit Adjustment using Excise Duty
You can adjust your Service Tax payment using Excise Credit . To create a Service Tax payment entry adjusting the Excise credit , Go to Gateway of Tally > ing Vouchers > Payment (F5 ) 1.
Select the Output Service Tax ledger from the List of Ledger s for the Service Tax Bill details to appear.
2.
Select Agst Ref in the Type of Ref column
3.
Select the bill from the List of Service Tax Bills
4.
2. 3. 4.
Enter the amount being paid
5.
Enter the rate of Credit Adjustment
6.
Credit the Excise Ledgers and specify the amount
7.
Credit difference amount to the Bank A/c
8.
Set the field Payment Period to Yes
9.
Specify the Service Tax Period
10.
Enter Narration if any
11.
Accept the Voucher to Save.
12.
11. 12.
Press Alt + P and set Print GAR-7 Challan to Yes
13.
Press Alt + I to view the preview as shown
The Excise Duty value of the above entry is displayed in Section 5(A) row 7 in ST3 report . The Education Cess and Secondary Education Cess for the above entry is displayed in Section 5(B) row 4 in the ST3 report .
Creating a Purchase Voucher using Excise Duty
The Excise Duty Input Credit can be availed on accrual and not on realization. You can create purchase entries using the Excise Duty ledgers. Go to Gateway of Tally > ing Vouchers > F9: Purchase in the Item Invoice Mode 1.
Enter the Supplier Invoice No. and Date
2.
Select the Party’s A/c Name from the List of Ledger s
3.
Select the Item from the List of Stock Items
4.
Enter the Quantity .
5.
Enter the Rate .
The ing Details sub form for the Stock Item appears as shown.
6.
Select the Purchase ledger from the List of Ledger s
7.
Select the VAT/Tax Class , if not assigned during ledger creation.
Note: Tally enabled.
provides
you
with
Excise
Classification even if the E x c i s e
8.
Accept the ing Details screen.
9.
Select the Excise ledgers from the List of Ledger s
feature
10.
Select the Input Vat ledger , created under Duties & Taxes from the List of Ledger s
11.
Select the VAT/Tax Class, if it is not assigned during ledger creation
12.
Tab down for the Bill Wise Details screen to appear
13.
is
not
11. 12. 13.
Select New Ref as Type of Ref .
14.
Select Service Tax ledger as Not Applicable
15.
Accept the above screen for the Voucher Entry screen to re appear.
16.
Enter Narration if any.
16.
17.
Accept the screen to Save.
Creating Vouchers for Arrears
To create vouchers for Arrears , Go to Gateway of Tally > ing Vouchers > Payment (F5) 1.
Select Arrears created under Indirect Expenses from the List of Ledgers .
2.
Select the payment type Arrears , from the List of Payment .
N o t e : You appropriate 3.
3.
can create options
Enter the Debit amount
vouchers
for
I n t e r e s t , O t h e r s and P e n a l t y
by
selecting
the
3.
3.
Enter the rate of credit adjustment .
Note : Payment
The option to Type only.
4.
Credit the Bank .
5.
Accept the voucher to save.
enter
the
rate
of
Credit
Adjustment
is
available
in
an
Arrears
5.
N o t e :- The Arrears of Service Tax and Education Cess Service Tax or Input Credit on E x c i s e , if available. The Journal Voucher. However, adjustment of Input Service Tax I n t e r e s t , P e n a l t y and M i s c e l l a n e o u s payments.
can be set off against I n p u t entry can be ed using is not allowed in case of
The value of the above entry is displayed in Section 2(B) row 1 of the ST3 report. Similarly, Payment entry for Penalty and Interest can be ed. A Payment entry for Penalty, for Rs. 1500 will be displayed in Section 2(B) row 4 of the ST3 report. A Payment entry for Interest, for Rs. 2000 will be displayed in Section 2(B) row 3 of the ST3 report
Transferring Earlier Service Tax Entries into Tally
You can transfer your pending Service Tax payable and available Service Tax Input Credit into Tally. Let us consider that the Input Service Tax has a debit opening balance of 618.00 and the Output Service Tax has a credit opening balance of 1236.00 for the previous year. To transfer the above Service Tax Payables and Input service tax to the current year, a new ledger should be created with Service Tax enabled , as mentioned below. Go to Gateway of Tally > s Info > Ledgers > Create 1.
Enter the Name of the service Tax Ledger
2.
Select the Group Duties & Taxes from the List of Groups in the field Under
3.
Select the Type of Duty as Service Tax from the Types of Duty/Tax
4.
Select the Category Name from the List of Service Categories .
5.
Set Inventory values are affected to No
5.
Similarly, you can create ledger for Output Service Tax .
Now, create the customer and party ledgers by setting Maintain Balances bill-by-bill to Yes and enter the opening balance. Assume that balance carried forward from previous year, for a supplier is Rs. 5,618 and for a customer is Rs. 11, 236 . The ledger creation screen appears as shown.
Let us now create a Journal Voucher to transfer Input service Tax . Go to Gateway of Tally > ing Vouchers > Journal (F7) 1.
Debit the Input Service Tax ledger created for the current year selecting from the List of Ledger s .
The Service Tax Bill Details for the Input Service Tax ledger appears as follows.
2.
Select the Type of Ref from Method of Adj .
3.
Enter the Amount .
Service Tax Opening Bill Details appears as follows
4.
Select the Party Ledger from the list of Service Party Ledgers. (The balance carried forward from the previous year can be entered in the field Opening Balance)
5.
Select the corresponding bill from the List of Pending Bills
6.
Enter the rate of Abatement if any
7.
Enter the Expense if any
8.
Enter the Assessable Value
9.
Enter the rate of Service Tax
10.
Enter the rate of Education Cess and Secondary Education Cess . Accept the Service Tax Opening Bill Details screen.
11.
Credit the Service Tax Input ledger created under Duties & Taxes for previous year.
11.
This journal will nullify the Input Service Tax Ledger of the previous year and transfer the pending service tax bill and the relevant tax information to the current Service Tax ledger. N o t e : The Input and Output Service Tax ledger for the previous year is created without the Service Tax feature enabled and setting the opening balances. The Service Tax liability and the Input Service Tax should be entered separately for each bill. 12.
Enter Narration if any.
13.
Accept the screen to Save the Voucher.
The Journal Entry for the Output Service Tax is created as follows: Go to Gateway of Tally > ing Vouchers > Journal (F7) 1. 2.
Debit the Output Service Tax ledger created for the previous year.
1. 2.
Enter the Amount in the field Debit.
3.
Credit the Output Service Tax ledger created for the current year
The Service Tax Bill Details for the Service Tax ledger appears as shown.
4.
Enter the Amount .
5.
Accept the above screen for the Service Tax Opening Bill Details to appear.
5.
6.
Select the Customer ledger from the list of Service Party Ledgers.
7.
Select the appropriate bill from the List of Pending Bills
8.
Enter the rate of Abatement if any.
9.
Enter the Expense if any.
10.
Enter the Assessable Value
11.
Enter the rate of Service Tax
12.
Enter the rate of Education Cess and Secondary Education Cess .
13.
Accept the above screen.
14.
Credit the Output Service Tax ledger created for the current year
15.
13. 14. 15.
Enter Narration if any.
16.
Accept to Save the Voucher.
ing of Advance Receipt from Customer Go to Gateway of Tally > ing Vouchers > Receipt (F6) 1.
Select the Bank to be debited
2.
Select the ledger to be credited from the List of Ledger s
3.
Select the customer ledger from the List of Ledger s.
4.
3. 4.
Enter the amount .
The Bill Wise Details screen appears:
5.
Select Advance as Type of Ref.
6.
Enter the Name , if required.
7.
Select the Service Tax ledger from the List of Service Tax Ledgers
8.
Accept the Bill Wise Details screen.
9.
Enter Narration if any.
9.
6.
Accept to Save the Voucher.
Creating a Memorandum Voucher
A Memorandum Voucher has to be created to capture the opening balance on the Service ledger. To create a Memo Voucher, Go to Gateway of Tally > ing Vouchers > Memorandum Voucher (Ctrl + F10) 1.
Select the Service ledger, e.g. Advertising Consultancy from the List of Ledger s
2.
Enter the Amount .
3.
Select the Service Ledger from the List of Ledger s .
4.
Accept the screen to save .
4.
N o t e : The above functionality.
entry
will
reflect
in
the
ST
3
report
and
does
not
affect
any
Service Tax Reports
Go to Gateway of Tally > Display > Statutory Reports > Service Tax Reports
More:
Service Tax Payables
Input Credit Form
ST3 Report
ST 3A Report
ST3 Report
The ST3 Report is a statutory report. This report displays the ST3 Form in the government prescribed format that is used to file Half – Yearly Service Tax returns to the Commissionerate of Service Tax . Go to Gateway of Tally > Display > Statutory Reports > Service Tax Reports > ST3 Report 1.
Use the Alt+P key or click on Print option to print your report.
This will display the Form ST-3 screen.
This is how the printed document will look:
For the period April – September October – March
The above boxes will be checked according to the ST-3 Period specified. 1.
Name and Address of the Assessee
The Name and Address of the company is displayed in this field. 2.
Registration Numbers of Premises for which return is being filed
The Service Tax Registration number is displayed in this field. 3.
Category of Taxable Services for which return is being filed
This field displays the list of Taxable Services provided by the company. 4.
Payment of Service Tax Category of Service
A. Payment details This section displays the Service Tax payment details for all the months in the specified period. It also provides you with a total of Service Tax for all the months. This section displays a monthly breakup of Service Tax payment details for the specified period. It also prints the
total of payment details for all the months. Amount received towards taxable service(s) provided - The total payment received from the customer, towards the taxable service provided is displayed in this field. Amount received in advance towards taxable service(s) to be provided - The advance received towards the Taxable Service is displayed in this field. Amount billed – Gross - The Total sales amount for the Service Category for the month is displayed in this field. Amount billed for exempted services other than export - The Total sales amount on an Exempted Service Category other than Export is displayed in this field. Amount billed for exported services, without payment of tax - The total sales amount on an Exported service category is displayed in this field. Amount billed for Services on which tax is to be paid - The total sales amount of the Taxable service is displayed in this field. Abatement Claimed – Value - The total amount claimed as abatement on the service provided is displayed in this field. Notification Number of Abatement - The notification number of abatement is displayed in this field. This number is provided by the Service Tax department. Notification number of Exemption - The notification number of the type of exemption selected in the ledger master is displayed in this field. (The type of exemption can be Export/Exempt) Provisional Assessment order no. - This field is to be entered manually. Service Tax payable - The total Service Tax payable for the service category is displayed in this field. Education Cess payable - The total amount of Education Cess and Secondary Education Cess payable for the service category is displayed in this field. Service Tax paid in cash - The service tax paid in cash is displayed in this field. Challan Number - The Challan number is entered manually in this field. Challan date - The Challan date is entered manually in this field. Service tax paid through Cenvat Credit - The Service Tax paid using the Service Tax Input Credit or Excise Input Credit is displayed in this field. Education Cess paid in cash - The total amount of Education Cess and Secondary Education Cess paid in cash is displayed in this field. Education Cess paid through Education Cess credit - The total amount of Education Cess and Secondary Education Cess paid through the Service Tax Input credit or Education Cess Input Credit is displayed in this field.
B. Details of Other payments
This section displays other payments made towards Service Tax. Column (1) Arrears of Service Tax - The arrears of Service Tax paid is displayed in this field. Education Cess - The sum of Education Cess and Secondary Education Cess paid is displayed in this field Interest - The Interest paid is displayed in this field. Penalty - The Penalty paid is displayed in this field. Miscellaneous - Any miscellaneous paid are displayed in this field. Excess amount paid and adjusted subsequently - This field is manually entered. Any extra amount paid that is adjusted with the payment is displayed in this field.
Column (2) 1.
Amount Cash - The payables specified in Column (1) are displayed in this field.
Column (3) 1.
Challan Number - The Challan number is manually entered in this field.
Column (4) 1.
Date - The date of the Challan is manually entered in this field.
Column (5) 1.
Amount – Credit - The Payment of arrear using the Input ST credit or Excise credit amount is displayed in this field.
Column (6) 1.
5.
Source Document No. - Payment of arrears using the Input cess is entered manually in this field.
Credit Details for Service Tax provider recipient
This section displays the monthly details of the Cenvat Credit ed on Service Tax . A. Cenvat Credit Details (1) Details of Credit Opening Balance - The debit opening Balance of the duty ledger is displayed in this field. The value is updated with the entries ed.
Credit Availed on Inputs - The Input credit availed on ing a default purchase entry with Excise duty (Excise ledger created under Duties & Taxes). Credit Availed on Capital Goods - The Input credit availed on selecting the VAT Classification in a default Purchase entry is displayed in this field and selecting the Excise classification as Purchase on Capital Goods. Credit availed on Input Service - The credit availed on Service Tax Purchases is displayed in this field. Credit received from Inputs service distributor - This table remains blank. Total credit availed - The total credit availed on the service is displayed in this field. Credit utilized towards payment of service tax - The amount used to adjust Service Tax credit is displayed in this field. Excise duty Input or Service Tax Input utilized for payment of Service Tax Closing Balance - The difference of the Total Credit Availed and the Credit utilized towards payment of Service Tax is displayed in this field.
B. Education Cess credit details This section displays the monthly break up of the credit availed on Education Cess. Opening Balance - The ledger debit opening balance of Education Cess is displayed in this field. Credit of Education Cess availed on goods - The total credit availed on Education Cess and secondary Education Cess on goods with capital goods and without capital goods is displayed in this field.. Credit of Education Cess availed on services - The total credit availed using Education Cess and secondary Education Cess on a realised Service Tax purchase is displayed in this field. Credit of Education Cess utilized for payment of Service Tax - The total credit used to adjust the Service Tax payment is displayed in this field. The total Service Tax Cess or Education Cess and Secondary Education Cess is displayed in this field. Closing Balance - The difference of the Total Credit Availed and the Credit utilised towards payment of Service Tax is displayed in this field.
6.
Credit Details for Input service distributor
(A) Details of Cenvat credit received and distributed (B) Details of Education Cess received and distributed (C) The taxable services on which input service credit has been distributed during the half year period This field remains blank as is not currently ed. 7.
Details of amount payable but not paid as on the last day of the period for which the return is filed. - The details of the Service Tax due are manually entered in this field.
8.
Self Assessment Memorandum - The name and place of the company and the signature of the concerned
7.
8. authority has to be filled manually.
Acknowledgement The details are to be filled by the Service Tax department .
ST 3A Report
The ST 3A report is similar to ST 3 report and is a provisional Assessment report only.
Introduction
Central Sales Tax (CST) is a tax on sales of goods levied by the Central Government of India. CST is applicable only in the case of inter-state sales and not on sales made within the state or import/export of sales. Inter-state sale is when a sale or purchase constitutes movement of goods from one state to another. Accordingly, consignments to agents or transfers of goods to branch or other offices is not a sale as per the CST Act CST is payable in the state where the goods are sold and movement commences. The tax collected is retained by the state in which the tax is collected. CST is istered by Sales Tax authorities of each state. Thus, the State Government Sales Tax officer who assesses and collects local (state) sales tax also assesses and collects CST.
Inter-state Sale
An inter-state sale takes place when a sale or purchase: Leads to movement of goods from one State to another State. Is achieved by the transfer of documents of title while the goods are being moved from one State to another State.
Example 1: “A” in Andhra Pradesh sells and delivers goods to “B” in Karnataka. Example 2: “A” in Maharashtra delivers goods to “B” in Gujarat. “B” sells it to “C” in Gujrat by transferring the document of title during the goods movement from Maharashtra to Gujrat. N o t e : Goods state is not
that are sold within considered inter-state
a state, sales.
but
while
transporting
travel
through
another
Subsequent Sales
Subsequent sale is a Sale of goods after the first time it has been sold through transfer of documents of title. Under the CST Act, sales tax is levied at a single point only (first sale) and no sales tax is payable on subsequent sales.
CST Transaction Forms
Dealers have to issue certain declarations in prescribed forms to buyers/sellers. The type of forms are C, D, E1, E2, F, H and I. Forms C, E1, E2, F and H are printed and supplied by Sales Tax authorities. Dealers have to issue declarations in these forms printed and supplied by the Sales Tax authorities. Form D is to be issued by government organization departments making purchases. These forms are to be prepared in triplicate.
Form C The sales tax on inter-state sale is 4% or the applicable sales tax rate for sale within the State whichever is lower if the sale is to a dealer ed under CST and the goods are covered in the registration certificate of the purchasing dealer. The purchasing dealer is eligible to get these goods at concessional rate if a declaration in C form is submitted to the selling dealer.
Form D Sale to government is taxable @ 4% or applicable sales tax rate for sale within the State whichever is lower. This concession on CST is applicable if Form D is issued by the government department which purchases the goods.
Form E1 This form is issued by the dealer who makes the first inter-state sale during movement of goods from one State to another. This enables the purchaser to claim exemption from CST on the second inter-state sale during the movement of goods by transfer of documents of title.
Form E2 This form is issued by the second or the subsequent seller when the goods move from one state to another in a series of inter-state sales by transfer of documents of title. This form enables the purchaser to claim exemption form CST on subsequent sale of goods.
Form F This form is issued when goods are despatched to another state as a consignment or to the branch of a dealer in another State. The CST is not payable if there is only inter-state stock transfer and there is no sale. To claim interstate movement of goods as “not a sale”, the dealer has to produce a declaration in Form ‘F’ received from Consignment Agent or Branch Office in another State. One Form F covering receipts during one calendar month has to be issued.
Form H This form is issued by an exporter for purchase of goods. The purchase of goods is for an export order or in pursuance of an export order. These goods are then sold in export and the form enables seller of the goods to the exporter to claim deduction on the goods sold for export.
Form I This form is issued by a dealer located in a Special Economic Zone (SEZ). No CST is levied when sales is made to a dealer located in SEZ.
Rate of CST
In an inter-state sale to a ed dealer against form C the rate of CST is 4% or local sales tax rate whichever is lower. If under the local sales tax law, sale or purchase is exempt from CST the CST is Nil. In an inter-state sale to government against form D the rate of CST is 4% or local sales tax rate whichever is lower. Rate of CST in case of inter-state sale of declared goods without form C or D is twice the rate of tax applicable to the local sale or purchase of such goods in that state. Rate of CST in case of other goods ( i.e. non-declared goods) is 10% or the applicable local sales tax of that state, which ever is higher.
Filing of CST Returns
CST amount shall be paid and returns to be filed on a monthly/Quarterly basis and as the case may be. Due date for submitting the return is on or before 15th of the succeeding month or due date for submitting the local sales tax or VAT return of a particular state whichever is later. CST Returns shall be submitted to local Commercial Tax Officer.
CST Features in Tally
State specific CST Returns Tracking of forms: C forms - (Issuable/Issued/Receivable/Received) E1, E2 Forms – Issued against sale of goods in transit by the buyer F forms - For Consignment sales and Branch Transfer H Forms – for sale in course of exports D Forms - For sale to Govt. Organisations I Forms - For sale to SEZ customers Reminder Letters/Covering letters to customers Auto-Fill option.
Enabling CST in Tally
To enable CST feature in Tally : Go to Gateway of Tally> F11: Features > Statutory & Taxation In the Company Operations Alteration screen set Enable Value Added Tax and Set/Alter VAT details to Yes and save.
Note:
CST
feature
is
enabled
only
if
Enable
Value
Added
Tax is set to Y e s .
Configuring Invoice for CST
To activate the E1 and E2 form in transactions: Go to Gateway of Tally > F12: Configuration > Invoice/Orders Entry . In the Invoice Configuration screen set Activate ‘E1’ or ‘E2’ Transaction? to Yes. Accept to save.
Creating CST Party Ledgers
Creating Party Ledgers for Sundry Creditors To create party ledgers for Sundry Creditors: Go to Gateway of Tally > s Info > Ledgers > Create In the Ledger Creation screen enter the name of the company supplying goods to you in the Name field. In the Under field, select Sundry Creditors option from the List of Groups . If required set Maintain balances bill-by-bill? to Yes . Enter details in the Default Credit Period if applicable. By default the Inventory Values are affected? field is set to No . Enter in the Tin/Sales Tax No. field. Accept Yes to save.
Creating Party Ledgers for Sundry Debtors To create party ledgers for Sundry Debtors: Go to Gateway of Tally > s Info > Ledgers > Create . In the Ledger Creation screen enter the name of the company receiving goods from you in the Name field. In the Under field, select Sundry Debtors option from the List of Groups . If required set Maintain balances bill-by-bill? to Yes . Enter details in the Default Credit Period if applicable. By default the Inventory Values are affected? field is set to No . Enter in the Tin/Sales Tax No. field.
Accept Yes to save.
Creating Sales and Purchases Ledger
Creating Sales Ledgers To create ledgers under Sales s group: Go to Gateway of Tally > s Info > Ledgers > Create . Enter a name for the sales ledger in the Name field. In the Under field select Sales s from the List of Groups . Set Yes in Used in VAT Returns? . Select Not Applicable from VAT/Tax Class list . Set the Inventory Values are affected? to Yes if you are maintaining inventory. Accept Yes to Save.
Creating Purchase Ledgers To create purchase ledgers under Purchase s group: Go to Gateway of Tally > s Info > Ledgers > Create . Enter a name for the purchase ledger in the Name field In the Under field select Purchase s from the List of Groups Set Yes in Used in VAT Returns? Select Not Applicable from VAT/Tax Class list Set the Inventory Values are affected? to Yes if you are maintaining inventory Accept Yes to Save
Creating CST Ledger for Sales
To create a CST Ledger under Duties and Taxes for CST on Sales: Go to Gateway of Tally > s Info > Ledgers > Create . In the Ledger Creation screen enter the name of the CST ledger in the Name field. In the Under field select the Duties & Taxes from List of Groups . Select CST from Types of Duty/Tax menu in the Type of Duty/Tax field. Select Not Applicable from VAT/Tax Class menu in the VAT/Tax Class field. Enter the CST percentage applicable in Percentage of Calculation? Select the Method of Calculation from Type of Duty menu. Accept Yes to Save.
Creating CST Paid on Purchases Ledger
To create CST paid on purchases ledger under Purchase s group. This ledger is created under Purchase s to include/appropriate CST value to purchase. Go to Gateway of Tally > s Info > Ledgers > Create Enter a name for the Purchase ledger in the Name field Select Purchase s from the List of Groups menu in the Under field Press Ctrl + Enter to go to the Group Alteration screen Set Yes in Used for Calculation (eg. Taxes, Discounts)? Accept Yes to Save
In the Ledger Creation screen, Enter the name of the ledger and select the expense group from the list. Set the Inventory Values are affected? to Yes if you are maintaining inventory. In Percentage of Calculation? enter the CST percentage applicable. Select the Method of Calculation from Type of Duty menu. Set Used in VAT Returns? to Yes. Select Not Applicable from VAT/Tax Class list. Accept Yes to Save.
Creating a Purchase Voucher
Go to Gateway of Tally > ing Vouchers > F9: Purchase Select As Invoice .
Note:
Purchase
Voucher
can
also
be
entered
in
As
Voucher mode.
Enter the date and reference. Select the Party to be credited from the List of Ledger s in Party’s A/c name. In the Party Details screen, check/modify details. Select the Purchase Ledger from the List of Ledger s . Select Inter-State Purchases from VAT/Tax Class . Select an item from the List of Items .
Note:
To
create
an
Item,
refer
to
topic
Stock
Items .
Enter the Quantity and the Rate to get the amount in the Amount field. Select the CST paid on purchases ledger under purchase s. Select the form to issue from Form Types . Enter the form number and date in Form No and Date respectively. Leave it blank if not yet issued. Select the form to receive from E Form Types . Enter the form number and date in Form No and Date respectively. Leave it blank if not yet received.
N o t e : E Form Types are displayed only if: 1. Activate ‘E1’ or ‘E2’ Transaction? is set to Y e s from F12: 2. C F o r m is selected from Form Types. Enter narration if required and accept Yes to save.
Configure .
Creating a Sales Voucher
Go to Gateway of Tally > ing Vouchers > F8: Sales . Select As Invoice .
Enter the date and reference. Select the Party to be credited from the List of Ledger s and enter Party’s A/c name. In the Party Details screen, check/ modify details. Select the Sales Ledger from the List of Ledger s . Select Inter-State Sales from VAT/Tax Class . Select an item from the List of Items .
Note:
To
create
an
Item,
refer
to
the
topic,
Stock
Items .
Enter the Quantity and the Rate to get the amount in the Amount field. Select the CST Tax ledger (under Duties & Taxes) for sales. Select the form to receive from Form Types . Enter the form number and date in Form No. and Date , respectively. Leave it blank if not yet received. Select the form to issue from E Form Types . Enter the form number and date in Form No. and Date , respectively. Leave it blank if not yet issued.
N o t e : E Form Types are displayed only if: 1. Activate ‘E1’ or ‘E2’ Transaction? is set to Y e s from F12: 2. C F o r m is selected from Form Types. Enter narration if required and Accept to save.
Configure .
Note: D Form F Form H Form I Form
C
Form is for ed customers. is for Government Organisations. is for Branch transfers. is for deemed exports. is for SEZ Customers.
Creating Debit and Credit Notes
You can create Debit and Credit Notes for changes in Quantity, Rate, Return of Goods, and so on. Debit/Credit note is enabled in F11:Features in the Gateway of Tally. To Create a Debit/Credit Note: Go to Gateway of Tally > ing Vouchers . In the ing Voucher Creation screen, select F9:Debit Note/ F8: Credit Note to create a debit/ credit note. Select As Invoice .
Note:
Debit/
Credit
Note
can
also
be
entered
in
As
Voucher mode.
Enter the date and reference. Select the Party to be credited from the List of Ledger s and enter Party’s A/c name . In the Party Details screen, check/ modify details. Select the Sales/ Purchase Ledger from the List of Ledger s . Select Inter-State Sales/Inter-State Purchases from VAT/Tax Class . Select an item from the List of Items .
Note:
To
create
an
Item,
refer
to
the
topic,
Stock
Items .
Enter the Quantity and the Rate to get the amount in the Amount field. Select the CST tax ledger under Duties & Taxes for credit note, and CST paid on purchases ledger under Purchase s for debit note. Select the form to receive from Form Types . Enter the form number and date in Form No. and Date , respectively. Leave it blank if not yet received. Select the form to issue from E Form Types . Enter the form number and date in Form No. and Date , respectively. Leave it blank if not yet issued.
N o t e : E Form Types are displayed only if: 1. Activate ‘E1’ or ‘E2’ Transaction? is set to Y e s from F12: 2. C F o r m is selected from Form Types.
Configure .
Enter narration if required and Accept to save.
CST Reports
CST Reports display forms to be received and issued. It allows you track pending forms and reconcile forms. To view CST Reports: Go to Gateway of Tally > Display > Statutory Reports > CST Reports
Forms Receivable Forms Issuable
Forms Receivable
This displays the CST forms receivable for the statutory reports from the CST Party Ledgers. Go to Gateway of Tally > Display > Statutory Reports > CST Reports > Form Receivable Select from CST Party Ledgers/Groups Forms to be received for the selected ledger are displayed in the Forms Receivable screen Enter in the Form Number and Date for forms received Accept to save
Forms Issuable
This displays the CST forms issuable for the statutory reports from the CST Party Ledgers. Go to Gateway of Tally > Display > Statutory Reports > CST Reports > Form Issuable. Select from CST Party Ledgers/Groups. Forms to be issued for the selected ledger are displayed in the Forms Issuable screen. Enter in the Form Number and Date for forms received. Accept to save.
Auto Fill option for CST
The Auto Fill option for CST is available in the Form Issuable/ Form Receivable screen. Use this option to filter the type of forms and to fill up the form number for a group of vouchers. Go to Gateway of Tally > Display > Statutory Reports > CST Reports > Form Receivable/ Form Issuable . Press F5: Auto Fill – CST . In the Set Form Numbers screen. Select the form from Form Types .
Enter the Form Number and Form Date for the group of vouchers. Accept to save.
In the Forms Receivable/ Forms Issuable screen, Accept to save.
Appropriation in Vouchers
Form numbers and date entered in Forms Receivable/ Forms Issuable are recorded and displayed in the Vouchers. To view this: Go to Gateway of Tally > Display > Daybook . Press Alt + F2 to change the period. Select the voucher and enter to go to the ing Voucher Alteration screen. The entries are displayed in Form No: and Date: fields.
Viewing All Vouchers
Go to Gateway of Tally > Display > Statutory Reports > CST Reports > Form Receivable/ Form Issuable . Select the party’s ledger from List of Ledgers . Press Alt + F2 to change the period. In the Forms Receivable/ Forms Issuable , screen press F12: Configure . In the CST Configure screen, set Show All Vouchers? to Yes . Show Vouchers of: displays Form Types . Select the type. To view all types, select Not Applicable .
Reminder and Covering Letters
You can send reminder letters to parties who have to issue forms. You can also send covering letters to parties, confirming receipt of forms.
Configuring Reminder and Covering letters To configure reminder and covering letters: Go to Gateway of Tally > F12:Configure > Printing . Reminder Letter – CST Form. Covering Letter – CST Form. Enter default details in the CST Reminder Print Config screen, for reminder letters, and in the CST Covering Print Config screen, for covering letters.
Reminder Letters Go to Gateway of Tally > Display > Statutory Reports > CST Reports > Form Receivable . Select the party’s ledger from List of Ledgers . In the Forms Receivable screen, press Print (Alt + P) . In the Report Generation screen, set Print Reminder Letter? to Yes .
Print Preview
Covering Letters Go to Gateway of Tally > Display > Statutory Reports > CST Reports > Form Issuable . Select the party’s ledger from List of Ledgers . In the Forms Issuable screen, press Print (Alt + P) . In the Report Generation screen, set Print Covering Letter? to Yes .
Print Preview
Introduction
Fringe Benefit Tax was introduced as part of Finance Act, 2005 as an additional income-tax and came into force from April 1, 2005. The term Fringe Benefits means ‘any consideration for employment provided by way of any privilege, service, facility or amenity provided by the employer to the employees’. Fringe Benefit Tax is to be levied on the employer in respect of fringe benefits provided/deemed to be provided by the employer to his employees during any financial year commencing on or after 1.4.2005 Fringe Benefit Tax is payable at the rate of 30% of the value of fringe benefits computed in the manner prescribed under the Section 115WC.
Salient Features of FBT
Some of the features of FBT are listed as follows: 1.
Fringe Benefit Tax payable by an employer is in respect of perquisites or fringe benefits provided or deemed to have been provided by the employer to his employees in addition to the cash salary or wages paid during the year.
2.
Fringe Benefit Tax is levied in addition to the Income-Tax charged.
3.
Fringe Benefit Tax is payable at the specified rate on the value of fringe benefits provided to the employees. The value of fringe benefits is calculated in accordance with the provisions of Section 115WC of the Income-Tax Act, 1961.
4.
An employer has to pay Fringe Benefit Tax even if no Income-Tax is payable on the total income.
5.
Like any other direct tax, Fringe Benefit Tax is not an allowable expenditure for the purpose of computation of taxable income.
Important points relating to Fringe Benefit Tax
Some of the important points to be observed in FBT: 1.
Rate is calculated on Net Expenses.
2.
Expenses are not to be segregated between ‘Paid to Employees’ and ‘Paid to Outsiders’.
3.
Depreciation is calculated on the basis of Income Tax.
4.
FBT is applicable on Service Tax paid on any of the expenditure chargeable to FBT.
5.
Payment of FBT in case employers have employees based both in and outside India.
6.
Medical reimbursement upto Rs. 15,000 per employee is charged to FBT.
7.
Applicability of FBT in case an employer is engaged in two or more business activities.
8.
Different rates of tax on the Fringe Benefits provided by different industries.
9.
FBT is not payable on Advance paid.
10.
Tax Rate is 30% + Surcharge @10% + Education Cess @ 2% .
11.
One Ledger may have expenditure relating to different groups under FBT.
Characteristics of FBT
Some of the characteristics of FBT are: It is a tax on expenditure, not income. It is a tax on employer, not employees. It is a surrogate tax on employers. It cannot be recovered from the employees. It is to tax benefits that are usually enjoyed collectively by the employees and cannot be attributed to individual employees. A combination of presumptive and non-presumptive approaches has been adopted.
Classification of Employer for FBT
Under FBT, an Employer is defined as any of the following: Company Firm Association of Persons or a Body of Individuals (except Fund or Trust or institution eligible for exemption under section 10(23C) or ed under section 12AA) Local Authority Every Artificial judicial person, not falling within any of the above
Note:
Under
FBT,
they
are
considered
as
Employer
even
if
the
Taxable
Income
is
NIL.
Classification of Not Employer for FBT
The following are not included as Employer under FBT: An Individual (i.e., Proprietorship concern) Hindu Undivided Family Association of Persons or a Body of Individuals exempt under section 10(23C) or ed under section 12AA Central Government State Government
Direct Fringe Benefit
Direct Fringe Benefit as classified under section 115(WB) (1) means: Any privilege, service, facility or amenity, which is directly or indirectly provided by an employer to his employees (including former employee or employees). Any free or concessional tickets provided by the employer for private journeys to employees or their family . Any contribution by the employer towards an approved superannuation fund for employees. Any reimbursement, which is directly or indirectly made by the employer to employees for any purpose.
Deemed Fringe Benefit
The Fringe Benefits are deemed to have been provided if the employer incurs any expenditure or makes any payment in the course of business or profession. This includes any activity whether or not such activity is carried on with the object of deriving income, profits or gains. Any expenditure incurred or payment made for the following constitutes deemed fringe benefit. Entertainment Hospitality Conference Sales promotion including publicity Employee welfare Conveyance, tours and travel Hotel, boarding, lodging Repair, running and maintenance of cars Repair, running and maintenance of aircraft Use of telephone Maintenance of any accommodation in the nature of guest house Festival celebrations Health Club Any other club Gifts Scholarship to employees’ children Consumption of fuel other than industrial fuel
Payment of FBT to the government
In accordance with the provisions, the FBT should be paid in advance during any financial year and the regular assessment of fringe benefits is to be made in a later assessment year.
Advance Fringe Benefit Tax Every assessee who is liable to pay advance tax has to pay tax on the current fringe benefits calculated in the manner laid down. The amount of advance tax payable in the financial year is 30% of the value of the fringe benefits paid or payable in each quarter. This is payable on or before the 15th day of the month following each quarter except for the quarter ending 31st of March. For the quarter ending on the 31st of March of the financial year, the amount of advance tax (on an estimated value) is to be paid on or before the 15th of March for the financial year. If tax is not paid or the tax paid is less than the prescribed rate, the assessee is liable to pay simple interest at the rate of 1% on the amount by which the advance tax paid falls short.
Filing of FBT return
An employer who has paid or made provision for payment of fringe benefits to his employees during the previous year is required to furnish a return of fringe benefits in the prescribed form and manner to the Assessing Officer before the due date. For a company as an employer the due date is the 31st of October of the assessment year. For a person who is an employer but not a company and whose s are required to be audited, the due date is the 31st of October of the assessment year. For any other employer, the due date for filing the return of fringe benefits is the 31st of July of the assessment year. After the due date, the Assessing Officer may issue a notice to the assessee requiring him to furnish a return in the prescribed form and manner within a period of thirty days. Failure to furnish a return of fringe benefits or delayed filing of such return will result in the levy of interest at the rate of 1% for each month of delay or till the assessment is made on the amount of tax on the value of fringe benefits.
FBT in Tally
FBT in Tally provides an easy-to-use and flexible interface. It allows the to view and print FBT Reports and Challans. N o t e: FBT can companies.
be
processed
for
both
s
Only
and
s
With
Inventory
Features of FBT in Tally The FBT functionality in Tally s the following features: Simple and -friendly. Quick and easy to set up and use. Challan management and printing for prompt and accurate filing of tax. One-time easy configuration to enable FBT. You have to enter transactions; FBT is automatically calculated and generated in Reports. The FBT Report has FBT Computation Report which displays detailed FBT calculations for each category under FBT. The report also displays FBT (-defined Ledger), Education Cess and Surcharge tax payable. Allows you to generate, print and file ITNS 283 Challan from Tally. All categories and assessee types of FBT are incorporated in Tally. Any changes made are updated automatically and manual changes are not required. FBT Assessee Type and FBT Category are displayed in the Statutory Masters with the details. Values in transactions are taken from here. Changes in details are updated automatically.
Enabling FBT in Tally
Configuration of FBT Set the option Use ing terminology of as India/SAARC in the F12: Configuration screen.
Enable FBT in F11: Features You can enable Fringe Benefit Tax (FBT) by using the F11: Features screen. 1.
Go to Gateway of Tally > F11: Features > Statutory & Taxation
2.
Set the option Enable Fringe Benefit Tax (FBT) to Yes
2.
3.
Set Set/Alter FBT Details to Yes . The Company FBT Assesse Details sub form appears as shown.
3.
Income-Tax/PAN Number If the Income Tax/PAN Number is not entered in the Company Master , the same can be entered in F11: Features under Company FBT Assessee Details . If the Income Tax/PAN Number is entered in the Company Master, it cannot be edited in F11: Features under Company FBT Assessee details .
Assessee Type Set the Assessee Type to which your company belongs to. This information is used to calculate the Income Tax, Surcharge and Education Cess while computing FBT. Note: * The option Is Surcharge Applicable ? is applicable only if your Assessee Type is Association of Persons/Body of Individuals. On setting this field to Yes in the Company FBT Assessee Details, the surcharge is calculated in FBT Computation Report. * For the Assessee Type Local Authority, the option Is Surcharge Applicable? is not
applicable. * For all the other Assessee allowed to edit the same.
Types, this
Assessee Category Select the appropriate Assessee Category from the list.
option
is
set
to
Yes
by
default
and
you
are
not
Display of FBT Assessee Types and Categories in Statutory Info.
Tally provides you with predefined set of FBT Categories and Assessee Details.
FBT Assessee Type To view the FBT Assessee Type details, Go to Gateway of Tally > Display > Statutory Info > FBT Assessee Type
Select the Assessee Type from the List of Assess Types. The screen has a Name field displaying the Assessee Type. The FBT Assessee Details displays the Rate of FBT, Surcharge, Additional Surcharge (Cess), Additional Education (Cess) and the dates they are applicable from.
FBT Categories To view the FBT Category details, Go to Gateway of Tally > Display > Statutory Info > FBT Category
Select the FBT category from the List of FBT Categories. The screen displays the FBT Category and the corresponding Section code. The FBT Category section displays the Eligible Percentage for all the Assessee Categories and the dates they are applicable from. Note:
Any
changes
to
the
values
will
be
updated
on
the
Tally
website.
FBT masters
You have to specify the FBT Ledger Names under any of these main group heads – Duties and Taxes, Sundry Creditors, Sundry Debtors, Indirect Expenses or sub groups of these main group heads. Create the following ledgers under specified groups: Tax Ledger under Duties and Taxes Party Ledger under Sundry Creditors Expense Ledger under Indirect Expenses
Creating Tax Ledger
The tax ledgers created under the group Duties and Taxes are used for calculation of tax. Tax Ledger is used in FBT payment. To create a Tax Ledger, Go to Gateway of Tally > s Info. > Ledgers > Create Enter the Name of the tax ledger Select the group Duties & Taxes from the List of Groups Select FBT from the list of Types of Duty/Tax
Creating a Party Ledger
Create ledgers for Party/Suppliers under the group Sundry Debtors/Sundry Creditors. To create an FBT Party Ledger , Go to Gateway of Tally > s Info. > Ledgers > Create In the Ledger Creation screen, enter the name of the party in the Name field In the Under field, select Sundry Creditors/Sundry Debtors If required, set Maintain balances bill-by-bill? to Yes . Enter details in the Default Credit Period , if applicable. By default, the Inventory Values are affected? field is set to No. Accept and Save.
Creating an Expense Ledger
All the expense ledgers are to be created under the group Indirect Expenses . The group Indirect Expenses is used for booking expenses. To create an FBT Expense ledger, Go to Gateway of Tally > s Info. > Ledgers > Create Enter the Name of the expense ledger Select the group Indirect Expenses from the List of Groups
When Is FBT Applicable ? is set to Yes , the field Default FBT Category? will be displayed. You have to select the appropriate FBT Category from the List of FBT Categories .
Accept Yes to save the ledger
Creating/Altering FBT Voucher Type
To create or alter a FBT Voucher type such as Journal 1.
Go to s Info. > Voucher Types > Create/Alter > Journal
2.
In the Voucher Type Alteration screen, Type the Name of Class . For example, Fringe Benefit Recovery.
The following screen displays.
Set Use Class for FBT Recovery to Yes and Accept the screen.
Creating FBT Vouchers
Creating FBT Journal Voucher: FBT Journal Voucher can be created in two ways: 1.
FBT Journal Voucher without a Class
2.
FBT Journal Voucher using a Class
Creating FBT Journal without a class
1.
Go to Gateway of Tally > ing Vouchers > F7: Journal
2.
Select Entertainment from the list and enter the amount in the debit column
3.
Select the Party (Supplier) from the list. Amount appears automatically in the Credit column
N o t e : FBT s selection of a ledger with multiple selection of FBT Category during entry to Y e s in F12:
categories. To do this, Configure screen.
set
Allow
Creating FBT Journal with a class
To create a Journal Voucher using a Voucher Class , 1.
Go to Gateway of Tally > ing Vouchers
2.
Select F7: Journal button from the button bar or press the F7 key. Select the class as Fringe Benefit Recovery from the list Class Table.
3.
The FBT Journal voucher screen displays as shown. This provides the recovery details from an employee and the same appears in the FBT Computation report.
Debit the Supplier Credit the Expenses incurred
4.
Enter the narration , if required
5.
Accept the voucher to save
Creating a Payment voucher to book expenses for FBT
To create a FBT Payment voucher, 1.
Go to Gateway of Tally > ing Vouchers
2.
Select F5: Payment from the ing Voucher Creation screen
3.
Enter the Date
4.
Select FBT Ledger in Particulars from the List of Ledger s . The FBT Category sub screen displays. Select the appropriate category from the list of FBT Categories and enter the amount.
N o t e : The FBT Category e n t r y is enabled in F12:
is
displayed if Allow Configuration .
selection
of
FBT
Category
5. Credit Bank or Cash through which the payment is to be made against the FBT Ledger.
6. Enter Narration , if required 7. Accept to save
during
Creating a Payment voucher without FBT helper button
1.
Go to Gateway of Tally > ing Vouchers
2.
Select F5: Payment in the ing Voucher Creation screen
3.
Select the Bank/Cash from the list
4.
Select the FBT Ledger from the list and enter the amount
5.
On selecting the FBT Ledger , the field FBT Details displays above the Narration field. Set FBT Details to Yes
6. On setting FBT Details to Yes , the following screen displays
7. Enter the FBT Filter details and Accept to save the payment voucher screen
Creating a Payment voucher with the FBT helper button
Payment of FBT can be made using FBT Helper button. Payment will be calculated only on the vouchers which are between the From Date and To Date. N o t e : FBT Helper feature is P y m t / R c p t / C o n t r a ? in F12:
available only if Use Single Entry mode for Configure (Voucher Configuration) is set to Y e s .
1.
Go to Gateway of Tally > ing Vouchers
2.
Select F5: Payment in the ing Voucher Creation screen
3.
Press Alt + F or click FBT Helper from the button bar to view the FBT Filters sub screen
4.
Select the Type of Payment from the list. The selection will be reflected in the Challan
For example, if Advance Tax (100) is selected in the payment filter, Advance Tax is automatically marked (x) in the FBT Challan.
5. Select the ledger from the List of FBT Ledgers
6.
Enter the From Date and To Date to select the period for computing payment and for the generation of FBT Challan
7.
Select the Bank ledger from the List of Ledger s, which is to be credited in the Payment Voucher
8.
Enter Narration , if required
9.
Click Print button or press Alt+ P to print FBT Challan , if required
10.
Accept to save
9. 10.
Printing FBT Challan
You can Print the FBT Challan for a FBT Payment voucher created manually or using the FBT helper button. To print a FBT Challan , 1.
Press Alt + P or click Print from the button bar in the Payment Voucher screen to view the Voucher Printing screen
2.
Press Backspace to navigate from Print Yes or No ? and move the cursor to Print as FBT Challan ?
3.
Set Print as FBT Challan to Yes
4.
Accept the sub screen to save
3. 4.
Note: * If the option Print as FBT Challan is set to Y e s then Default Payment C h e q u e will not be printed. * Ensure you click With Preview button or press Alt+ I to view the FBT Print Preview mode
Print Preview of FBT Challan
Challan Challan in
and
Creating a Purchase voucher
To create a Purchase Voucher, Go to Gateway of Tally > ing Vouchers Select F9: Purchase from the button bar or press F9 Select As Voucher/As Invoice Enter the Date and Reference Credit the party ledge r from the List of Ledger s Select the expenses from the List of Ledger s and debit the same. The FBT Category sub screen displays. Select the appropriate category from the list of FBT Categories and enter the amount Enter Narration, if required Accept to save
N o t e : Set the Configure .
option
Allow
Expenses/Fixed
Assets
in
Purch.
Vouchers to Y e s In F 1 2 :
Creating a Debit Note
A Debit Note for FBT can be entered in Voucher or Invoice mode. N o t e : Set
the
option
Use
Debit/Credit
Notes to Y e s in F11:
To create a Debit Note, Go to Gateway of Tally > ing Vouchers Select F9: Debit Note from the button bar or press Ctrl + F9 Select As Voucher/As Invoice Enter the Date and Reference Debit Cash from the List of Ledger s Select the Party from the List of Ledger s and credit the same Enter Narration , if required Accept to save
Features .
FBT Computation
FBT Computation lists only those categories for which ledgers are created and transacted. To view the FBT Computation screen, Go to Gateway of Tally > Display > Statutory Reports > FBT Reports > FBT Computation
FBT Payment Details Set the option Show FBT payment Details to Yes in F12: Configure for the payment details to be displayed in the FBT Computation screen.
The screen displays as shown
Less: Advance Tax Paid The value in this field is taken from all the Payment vouchers with the FBT Ledger and Type of payment marked as Advance Tax (100) with the appropriate period.
Less: Self Assessment Tax Paid The value in this field is taken from all the Payment vouchers with the FBT Ledger, Type of payment marked as Self Assessment Tax (300) with the appropriate period.
Less: Tax paid on Regular Assessment The value in this field is taken from all the Payment vouchers with the FBT Ledger and Type of payment marked as Tax On Regular Assessment (400) with the appropriate period.
Section Code Set the option Show Section Code to Yes in F12: Configure if the Section code i s to be displayed in the FBT
Computation screen.
The screen displays as shown.
Expenditure Amount This field displays the amount that is spent on the FBT marked Indirect Expenses like Entertainment, Conveyance, and so on.
Amount Recovered The amounts that are recovered from the employees towards the expenses incurred are displayed here.
Nett Amount The difference between the amount incurred on the Indirect Expenses and the amount recovered from the Employee is the Nett Amount.
Percentage as per Sec 115WC The percentage of Rate of Tax of FBT Category (Enabled in F11: Features ) for the respective FBT category is displayed in this field. For more details, refer FBT Ledger Category
Value of Fringe Benefit The Percentage obtained as per sec 115WC on Nett Amount for the respective category is the value of Fringe Benefit.
FBT Ledger Category
From the FBT Computation screen press Enter on any particular FBT Category to drill down to a report that displays all the ledgers marked with respective FBT Category. Consider the FBT Category Entertainment – under the Section 115WB (2) (A)
Name of the Ledger Name of the ledger marked with above mentioned FBT Category is displayed here.
Expenditure Amount The amount spent towards Entertainment - 115WB (2) (A) and ed for a particular ledger is displayed here.
Amount Recovered The amount that has been recovered from the employees towards the expenses incurred is displayed here.
Nett Expenditure The difference between the amount spent on Entertainment and the amount recovered from the Employee is the Nett Amount.
Percentage as per Sec 115WC The percentage of the Rate of Tax of Company Assessee Category (enabled in F11: Features) for the respective FBT category is displayed in this field.
Value of Fringe Benefit The percentage obtained as per sec 115WC on Nett Amount for the respective category is the value of Fringe Benefit.
FBT Tax is calculated on the value of fringe benefits. Rate of tax is extracted from FBT Assessee Type master for the selected Assessee Type in F11: Features. For example, if Assessee Type is Association of Persons/Body of Individuals then, Income Tax Rate is 30%, Surcharge is 10 % and Education Cess is 2%. Note:
The
percentage
will
vary
for
different
Assessee
Types.
Surcharge Surcharge is calculated on Fringe Benefit Tax Amount and is extracted in the same way as Rate of Tax .
Education Cess Education Cess is calculated on the sum of value of Income Tax and Surcharge. Additional Surcharge Rate/Cess Rate is also extracted in the same way as Rate of Tax.
Total Tax This is the total of the Income Tax, Surcharge and Education Cess percentage values. Note: * From FBT Ledgers * From FBT Ledger Alteration screen.
of Category, you can drill Vouchers, you can further
down to FBT drill down to
Ledger Vouchers. ing Voucher
Introduction
A manufacturer of excisable goods can avail MODVAT (now CENVAT) credit of duty paid on the goods purchased from any dealer w.e.f. 04.07.94. The dealer intending to issue modvatable (now Cenvatable) invoices should get themselves ed with the jurisdictional Range Superintendent by following the procedure prescribed in Rule 9 of Central Excise (No.2) Rules, 2001. All the godowns /Store-rooms should be ed separately. A Central Excise ed dealer should ensure that the prescribed is maintained for the godown/ Storeroom. All the consignments received/ issued from the godown have to be entered in the (further details in Central Excise Rules and Manual). The Dealer shall issue the invoices in quadruplicate. The copies of the invoices issued by a first stage dealer and a second stage dealer shall be marked at the top as "FIRST STAGE DEALER" and "SECOND STAGE DEALER" respectively. The invoice issued by a first stage or second stage dealer in the case of imported goods and by a second stage dealer in the case of other goods, shall be duly authenticated by the officer. The Dealer shall issue one invoice for every consignment dispatched in one batch and at a given time. If a consignment is split into two or more batches, then each consignment is dispatched separately with separate invoices.
Who is a Trader/Dealer? A Trader/Dealer is someone who purchases and sells goods and maintains an inventory of goods. A ed Excise dealer is a dealer of Excisable goods who is ed under Central Excise rules, 1944 and on the strength of whose invoice Cenvat credit can be taken.
Who will be covered under Dealer Excise? The following dealers are covered under Excise for Dealer.
First Stage Dealer A First Stage Dealer is one who purchases goods directly from any of the following:
The manufacturer under the cover of any invoice issued in of the provision of Central Excise Rules, 2002 or from the depot of the said manufacturer.
Goods purchased from the premises of the consignment agent of the said manufacturer.
Goods purchased from any other premises from where the goods are sold by or on behalf of the said manufacturer.
Goods purchased from an importer or from the depot of an importer.
Goods Purchased from the premises of the consignment agent of the importer.
Second Stage Dealer
A ed dealer who purchases goods from the First Stage Dealer is called a Second Stage Dealer.
Flowchart on Excise Dealer
The categorization of a dealer as first stage or second stage is not predefined. It is decided during the purchase. Therefore, a dealer may be a first stage dealer or a second stage dealer depending on the type of purchase. Assume you are a First Stage Dealer and you buy the goods from the importer or Manufacturer.
The Invoice issued on sale of goods to the Manufacturer or Second Stage Dealer has to indicate the amount of Excise Duty ed on or proportionate value to the excise of the goods being sold.
Example 2 Let us assume that you are a Second Stage Dealer and you purchase goods from a First Stage Dealer.
Type of Duties and Method of Calculation
The Duties for Excise can be calculated on Assessable value and on Duty Value. According to the Excise laws, find below the list of Excise duties with the method of calculation. Type of Duty
Method of Calculation
Formula for Calculation
Basic Excise Duty
On Assessable Value
Assessable Value
Special Excise Duty
On Assessable Value
Assessable Value
Additional Duty of Excise (Goods of Special
On Assessable Value
Assessable Value
On Duty Value
BED + SED
On Duty Value
BED + SED
National Calamity Contingent Duty (NCCD)
On Duty Value
BED + SED + AED(GSI)
Countervailing Duty (CVD) On Import)
On Assessable Value
Assessable Value OR Assessable Value + BED
Education Cess
On Duty Value
BED + SED + AED(GSI)+ AED(TTA) +AED(TTW) + NCCD + ADE + SAD
Secondary Education Cess (SED)
On Duty Value
BED + SED + AED(GSI) + AED(TTA) + AED(TTW) + NCCD + ADE + SAD
Education Cess on CVD
On Duty Value
CVD Value
Importance) AED (GSI) Additional Duty of Excise (Textile and Textile Articles) AED (TTA) Additional Duty of Excise (Tea and Tea Waste) AED (TTW)
Special Additional Excise Duty (SAD)
On Duty Value
BED + SED + AED(GSI) + AED(TTA) + AED(TTW) + NCCD + ADE
Additional Duty of Excise (ADE)
On Duty Value
BED + SED
Filing Excise Returns
Every ed dealer is required to maintain a Daily Stock of records of receipts of duty-paid goods and issue thereof, and submit quarterly return in the Form - 2.
Excise for Dealers in Tally
The Excise for dealers feature in Tally s the following, making it easy for computation:
Easy to use
Fast and error free voucher entry
Complete tracking of Excise duty on each transaction
Printing of Excise invoice with the Supplier & Manufacturer details as configurable option
Reports are generated as per Central Excise Statutory requirements
Generation of Quarterly Return in Form-2
Generation of Sales and Purchase Extract
Enabling Excise in Tally
You can enable Dealer - Excise in Tally, in the F11: Features screen. Go to Gateway of Tally > F11: Features > Statutory & Taxation The Company Operations Alteration screen appears as mentioned below 1.
Set Enable Dealer – Excise to Yes .
2.
Set Set/Alter Dealer – Excise Details to Yes .
3.
The Company Excise Details sub-form appears as shown below.
3.
ECC/PAN Based Regn/Code No.: The 15-Digit PAN based registration number is an alphanumeric number mentioned in the Registration Certificate. The first part would be the 10-character (alphanumeric) Permanent Number [PAN] issued by the Income Tax Authorities to whom the registration number is allotted (includes a legal person). The second part comprises a fixed 2-character alpha-code indicating the category of the Registrant. The third part is a 3-character numeric code. Commissionerate: The Commissionerate of central Excise is the division under which your ed premise is located.
Range
Code: Enter the code of the range under which your company is ed. Name: Enter the name of the range under which your company is ed. Address: Enter the address of the Range under which your company is ed.
Division
Code: Enter the code of the division under which your company is ed. Name: Enter the name of the division under which your company is ed. Address: Enter the address of the division under which your company is ed.
Creating a Supplier Ledger
Go to Gateway of Tally > s Info > Ledgers > Create The ledger creation screen appears as shown below. 1.
Enter the name of the Supplier in the Name field.
2.
Select the group Sundry Creditors in the Under field.
3.
Set Maintain Balances Bill by Bill to Yes and enter the Default Credit Period
4.
Inventory Values are affected is set to No
5.
In the Mailing Details section enter the supplier details, Income Tax and the Sales Tax numbers .
5.
6.
Set Excise Details to Yes to display the Excise Details sub form.
6.
7.
Enter the Excise Registration Number of the supplier.
8.
Enter the Range under which the supplier’s company is ed.
9.
Enter the Division under which the supplier’s company is ed.
10.
Enter the division under which the premise of the Supplier’s company is ed.
11.
Select the Default Nature of Purchase from the Nature of Purchase list. The table lists the Type of Purchase , which can be changed during transactions.
N o t e : The and Sundry
Excise Details sub-screen Debtors only.
Creating Customer Ledger
appears
for
ledgers
created
under
Sundry
Creditors
Creating Customer ledger is similar to that of creating the Supplier Ledger but it should be created under Sundry Debtors.
Creating a Stock Item
Go to Gateway of Tally > Inventory Info > Stock item > Create The Stock Item Creation screen appears as shown below.
1. Enter the name of the Stock Item in the Name field. 2. In the Under field, select the group under which the Stock Item is created from the List of Groups list. 3. Select the unit for the Stock Item from the Units list. 4. Set Excise Details to Yes to display the Duty Details sub form as shown below.
4.
5. Enter the Tariff Classification number.
Note: The Tariff Classification field is Note and Debit Note will list the Stock 6.
Select the Type of Duty from the List of Duties
7.
Specify the Rate of Duty
8.
Select the Method of Calculation
9.
After entering the details accept Yes to save
mandatory. Items with
The Tariff
Refer to Types of Duties and Method of Calculation for details on all the duties.
Excise Purchase/Sales/Credit Classification only.
Creating Ledgers for Excise Duty
The Ledgers for Excise Duty are used to the Excise Duty . Go to Gateway of Tally > s Info > Ledgers > Create 1.
Select Duties & Taxes from the List of Groups
2.
Select Excise for Type of Duty/Tax
3.
Select the appropriate Duty Head from the list
4.
Set Inventory values are affected to Yes
5.
3. 4. 5.
Enter the Percentage of Calculation
6.
Select the Method of Calculation from the Type of Duty list
Similarly, you can create Ledger Masters for different Rates of Excise Duties .
Methods of Excise ing The can use any of the following two methods to Excise Duty in Tally 1. On the Total Cost Basic Rate
Assessable Value + Taxes = Cost of the Item The sum of the Total Assessable Value and the Excise Duty will form a part of the Cost of the Item
Eg. Stock Item A costs
Rs. 50/ unit
100 nos of Stock Item A
Total Cost Rs. 5000(@ Rs. 50/unit)
Excise Duty@16%
Rs. 800/-
Education Cess@2%
Rs. 16/-
Secondary Education Cess @ 1%
Rs. 8/-
The Total Amount
Rs. 5824/-
The Total Purchase Cost/unit
Rs. 5824/100= 58.24
Note:
The
Excise
Duty
paid
by
the
dealer
becomes
the
cost
for
the
dealer.
2. Appropriation by Quantity or Value
Eg.
Stock Item A cost 100 nos of Stock Item A
Rs. 50/unit Total Cost Rs. 5000
Excise Duty@16%
Rs. 800/-
Education Cess@2%
Rs. 16/-
Secondary Education Cess @ 1%
Rs. 8/-
The basic Rate of the Stock Item is retained and the details of the Excise Duty are shown using the duty ledgers created under the purchase . The appropriation is done by Tally and the duty against is added to the cost of the material.
Creating Ledgers for VAT
VAT ledgers are created to allocate Input and Output VAT on purchase and sales transactions. Go to Gateway of Tally > s Info > Ledgers > Create 1.
Select Duties & Taxes from the List of Groups
2.
Select VAT for Type of Duty/Tax
3.
Select the Default VAT/ Tax Class from the List of VAT/Tax Class
4. 5.
3.
4.
By default Inventory values are affected field is set to Yes
5.
Set Percentage of Calculation, if required
6.
Method of Calculation is set to On VAT Rate by default.
N o t e: If the V A T / T a x Class is not selected during v o u c h e r entry.
selected
at
the
ledger
level,
the
same
can
be
Creating Voucher Type
The Excise Voucher Type for Purchase , Sales , Credit Note and Debit Note has to be created before creating the invoices.
Creating Purchase Voucher Type Go to Gateway of Tally > s Info > Voucher Type > Create
Name: Enter the name of the Voucher type. Type of Voucher: Select the type of voucher as purchase from the list of Voucher types . Abbreviation: You may abbreviate the Vouchers type as per your requirement. Method of Voucher Numbering: Select Automatic for the method of Voucher numbering.
Use Advanced Configuration: Set it to Yes to specify the numbering method, if required. Refer Creation of Voucher Types for details on other fields. Use for Dealer Excise: Set this field to Yes to enter Excise Purchase to capture Assessable Value and Excise Duty breakup. Accept the screen to save after entering all the details. N o t e : The Use for Dealer Excise option will appear Sales/Credit Note only and if the Dealer Excise is Statutory & Taxation .
in Purchase/Debit Note and enabled in the F11 Feature F3
–
Creating Sales Voucher Type Creating Sales Voucher Type is similar to that of Creating a Purchase Voucher Type but it should be created under the Sales Type of Voucher.
Creating a Debit Note Voucher Type A Debit note Voucher type has to be created if a Debit Note has to be ed. The Voucher Type should be created under Debit Note type of Voucher.
Creating a Credit Note Voucher Type A Credit note Voucher type has to be created if a Credit Note has to be ed. The Voucher Type should be created under Credit Note type of Voucher.
Creating an Excise Opening Stock
Tally allows you to maintain a record of Excise Opening Stock Balance of the Excise Stock Items N o t e : Excise Opening Stock option create an Excise Purchase voucher
under the Inventory Info menu will appear only if you type with Use for Dealer Excise o p t i o n set to Y e s .
To create an Excise Opening Stock : Go to Gateway of Tally > Inventory Info > Excise Opening Stock
Creating an Excise Opening Stock You can track the Excise Opening Stock by entering the Stock Item Purchase details in the Excise Opening Stock . Let’s consider an Example: A buys 100 nos of Stock Item A from King & Sons and 50 nos of Stock Item A from MICO Manufacturing Limited . The Opening Stock carried forward for the current year will be 35 nos of Stock A ( 25 nos . from king & Sons and 10 nos from MICO Manufacturing Limited ). To record this Excise Opening Stock balance, you need to follow the below procedure: Go to Gateway of Tally > Inventory Info > Excise Opening Stock 1. 2. 3.
Enter the purchase Invoice Number of the Stock Item in the field Supplier Invoice No.
1. 2.
Select the Party’s A/c Name from the List of Ledger s
3.
Enter the Party details in the Party Details sub form
4.
Accept the above screen and select the Nature of Purchase from the list
4.
5.
Select the Purchase Ledger from the List of Ledger s
6.
Select the Stock Item from the List of Excise Stock Items for the Item Allocations screen to appear
7.
Enter the Purchase Quantity in the field Quantity , i.e. quantity purchased from the supplier
8.
Enter the purchase Rate
8.
9.
Accept the above screen and the Excise Details screen to appear
9.
10.
Enter the Supplier Invoice Number and Supplier Invoice Date
11.
Enter the PLA RG 23 Sl. No. if any
12.
Enter the Quantity on hand in the field Excise Opening Stock and accept the Excise Dealer sub form
N o t e : For accepted.
accurate
Duty
calculations
,
all
the
fields
in
the
above
screen
have
to
be
13.
Accept the above screen
Similarly, the Excise Details sub form for the Stock Item purchased from MICO Manufacturing Limited appears as shown
The Excise Opening Stock appears as shown
N o t e : The Excise Opening Stock affect your Book of s. They Book .
voucher is an o p t i o n a l voucher, can be viewed under Exception
which will not Reports and D a y
Creating an Excise Purchase Invoice
The Voucher Types created should be used for all the purchase and sales entries of Excise transactions. The Excise feature s Multi Currency and Voucher Class. Go to Gateway of Tally > ing Vouchers > Select F9: Purchase
1. Select the Excise Purchase as the Voucher Type from the list of Voucher types in the Invoice mode. 2. Select Item Invoice on the right side of the screen 3. Enter the Supplier Invoice No. and Date 4. Select the appropriate Party’s A/c Name from the list displayed The Party Details sub-form will appear as shown
5. Supplier’s Details This section will include the Consignee and supplier details like the details, Sales Tax number and the Excise registration details. The details will appear automatically if they are provided during the Supplier Ledger Creation. N o t e : The Consignee Consignee Names in
and F12:
the Supplier Configuration
details appear is enabled
if
Allow
separate
Buyer
and
6. Manufacturer/Importer Details If your supplier is not a Manufacturer , enter the name , address , Excise registration details Invoice number and date of Invoice , of the Supplier Manufacturer /Importer. If you are not a Self Importer, you can enter the respective company details. After entering the above details, the ing Voucher Creation screen re appears.
7.
7. Select the Nature of Purchase from the list of Nature of Purchase . This field defines the Supplier’s role in selling the product to us. Agent of Manufacturer is selected when the supplier is an agent of the manufacturer and the goods is directly sold from the manufacturer to the buyer. The buyer is a First Stage Dealer. In this case the excise invoice may be issued by the manufacturer or the agent. First Stage Dealer is selected when the goods are directly purchased from the First Stage Dealer. In this case the excise invoice is issued by the First Stage Dealer. Importer is selected when the goods are directly self imported. In this case the invoice is issued by the exporter. Manufacturer is selected when the goods are directly purchased from the manufacturer. In this case the excise invoice is issued by the manufacturer. Purchase from Importer is selected when the goods are purchased from the importer. In this case the invoice is issued by the importer. Second Stage Dealer is selected when the goods are purchased from the Second Stage Dealer. In this case the invoice is issued by the Second Stage Dealer.
N o t e : By default the Nature of Purchase above field which can be changed.
selected
in
the
Party
Ledger
appears
in
the
8. Select the Purchase Ledger. 9. Select the VAT/Tax Class from the list. 10. Select the Stock Item from the List of Stock Items table to display the Excise Details (Excise Allocations) Screen. N o t e : The List enabled
of
Stock
Items
displayed
will
list
the
Stock
Items
11. Select the Name of the Item and the Item Excise Allocations Screen appears.
12. Enter the Order Number , if any 13. 14.
with
Excise
feature
12. 13. Enter the Quantity and Rate 14. Accept the Item Allocation Screen for the Excise Details sub-screen for the stock item will appear.
16. The Supplier Invoice No. is automatically captured from the Ref field in the Voucher entry screen. However, it is an editable field. N o t e : The Supplier Invoice No. is mandatory and can be alphanumeric. If the Ref No. is not entered in the Voucher creation screen, then the Supplier Invoice No. field by Default will appear as Not Applicable and the cursor remains in the field until a valid number is entered. The Supplier Invoice Date is mandatory. The date has to be same or lesser than the Voucher date.
17. The Supplier Invoice Date and the Assessable Value is automatically captured. However, the above fields can be edited. Ensure that the Supplier Invoice Date is same as the Excise Purchase Invoice date. Any additional cost apart from basic value falling under the purview of Excise can also be included in the Assessable Value field.
18.
18. Enter the PLA RG Number , if any 19. The Type of Duty and the Rate of Duty defaults, as specified in the Item Masters Creation screen Note:
The
entries
for
the
Excise
Duty
have
to
be
ed
in
20. Accept the Excise Details sub screen for the Voucher Entry screen to reappear.
21. Select the required Excise Duty Ledgers 22. Accept the Invoice to Save
Invoice
mode
only.
Creating a Non Excise Purchase Invoice for Excise Stock Item
Go to Gateway of Tally > ing Vouchers > Select F9: Purchase 1. Select the Purchase Voucher from the List of Voucher Types . 2. Enter a Reference Number in the Ref field if required. 3. Select the appropriate Party’s Name from the list displayed. 4. Enter the details in the Party Details sub form. 5. Select the Purchase Ledger for the Ledger Allocation. 6. Select the Excisable Stock Item from the List of Items table.
Note :
The
list
of
items
will
consist
of
E x c i s a b l e and Non
8. The Item Allocation screen appears as shown below.
Excisable
stock
items
8.
9. Specify the Quantity and the Rate of the Stock Item and accept the Item Allocation screen for the Purchase Creation screen to reappear. 10. Enter Narration if required.
10.
12. Accept the voucher to Save .
In the above scenario, credit cannot be ed on the stock item.
Creating an Excise Sales Invoice
To create a Sales Invoice, Go to Gateway of Tally > ing Vouchers > F8: Sales 1.
Select Excise Sales Voucher type from the list of Voucher Types .
2.
Enter the Sales Invoice Number in the No. Field if the Voucher type is set to Manual.
3.
Select the Party’s Ac Name from the list displayed.
4.
The Party Details sub-form appears as below.
Note: The creation.
Buyer's
Details
will
appear
automatically
if
specified
during
the
ledger
5.
Enter the details in corresponding fields and accept the screen to save.
6.
Select the Sales ledger for allocation on returning to the Voucher Entry Screen.
7.
Select the Stock Item from the list of Items.
8.
On selecting the item, the Supplier Details sub-screen for the item appears as shown below.
9.
Select the appropriate purchase from the List of Purchases table. This table lists all the purchases made for the Stock Item .
10.
Upon selecting a Purchase, the cursor skips to Quantity Utilized field. The value in this filed can be altered.
10.
If the Purchased quantity is 100 and the Utilised quantity is 25, it can be specified in the above field. N o t e : If a message 11.
the
utilized
quantity
is
more
the
purchased
quantity,
Tally
warns
you
with
On selecting the second entry, Tally filters the List of Purchases to display the purchases made from the Supplier and the nature of purchase specified in the first entry.
N o t e : The Supplier Details sub-form and one type of purchase only. 12.
than
can
hold
the
details
belonging
to
a
Single
Supplier
After selecting the Supplier Details, the Item Allocation screen for the Stock Item appears. The details are automatically captured from the supplier details sub form. However, the fields can be altered.
12.
13.
Accept the Invoice to save the entry.
14.
Use Alt+P from the Sales Invoice Screen to display the print preview of the Sales Excise Invoice (ISSUE OF INVOICE UNDER RULE 11 OF CENTRAL EXCISE RULES 2002). Set the print configuration for the Sales Excise Invoice by selecting the appropriate buttons
15.
Press Alt+I and accept Yes to print preview the Sales Excise Invoice screen. The preview of Excise Sales Invoice appears as shown below:
The Excise Sales Invoice includes the Sales details of the Stock item sold, like the Quantity , Rate and Amount . The Excise Duty ed on credit information will contain Assessable Value, Rate of Basic Excise Duty, Rate of Cess and Cess amount is printed in this section. To print the Purchase details and Excise duty breakup in the Excise Sales Invoice , click on F12: Configure .
Set Print Trader Supplier info to Yes . Setting this option to Yes , the Excise details of the Stock item are printed in the Invoice with supplier and Manufacturer’s Excise details and Invoice No . and Date of Purchase . The preview of the Excise Sales Invoice appears as shown below. The Invoice can be printed in only.
Neat Format
The Excise Sales Invoice will include the Supplier and the Manufacturer’s details and the Customer details. This invoice provides you with the Purchase and Sales details of the Excise Stock Items , along with the Excise Duty paid on the Products. In the above screen, it is assumed that the Excise Stock Items are purchased from a First Stage Dealer . Hence, the Sales Excise Invoice is titled as Second Stage Dealer , which indicates the stage of this Transaction. The title of Excise Invoice printing will be as follows: If the Stock Items are purchased from a Manufacturer/Importer , then the sales invoice for that item will print as First Stage Dealer . If the Stock Items are purchased from a First Stage Dealer , then the sales invoice for that item will print as Second Stage Dealer . If the Stock Items are purchased from a Second Stage Dealer , then the Sales Invoice for that item will print as Second Stage and Subsequent Dealer . The Sales Excise Invoice prints the VAT/CST/ST registration details, captured from Company Creation Screen. Range/Code, Division / Code, Commissionerate The details specified in the Excise Details sub form of the Statutory & Taxation of F11: Features is printed in the corresponding fields. Buyer/Consignee details The Buyer/Consignee details specified in the Party Details sub form is printed in this field. The details will also include the corresponding Excise and Tax registration details.
Sales Section This section will print the Excise Stock Items sold. It displays the Quantity , Rate and the total Amount of the Stock Items sold. Excise Duty ed on credit information will contain Description of goods , Assessable Value , Rate of Basic Excise Duty , Rate of Cess and Cess amount is printed in this section. If the quantity of Stock Items sold is less than the purchased quantity, then the proportionate Assessable Value of item is captured along with the Rate of Duty of Item and Education Cess from the Purchase Invoice. The Amount of Excise Duty and Amount of Cess is printed in words. N o t e : Similarly, are printed.
VAT Declaration
if
there
is
more
than
one
type
of
duty,
then
the
breakup
of
the
duties
The VAT Declaration is printed if the VAT ledgers are allocated in the sales entry.
Purchase Section This section prints the purchase details of the Stock Items . The Supplier details like the Name and Address along with the Excise Registration details, of the Manufacturer/Importer , First Stage or the Second Stage Dealer is printed in this field. It also prints the Purchase Invoice number and the Date of the Purchase invoice issued by the Supplier and the Manufacturer. The Invoice will also print the PLA RG Serial numbers. The Excise Duty Section will list the Description of Goods , Tariff Classification number of the Stock Item and the Quantity of the Stock Item purchased. The Rate of Basic Excise Duty , Assessable Value , Duty per Unit , Total Duty Amount and Ed Cess amount is captured from the corresponding Purchase Entry. Note : Excise Sales Invoice as per Rule 11 should be a single page document. Therefore, it is recommended to use a maximum of Six Stock items and one ledger an A4 size paper and seven stock items and one ledger on Legal size paper. The preview of a Sales Invoice for an Import transaction appears as shown.
on
N o t e : The Excise Transaction .
Sales
Invoice prints an I m p o r t D e c l a r a t i o n for an I m p o r t
Creating a Sales Invoice without ing Excise Duty
Tally allows you to sell an Excise Stock Item using an Excise Sales Invoice or Standard Commercial invoice where duty is not ed on to the buyer. For Example : Assume that you have 20 nos of Excisable Stock Item You can sell both 10 nos of Excisable Stock Item and 5 nos of Non Excisable Stock Item in a single sales invoice. The above example can be entered in a single Sales Invoice screen as displayed below: 1.
Go to Gateway of Tally > ing Vouchers > F8: Sales
2.
Select Sales Invoice from the Voucher Types
3.
Enter the reference number in the Ref field
4.
Select the Party’s A/c name from the List of Ledger s
4.
5.
Select the Sales ledger for ledger allocation.
6.
Select the Stock Item from the List of Stock Items table to display the Supplier Details sub form .
6.
7.
The Purchase entries ed for the Stock Items using an Excise Purchase Voucher Type is displayed in the List of Purchases table.
8.
Select the Purchase entry from the list.
N o t e : If you do not wish the item, you may select Not item allocation screen . 9. 10.
to
select the purchase transaction with Excise duty value for Applicable , and then specify the Item quantity in the
On selecting the entry, specify the quantity to be sold in the Quantity Utilized field. You can select the purchase entries belonging to different Party’s in the same sub form.
10.
11.
Accept the above screen for the Item Allocations screen to appear.
12.
If the above Stock Item is not Excisable , then specify the same in Quantity field of the Item Allocation screen.
12.
Note: 13.
In
the
above
screen,
Accept the screen to Save .
10
items
are
E x c i s a b l e and 5 items are Non
Excisable .
13.
Creating an Excise Debit Note
Go to Gateway of Tally > ing Vouchers > Debit Note (Ctrl + F9) 1.
Select the Debit note created for Excise from list of Voucher Types.
2.
Enter the Ref number in the Ref field.
3.
Select Party’s A/c Name from the list of ledger s
4.
Specify the required details in Party details sub form.
5.
Select the Purchase ledger for allocation
6.
Select the Item from the list of Excise Stock Items
7.
The Excise Details sub form for the Stock Item appears.
7.
8.
Select the Purchase Invoice from the List of purchases .
9.
The cursor then skips to Quantity Return field. Specify the quantity to be returned to the supplier.
10.
Accept the above screen for the Item Allocation screen to appear.
11.
Accept the Debit Note to save the entry.
11.
Creating an Excise Credit Note
Go to Gateway of Tally > ing Vouchers > Credit Note (Ctrl + F8 ) 1.
Select the Credit Note created for Excise from the List of Voucher Types
2.
Enter the Ref number in the Ref. field.
3.
Select the Party’s A/c Name
4.
Enter the corresponding details in the Party Details .
5.
Select the Sales ledger to be allocated.
6.
Select the Name of the stock item from the list of Excise Stock Items
7.
The Supplier Details sub form for the Stock Item is displayed
7.
8.
Enter the Sales Invoice Number issued to the customer.
9.
The Sales Invoice Date is automatically captured.
10.
The corresponding Purchase Invoices are listed and select the purchase invoice from the list of Purchases.
11.
Enter the Quantity returned.
12.
The Credit Note screen reappears, the rate and the amount is automatically captured.
13.
Accept the screen to save.
13.
Creating a Non Excise Credit Note
Go to Gateway of Tally > ing Vouchers > Credit Note or Ctrl + F8 1.
Select default Credit Note from the List of Voucher Types .
2.
If an Excise Credit Note is selected, then Tally prompts you with the following message.
Therefore, only a default Credit Note has to be ed against a default Sales Invoice . 3.
Enter the reference number in the Ref field if required.
4.
Select Party’s A/c Name
5.
3. 4. 5.
Enter the corresponding details in the Party Details sub form
6.
Select the Sales ledger to be allocated.
7.
Select the Stock Item from the List of Stock Items to display the Supplier Details sub form.
8.
The Supplier Details sub form will list the purchases for Excise Stock Items only, and hence will not list the Purchases. The Non Excisable Stock Item can be allocated in the Item Allocation screen
9.
If the Excisable Stock Items are returned, then the quantity has to be entered in the above screen by selecting the appropriate Purchase from the table.
10.
If the Non Excisable Stock Items are returned, then select Not Applicable in the above screen.
11.
The Item Allocation screen appears as shown below.
11.
13.
Enter the returned Quantity .
14.
On accepting the Item Allocation screen, the Credit Note screen reappears.
14.
Excise Reports
To view Excise Reports Go to Gateway of Tally > Display > Statutory Reports > Dealer Excise Reports
The Dealer Excise Reports menu consists of
Excise Stock Excise Purchase Bill Form RG 23D
Form 2
Sales And Purchase Extract
Excise Stock
Every ed Dealer has to maintain Stock recording the daily receipt and issue of Excisable goods ready for inspection by the officers of the department. The Excise Stock in Tally gives the purchase and sales information. It has two sections, which are, the Receipt section for Purchases and Issues section for the Sales/Debit Note/Credit Note details. Go to Gateway of Tally > Display > Statutory Report > Dealer Excise Reports> Excise Stock Select the Stock Item from the list of items to view the report.
The above screen lists the Purchase details.
Receipt
Invoice No. /Date: The number given to the Invoice . Name and Address of the Supplier: The field displays the Name and the Address of the Supplier . Nature of Purchase: Lists the Nature of Purchase as specified during the Invoice Entry. Quantity: Quantity purchased. Rate: The Rate at which the item is purchased. Assessable value: The Total Assessable Value of the product. Duty per Unit: The Total Duty amount divided by quantity is printed in this field. Total Duty: The Total Duty for the Stock Item is displayed in this field. This field captures the total Duties paid. Cess per Unit: Excise Cess per item is displayed. Total Cess: Total Cess on the total Quantity of the Stock Item.
Issue The Issue/Debit Note/Credit Note details in the Excise Stock are specified in the screen below.
The F6: Date button lists all the Purchase and Sales transactions for a specified period. Toggle to F6: Purchase Date button to list the Excise Sales/ Excise Credit Note/ Excise Debit Note transactions, for the purchase bills as specified in the Purchase date range. Duty Details Duty ed On/Duty not ed on : This row displays the details of the Stock Items on which the duty is ed or not ed. Balance Duty : The Balance available Duty Amount to be ed on is displayed in this field. Issued Quantity : The Total Quantity of Items Sold/Returned is displayed in this field. Total Duty : This Field displays the Total Duty utilized in whole or proportionate to the Quantity Issued/Returned . The return inward quantity is displayed in negative. Total Cess : The Total Cess Amount utilized is displayed in this field. Use Alt +F1: Detailed to get a detailed Report. The detailed Excise Stock appears as shown below.
Vch Type/Invoice No./Date/: The Document type, Invoice number and date as specified in the Sales/Credit Note/Debit Note Invoice is displayed in this field. An additional column appears. Vch Type/Invoice No./Date: The Document type , Invoice Number and Date as specified in the Sales/Credit Note/Debit Note Invoice are displayed in this field and the Duty Details column displays the Name and Address of the Party . This Column also details the Duty ed On, Duty not ed On and the Balance Duty. Use the Alt + P key or click on the Print option to print your Report. The printed document will appear as shown below.
The preview of the Excise Stock on pressing Alt + F1 is as shown below.
Note:
The
Excise
Stock
can
be
printed
in
Neat
Mode
format
only.
Excise Purchase Bill
The Excise Purchase Bill provides the bill wise details of all the purchase and corresponding sales invoices for each of the purchase invoices.
The consists of two sections Receipt and issue.
Receipt This section details the Purchase details. Invoice No. / Date: This column displays Purchase Invoice number and Date . Particulars : This column displays the Stock Item purchased and its Tariff Number . Name and Address of the Supplier : This column displays the Name and the Address of the Supplier .
Nature of Purchase : This column lists the Nature of Purchase as specified during the Invoice Entry. Quantity : This column displays the Quantity purchased. Rate : The Rate at which the item is purchased appears in this column. Assessable Value : The Total Assessable Value of the item appears in this column. Total Duty : The Total Duty for the Stock item is displayed in this column. Total Cess : The Total Cess Amount calculated on the purchased quantity is displayed in this column.
Issue This section displays the Sales/Credit Note/Debit Note details.
Duty Details Duty ed On / Duty Not ed On: This column displays the Duty details on the quantity sold.
Balance Duty : The Balance Unutilized Duty Amount is displayed in this column. Issued Quantity : The Total Quantity of Items Sold/Returned is displayed in this column. Total Duty : This column displays the Total Duty Utilized in whole or proportionate to the quantity Issued/Returned . Total Cess : The Total Cess Amount utilized on the Stock items Issued/Returned On using Alt + F1: Detailed , an additional column displays the Voucher details column.
Vch Type/ Invoice No. / Date : This column displays the details of the Voucher entries ed. Name and Address of the Party : On selecting Alt +F1 the Duty Details column displays the Name and address of the Party . F2: Period displays all the Purchase entries corresponding to the date specified. The preview of the Excise Purchase Bill appears as follows
The preview of the Excise Purchase Bill on pressing Alt + F1 is as shown below.
Form RG 23D
Form RG 23D details the Excise purchases and the corresponding Sales transactions . The preview of Form RG 23D prints as shown.
Invoice No. /Date : The Purchase Invoice number and the date are displayed in this field. PLA RG23 Sl. No. : The PLA RG23 serial number for the Purchase Invoice is printed in this field Name and Address of Manufacturer/ Importer including Central Excise Regn No/ Range/ Division/ Commissionerate The Manufacturer/ Importer details entered in the Party details sub form of the Purchase voucher is printed in this field. Quantity : The quantity of items purchased is printed in this field. Rate : The rate of the Stock Item purchased is printed in this field. Assessable Value : The Assessable Value of the Stock Items is printed in this field. Duty per Unit : The Excise Duty paid per unit is printed in this field. Excise Duty : The Excise Duty calculated on the Assessable Value is printed in this field. Edn Cess per Unit : The Education Cess paid per unit is printed in this field. Education Cess : The total Education Cess paid is printed in this field. Sec Edn Cess per Unit : The total amount of Secondary Education Cess paid per unit is printed in this field. Secondary Education Cess : The total amount of Secondary Education Cess paid is printed in this field. Total Duty : The Total Duty paid is printed in this field. Duty ed on This row lists the Excise duty ed on to the corresponding Excise Sales
Form - 2
Every ed dealer is required to submit a return as per Excise Rules 2002 every quarter in Form - 2 Go to Gateway of Tally > Display > Statutory Reports > Dealer Excise Reports > Form – 2 In the Form - 2 printing screen, Press Backspace and specify the From date and To date
Form - 2 displays the details of the Stock item with the maximum duty value. To configure Form – 2 to show details of all stock items, from the above printing configuration screen press F12: configure and set Show All Items to Yes
Form - 2 is divided into two sections. The Issue/ Sales section and the Receipt / Purchase section. The preview of Form - 2 , Issue/ Sales section appears as shown.
Press Pg Down to view the Receipts/ Purchase section,
Note: of the
For invoices Stock item
with with
more than one Stock item entries, Form the maximum duty component value.
-
2
captures
the
1. Name of the First Stage/Second Stage Dealer: The name of your company is printed in this field. 2.
3.
details
1. 2. Excise Registration Number: The Excise Registration Number of your company, specified in the F11: Features screen is printed. 3. Address: The address of your company specified in the Company Creation screen is printed in this field. 4. Particulars of Invoice issued by First Stage / Second Stage Dealer This section will list the Sales Invoices. Invoice Number with Date : The Date and the Invoice Number is printed in this field. Description of the Goods : This column list the Stock Items sold Central Excise Tariff Heading : The Tariff Number of the Stock Items are printed in this column. Quantity : The total number of Stock items sold is printed in this column. Amount of Duty : The total amount of Excise Duty ed on for the Stock Item is printed in this column. Amount of Ed Cess : The total amount of Education Cess ed on for the Stock Items is printed in this column. Amount of Sec Ed Cess : The total amount of Sec Education Cess ed on for the Stock Items is printed in this column.
5. Particulars of the Documents based on which the credit is ed on Invoice / Bill of Entry Number with Date : The Purchase Invoice number and date is printed in this field. Name and Address of the First Stage /Second Stage Dealer : This column displays the First Stage /Second Stage Dealer details specified in the Purchase Entries. Name and Address of the Manufacturer / Importer : This column displays the Manufacturer / Importer details specified in the Purchase Entries. Description of the Goods : The description of the goods is printed in this column. Central Excise Tariff Heading : The Tariff the number of the Stock Items are printed in this column Quantity : The quantity of goods purchased is printed in this column. Amount of Duty : The total duty paid on the Stock Items is calculated in this column. Amount of Ed Cess : The total amount of Education Cess paid on for the Stock Items is printed in this column. Amount of Sec Ed Cess : The total amount of Sec Education Cess ed on for the Stock Items is printed in this column.
Sales and Purchase Extract
Excise Sales and Purchase Extract report displays the details of purchase and sales transactions of all excisable goods (Excise Invoice as well as Commercial Invoice). Go to Gateway of Tally > Display > Statutory Reports > Dealer Excise Reports > Sales and Purchase Extract In the Sales and Purchase Extract printing screen, Press Backspace and specify the From date and To date
The preview of Sales and Purchase Extract appears as shown.
Press Pg Down
1. Name of the First Stage/Second Stage Dealer: The name of your company specified in the Company Creation screen is printed in this field.
2. Excise Registration Number: The Excise Registration Number of your company, specified in the F11: Features screen is printed.
3. Address: The address of your company specified in the Company Creation screen is printed in this field.
4. Particulars of Invoice issued by First Stage / Second Stage Dealer This section will list the Sales Invoices. Invoice Number with Date : The Date and the Invoice Number is printed in this field. Description of the Goods : This column list the Stock Items sold Central Excise Tariff Heading : The Tariff Number of the Stock Items is printed in this column. Quantity : The total number of Stock items sold is printed in this column. Amount of Duty : The total amount of Excise Duty ed on for the Stock Item is printed in this column. Amount of Ed Cess : The total amount of Education Cess ed on for the Stock Items is printed in this column. Amount of Sec Ed Cess : The total amount of Sec Education Cess ed on for the Stock Items is printed in this column.
5. Particulars of the Documents based on which the credit is ed on Invoice / Bill of Entry Number with Date : The Purchase Invoice number and date is printed in this field. Name and Address of the First Stage /Second Stage Dealer : This column displays the First Stage /Second Stage Dealer details specified in the Purchase Entries.
Name and Address of the Manufacturer / Importer : This column displays the Manufacturer / Importer details specified in the Purchase Entries. Description of the Goods : The description of the goods is printed in this column. Central Excise Tariff Heading : The Tariff the number of the Stock Items are printed in this column Quantity : The quantity of goods purchased is printed in this column. Amount of Duty : The total duty paid on the Stock Items is calculated in this column. Amount of Ed Cess : The total amount of Education Cess paid on for the Stock Items is printed in this column. Amount of Sec Ed Cess : The total amount of Sec Education Cess ed on for the Stock Items is printed in this column.
Introduction
GST stands for Goods and Service Tax. A person is required to for GST when his annual taxable supplies exceed or are expected to exceed S$1 million. However, a person may apply for voluntary registration even if his taxable supplies do not exceed S$1 million. Once he has ed voluntarily, he is required to remain ed for at least 2 years. Inland Revenue Authority of Singapore: The IRAS holds the responsibility of collecting GST. A Comptroller is appointed for the istration of the GST Act.
GST Classes
Supply The GST Act defines supply as including "all forms of supply done for a consideration". A supply includes a sale of goods or rendering of service. It can be either taxable (standard-rated or zero-rated), exempt or outside the scope of GST.
Taxable supply A taxable supply is a standard-rated or zero-rated supply. GST incurred by a GST ed person on his business purchases is recoverable from the Comptroller as input tax credit if the purchase is for the making of taxable supplies.
Types of GST Classes Standard-Rated supply Standard-rated supply is the supply of goods or services made in Singapore. GST is chargeable at the rate of 5% on the value of the supply.
Zero-Rated supply Zero-rated supply is the export of goods or the rendering of international services. GST is chargeable at the rate of 0% on the value of supply.
Exempt supply Exempt supply can be the sale/ lease of a residential property or certain financial activities as stated under the Fourth Schedule of the GST Act. GST is not chargeable on Exempt supply. Generally, any GST incurred in making Exempt supplies cannot be claimed as input tax.
Combined This is a special feature offered by Tally to different Types of GST Classes in one single entry. For instance, you can first a Purchase/ Sales entry by selecting the GST Type as Combined and then assign more than one GST Type in the voucher. Refer to the topic ' Entries Using Combined GST Type'.
Out-Of-Scope supply When you have make a supply of goods which are delivered from a place outside Singapore to another place outside Singapore without ing through Singapore, such supplies are treated as out of scope supplies for GST purposes. Accordingly, you are not required to charge GST on the supplies.
Imports Imports are goods removed from a place outside Singapore and brought into Singapore. GST is chargeable on the importation of goods into Singapore. It is collected by the Singapore Customs at the point of importation, regardless of whether the person is GST ed or not. However, GST will not be payable when a person is granted relief under the GST (Imports Relief) Order or is an approved traders under the Major Exporter Scheme, or the Third Party Logistics (3PL) Company Scheme.
GST Flow
GST is charged on the value of the supply of goods and services whenever the time of supply is triggered. The value of the supply can be for a consideration in either money or open market value of the supply. If the value is for a consideration in money, the value of supply is determined as follows: Value of supply + GST = Consideration If the supply is not for a consideration in money or is for a consideration not wholly consisting of money, then the value of the supply will be its Open Market Value (OMV).
Open Market Value OMV is the price (exclusive of GST) that the goods or services would fetch at the time when they are supplied between two unrelated persons.
GST Glossary Taxable Person: A Taxable Person is a person who is ed or required to for GST. A The term includes an individual, a partnership, a company, a club, an association, a society, a management corporation or a non profit organisation. Input Tax: Input Tax is the GST paid on your business purchases. You can claim Input Tax Credit from IRAS. Output Tax: Output Tax is the GST collected or absorbed by a GST ed person on the sale of goods or provision of services. It is the GST payable to IRAS.
Filing GST Returns
Form GST F5 is the return that a GST ed person has to submit at regular intervals. A GST ed person s for the output tax collected and claims the input tax incurred in this return. Form GST F5 is issued to a GST ed person on a quarterly basis i.e. once in 3 months . A GST ed person receives the Form GST F5 in the last month of each quarter. If he opts for a monthly ing period, then Form GST F5 is sent to him on a monthly basis. Form GST F5 must be completed and submitted to the Comptroller not later than 1 month after the end of the prescribed ing period. For example, if Form GST F5 is issued to you for the prescribed ing period from 1 January 2006 to 31 March 2006 , you need to furnish the duly completed and signed return to the Comptroller by 30 April 2006 .
Prescribed ing Periods Cycle A
Cycle B
Cycle C
01 January to 31 March
01 February to 30 April
01 March to 31 May
01 April to 30 June
01 May to 31 July
01 June to 31 August
01 July to 30 September
01 August to 31 October
01 September to 30 November
01 October to 31 December
01 November to 31 January
01 December to 28/29 February
Other GST Transaction Forms Form GST F7 Form GST F7 is a return that a GST ed person can use to rectify any error made in Form GST F5 .
Form GST F8 This is the final GST return that you need to file before you are de-ed from GST.
Payment of GST Payment refers to the amount of tax payable by a GST ed person. It must be made within 1 month after the end of the ing period. However, if you are under the GIRO scheme, an electronic direct debit mechanism, your tax payable will be deducted from your bank on the 15th day of the month after the due date for submission of Form GST F5 . For example, if you have filed Form GST F5 for the prescribed ing period from 1 January 2006 to 31 March 2006 before 1 May 2006 , your tax payable will be deducted from your bank on 15 May 2006 .
Enabling GST in Tally
Creating a Company Go to Gateway of Tally > Alt+F3 > Create Company
Enter the details of the Company Select the country from the List of Countries , in the field Statutory Compliance for
Enabling GST in F11: Features
Go to Gateway of Tally > Select F11: Features > Statutory & Taxation
Set Prepare & Follow Singapore Style GST Returns to Yes Enter the GST Registration Number and the Company Registration Number
Creating a Party Ledger
1.
Go to Gateway of Tally > s Info > Ledgers > Create
2.
In the Ledger Creation screen enter the name of the GST ledger in the Name field
3.
In the Under field, select Sundry Creditors from the List of Group s
4.
Set Maintain Balances Bill by Bill to Yes
5.
The option, Inventory Values are affected is set to No by default. Set this to Yes if applicable
6.
5. 6.
Accept the screen to s ave
Customer ledgers can be created in a similar manner.
Creating a Tax Ledger
1.
Go to Gateway of Tally > s Info > Ledgers > Create
2.
In the Ledger Creation screen enter the name of the GST ledger in the Name field
3.
In the Under field, select Duties & Taxes from List of Groups
4.
Set Inventory Values are affected to No
5.
Set the Percentage of Calculation to 5%
6. 7.
5. 6.
Select the Method of Calculation from the Type of Duty menu
7.
Select GST Deductible – Input Tax from the GST Type menu in the GST Type field.
8.
Accept the screen to s ave .
You can similarly create a ledger for GST Output , by selecting GST Type as GST Payable – Output Tax .
Creating a Purchase Ledger
To create ledgers under the Purchase s group 1.
Go to Gateway of Tally > s Info > Ledgers > Create
2.
Enter a name for the Purchase ledger in the Name field
3.
In the Under field select Purchase s from the List of Groups
4.
Set Inventory Values are affected? to Yes if you maintain inventory
5.
Set the field GST Applicable? to Yes under Statutory Information
6.
6.
Accept the screen to Save
Sales ledgers can be similarly created.
Creating an Expense Ledger
To create ledgers under the Expenses s group 1.
Go to Gateway of Tally > s Info > Ledgers > Create
2.
Enter a name for the Expenses ledger in the Name field
3.
In the Under field select Indirect Expenses from the List of Groups
4.
Set Inventory Values are affected? to Yes if applicable
5.
Set GST Applicable? to Yes under Statutory Information
6.
6.
Accept the screen to save.
You can, similarly create ledgers for Sales s, Expenses s, Fixed Assets, Liabilities and Income s under the respective groups.
Creating a Stock Item
1.
Go to Gateway of Tally > s Info > Ledgers > Create
2.
Enter a name for the Stock Item in the Name field
3.
In the Under field select Primary from the List of Groups
4.
Select the Units
5.
Enter the Rate of GST
6.
Accept the screen to save
Creating a Payment Voucher
1. Go to Gateway of Tally > ing Vouchers > Select Payment (F5) 2. Select Cash for the to be debited 3. Select the required GST Type , for example, Standard Rated 4. Select the ledger Stationery Expenses from the List of Ledger s 5. Select the ledger GST Input from the List of Ledger s
6. 7.
6. Enter the Narration 7. Accept the voucher to s ave .
You can similarly create payment entries for different GST Types. However, GST is chargeable on Standard Rated only. Refer GST Classes . N o t e :The above entry can be created, then the ledger allocated A p p l i c a b l e ledger only.
created for a
using Classes. If a Voucher Type Class
Voucher Type should be a
Class GST
is
Creating a Purchase Voucher
1. Go to Gateway of Tally > ing Vouchers > Purchase (F9) 2. Enter the reference for the voucher in the Ref field 3. Select the Party’s A/c Name from the List of Ledger s 4. Select the Purchase Ledger 5. Select the GST Type (Standard Rated ) from the List of GST Type 6. Select the Name of the Stock Item from the List of Items 7. Enter the appropriate Quantity and Rate and the amount is displayed in the Amount field 8. Select the GST Input ledger from the List of Ledger s
8.
When the payment is made, the GST Type should be set to Not Applicable , as the Purchase Voucher is booked to include the GST Input. The Payment entry should be ed as follows.
Creating a Sales Voucher
1. Go to Gateway of Tally > ing Vouchers > Select Sales Voucher (F8)
2. Enter the reference in the Ref field 3. Select the Party’s A/c Name from the List of Ledgers 4. Select the Sales A/c Ledger 5. Select the GST Type from the List of GST Types 6. 7.
5. 6. Select the Stock Item from the List of Stock Items 7. Select the ledger GST Output from the List of Ledgers 8. Enter the N arration if required 9. Accept the Voucher to s ave
On receipt of payment, a payment entry has to be ed without allocating the Tax ledger and GST Type.
Creating an Exempt Purchase Voucher
A GST Exempt Purchase Voucher can be created by selecting the GST type as Exempt . To create an Exempt Purchase Voucher , 1. Go to Gateway of Tally > ing Vouchers > Select Purchase Voucher (F9) 2. Enter the Reference for the voucher in the Ref field 3. Select the Party’s A/c Name from the List of Ledger s 4. Select the Purchase ledger 5. Select the GST Type (Exempt ) from the List of GST Type 6. Select the Name of the Stock Item from the List of Items 7. Enter the appropriate Quantity and Rate and the amount displayed in the Amount field. 8. Enter Narration, if any 9. Accept the voucher to s ave
9.
N o t e : If you select a GST Ledger GST Not Allowed .
in
the
above
entry,
Tally
displays
the
error
message
Creating a Sales Voucher Using Combined GST Type
Tally provides you with a new GST Type called Combined , which allows you to allocate Stock Items to different GST Types in one single entry. 1.
Go to Gateway of Tally > ing Vouchers > Select (F8) Sales > Select Voucher mode
2.
Enter the reference number in the Ref field.
3.
Select Combined as the GST Type from the list
Note : A/c for
In an Invoice mode, Item Allocation in
the option C o m b i n e d appears only F12: Configure is set to N o .
if
Use
Common
4.
Debit the Party ledger from the List of Ledgers
5.
Enter the amount in the Amount field
6.
Credit the Sales ledger
7.
Select the Name of the Item from the List of Stock Items in the Inventory Allocation screen
8.
Enter the Quantity to be sold
9.
Enter the Rate for the Voucher Entry screen to reappear
Ledger
9.
10.
Select the GST Type (Example: Exempt ) from the List of GST Types .
11.
Credit the Sales ledger from the List of Ledger s to allocate the remaining value
12.
Specify the Stock Item , Quantity and R ate in the Item Allocation screen
13.
Select the GST Type (e.g. Standard Rated) from the list
14.
Credit the GST Output ledger to allocate the tax amount
15.
The Bill Wise Details sub screen displays as shown below.
15.
16.
Select Agst Ref as Type of Ref
17.
Select Pending Bill from the List of Pending Bills
18.
Accept the above screen for the Voucher Entry screen to reappear
19.
Enter the Narration if any
19.
20.
Accept the screen to save
Purchase vouchers using different GST Types can be created in a similar manner.
Reports
To view the GST Reports, Go to Gateway of Tally > Display > Statutory Reports
GST Reports consist of GST Analysis GST Return – F5
GST Analysis
The GST Analysis report gives details on the Total of all Purchase and Sales transactions, ed using different GST Types .
Supplies/Incomes (Output Tax) This section displays the total sales amount on each GST Type .
Combined The total sales amount calculated on different GST Types using a Combined class displays in this column.
Standard Rated
The total sales amount on all the transactions ed using the Standard Rated GST Type, is calculated and displayed is this column.
Zero Rated The total sales amount on all the transactions, ed using the Zero Rated GST Type, is calculated and displayed is this column.
Exempt The total sales amount on all the transactions, ed using the Exempt GST Type, is calculated and displayed is this column.
Out-of-Scope The total sales amount on all the transactions ed using the Out-of-Scope GST Type is calculated and displayed is this column.
Purchases/Expenses (Input Tax) This section displays the total purchase amount on each of the GST Types mentioned above.
Import Under MES The total purchase amount on all the transactions, ed using Imports under MES GST Type is calculated and displayed is this column.
Gross Amount This column displays the total sales/purchase amount in each of the GST Types .
GST Amount This column displays the total GST amount on each of the GST Types .
GST% This column displays the Percentage of GST . The GST Analysis report also calculates and displays the Net GST to be claimed from IRAS . Use Alt + F1 to view a detailed GST Analysis .
GST Return F5
GST Return F5 is a statutory report which has to be filed every quarter.
Box 1 displays the total value of Standard Rated sales. Box 2 displays the total value of Zero Rated sales. Box 3 displays the total value of Exempt sales. Box 4 displays the sum of Box 1, 2 and 3 . Box 5 displays the total value of Taxable Purchases . Box 6 displays the Output Tax due on the sales. Box 7 displays the Input Tax and the Refund Claimed Box 8 displays the Net GST to be paid to IRAS (if Output Tax is greater than Input Tax ) or to be claimed from IRAS (if Input Tax is greater than Output Tax ). Box 9 displays the total value of the goods imported under the scheme.
Introduction
Sales Tax in Malaysia is a single stage tax imposed in proportion to the value of certain imported and locally manufactured goods. Under the Sales Tax Act 1972, Sales Tax is istered by the Royal Customs and Excise Department of Malaysia. The Financial Year is 1st January to 31st December. Manufacturers need to be licensed under the Sales Tax Act 1972, a Federal Act, and are obligated to levy charge and collect the tax from their customers. Sales tax, for imported goods, is collected from the importer, at the time of release of goods from customs. The Sales Tax levy is applicable to the entire Federation of Malaysia, except Labuan, Langkawi, Tioman, Free Zones and Licensed Manufacturing Warehouses.
Information on Sales Tax
Taxable Goods Under the Sales Tax Act , 1972, except those goods which are specifically exempted by order of the Minister of Finance, all goods manufactured domestically or imported into Malaysia are taxable. The term ‘manufacture of goods other than petroleum’ means the conversion of organic or inorganic materials, by manual or mechanical means, into new products by changing their size, shape or nature. It includes the assembly of parts into machinery or other products, but does not include the installation of machinery or equipment for the purpose of construction. In relation to petroleum, the term ‘manufacture’ means refining or compounding, and includes the addition of foreign substances.
Goods Exempted from Sales Tax Live animals, fish, seafood and certain essential food items including Meat, milk, eggs, vegetables, fruits, bread and so on. Medical and educational equipment including sports equipment, Books, and so on. Photographic equipment and films Motorcycles below 201 c.c. capacity, bicycles for adult use including Parts and Accessories Machinery for textile industry, food industry, paper and printing industry, construction industry, metal industry, and so on Primary commodities including cocoa, rubber and their related Products Naturally occurring minerals, chemicals, etc. Helicopters, aircraft, ships and other vessels Mobile libraries and clinics; computers Books, newspapers and other reading material Building equipment
Exemption from licensing If the total sales value of taxable goods manufactured did not exceed RM100,000 in the preceding year and is not expected to exceed RM100,000 during the next 12 months, the manufacturer may apply for a certificate of exemption from licensing. This certificate is renewable on a yearly basis. However, the manufacturer may choose to apply for licensing in order to enjoy tax-free inputs.
Tax-free Inputs (Raw materials) Raw materials and components (inputs) can be imported or acquired, free of sales tax, by a licensed manufacturer, for use in the manufacturing process in order to maintain the single-stage tax concept.
Flow of Sales Tax
Ring System The Sales Tax Act entitles only the licensed manufacturer and tax exemption license holders to manufacture and sell produce. However, it does not single out the non licensed manufacturers for discrimination. The ring system explained below demonstrates how this is avoided: A Licensed manufacturer can acquire taxable goods, from another manufacturer, free of sales tax A Licensed manufacturer can import taxable goods free of sales tax A Licensed manufacturer can transfer taxable goods to another licensee for completion of manufacture and then acquire them back, free of sales tax. This is basically to solve problems of sub-contracting and farming out A Licensed manufacturer can acquire taxable goods which are deposited or kept in a customs warehouse or a warehouse licensed under Section 65 of the Customs Act free of sales tax A non-licensed manufacturer can import taxable goods on behalf of a licensed manufacturer free of sales tax A non-licensed manufacturer can acquire taxable goods from a licensed manufacturer on behalf of a licensed manufacturer free of Sales Tax
Rate of Tax
Goods
Rate of Tax
Fruits, certain foodstuff, timber and building materials
5%
For all unspecified goods
10%
Cigarettes and tobacco
15%
Liquor drinks
25%
and
alcoholic
Petroleum Products
Rates specified from time to time.
Filing Sales Tax
Except Petroleum Products, the tax period for all goods is 2 calendar months. The tax must be paid to the customs authorities within 28 days of the expiry of the taxable period. The Taxable periods and their due dates are as follows
Tax Period
Due Date
January – February
28th March
March – April
28th May
May – June
28th July
July - August
28th September
September – October
28th November
November – December
28th January of next Financial Year
The taxable period for petroleum products manufactured in Malaysia is one calendar month and tax charged must be paid to the sales tax office within 10 days of the expiry of the taxable period. For petroleum products stored in licensed warehouses, the sales tax is due only when they are released from the licensed warehouse. The sales tax is payable within 10 days of the end of the month in which the sales tax arises.
Penalties The failure to pay the sales tax within the stipulated time attracts penalties as follows.
Period delayed
Penalty
Unpaid after days / 10 days
10%
28
Unpaid for each subsequent period of 30 days
Drawback
10% to a maximum of 50%
Under Section 29 of the Sales Tax Act 1972, all duty-paid goods used as materials for the manufacture of other goods which are subsequently exported, are eligible for drawback of the sales tax in full.
Refund of sales tax on Bad Debts With effect from 1 January 2003, a licensed manufacturer or importer is eligible for a refund of sales tax in relation to debts deemed as bad debts. Bad Debts include debts which cannot be collected after 12 months from the date of payment of tax.
Credit notes In the returns furnished in accordance with Section 19, a licensed manufacturer may deduct the amount of sales tax paid in respect of taxable goods returned by a purchaser, or discounts subsequently given to the purchaser, from the amount of sales tax ed for in the return. The credit note issued by a licensed manufacturer to a purchaser must contain the requisite particulars.
Sales Tax in Tally
Tally offers complete and accurate tracking of sales tax entries. It calculates the sales tax paid on each transaction. It also offers you the flexibility to track part payments received and adjust them with the expenses incurred. The information collated using Tally can be printed in the Government prescribed format.
Enabling Sales Tax in Tally
Company Creation To create a company, Go to Gateway of Tally > Alt + F3 > Create Company
Select Malaysia from the List of Countries in Statutory compliance for field
Enabling Sales Tax in F11: Features To enable Sales Tax in Tally , go to Gateway of Tally > F11: Features >Statutory and Taxation .
Set Enable Sales Tax to Yes . Enter the Sales Tax Registration number. Enter Sales Tax File Numbe r given by the Malaysian Customs and Excise Department
Creating a Party Ledger
To create a Party ledger, go to Gateway of Tally > s Info > Ledgers > Create . 1.
In the Ledger Creation screen enter the name of the company supplying goods to you in the Name field
2.
Select Sundry Creditors in the Under field from the List of Groups
3.
Set Maintain balances bill-by-bill? to Yes . Enter details in the Default Credit Period if set to Yes
4.
Enter the Details of the customer
5.
Enter the Tax Information
6.
4. 5. 6.
Accept Yes to save
Creating a Sales Ledger
To create a Sales ledger, Go to Gateway of Tally > s Info > Ledgers > Create 1.
In the Ledger Creation screen enter the name in the Name Field
2.
In the Under field, select Sales s from the List of Groups
3.
Set Inventory Values are affected? field is set to Yes, if applicable
4.
Set Used in Sales Tax to Yes
4.
5.
Select the Sales Tax Class from the list
N o t e : The Sales Tax Class can also Not Applicable in the ledger creation 6.
Accept the screen to save
Similarly, you can create for Purchase ledgers
be selected screen.
during
voucher
entry,
by
selecting
Creating a Stock Item
To create a Stock Item, Go to Gateway of Tally > Inventory Info > Stock Items > Create 1.
Enter the name in the Name Field
2.
In the Under field, select the group from the List of Groups
3.
Select the Units
4.
Enter the Tariff Code No.
5.
Enter the Rate of Sales Tax
Note: 4.
It
is
mandatory
Accept the screen to save
to
specify
the
Rate
of
Sales
Tax
in
the
above
screen
4.
Creating a Voucher Type to Adjust Sales Tax
A Voucher Class has to be created to claim Sales Tax . The use of class is discussed further. Go to Gateway of Tally > s Info > Voucher Types > Alter > Journal 1.
Set the options to Yes/No as per requirement
2.
Enter the Name of the Class
3.
Set Use Class for Sales Tax Adjustments to Yes
4.
Accept the screen to save
Creating a Purchase Voucher
To create a Purchase Voucher , Go to Gateway of Tally > ing Vouchers > F9: Purchase in the Item Invoice Mode 1.
Enter the reference number in the Ref field if any
2.
Select the Party’s A/c Name from the List of Ledger s
3.
Select the Item from the List of Stock Items
4.
Enter the Quantity .
5.
Enter the Rate .
The ing Details sub screen displays as shown.
6.
Select the Purchase A/c from the List of Ledger s
7.
Select the Sales Tax Class from the list for the Purchase Voucher.
8.
Accept the above screen to save
9.
Select the Sales Tax ledger created under Duties & Taxes for the VAT Class Details sub screen to display
9.
10.
Select the Sales Tax Class from the list.
11.
Accept the Voucher Entry screen to save .
11.
Creating a Sales Voucher
Create a Sales Voucher for a taxable stock item according to the following procedure. (The Sales Tax ledger selected in the Sales voucher should be in accordance to the rate specified in the Stock Item master.) Go to Gateway of Tally > ing Vouchers > F8: Sales 1.
Enter the reference number in the Ref field if required
N o t e : Set Use Common to allocate sales A/c for
Ledger A/c each Stock
for Item Item.
Allocation
2.
Select the Party’s A/c Name from the List of Ledger s
3.
Select the Item from the List of Stock Items
4.
Enter the Quantity
5.
Enter the Rate
The ing Details sub screen displays as shown.
t o No i n the F 1 2 : C o n f i g u r e ,
6.
Select the Sales A/c from the List of Ledger s
7.
Select the Sales Tax Class from the List for the Sales Voucher
8.
Accept the screen to save
9.
Select the Sales Tax ledger created under Duties & Taxes for the VAT Class Details sub screen to display
9.
10.
Select the Sales Tax Class from the list
11.
Accept the Voucher Entry screen to save
11.
Creating a Credit Note
When a customer returns stock items, the entry using a Credit Note . 1.
Go to Gateway of Tally > ing Vouchers > Credit Note (Ctrl + F8)
2.
Enter the Reference Number if required
3.
Debit the Customer ledger
4.
Enter the amount
The Bill Wise details screen displays as shown.
5.
5.
Select the Type of Reference from the List of Method of Adj
6.
Select the bill from the List of Purchase Bills
7.
Enter the Amount
8.
Debit the Sales A/c
9.
Select the Sales Tax Class from the List of Sales Tax Class
The Inventory Allocation screen displays as shown.
10.
Select the Stock Item returned from the List of Stock Items
11.
Enter the Quantity returned
12.
Enter the Rate
13.
Accept to display the Voucher Entry screen to appear
14.
Enter the Narration if any
15.
Accept the screen to save
15.
Creating a Sales Voucher Exempted from Sales Tax
The sale of goods to an export customer or licensed manufacturer is tax free . To create a sales voucher for an Export Customer or a Licensed Manufacturer , Go to Gateway of Tally > ing Vouchers > F8: Sales 1.
Enter the reference number in the Ref field if required
N o t e : Set Use
Common
Ledger
A/c
for
Item
Allocation to N o in the F12:
2.
Select the Party’s A/c Name from the List of Ledger s
3.
Select the Item from the List of Stock Items
4.
Enter the Quantity
5.
Enter the Rate
The ing Details sub screen displays as shown.
Configure
6.
Select the Sales A/c from the List of Ledger s
7.
Select the Sales Tax Class as Export Sales from the List for the Sales Voucher
8.
Accept the screen to save
8.
Creating a Journal Voucher
If a Taxable Stock Item is used, for own use or disposed, or not sold, then the same can be shown by ing the following entry. Go to Gateway of Tally > ing Vouchers > Select Journal Voucher: F7 1.
Select the Voucher Type from the Voucher Class List
2.
In the Journal Voucher screen, debit the Expenses ledger created under Indirect Expenses
3.
Enter the Amount
4.
Credit the Purchases
5.
Select the Stock Item from the List of Items in the Inventory Allocations screen
6.
Enter the Quantity
6.
7.
Accept the screen for the VAT Class Details to display
7.
N o t e : If then select 8.
10.
be
categorised
under
any
of
the
above
Sales
Tax
classes,
Select the Sales Tax Class from the list
N o t e : The 9.
the purchase cannot Not Applicable
Rate
of
Enter Narration if any Accept the screen to save
Sales
Tax
class
should
be
the
same
as
specified
in
the
Stock
Item.
10.
Creating a Journal Entry to Adjust Rebate in Sales Tax Using ST 10
A Licensed Manufacturer is entitled to purchase goods, tax free. If a Licensed Manufacturer has paid tax on purchase of raw materials, then he can claim rebate against the sales tax paid on purchases. This type of rebate can be adjusted against the sales tax liability of the licensed manufacturer. A Licensed Manufacturer can claim a rebate of 4% on Sales Tax paid @ 5% and a rebate of 8% on Sales Tax paid @ 10%. 1.
Go to Gateway of Tally > ing Vouchers > Select Journal Voucher: F7
2.
Select the Voucher Type from the Voucher Class List
3.
In the Journal Voucher screen, debit the Sales Tax ledger
4.
Enter the Amount
5.
Select the Sales Tax Class from the List of Sales Tax class
5.
6.
Enter the Assessable Value of the Purchase
7.
Credit the Purchases in the Journal Entry screen
7.
8.
Select the Stock Item from the List of Items in the Inventory Allocations screen.
9.
Enter the Quantity
10.
Enter the Amount
11.
Select the Sales Tax Class for the Purchase ledger
11.
12.
Enter the Narration if any
13.
Accept the screen to save
13.
Reports
Tally provides you with the Sales Tax forms in the Government prescribed format. Go to Gateway of Tally > Display > Statutory Reports > Sales Tax Reports
The Sales Tax Reports menu consists of two forms
Form ST 3 Form ST 10
Form – ST 3
The Form ST 3 comprises the details of all the sales transactions. The form has to be filed at the Malaysian Excise and Customs Department every two months. Go to Gateway of Tally > Display > Statutory Reports > Service Tax Reports > Form – ST 3 Press Alt + P to print the form.
The preview displays as shown
Scroll through the form using the Page Down key in your keyboard.
Note format
:
The information issued by the
given in the Government.
above
forms
has
to
be
used
Box 1 The Name and Address of the Company is printed in this field Box 2 This field remains blank. Box 3 The Sales Tax License number, as entered in F11: Features, is printed in this field. Box 4 The Sales Tax File Nr, as entered in F11: Features, is printed in this field. Box 5,6,7 and 8
to
fill
the
pre
printed
The above boxes are filled by the Malaysian Customs and Excise Department . Box 9 The Taxable period for the Return is printed in this field. Box 10 The Total value of goods Exported is printed in this field. Box 11 The total value of the goods exempted from Sales Tax is printed in this field. Box 12 The total value of goods sold to a Licensed Manufacturer is printed in this field. Box 13 The Serial Numbers of the Stock Items are printed in this field Box 14 The List of Sales Tax enabled Stock Items is printed in this field Box 15 The Tariff Code entered in the Stock Item Master is printed in this field. Box 16 The total value of Sales Tax enabled goods sold is printed in this field. Box 17 The total value of goods that are not sold, but used for Own Use, or Disposed Off other than sale is printed in this field. Box 18 The sum of Box 16 and Box 17 is printed in this field. Box 19 The Rate at which the Sales Tax is charged is printed in this field. Box 20 The total amount of Sales Tax charged on the goods is printed in this field. Box 21 The total amount of Tax deducted via ST 10 is printed in this field. Box 22 The total amount of Tax deducted using Credit Notes is printed in this field. Box 23 This box remains blank because Penalty cannot be estimated during the generation of the returns.
Box 24 This box remains blank because Penalty cannot be estimated during the generation of the returns. Box 25 This box displays the total Tax Payable. Box 26 The Name of the Declarant entered in the print configuration screen, is printed in this field. Box 27 The Identity Card No. or the port No. entered in the print configuration screen, is printed in this field. Box 28 The Designation of the person filing the return, entered in the print configuration screen, is printed in this field. Box 29 The Declarant is required to sign in this column. Box 30, 31, 32, 33, 34 The above boxes are filled by the Malaysian Customs and Excise Department .
Form ST – 10
The Form – ST10 lists the purchase details. It has to be filed at the Malaysian Excise and Customs Department every two months. Go to Gateway of Tally > Display > Day Book > Statutory Reports > Sales Tax Reports > Form ST – 10
Box 1 The Name and Address of the company is printed this field. Box 2 This field remains blank. Box 3 The Sales Tax License number as entered in F11: Features is printed in this field. Box 4 The Sales Tax File Nr as entered in F11: Features is printed in this field. Box 5,6,7 and 8 The above boxes are filled by the Malaysian Customs and Excise Department . Box 9 The period for which the ST3 is generated is printed in this field. Box 10 The Serial number is printed in this field. Box 11 The Supplier’s Name is printed in this field. Box 12 The Stock Items purchased are printed in this field. Box 13 The Tariff Code of the Stock Items entered in the Stock Item Master is printed in this field. Box 14 The Rate of Sales Tax paid on each of the Stock Items is printed in this field. Box 15
The Invoice numbers of the purchase entries ed is printed in this field. Box 16 The Invoice Dates are displayed in this field. Box 17 The purchase prices of the Stock Items are printed in this field. Box 18 The rate of rebate on Sales Tax is printed in this field. Box 19 The total value of Sales Tax deduction for each sale is printed in this field. Box 20 The total value of the deduction in Sales Tax is printed in this field. Box 21 The Name of the Declarant, as entered in the print configuration screen, is displayed in this field. Box 22 The Identity Card No. or the port No., as entered in the print configuration screen, is printed in this field. Box 23 The Designation of the person filing the return, entered in the print configuration screen, is printed in this field. Box 24 The Declarant is required to sign in this column. Box 25 The above box is filled by the Malaysian Customs and Excise Department.
Introduction
Service Tax is a form of indirect tax imposed on taxable services as prescribed under the second schedule of the service tax regulations of 1975. Service Tax is imposed on a Taxable service provided by a Taxable person. The Government of Malaysia has defined a set of services which are Taxable. The collection of the tax is istered by the Royal Customs and Excise Department of Malaysia .
Information on Service Tax
Rate of Tax The Rate of Service Tax on all the services under the Service Tax acts is 5%.
Taxable Person/Licensing Any Taxable person, who carries on business of providing taxable service and on crossing the threshold limit if any, must apply for a license. The term “person” includes an individual, a firm, a society, an association, a company and every other juridical person. No fee is payable for the issuance of a license. A complete list of Taxable Services is as follows:
Department Code 601
Supplying MMT inside Hotel
602
Supplying MMT outside Hotel
603
Supplying room to stay / sleep
604
Corkage, towel charge & cover charge services
605
Supplying room for Meeting / Cultural performances / Fashion Shows
606
Health Service
607
Massage Service
608
Supplying Escort to Social and Couple Dance
609
Sport and Recreation/Picnic Service
610
Preparation of Insurance Policy
611
Telecommunication Service
612
Credit Card Service
613
Customs clearance of Goods/Commodity Services
614
Supplying automobile parking space
615
Speed Courier/Shipment Service
616
Transport Service
617
Security / Guard Service
618
Professional Services
619
ing Services
620
Juridical / Legislative Services
621
Engineering Professional Services
622
Architectural Services
623
Surveyor / Assessor / Valuator / Real Estate Agent Service
624
Consulting Services
625
Veterinary Services
626
Automobile lease/rental Services
627
istrative services
628
Advertising Services
629
Golf game services
630
Corporate Protection and Security
631 - 644
Reserved
645
Tax on service apart from those stated above
646
Outdoor gathering / event services
Assessable value
Service Tax is calculated on Assessable Value. The Assessable Value is the difference of the Total Service charge and Expenses.
Expenses Expenses include those which incur while providing services i.e. postage, conveyance etc.
Payment of Service Tax
Service Tax is due when payment is received for taxable services rendered. If payment is not received within 12 calendar months from the date of issuance of invoice, the tax is due on the day immediately after the expiry of the 12-month period. Example: The service provider has issued an invoice on 1-1-2005 for Rm. 1050.00 and this includes Rm.50/- as service tax. If he doesn’t receive the payment by 2-1-2006 then he has to pay tax of Rm.50.00 to the department. In Malaysia the Financial Year covers from 1st January to 31st December.
How Much do I pay? Service Tax is paid on the Assessable Value at 5%. Consider the following example. ABC Company is a Consultancy firm and charges 1200 as consultation fees. The breakup of the Total Service Charge is as follows. Consultation Charges Tax @ 5% Disbursement -
1000.00 50.00 150.00
If the client pays RM. 600 as partial payment, then the amount can be allocated using any of the following methods.
Adjusting the Disbursement Amount First:
Total Billed Amount Total Amount Received
1200 600
Adjusting the Disbursement Amount Amount received
600
Total disbursement
150
Balance
450
The Balance amount can be adjusted as follows. Towards Consultation charges (450*1000)/1050
428.57
Towards Tax (450*50)/1050
21.43
Total The Service Tax Report appears as follows.
450.00
Date
Total Amount Billed
01-Jan06
Taxable Fees Collected
1200
Tax Collected
428.57
Taxable Fees Outstanding > 1 year
Tax Outstanding > 1 year
21.43
Total Tax Payable
21.43
If payment is not received within 12 calendar months of the date of issuance of invoice, the tax is due on the day immediately after the expiry of the 12-month period. This amount appears in the column Tax Outstanding > 1 year.
Adjusting the Disbursement Amount Last: Total Billed Amount
1200
Total Amount Received
600
Adjusting the Disbursement Amount Amount received
600
Total disbursement Balance
600
The Balance amount can be adjusted as follows. Towards Consultation charges (600*1000)/1050
571.43
Towards Tax (600*50)/1050
28.57
Total
600.00
The Service Tax Report appears as follows. Date
01,Jan06
Total Amount Billed 1200
Taxable Fees Collected
Tax Collected
571.43
28.57
Taxable Fees Outstanding > 1 year
Total Amount Received
1200 600
Adjusting the Disbursement Amount Amount Received The amount can be adjusted as follows.
Total Tax Payable 71.73
Allocating the charges proportionately Total Billed Amount
Tax Outstanding > 1 year
600
Towards Consultation Charges (600*1000)/1200 Towards Tax (600*50)/1200
500.00 25.00
Towards Disbursement Amount (600*150/1200 Total
75.00 600.00
The Service Tax Report appears as follows Date
01Jan06
Total Amount Billed
1200
Taxable fees Collected
Tax Collected
500.00
25.00
Taxable fees Outstanding > 1 year
Tax Outstanding > 1 year
Total Tax Payable
25.00
Invoice Invoice for Taxable Service must fulfil the following criteria: 1.
All invoices and receipts shall be printed and serially numbered.
2.
The total of all sales made and all service tax collected in each day shall be transferred at the end of such day to a record of sales, which shall be submitted together with the monthly returns.
3.
No alteration shall be made on the invoices or receipts and copies thereof. If a mistake has been made, the invoice or receipt and copy thereof shall be treated as cancelled and clearly marked "CANCELLED". The cancelled invoice or receipt together with all copies thereof shall be submitted to the Director General for inspection.
4.
If any invoice or receipt which has been issued is missing, the Director General shall estimate the service tax to be paid.
Maintenance of Records All invoices, receipts, books of and other records as required by the Act shall be kept within the principal place of business, or in any other place approved by the Director General. The person claiming the refund must keep all records and documents pertaining to the claim for a period of six years from the date of claim for inspection by the proper officer at any time.
When do I pay Service Tax? When a payment is received from a customer, Service Tax must be paid to the Customs Department within 28 days of the end of a Taxable Period (a Taxable Period covers two months). If the licensee does not receive the payment even after the invoice has been issued, the Service Tax has to be paid within 28 days of the 12 monthperiod from the date of issuance of the invoice.
Method of Payment
The Service Tax due and payable, in respect of any return required to be filed under the Act, can be paid by any of the following methods. 1.
Cash
2.
Postal Order or Money Order
3.
Cheque or Bank Draft
The cheque or bank draft has to be addressed to the ‘State Customs Director’ where the Tax is paid.
Service Tax
Tally provides you with a complete tracking of sales transactions for Malaysia Compliant Service Tax. Its fast and error-free voucher entry enables the easy calculation of Service Tax to be paid on each transaction. Tally offers you the flexibility to track part payments received and adjust them with the expenses incurred. Tally also tracks Service Tax which is unpaid for more than a year and generates reports in the Government prescribed format.
Enabling Service Tax
Company Creation Go to Gateway of Tally > Alt + F3 > Create Company
Enter Company details such as Mailing details. Select the Country from the List of Countries under the field, Statutory Compliance for .
Enabling Service Tax in F11 Features Go to Gateway of Tally > Select F11: Features > Statutory & Taxation
1.
Set Enable Service Tax to Yes
2.
Set Set/Alter Service Tax Details to Yes to display the Company Service Tax Details screen.
2.
3.
Enter the Service Tax Registration Number allotted by the Service Tax department
4.
Enter the Date of Registration
5.
Enter the File No. (The File No. is the Ledger Folio number)
6.
Select the Method of adjustment of Expenses from the List of Adjustment Methods
First Receipt : The expenses are first adjusted from the amount received and then the rest of the amount is adjusted against Service fee and Tax . Last Receipt : The expenses are adjusted from the last receipt of the bill amount Proportionate : The payment received from the customer is proportionately adjusted against fee, tax and disbursement 7.
Accept the screen to save
7.
Creating a Customer Ledger
To create a Customer ledger, 1.
Go to Gateway of Tally > s Info > Ledgers > Create
2.
In the Ledger Creation screen enter the name of the company that has supplied goods to you in the field
3.
Select Sundry Debtors in the Under field from the List of Groups
4.
Set Maintain balances bill-by-bill? to Yes . Enter details in the Default Credit Period if applicable
5.
Name
4. 5.
Set Is Service Tax Applicable to Yes for the Exemption Details screen to display
6.
Set Type of Classification as Exempt if tax is not payable. Set the above field to Not Applicable if tax is payable
7.
Enter the Mailing details and Tax information
7.
6.
6. Accept the screen to save
Similarly, you can create Supplier ledgers.
Creating a Tax Ledger
To create Service Tax ledger, 1.
Go to Gateway of Tally > s Info > Ledgers > Create
2.
Enter the Name of the Ledger
3.
Select the Group Duties & Taxes in the Under field
4.
Select the Type of Duty from the list of Types of Duty/Tax
5.
On selecting Service Tax as Type of Duty , an additional table to select the Category Name appears
6.
6.
Select the Category Name from the List of Service Categories
7.
Set Maintain Balances bill by Bill to Yes if applicable
8.
Set Inventory Values are affected to No, which can be set to Yes if applicable
9.
Accept the screen to save
Creating Sales Ledgers for Services
To create Sales ledgers for Services, 1.
Go to Gateway of Tally > s Info > Ledgers > Create
2.
Enter the Name of the ledger. . For example, ancy
3.
Select the Group Sales/Direct Income from the List of Groups
4.
Set Inventory Values are affected to Yes, if applicable
5.
Set Is Service Tax Applicable to Yes for the ledger. A list of all types of services category displays as shown:
6.
5.
6.
Select ing Services (619) from the List of Service Categories
7.
Accept the screen to save
Similarly, you can create ledgers for various services.
Creating Ledgers for Indirect Expenses
An Expenses ledger has to be created to claim the expenses. 1.
Go to Gateway of Tally > s Info > Ledgers > Create
2.
Enter the Name of the ledger
3.
Select the Group Indirect Expenses from the List of Groups
4.
Set Maintain Balances Bill By Bill to Yes/No if applicable
5.
Set Is Service Tax Applicable to Yes for the ledger
6.
Select ing Services (619) from the List of Service Categories
6.
8.
Accept the screen to save
Creating a Sales Voucher
Create the entry to show the sale of the service using the following steps. 1.
Go to Gateway of Tally > ing Vouchers > Sales (F8)
2.
Enter the reference number in the Ref field
3.
Select Party’s A/c Name from the List of Ledger s
4.
Enter the party details in the Party Details sub form
5.
Select the Service Ledger from the List of Ledger s
6.
Enter the amount in the Amount field
7.
Select the Service Tax ledger from the List of Ledger s
On selecting the Tax ledger, the Service Tax Details sub form displays.
8.
Accept the above screen for the Bill wise Details sub form to display
9.
Select New Ref as the Method of Adjustment
9.
10.
Accept the above screen for the Voucher Creation screen to reappear
10.
11.
Accept the screen to save the voucher
The above entry displays as shown.
Creating a Sales Voucher to Allocate Expenses
Tally provides you with two methods to allocate expenses incurred on the sale of services.
Method 1 The expenses can be included in the Service Charges . Example: The service charge is RM. 1000 and the expense incurred is RM. 150 , therefore the service charge would be RM. 1150 . The voucher for the above entry is created, using the following steps. 1.
Go to Gateway of Tally > ing Vouchers > Sales (F8)
2.
Enter the reference number in the Ref field
3.
Select Party’s A/c Name from the List of Ledger s
4.
Enter the party details in the Party Details sub form
5.
Select the Service Ledger from the List of Ledger s
6.
Enter the amount in the Amount field
7.
Select the Service Tax ledger from the List of Ledger s
On selecting the Tax ledger, the Service Details sub form displays.
8.
Accept the above screen for the Voucher Entry screen to reappear
9.
Select the Expenses ledger created under Indirect Expenses to allocate the expenses
10.
Enter the amount
11.
Tab down for the Bill Wise Details sub form to display
11.
12.
Select New Ref as the Method of Adj
13.
Tab through the fields for the Voucher Entry screen to display
14.
Enter the Narration if any
14.
15.
Accept the Voucher to save
The above entry displays as shown.
Method 2 Expenses can be allocated using an Expense ledger, created under Indirect Expenses . The voucher can be created using the following steps. 1.
Go to Gateway of Tally > ing Vouchers > Sales (F8)
2.
Enter the reference number in the Ref field
3.
Select Party’s A/c Name from the List of Ledger s
4.
Enter the party details in the Party Details sub form
5.
Select the Service Ledger from the List of Ledger s
6.
Enter the amount in the Amount field
7.
Select the Expenses ledger created under Indirect Expenses
8.
Specify the Expenses amount in the Expenses field
9.
Select the Service Tax ledger from the List of Ledger s
On selecting the Tax ledger, the Service Details sub form displays
10.
Enter the amount in the Expense field
11.
Accept the above screen for the Voucher Entry screen to reappear
12.
Tab down for the Bill Wise Details sub form to display
12.
13.
Select New Ref as the Method of Adj
14.
Tab through the fields for the Voucher Entry screen to display
15.
Enter the Narration if any
15.
16.
Accept the voucher to save
The entry displays as shown.
Creating Sales Vouchers Exempted from Service Tax
For services exempted from tax, the classification should be selected in the ledger master. 1.
Create the Customer ledger to set the Exemption Detail to Exempt
2.
Go to Gateway of Tally > ing Vouchers > Sales (F8)
3.
Enter the reference number in the Ref field
4.
Select Party’s A/c Name from the List of Ledger s
5.
Enter the party details in the Party Details sub form
6.
4. 5. 6.
Select the Service edger from the List of Ledger s
7.
Enter the amount in the Amount field
Tab down for the Bill Wise Details sub form to display
8.
Select New Ref for the Type of Ref
9.
Accept the above screen for Voucher Entry screen to display
10.
Enter the Narration if any
11.
Accept the voucher to save
11.
Note
:
The
above
entry
is
applicable
for
ST
3
report
only.
Creating a Receipt Voucher
On receipt of payment from a customer, a Receipt voucher has to be entered. 1.
Go to Gateway of Tally > ing Voucher > Select Receipt (F6)
2.
Select the Customer ledger from the List of Ledger s for the Bill Wise Details sub form to display
3.
Select Agst Ref as the Type of Ref
4.
Select the Bill against which the payment is received from the List of Pending Bills
5. 6.
5.
Accept the above screen for the Voucher entry screen to display
6.
Debit the Cash/Bank with the amount received
7.
Enter the Narration, if any
8.
Accept the voucher to s ave
Creating a Receipt Voucher to Adjust the Expenses
Expenses can be adjusted in the receipt entry by selecting the appropriate Method of Adjustment in F11: Features > Statutory & Taxation
For example, a customer makes a partial payment of RM. 600 for the Sales entry of RM. 1200 .
On First Receipt A receipt entry can be created selecting Method of Adjustment of Expenses as On First Receipt . The value in the Service Tax displays as shown.
The Total Tax adjusted is calculated is as follows. Total Billed Amount
1200
Total amount received
600
Adjusting the Disbursement Amount Amount received
600
Total disbursement
150
Balance
450
The Balance amount can be adjusted as follows. Towards the Consultation charges (450*1000)/1050 = 428.57 rounded off to
428.60
Towards the Tax (450*50)/1050
21.43
Total
450.03
On Last Receipt On creating a receipt entry selecting Method of Adjustment of Expenses as On Last Receipt , the value in the Service Tax displays as shown.
The Total Tax adjusted is calculated is as follows. Total Billed Amount Total Amount Received
1200 600
Adjusting the Disbursement Amount Amount received
600
Total disbursement Balance The Balance amount can be adjusted as follows.
600
Towards Consultation charges (600*1000)/1050 = 571.43 rounded off to
571.40
Towards Tax (600*50)/1050
28.57
Total
599.97
Proportionate On creating a receipt entry selecting Method of Adjustment of Expenses as Proportionate , the value in Service Tax displays as shown.
The Total Tax Payable is calculated is as follows. Total Billed Amount Total Amount Received
1200.00 600.00
Adjusting the Disbursement Amount Amount Received The amount can be adjusted as follows.
600.00
Towards Consultation charges (600*1000)/1200
500.00
Towards Tax (600*50)/1200
25.00
Towards Disbursement amount (600*150/1200 Total
75.00 600.00
Creating a Payment Voucher
To pay the Service Tax , 1.
Go to Gateway of Tally > ing Vouchers > Payment (F5)
2.
Debit the Tax ledger from the List of Ledger s
3.
Select Agst Ref from the Method of Adj in the Service Tax Bill Details
4.
Select the Service Tax Bill against which the payment is made from the List of Service Tax Bills
5.
The amount can be altered
6.
5. 6.
Credit the Bank
7.
Enter the Narration, if any
8.
Accept the voucher to s ave
Reports
To view the Service Tax Reports, Go to Gateway of Tally > Display > Statutory Reports > Service Tax Reports
The Service Tax Reports consist of the following.
Service Tax Service Tax Return
Service Tax
The Service Tax details the total sales of taxable goods and the tax received. It also provides details on unpaid tax. Go to Gateway of Tally > Display > Statutory Reports > Service Tax Reports > Service Tax
Date : This column lists the dates in the period specified in the F2: Period . Total Daily Sales Based on Invoices : This column displays the total sales made on the specific dates.
Paid Qty/Invoice Value of Goods/Services Taxable : This column displays the total payment received for the sale of service. Total of Tax received : This column displays the value of the Service Tax received on the sales made for a
specific date.
Invoice Unpaid Bill/Invoice Value of Goods/Services Taxable : This column displays the value of the goods or services on which tax has not been paid for more than a year. Total of Tax to be paid : This column displays the total tax due on the sales of taxable service for which the payment has not been received for more than one year. Total tax to be paid : This column displays the total amount of tax to be paid (i.e. column 4 + column 6) On viewing the Service Tax after changing the year to 2007 , the screen displays as shown
Press Alt + P to view the preview of the Service Tax
The preview of Service Tax displays as shown.
Name & Address Licensee : The name and mailing details of the company display in this field.
License No : The Service Tax Registration number is displays in this field.
Tax Period Month : The month for which the Service Tax is viewed is displays in this field. Year : The year for which the Service Tax is viewed is displays in this field.
Service Tax Return
The Service Tax Return is a statutory report which has to be filed bimonthly. This report displays Tax details such as the Rate of Tax, Total Tax Payable and so on. Go to Gateway of Tally > Display > Statutory Reports > Service Tax Reports
The preview of the Service Tax Return displays as shown. The details are displayed in Bahasa Melayu ` and English
Name and Address of Principal Place of Business : This box displays the name and address of the company . Address of Branches if different from above : This box remains blank. Service Tax License No. : The Service Tax Registration Number , as specified in F11: Features , displays in this field. File No. : The File Number, as specified in F11: Features , displays in this field. Box 5, 6, 7 and 8 : These boxes have to be filled by the Service Tax Department . Return for Taxable Period : The period for which the Service Tax Return is filed is specified in this field. Type of Service Provided : This box displays the Type Of Service provided to the customer . Department’s Revenue Code : This box displays the revenue code to the corresponding service. Quantity : If the service provided is in the form of an item, then this box displays the quantity of the item sold. This column currently remains blank. Value : This box displays the total value of taxable service provided. Less Value of Service Exempted : This box displays the total value of the exempted sales entries. Total Taxable Value : This box displays the total taxable value on all the sales ( i.e. 16 = 14-15)
Service Tax Rate : The rate of the Service Tax is displays in this box. Amount : The total amount of Service Tax displays in this box.
Penalty Rate : This column currently remains blank. Amount : This column currently remains blank. Less Deduction Allowed : This column currently remains blank. Total Amount Payable : This column displays the sum of total tax and the penalty. Name of the Declarant : The name of the person filing the returns displays in this box. Identity Card/port No. : The Identity Card Number or the port Number is entered in this field. Designation : The designation of the person filing the returns displays in this box. Box 27, 28, 29, 30 and 31 : These boxes have to be filled in by the Service Tax Department .
Introduction
Value Added Tax is a tax levied on the sale of tangible goods, which according to their nature and legal status, may be movable, immovable, or intangible assets. The Government appoints VAT collectors, who collect the VAT due from goods purchased or services received and forward the payments to the State Treasury. VAT collectors include Production Sharing Contractors (PSCs), Government Treasurer Companies, or Government institutions appointed by the Minister of Finance.
Information on VAT
Tax Payer A Taxable Person or a Tax Payer for Value Added Tax purposes is an individual or an entity, supplying taxable goods and/ or rendering taxable services.
Entity Entity is a group of people and/or capital which forms a unity that either conducts business or does not. It includes: Corporation Limited partnership State – local owned enterprise in whatever name and form Co operative, pension fund, partnership, association foundation, public organisation, social and political organisation, or any similar organisation, institution, permanent establishment and any other form of entity.
Taxable Goods Value Added Tax shall be imposed on: 1.
Supply of Taxable Goods carried out in the customs area by a Firm
2.
Import of Taxable Goods
3.
Taxable Services rendered in a customs area by a Firm
4.
Utilisation of intangible Taxable Goods obtained from outside the customs area within a Customs Area
5.
Utilisation of Taxable Services obtained from outside the customs area within a customs area
6.
Export of Taxable Goods by a taxable person for VAT purposes.
Rate of VAT VAT is imposed on most goods and services at a rate of 10%. Government regulations can adjust the rate to as low as 5% and as high as 15%.
Terminology Used in VAT
Taxpayer Identification Number Every tax payer should at the office of Directorate of General of Taxes to obtain a Taxpayer Identification Number, which will be unique to him/ her.
Taxable Period Taxable period is equal to one calendar month or any other period that does not exceed three calendar months as stipulated in a decree by the Minister of Finance.
Taxable Year Taxable Year is a calendar year unless the taxpayer adopts an ing year, which is different from the calendar year.
Filing VAT Returns
Every Tax Payer is obliged to complete his Tax Return, using the Indonesian Language in the Latin alphabet with Arabic numerals and Rupiah currency, and and confirm it by g and filing it at the district tax office. A Tax Payer who has obtained permission from the Minister of Finance to use a foreign language and non-Rupiah currency in the Tax Return, shall file his Tax Return in the Indonesian Language or Foreign Language, using currency other than the Rupiah, as regulated in a decree by the Minister of Finance. A Tax Payer shall obtain a Tax Return form at the locations specified by the Director General of Taxes. On request, the Director General of Taxes may extend the period for filing an Annual Tax Return for no longer than six months. The request shall be in writing, accompanied by a statement estimating the amount of tax payable for a taxable year and proof of settlement of the tax payable. If the Tax Return is not filed within the due date, or is filed after the due date, a Letter of Reprimand shall be issued. The form and content of the Tax Return and the required information, along with the documents, shall be stipulated in a decree by the Minister of Finance. A Tax Return shall be considered ‘Not Filed’ if it is not signed, or does not contain the required information and documents.
Tax Return A Tax Return is a document used by a tax payer to report the calculation and/or payment of taxes.
Annual Tax Return Annual Tax Return is a tax return for a particular taxable year or a fraction of the taxable year.
Due Dates for Filing Tax Returns Periodic Tax Return Periodic Tax Return is filed twenty days after the end of a taxable period. If the tax is not paid within the due date, then an istrative Penalty of Rp. 50,000.00 is charged for an individual tax payer.
Annual Tax Return Annual Tax Return is filed three months after the end of taxable year. If it is not paid within the due date, then a penalty of Rp. 100,000.00 is charged. N o t e: The decree of
istrative the Minister
Where and When do I pay? Tax shall be payable at the time of: 1. 2.
penalty applies of Finance.
to
certain
tax
payers
who
are
stipulated
by
a
1.
Supply of Taxable Goods
2.
Import of Taxable Goods
3.
Rendering of Taxable Services
4.
Utilisation of intangible Taxable Goods obtained from outside the Customs Area
5.
Export of Taxable Goods
If payment is received: 1.
Before supply of Taxable Goods or rendering of Taxable Services
2.
Before the utilisation of intangible Taxable Goods
The tax shall be paid at the time of payment. N o t e: If there is payment then the tax payable
any change of rules or if there is any difficulty in deciding the time of Director General of Taxes may determine a certain time as ‘time of
Issue of Invoice A Taxable Person for VAT purposes shall be obliged to issue a Tax Invoice for each supply of Taxable Goods or Services. A Taxable Person for VAT purposes may issue a single Tax Invoice, consisting of all supplies, to the same buyer of Taxable Goods or recipient of Taxable Services during one calendar month. If the payment is received before the supply of Taxable Goods or the rendering of Taxable Services, then the Tax Invoice shall be issued at the time of payment. The time of issuance, format, size, availability and procedures for submission and correction of a Tax Invoice shall be determined by the Director General of Taxes. A Tax Invoice shall include information concerning the supply of Taxable Goods or the rendering of Taxable Services along with. 1.
The name, address and Taxpayer Identification Number of the Taxable Person supplying the taxable Goods or rendering the Taxable Services
2.
The name, address, and Taxpayer Identification Number of the buyer of the taxable of the Taxable Services
3.
The type of Goods or Services, total Sales Price or Consideration, and amount of
Value Added Tax withheld Sales Tax on Luxury Goods withheld code, serial number and date of issuance of the Tax Invoice and
name, position, and signature of person authorised to sign the Tax Invoice.
Interest If the payment or remittance of tax payable is made after the due date, a penalty of 2% is charged. The interest is calculated monthly, from the due date of payment up to the date of payment, where a fraction of the month is treated as one full month.
Refund of Tax Overpayment The Director General of Taxes must issue a notice of tax assessment within twelve months of the acceptance of a request for refund of tax overpayment.
VAT in Tally
VAT for Indonesia in Tally is simple and easy to use with in-built classifications for easy voucher entry. It tracks all VAT enabled transactions and computes them automatically. Transactions can be recorded in foreign currency. Tally allows the generation of simple and standard invoices as well VAT Return forms in Government prescribed formats.
Enabling VAT in Tally
Creating a Company 1.
Go to Gateway of Tally > Alt+F3 > Create Company
2.
Enter the details of the Company.
3.
Select the country from the List of Countries, in the field Statutory Compliance for .
Enabling VAT in F11: Features 1.
1.
Go to Gateway of Tally> s info. > F11: Features > Statutory & Taxation.
2.
Set Enable VAT to Yes .
Under Tax Information, enter the following fields: VAT Regn. No. : Enter the 15 digit VAT Registration Number issued by the tax office VAT Regn. Date : Enter the VAT Registration Date Tax Invoice Code : Enter the alpha-numeric tax invoice code Accept the screen to save .
Creating a Sales Ledger
To create a Sales ledger for VAT 1.
Go to Gateway of Tally > s Info > Ledger > Create/Alter
2.
Enter the Name of the ledger
3.
Select the group Sales s from the List of Groups
4.
Set Inventory values are affected? to Yes
5.
Set Used In VAT Returns? to Yes and Select the VAT/Tax Class as shown in the screen below.
6.
6.
Accept the screen to save .
N o t e : You can select the VAT/TAX Applicable in the above field.
Class
during
voucher
entry,
by
selecting
Not
Similarly, you can create a sales ledger with VAT/TAX Class – Sales @ 10% to Uned Dealers .
Creating a Party Ledger
To create a ledger for the Supplier , 1.
Go to Gateway of Tally > s Info > Ledgers > Create
2.
Enter the name of the ledger in the Name field
3.
In the Under field, select Sundry Creditors from List of Groups
4.
Set Maintain Balances Bill by Bill to Yes/No
5.
By default Inventory Values are affected is set to No , which can be set to Yes , if applicable
6.
Enter the Mailing Details for the ledger
7.
Enter the 15 digit VAT Regn. No .
7.
8.
Accept the screen to s ave .
Creating a Purchase Ledger
To create a Purchase ledger for VAT, 1.
Go to Gateway of Tally > s Info > Ledger > Create/Alter
2.
Enter the name of the ledger in the Name field
3.
In the Under field, select the Purchase s from the List of Groups
4.
By default Inventory Values are affected is set to No , which can be set to Yes , if applicable
5.
Set Used In VAT Returns? to Yes and Select the VAT/Tax Class as shown in the screen below
6.
6.
Accept the above screen to save
Creating a VAT Ledger
Ledgers for VAT has to be created following the procedure mentioned below. 1.
Go to Gateway of Tally > s Info > Ledgers > Create
2.
Enter the name of the ledger in the Name field
3.
In the Under field, select Duties & Taxes from List of Groups
4.
Select VAT in the field Type of Duty/Tax
5.
In the VAT/TAX Class field, select the appropriate classification
Note: You Applicable
can select the in the above
VAT/TAX field
Class
during
the
Voucher
entry
by
selecting
Not
6.
By default Inventory Values are affected is set to No , which can be set to Yes , if applicable
7.
Set Percentage of Calculation to the VAT rate that you selected in the VAT/Tax class field or set it to 0%
8.
Select the Method of Calculation – On VAT Rate from Type of Duty menu
8.
9.
Accept to save .
Creating a Sales Voucher Type
A Sales Voucher Type has to be created/Altered to issue a Standard VAT Invoice 1.
Go to Gateway of Tally > s Info > Voucher Types > Alter/Create
2.
Enter the Name of the Voucher Type
3.
Select the Type of Voucher as Sales from the List of Voucher Type
4.
Abbreviate the Voucher Type as per your requirement in the Abbr. field
5.
Select Automatic for the method of Voucher numbering
6.
Set Use Advance Configuration to Yes, to specify the numbering method, if required
7.
Set the remaining fields according to your requirements. For more information, refer to Voucher Types
8.
Set Is Tax Invoice? to Yes to issue a Standard Invoice
N o t e : If Set format.
is
Tax
Invoice is set to N o
,
then
the
Invoice
is
printed
in
Simple
Invoice
9.
Enter all the details and accept the screen to save
Creating a Purchase Voucher
To create a Purchase Voucher, 1.
Go to Gateway of Tally > ing Vouchers > Select Purchase Voucher (F9)
2.
Enter the Reference in the Ref field if required
3.
Enter the Date of Purchase in the Date field
4.
Select the Party’s A/c Name from the List of Ledgers
5.
Select the Purchase A/c Ledger
6.
Select the VAT/Tax Class from the List of VAT/TAX Class , if it is not specified in the ledger creation
Note select
: Set Allow selection of VAT/Tax VAT/Tax Class during Voucher
Class during entry to Yes in F12: Entry
7.
Select the Stock Item from the List of Items
8.
Select the VAT ledger from the List of Ledger s
9.
Enter Narration if required
Configure , to
9.
10.
Accept the voucher to save
Creating a Debit Note
You can use the Debit Note Voucher to record a Purchase Return entry. 1.
Go to Gateway of Tally > ing Vouchers > Ctrl + F9
2.
Enter the Reference in the Ref field
3.
Select Party’s A/c Name from the List of Ledger s
4.
Enter the required details in Party Details sub form
5.
Select the Purchase ledger for allocation
6.
Select the VAT/Tax Class from the List
7.
Select the Stock Item from the List of Items
8.
Enter the Quantity and Rate
9.
Select the VAT ledger from the List of Ledger s
10.
Enter N arration if required
10.
10.
Accept the voucher to s ave
Creating a Simple Sales Invoice
To create a Simple Sales Invoice that includes VAT, 1.
Go to Gateway of Tally > ing Vouchers > Select Sales Voucher (F8)
2.
Enter the Reference in the Ref field if required
3.
Enter the Tax Invoice No.
4.
Select the Party’s A/c Name from the List of Ledgers
5.
Select the Sales A/c Ledger
6.
Select the VAT/Tax Class from the List of VAT/TAX Class , if the class is not selected during the ledger creation.
N o t e : Set Allow to select VAT/Tax
selection Class
of VAT/Tax Class during Voucher Entry
7.
Select the Stock Item from the List of Items
8.
Select the ledger VAT from the List of Ledger s
9.
Enter N arration if required
during
entry to Y e s in F12:
Configure ,
9.
10.
Accept the voucher to s ave .
N o t e : In the VAT/Tax Class field, there is an option called Not Applicable . Select this option if you need different classifications for each item during voucher entry. Similarly, you can create entries for Sale to Uned Dealers .
Creating Standard Sales Invoice
To issue a sales invoice using a currency other than the Rupiah , follow the procedure given below. To create a sales entry, a foreign currency has to be created, e.g. RM. Refer to Currencies for more information. 1.
Go to Gateway of Tally > ing Vouchers > Select Sales Voucher (F8)
2.
Select the Voucher type – Sales Standard
3.
Enter the Reference in the Ref field if required
4.
Enter the Tax Invoice No .
5.
Select the Party’s A/c Name from the List of Ledgers
6.
Select the Sales A/c Ledger
7.
Select the VAT/Tax Class from the List of VAT/TAX Class
8.
Select the Stock Item from the List of Items
9.
Enter the quantity
10.
As it is a Forex transaction, enter the foreign currency. In this case, enter RM and then rate
11.
The Forex Rate of Exchange screen is displayed as shown.
11.
12.
Enter the Rate of Exchange
13.
If the item is sold at a discount price then, select the ledger Discount created under Indirect Expenses
14.
If the Discount ledger is selected, then prefix the rate of discount with a Negative (-) symbol.
15.
Select the ledger VAT from the List of Ledger s and enter the rate .
16.
Enter Narration if required
16.
17.
Accept the screen to save
To Print a Standard Sales Invoice Press Alt + P (Print) to display the Voucher Printing screen,
Enter the details like the Name , Status/Designation/Place and Date . Press F12: Configure to display the Invoice Printing Configuration Screen, Set Print in Statutory Format to Yes
The preview of the invoice displays as shown:
The following details are displayed in the Standard Tax Invoice The Invoice No. : It displays the number assigned in the sales voucher Code and No. of Tax Invoice : The Tax Invoice Code as entered in F11: Features and the seven digit number entered in the Invoice is printed in this field.
Seller Details Name : The company name as entered in the company creation screen is printed here Address : The company address as entered in the company creation screen is printed here VAT Regn. No. : The VAT Regn. No. as entered in F11: Features is printed in this field The Date of Issue of Taxable Invoice : The VAT Regn. Date as entered in F11: Features is printed in this field
Buyer Details Name : The name of the buyer is printed in this field Buyers Address : The buyer's address is printed in this field VAT Regn. No. : The buyers VAT Regn. No. as entered in the ledger is printed here Type of Goods/ Services : The nature of goods or service being sold is entered here Selling Price in Foreign Currency and In Indonesian Rupiah : The value of the goods being sold is printed in both the sellers as well as the buyers currency (Since the above is a foreign currency transaction) Total Sale/Compensation/Advances : The value of the sale is printed in this field Total Discount : Any discount offered is printed in this field Amount of Down Payments : This field remains blank Total Subject to VAT : The total value of goods sold that are VAT liable is printed in this field VAT Amount : 10% X Total Subject to VAT Place & Date : The date and place of the Invoice is printed in this field Authorised Signatory : The Designation of the person filing the return entered in the Print Configuration screen is printed in this field. Exchange Rate : The Rate at which the currency was exchanged
Creating a Credit Note
A Credit Note voucher can be used to record a Sales Return entry. To create a Sales Return entry, 1.
Go to Gateway of Tally > ing Vouchers > Ctrl + F8
2.
Enter the Reference number in the Ref field if required
3.
Select Party’s A/c Name from the List of Ledger s
4.
Enter the required details in Party Details sub form
5.
Select the Sales ledger for allocation
6.
Select the VAT/Tax Class from the List of Ledger s
7.
Select the Item from the List of Items
8.
Select the ledger VAT from the List of Ledger s
9.
Enter N arration if required
9.
10.
Accept the voucher to s ave .
VAT Reports
To view VAT Reports, Go to Gateway of Tally > Display > Statutory Reports > VAT Reports
The VAT Reports menu displays the following options VAT Computation VAT Forms
VAT Computation
VAT Computation report displays the summary of Input and Output VAT Classifications, Assessable Value and subsequent Tax calculated on the Assessable Value. It also calculates the opening Input VAT carried forward if any, and the balance paid/payable. To view the VAT Computation report Go to Gateway of Tally > Display > Statutory Reports > VAT Reports > VAT Computation .
The VAT Computation Report displays the Total Output and Input Tax payable and the Total Input Credit available. Drill down to each tax classification to view the Sales/ Purchase reports as shown.
VAT Forms
The VAT return forms can be viewed using the VAT Forms menu. Go to Gateway of Tally > Display > Statutory Reports > VAT Reports > VAT Forms > VAT Return Forms
FORM – 1195 A1 FORM – 1195 B1
FORM 1195 A1
Form – 1195 A1 displays the Sales entries as shown.
Tax Year Period : The month of submission is displayed in this field The Name of the Company : The Name of the Company is displayed in this field. VAT Regn. No. : The VAT Regn. No. as entered in F11: Features > F3: Statutory and Taxation is displayed here. N.P.P.K.P No. : The VAT Registration number is displayed in this field VAT Regn. Date : The VAT Regn. Date as entered in F11: Features is displayed in this field Column 1 : The Serial Number is displayed in this column. Column 2: The Supplier's Name is displayed in this column. Column 3 : The Supplier's Tax ID is displayed in this column Column 4 : The Supplier's Tax Invoice No. is displayed in this column Column 5 : Date of Invoice is displayed in this column Column 6 : The Tax Value in Rupiah is displayed in this column Column 7 : This field remains blank Row I : The Total Tax Value for a non tax ed customer is printed in this field Row II : This field remains blank Row III : This field remains blank
Recapitulation 1. 2.
Simple Tax Invoice : The total tax on Simple Tax Invoices is displayed in this field.
1. 2.
Tax Invoice to Value Added Tax Payee : This field remains blank
3.
Standard Tax Invoice to Third Party who is not a Value Added Tax Collector : The total tax value paid to the ed dealer is printed in this field
4.
Total Value Added Tax : The sum of box 1 and box 3 is displayed in this field.
5.
Reduced by VAT/Sales Tax on Luxury Goods : The tax value calculated on the return of the sold goods (credit notes) is printed in this field.
6.
Total : The difference between Box 4 and Box 6 is displayed in this field
FORM 1195 B1
Form 1195 B1 displays the purchase transactions:
Date of Statement month and year : The Period specified in the print configuration is displayed in this field Date of revised statement : This field has to be filled manually The Name of the Company : The Name of the Company is printed in this field VAT Regn. No. : The VAT Registration number as entered in F11: Features > Statutory & Taxation is displayed in this field N.P.P.K.P No . –The VAT Registration is displayed in this field VAT Regn. Date – The VAT Registration Date as entered in F11: Features > Statutory & Taxation is displayed in this field Column 1 : The Serial Number for the details in the form is printed in this field Column 2 : The Supplier's Name is displayed in this column. Column 3 : The Supplier's Tax ID is displayed in this column Column 4 : The Supplier's Tax Invoice No. is displayed in this column Column 5 : The Date of the supplier Invoice is displayed in this column Column 6 : The Tax Value in Rupiah is displayed in this column Column 7 : This field remains blank Row I : This field remains blank Row II : This field remains blank Total Tax Value : The Total Tax Value is printed in this field Row III : This field remains blank
Recapitulation Import Tax duty which is in the same tax period : This field remains blank VAT-In for the same Tax period : Total Tax paid for the specified period is printed in this field. Import Tax Duty which is not in the same Tax period : This field remains blank VAT-In for not the same Tax Period : The Input VAT paid on the purchases which do not belong to the same period is printed in this field. Total Input Tax : The total of the fields 2 and 4 is printed in this field. Reduced with VAT for Procurement Return Goods : The amount on Input Vat reversed due to return of goods is printed in this field. Others : This field remains blank Total Input Tax which has been credited : The difference of rows 5 and 6 (5-6) is printed in this field N o t e : An M T S code the date entered in
appears in Column 7 of the Purchase Voucher
the
form,
when
the
bill
date
is
greater
than
UK VAT Analysis
Tally produces the VAT Analysis Report in the British VAT Return Form 100 format with Boxes 1 to 9. It is automatically produced for a quarter ending the last date of voucher entry and is picked from the sales and purchase voucher entries..
Set-up required to produce the return The set-up is more in detail if you deal with the European Union.
Where Boxes 2, 8 and 9 are not applicable Businesses not trading in Goods or related services with the EC – Domestic trade only or Exports to other countries or supply of services, like consultancy, to EC. In short, where Boxes 2, 8 and 9 are not applicable. In the Company Creation screen, 1.
Select the UK from the List of Countries in the field Statutory Compliance for.
2.
Activate the option Prepare and Follow British Style VAT Returns to Yes in F11: Features > Statutory & Taxation. Select Not Applicable for the option Group Name Under which EC Debtors are classified . Select Not Applicable for the option Group Name Under which EEC Creditors are classified.
Note: 2.
Use
Voucher
Classes
for
sales
to
automate
sales
invoice
entry
if
required.
Ensure that all VAT entries are made through Purchases, Sales, Debit Note and Credit Note vouchers only. VAT entries made in other voucher types like Payment, will not be included in the VAT Return.
N o t e : The set up determines the figures that go into the VAT Analysis Report. Hence, check the figures and the entries carefully before copying them into your VAT Return. Adjustment items like Fuel scale charges are typically entered through a journal and would not be reflected in the Report. For this, you might have to adjust the Report figures. More: VAT Analysis Report Businesses trading in goods with the EEC and not services Print VAT Analysis Return and Reports
Business Trading in Goods with the EEC and Not Services
Where Boxes 2, 8 and 9 are applicable If you deal with the EEC, it is advisable to group your EC Customers separately under a sub group of Sundry Creditors. You have to be careful while grouping only VAT ed companies in these groups as they would affect Box 8 and 9 as well as the EC Sales List. Note: Uned like UK companies 1.
2.
companies
or
individuals
should
be
grouped
Go to Gateway of Tally > F11: Features > F2: Inventory Features > Style VAT Returns to Yes. The following screen displays.
separately
and
treated
Set Prepare & Follow British
2.
Select any Group Name for the option Group Name Under which ‘EEC Debtors’ are classified . E.g. EC Customers.
3.
Select any Group Name for the option Group Name Under which ‘EEC Creditors’ are classified. E.g. EC Suppliers..
4.
Alter the group Sales s to enable Used for Calculation . Set it to Yes .
6.
Now create or alter the ledger used for recording sales of Goods (not services) to EC Countries. Activate Percentage of calculation and set it to the standard rate of VAT , E.g. 17.5. Set the method of calculation to any one method, say On Total Sales .
7.
If you have sales for items with different VAT rates, create separate sales s for them and give percentages accordingly.
8.
Follow the same steps for EC Purchases s as well.
9.
Use Voucher Classes for sales to automate sales invoice entry if required.
10.
Ensure that all VAT entries are made through Purchases, Sales, Debit Note and Credit Note vouchers only.
Note:
VAT
entries
made
in
other
voucher
types
like
Payment,
will
not
be
included
in
the
10.
VAT
Return
Business providing services to the EC in addition to Goods as well as exporting to other countries If you deal with the EC, it is advisable to group your EC Customers separately under a sub-group under Sundry Debtors. Likewise, group EC Suppliers under a separate sub-group of Sundry Creditors 1.
Activate British Style VAT Returns in F11:Company Features.
2.
Select any Group Name for the option Group Name Under which EEC Debtors are classified . E.g. EC Customers..
3.
Select any Group Name for the option Group Name Under which EEC Creditors are classified . E.g. EC Suppliers.
4.
Alter the group Sales s to enable Used for Calculation and set it to Yes . For Goods follow the instructions in 2 above.
For sale of services to EC Countries, do not give any percentage. Leave the field blank. For export sales, do not give any percentage.
5.
Follow the same steps for EC Purchases s.
6.
Use Voucher Classes for sales to automate sales invoice entry if required.
7.
Ensure that all VAT entries are made through Purchase, Sales, and Debit Note and Credit Note vouchers only. VAT entries made in other voucher types like Payment, will not be included in the VAT Return.
N o t e : The set up determines the check the figures and the entries
figures that go carefully before
into the VAT Analysis Report. copying them into your VAT
Hence, Return.
VAT Analysis Report
To view the VAT Analysis Report Go to Gateway of Tally > Display > VAT Analysis The following screen displays.
Box 1 Gives VAT due calculated from the sales vouchers. Double click on the row or press Enter and the following screen displays.
The sales entries are displayed in columns showing break-up of net value of sales on which VAT is applicable or not. The VAT charged on each invoice is shown in a column. VAT calculated but not applied is shown for EC Sales information for items on which VAT is charged only in the UK. This is directly relevant for Box 2 purposes. The amount shaded green is brought to the VAT box.
Box 2 The Box is not relevant if there are no inputs from EEC. The EC VAT calculated but not applied is brought in. It is also included in Box 4, which is the total VAT Charged and EC VAT Calculated (not applied). Double click on the row or press Enter and the following screen displays.
Box 3 This prints the total of the sum of Box 1 and Box 2 .
Box 4 It is the VAT dues calculated from Purchase Voucher entries. It includes the Box 2 figure. Double click on the row or press Enter to view input details. The following screen displays.
The purchase entries are displayed in columns showing break-up of net value of purchases on which VAT is applicable or not. The VAT charged on each invoice is shown in a column. VAT calculated but not applied is shown for EC purchases information for items on which VAT is charged in the UK. The amount shaded green is brought to the VAT box.
Box 5 Net VAT due to be paid or refunded which will be the difference between the Box 3 & Box 4 .
Box 6 Total Net Value of sales and other outputs as obtained from the sales voucher entries. Double click on the row or press Enter to view Output Details. The following screen displays.
Box 7 Total Net Value of purchases and other inputs as obtained from the purchase voucher entries. Double click on the row or press Enter to view Output Details. The following screen displays.
Box 8 This shows the sale of goods to EEC customers. The figure depends upon correct classification of EEC customers and activation of percentage of calculation in sales ledger s. It is the total of the amounts in the Nett Value (VAT Applicable) column in the Output Details for EC Member Countries. Note: Those items that although have a VAT Rate specified, but whose sale allocation do not have a percentage of calculation will not be included. Hence, it is important to allocate EC Sales to a separate Sales for which percentage of Calculation has not been set to 0. On the other hand, services supplied to EC Customers are not to be considered and hence should be allocated to a sales for which the percentage of calculation is 0. The following screen displays Output Details for EC Member Countries.
Box 9 This reflects the purchase of goods from EC Suppliers. Note:
The
same
note
of
caution
as
for
Box
8
applies
to
Box
9
as
well.
Print VAT Analysis Return and Reports
Display the VAT Return Screen and click on the Print Button or use the keys Alt+P. The Print option cycles through all reports including EC reports. Let us consider an Example: Create the following groups: 1.
EC Customers under Sundry Debtors
2.
EC Suppliers under Sundry Creditors
3.
EC Customers for goods and services
4.
Export Customers
N o t e : Alter the Groups Sales s and for the Field Used for Calculation to Yes..
Purchase
s
to
change
Create the following Ledger s (alter if they already exist). Under the Group Sales s EC Sales – Goods Set the option Inventory Values are affected? to Yes Enter the required percentage in the Percentage of Calculation field. Here it is 17.5%. Select On Total Sales from the Type of Duty list under the Method of Calculation field.
EC Sales – Services Set the option Inventory Values are affected? to Yes Enter the required percentage in the Percentage of Calculation field. Here it is 0%.
UK Sales Set the option Inventory Values are affected? to Yes Enter the required percentage in the Percentage of Calculation field. Here it is 17.5% Select On Total Sales from the Type of Duty list under the Method of Calculation field.
the
setting
Export Sales Set the option Inventory Values are affected? to Yes Enter the required percentage in the Percentage of Calculation field. Here it is 0%.
Under the Group Purchase s EC Purchases Set the option Inventory Values are affected? to Yes Enter the required percentage in the Percentage of Calculation field. Here it is 17.5%. Select On Total Sales from the Type of Duty list under the Method of Calculation field.
VAT s under the group Duties and Taxes 1.
Output VAT
Enter the required percentage in the percentage of calculation. Here it is 17.5% Select Based on Item Rate from the Type of Duty list under the Method of calculation field.
2.
Output VAT – 0%
Enter the required percentage in the percentage of calculation. Here it is 0% Select Based on Item Rate from the Type of Duty list under the Method of calculation field.
3.
VAT Exempt
Select VAT from the Types of Duty/Tax list under the field Type of Duty/Tax. Select the required VAT/Tax Class under the field VAT/Tax Class.
4.
Input VAT.
Enter the required percentage in the percentage of calculation. Select Based on Item Rate from the Type of Duty list under the Method of calculation field.
Classes (to automate invoice entry) Alter the Sales Voucher Type and create the following classes. Refer Voucher Classes for more details. VAT Sales In the Voucher Type Alteration screen, give a suitable name under the field Name of Class. Then the Voucher Type Class screen is displayed. Select UK Sales as the Ledger Name from the List of Ledger s under the Default ing Allocations for each Item in Invoice . Type 100% under the Percentage field. Select Output VAT @ 17.5% as the Ledger Name and Value Basis as 17.5% under the Additional ing Entries
EC Sales (Goods) Select EC Sales (Goods) as the Ledger Name from the List of Ledger s under the Default ing Allocations for each Item in Invoice Select Output VAT @ 0% as the Ledger Name under the Additional ing Entries
EC Sales (Services) Select EC Sales (Services) as the Ledger Name from the List of Ledger s under the Default ing Allocations for each Item in Invoice Select VAT Exempt as the Ledger Name under the Additional ing Entries
Export Select Export Sales as the Ledger Name from the List of Ledger s under the Default ing Allocations for each Item in Invoice . Select VAT Exempt as the Ledger Name under the Additional ing Entries .
Introduction
Value Added Tax is a form of sales tax. It is a tax on consumption, levied on the sale of goods and services and on the import of goods into the Philippines. It is an indirect tax, which can be ed on to the buyer. Every person or entity that sells/ leases goods, properties and services subject to VAT is required to file VAT Returns, if the aggregate amount of actual gross sales/ receipts exceeds Seven Hundred Fifty Thousand Pesos (PHP 750,000.00), for any twelve-month period. In short, the following persons are liable to file VAT returns:
A person required to as VAT taxpayer, but who failed to
A person who imports goods
Professional practitioners such as
Certified Public ants
Insurance Agents (Life & Non-Life)
Professional Practitioners who are required to the government examination
Others
Type of Rates
The standard VAT rate is 12 percent. Certain goods and services are exempted from VAT (i.e., exempt without credit for input VAT), including medical, dental, and hospital services; educational services provided by private and government educational institutions; and educational services rendered by duly accredited private educational institutions.
Tax Rates 1.
For output tax - 0% or 12%
2.
For input tax
Normal - 0% or 12% Transitional input tax rate - 8% or 10% Presumptive input tax rate - 1-1/2%
Creditable VAT withheld by the Government and the licensee or lessee (3%, 6%, 8.5% and 10%).
Types of Purchases
Purchase of Capital Goods (Not exceeding P1 Million )
Purchase of Capital Goods (Exceeding P1 Million)
Domestic Purchases of Goods Other than Capital Goods
Importation of Goods Other than Capital Goods
Domestic Purchase of Services
Services Rendered by Non-Residents
Purchases Not Qualified for Input Tax
Others
Types of Sales
The term "sale or exchange of services" implies the performance of all kinds of services in the Philippines for others for a fee, remuneration or consideration.
Zero-Rated Sale It is a sale, barter or exchange of goods, properties or services that are subject to 0% VAT.
VAT Exempt Sales It is a sale or lease of goods, properties and services that are not subject to output tax. The buyer cannot avail tax credit or input tax on such exempt sale.
Sales Subject to VAT Normal sales by a VAT ed dealer to another VAT ed dealer or retailer.
Sales to Government Sales made to the government.
Types of Returns Monthly VAT Declaration Tax Form BIR Form 2550 M
Documents Required for filing returns 1.
Duly issued Certificate of Creditable VAT Withheld at Source (BIR Form 2307), if applicable
2.
Duly approved Tax Debit Memo, if applicable
3.
Duly approved Tax Compliance Certificate, if applicable
4.
Previously filed return and proof of payment, for amended return
5.
Summary List of Sales (if quarterly total Sales/Receipts (net of VAT) exceeds PHP 2,500,000) with the following information:
BIR-ed name of the buyer who is engaged in business/exercise of profession Taxpayer Identification Number (TIN) of the buyer (Only for sales that are subject to VAT) Exempt Sales Zero-Rated Sales Sales subject to VAT (exclusive of VAT)
Output Tax (VAT on Sales)
6.
Summary List of Purchases (if quarterly total purchases (net of VAT) exceeds PHP 1,000,000) with the following information:
BIR-ed name of the seller/ supplier/ service provider Address of seller/ supplier/ service provider Taxpayer Identification Number (TIN) of seller/ supplier/ service provider Exempt purchases Zero-Rated purchases Purchases subject to VAT (exclusive of VAT) - on services Purchases subject to VAT (exclusive of VAT) - on capital goods Purchases subject to VAT (exclusive of VAT) - on goods other than capital goods Creditable Input Tax Non-creditable Input Tax
N o t e : Creditable and non-creditable basis, but on per month basis. 7.
input
taxes
are
to
be
The Quarterly Summary List of Importation with the following information:
Import Entry Declaration Assessment/ Release Date Date of Importation Name of the Seller Country of Origin Dutiable Value All Charges Before Release from Customs Custody Landed Cost Exempt
computed
not
on
per
supplier
Taxable (Subject to VAT) VAT Paid Official Receipt (OR) Number of the Official Receipt evidencing payment of tax Date of VAT payment
Quarterly VAT Declaration Tax Form BIR Form 2550 Q Documents Required for Filing Returns
1. Duly issued Certificate of Creditable VAT Withheld at Source (BIR Form 2307), if applicable 2. Duly approved Tax Debit Memo, if applicable 3. Duly approved Tax Compliance Certificate, if applicable 4. Previously filed return and proof of payment, for amended return 5. Summary List of Sales (if quarterly total Sales/Receipts (net of VAT) exceeds PHP 2,500,000) with the following information: BIR-ed name of the buyer who is engaged in business/exercise of profession
Taxpayer Identification Number (TIN) of the buyer (Only for sales that are subject to VAT)
Exempt Sales
Zero-Rated Sales
Sales subject to VAT (exclusive of VAT)
Output Tax (VAT on Sales)
6. Summary List of Purchases (if quarterly total purchases (net of VAT) exceeds PHP 1,000,000) with the following information:
BIR-ed name of the seller/ supplier/ service provider
Address of seller/ supplier/ service provider
Taxpayer Identification Number (TIN) of seller/ supplier/ service provider
Exempt purchases
Zero-Rated purchases
Purchases subject to VAT (exclusive of VAT) - on services
Purchases subject to VAT (exclusive of VAT) - on capital goods
Purchases subject to VAT (exclusive of VAT) - on goods other than capital goods
Creditable Input Tax
Non-creditable Input Tax
Note: basis,
Creditable and non-creditable but on per month basis.
input
taxes
are
to
be
computed
7. The Quarterly Summary List of Importation with the following information:
Import Entry Declaration
Assessment/ Release Date
Date of Importation
Name of the Seller
Country of Origin
Dutiable Value
All Charges Before Release from Customs Custody
Landed Cost
Exempt
Taxable (Subject to VAT)
VAT Paid
Official Receipt (OR) Number of the Official Receipt evidencing payment of tax
not
on
per
supplier
Date of VAT payment
Filing of Returns
For Monthly VAT Declarations Manual Filing Returns must be filed not later than the twentieth (20th) day, of the following month.
For Quarterly VAT Declarations Returns must be filed within twenty-five (25) days, following the close of the taxable quarter of the taxpayer, for manual filing.
How Do I File My Returns? When a payment has to be made:
You are required to and present the duly accomplished BIR Form 2550 M/Q with the required attachments and your payment at the nearest Authorised Agents Bank (AAB) of the Revenue District Office.
Where there are no AABs, you are required to and present the duly accomplished BIR Form 2550 M/Q, together with the required attachments and your payment to the Revenue Collection Officer or duly Authorised City or Municipal Treasurer, located within the Revenue District Office.
You will receive a copy of the duly stamped and validated form from the teller of the AABs/ Revenue Collection Officer/ duly Authorised City or Municipal Treasurer.
When there is no payment:
You are required to and present the duly accomplished BIR Form 2550 M/Q with the required attachments at the Revenue District Office.
You will receive your copy of the duly stamped and validated form from the RDO representative.
Note: For taxpayers filed for the
1. with offices in multiple locations, only one consolidated return shall be principal place of business/ head office and all the branches. 2. The Quarterly List of Sales and Purchases shall be submitted in magnetic form, using a 3.5-inch floppy diskette, following the format provided under Section4. 110-4 (sub-section G) of RR 8-2002
Penalties
There shall be imposed and collected as part of the tax: A surcharge of twenty-five percent (25%), fifty percent (50%), interest at the rate of twenty percent (20%) per annum, compromise penalty or such higher rate as may be prescribed by rules and regulations, on any unpaid amount of tax, from the date prescribed for the payment until the amount is fully paid.
Creating a Company
To create a company, provide basic information about the company whose books of s are to be maintained in Tally Go to Gateway of Tally > Alt + F3 > Create Company
Statutory Compliance for: Select Philippines from the List of Countries
Enabling VAT Returns Go to Gateway of Tally> s Info. > F11: Features > Statutory and Taxation
Set Enable Value Added Tax (VAT) to Yes
Select Type of Dealer as Regular
Enter the VAT Registration number
Enter VAT Applicable from date
Enter the Line of Business
Enter RDO Code given by the Philippines Customs and Excise Department
Accept to save the changes
Creating a Customer Ledger
To create a Customer ledger,
1. Go to Gateway of Tally > s Info > Ledger > Create 2. Enter the Name of the customer ledger you wish to create 3. Select the group Under which you are creating the customer ledger 4. Enable Maintain balance bill-by-bill? to Yes and enter details in the Default Credit Period if applicable 5. By default the Inventory Values are affected? field is set to No 6. Accept to save
Creating a Supplier Ledger
Create a Supplier Ledger under Sundry Creditors as shown.
Creating an Input VAT Ledger
To create a Input VAT Ledger 1.
Go to Gateway of Tally > s Info > Ledger > Create
2.
Enter the Name of the Tax ledger you wish to create
3.
Select the group Duties and Taxes from the field Under
4.
On the selection of group Duties and Taxes , you will get the option to select Type of Duty/Tax . Select VAT from the list
5.
5.
If you do not wish to select VAT classification at the Ledger level, select Not Applicable as the VAT/Tax Class can be selected while creating a voucher.
6.
By default the Inventory values are affected field is set to No
7.
Set the Percentage of Calculation as 12% and Method of Calculation as On VAT Rate .
Note: If selected
the VAT/Tax Class is not during voucher entry.
selected
at
the
ledger
level,
the
same
can
be
Creating an Output VAT Ledger
Creating Output VAT is similar to that of creating Input VAT.
Creating a Sales Ledger
To create a Sales Ledger,
1. Go to Gateway of Tally > s Info > Ledger > Create 2. Enter the Name of the sales ledger you wish to create 3. Select the group under which you are creating the sales ledger 4. Set the option Used in VAT Returns to Yes , if you want to select VAT classifications for this Ledger
5. Once you set this to Yes , Tally prompts with VAT/Tax Class screen 6.
5. 6. Select the required classification from the drop down list under the field VAT/Tax Class . The drop down list consists of the Sales classifications pertaining to Philippines . If you do not wish to select a classification at the Ledger level, select Not Applicable 7. Select the Type of Industry from the list Type of Industries Note: Types of Industry the is selecting the will appear.
is applicable taxable sales
only in the as VAT/Tax
case Class
of taxable sales. Therefore, then this Type of Industry
if list
Creating a Purchase Ledger
Creating a Purchase ledger is similar to creating the Sales Ledger, but it should be created under Purchase s.
Creating a Journal Voucher Type
To create/Alter a Voucher Type, e.g. Journal
Go to s Info. > Voucher Types > Create/Alter > Journal
Enter VAT Adjustment Class in the Name of Class field.
Set Use Class for VAT Adjustments to Yes and accept the screen
Creating Sales Voucher
To create a Sales Voucher ,
1. Go to Gateway of Tally > ing Vouchers > F8: Sales 2. Select As Invoice 3. Enter the Reference in the Ref field , if required 4. Select the Party’s A/c Name from the List of Ledger s 5. Select the Sales Ledger applicable to the type of sales from the List of Ledger s . Select the VAT/Tax Class from the drop down list
6. 7.
6. Select the Name of Item from the List of Items 7. Enter the Quantity and Rate . The amount is automatically displayed in the Amount field 8. Select the Output VAT from the List of Ledger s . The percentage of the Output VAT rate is automatically calculated on the Assessable Value 9. Enter Narration , if required 10. Accept to save the voucher Similarly, you can create Sales Vouchers for the remaining sales classes.
Creating a Sales Exempt Voucher
Go to Gateway of Tally > ing Vouchers > F8: Sales
1. Select As Invoice 2. Enter the Reference in the Ref field, if required 3. Select the Party’s A/c Name from the List of Ledger s 4. Select the required VAT/Tax Class from the drop down list
5. Select the Name of Item from the List of Items 6. 7.
5. 6. Enter the Quantity and Rate . The amount is automatically displayed in the Amount field 7. Enter Narration , if required 8. Accept to save the voucher Similarly, you can create Sales Vouchers for the remaining sales classes
Creating a Sale of Service Voucher
1. Go to Gateway of Tally > ing Vouchers > F8: Sales 2. Select As Invoice 3. Enter the Reference in the Ref field, if required 4. Select the Party’s A/c Name from the List of Ledger s 5. Select the Sales Ledger from the List of Ledger s 6. Select the required VAT/Tax Class from the drop down list. If the Vat class is not selected in the ledger creation
7. 8.
7. Select the Name of Item from the List of Items 8. Enter the Quantity and Rate. The amount is automatically displayed in the Amount field. 9. Select the Output VAT from the List of Ledger s. The percentage of the Output VAT rate is automatically calculated on the Assessable Value 10. Enter Narration, if required 11. Accept to save the voucher Similarly, you can create Sales Vouchers for the remaining sales classes.
Creating a Purchase Voucher
To create a Purchases Voucher,
1. Go to Gateway of Tally > ing Vouchers > F9: Purchase 2. Select As Invoice 3. Enter the Reference in the Ref field, if required 4. Select the Party’s A/c Name from the List of Ledger s 5. Select the Purchase Ledger 6. Select the required VAT/Tax Class from the drop down list
7.
7. Select the Name of Item from the List of Items 8. Enter the Quantity and Rate . The amount is automatically displayed in the Amount field 9. Select the Input VAT . The Input VAT percentage is automatically calculated on the Assessable Value 10. Enter Narration , if required 11. Accept to save the voucher
Creating Purchase service voucher
To create a Purchase Voucher,
1. Go to Gateway of Tally > ing Vouchers > F9: Purchase 2. Enter the Reference in the Ref field, if required
3. Select Vendor-Services from the List of Ledger to be credited 4. Enter the amount to be credited 5. Select Purchase-Services and Input VAT@12%-Services from the List of Ledger to be Debited 6. 7.
4. 5.
6. Enter the amount 7. Enter Narration , if required 8. Accept to save the voucher
Creating a Journal Voucher
To create a Journal using a Voucher Class,
1.
Go to Gateway of Tally > ing Vouchers > F7: Journal
2.
Select the class as VAT Adjustment Class from the Voucher Class List
3. Select the flag from the VAT Adjustments list under the field Used For
4.
Select Advance Tax Paid in Used for field
4.
5.
Select the Ledger Net VAT Payable created under Duties and Taxes from the List of Ledger s to be debited
6.
Select the Ledger, Advance Tax Paid from the List of Ledger s to be credited
7.
The Amount is automatically entered
8.
Enter Narration, if required
9.
Accept to save the changes
Creating a Journal for Compromise for Philippines 1.
Go to Gateway of Tally> ing Voucher > F7: Journal
2.
Select VAT Adjustment Class as the Voucher Class
3.
1. 2. 3.
Select Compromise in Used for field
3.
Select the Ledger Compromise created under Indirect Expenses from the List of Ledger s to be debited
4.
Enter the amount to be debited
5.
Select the Ledger Compromise Payable from the List of Ledger s to be credited
6.
The Amount is automatically entered
7.
Enter Narration, if required
8.
Accept to save the voucher
8.
Creating a Journal for Attributable Input Tax Towards Exempted Sales Go to Gateway of Tally> ing Voucher > F7: Journal 1.
Select VAT Adjustment Class as the Voucher Class
2.
Select Attributable Input Tax Towards Exempted Sales in Used for field
3.
Select the Ledger Expenses created under Indirect Expenses from the List of Ledger s to be debited
4.
Enter the amount to be debited from the List of Ledger to be credited
5.
Select the Ledger Input VAT-Normal Purchase @ 12% from the List of Ledger s to be credited
6.
The Amount is automatically
7.
5. 6. 7.
Enter Narration, if required
8.
Accept to save the voucher
Creating a Journal for Deferred Input Tax on Capital goods Greater than P1M Go to Gateway of Tally> ing Voucher > F7: Journal 1.
Select VAT Adjustment Class as the Voucher Class
2.
Select Deferred Input Tax on Capital goods Greater than P1M in the Used for field
3.
Select the Ledger Deferred Input VAT on Capital goods A/c created under Current Assets from the List of Ledger s to be debited
4. 5.
3.
4.
Enter the amount to be debited
5.
Select the Ledger Input VAT on Capital Goods 12%-More than 1 M from the List of Ledger s to be credited
6.
The Amount is automatically entered
7.
Enter Narration, if required
8.
Accept to save the voucher
Creating a Journal for Input Tax Reversal - Others Go to Gateway of Tally> ing Voucher > F7: Journal 1.
Select VAT Adjustment Class as the Voucher Class
2.
Select Input Tax Reversal Others in Used for field
2.
3.
Select the Ledger Expenses created under Indirect Expenses from the List of Ledger s to be debited
4.
Enter the amount to be debited
5.
Select the Ledger Input VAT @ 12%-Normal Purchase from the List of Ledger s to be credited
6.
The Amount is automatically entered
7.
Enter Narration, if required
8.
Accept to save the voucher
Creating a Advance Tax Payments Made
1.
Go to Gateway of Tally> ing Voucher > F7: Journal 1.
Select VAT Adjustment Class as the Voucher Class
2.
Select Advance Tax payment Made in Used for field
3.
Select the Ledger Net Vat payable from the List of Ledger s to be debited
4.
Enter the amount to be debited
5.
Select the Ledger Advance Tax paid from the List of Ledger s to be credited
6.
The Amount is automatically entered
7.
Enter Narration, if required
8.
7. 8.
Accept to save the voucher
Creating a Journal for Not Attributable Input Tax Towards Exempted Sales Go to Gateway of Tally> ing Voucher > F7: Journal 1.
Select VAT Adjustment Class as the Voucher Class
2.
Select Not Attributable Input Tax Towards Exempted Sales in Used for field
3.
Select the Ledger Expense from the List of Ledger s to be debited
4.
Enter the amount to be debited
5.
Select the Ledger Input Vat @12% on Normal Purchase from the List of Ledger s to be credited
6.
5.
6.
The Amount is automatically entered
7.
Enter Narration, if required
8.
Accept to save the voucher
Creating a Interest Payable Go to Gateway of Tally> ing Voucher > F7: Journal 1.
Select VAT Adjustment Class as the Voucher Class
2.
Select Interest Payable in Used for field
3.
Select the Ledger Interest from the List of Ledger s to be debited.
4.
3. 4.
Enter the amount to be debited.
5.
Select the Ledger Interest Payable from the List of Ledger s to be credited
6.
The Amount is automatically entered
7.
Enter Narration, if required
8.
Accept to save the voucher
Creating a Journal for Not attributable Input Tax Towards Sales to Government Go to Gateway of Tally> ing Voucher > F7: Journal 1.
Select VAT Adjustment Class as the Voucher Class
2.
Select Not Attributable Input Tax Towards Sale to Govt in Used for field
2.
3.
Select the Ledger Expenses from the List of Ledger s to be debited
4.
Enter the amount to be debited
5.
Select the Ledger Input Vat @12% on Normal Purchase from the List of Ledger s to be credited
6.
The Amount is automatically entered
7.
Enter Narration if required
8.
Accept to save the voucher
Creating a Journal for Transitional Input Tax Go to Gateway of Tally> ing Voucher > F7: Journal 1.
1.
Select VAT Adjustment Class as the Voucher Class
2.
Select Transitional Input Tax in Used for field
3.
Select the Ledger Input VAT from the List of Ledger s to be debited.
4.
Enter the amount to be debited.
5.
Select the Ledger Tax Paid on Opening Stock from the List of Ledger s to be credited
6.
The Amount is automatically entered
7.
Enter Narration, if required
8.
Accept to save the voucher
8.
Creating a Journal for Withheld Tax Credit Availed- Government Go to Gateway of Tally> ing Voucher > F7: Journal 1.
Select VAT Adjustment Class as the Voucher Class
2.
Select Withheld Tax Credit Availed-Govt in Used for field
3.
Select the Ledger Output VAT@12% from the List of Ledger s to be debited.
4.
Enter the amount to be debited
5.
Select the Ledger Tax Withheld from the List of Ledger s to be credited
6.
The Amount is automatically entered
7.
5. 6. 7.
Enter Narration, if required
8.
Accept to save the voucher
Creating a Journal for Standard Input Tax to sale to Government Go to Gateway of Tally> ing Voucher > F7: Journal 1.
Select VAT Adjustment Class as the Voucher Class
2.
Select Standard Input Tax to Sale to Govt in Used for field
3.
Select the Ledger Input VAT from the List of Ledger s to be debited
4.
Enter the amount to be debited
5.
3. 4. 5.
Select the Ledger Expenses from the List of Ledger s to be credited
6.
The Amount is automatically entered
7.
Enter Narration, if required
8.
Accept to save the voucher
Creating a Journal for Surcharge Payable Go to Gateway of Tally> ing Voucher > F7: Journal 1.
Select VAT Adjustment Class as the Voucher Class
2.
Select Surcharge Payable in Used for field
3.
2.
3.
Select the Ledger, Surcharge , from the List of Ledger s to be debited
4.
Enter the amount to be debited
5.
Select the Ledger Surcharge Payable from the List of Ledger s to be credited.
6.
The Amount is automatically entered.
7.
Enter Narration, if required
8.
Accept to save the voucher
Creating a Journal for VAT Refund/TCC Claimed Go to Gateway of Tally> ing Voucher > F7: Journal 1. 2.
1.
Select VAT Adjustment Class as the Voucher Class
2.
Select VAT Refund/TCC Claimed in Used for field
3.
Select the Ledger, Refund Claim , from the List of Ledger s to be debited
4.
Enter the amount to be debited
5.
Select the Ledger, Input VAT , from the List of Ledger s to be credited
6.
The Amount is automatically entered
7.
Enter Narration, if required
8.
Accept to save the voucher
8.
VAT Reports
To view VAT Reports, Go to Gateway of Tally > Display > Statutory Reports > VAT Reports
The VAT Reports menu displays the following options VAT Computation VAT Forms
VAT Computation
The VAT Computation screen displays as shown.
Assessable Value The Assessable Value is the total value of the transactions made with the respective VAT/Tax Classification.
Tax Amount The rate of percentage calculated on the Assessable Value is the Tax Amount.
Show all VAT Classifications
Enable the option Show all VAT Classifications? to Yes in F12: Configure
The VAT Computation screen displays as shown.
VAT Return
Go to Go to Gateway of Tally > Display > Statutory Reports > VAT Reports > VAT Forms > VAT Return Forms
The VAT Return for Philippines is displayed in the government prescribed format. Use Alt + P or click on Print option to print the report.
The VAT Return form displays as shown
Monthly Value added Tax – Declaration Fill in all applicable space. Mark all appropriate boxes with an ‘X’ 1. For the Month of DD/MM/YY The date entered in the Report Generation screen is captured in this column. 2. Amended Return This field is to be filled manually. 3. Number of sheet attached This field is to be filled manually. Part I 4. TIN The VAT TIN (Regular) as entered in F11: Features > F3: Statutory and Taxation is displayed here. 5. RDO Code The RDO Code as entered in F11: Features > F3: Statutory and Taxation is displayed here. 6. Line of Business The Line of Business as entered in F11: Features > F3: Statutory and Taxation is displayed here. 7. Taxpayer’s Name (for Individual) Last Name, Middle Name/ (for Non-Individual) ed Name Taxpayer’s Name as entered in the Company Creation screen is printed in this column. 8. Telephone no The Telephone number as entered in the Company Creation screen is captured in this column. 9. ed address The ed Address as entered in the Company Creation screen is captured in this column. 10. Zip code The Zip Code as entered in the Company Creation screen is captured in this column. 11. Are you availing of tax relief under Special Law or International Tax Treaty? To be filled manually after printing. Part II 12. Vatable Sales/Receipt- Private (Sch.1) The Total of all the Sales transactions made using the VAT/Tax Classifications, Sales of Service@12% and Sales of Goods @12% Assessable Value is captured in the Sales/Receipts for the month (exclusive of VAT) column and the corresponding Tax amount is captured in the Output Tax due for the month column. 13. Sales to Government
The Total of all the Sales transactions made using the VAT/Tax Classifications Sales of Service to Govt@12% and Sales of Goods to Govt @12% Assessable Value is captured in the Sales/Receipts for the month (exclusive of VAT) column and the corresponding Tax amount is captured in the Out put Tax due for the month column. 14. Zero Rated Sales/Receipts The Total of all the Sales transactions made using the VAT/Tax Classification Sales-Zero Rated Assessable Value is captured in the Sales/Receipts for the month (exclusive of VAT) column. 15. Exempt Sales/Receipts The Total of all the Sales transactions made using the VAT/Tax Classification Sales Exempt Assessable Value is captured in Sales/Receipts for the month (exclusive of VAT) column. 16. Total Sales/Receipts and Output Tax Due The Total of Boxes (12A+13A+14+15) is captured in column 16A and the Total of (12B+13B) is captured in 16B. 17 A. Input Tax Carried Over from Previous Period / Excess over 70% of Output VAT Input Tax Carried Over from Previous Period / Excess over 70% of Output VAT is captured in this column. 17 B. Input Tax Deferred on Capital Goods Exceeding P1Million from Previous Period The entry made using Journal Voucher with the Vat Adjustment Class and Used for as Input Tax Deferred on Capital Goods is printed this column. The sample entry is given below. Dr. Input Tax Deferred on Capital Goods Cr. Input Vat on capital goods@12% 17 C. Transitional Input Tax The entry made using the Journal Voucher with the Vat Adjustment Class and Used for as Transactional Input Tax is printed this column. The sample entry is given below. Dr. Input VAT Cr. Tax paid on opening stock 17 D. Presumptive Input Tax The entry made using the Journal Voucher with the Vat Adjustment Class and Used for as Presumptive Input Tax is printed this column. The sample entry is given below. Dr. Input VAT Cr. Other Income 17 E. Others This field remains blank. 17 F Total (Sum of Item 17A, 17B, 17C, 17D & 17 E) The Sum of Item 17A, 17B, 17C, 17D & 17E is captured in this column. 18 A/B. Purchase of Capital Goods not exceeding P1Million (see sch.2) The Total of all the Purchase transactions made using the VAT/Tax Classification, Purchase of capital goods, not
exceeding P1M Assessable Value is captured in Purchases column and the corresponding Tax amount is captured in 18 B column. 18 C/D. Purchase of Capital Goods exceeding P1Million (see sch.2) The Total of all the Purchase transactions made using the VAT/Tax Classification, Purchase of capital goods exceedingP1MAssessable Value is captured in Purchases and the corresponding Tax amount is captured in 18D column. 18 E/F. Domestic Purchase of Goods other than capital goods The Total of all the Purchase transactions made using the VAT/Tax Classification, Purchase of goods@12% Assessable Value, is captured in Purchases column and the corresponding Tax amount is captured in 18 F column. 18 G/H. Importation of Goods other than capital goods The Total of all the Purchase Transactions made using the VAT/Tax Classification, Purchase-Import@12% Assessable Value, is captured in Purchases and the corresponding Tax amount is captured in 18 H column. 18 I/J. Domestic Purchase of Service Goods other than capital goods The Total of all the Purchase Transactions made using the VAT/Tax Classification, Purchase-Service@12% Assessable Value, is captured in Purchases and the corresponding Tax amount is captured in 18 J column. 18 K/L. Service rendered by Non-residents The Total of all the Purchase transactions made using the VAT/Tax Classification, Purchase of Service rendered by Non- Residents@12% Assessable Value, is captured in Purchases column and the corresponding Tax amount is captured in 18 L column. 18 M. Purchases Not Qualified for Input Tax The Total of all the Purchase transactions made using the VAT/Tax Classification, Purchase not Qualified for Input Tax Assessable Value, is captured in the Purchases column. 18 N/O. Others This field remains blank. 19. Total Available Input tax (Sum of item 17F, 18B, 18D, 18F, 18H, 18J, 18L & 18O) The Total Available Input tax (Sum of item 17F, 18B, 18D, 18F, 18H, 18J, 18L & 18O) is captured in this column. 20 A. Input Tax on Purchases of Capital Goods exceeding P1Million deferred for the succeeding period (Sch.3) The entry made using the Journal Voucher with the VAT Adjustment Class and Used for as Deferred Input Tax on Capital Goods greater than P1M is printed this column. The sample entry is given below. Dr. Deferred input on capital goods Cr. Input Vat on capital goods@ 12% 20 B. Input Tax on Sale to Govt. closed to expense (Sch.4) The Schedule 4 Value is captured in this column. 20 C. Input Tax allocated to exempt sale (Sch.5) The Schedule 5 Value is captured in this column. 20 D. Vat Refund/TCC Claimed
The entry made using Journal Voucher with the Vat Adjustment Class and Used for as Vat Refund/TCC Claimed is printed this column. The sample entry is given below. Dr. Refund Claim Cr. Input Vat 20 E. Input Tax in excess of 70% cap to be carried to next period (Sch.6) The Schedule 6 Value is captured in this column. 20 F. Others The entry made using Journal Voucher with the Vat Adjustment Class and Used for as Input Tax reversal- others is printed this column. The sample entry is given below. Dr. Expense A/c Cr. Input Vat @12% 21. Total Allowable Input Tax (Item19 less Item 20G) The Difference of Box 19 and 20 G is captured in this column. 22. Net VAT Payable (Item 16B less Item 21) The Difference of Box 16Band 21 is captured in this column. 23 A.
Creditable Value-Added Tax Withheld (Sch. 7)
The Schedule 7 Value is captured in this column. 23 B. Advance Payments (Sch.8) The Schedule 8 Value is captured in this column. 23 C. VAT withheld on Sales to Government (Sch.9) The Schedule 9 Value is captured in this column. 23 D. VAT paid in return previously filed, if this is an amended return This field remains blank. 23 E. Others This field remains blank. 23 F. Total Tax Credit/Payment The Total of 23A+23B+23C+23D+23E is captured in this column. 24. Tax Still Payable/(Overpayment) (Item 22 less Item 23F) The Difference of Box 22 and 23F is captured in this column. 25A. Surcharge The entry made using Journal Voucher with the VAT Adjustment Class and Used for as Surcharge Payable is
printed this column. The sample entry is given below. Dr. Surcharge A/c Cr. Surcharge Payable A/c 25B. Interest The entry made using Journal Voucher with the VAT Adjustment Class and Used for as Interest Payable is printed this column. The sample entry is given below. Dr. Interest A/c Cr. Interest Payable A/c 25C. Compromise The entry made using Journal Voucher with the VAT Adjustment Class and Used for as Surcharge Payable is printed this column. The sample entry is given below. Dr. Compromise A/c Cr. Compromise Payable A/c 26 Total Amount The Difference of Box 24 and 25D is captured in this column. The Fields 27, 28, 29, 30, 31 and 32 are entered manually.
Schedule Schedule 1:
Schedule of Sales/Receipts and Output Tax (Attach additional sheet, if necessary) The Total of all the Sales transactions made using the VAT/Tax Classification as normal sales and selecting the Type of Industry is captured in the ATC column, Assessable Value is captured in Sales/Receipts for the period column and corresponding Tax amount is captured in Out put Tax due for the period column
Schedule 2:
Purchases/Importation of Capital Goods (Aggregate Amount Not Exceeding P1 Million) (Attach additional sheet, if necessary) The Total of all the Purchase transactions made using the VAT/Tax Classification, Purchase capital goods not exceeding 1 Million Assessable Value is captured in Amount column and the corresponding Tax amount is captured in Input Tax due for the month column. Schedule 3:
Purchases/Importation of Capital Goods (Aggregate Amount Exceeds P1 Million) (Attach additional sheet, if necessary) The Total of all the Purchase Transactions made using the VAT/Tax Classification, Purchase capital goods exceeding 1 Million- Assessable Value is captured in the Amount column and the corresponding Tax amount is captured in the Input Tax due for the month column.
Schedule 4:
Input Tax Attributable to Sale to Government The entry made using the Journal Voucher with the Vat Adjustment Class and Used for as Attributable Input tax
towards to Govt is printed in this column. The sample entry is given below. Dr. Expense A/c Cr. Input Vat normal purchase The entry made using the Journal Voucher with the Vat Adjustment Class and Used for as Not Attributable Input tax towards to Govt is printed in this column. The sample entry is given below. Dr. Expense A/c Cr. Input Vat normal purchase The entry made using the Journal Voucher with the Vat Adjustment Class and Used for as Standard Input Tax to sale to govt is printed in this column. The sample entry is given below. Dr. Input A/c Cr. Expense a/c
Schedule 5:
Input Tax Attributable to Exempt Sales i. The entry made using the Journal Voucher with the Vat Adjustment Class and Used for as Attributable Input tax towards Exempted Sale is printed in this column. The sample entry is given below. Dr. Expense A/c Cr. Input Vat normal purchase ii. The entry made using the Journal Voucher with the Vat Adjustment Class and Used for as Not Attributable Input tax towards Exempted sale is printed this column. The sample entry is given below. Dr. Expense A/c Cr. Input Vat normal purchase
Schedule 6: Input Tax in Excess of 70% Cap
The entry made using the Journal Voucher with the Vat Adjustment Class and Used for as Input Tax adjustment is printed in this column. The sample entry is given below. This field remains blank. Dr. Input Tax adjustment A/c Cr. Input Vat
Schedule 7: Tax Withheld Claimed as Tax Credit (Attach additional sheets, if necessary)
The entry made using the Journal Voucher with Vat Adjustment Class and Used for as Withholding Tax-Other Agency is printed in this column. The sample entry is given below: Dr. Withholding Tax other agency A/c Cr. Sundry Drs
Schedule 8: Schedule of Advance Payment (Attach additional sheets, if necessary)
The entry made using the Journal Voucher with Vat Adjustment Class and Used for as Advance Tax Payment Made is printed this column. The sample entry is given below. Dr. Net Vat payable A/c Cr. Advance Tax Paid
Schedule 9: VAT Withheld on Sales to Government (Attach additional sheets, if necessary)
The entry made using the Journal Voucher with the Vat Adjustment Class and Used for as Withheld Tax Credit availed -Govt is printed in this column. The sample entry is given below. Dr. Output Vat A/c Cr. Tax withheld A/c
Introduction
Point of Sales is considered a one-step billing process. This means that entering the order and generating the invoice and receipt of amount are considered to be part of the same step. This is normally used in an environment where the customer is making the purchase in person and the invoicing process is part of the checkout process.
POS Invoicing in Tally
The POS (Point-of-Sales) Invoice feature allows you to create invoices at a point of sales and to collect payment from your customers. POS Invoice allows you to create invoices in seconds and also print and mail the invoices.
Features of POS Invoicing in Tally The POS Invoicing functionality in Tally is :
Simple and very friendly.
Quick and easy to set up and use.
Facilitates faster data entry and calculations.
High speed printing of Invoices.
POS Voucher Type without a Class
To create a POS Invoice Voucher Type without Voucher Class Go to Gateway of Tally > s Info > Voucher Type > Create
Name: Enter the name of the new Voucher type (for e.g.: POS Invoice). Type of Voucher: The type of voucher Sales from the predefined voucher types. Select the type of Voucher as Sales from the list of Voucher Types. Abbreviation: By default Sales text will appear in the abbreviation field. abbreviation as per your requirement
However, you can enter the
Used for POS Invoicing?: On selecting the Sales voucher type from the list, “Used for POS Invoicing?” field appears. Set this field to YES if you wish to a POS Invoice.
Print Message 1 and Print Message 2: These fields can be filled with appropriate messages and they are provided just for the Convenience. The same will be printed at the bottom of the POS invoice in the Tax Invoice. Note: 1 . Once Use entitled to set
POS for Invoicing field is set to Y e s in voucher type, this field to N O if you have ed a POS Invoice.
you
will
not
be
2 . For Information on Default Print Title, Method of Voucher Numbering, Starting Number, Width on Numeric Part, Use Common Narration, Print after saving Voucher, Name of Class, Restart Numbering and Prefix Details click here.
POS Voucher Type with a Class
To create a POS Invoice Voucher Type with Voucher Class: Create a new Voucher type POS Invoice with a Voucher Class. Complete the form for creating a new Voucher Type as given. Press Enter at the Name of Class field in the Voucher type creation screen to see the following screen with the entries made.
If the different modes of payment for invoices are Gift vouchers, Credit/Debit Card Payment, payment through Cheque/DD and Cash, then the following four new default ledger s have to be created: 1.
Gift Vouchers under group Sundry Debtors
2.
Ledger Bank or Bank OD/OCC (for card payments)
3.
1. 2. 3.
Payment through C heque/DD , under the group Ledger Bank s or Bank OD/OCC
4.
Cash under group ledger Cash
The other entries for each item in Invoice are similar to default Sales Voucher class creation.
Creating a POS Invoice
To enter a simple transaction using a POS Invoice . Go to Gateway of Tally > ing Vouchers > Select F8 1.
Select the POS Invoice as the Voucher type from the list of Voucher types.
2.
Select the Godown , Sales Ledger and VAT/Tax Class if applicable.
3.
Select the Item using the Bar code reader to scan the bar code or select the Item from the list.
4.
Enter the Batch-wise details and Actual and Billed Quantity (If these features are activated in F11: Features).
5.
The Rates of the Item is picked up from Set Standard Rates screen (Stock Item Creation screen) or from the Price List screen.
6.
Select VAT/Tax from the list.
7.
By default for the first time, the POS Invoice screen will appear in appear as below with the Cash and Cash tendered field:
Single Mode Payment. The screen will
7.
8.
The Multi Mode Pymt button helps you to make the payment through other mode like Gift voucher, credit card or by cheque. Click on the Multi Mode Pymt button, the POS Invoice will appear as:
8.
9.
10.
Select Gift voucher from the list and enter the amount OR Select Credit/Debit Card Payment and enter the amount and the card number OR Select the Cheque and enter the amount , Bank Name and Cheque Number OR Select Cash ledger from the list and enter the amount to be paid. Enter the Cash Tendered and Balance will be calculated automatically. Accept the POS Sales Invoice screen.
Consider the above example shown in the above screen, where Multi-mode Payment options like Gift Vouchers, Credit/Debit card payment, Cheque and Cash were allowed. Here, the Customer has made a payment of Rs.1000 using a Gift Voucher and Rs.1000 is paid by Credit Card and Rs.500 by Cheque and the remaining balance amount Rs.587.50 is paid in Cash. The Debit/Credit Card Number, Cheque payment and the actual money tendered in cash are recorded. Since the Customer tenders Rs.1000 in cash, the system calculates the balance amount as Rs.412.50, which is returned to the customer. The calculation is as below:
Total amount to be paid : Rs.3087.50 Amount paid by Gift Vouchers : 1000 Amount paid by Credit/Debit Card : 1000 Amount paid by Cheque : 500 Amount paid by Cash : 587.50
Cash to be owed by the customer is Rs.3087.50, the system calculates the Amount Received – Actual Billed Amount less amount received through other mode apart from cash = Balance Amount (viz. 3087.50-[1000-1000-500-587.50]=1000 = Rs.412.50 ) N o t e : If Maintain select only one
Multiple Godown feature is set to Y e s in F11: Godown while ing a POS Invoice.
Features , you can
Illustrating POS invoicing for billing Pharmaceutical products To create a POS Invoice follow the procedure given: 1.
Set Use Security Control to Yes in Company Creation/Alteration screen and create the name using the security feature in Tally. The who logs in to Tally with the name of the and can print the POS Invoice with the name.
2.
Set Maintain Batch-wise Details and Set Expiry Dates for Batches to Yes in the F11: Features screen.
3.
Set Use different Actual & Billed Quantities to Yes in F11: Features screen to specify the free items.
4.
Set Separate Discount column on Invoices to Yes to specify the discount on any items while making a POS sales invoice.
5.
Create Stock Items. Place the cursor in the alias field and use the Bar Code Reader to scan and read the bar code of the Item. This code will automatically get displayed in the alias field. Select the Unit of measure and Set Maintain in Batches to Yes. On setting this option you will get Track Date of Mfg and Use expiry dates set these two fields to Yes.
6.
Set Standard Rates to Yes and enter the standard selling price of the Item (Press F12: Configure button in the Stock Item creation screen and Set Allow Std. Rates for Stock Items to Yes). If you have specified the rates in the price level then you can skip this field.
7.
Create a Voucher Typ e (e.g. POS Invoice) under Sales voucher type.
8.
Press F8: Sales in the Voucher Entry screen and select the POS Invoice from the list of Voucher Types.
9.
Select the Godown, Sales Ledger and VAT/Tax Class (if applicable) from the list.
10.
Select the Item from the list or use the scanner to read the bar code of the item. On selecting the Item from the list or by scanning, you will be prompted to enter the Batch Name in the New Number screen. Enter the Batch Name of the Item.
10.
11.
Tally prompts you to enter the Manufacturing Date and the Expiry Date as below:
11.
12.
The rate of the Item entered in the Set Standard Rates (in Stock Item creation screen) or in Price List screen will get reflected in the rate and amount column.
12.
Note: To enter details of items offered free with purchases, set Use different Actual and Billed Qty and Allow 0 valued entries in vouchers to Y e s in F 1 1 : Features . For Example: If you buy 2 shirts and get 1 shirt free with it, while entering POS Invoice, enter 3 shirts in the A c t u a l Column and 2 shirts in the B i l l e d Column. While printing the Invoice, the difference in the actual and billed quantity will be shown as F r e e in the R a t e Column. 13.
Select VAT/Tax from the list.
14.
Select Gift voucher from the list OR Select Credit/Debit Card Payment and the card number and enter the amount OR Select the Cheque and enter the amount, Bank Name and Cheque Number .
15.
Select the Cash and enter the cash paid by the customer at the counter. The balance amount , which has to be paid to the customer, will be calculated automatically.
16.
Accept the POS Sales Invoice screen to save the transaction.
16.
Extra Features available from a POS Invoice screen are : Single Mode/ Multi Mode Pymt: You can toggle between single and multi mode payments by clicking on the Single Mode Pymt button. In Multi Mode the customer can choose to make his payment by Credit/Debit cards, Gift Vouchers, Cheque or Cash and have all details available on his invoice. In Single Mode only the Cash transaction fields will be printed on the invoice. Note: * If Use Multiple Price level for Invoicing is enabled for the Item then the rates of the Item is picked up from the price levels. Else, you can set the price of the Item in the Stock Item creation screen using the Set Standard Rates to Yes. Enter the standard selling price of the Item (Press F12: C o n f i g u r e button in the Stock Item creation screen and set Allow Std. Rates for Stock Items to Y e s ). * If you have set the rate for an Item both in Price Levels and in Set Standard Rates (in Stock Item Creation screen), the rate is picked up from the Price List and not from the Set Standard Rates in Stock Item creation screen.
Printing a POS Invoice On accepting the POS Sales Invoice screen, press ALT+P or click on Print button, Tally prompts you to print. Press ALT+S or click on the Select Printer button and select the printer from the list. Currently, Tally STAR TSP 600 Compatible, Epson TM T88iii Compatible and Epson TM U220 Compatible printers.
Press ALT+F or click on the Print Format to select the print mode. You can either select the Neat Mode or Quick /Draft . In Neat Mode format you will be able to preview the POS Invoice where as in Quick/Draft mode you cannot preview the POS Invoice.
Press F12 or click on F12: Configure button and set the required options:
Set Print Item Name in One Line to Yes to print the Item details in a single line. If print format is set to Neat Mode then Tally will compress the name of the Item and prints in one single line. However, if the print format is set to Quick Draft Mode then Tally truncates the text and prints in multiple lines.
Set Print Serial No. to Yes to print the serial number.
Set Print Rate Column to Yes to print the rate column.
Print Batch Details is set to No by default, set this option to Yes , if you wish to print the Manufacturing Date and Expiry Date
Set Print Card/Cheque No. to Yes to print the Card/Cheque number.
Print whole Card Number is set to No by default, which will print only last 4 digit of card number. Set this option to Yes to print the 16 digit card number on the POS Invoice.
Set Print VAT Analysis of Item to Yes to print the VAT Analysis on POS Invoice.
Set Print Narration to Yes to print the Narration on POS Invoice.
Accept the Print screen to view the POS Invoice in preview mode (Only for Neat Mode format).
The Invoice displays the company name and address, TIN, CST, Bill number, time, date, name, serial number, description, quantity, rate, amount, Batch number, Expiry date, Manufacturing date, Free Item (if any), discount (if any) Vat analysis, payment mode details, balance to be paid to the customer and the print message.
POS
POS provides the list of Invoices. These Vouchers are collated and listed together for a period to give meaningful information. Each POS Invoice is further drilled down to obtain the lowest level of information. To view the list of POS Invoice Statement: Go to Gateway of Tally > Display > s Books > POS
N o t e : POS activated in
Voucher
option will appear, only Type and at least one
if the option Use entry is made
for
POS
Invoicing is
Press ALT+F1 or click on F1: Detailed button to view the POS Invoice in detailed format with all the tax details.
Press F12 key or click on F12: Configure button.
Set Show Inventory Details also to Yes and view List of All POS Vouchers with Inventory details. F4: Chg Vch: This button allows you to view different voucher type within the POS screen. Example:
Change to Payment from POS by clicking on the F4: Chg Vch button or by pressing the F4 key. F5: Columnar: This button allows you to select different columns for the report. For additional information refer to Columnar Sales . F6: Extract: Provides you with a break down of the POS Invoice vouchers and groups them to provide totals for each group and ledger used in all POS Invoice for that period. Click on the Print button or press ALT+P to view the POS in print preview mode. Press ALT+Z to zoom the print preview screen.
N o t e : Click on P g D n to view the next page. The total carried over and brought forward to the next page.
balance
of
the
first
page
is
Introduction
The Job Costing feature allows you to track cost and revenue information down to the smallest detail. Costs associated with the planning, implementation and completion of a project or job are known as Job costs. It includes expenses related to labour, material purchases, subcontractor costs, as well as other costs and inventory consumed on projects. You track the costs/ expenses by asg them to specific incomes received on of jobs/ projects.
Use of Job Costing
Job Costing is used: To determine the true cost for each job broken down by locations To determine the revenue and expenditure and therefore the profit associated with each job To track overhead costs by allocating them for each job To identify loss on projects at an early stage
Enabling Job Costing in Tally
Use the Job Costing feature in Tally to track all income and expenses for a project. Each project or job is created as a Cost Centre. The Cost Centres and Inventory Options (Maintain Multiple Godowns) are integrated in Tally to enable Job Costing if the company maintains s with Inventory. For companies that maintain s Only, the Job Costing feature cannot be enabled. To enable Job Costing Go to Gateway of Tally > F11: Features > ing Features In the Company Operations Alteration screen set Maintain Cost Centres and Use Cost Centre for Job Costing to Yes . If you have more than one active Project/Job (Cost Centre) set Maintain Multiple Godowns to Yes in F11: Features > Inventory Features Accept to save.
Tip: For Companies that maintain s Only, Costing is disabled in F11: Features screen.
the
option
Use
Cost
Centre
for
Job
N o t e : To Job Costing principles/Cost Centres , Tally needs to ensure that each transaction recorded is ed for internally with respect to all the Cost Centres. This additional real-time processing task can potentially reduce the operating efficiency of Tally thereby resulting in reduction of speed. This could be significant, especially on computers unable to handle the additional computing load adequately. s are therefore advised to create Cost Centers and Job Costing s within reasonable limits to get the optimum business benefit from the module and yet retain the unmatched speed of the software. For more information on this topic, please your nearest Tally office.
Creating Ledgers for Job Costing
Creating Ledgers for Job Costing is similar to that of other Ledgers. Refer Ledgers for additional information.
Creating Job Costing Party Ledgers Create party s for our Customers under Sundry Debtors. For e.g. you can create a Ledger for a Bangalore customer and one for a Chennai customer. Similarly create your Suppliers under Sundry Creditors.
Creating Sales and Purchases Ledgers Create Sales Ledgers under Sales s and Purchase Ledgers under Purchase s. Ensure that the field Cost Centres are applicable? is Yes for the Ledgers you want to include in Job Costing.
Creating Income and Expenses Ledgers Create Income Ledgers such as Project Inspection Charges etc. under Direct Income. Expense ledgers such as Transportation Charges, Project Site Rent, and so on can be created under Direct Expenses. Staff Welfare, Telephone Charges etc. can be created under Indirect Expenses as required by your project. Ensure that the field Cost Centres are applicable? is Yes for all the Ledger s you want to include in Job Costing.
Creating Cost Centres for Job Costing
You can create different Cost Centres for different projects, with each Cost Centre being treated as a Job. For e.g. you can create a Cost Centre Project-Bangalore for the on-going projects in Bangalore and Project-Chennai for the on-going projects in Chennai. Refer to Cost Centre for additional information. To activate Job Costing Go to Gateway of Tally > s Info > Cost Centres > Create Enter the name of the Cost Centre in the Name field In the Under field select Primary from the List of Options Set the option Use for Job Costing to Yes. This cost centre will then be available in the dropdown for the Job Work Analysis report Accept to save
Note: under
Use for Job Costing field is set to Y e s by default a Cost Centre for which Job Costing is activated.
for
the
Cost
Centres
created
Creating Godowns/Locations for Job Costing
Creating Godowns is very important in Job Costing. Each project is associated with a Godown. This link is provided while creating the Godown. Any material consumption from this Godown is taken into as the material consumed for that project and will reflect in the reports. Go to Gateway of Tally> Inventory Info > Godowns > Create In the Godown Creation screen, Allow Storage of Materials is automatically set to Yes . An additional field Set Job/Project Name for Job Costing is displayed. Press the spacebar in the field and the list of Cost Centres for which Use for Job Costing was set to yes is displayed in the List of Cost Centres sub-screen. Select the Cost Centre to which the Godown is associated. Accept Yes to Save. Refer Create a Location for more details on Creating Godown.
Tip: The additional field Default Job Name is displayed only if Maintain and Use Cost Centre for Job Costing are set to Y e s in F11: Features. s u p p o r t s multiple levels of Godown.
Cost Centres Job Costing
Creating Voucher Classes for Stock Journals
Stock Journal classes allow you to handle transfers from one location (Godown) to another, for companies having Multi-Location Inventory and at least two locations/Godowns created. It also allows you to track transfer of materials for consumption. Refer to Voucher Classes for Stock Journals for additional information.
Creating Stock Journal Class Go to Gateway of Tally > s Info. > Voucher Type > Create / Alter Select the Stock Journal Voucher from the List of Voucher Types. Enter all the fields as per your requirement. Refer Create a Voucher Type for more details. To create a Stock Journal Voucher Class, enter a name in the Name of Class field. The Class Consumption: screen is displayed. To create a class for inter-godown transfer set the option Use Class for Inter-Godown Transfer to Yes. To create a class for consumption set the option Use Class for Inter-Godown Transfer to No. An additional option Use Class for Job Costing Consumption is displayed. Set this option to Yes.
N o t e : If you maintain only one P r o j e c t / J o b with a single Godown, while Stock Journal Voucher Type and creating a class, the option Use Class Godown Transfers is not displayed. Only the option Use Class for Job Consumption is displayed.
altering the for InterCosting
Creating Purchase Vouchers
You can enter a purchase voucher in As Voucher mode as the Cost Allocation sub-screen does not appear in the As Invoice mode. Create a Cost Centre class before ing the entries. In the purchase entry it is not necessary to allocate to Job Costing for Job Cost reporting. Go to Gateway of Tally > ing Vouchers In the Voucher Creation screen select F9: Purchase Select As Invoice Enter the date and reference Select the Party to be credited from the List of Ledger s in Party’s A/c name Select the required Purchase Ledger from the List of Ledger s Select an item from the Stock Items List of Items .
On selecting the Item, an Item Allocations sub screen for the selected Item appears:
Select the Godown under the Godown field and specify the quantity to be allocated under the Quantity field. Enter the Quantity and Rate , and the amount is automatically displayed in the Amount field. Select the next Godown and follow the similar procedure for Item allocation . Select the Items to be purchased. Enter Narration if required and accept to save
Creating Sales Vouchers
Sales Vouchers can be created in Voucher or Invoice Mode To create Sales Invoice: Go to Gateway of Tally > ing Vouchers In the Voucher Creation screen select F8: Sales Select As Invoice Select Acct Invoice Enter the date and reference Select the appropriate Customer in the Party’s A/c Name Enter the Despatch , Order and Buyer’s details in the sub-form that appears Select the Sales ledger from the List of Ledger s Select the corresponding Ledger below the Particulars field Enter the amount in the Amount field In the Cost Allocations sub screen, select the Cost Centre from the List of Cost Centres under the field Name of Cost Centre and enter the amount to be allocated to that Cost Centre. Enter narration if required and accept to save
Similarly, you can create Sales Vouchers for Project Inspection Charges, Miscellaneous Receipts etc.
Creating Payment Vouchers
To create Payment Vouchers: Go to Gateway of Tally > ing Vouchers In the Voucher Creation screen select F5: Payment Enter the date and reference Select the Bank from where payment has to be made Select the Ledger e.g. General Maintenance created under Indirect Expenses and enter the amount to be debited The Cost Allocations sub-screen appears. If the payment has to be allocated to more than one Cost Centre, select the Cost Centres and allocate the corresponding amount In the Voucher Creation screen, enter narration if required and accept to save
Similarly you can create Payment Vouchers for Labour Charges Paid, Printing and Stationary, Staff Welfare, Telephone Charges, Transportation Charges or any other expenses that form a part of project cost.
Creating Journal Vouchers
Creating Journal Vouchers is similar to that of other vouchers. While creating Journal Vouchers, you can allocate the amount to more than one Cost Centre in the Cost Allocations sub-screen that appears. An example of a Journal Voucher entry is shown below:
Similarly, you can create Journal Vouchers for Labour Charges Paid, Salaries, Project Site, Rent, etc.
Creating Stock Journal Voucher (Consumption Transfer)
Create a Stock Journal voucher by selecting the Voucher Class Consumption to create a Stock Journal voucher for Consumption Transfer.
Creating Stock Journal Voucher (Inter - Godown Transfer)
To create a Stock Journal for Inter - Godown Transfer: Go to Gateway of Tally > Inventory Vouchers In the Inventory Voucher Creation screen, select F7: Stk Jrnl and select the Voucher Class Transfer to create a Stock Journal voucher for Inter-Godown Transfer. Enter the date of the Voucher Select the name of the Destination Godown in the Destination Godown field. Select the Item to be transferred under the Name of the Item field. To create an Item, refer to the topic Stock Items Select the Godown where the Stock Item is currently located under the Godown field Enter the amount to be transferred under the Quantity field. The Rate and Amount field gets displayed automatically if the rate is specified while creating the Stock Item; else enter the rate to get the amount in the Amount field Similarly enter all the items to be transferred. Enter narration if required and accept Yes to save
Two Levels of Reports
Two levels of reports are displayed in Job Costing. 1.
Job Work Analysis
2.
Material Consumption Summary
The Job Work Analysis report s details of Multiple Companies, Multiple Jobs, Multiple Currencies in a single report. The Materials Consumption Summary report gives details of the materials consumed for that project from the particular Project Location.
Job Work Analysis Report
To view Job Work Analysis report: Go to Gateway of Tally > Display > Statements of s > Job Work Analysis The jobs for which Use for Job Costing was set to Yes in the Cost Centre Creation/Alteration screen is displayed in the List of Job/Project sub-screen that appears. Select the Cost Centre for which you need a Job Costing report from the list. The Job Work Analysis screen appears as shown below:
The Job Work Analysis report s details of Multiple Jobs in a single report. All these details are viewed as different columns with the help of New Column button. The button Auto Column is also available in the report to view the period for a particular period that can be selected from the list. Refer Modify Reports for adding, deleting and altering columns.
Thus the Job Work Analysis report gives a breakup of Revenue , Cost (Expenses) with respect to material consumption, Direct Expenses , Indirect Expenses and Nett Profit . N o t e : C o n s u m p t i o n is the Outwards Inventory entries of Items made in the Stock Journal Voucher with Consumption Class enabled and the Outwards Inventory entries of Items made with the Manufacturing Journal for a particular Project Location. All other Outwards Inventory entries are considered as Other Transfers .
C omparing Job Work Analysis of Multiple Jobs You can compare the job costs of two or more jobs by adding another job as a New Column . To add another job as a new column select the button New Column on the right hand side of Job Work Analysis screen. The following screen appears.
To compare two jobs of the same company, select the same company in the Name of Company field To compare two jobs of different companies, load the companies and select a different company in the Name of Company field
Enter the period for which you like the report to be displayed in the From and To fields Select the Job from the List of Job/Project in the Name of Cost Centre field
A new column is added to the report for the selected new job Similarly you can compare the Job Costing of multiple companies To view the total costs of multiple jobs as a new column, from the Job Work Analysis screen for multiple jobs, select F12: Configure and set Show Total Column to Yes . A new column Total is added to the existing report format and the total cost of all the jobs selected gets displayed.
There are other F12: Configure options available, which you can activate as per your requirements.
The following screen shot shows the report with Show Percentages activated
Drill down the groups under Revenue (Income) to view a break up of Job/Project. Further drilling down displays the Job/Project Monthly summary and Job/Work vouchers. Refer to Cost Centre Breakup report section for more information.
Material Consumption Summary Report
To view the Material Consumption Summary report, scroll down to the line Consumption in Job Work Analysis Report and press Enter . The Report Material Consumption Summary is displayed.
When multiple levels of Godowns are used, the values are displayed accordingly for each Godown Group and when you drill down further the values are displayed for individual Godown.
Drill down from the above report, to get a Godown summary report. This report displays Stock Items and also Stock Groups if any.
The Stock Groups when drilled down further displays the Godown summary of that Stock Group
Additional details are displayed based on the options selected in F12: Configure .
Configure as per your requirements to get the additional fields in the report as shown below.
Introduction
Tally Payroll is integrated with ing to give the the benefits of simplified Payroll processing and ing. Tally Payroll enables s to set up and implement salary structures, ranging from simple to complex, as per the organization’s requirements. You can also align and automate payroll processes and directly integrate them with main stream ing applications. Payroll data can be viewed as part of the existing and configurable cost centre reports for business analysis. Tally Payroll also s configurable formats for payslip printing; flexible salary/wage, attendance, leave and overtime s; gratuity and expat reports.
Features of Tally Payroll In keeping with Tally’s tradition of simplicity, strength and flexibility, Tally Payroll offers the following features to meet the diversified requirements of small to large business enterprises. It allows seamless integration with Tally s. There are no disconnects between Payroll and s. It offers Employee Groups - unlimited classification and sub-classification of employees. It offers Pay Structures – ease of conformity, faster entry and flexibility of non-dependence. It offers Pay Components - -definable earnings, deductions and others. It offers a unique Auto-Manual payroll processing facility. It is independent of processing period restrictions. It offers Employee Groups, Pay structures and Pay components. It offers a unique Auto-Manual payroll processing facility. It allows Arrears Calculation. It computes salary based on Attendance, Time, Unit of Production or any other criteria. Tally Payroll helps in tracking of Loans and Advances. It provides calculation of Gratuity. It allows you to drill down from any summary report to detailed levels, and till the originating transaction, for a particular Pay component value. It provides configurable report formats. You can also process Payroll using the Multilingual feature in Tally.
Enabling Payroll in Tally
To enable Payroll in Tally Go to Gateway of Tally > F11: Features> ing Features
Set Maintain Payroll to Yes You can set More than ONE Payroll / Cost Category to Yes if you wish to process payroll for multi group of Employees.
Four Easy Steps To Generate a Payslip
Four Easy Steps To Generate a Payslip
The new enhanced Payroll in Tally requires minimal effort for accurate processing. Setting up Pay Heads, Employee Group, Employees, Salary Details and Attendance/Production Type is now a simple process with Tally’s Four easy steps to generate a payslip.
Step 1 Create Pay Heads The components of structured salary are created under Pay Head Create the salary structure components in pay head. The Pay head creation in tally is very friendly. Tally allows creating any complex type of pay head.
Step 2 Create Employee Masters Create an Employee master. Enter the requisite Employee Details & Employee group by grouping employees under the function they perform; their department or designation.
Step 3 Create Salary Details Create the applicable Salary Details for both Employee Groups as well as Individual Employees with earnings, deductions and basis of computation.
Step 4 Process Payroll and Generate the Payslip a Payroll voucher to enter all Earnings and Deductions in payroll transactions that are paid along with the Salary Payslip for all employees Generate the Payslip that provides employee as well as attendance details, itemises each component of the employee’s earnings and deductions, and displays the net amount paid to him for a given pay period. It also provides information to the employee as to how the net amount was arrived at.
Payroll Configuration
The Payroll Configuration can be enabled as shown below: Gateway of Tally > F12: Configure > Payroll Configuration
In the above screen: The option Show NI Number (for International companies only) and Show Statutory Details (for India/SAARC companies only) can be set to Yes to enter the NI details/ PF, ESI and PF PAN details in the Employee details form and print the same information in the Employee Payslip. The options, Show port & Visa Details and Show Contract Details, should be set to Yes as shown, to display the port, Visa and Contract Details in the Expat Reports. If these options are set to No, then the Expat Reports menu will not be displayed under Payroll Reports. Some of the Information related to Employee port such as port Number, port Expiry date, Visa Number, Visa Expiry date, Contract Start and Expiry dates will not be displayed at the creation of the Employee.
Payroll Info.
The Payroll Info. allows you to set up the employee defaults and standard payroll information with common payroll fields used for calculating earning and deductions. Go to Gateway of Tally > Payroll Info.
Payroll Info: Pay Heads Employee Groups Employee Salary Details Units (Work) Attendance/Production Types Voucher Types
Pay Heads
The salary components constituting Pay Structures are called Pay Heads. A Pay Head may be an earning, which is paid to an employee, or a deduction, which is recovered from his/her salary. The value of these Pay Heads could be either fixed or variable, for each Payroll period.
Pay Head Type A Pay Head is categorized as Allowances, Deductions or Reimbursements In Tally Payroll, Pay Head types are provided in a natural language for ease of use, as follows: 1.
Earning for Employees
2.
Deduction from Employees
3.
Employees Statutory deductions
4.
Employer’s Statutory Contribution
5.
Gratuity
6.
Loans and Advances
7.
Reimbursement to Employees
While creating the salary payable ledger you can use Not Applicable type which will be used to post appropriate ing entries.
Calculation Types The Calculation of the Pay Head is based on its Calculation Type. Tally payroll allows following calculation methods Note: using mode
The formula Payroll Auto of Payroll
defined in Calculation Type will be used for computation only while Fill functionality in the Payroll Voucher, and not in Manual entry voucher.
The following computational models are ed in Calculation Types.
As Flat Rate As Flat Rate is a Calculation where the value of the Pay head is a fixed amount for a period. Pro-rata will not happen in this type of the component. (Pay Head) Examples of Flat Rate Calculation Type: Conveyance Allowance of Rs. 800.00 per month is exempt from tax and followed by many organisation. Fixed Loan Installment deduction amount.
On Attendance On Attendance type of calculation is based on the attendance data where the component will get pro-rated. In Tally the attendance can be of Payable days (Present) or loss of pay (Absent) type.
On Production On Production calculation type is used to calculate the Production incentive type of Pay head. The production data can be entered in Attendance voucher against a Production type.
As Computed Value As Computed Value is used if the Pay Head value is based on a dependent component. You will be able to define the dependent component by specifying the formula or using the current sub-total or current earning or deduction total. You can also define the slab either by percentage to value or the combination in a slab. Example: HRA as 40% of Basic Salary
As defined Value As defined Value allows you to manually enter the value at the time of processing the salary. This calculation type is useful for Pay Heads that have variable values and are not related to any attendance/production data
Creating an Earning Pay Head
To create an Earning Pay Head, Basic Salary , under Indirect Expenses : Go to Gateway of Tally> Payroll Info. > Pay Heads> Create
1.
Enter the Name of the Earning Pay Head.
2.
Select Earnings for Employees as the Pay Head Type from the List of Pay Head Types .
3.
Select the respective Pay Head Group Earnings from the list for the field Unde r.
4.
Select Yes from the list if you want the Pay head to affect the net salary.
5.
4. 5.
The Pay Head name entered in the Name field will appear in this field. You can change the same, if required. The name entered in this field will appear on the payslip.
6.
Select Flat Rate from the List of Calculation Types .
7.
Select the Calculation Period Type from the list.
8.
Based on the Calculation Period Type , you can select and enter the details for Per Day Calculation Basis .
9.
Select the Rounding Method from the list if applicable.
10.
Accept to save the Pay Head.
Similarly, you can create Earning Pay Heads for HRA, Conveyance and so on..
Creating a Deduction Pay Head
To create a Deduction Pay Head, Professional Tax under Employees’ Statutory Deductions: Go to Gateway of Tally> Payroll Info.> Pay Heads> Create
1.
Enter the Name of the Deduction Pay Head.
2.
Select the Pay Head Type from the List of Pay Head Types .
3.
Select the Group from the List of Groups .
4.
Select Yes from the list if you want the Pay Head to affect the net salary.
5.
4. 5.
The Pay Head name entered in the Name field will appear in this field. You can change the same, if required. The name entered in this field will appear on the payslip.
6.
Select the Calculation Type from the List of Calculation.
7.
On selecting the calculation type to ' As Computed Value , a new field Calculation Period appears which will be set to Months automatically
8.
Select On Current Earnings Total from the list to be Computed On.
9.
Specify the Slab Rate .
10.
Select the Rounding Method from the list if applicable.
11.
Accept to save the Pay Head.
Similarly, you can create a Deduction Pay Head for Provident Fund and so on. N o t e : If you are using any Pay Head component having Calculation Type V a l u e and Compute : On Current Earnings Total, while defining Salary sequence of the component has to be selected accordingly.
As Computed Detail, the
Creating Salary Payable Ledger
A Salary Payable under the group Current Liabilities is used to credit the total of Net Payable salary of all employees. When salary is disbursed, this is debited and Cash or Bank is credited. To create Salary Payable Pay Head under the group Indirect Expenses : Go to Gateway of Tally> Payroll Info.> Pay Heads> Create
1.
Enter the Name of the Pay Head
2.
Select Not Applicable from the List of Pay Head Types
3.
Select Current Liabilities from the list
4.
3. 4.
Accept to save the Pay Head
Creating Gratuity Pay Head
To create a Pay Head Gratuity under Current Liabilities : Go to Gateway of Tally> Payroll Info.> Pay Head> Create
1.
Enter the Name of the Pay Head
2.
Select Gratuity from the List of Pay Head Types
3.
Enter the Slab Rate Details for Gratuity Calculation in the sub-screen
3.
4.
Select Current Liabilities from the list
5.
Accept to save the Pay Head
N o t e : To use the Earning Pay Head for G r a t u i t y calculation, set Use for Gratuity ? field to Y e s in the ledger creation screen (for Pay Heads such as Basic Salary, HRA, and so on, created under Indirect Expenses).
Employee Group
Tally allows you to set up default (common) information for employees. An Employee Group allows you to group employees in a logical manner. The Salary structure can be defined at the Employee Group level. Referring to this Group as a template and changing accordingly will ease building all your employee records on it. For example, by department or function such as Production, Sales, istration and so on, or by designation such as Managers, Supervisors, Workers and so on.
Creating an Employee Group
To create Sales as an Employee Group , Go to Gateway of Tally> Payroll Info.> Employee Groups> Create (Single Group)
Enter the Name of the Employee group. Select the group from the List of Employee Groups . Accept to save the Employee Group.
Creating Multiple Employee Groups You can create multiple Employee Groups in this mode. Go to Gateway of Tally> Payroll Info.> Employees> Create (under Multiple Groups) The Multi Employee Group Creation screen displays.
Employee
The Employee Creation screen allows you to enter basic setup information that applies to the employees. Enter General Information, Payment Details and port & Visa Details.
Creating an Employee
Creating Single Employee To create an Employee under the Employee group, Sales: Go to Gateway of Tally> Payroll Info. > Employees> Create (Single Employees)
Enter the Name of the Employee , Select the Employee Group in the field Under , Enter the Date of ing , the Employee General Information , Payment Details , port & Visa Details and Accept to save.
Creating Multiple Employees You can create multiple Employees in this mode. Go to Gateway of Tally> Payroll Info.> Employees> Create (under Multiple Employee)
The Multi Employee Creation screen displays.
Salary Details
Salary Details is used to define a Pay Structure to an Employee or to an Employee Group to speed up the entry of Individual Employee’s Pay Structure. Select the basic Pay Heads that applies most for your employees and create as an Employee Group. However, it is not compulsory for all employees to have the same compensation structures as of the Employee Group. If required, a Pay Head element or its value may be added, deleted or altered at Individual Employee level. N o t e: If
the
slab
rate
is
not
defined
in
the
PayHead
then
you
will
get
the
full
value
Creating Salary Details for an Employee Group
To create Salary Details for an Employee Group , for example, Sales: Go to Gateway of Tally> Payroll Info.> Salary Details> Create> Select Sales from the List of Employees/Group
1.
Enter the Effective From date.
2.
Select the Pay Heads from the List of Pay Heads.
3.
The Pay Head Type , Calculation Type and Calculated On fields display the details provided at the Pay Head creation level.
4. 5.
3.
4.
Enter the Defined values , if applicable.
5.
Accept to save
N o t e : If you are using any Pay Head component having Calculation Type : As Computed Value and Compute : On Current Earnings Total then while defining Detail, the sequence of the component has to be selected accordingly.
Salary
Salary Details Configuration Go to Gateway of Tally> Payroll Info.> Salary Details> Alter > Select Employee/ Employee Group from the List of Employees/Group > F12: Configure
Allow to Override Slab Percentage Set Allow to Override Slab Percentage to No to prevent changes made to Slab Percentages. If you set it to Yes , you can override the percentages already defined. E.g. If you have defined Slab Rate for HRA as 40% in the Pay Head level, and if you wish to change the Slab Rate percentage in the Salary details screen. Set Allow to Override Slab Percentage to Yes in Salary details configuration screen and Tally will allow you to Overridde the percentage e.g. to 50% and so on... (Metro Cities & Non Metro Cities).
Show Payhead Type Set Show Payhead Type to Yes to display if the Pay Head is an Earning or Deduction in the Salary Details screen.
Show Calculation Type Set Show Calculation Type to Yes to display the method of calculation adopted (As Computed Value, As Defined Value, Flat Rate, On Attendance or On Production) .
Show Computed On Set Show Computed On to Yes to display the Computation Information (On Current Deductions Total, On Current Earnings Total, On Current Sub Total, On Specified Formula)
Creating Salary Details for an Employee
To create Salary Details for an Employee: Go to Gateway of Tally> Payroll Info.> Salary Details> Create> Select the Employee from the List of Employees/Group
1.
Enter the Effective From date.
2.
In the Pay Head field, the Start Type list displays two options namely, Copy From Parent Value and Start Afresh .
2.
3.
If you select Copy From Parent Value , the Salary Details defined for the Employee Group to which the Employee belongs will appear in the screen.
N o t e : If from parent 4.
the PayHead details are available in the parent value, else you will get only Start Afresh.
group
then
you
will
get
Copy
If you select Start Afresh , you have to select the Pay Heads from the List of Pay Heads and enter the Defined rates if required.
Units (Work)
A Unit in Tally Payroll is similar to the Unit of Measure in Tally’s Inventory module. In Payroll, Units are used to facilitate calculation of a Pay Head value based on Production, which in turn would be linked to Units such as Time, Work or Quantity. Go to Gateway of Tally > Payroll Info. > Unit (Work)
Creating Units (Work)
In the Units Creation screen, select the Type of unit from the list. Select the Symbol from the list. A Simple Unit in Tally is a single independent unit and has no relationship with other units, while a Compound Unit refers to two Simple Units having an arithmetical relationship and is not a distinct unit. In the case of Overtime, whose value is computed based on Overtime Hours put in by an employee, you would need to define Hr – Hours and Min – Minutes as Simple Units and Hr of 60 Min as a Compound Unit and set this unit in Overtime Pay Head.
Refer to Units of Measure for details description of Unit of Measure.
Attendance/Production Type
The Attendance / Production type is used to record the attendance and production data. Based on the component (Pay head) structure, you can define multiple attendance / production types. Examples for attendance / production types are No. of days present or conversely, No. of days Absent and production based such as Hours worked, Number of Pieces produced. Attendance/Production Type is associated with the Pay Head in employee’s Pay structure. The variable data is entered in the Attendance voucher for the payroll period. Attendance/Production Types may also be defined in hierarchical groups whereby Types having a common Unit are combined under logical groups. The Attendance/Production Type may be Attendance/leave with pay, Leave without Pay (if salary is to be paid based on number of days attended) Paid Leave, Unpaid Leave, Absent and Production type which can be based on Piece Production, Overtime Hours, and so on.
Creating an Attendance/Production Type
Creating an Attendance/Production Type for Attendance/Leave With Pay Go to Gateway of Tally > Payroll Info. > Attendance/Production Types > Create
1.
Enter the Name of the Attendance Type
2.
Select Primary from the list for the field Under.
3.
Select Attendance/Leave with Pay as the Attendance Type.
4.
The Period Type appears automatically.
5.
Accept to save the Attendance Type.
Similarly, you can create an unpaid Leave grouped under Leave without Pay.
Creating an Attendance/Production Type for Production Go to Gateway of Tally > Payroll Info. > Attendance/Production Types > Create
1.
Enter the Name of the Attendance Type
2.
Select Primary from the list for the field Under.
3.
Select Production as the Attendance Type.
4.
The Unit field will appear, select the appropriate type of unit from the list.
5.
Accept to save the Attendance Type.
Similarly, you can create Box Production Attendance Type
Voucher Types in Tally Payroll
Tally Payroll provides you with Payroll, Attendance and Payment Voucher Types. You may define a template called Voucher Class in order to automate and control usage of ledger s and computed values to be posted. It is a powerful and configurable option that enables you to define the rules of voucher entry for a particular voucher type. It also helps in speeding up the process and minimises data entry for posting a voucher. However, creating a Voucher Class is not mandatory. For more information, refer to Creating a Voucher Class for Payroll
Payroll Vouchers
In addition to the existing voucher types in ing and Inventory module, two new Voucher Types Attendance and Payroll are enabled when Payroll Feature is activated in F11: Features. Go to Gateway of Tally > Payroll Vouchers Attendance voucher is used to record employees’ Attendance / production data for the Attendance/Production Types created in Payroll Masters. Such data may be entered as a single Attendance voucher per payroll period or multiple vouchers as and when required within a payroll period. While generating the Payroll voucher, Tally automatically picks up required data, based on the period selected and computes the corresponding value of Pay Heads, which are linked to such attendance/production types. Payroll voucher is a document to manually enter one-time/ad-hoc payroll transactions for individual employees; as well as Payroll processing activity for all or selected employees, using Auto Fill functionality. Payroll Buttons If Maintain Payroll option is set to Yes in F11: Features, the Payroll Buttons will appear along with s and Inventory buttons in Voucher Creation screen on the button bar.
Attendance Vouchers
Attendance voucher allows you to enter Attendance , Overtime , Leave or Production details. You can enter separate vouchers for each day or a single voucher for a given pay period, say a month, with aggregated values. You can also enter data for one or more or all employees. Similarly, one or more attendance types together in a single voucher.
Attendance Voucher Entry – Manual Entry Go to Gateway of Tally > Payroll Vouchers > F5: Attendance
1.
Click F2: Date to change the date
2.
Select the Employee from the List of Employees
3.
1. 2. 3.
Select the Attendance/Production Type from the List
4.
Enter the Value
5.
Select End of List from the List of Employees.
6.
Accept to save the voucher
Attendance Voucher Entry - Auto Fill In the attendance voucher, you can use the A : Payroll Auto Fill button to speed up data entry process. Auto Fill enables the to fill all employees of a selected Cost Category (if more than ONE Cost Category is enabled) and/or a selected employee group and enter value data for selected type of Attendance/Production Type for these employees. Go to Gateway of Tally > Payroll Vouchers > F5: Attendance 1.
Click F2: Date to enter the date.
2.
Click A : Attd Auto Fill .
3.
In the Attendance Auto Fill screen, select the Cost Category if applicable.
4.
Select the Employee/Group from the List of Group/Employees .
5.
Select the Attendance/Production Type from the list.
6.
Enter the Value against the Employee name .
5. 6.
7.
Accept to save the Attendance voucher .
N o t e : Days with Loss of Pay (LOP) are treated as a D e d u c t i b l e with respect to an Earning Pay Head type and as a P a y a b l e with respect to a deduction component. F o r E x a m p l e : An L O P is deducted from B a s i c salary which is an Earning Pay Head. However, with respect to a Deduction Component such as canteen expenses, it is treated as a payable.
Usage of Voucher Class in Tally Payroll
In some of the Tally vouchers, you may define a template called Voucher Class in order to automate and control usage of ledger s and computed values to be posted. It is a powerful and configurable option that enables you to define the rules of voucher entry for a particular voucher type. It also helps in speeding up the process and minimises data entry for posting a voucher. In a voucher class , you may exclude selection of inapplicable groups and/or specify applicable groups. For example: In a Payroll voucher, you may exclude posting to ledger pertaining to groups such as Fixed Assets, Sundry Debtors/Creditors, Sale/Purchase etc., or Include groups like Indirect Expenses, Loans & Advances (Liabilities) and so on. Voucher Class in Tally Payroll helps the to rapidly process their Payroll data.
Voucher Class – Manual Salary Create a voucher class to use for manual payroll entry. Go to Gateway of Tally > Payroll Info. > Voucher Type > Alter > Payroll
Enter Manual Salary in the Name of the Class and press Enter Key. Tally will display a sub-form for Class definition. Enter Yes, in Use Employee-wise Pay Head Allocation ? Typically, in a manual salary no particular groups are included or excluded and net payable amount of manual payroll entries will be posted to the Salary payable ledger. Therefore, Select End of List in Exclude and Select the Group in Include and select Salary Payable (Ledger created under Current Liabilities) Values for Voucher Class: Manual Entry.
Accept Class definition screen and also the Voucher Alteration screen.
Payroll Voucher
Payroll voucher is used to record Employees’ Payroll related transactions. This voucher may be used in two ways – Manual Entry and Automated Entry .
Payroll Voucher entry - Manual Salary To create a Payroll voucher manually, Go to Gateway of Tally > Payroll Vouchers > Payroll Voucher
1.
Change the Voucher date .
2.
Select Salary Payable from the List of Ledger s .
3.
1. 2. 3.
Select the Employee from the List of Employees in the field Particular
4.
Select the Pay Heads and enter the appropriate values
5.
Select End of List and Accept the voucher.
Payroll Voucher – Auto Fill To create a Payroll Voucher using the button A : Payroll Auto Fill , Go to Gateway of Tally > Payroll Vouchers > Payroll voucher 1.
Select the Ledger (Cash/Bank/Salary Payable) from the list
2.
Click A: Payroll Auto Fill
Note:
You
can
calculate
the
Payroll
Voucher
for
a
week
3.
Enter the From and To date in the Employee Filter screen
4.
Select the Employee/Group from the List of Group/Employees
5.
Enter the defined values if required
or
fortnight.
5.
6.
Accept to save the voucher
N o t e : A single payroll voucher can be used to efficiently. For a company with more than 100 voucher for every 100 employees.
entries for upto 100 employees employees, create a multiple payroll
Payroll Reports
To view Payroll Reports Go to Gateway of Tally > Display > Payroll Reports
The Payroll Reports menu displays: Statements of Payroll Attendance Sheet Attendance Gratuity Report Expat Reports
Statements of Payroll
Go to Gateway of Tally > Display > Payroll Reports > Statements of Payroll
The Payroll Reports menu displays: Payslip Pay Sheet Payroll Statement Payment Advice Payroll Employee Ledger Breakup Ledger Employee Breakup
Payslip
A Payslip is a document issued to an employee that itemises each component of earnings and deductions, and the net amount paid to an employee for a given pay period. It provides visibility to an employee of how the net amount has been arrived at. In Tally Payroll, the Payslip option of Display, Payroll reports menu provides s the facility to View the Payslip, Configure content and appearance based on the requirement and then Print the Payslip. Go to Gateway of Tally > Display > Payroll Reports > Statement of Reports > Payslip
Configuration options in Payslip Click on F12: Configure button in the Payslip to display a configuration sub-form, using which the can customise the display/printing content and appearance of the Payslip.
The default settings for the configuration options are shown above. These options are self-explanatory. The options, which are set to Yes, will become visible in the Payslip. Select No to exclude the information, which is not required to be on the Payslip. Configuration options in : Pay Slip Show Vertical Payslip - Set this option to Yes to align Deduction Part below the Earning. Set it to them side-by-side.
No to align
Show Employee Details - Set this option to Yes to display Employee Details as entered in the employee master. Show port Details - Set this option to Yes to display the port Details. Show Visa Expiry Date - Set this option to Yes to display the Visa Expiry Date. Show Attendance/Production Details - Set this option to Yes to display Attendance/Production data. Show Attendance/Production Groups - Set this Attendance/production data as defined while Types creation.
option
to
Yes
to
display
grouping
of
the
Display Attendance/Production Type in Tail Units? - For compound units used in Attendance/Production Type, set this flag to Yes to display value of the Attendance/Production Data in Tail unit and set the same to No to display data in Main unit. Show Year To Date values - Set this option to Yes to display cumulative value of attendance/production data or Earning and Deduction data for the current Financial Year. Remove Zero Entries - Set this option to Yes to remove Earning/Deduction data with Zero value from the Pay Slip For Attendance/Production Also - Set this option to Yes to remove Attendance data with 0 values from the
Pay Slip. Appearance of Name - You can select the appropriate appearance of name from the Name Style list.
Detailed/Condensed Button Click on Detailed button or press ALT+F1 to view source details of individual Attendance and Pay Head values. This view displays the Attendance or Payroll vouchers from which the data is picked in the current Payslip. Voucher Number, Date and the Value of the attendance or earning or deduction value is displayed. This is useful when multiple attendance/payroll vouchers are entered during the same payroll period. The can drill down to the corresponding voucher directly from the Payslip screen. Click the Condensed button or press ALT+F1 again to return to the normal mode.
Period Button By default, when you bring up the Payslip view, the Period of Payslip - Attendance and Payroll Vouchers data is set to current month, and in most cases you don’t have to change it. However, if required, you can change the period of data and include multiple-period payroll information to view/print a consolidated Payslip. As in all other Tally reports, there is a great flexibility in of Period of Payroll processing as well as in the printing of Payslip.
Employee Button Using Employee Button (F4 Key) , you can view another employee’s Payslip from the existing Payslip display screen.
Printing Single Payslip Click on Print button or Press ALT+P from the Payslip display screen to print currently displayed Payslip. Tally will print the Payslip in the format that is configured for display.
Pay Sheet
Pay Sheet is a matrix report with category, group and employees cascading in rows, and Pay Heads appears as columns. The default report contains all earnings and deduction details for a given month or period with a number of options to configure appearance of rows and columns. Format of the pay sheet report may be configured to serve as a Salary/Wage as required by the organisation. The selection of data may be filtered for given category or group of employees. Go to Gateway of Tally > Display > Payroll Reports > Statement of Reports > Pay Sheet
Configuration options in Pay Sheet report F12: Configure button in the Pay Sheet brings up a configuration sub-form by which the can customise the
display/printing content and appearance of the Pay Sheet report.
Show ‘Net Pay’ Column - Set this option to Yes to display the Net Payable Column. Show Column Subtotals - Set this option to Yes to display the sub-totals of Earnings/Deduction columns. Remove Zero Entries - Set this option to Yes to remove Earning/ Deduction data with Zero value Show Payslip Names for Ledgers - Set this option to Yes to display the Name to Appear in Payslip, defined in Ledger, as the column headings. Setting this to No will display Ledger name. Include Employee Groups & Categories - Set this option to Yes to display rows showing Category and Groups. Set this to No to list only employee information. Show Category/Group Total - Set this option to Yes to display Category and Group wise Totals. Show Grand Total - Set this option to Yes to display Grand total at the bottom of the report. Format - You can choose either Detailed or Condensed . Show Employee Number - Set this option to Yes to display employee number along with the Name. Expand all levels in Detailed format? - Set this option to Yes to expand all levels and display Employee details. Set the same to No , to display summary report for Category/Group. Appearance of Name - You can Select the appropriate appearance of name from the Name Style list. Sorting Method - You can select the appropriate sorting method from the list.
Button functionalities in Pay Sheet report Detailed/Condensed Button
Use this toggle button (F1) to quickly change the report view from detailed to summary and vice versa.
Period button Using Period (F2) button, you can change the period for which the report is viewed. Using this functionality, you can display the report for any period such as Day, Week, Fortnight, Month, Quarter, Half-Year or entire Year.
Employee Filter Button Similar to Payroll and Payment vouchers, using Employee Filter button or clicking on F7 : Employee Filters button, the can quickly select employees/groups to be displayed in the pay sheet report.
F4: Change Currency: Click on F4: Change Currency button or press F4 key to change the currency.
New Column Use this button (ALT+C) , to add a column for any other Pay Head not part of the default Pay Slip format. Such new column is added on the right-hand side of the existing columns.
Alter Column Use this button (ALT+A) , to replace an existing column in the report with a new Pay Head column. The cursor should be positioned in the column to be replaced.
Delete Column Use this button (ALT+D) , to delete an existing column in the report. The cursor should be positioned on the column to be deleted. Use above column buttons to customise the appearance of various Pay Heads as columns as per requirement.
Printing Pay Sheet Report Printing of Pay sheet is done in a similar way as any other report in Tally, by Pressing ALT+P from the report display screen. While printing the Pay Sheet report, choose an option to Increase the Line Height (for each employee line) for the purpose of obtaining signature of employee or fixing a stamp, and use the printed report for manual salary disbursement or any other similar purpose.
Payroll Statement
While Pay Sheet report gives you a readily available set of earning/deduction columns and format, Payroll Statement Report allows you to generate the report for a specific Pay Head/Ledger. Go to Gateway of Tally > Display > Payroll Reports > Statement of Reports > Payroll Statement
N o t e : The button report. Refer Pay
functionalities Sheet report
in Payroll for more
Configuration options in Payroll Statement report
Statement report is similar to Pay information on button functionalities.
Sheet
F12 : Configure button in the Payroll Statement brings up a configuration sub-form using which the can customise the display/printing content and appearance of the Payroll statement report.
Remove Zero Entries : Set this option to Yes to remove Earning/Deduction data with Zero value. Show Payslip Names for Ledgers - Set this option to Yes to pick the name entered in the Name to Appear in Payslip field in Ledger master screen. Set this option to No to pick the name entered in the Name field of the Ledger master screen. Include Employee Groups & Categories - Set this option to Yes will display rows showing Category and Groups. Setting this to No will list only employee information. Show Category/Group Total - Set this option to Yes to display Category and Group wise Totals. Show Grand Total - Set this option to Yes will display Grand total at the bottom of the report. Format - Detailed or Condensed Show Employee PF Number: Set this option to Yes to display employee PF number. Show Employee IT PAN: Set this option to Yes to display employee IT PAN number. Show Employee Bank Details: Set this option to Yes to display employee bank details. Show Employee Number: Set this option to Yes to display employee number along side the Name. Show Employee ESI Number: Set this option to Yes to display employee ESI number. Show Employee port Details : Set this option to Yes to display employee port details. Show Employee Visa Expiry Date: Set this option to Yes to display employee Visa Expiry date. Expand all levels in Detailed Format: Set this option to Yes to expand all levels and display Employee details. Set this option to No to display summary report for Category/Group. Appearance of Name - Select the appropriate appearance of name from the Name Style list.
Sorting Method - Select the appropriate sorting method from the list.
Payment Advice
The payment Advice report is used to generate Payment Advice / Bank Transfer letters for a specific bank based on the Salary Payment vouchers posted to the . For more details refer to Payment Advice for Bank Transfer , in the advanced usage section. Go to Gateway of Tally > Display > Payroll Reports > Statement of Reports > Payment Advice
Click Yes to display the screen as shown
This is a default payment advice format. If you require changes specific to your bank’s requirement, Tally Business Solutions Development Services.
Payroll
Payroll is a month-wise transaction summary report displaying vouchers month-wise, akin to Display Statistics in the ing module. Though the primarily displays Payroll vouchers, you can customise to add any other voucher type by adding a new column. Go to Gateway of Tally > Display > Payroll Reports > Statement of Reports > Payroll
Press F12: Configure button and set the Appearance of Names and the Periodicity to use as shown
You can drill down to a List of Payroll Voucher reports for a month and then to a specific voucher, if required.
Employee Pay Head Breakup
This report is similar to a Payroll Statement for a selected Pay Head / Ledger, with a difference that, in this report, opening balance, credit/debit transaction and closing balance for the selected period would be displayed as columns. Refer to Track Loans and Advance balances for an example of usage of this report. Go to Gateway of Tally > Display > Payroll Reports > Statement of Payroll > Employee Pay Head Breakup
Note: Refer to Reconciliation F12:Configuration screen.
Statement
section
for
additional
You can drill down to Employee Summary report, from the Employee Ledger Breakup report.
information
on
From Employee Ledger Breakup report you can drill down to a Monthly Employee Summary report.
From Employee You can further drill down to Employee Voucher s screen.
Ledger Employee Breakup
This report displays a group wise summary of the transactions and Closing balance for selected employee. Drill down to specific ledger of the group, the month wise summary and up to voucher, is available in this report. Go to Gateway of Tally > Display > Payroll Reports > Statement of Reports > Ledger Employee Breakup
Select the Employee from the list to view the ledger breakup of a particular employee.
Note: Refer to Reconciliation F12:Configuration screen.
Statement
section
You can drill down to Breakup of Employee report, from this report.
for
additional
information
on
Drill down further to view the Ledger Monthly Summary report and the Employee Voucher report.
Attendance Sheet
The Attendance Sheet report is similar to Pay Sheet report, and displays a pre-formatted report with columns, related to your attendance/production data. Go to Gateway of Tally > Display > Payroll Reports > Attendance Sheet
Configuration options in Attendance Sheet report Configuration button, F12 in the Attendance Sheet, brings up a configuration sub-form by which the can customise the display/printing content and appearance of the Attendance Sheet report.
Include Group Attendance/Production Types Attendance/Production Types in Attendance Sheet report. Display Attendance/Production Types Attendance/Production Types in Tail Units.
in
Tail
Set
Units?-
Refer Pay Sheet Section for more information on other fields.
this
Set
option
this
to
option
Yes
to
to
Yes
Include
to
Group
display
the
Attendance
This report is similar to Payroll and displays the summary report of the Attendance vouchers. The configuration and button functionality are the same as in other Payroll reports. Go to Gateway of Tally > Display > Payroll Reports > Attendance
Press F12: Configure button and set the Appearance of Names and the Periodicity to use as shown:
Gratuity Report
Gratuity is a statutory benefit to the employees who have rendered continuous service for at least five years. The gratuity benefit is payable on cessation of employment either by resignation, death, retirement or termination. The last drawn basic salary is taken as the basis for the calculation. For Example : In India, As per statute, he/ she is eligible for 15 days pay for each completed year of service though the employer can also structure a gratuity benefit that is higher Gratuity payment is a statutory liability for an organization and tends to increase as the salaries and tenure of employment increase annually. The Gratuity Summary report provides comprehensive information about the Employee’s Gratuity Eligible Salary and the Total Gratuity amount that is liable to be given to the employees. Go to Gateway of Tally > Display > Payroll Reports > Gratuity Report
It displays a summary of all the Employee names along with their Date of Birth, Date of ing the Organisation, as well as the Gratuity Eligible Salary and the Total Gratuity liability as on date. You can drill down in the screen shown to view the Gratuity details.
Button Functions in Gratuity Report: F4: Change Currency: Click F4: Change Currency button or press F4 key to change the currency.
F5: Employee Wise Click F5: Employee Wise or press F5 to view the Employee wise Gratuity Report F7 : Employee Filters Click F7: Employee Filters or press Ctrl+F7 to filter the cost category wise and Employee/Group wise details in Gratuity Report
After you enter the Employee filter details the screen appears as below
Click F12: Configure button from Gratuity Report screen to display four options namely Show Employee Number, Show Date of Birth, Show new ees only and Show Deactivated Employees.
The option Show Employee Number? is set to No by default. You can set this option to Yes so that the Report displays the Employee number. The option Show Date of Birth? is set to Yes by default. The Last two options Show new ees only and Show Deactivated Employees are set to No by default. If the option Show new ees only is set to Yes , then Gratuity Summary of all the new employees will be displayed i.e. the details of the employees whose date of ing lies between the From Date and To Date of the Report is displayed. Similarly, if the Option Show Deactivated Employees is set to Yes , the details of the Employees who have
been deactivated are displayed. Note: * When the option Show new ees only? is set to Y e s , the will not be able to move to the next option and the report will be displayed immediately with the corresponding details. If the option Show new ees only? is set to N o, the option Show Discontinued Employees? can be set. When the details of D i s c o n t i n u e d E m p l o y e e s are displayed, you will get additional information in the form with Date of L e a v i n g along with the existing details. * When
both
the
options
are
set
to
N o, the
details
of
all
the
employees
are
displayed.
Expat Reports
The Expat reports provide comprehensive information about foreign nationals who are employed (as both regular as well as contract employees) on short/long work assignments in your company. It displays all the relevant information such as port/Visa/Contract Expiry dates along with the date of ing with respective port/Visa numbers and so on... both at an individual employee level as well as at the group level. Go to Gateway of Tally > Display > Payroll Reports > Expat Reports
The Expat Repor ts are further divided into three sub reports. They are: 1. port Expiry 2. Visa Expiry 3. Contract Expiry Each of the above mentioned reports have been discussed in detail further.
port Expiry: This report provides all the relevant information about the port of an Employee such as port number, Country of Issue, port Expiry date and other details such as the Employee’s date of ing the organisation and the information of the employee in the form of Email address. To view the port Expiry report Go to Gateway of Tally > Display > Payroll Reports > Expat Reports > port Expiry
Individual Employee/Group Employee port expiry details can be obtained by clicking/selecting Ctrl + F7 or F7 : Employee Filters on the button bar. On selecting this, a list displays prompting you to select either an employee or their groups. You can drill down for further details.
F12: Configure Click F12: Configure button or press F12 key to set the configuration as shown
N o t e : F12: and Contract
Configure screen in Expat Reports i.e. Expiry is the same as shown above.
for
port
Expiry,
Visa
Expiry
Show All Employees: Set this field to Yes to view all the employee port details. Show Expiry in days: Set this field to Yes to enter the expiry days. Expiry in next n days: To get the port expiry details for the next n days, enter the number of days in this field. ‘0’ will denote the current date (last voucher entry date). Show Employee Number: Set this field to Yes to display the Employee Number in the report. Appearance of Name: Select the name style from the list. Sorting Method: Select the Sorting Method from the list. You can sort the employee details based on the Employee Number, port Expiry date in ascending or descending order. Show Employee Email Id: Set this to Yes to view the email id. Show Deactivated Employees: Set this to Yes to view all the employees along with the deactivated employees. Note: * On setting Show All Employees to Y e s, Tally displays all the employee details, which includes both the expired and not expired port details. * On setting Show All Employees and Show Expiry in days to N o, Tally filters only those employee ports, which are to be expired. * On setting Show All Employees to N o and if Show Expiry in days is set to Y e s , then you will get the Expiry in next n days field, on entering the number of n days, Tally will filter the port which will be expired within the stipulated period (number of n days). On entering all the above details in F12: Configure screen, the port Expiry report will appear as shown
Visa Expiry: This Report is similar to port Expiry Report and provides all the relevant information related to Employee such as Visa Number, Visa Expiry Date and other details such as Employee’s date of ing the Organisation and his/her details. To view the Visa Expiry report Go to Gateway of Tally > Display > Payroll Reports > Expat Reports > Visa Expiry
Select F2: Period to view the Visa expiry details of all the employees. Individual Employee/Group Employee Visa expiry details can be obtained by clicking/selecting Ctrl + F7 or F7 : Employee Filters on the button bar. On selecting this, a list displays prompting you to select either an employee or their groups. You can drill down for further details.
Contract Expiry: This report primarily provides useful information about the Contracted Employees. All the relevant information about the Contract Employee such as the Work Permit Number, Contract Start and Expiry Date along with some additional details such as Employee’s date of ing the Organisation and Email address are captured and displayed.
Select F2: period button to view all details of the report. Click/Select Ctrl + F7 or F7 : Employee Filters to view the details of an individual employee or group. You can also alternatively view the Employee Contract Expiry details individually, by clicking F5: Employee wise on the button bar.
Payroll with Provident Fund
Payroll in Tally s the computation of Provident Fund, its deductions and ing. You can process the PF in any one of the following ways: 1.
PF process using a single payroll voucher
2.
PF process using separate payroll vouchers
3.
PF process using voucher class
Creating a Ledger for PF Payable Go to Gateway of Tally > s Info. > Ledgers > Create 1.
Enter the name (Eg: Employer PF Payable ) in the Name field
2.
Select Current Liabilities in the Under field
Creating a Pay Head for Employee's Contribution to PF To create a Pay Head, Employee’s PF @ 12% Go to Gateway of Tally > Payroll Info > PayHeads > Create
1.
Enter the Name of the Pay Head
2.
Select Employee’s Statutory Deductions as the Pay Head Type from the List of Pay Head Types
3.
Select Current Liabilities for the field Under
4.
Select Yes if you want the Pay head to affect the net salary.
5.
Specify the Pay Head Name to appear on the Payslip
6.
On selecting the calculation type to 'As Computed Value' , a new field Calculation Period appears which will be set to Months automatically
7.
Select Normal Rounding for Rounding Methods
8.
Set the Rounding Limit to 1
9. 10.
8. 9.
Select On Specified Formula for Computation
10.
Select the appropriate Pay Head for Specified Formula
11.
Enter the Slab Details in the table, as applicable
12.
Accept to save the Pay Head
Creating Pay Heads for Employer’s Contribution to PF The employer’s contribution to PF is divided into Employers PF @ 8.33% and Employers PF @ 3.67% for which separate Pay Heads are created.
Employer’s PF @ 8.33% To create a Pay Head , Employer’s PF @ 8.33% Go to Gateway of Tally > Payroll Info > PayHeads > Create 1.
Enter the Name of the Pay Head
2.
Select Employer’s Statutory Contributions as the Pay Head Type from the List of Pay Head Types
3.
Select Employer’s PF Contributions for the field Under
4.
Select No,
5.
Select As Computed Value from the List of Calculation Types
6.
Select Normal Rounding for Rounding Methods
7.
Set the Rounding Limit to 1
8.
Select On Specified Formula for Computation
9.
Select Basic for the Specified Formula
if you do not wish the payhead to affect in the net salary.
10.
Select the appropriate Pay Head for Specified Formula
11.
Enter the Slab Details in the table, as applicable
12.
Accept to save the Pay Head
12.
Employer’s PF @ 3.67% To create a Pay Head, Employer’s PF @ 3.67% Go to Gateway of Tally > Payroll Info > PayHeads > Create 1.
Enter the Name of the Pay Head
2.
Select Employer’s Statutory Contributions as the Pay Head Type from the List of Pay Head Types
3.
Select Employer’s PF Contributions for the field Under
4.
Select No,
5.
Select As Computed Value from the List of Calculation Types
6.
Select Normal Rounding for Rounding Methods
7. 8.
if you do not wish the payhead to affect in the net salary.
6. 7.
Set the Rounding Limit to 1
8.
Select On Specified Formula for Computation
9.
In the Compute: On Specified Formula sub screen, Select Employee’s PF @ 12% . In the next line, under the Function field, select Subtract Pay Head from the list Additional Computations for and select Employer’s PF Contr. @ 8.33%
10.
Enter the Slab Details in the table, as applicable
11.
Accept to save the Pay Head
N o t e : Employer’s Contribution after subtracting Employer’s PF
to PF @ Contr. @
3.67% 8.33%
is calculated on from Employee’s
the PF
amount arrived @ 12%
at
Additional Information Creating Ledgers for istrative Charges – PF, Deposit Linked Insurance (DLI) and Employee’s Deposit Linked Insurance(EDLI) istrative Charges for PF @ 1.1% , DLI @ 0.5% and EDLI @ 0.01% are paid by the employer from time to time for every employee employed by him. Since the above charges are paid by the employer, they do not appear as part of the CTC. They are created as ledgers and a liability entry should be ed for all of them.
PF Process using a single payroll voucher
In this case, you can book the PF employer contribution payable (Expense) and PF employer contribution payable (Deduction) in a single payroll voucher.
Creating an Employer Contribution Voucher Go to Gateway of Tally > Payroll Vouchers > Payroll Voucher 1.
Press ALT+A (Payroll Auto Fill) and select 1-4-2006 for From and 30-4-2006 for To , the Primary Cost Category in Cost Category and Sales in Employee Group respectively.
1.
Payroll Voucher is processed with Employees and Employer Contribution with employer contribution deduction (current liability) details.
Payments of PF In order to the Employees and Employer Contribution details of an employee, enter the Payment voucher as shown below. Go to Gateway of Tally > ing Voucher > F5: Payment 1. 2. 3.
Change voucher date to 30-April -2006 using F2: Date button.
1. 2.
Click on Payroll Auto-Fill or Press CTRL+F7 to bring up Employee Filters pop-up.
3.
Select appropriate employee group or employee (E.g. All Items ) and Salary Payable in the Payroll Ledger.
4.
Tally will fill the Payment voucher with employee wise salary unpaid/outstanding in the Salary Payable . The actual amount paid/payable to each employee may be modified if required.
5.
Accept and save the voucher.
Payment of PF Employer’s Payable
Go to Gateway of Tally > ing Voucher > F5: Payment 1.
Change voucher date to 30-April-2006 using F2: Date button.
2.
Select the Bank from the list
3.
Select the appropriate PF Employer’s Payable payhead from the list, Tally displays the Employee Allocation for: sub-form to allocate the PF Employer’s payables.
4.
Select the Employee from the list and enter the PF Employer’s Payable amount.
5.
Accept and save the voucher.
To View the Monthly PF Employer’s Payable Statement
After the Employer contribution voucher has been posted, Go to Gateway of Tally > Display > Payroll Reports > Statement of Payroll > Payroll Statement 1.
Select Ledger for PF Employer’s Payable @ 3.67%
2.
Press F2 and Select the period for the Payroll Statement
N o t e : You can click on Employer Contribution
New Column button or Press A L T + C ledgers in the required order.
and
select
To view the Employee Breakup of PayHead Go to Display > Payroll Reports > Statements of Payroll > Employee Pay Head Breakup 1. 2.
Select PF Employer’s Payable @ 8.33%
all
appropriate
1. 2.
Select Sales in the Primary Cost Category
The following screen displays
Similarly, you can view the Employee breakup of Payhead for PF Employer’s Payable @ 3.67%
PF process using separate payroll vouchers
You can book the PF employer contribution payable ( Expenses) along with the salary process and subsequently book the current liability for PF contribution separately.
Creating a Payroll Voucher Go to Gateway of Tally > Payroll Vouchers > Payroll Voucher 1.
Press CTRL+F4 and select voucher class Salary Process .
2.
Press ALT+A (Payroll Auto Fill) and select 1-5-2006 for From and 31-5-2006 for To , the Primary Cost Category in Cost Category and Sales in Employee Group/Employee respectively.
3.
3.
Enter the narration , if required
4.
Accept the screen.
Creating a PF Process Voucher Go to Gateway of Tally > Payroll Vouchers > Payroll Voucher 1.
Press CTRL+F4 and select voucher class PF Process
2.
Press ALT+A (Payroll Auto Fill) and select 1-5-2006 for From , 31-5-2006 for To , select the Employee from the list.
3.
Enter the narration , if required
4.
3. 4.
Accept the screen.
Payments to Employee In order to the salary payment to employee, enter the Payment voucher as shown below. Go to Gateway of Tally > ing Voucher > F5: Payment 1.
Change voucher date to 31-May -2006 using F2 : Date button.
2.
Click on Payroll Auto-Fill or Press CTRL+F7 to bring up Employee Filters pop-up
3.
Select the Bank from the list.
4.
Select Salary Payable from the list.
5.
Select appropriate employee group or employee (E.g. All Items)
6.
Tally will fill the Payment voucher with employee wise salary unpaid/outstanding in the Salary Payable . The actual amount paid/payable to each employee may be modified if required.
6.
7.
Accept and save the voucher.
Payment of PF Employer’s payable . Go to Gateway of Tally > ing Voucher > F5: Payment 1.
Change voucher date to 31-May-2006 using F2: Date button
2.
Select the Bank from the list
3.
Select the appropriate PF Employer’s [email protected]% payhead from the list, Tally displays the Employee Allocation for: sub-form to allocate the PF Employer’s payables
4.
Select the Employee from the list and enter the PF Employer’s Payable amount.
5.
Select the appropriate PF Employer’s [email protected]% payhead from the list, Tally displays the Employee
6.
4. 5. Allocation for: sub-form to allocate the PF Employer’s payables 6.
Select the Employee from the list and enter the PF Employer’s Payable amount
7.
Accept and save the voucher.
To View the Monthly PF Contribution Statement After the Employer contribution voucher has been posted, Go to Gateway of Tally > Display > Payroll Reports > Statement of Payroll > Payroll Statement 1.
Select Ledger for PF Employer’s Payable @ 3.67%
2.
Press F2 and select the period for the Payroll Statement
1. 2.
N o t e : You can click on New Column button or Press A L T + C Employer Contribution ledgers in the required order.
and
select
all
To view the Employee Breakup of PayHead Go to Display > Payroll Reports > Statements of Payroll > Employee Pay Head Breakup 1.
Select PF Employer’s Payable @ 8.33%
2.
Select Sales in the Primary Cost Category
The following screen displays
Similarly, you can view the Employee breakup of Payhead for PF Employer’s Payable @ 3.67%
appropriate
PF process using voucher class
Tally Payroll provides you with Payroll, Attendance and Payment Voucher Types you may define a template called Voucher Class in order to automate and control usage of ledger s and computed values to be posted. It is a powerful and configurable option that enables you to define the rules of voucher entry for a particular voucher type. It also helps in speeding up the process and minimises data entry for posting a voucher. You can book the PF contribution using the Voucher Class Go to Gateway of Tally > Payroll Info. > Voucher Types > Alter
In a Voucher Class , you may exclude selection of inapplicable groups and/or specify applicable groups. For example: In a Payroll voucher, you may exclude posting to ledger pertaining to groups such as Fixed Assets, Sundry Debtors/Creditors, Sale/Purchase etc., or Include groups like Indirect Expenses, Loans & Advances (Liabilities) and so on. Voucher Class in Tally Payroll helps the to rapidly process their Payroll data. Values for Payroll Class: Employer’s Process 1.
Select End of List for Exclude these Groups
2.
Select Employer’s PF Contributions for Include these Groups
3.
Select the Ledger Employer’s Payable for Ledger to use
4.
Accept and Save changes
4.
Creating an Employer Contribution Voucher Go to Gateway of Tally > Payroll Vouchers > Payroll Voucher 1.
Press CTRL+F4 and select voucher class Employer’s Process .
2.
Press ALT+A (Payroll Auto Fill) and select 1-4-2006 for From and 30-4-2006 for To , the Primary Cost Category in Cost Category and Sales in Employee Group respectively.
2.
Payroll Voucher is processed with Employer Contribution details .
To View the Monthly PF Contribution Statement After the Employer contribution voucher has been posted, Go to Gateway of Tally > Display > Payroll Reports > Statement of Payroll > Payroll Statement 1.
Select Ledger for Employer’s PF Contr. @ 3.67% .
2.
Press F2 and Select the period for the Payroll Statement
2.
N o t e : You can click on New Employer Contribution ledgers
Column in the
button or required
Press A L T + C order.
and
select
To view the Employee Breakup of PayHead Go to Display > Payroll Reports > Statements of Payroll > Employee Pay Head Breakup 1.
Select Employer’s contri. @ 8.33%
2.
Select Sales in the Primary Cost Category
The following screen displays
all
appropriate
Similarly, you can view the Employee breakup of Payhead for Employer’s Contri. @ 3.67%
Payroll with ESI
Tally Payroll s the computation, deduction and ing of ESI for filing monthly and annual returns.
Creating ing Group, Ledgers and Pay Heads Creating a Pay Head for Employer’s ESI @ 4.75% Go to Gateway of Tally > Payroll Info > PayHeads > Create 1.
Enter the Name of the Pay Head
2.
Select Employer’s Statutory Contributions as the Pay Head Type from the List of Pay Head Types
3.
Select Employer’s ESI @ 4.75% for the field Under
4.
Select Yes if you want the Pay head to affect the net salary
5.
Specify the Pay Head Name to appear on the Payslip
6.
Select As Computed Value from the List of Calculation Types
7.
Select Normal Rounding for Rounding Methods
8.
Set the Rounding Limit to 0.05
9.
Select On Current Earnings Total for Computation
10.
Enter the Slab Details in the table, as applicable
11.
Accept to save the Pay Head
11.
Creating a Pay Head for Employee ESI @ 1.75% Go to Gateway of Tally > Payroll Info > PayHeads > Create 1.
Enter the Name of the Pay Head
2.
Select Employee’s Statutory Deductions as the Pay Head Type from the List of Pay Head Types
3.
Select Employee ESI @ 1.75% for the field Under
4.
Select Yes, if you want the Pay head to affect the net salary
5.
Select As Computed Value from the List of Calculation Types
6.
Select Normal Rounding for Rounding Methods
7.
Set the Rounding Limit to 0.05
8.
6. 7. 8.
Select On Current Earnings Total for Computation
9.
Enter the Slab Details in the table, as applicable
10.
Accept to save the Pay Head
Creating a Voucher Class- ESI Process. Go to Gateway of Tally > Payroll Info. > Voucher Types > Alter Values for Payroll Class: ESI Process 1.
Select End of List for Exclude these Groups
2.
Select Employer’s ESI Contributions for Include these Groups
3. 4.
2. 3.
Select the Ledger Employer’s Payable for Ledger to Use
4.
Accept and Save changes
Creating an Employer Contribution Voucher Go to Gateway of Tally > Payroll Vouchers > Payroll Voucher 1.
Press CTRL+F4 and select voucher class ESI Process .
2.
Press ALT+A (Payroll Auto Fill) and select 1-4-2006 for From , 30-4-2006 for To , the Primary Cost Category in Cost Category and Sales in Employee Group respectively.
2.
Payroll Voucher is processed with Employer Contribution details .
To View the Monthly ESI Contribution Statement After the Employer contribution voucher has been posted, Go to Gateway of Tally > Display > Payroll Reports > Statements of Payroll > Pay Sheet 1.
Press F2 and Select the period for the Pay Sheet
1.
Increments and Arrears Processing
Salary of employees that get revised periodically to a higher salary is known as Increment. When such increment is given retrospectively, it amounts to calculation and payment of arrears. Tally Payroll s such revision both as prospective change and also as retrospective change. Consider a scenario where ABC Company revises the salary on 1-7-2006 for the employees with effect from 1-52006 . To specify the revised salary details for Employee A whose Basic Salary has increased by Rs. 2000 : Go to Gateway of Tally> Payroll Info.> Salary Details> Create> Select Employee A from the List of Groups/Employees
1. 2.
1.
Enter 1-5-2006 as the Effective From date
2.
Select Copy From Previous Value from the Start Type
3.
Enter 12000 as the Rate against the Pay Head Basic Salary
4.
A ccept to save the changes made.
Create a Payroll Voucher for Employee A for the period 1-5-2006 to 31-7-2006 . Go to Gateway of Tally > Payroll Voucher 1.
Select the from the List of Ledger s
2.
Click A: Payroll Auto Fill .
2.
3.
Enter the From and To date in the Employee Filters screen
4.
In the Employee/Group field, select the Employee from the List of Group / Employees
5.
Select the Payroll Ledger from the List of Ledger s .
6.
A ccept to save the Payroll Voucher
6.
To view the Payslip generated for Employee A for the period 1-5-2006 to 31-7-2006 Go to Gateway of Tally> Display> Payroll Reports> Statements of Payroll> Payslip> Select Employee A from the List of Employees
Notice that the payment of arrears has been made for the employee with effect from 1-5-2006 . N o t e : If a company decides to revise can be altered from the Salary Details thus overriding the previous effect.
salaries with effect from screen for the existing
1-4-2006, the effective date
Pay Heads 1-4-2006
Loan Management in Tally Payroll
1.
Enter the Name of the Deduction Pay Head.
2.
Select Loan & Advances as the Pay Head Type from the List of Pay Head Types.
3.
Select the respective List of Groups for the field Under.
4.
Select Yes from the list if you want the Pay head to affect the net salary.
5.
Specify the Pay Head name to appear on the Payslip.
6.
Select Flat Rate from the List of Calculation Types .
7.
Select Calculation period form the list of Calculation Period
8.
Select Per Day from the list Calculation Basis .
9.
Set the Rounding Methods to Not Applicable
10.
Accept to save the Pay Head.
Payment of Loans / Advances In order to the Loan payment to an employee, enter the Payment voucher as shown below.
Payment of Loan Go to Gateway of Tally > ing Voucher > F5: Payment 1.
Select Not applicabl e in the Class.
2.
Change voucher date to 31-May-2006 using F2: Date button.
3.
Debit Festival Loan with an amount of 10000.00, Tally displays a sub-form to allocate this debit to a cost centre.
5.
5.
Select Employee A and accept the sub-form.
6.
Credit Cash and accept the voucher.
If in
you the
are using the voucher header
Single entry mode of and select Festival
Payment voucher, then select Cash Loan from the List of Ledgers .
Loan Instalment in Pay Structure Go to Gateway of Tally > Payroll Info > Salary Details > Alter 1.
Select Employee A from the list.
2.
Navigate through the existing pay structure till the end.
3. 4.
2. 3.
Add new Pay head Festival Loan with Calculation type Flat Rate .
4.
Select End of List to exit from the current Pay Structure.
5.
Pay Heads of previous pay structure are copied.
6.
At end of the new structure, add new Pay Head, Festival Loan with Calculation type Flat Rate, and enter Loan Installment amount, 1000.00 in the Rate field.
7.
Accept and save the Changes
When a Loan is to be Employee’s Pay Structure
recovered in Multiple Fixed Installments, with Calculation Type Flat Rate.
When all Installments for an Employee loan has alter the Pay Structure from next effective payroll or set the Value basis to Zero.
it
is
added
been recovered/deducted, date and either remove
to
you the
an
need to Pay Head
Payroll Voucher for Loan Go to Gateway of Tally > Payroll Vouchers 1.
Change the voucher date to 31-7-2006 .
2.
Select voucher class Salary Process , and Auto-fill for period 1-5-2006 to 31-5-2006 and select the group as Employee A .
Observe that Festival Loan appears as new Pay Head for Employee A.
Track Loans and Advance balances Go to Gateway of Tally > Display > Payroll Reports >Statement of Payroll> Employee Ledger Breakup 1.
1.
Select Festival Loan
As per your requirements you can configure the appearance of this report and also combine multiple loans/advances ledgers into same report.
Stopping Loan Instalment deductions When the entire loan is recovered through deduction of Installment, you can modify the employee master, either by setting the value basis of the loan Pay Head to Zero or by creating a new pay structure effective from subsequent payroll period and removing the loan Pay Head.
Printing Multiple Payslips
U sing Multi-Payslip Printing option you can configure the print format of the Payslip, and print for selected periods and employee groups. Go to Gateway of Tally > Multi- Printing > Multi-Payslip Printing
It will display the following Print configuration screen; with all Payslip configuration parameters as set in the view Payslip report configurations. However, as per your requirement you can modify these settings by selecting No in the Print option. The Format of a Printed Payslip will appear as below if the country details is set to India/SAARC in F12: General screen:
Salary Disbursement
Once the payroll is processed, disbursement of the salary may be carried out using one of the following processes.
Payment Voucher Payment voucher is a Tally ing document, Crediting to cash or bank and Debiting to any Expense, Party or Asset/Liability . In the context of Payroll the employees are paid, against their Salary credited in the Salary Payable during the Payroll Voucher entry. Similar to Payroll Voucher, entry of Payment voucher can also be automated using the Voucher Class – one separate class for - crediting to Cash or a Specific bank ledger . In other words to both, Cash and Cheque or bank transfer mode of salary disbursement one needs to create separate voucher class for each of them, and also one separate class for each bank , if multiple bank s are to be used. In order to make salary payment by Cheque, separate payment voucher for each employee should be entered. For cash disbursement both options, either to create separate vouchers or a consolidated voucher, are ed. For disbursement through a bank transfer a single consolidated payment voucher for a bank , is possible.
Salary Disbursement through Bank Transfer 1.
Create Salary Ledger under Bank Group.
Go to Gateway of Tally > s Info. > Ledger > Create Accept and Save the new Ledger
2.
Create Salary Bank Transfer Voucher Class Go to Gateway of Tally > s Info. > Voucher Type > Alter > Payment Add new voucher class Salary Bank Transfer Do not specify any group in Exclude or Include parts Select Bank – Salary
3.
Salary Payment Voucher Entry Go to payment voucher entry, Press F5 and select voucher class “Salary Bank Transfer ” Click on Payroll Auto-Fill or Press CTRL+F7 to bring up Employee Filters pop-up. Select appropriate employee group or employee (E.g. All Items ) and Salary Payable in the Payroll Ledger. Tally will fill the Payment voucher with employee wise salary unpaid/outstanding in the Salary Payable . The actual amount paid/payable to each employee may be modified if required.
4. Accept and save the voucher. Note: In the event, when cash disbursement is done prior to payment voucher entry, after the auto-fill, unpaid salaries may be removed by making the payable amount Zero, in this voucher. Such unpaid salary will remain as outstanding in Salary Payable and may be auto-filled in Payment voucher as and when the actual payment is made. In the event, where you want to make disbursement by Cheque, select individual employee in the Auto-fill and create separate payment voucher for each, later printing the Cheque from each payment voucher.
License Agreement
Read this section before using the product Software License Agreement TALLY 9 This is a legal agreement between yourself, the lawful purchaser of the software described hereunder, hereinafter referred to as the LICENSEE on the one part and Tally Solutions FZ-LLC, hereinafter referred to as the COMPANY on the other part. By installing the software described below, the Licensee agrees to be bound by the of this agreement. If you, the Licensee, do not agree to the of this agreement, promptly return the complete and undamaged software packet along with the accompanying items (including written materials, binders, brochures etc) to the place from where the software was purchased for a full refund of price paid. GRANT OF LICENSE: The COMPANY grants to the LICENSEE a non exclusive right to use the accompanying software program, TALLY 9 hereinafter called the SOFTWARE. The SOFTWARE is in ‘use’ on a computer when it is loaded into temporary memory (that is RAM) or it is ‘installed’ into permanent memory (example, Hard Disk, CDROM Disk, or any other storage device on the computer). The SOFTWARE may be used on a single computer (for the Single edition of the SOFTWARE) or on a Local Area Network (LAN) Server (for the Unlimited Multi Edition of the SOFTWARE) for use on any one or more nodes connected directly to the LAN server for simultaneous use by more than one . This is the only situation under which more than one can use the SOFTWARE simultaneously. The SOFTWARE may be freely moved from one computer to another belonging to the LICENSEE. The LICENSE is granted only for the use of the LICENSEE. The LICENSEE shall not rent, lease, or otherwise transfer this SOFTWARE and the rights to use the SOFTWARE.
INTELLECLTUAL PROPERTY & COPYRIGHT: The SOFTWARE is owned by Tally Solutions FZ-LLC and is protected by Copyright Laws of UAE and International Treaty Provisions relating to protection of all Intellectual Properties. Therefore, the Licensee must treat this SOFTWARE like any other copyrighted and intellectual property material (e.g. a book or musical recording). The Licensee shall not copy the SOFTWARE and/or written materials accompanying the SOFTWARE.
LIMITED WARRANTY AND REMEDY WARRANTY: There is a limited warranty from the Company that the SOFTWARE will perform substantially in accordance with the accompanying written materials for a period of 90 (ninety) days from the date of purchase and that the medium on which the SOFTWARE is supplied, will be free from defects in materials and workmanship under normal use and service for a period of 90 (ninety) days from the date of purchase. WARRANTY is void unless the purchase of the SOFTWARE is from authorized vendors in the geographical territory of the LICENSEE, or from the COMPANY. WARRANTY is applicable if, and only if, the licensee has completed the activation process by logging in the serial number and the key for the software, and the registration information of the licensee has been received and acknowledged by the COMPANY. Otherwise the WARRANTY shall not apply. NO OTHER WARRANTY: The COMPANY and all its suppliers disclaim all other warranties, whether expressed or implied, including, but not limited to, implied warranties of merchantability and fitness for a particular purpose, with regard to the SOFTWARE and the accompanying written materials. LICENSEE’S REMEDIES: The COMPANY and its suppliers’ entire liability and Licensee’s exclusive remedy shall be at the option of the COMPANY, either (a) refund of the price paid on the return of the SOFTWARE to the supplier and giving the proof of having uninstalled the activation license, or (b) repair or replacement of the SOFTWARE that does not meet LIMITED WARRANTY of the COMPANY, and which is returned to the supplier with a copy of the proof of purchase (such proof of purchase being either the original invoice or receipt of the supplier). The LIMITED
WARRANTY is void if the failure of the SOFTWARE has resulted from virus, any other software or process on the computer of the LICENSEE, improper use, accident, theft, abuse or misapplication of the SOFTWARE. Any replaced SOFTWARE will be warranted for the remainder of the original warranty period or 30 (thirty) days whichever is longer. NO LIABILITY FOR CONSEQUENTIAL DAMAGES: The COMPANY and its suppliers under no circumstances shall be liable for any damages whatsoever (including, without limitation, damages for loss of business profit, business interruption, loss of business information, or any other monetary or non-monetary loss) arising out of the use or the inability to use this SOFTWARE, even if the COMPANY has been advised of the possibility of such damages. DISPUTE RESOLUTION AND JURISDICTION All disputes between the parties connected with the of this agreement, or the use or inability to use the SOFTWARE or any other services of the COMPANY, related to the SOFTWARE, shall be subject to arbitration of a person to be appointed by the COMPANY, and the decision of the arbitrator will be binding on all parties as per applicable statutes. The arbitration proceedings shall be conducted in English and place of arbitration shall be Singapore. All proceedings shall be governed and construed in accordance with the laws prevailing in Singapore and only competent courts within Singapore shall have jurisdiction to adjudicate the same. If you have any questions or clarifications concerning this LICENSE, please in writing: CUSTOMER SERVICE CELL C/o Tally (India) Pvt. Ltd., 331-336, Raheja Arcade, Koramangala, Bangalore – 560 095 INDIA. (Please quote your Tally 9 serial number in all correspondence or with the COMPANY concerning the SOFTWARE)
Tally Solutions FZ-LLC Web site: www.tallysolutions.com E-mail: [email protected] ©Tally Solutions FZ-LLC, 1988-2007. All rights reserved. Tally, POWER OF SIMPLICITY is ed trademark of Tally Solutions FZ-LLC. All other trademarks are the property of their respective owners and are hereby recognised.
Using TallyHelp
TallyHelp file is structured in such a way that it provides easy navigation between topics and facilitates easy search. The comprehensive Online Help covers basic and advanced operations. It is context-sensitive and extracts help on topics related to the current screen in Tally. Use Alt + H from the keyboard or click the Help button to access the relevant topics in the Online Help. Here are some details on how to use this help file effectively. It is suggested to go through this topic to utilize the help file effectively. To handle the Left (navigation) pane To handle tool bar buttons To get to know some basics
What's new in this release?
The following links contain information on new features or areas that have been updated in Tally. New Features in Tally 9 New Features in Tally 8.1
New Features in Tally 9
Release 2.0 Release 1.31 Release 1.3 Release 1.21 Release 1.2 Release 1.11 Release 1.1 Release 1.0
Release 2.0 Tally 9 Release 2.0 unleashes the full power of the new engine built into it to give you superlative performance. The response time of the application can now be measured in seconds rather than minutes, even for high volume data. This percolates down to a tenfold increase in performance in several operations. It will improve the experience with the application and will substantially increase productivity.
Enhancements in overall performance Tally 9 Release 2.0 is incorporated with several advanced features which bring about an overall improved performance of the application. One of the most important advancements is the substantial increase in the speed of several operations like loading of company data, backup and restore, reports generation, etc., thus giving an improved and thrilling experience.
Export to Excel Export to Excel is a new feature that has been incorporated in this release of Tally 9. This feature enables the to export any report generated by Tally into Excel. Consequently the can generate graphical representations of his data for better visual presentation. It will considerably speed up and ease the process of filing e-VAT in the future. Note:
Export
to
Excel
is
compatible
with
Microsoft
Office’97
or
higher.
LAN for Tally 9 Silver A single company data can now be accessed simultaneously by more than one Tally 9 Silver (Single ) licenses.
Speed of Migration – reduction in memory usage, increase in speed Another development is the improved performance in Data migration. The application architecture has been designed to reduce the memory usage during the migration process. This results in an increase in the speed of the migration process and subsequent reduction in time required for the migration.
Rewrite speed – improved function
The rewrite function for data correction has been further enhanced in this latest release of Tally.
POS Invoice Modifications have been done to ensure the appropriate display of Multi Mode Payment details that appear at the bottom of the POS Invoice.
Printing Party Name and Address Earlier, printing ledgers using the Multi Printing option in Tally with Normal Ledger selected as the Style of Report, Format as Condensed, and with Start fresh page for each set to Yes in the Report Generation screen would print the Party’s Name only after the Party’s Address. Go to Gateway of Tally> Multi Printing> Books> Ledger> Group pf s> Select Sundry Debtors or Sundry Creditors However, modifications have been made to print the Party’s name prior to the party’s Address.
F4: Change Items Corrections have been made to enable selecting Cost Centres using the button F4: Change Items while at the Cost Centre Vouchers screen. Go to Gateway of Tally> Display> Statements of s> Cost Centres> Cost Centre Break-up> Select the Cost Centre and drill down to the Cost Centre Vouchers screen.
TDS The option Allow Alteration of TDS Rates in F12: Configure when clicked at the voucher level has been replaced with Allow Alteration of TDS Rates for Lower Deduction.
Selecting Invoice in Excise Purchase Invoice Earlier, on selection of an Excise Purchase Invoice from the List of Purchases that appears in the Supplier Details sub screen during an excise sales transaction, Tally would not allow you to trace back to the sub screen and select an invoice from the list in case of a misjudgment on selection. However, Tally 9 Release 2.0 is now made more flexible to accommodate such changes.
Excise Opening Stock By default, the date that appears in the As on field in the Excise Opening Stock Creation screen is the Current date specified. Earlier this field could not be modified. However, you now can enter the date of your choice in the As on field.
M: Manufacturer List Tally now offers the flexibility to select the details of a Manufacturer or Importer by clicking the M: Manufacturer List button during an Excise Purchase transaction. Toggling with the button allows you to select the Manufacturer or Importer from the List of Ledger s or enter details manually while at the Manufacturer/ Importer Details section in the Party Details screen.
Printing Excise Sales Invoice The title Name and Address of Supplier of Goods if he is a Manufacturer or Importer which appears in the excise sales invoice when Print Trader Supplier Info is set to Yes in the Invoice Print Configuration screen has been changed to Name and Address of the Manufacturer/Importer.
Printing State and PIN Code With Printing State and PIN Code set to Yes in F12: Configure> Printing> General, you can now print the Buyer’s State and PIN Code in Sales invoice, Purchase invoice, Credit note and Printing through Multi Printing, as entered at the time of Ledger creation.
Service Tax – Malaysia Corrections have been made to ensure that the Service Tax gets calculated for during sales transactions.
Printing Excise Sales Invoice Corrections have been made to ensure that Tally prints the titles for Excise Sales invoices as follows:
The original copy being marked as ORIGINAL FOR BUYER
The duplicate copy being marked as DUPLICATE FOR TRANSPORTER
The triplicate copy being marked as TRIPLICATE FOR ASSESSEE
The subsequent copies NOT FOR CENVAT PURPOSES
Modifications done now ensure that the excise duty amount gets printed in numbers in the Net Value Excise Amt field on sales invoices printed while Follow Excise rules for Invoicing in F11: Features> Statutory & Taxation is set to Yes.
Nature of Purchase in Excise Two new Nature of Purchase: Agent of Manufacturer and Purchase from Importer have been added in Master creation.
Excise Invoice Printing The option of Print Trader Import Declaration has been provided for in the Invoice Printing Configuration. Under F12 - Voucher Configuration, the earlier label “Allow Alteration of TCS Rate” has been changed to "Allow Alteration of TCS Rate for Lower Collection ". The earlier label name has been changed from "PLA RG 23 Sl. No." to "Seller RG23D No." in Excise Sales Invoice (Manufacturing Section)
Additional Description for Ledgers Additional description for ledgers has been provided for. This option can be activated in F-12 – Invoice Configuration screen.
TDS Report Retrieval of TDS computation reports has been enhanced.
UDFs migration Migrating data from Tally 7.2 to Tally 9 Release 1.3 would not capture values for and 2 as Index numbers for String Data type in TDL containing UDFs.
Ledger Object UDFs taking 1
Appropriate measures have been taken to ensure that the values are captured accurately.
Printing Bill wise Details Printing Bill wise details of ledgers using Multi Printing with Show Billwise Details also set to Yes and Start fresh page for each set to No would not display bill wise details in the report. The issue has been addressed. [Go to Gateway of Tally> Multi Printing> Books> Ledger> Group pf s> a Group]
select
Payroll Exporting Pay Sheet Earlier, exporting a Pay Sheet with a few empty columns in the ASCII format on to MS Excel and selecting Comma as the Delimiter would not be considered. The same has been addressed appropriately.
Date of Leaving for Employees While entering the Date of Leaving for an employee in the Employee Alteration screen, Tally used to accept dates prior to the Date of ing, specified in the master. This issue has been addressed.
Date for Despatch Document Create a Delivery note skipping the Despatch Doc. No. field in the Party's Supplementary Details screen. Now a Sales invoice and track the Delivery note. A print out of the sales invoice would not display the Date against the Despatch Doc. No. The issue has been addressed appropriately.
Tally Link Server Synchronization Synchronization initiated with Tally Link Server through certain Internet Service Providers displays the message Out of Memory and terminates the process immediately. The issue has been resolved.
Memory Access Violation Drilling down from the Statistic screen for a Group company to the vouchers gives MAV (Memory Access Violation) error. This issue has been resolved.
Stock Ageing Analysis The Stock Ageing Analysis does not display the combined total for the Group company. This problem has been appropriately addressed.
Physical Stock in FIFO method Physical stock voucher entry is not affecting the value of the stock items, when using the
FIFO valuation method
for stock item. Necessary action has been taken to affect the stock value when ing a physical stock entry.
Bank reconciliation Statement Printing The print option screen for printing the Bank Reconciliation Statement (BRS) displays Printing Ledger. This issue has been resolved and the option will now be displayed as “Printing Bank Reconciliation”.
Rejection Outward note Tally shows a Negative Stock warning when ing a Rejection Outward note, even when there is stock for the specific item. This has been rectified.
CST CST Pending List screen does not show the break-up of the gross invoice value. This problem has been rectified. Details of Gross amount are now being displayed in CST in the Form Receivables screen.
Multiple VAT Classification When there is a Multiple VAT Classification like "Inter- State Sales" and "Inter - State Sales - Spl. Category Sales" used in an invoice, the amount of CST displayed is incorrect in the VAT Computation Report. Appropriate steps have been taken and this issue has been resolved.
Cost Center budget report When we set the budget for Cost Centers and try to view the Cost Center budget break up report, the values re not displayed correctly. This issue has been resolved. The reports as per the Cost Center Budget are displayed correctly.
Location mismatch during re-write If a Purchase Order/Sales Order is created with the option Any selected under Godown, and then a Receipt Note/Delivery Note entry is ed linked to the PO, on re-writing the data, the PO ed with the above godown option, changes to Main Location. This has been rectified.
Sales Order/Purchase Order status mismatch On rewriting data, the Sales Order/Purchase Order outstanding report displays the Sales Order/Purchase Order as pending, even after they have been adjusted. Appropriate steps have been taken to resolve this issue.
Purchase Order status mismatch Already knocked off Purchase Order with the Receipt Note in Tally 7.2 is shown as “ Pending” after migration to Tally 9. This issue has been duly addressed and the problem has been resolved.
Retention of POS parameter While creating a voucher type for POS invoicing, the option Print after saving Voucher does not retain the parameter No. The parameter defined by the is now retained.
POS entry in Edit mode On opening a POS entry in the Alter mode, the credit Card number, Bank Name and Cheque Number were not displayed. Necessary steps have been taken to resolve this issue.
Distorted Alignment In the Alteration Mode of a POS Invoice, the alignment of the field name “Ledger” is distorted. This issue has been resolved.
Negative stock warning
While using multiple batches of purchase for a single item, in a Sales Invoice, Tally displays a negative stock warning.
On ing a stock journal for an item with balance stock, Tally displays a message saying “Negative Stock”.
These issues have been addressed.
FBT Helper When an expense amount is entered and then an FBT Payment is made using the FBT Helper, there is a difference between FBT Computation and the amount calculated by FBT Helper. Necessary steps have been taken and this issue has been resolved.
TCS TCS Party name does not change in the TCS details sub-screen when the party name is changed in the invoice. This issue has been resolved. The party name will change in accordance with the name on the invoice.
Release 1.31 TDS Earlier making an advance payment to a party through the single entry mode would not calculate the TDS amount. However, now the TDS amount appears appropriately.
Mismatch in Credit and Debit Balances Receipt vouchers created in the double entry mode using foreign currency used to display a mismatch in Credit and Debit balances in the alteration mode. The mismatch in balances has been resolved.
Negative Stock Warning in Journal Voucher Create a stock item with an opening balance of considerable units and a delivery note against it. Using a Journal Voucher to record a sales transaction tracking the delivery note would display a warning message of negative stock even though a considerable amount of stock was left over. The same has been addressed appropriately in Journal voucher.
Migrating € to Tally 9 Data migrated from Tally 7.2 used to display the Euro currency symbol modifications done will successfully migrate
€,
as a box in Tally 9. However,
€ to Tally 9 now.
Booking FBT Expenses Corrections have been made in the Ledgers of FBT Category report to display details of FBT expenses booked by means of a Memorandum voucher report.
Price lists and Stock Items with Negative or Zero Balance Set Allow Invoicing and Use Multiple Price levels to Yes and Allow Sales Order Processing to No in F11: Features> Inventory Features. In such circumstances, the Price Rate in Sales invoices created using Price Lists for Stock items having a Negative or Zero Balance used to appear late or would not appear at all. The error in displaying the Price Rate in such conditions has been resolved.
UDF Value left Blank With Maintain Multiple Godowns in F11:Features> Inventory Features set to Yes, Sales transactions for a stock item with UDF value at the Batch Allocation Level left Blank when viewed in the alteration mode, displayed the UDF value specified during the Purchase of the same item. The issue has been addressed.
Excise stock duty details after data rewrite With Dealer Excise enabled in F11: Features > Statutory & Taxation, the Excise duty details of Excise Stock Items available in hand, were getting deleted after a data rewrite. This issue has been fixed to retain the Excise Duty values.
Migrating String UDF value specified under Voucher Object Earlier, migrating data from Tally 7.2 to Tally 9 would not display the String UDF value specified under Voucher Object in Tally 9. However, modifications have been done to ensure successful migration of the same.
UDF Values specified under Company Object Modifications have been done to ensure that the values of String and Date UDFs specified under Company Object appear in Tally 9 on migration from Tally 7.2.
Release 1.3 Performance in Networking Environment In a networking environment, if the Server has Windows XP and Clients have Windows 98 as the operating system, Tally performs efficiently with improved data stability. The error Record Insertion Failure will not occur in Tally while working in a networking environment.
Day Book
Selecting Cost Centres in the option Alt+F12: Range from Day Book, lists the appropriate options.
Voucher Printing Set the option Print after saving voucher to Yes in the Voucher Type Alteration screen, to print a Rejection in/ Rejections Out voucher, after saving. Go to Gateway of Tally > s Info > Voucher Type > Alter
Interest calculation in Forex A Sales transaction created using Forex currency and Interest calculation, calculates the Outstanding Forex Interest accurately. Go to Gateway of Tally > Display > Statement of s > Interest Outstanding > Ledger > Customer
Ledger Tally now prints the address of the Sundry Debtor / Creditor ledgers, while printing a ledger . Go to Gateway of Tally > Display > Books > Ledger
Ratio Analysis If the Nett Profit is lesser than the Return on Investment% or Return on Working Capital, Tally displays the values with a negative sign.
Maintain balances bill by bill Altering a ledger created under Sundry Debtors or Sundry Creditors, by setting Maintain balances bill by bill to Yes affects only the selected ledger and not the Group.
Columnar Profit & Loss A/c Go to Gateway of Tally> Profit & Loss A/c > C: New Column Tally displays the Columnar Profit & Loss A/c report for any specified period and prints the report accurately.
Migration Tool Licensed s may now migrate data to Tally 9, using the Tally Data Migration Tool on Tablet PCs and Desktop computers of higher processor speed.
Multi Printing Go to Gateway of Tally> Multi Printing> Outstanding Statements> Ledger> Group of s> Select the Group Set Start fresh page for each in the Printing Ledger Outstanding screen to No and print the outstanding ledger s along with accurate On details.
Printing Invoice Tally prints with proper line spacing on Pre-Printed stationery
Printing List of s
While printing the List of s, pressing Enter in the Report Generation screen will not take the cursor to the Type of Masters field. Go to Gateway of Tally> Display> List of s> Alt+P
Actual – Billed Quantity Tally captures correct Actual and Billed quantities in Delivery Notes with any reference number and with Maintain Multiple Godowns in F11: Features > F2: Inventory set to Yes.
Titling While printing multiple vouchers using the Multi Voucher Printing option, use Alt+T: Titling and set Print page numbers in the report to No, in order to stop the printing of page numbers on all pages.
Designation of g Authority The Designation of g Authority appears in the print configuration screen and print preview, only if Confirmation of A/cs is selected as the Style of Report.
Interest Parameters Advanced Interest Parameters entered while creating a ledger appear accordingly at the time of voucher creation.
Interest Calculation Tally calculates interest rates appropriately for occasions where different rates have been specified for different periods.
Formal Receipt While creating Receipt vouchers, Tally displays the name of the Branch/Division or Capital A/c Ledgers in the field Name of Receipt, when Print Formal Receipt after saving is set to Yes in the voucher type
Cheque Printing Tally captures the name of the Branch/Division or Capital Ledgers in the field Name on Cheque while creating Payment vouchers.
Foreign Exchange A Purchase entry made in foreign exchange with Use Common Ledger A/c for Item Allocation in F12: Configure set to Yes, display appropriate values when viewed in the alteration mode.
Multi Column Cash/Bank You can use the Multi Column Cash/Bank option in Multi Printing to print Multi Column Cash/Bank with columns and get well-defined prints of the same.
Tracking Consignee Tracking of Purchase or Sales Orders, created with different Buyer and Consignee names in Receipt and Delivery notes displays accurate Consignee Details.
Godowns The address entered in the Godown creation screen appears legible.
Bank Reconciliation The Bank Reconciliation statement displays appropriate entries as configured in F12: Configure. Go to Gateway of Tally> Display> Books> Cash/Bank Book> Cash Bank Summary> Drill down to the Ledger Vouchers screen and press F5: Reconcile.
Stock Journal The value in the rate field of a Stock Journal (Transfer of Materials) appears appropriately.
Reference You can now print the Reference number entered in the Stock Journal entry.
Purchase/ Sales Order The list of Party or Customer ledgers is displayed appropriately, while creating a Purchase/ Sales order respectively.
Rejection In/ Out Vouchers The Rejection Inward/ Outward vouchers display the customer details as entered in the Mailing Details section of the Customer ledger creation.
Inventory Report The Godown – wise Inventory reports now displays accurate balance values whereas multiple Godowns are maintained.
Price Level Creating a Price Level, using Alt+C from the Price List screen will display the same in the Price Level field spontaneously.
Security Control Tally provides access to the features/ options as specified in the Security Levels screen.
Cost Centre Set the option Show Cost Centre Details also to Yes in the Multi Printing for Group of s to print the Cost Centre details. Go to Gateway of Tally > Multi Printing > Books > Ledger > Group of s
Payroll Configuring Payslip Tally allows you to configure the Payslip to define the Height & Width. Go to Gateway of Tally > Display > Payroll Reports > Statement of Payroll > Payslip>Alt+P and then press F12: Configure for the printing configuration
Authorised Signatory
You can now configure your Payslip to include the signature of an Authorised Signatory.
Pay Head Once you select a Pay Head from the List of Pay Heads in the Salary Details Creation screen, the Pay Head and its alias will not be displayed in the selection list.
Excise for Dealer Local Sales Tax Number The Excise Sales Invoice prints the Local Sales Tax Number, entered in F11: Features > Statutory & Taxation, if the VAT feature is not enabled.
Secondary Education Cess on CVD Tally now s the calculation of Secondary Education Cess on CVD on Excise Stock Items. The following new columns have been added to print the duty value in the sales section of Excise Sales Invoice Rate of Sec Ed Cess on CVD Sec Ed Cess on CVD Amount
The Sec Ed Cess Amount column in Purchase Section of Excise Sales Invoice will capture the duty value. The Excise Purchase Bill and Excise Stock will capture the value in the Total Cess Column
Range and Division in Excise Sales Invoice The Excise Sales Invoice captures the address of the Range and Division specified in F11: Features > Statutory & Taxation
Range and Division The field Range/ Code and Division/ Code in Excise Sales Invoice has been renamed to Range and Division respectively.
Excise Opening Stock You can enter Narration while creating the Excise Opening Stock in Tally.
Excise Purchase Invoice Tally allows you set different duty values for a single Excise Stock Item , which can be set to zero while creating different Types of Purchases.
Excise Sales Invoice The Excise Sales invoice now prints the title as follows: 1.
The original copy being marked as ORIGINAL FOR BUYER
2.
The duplicate copy being marked as DUPLICATE FOR TRANSPORTER
3.
1. 2. 3.
The triplicate copy being marked as TRIPLICATE FOR ASSESSEE
4.
The subsequent copies NOT FOR CENVAT PURPOSES
While printing a single copy of Excise Sales Invoice, the title will not be printed.
Excise Stock Item The Excise Stock Item alteration screen will now display the Tariff Classification below the field Excise details in the Tax information section, to identify the Excise Item.
Refreshing of Duty Value in alteration mode While creating an Excise Purchase Invoice, if the Duty Value is changed, Tally retains and displays the same when viewed in the Alteration mode.
Duty names in Excise Invoice The Excise Sales Invoice will capture the duty names of the Stock Item appropriately, as specified in the Excise Purchase creation (CVD name instead of BED).
TDS Surcharge Value Tally calculates accurate Surcharge Value on the total amount specified in the Party Payment Entry, if the field Ignore Surcharge Exemption Limit in the Party ledger is set to No.
TDS Ledgers While creating a voucher without using TDS ledgers, in a TDS enabled company, Tally displays all the fields appropriately.
POS POS Invoice Set the option Use Additional Description(s) for Item Name to Yes in the POS Invoice Printing configuration to print Additional Item Description in a POS Invoice.
Cancelled POS Invoice You can now preview a cancelled POS Invoice in the alteration mode.
Job Costing Job Work Analysis Use Alt+F1 to view the voucher details of the selected ledger in the Job/Project Monthly Summary report. Go to Gateway of Tally> Display> Statement of s> Job Work Analysis> Job/Project Monthly Summary
Release 1.21
Minor Enhancements Service Tax Secondary Education Cess Effective Date To comply with the Finance Act 2007, Tally provides the Additional Secondary and Higher Education Cess (SHEC) @ 1%, effective from May 11, 2007 N o t e : Secondary and Higher Education Cess @ 1% was effected in Stat version 53 April 1, 2007. You need to re-accept any voucher ed with SHEC (from 1.4.2007 10.5.2007) to update the SHEC calculation.
from to
New Service Categories The following new Service Categories have been provided: 1. Telecommunication service 2. Mining of mineral, oil or gas 3. Renting of immovable property service 4. Works contract Service 5. Development and supply of content 6. Asset management 7. Design Services
Tax Deducted at Source (TDS) Calculation of TDS Surcharge Surcharge is calculated appropriately in the alteration mode.
Form 16A Form 16A in TDS has been revised.
Change in TDS Tax Rate 1.
Effective April 1, 2007, the TDS Tax rate for Rent of land, building or furniture for deductee type Individual/HUF - Resident has changed to 15% and for all other deductee types the tax rate has been revised to 20%, effective from June 1, 2007.
2.
Effective June 1, 2007, the TDS Tax rates for deductee type Resident have changed with regard to the following Nature of Payments.
Commission or Brokerage to 10%
Fees for professional or technical services to 10%
New TDS Nature of payment The following new TDS Nature of payments have been provided: Rent of Plant, Machinery or Equipment at 10%, effective from June 1, 2007. Any Other Interest on Securities as per sec.193 for all Resident deductee types at 20%, effective from April 1, 2004.
TDS Nature of Payment Rent has been renamed to Rent of Land, Building or Furniture.
Tax Collected at Source (TCS) Calculation of TCS Surcharge Surcharge is calculated appropriately in the alteration mode.
Form 27D Form 27D in TCS has been revised.
Display of State Name Tally now displays Uttaranchal as Uttarakhand in accordance with its recent renaming. Tally also displays Chhattisgarh appropriately. To effect these changes in Tally, go to Gateway of Tally > Company Info. ( Alt + F3) > Alter. Select the appropriate state from the List of States and accept the Company Alteration screen to save the changes.
Tracking Delivery and Receipt Notes in a Journal Voucher Enable Use Tracking Numbers (Delivery/Receipt Notes) in F11: Features > Inventory Features to facilitate easy track of Delivery and Receipt Notes in a Journal Voucher.
Release 1.2
New Features Excise Opening Stock Tally allows you to record the Opening Stock Balance of Excise Stock Items. Refer to Excise for Dealers for more details on Creating an Excise Opening Stock.
Calculation of Secondary Education Cess With effect from 1st April, 2007, Secondary Education Cess displays accurate values when selected with other Types of Duties such as TDS, TCS, FBT and Service Tax.
Calculation of CVD (On Import)
Tally calculates CVD (On Import) on (Assessable Value + BED) appropriately in accordance with legal requirements.
Start of new Financial Year Tally displays a warning Change in Date may cause loss of Data if the financial year is altered in the Company Alteration screen.
VAT Payment Vouchers – For India Only You can record details such as Payment period, Challan No. and so on, for each transaction while creating the VAT Payment vouchers.
VAT Declaration in Excise Sales Invoice Tally displays a VAT Declaration in the Print Preview of an Excise Sales Invoice that has utilized VAT ledgers.
Education Cess on CVD in Excise Sales Invoice Tally now calculates Education Cess on CVD in an Excise Invoice.
Duty Heads for Customs and Excise Select the appropriate Duty Head for Excise from the Type of Duty/Tax list while creating Ledgers under Duties & Taxes.
Major Enhancements Speed of Data Transfer Tally now facilitates faster report generation.
Pending Purchase Order While entering a Purchase Voucher against a Purchase Order with different delivery schedules, the Item Allocations sub screen displays only the Pending Purchase Order quantities.
List of Delivery Note Vouchers Press F12: Value and enter the appropriate Range of Information in Report to view vouchers in the required format at the List of Delivery Note Vouchers report which is available in Statistics in Statement of s.
Excise for Dealers Self Importer details in Excise Tally now displays the Self Importer details in the Excise Sales Invoice.
Printout of an Excise Sales Invoice Tally allows you to print the Excise Sales Invoice with three stock items and three different tax ledgers on a single page.
Name and Address of Self Importer The print preview of the Excise Stock and Purchase Bill report includes the Name and Address of the Self Importer.
POS Editing a Cancelled POS Invoice You can edit a cancelled Single Pymt/Multi Mode Pymt POS Invoice and re-enter the Invoice.
POS Invoice Printing Set the option Print Batch Details to Yes in the POS Invoice Printing Configuration to print batch details in the POS Invoice.
Service Tax Sales Voucher Class You can use Voucher classes to create Sales invoices for Service Tax.
Switching the Service Tax Invoice to Voucher Mode You can now toggle from Invoice mode to Voucher mode using the Ctrl+V keys in the Service tax voucher.
Payroll Exporting Pay Heads Tally now offers you the flexibility to export Pay Heads from List of s report. Select Alt+E (Export) to bring up the Exporting List of Ledgers screen. Select Pay Heads from the Type of Masters list.
Tax Deducted at Source Amount in Formal Receipt The printout of a Formal Receipt Voucher with TDS Receivable deducted displays the accurate total amount.
Minor Enhancements VAT Registration Number in U.K. VAT Analysis Report The U.K. VAT Analysis report displays the VAT Registration number for all the Purchase and Sales entries.
Cost Centre Allocation in Payment/Receipt Voucher The Cost Centre allocation sub screen in Payment/Receipt vouchers appears appropriately.
Inventory Vouchers Use Alt + A from the Stock Vouchers screen of the Stock Item Monthly Summary for faster access to the Inventory/ing Voucher creation screen.
Stock Journal Details of a Stock Journal Voucher display appropriately after Printing.
Forex Transactions in Job Costing Set Show Forex Transactions only in F12: Configure to Yes to display the Forex transactions in the JobWork Vouchers report.
Interest Calculation using Multicurrency after Importing The Forex Rates appear accurately at the Voucher entry level, after import of data that contain Interest Calculation.
Foreign Exchange values in Ledger Vouchers report The ledger voucher report for Foreign Exchange transactions displays accurate Foreign Currency values for specified periods.
Closing Balance in Stock Summary The Stock Summary report displays the appropriate Stock Item Rate and Value for Items sold at a discount.
Payment Voucher A single Payment voucher inclusive of a discount created for multiple ledgers in the double entry mode using To/By during entry and later altered to Cr/Dr, displays accurate values.
Display of Multiple Ledgers and Groups The Name of Ledger and Name of Group are shown appropriately at the Multi Ledger and Multi Group display screen.
Multi Column Cash/Bank Book Printing a Multi Column Cash/Bank Book from s Book at Multi Printing shows accurate Opening Balances and Total values.
Forex Gain/Loss display after Splitting data Forex Gain/Loss adjusted previously does not reflect in the Balance Sheet following the split of Company Data.
Balance Sheet display after Splitting data The Balance Sheet displays accurately following the split of Company Data.
Multi Printing of Inventory Books Select All Items at Multi Printing and set Start Fresh Page for each is to No to display the Closing Value in the Item and the Quantity at Physical Stock Entry.
Cost Centre Allocation Set Show Cost Centre Details in F12: Configure to No while selecting Cash or Bank s during the entry of a Payment or Receipt voucher in the double entry mode to prevent the appearance of the Cost Centre Allocation screen.
Allocating Cost Centres Set Pre-Allocate Bills for Payment/Receipt to Yes in F12: Configure during the entry of a Payment or Receipt voucher in the double entry mode to facilitate the allocation of Cost Centres to ledgers.
Multi Voucher Printing You can use the Multi Voucher Printing option to print vouchers/invoices with details of Party Name, Item and values.
Columnar Alteration Drill down to the Voucher from the Sales , click F5: Columnar and select All Items (automatic columns) at Type of Column to view complete details of all the items at the Voucher .
Purchase Voucher Class Set Override Using Item Default to Yes during the creation of a Purchase Voucher Class and create a stock item with the option Set/Modify Default Ledgers for Invoicing to Yes and enter appropriate values for Quantity and Rate. These values will display appropriately during Purchase Voucher entry as well as in the alteration mode.
Stock Summary report with Show Profit Set Can Quantities of Items be Added to Yes when creating a Stock Item under Stock Groups to display appropriate values for transactions using the above mentioned Stock items in the Stock Summary report.
Tax Collected at Source Printing of TCS Invoice Set Print in Simple Format and Print TCS Details to Yes in F12: Invoice Printing Configuration to display the break up details of Income Tax, Surcharge and Cess in the TCS Invoice.
TCS Challan The breakup of TCS payment details is captured in the TCS Challan.
Gross Amount When you enable TCS and VAT for a company, the the Gross Amount inclusive of VAT.
TCS Details sub screen in Sales ing voucher displays
VAT – For India Voucher Number in VAT Classification Vouchers Report When you drill down from the VAT Computation report, the VAT Classification Voucher screen displays Voucher Reference Numbers for all Purchase and Sales vouchers.
Voucher Date in VAT Classification Vouchers Report The Voucher date in a VAT Classification Vouchers report appears in the numeric date format (e.g. 1-42007).
VAT – For Philippines
Invoice Printing Configuration for Philippines Set the option Print VAT Analysis of Items at the F12: Print Configuration screen to Yes/ No while printing invoices for Philippines.
Excise for Dealers Excise Sales Invoice The Excise Sales Invoice prints the appropriate declaration in the Declaration field.
VAT/Excise Details in Dealer Excise The Supplementary Details sub form displays VAT/Excise Details appropriately at Excise Sales Invoice creation.
POS POS Invoice The POS Invoice displays the appropriate details both in Single and Multi Payment modes.
Service Tax Printing Service Tax Enabled Sales and Purchase Voucher Types Set Print after saving Voucher? to Yes to print a Service Tax enabled Sales and Purchase Voucher Type.
Fringe Benefit Tax FBT Computation Report The FBT Computation report displays accurate tax values.
Central Sales Tax Display of Debit Note in Stock Vouchers Report The Stock Vouchers Report at Stock Summary displays accurate Closing Stock values as well as correct Item rates and CST Values in the Outward Column for a Debit Note ed in As Invoice/As Voucher mode.
Deactivation of Form D With effect from 1st April, 2007, Form D will no longer be tracked for CST in Tally to conform to Government regulations.
CST with/without C form The general rate of CST on all goods with the C form has now been set at 3%. The rate of CST on all goods without the C form has been modified to the Local VAT or Sales Tax rate.
Payroll
Payslip Title A Payslip printed for a defined period using the Multi Payslip Printing feature at Multi Printing displays the title Payslip for period ----- to -----.
Release 1.11
Major Enhancements Secondary Educational Cess in Excise for Dealers The budget for 2007 – 2008 has introduced a Secondary Educational Cess at the rate of 1% of the aggregate duties of custom and excise from March 1, 2007. To accommodate the same in Tally Excise for Dealers, we have incorporated a new type of duty Secondary Educational Cess. Incase of excise duties, Secondary Education Cess on excisable goods will be chargeable on the aggregate duties of excise (Excluding Education cess) levied on such goods. The method of calculation of the Secondary Education Cess will be the same as that of Education Cess, which was introduced in the 2004 budget. The Cess breakup will be displayed in the Dealer Excise Sales Invoice .
Rewrite of Existing Data Tally 9 Release 1.11 prompts you to rewrite the existing Tally 9 data automatically.
Minor Enhancements Multi- Environment in Educational Mode Tally 9 Release 1.11 works as a multi- even in the Educational Mode.
Printing Declaration While printing a Sales invoice, the option to set Print Declaration? to Yes or No appears in F12: Invoice Printing Configuration for all companies regardless of their Statutory Compliance for settings.
Declaration in Sales Invoice for s Only Company Set Print Declaration? to Yes or No in F12: Invoice Printing Configuration. The Declaration entered in the Sales Voucher Type Alteration of an s Only Company will display in the Sales Invoice.
Release 1.1
Major Enhancements New Attributes in Tally.ini Tally introduces three new attributes to the Tally.ini file .
OptimizeNetwork
LoadBuffering
FlushFile
Stat.900 Version 51 the new Stat.900 Version 51 from www.tallysolutions.com to use West Bengal and Chattisgarh VAT Returns and TDS Enhancements in Tally 9 Release 1.1
FIFO Perpetual Tally introduces a new method of inventory valuation FIFO Perpetual, which is similar to LIFO Perpetual. The Normal FIFO treats the opening balance of the financial year as the terminating rate to apply for residual stock. FIFO Perpetual takes all existing past data. Both LIFO and FIFO Perpetual are capable of changing the valuation when the company is split unlike their ‘Annual’ versions, which are consistent.
Abatement in Service Tax Tally now offers you the flexibility of entering the desired percentage of abatement in service tax.
Sales Invoice Printing You can now print any number of sales invoices, with the appropriate print title.
Option to Print Invoices as Excise or VAT Invoice Tally now offers you the option Print as Commercial Invoice at the Print Configuration screen. Set it to Yes/No to print an Invoice either in the Commercial (VAT) or Excise invoice format.
Performance and Data Migration in Tally 9 Tally 9 comes with enhanced performance and improved stability over the previous versions. The data migration tool has also been enhanced resulting in more accurate and speedier migration of data.
Minor Enhancements Show Godown-wise Details Use the option Show Godown-wise Details in Gateway of Tally > F12: Configure > Voucher Entry to obtain details of stocks in godowns during Voucher entry.
Display of Date and Buyer Name in Sales Sub-form Set the option Allow separate Buyer and Consignee names to Yes in F12: Configure > Configure Invoice / Orders Entry. On entering the order number manually in the supplementary sub form of the sales voucher, the date and the name of the buyer appears automatically.
Budget A Budget for an expenses ledger for which no transaction has been ed will display exact ledger wise values both in the Profit and Loss and the Trial Balance.
Calculation of Cess in an Excise Purchase entry Tally now calculates excise duty on the Assessable Value (Total purchases less Discount) as entered. Calculation of
Cess is based on the excise duty payable. For eg: Total Purchases = Rs.10000 Discount = Rs. 2000 Assessable Value= Rs. 8000 Excise duty = Rs. 1280 Cess = Rs. 26 Excise Duty:16% of Assessable Value = Rs. 1280 Cess: 2% of Excise duty = Rs. 26
details in Outstanding Statement The printout from Multi Printing of an Outstanding statement for a group (such as Sundry Debtors) will display the details for each debtor from whom bill amounts are pending.
Total Invoice Value in UK VAT The Total Invoice amount of a sales voucher ed in the Invoice mode displays in the column Total Invoice Value of the UK VAT Analysis Output Details Report.
Tax Invoice for Indonesia Set Enable VAT in F11: Company Features > Statutory & Taxation to Yes to display the field Is Tax Invoice? in a Sales Voucher Type Creation screen.
Bill-wise Details for Outstandings in Multi-Currency Transaction Tally displays accurate bill-wise details in the Ledger Outstandings Report for a ledger that has an opening balance in a currency other than the Base Currency.
VAT Classification – Date Range A VAT Classification that is applicable for a month, for example, from 1.4.07 to 30.4.07, does not appear for selection during master or voucher entry before 1.4.07 or after 30.4.07
Change in Name The field Appears in Payslip ? in the Pay Head Creation screen of Payroll is now changed to Affect Net Salary ?
Display of Attendance Vouchers instead of Payroll Vouchers at the Gateway of Tally The Gateway of Tally displays either Attendance Vouchers or Payroll Vouchers depending on the level of security assigned in favour of the at Alt+F3: Company Info. > Types of Security .
Address Details in Cancelled Voucher A cancelled sales voucher will still display the customer’s address details in the Buyer’s Details field of the supplementary sub-form.
Payroll Reports in Different Languages
Payroll Reports display PayHead, Attendance Type and the Primary Cost Category information, in the language of your preference. The Paysheet report can also be configured to display in the chosen language with correct total values.
Using Alt+C in Sales Voucher for an s Only company If you create a Sales Voucher Class in an s Only type of Company and if you select the voucher class while ing a Sales entry, you can navigate to the Ledger Creation (secondary) screen and create a Ledger by pressing Alt+C, from the Particulars field.
Display of Alternative Units If you a Sales entry using a Stock item, which has an Alternative Unit specified, the appropriate value and unit gets displayed in the Rate field for the next sales voucher entered.
Unadjusted Forex Gain/Loss in Balance Sheet Following a change in the Exchange Rate, the Balance Sheet displays the appropriate Unadjusted Forex Gain/Loss amount.
Position Index If you have created multiple voucher types under a Voucher Type and if you try to alter any of them, the Voucher Type Alteration screen will display accurate Position Index value.
Quantity Utilized in Excise Sales Invoice While creating an Excise Sales invoice after the Quantity Utilized in the Supplier Details For sub screen is specified, the cursor moves to the Rate field in the main screen.
Computation of Payhead with On Production Calculation Type A Payhead that uses the Calculation Type On Production shows exact values for an employee who s work on a date later than the first of the month when: Attendance is filled using the Auto-fill option Payroll voucher is ed for a period or Payroll voucher is ed for a month
TDS Challan Bifurcations The bifurcations of a TDS payment entry in the TDS challan agrees with its total.
Printing Daily Breakup When you drill down from the Daily Breakup of Ledger , the Printout of a ledger voucher for a particular day will show correct opening and closing balances.
Opening Balances in the Profit and Loss and Balance Sheet The Balance Sheet displays accurately the closing balance of the previous year as the current years opening balance.
Display of Additional Description for Ledgers and Items After Migration Additional descriptions configured for Ledger and Item names during Ledger entry display accurately along with their respective values after migration from Tally 7.2 to Tally 9.
Stock Valuation Calculation Data migrated from Tally 7.2 to Tally 9 that contains entries ed for Stock transfer from one godown to another utilizing FIFO or Average Cost as the Costing Method will show accurate quantities when you drill down from the Stock Summary Report to the Stock Voucher.
Job Costing Option While Creating the Cost Centre The option Use for Job Costing ? can be set to Yes/No in the Secondary Cost Centre creation screen.
Form 16 for a TDS Ledger You can generate Form 16A for a TDS Ledger even when it has been reconciled without specifying the Bank Name.
Additional Cost on a Stock Item Additional cost on a stock item is taken into consideration for Stock Item Inwards as well as for its Closing Value.
Migration of T Files UDF values, values set at each line level of the bill allocations sub form and Receivables display accurately after migration of a .t file from Tally 7.2 to Tally 9.
Migration of Data Migration of Data is successful on a computer having Internet Explorer 7. Data is successfully migrated in the following cases Data Migration into another machine Statutory Master Files migration Creating a new company
Synchronization Synchronization of data takes place successfully without duplication in Windows – 98 and Windows- ME Operating Systems.
Stock Summary Details View accurate and detailed Stock Summary particulars of two companies using the New Column button.
Display of Stock Journal Values After UDF Migration Default UDF values used in a Stock Journal display accurately after migration from Tally 7.2 to Tally 9.
Movement Analysis of Inventory
An Item Movement Analysis Report accurately displays Values for a stock item for the period selected.
Items in Stock Ageing Analysis In the Stock Ageing Analysis screen, if Primary is selected at the Items Under field, the Values in the Total Quantity and bifurcated quantity columns are appropriate.
Quantity in Stock Ageing Analysis (<90 days) In the Stock Ageing Analysis screen, the Quantity field in the (< 90 days) column displays the accurate values.
Column Titles in Columnar Sales Tally displays column titles in the Columnar Sales screen in the language of your choice.
Multi Form 27D Printing Form 27 D can be printed for a TCS ledger using Multi- Printing for a specified period.
Reorder Status The Re-order level column in the Inventory Reorder Status screen displays details of actual consumption.
Column Detail in Monthly Summary Report You can press Alt+N (Auto Column) and select any Column Detail from the list at any monthly summary report screen in Tally.
Tracking Delivery Notes If you create a Delivery Note with Tracking Numbers enabled, and later enter a Rejection In, Tally will display only the delivery note raised against the particular customer in the List of Tracking Numbers.
Migrating Marks to Tally 9 If you have specified Marks as Exporter options in Sales or Purchase vouchers in Tally 7.2, you can migrate the same to Tally 9.
Name on Receipt If you alter the name of a Sundry Debtor for which you have created a Receipt in the single entry mode, then the name specified in the Name on Receipt at the time of the voucher creation will be retained in the Name on Receipt field and can be altered if required when the receipt is viewed in the alteration mode.
Printing Sales voucher If you have ed a sales entry using a Sales Voucher class where set Print after saving Voucher to Yes and view the print preview of the same voucher in the alteration mode, the VAT% amount will appear in the invoice.
Decompiling T You can decompile the T, migrated from Tally 7.2, using the Tally Developer 2.7.
Viewing Columnar in a Windows XP and 98 Environment In a Client-Server environment, if the Server and one Client have Windows XP as the operating system and
another Client has Windows 98, the Columnar can be viewed at ease.
Group Summary You can specify a Period and view the Group Summary details.
Invoice Numbering If you have enabled the Print after saving Voucher option in the Purchase Voucher Types, the Invoice numbering will appear appropriately on the Print preview for those Purchase entries.
Bill Wise Reference If you a Purchase Voucher with Bill-wise Details, while Enter Purchases in Invoice Format is set to Yes in F11: Features, and later press the Page Up key, the appropriate Bill Reference and amounts are displayed.
Release 1.0 Tally 9 – The World’s Most Powerful Concurrent Multi-lingual Integrated Business ing Software is now enhanced with major new capabilities like Payroll, POS Invoicing, Service Tax for Malaysia, Sales Tax for Malaysia and VAT for Indonesia besides numerous minor functional improvements in the product.
New Features Payroll POS Invoicing Multilingual Statutory and Taxation
Payroll It has been integrated with s, in order to simplify Payroll processing. Payroll can be configured to suit the requirements of various types of organization. You can now configure, align and automate simple to complex payroll processes. You can print pay slips, maintain salary/wages and attendance/ leave/ overtime s, and generate Gratuity and Expat reports. You can also configure Payroll Data with cost centre reports for business analysis. The enhanced Payroll in Tally 9 is now simple and allows you to generate a Payslip four easy steps.
POS Invoicing POS Invoicing in Tally is equipped with ease of use and advanced capability to simplify your retail operations. It efficiently automates the ‘check-out’ process, and allows you to create invoices and collect payments from customers, in a matter of moments.
Multilingual Tally 9 now provides the language interface in Bahasa Melayu and Bahasa Indonesia.
Statutory Compliance and Taxation Tally 9 now provides you with compliance of VAT for different states in India. It also provides you Service Tax for Malaysia, Sales Tax for Malaysia and VAT for Indonesia.
Minor Enhancements in Tally 9 Display of TDS Bifurcations The TDS bifurcations are displayed when you book expenses for amounts in crores.
Display of Bank Reconciliation Date in Form 16A Form 16A displays the bank reconciliation date.
Gridlines in Printed Price List Tally 9 prints the price list with grid lines. When printed, all the pages of the price list appear with grid lines.
Cost Centres with Scenario Scenarios can be viewed in the Cost Centre Break-Up Report. For example, a Reversing Journal for a Cost Centre. Create a scenario and include the Reversing Journal. Go to Gateway of Tally > Display > Statement of s > Cost Centres > Cost Centre Break-up Select the cost centre from the list and press Alt + C (New Column) . Select the Type of Value (Scenario), and set Show variance to Yes, to view details of its variance.
Stock Item with Different Rates in Invoice When a stock item is repeated in an order with different rates, values and additional descriptions, the invoice displays the stock item individually, in separate lines.
Negative Quantity Warning During invoice entry, the negative quantity warning is provided, not just on the total closing quantity of an item, but also on the quantity of a selected batch/ godown/ location of that particular item.
Exclusion of Groups for Payment and Receipt Vouchers While creating a Class for Payment/ Receipt Vouchers, you can exclude Groups under the section, ‘Exclude these Groups,’ to prevent them from appearing during Voucher Entry. Sundry Debtors and Sundry Creditors are not included in the ‘Exclude’ list.
Report Title in Multi Printing To display the Group Name as a report title when using the Multi Printing option, Go to Gateway of Tally > Multi printing > Books > Ledger > Group of s Select the required Group.
Display of Credit Days While ing a Purchase entry in Voucher mode, the number of credit days specified in ‘Due Date’ displays in
the Voucher under Credit Days.
Altering Single Groups in Multi Group Alteration Mode You can alter a Single Group in Multi Group alteration mode.
Altering a Forex Purchase Transaction When altering a Purchase invoice of a Forex transaction with Use Common Ledger A/c for Item Allocation set to Yes in F12: Configure, the Item Allocation sub-screen retains the currency selected.
Display of Surcharge in Credit Note The surcharge paid on TCS is displayed in the Credit Note.
Period-wise VAT Forms Enhanced memory makes it possible to open VAT Forms for any period, including the fourth quarter.
Order of Ledgers in Purchase Invoice Set Use Common Ledger A/c for Item Allocation and Accept Supplementary Details to Yes in F12: Configure, to retain the order of additional ledgers entered in a Purchase Invoice even when you are in the alteration mode.
Invoice against Sales Orders with Additional Ledgers You can now enter an invoice, with Use Common Ledger A/c for Item Allocation set to Yes in F12: Configure, against the sales order with additional ledgers.
Purchase Vouchers All Purchase Vouchers with/ without VAT selected, or Purchase Voucher types, with Print after Saving Voucher set to Yes, are error-free after they are saved.
Staggered Delivery In Tally 9, an order containing different due dates can be tracked, using a single delivery note.
Interest on Loans to Sundry Debtors/Creditors Interest received on loans given to Sundry Debtors/ Creditors is ed with a Debit Note/ Credit Note using a Voucher Class. The Interest Receivable Report displays only the pending interest receivable and not that for which a Debit Note/ Credit Note has been raised.
Period in TR-6 Challan Tally 9 gives you the option of specifying the period for Service Tax payable, which is captured in the TR-6 Challan.
Setting Off Excise Duty Credit Against Service Tax Payable Tally 9 allows you to set off Excise Duty Credit against Service Tax Payable. This excise duty credit can be availed for inputs as well as capital goods.
Display of Date of Deposit/ Payment in Form 16A After TDS Reconciliation in Tally 9, the date of Deposit/ Payment is appropriately displayed in the TDS Form 16A.
Inclusion of New ST3 Form Tally 9 includes the new ST3 Form of Service Tax.
TCS Surcharge Rounding Off The TCS Surcharge Rounding Off is accurately displayed in Tally 9.
Printing Cheques in Foreign Currency This is a significant enhancement. Tally 9 allows you to print a cheque in a foreign currency, Go to F12: Configuration > Printing > Payment Voucher Set Print Foreign Currency Symbol to Yes.
Performance Enhancements Import of Statutory Masters The speed at which Statutory Masters can be imported has been greatly enhanced.
Display of VAT Computation Report The VAT Computation Report now displays at a greatly enhanced speed.
Display of VAT Return Report The VAT Return Report now displays at a greatly enhanced speed.
Export of E-TDS Report The E-TDS Report can be exported at a greatly enhanced speed.
Important tasks to be performed by existing customers Statutory Compliance For s, who have upgraded from Tally 8.1 to Tally 9, have to select a country from the List of Countries at the Statutory compliance For field, to enable the statutory features of the required country in Tally 9. Go to Gateway of Tally > Cmp Info (Alt + F3) > Alter
Using Ts Migrated to Tally 8.1 in Tally 9 Tally 9 will rewrite the format of the Ts migrated from Tally 7.2 to Tally 8.1 and creates a backup file with the extension .BAK For example, if you migrate the Emp.t file to Tally 8.1, it will appear as Emp9.t. When the same .t file is loaded on Tally 9, the backup file created will appear as Emp9.BAK N o t e : You need to rename the . B A K file to . t c p, if files in Tally 8.1.
Budgets in Tally 9
you
wish
to
use
the
migrated
.t
Budgets created for different periods in Tally 8.1 are combined in the First budget period itself, after migration of Tally 8.1 data to Tally 9. Hence, you are advised to manually recreate the budget in Tally 9 after migration, to avoid any possible loss of data.
New Features in Tally 8.1
Release 1.0 Release 1.1
Release 1.0 Tally 8.1 - A Multilingual Business ing & Inventory Management Software provides for Fringe Benefit Tax computation and VAT Composition returns generation in addition to its language capabilities.
New Features Multilingual Fringe Benefit Tax VAT Composition Returns Excise for Dealers
Multilingual Tally 8.1 is so technologically advanced that it can operate in all Indian languages concurrently! That means, you maintain s in any Indian language view it in another and print it in yet another language of your choice…. at the same time! With Tally 8.1 capture multiple language-specific aliases for all Masters and print Reports, Vouchers and Invoices in the language of your choice. What’s more, Tally 8.1 s transliteration of data for Indic family of languages.
Fringe Benefit Tax FBT (Fringe Benefit Tax) is a one time, easy to enable configuration. Tally provides the complete tracking of expenses covered under FBT. It computes FBT based on the eligibility criterion and generates FBT Challan and returns.
VAT Composition Returns VAT Composition Returns provides fast and error-free voucher entry with complete tracking of each transaction. The Composition Rate of VAT is automatically recognised based on the turnover. It prints VAT Composition Returns for VAT enabled states. The tax payable is calculated automatically and displays in the Return Form.
Excise for Dealers Excise for Dealers provides complete tracking of duty credit availed and ed on. It s printing of excise invoice and generates the required statutory reports.
Enhanced functionalities and features in Tally 8.1 Tally 8.1 is performance driven. Its enhanced features include: Language directory Ability to restore Tally 7.2 data within minutes Easy import and export of data interface colours that are even more pleasing to the eye Speed of operation with extensive reduction of the Stat.900 file size Choice of multilingual options Multi-language printing options Ability to copy text from Tally to windows and vice versa Miscellaneous features
Language Directory Language files (.dct) reside in the Language Directory . Specify this path at the time of installation or in the Tally.ini file. To change the Language directory path in the Tally.ini Open Tally.ini file from the Tally installed folder.
Enter the path where the language files are present.
Save and close the file.
Restore Process of 7.2 Data Tally 8.1 does not recognise Tally 7.2 data backup files. You can restore Tally 7.2 data by clicking the
tally72migration icon in the Tally 8.1 folder. Specify the destination and source files in Select Companies to Restore. The Migrate Data option completes the process. The 4 digit number 7.2 number is prefixed by 0, making it a 5 digit 8.1-compatible number. Refer to Restore 7.2 backup in Tally Data Migration tool section for more details.
Import of Masters and Vouchers Tally now s only the XML format to import Masters and Vouchers.
Export If you select Multilingual from the language list during export, then Tally allows you to Export in three formats ASCII (Comma-delimited), HTML (Web-publishing) and XML (Data-interchange) . If you select English from the language list, then Tally allows you to Export in two formats - ASCII (Commadelimited) and XML (Data-interchange) . N o t e : By default, Tally does SDF format, you can
not the
SDF format. However, if S D F E x p o r t I m p o r t . T C P utility
you wish from the
to use the Tally website.
Stat.900 Tally 8.1 has now been enhanced with features that speed up your operations. The Stat.900 file size has now reduced extensively. This improves the performing speed while creating or importing a company.
Colours The interface has now changed to more appealing colours aimed at enhancing your use of Tally. By default, Tally 8.1 screens display in a new colour as the colour quality is set to Highest (32 bit). However, to retain the usual display of Tally: Go to Desktop > Display properties> Settings > Set the Color quality to Medium (16 bit) > Restart Tally
Tally’s Phonetic Keyboards Tally’s Phonetic keyboard is useful for those who speak the language but do not know how to type it using the operating system keyboard. It is friendly with the same layout as that of the English characters. You can spell the term based on its sound and the data is transliterated in the language selected.
Print language You can print documents and reports in the language of your choice in Tally. For instance, while printing the following voucher, select Alt+ L to bring up the Print Language Configuration prompt.
Select the language of your choice. The printed document displays as shown.
Major Changes and Enhancements There may be minor variation in reports during migration of data from Tally 7.2 to Tally 8.1 due to the changes listed below:
LIFO and FIFO valuation method Sales and Purchase vouchers ed on a single day now display in the Stock vouchers report in the order of their entry thus ensuring effective functioning of LIFO and FIFO Stock valuation methods. For example, In Tally 7.2, A purchase invoice followed by a sales invoice and then again a purchase invoice will display in the stock vouchers report with all the sales entries listed first followed by all the purchase entries. Tally 8.1, however, displays the vouchers in the order of their entry –Purchase – Sales – Purchase.
Std Cost and Std Price Valuation method If you have not set Set Standard Rates? in Stock Item masters but have set Costing Method to Std Cost and Market Valuation Method to Std. Price. In Tally 7.2, the First Purchase cost was taken into consideration for the Std Cost Valuation and the First Sale price for Std Price valuation methods. However, Tally 8.1 accurately considers the Last Purchase cost for Std Cost Valuation and the Last Sale Price for Std Price valuation
Average Cost When Multiple Sales and Purchases are made against Receipt and Delivery Notes at a rate different from that specified in the Receipt and Delivery notes For Example: Let us assume you have ed a Receipt Note for 100 nos. of an item @ Rs. 100 per item. Subsequently you a Purchase Invoice for 30 nos of the item @ Rs. 120 against the above Receipt Note. This means that some items are still pending against the tracking number. In Tally 7.2, the difference in the rates would be incorrectly included in the original value The balance sheet viewed with Avg. Cost valuation method displays closing stock values at Rs. 10,600. This has been resolved in the new Tally 8.1, which accurately displays the Avg. Cost closing stock valuation in the balance sheet as Rs. 10,000.
On values were being taken as 'overdue' in Ratio Analysis in 7.2 In Tally 7.2, On values were taken into consideration while calculating values for Due till today in Ratio Analysis. Tally 8.1 has resolved this and displays only the outstanding values in Due till today. (for Sundry Debtors and Creditors)
Pending Tracking number values were approximate, even though quantities were accurate (causing few Paise difference depending on context) Tally 7.2 used to display pending Delivery/Receipt with approximate values, causing a small difference in the values. Tally 8.1 has resolved this and displays the pending Delivery/Receipt Notes values accurately.
Miscellaneous Changes and Enhancements Tallysav.dat file The Tallysav.dat file in the tally folder is now Tallysav.tsf.
Tally_req.slk and Tally_resp.slk files The tally_req.slk file, which is generated while activating the Tally license, is now tally_req.lic.
Similarly, the tally_resp.slk file, which is generated as a response from the Tally Internet Services server, is now tally_resp.lic .
Tally Data files The Tally 8.1 data file now consists of 5 digits. The numbering of a company created in Tally 8.1 starts with 10000. Additional companies created will be suffixed with 10001, 10002, 10003 and so on. However, when you migrate Tally 7.2 data to Tally 8.1, the 4 digit-data file in the 7.2 folder is converted to a 5 digit-data file with 0 prefixed. Example: 00001, 00002 and so on…..
Loading Icon
The Tally Clock
is now replaced with the Windows Wait icon
Close Button To quit any Tally screen, you now have an option apart from the
Esc key on the keyboard. The following button
displays on the right of every screen in Tally. Click the Close
button to quit the current screen.
Copying Text From Tally to Windows Copying text to and from Tally to Windows is now a simple process. Use Ctrl+Alt+V to paste text into Tally.
Ctrl+Alt+C to copy text from Tally and
Release 1.1 E-Mail Authentication While mailing reports in Tally, the E-Mail Server now accepts the Authentication Name and .
Multi-ing Allocation When you rewrite a company, the vouchers with multiple ing allocations will be retained if Use Common Ledger A/c for Item Allocation is set to No.
Synchronization of Altered Transactions Synchronization is possible even when data migrated from Tally 7.2 consists of cancelled vouchers.
Cost Centre Class in Stock Journal In Tally 8.1 you cannot select Cost centre class while creating Stock Journals as it is not applicable.
Migration The process of Migrating Data to Tally 8.1 is now effectively enhanced.
Migrating Currencies Multiple currencies can now be easily migrated to Tally 8.1.
Forex Gain Loss Calculations Tally 8.1 displays accurate Debit and Credit amounts in the Ledger Forex Gain/Loss report unlike Tally 7.2 in which Debit amounts were displayed as Credit and vice versa.
Introduction
When you install Tally, a folder named Tally is created by default, where the program files will reside. You can specify a different folder name, if you wish.
System Requirements To install Tally, your system must meet the following minimum requirements.
Configuration
System Requirements
Intel Pentium IV and higher or equivalent Processor 256 MB RAM or more Memory 40 MB Minimum (excluding the data) Free Hard Disk Space Recommended 1024 x 768 or higher Monitor Resolution N o t e : For better performance Free Hard Disk Space)
Tally
Multilingual
needs
more
memory
Operating System Requirements for Tally Multilingual
Operating System
for Indian Scripts in Windows version
Windows 95 Windows 98 Windows ME
Does not Unicode
Windows NT
s Unicode but not Indic languages
Windows 2000
s Unicode and the following Indic languages:
Hindi
(about
40MB
of
Marathi
Tamil
Windows XP
s Unicode and the following Indic languages:
Hindi
Marathi
Tamil
Telugu
Kannada
Punjabi
Gujarati
Windows 2003
s Unicode and the following Indic languages:
Hindi
Marathi
Tamil
Telugu
Kannada
Punjabi
Gujarati
Windows XP SP2
s Unicode and the following Indic languages:
Hindi
Marathi
Tamil
Telugu
Kannada
Punjabi
Gujarati
Bengali
Malayalam
Pre-Installation
To install Tally in Windows NT/2000/XP/2003/XP SP2 Workstation, 1.
You need to have /all rights (to create, write, update, modify and delete) on the Application, Data, Configuration and Language directory.
2.
Ensure that the Operating System you use s Tally for Multilingual .
Installing Tally
You can install Tally using one of the given methods.
Method 1: Double click install.exe from the CD.
Method 2: Click START from Windows. Select RUN. TYPE
Follow the instructions on your screen to install Tally. 1.
2.
The Tally Setup Wizard is displayed.
1.
2.
Click Next to continue
3.
The Installation wizard displays the License Agreement. Read the license agreement before you proceed. Click I Agree to continue. Click I Decline to stop setup or click Back to go to the previous screen.
3.
4.
In the Installation screen, you may accept the suggested directories. Else click Change Application Directory or Change data Directory or Change Configuration Directory or Change Language Directory to change the respective directory paths. Use Tab or the mouse to change the path in any of the directories.
Application Directory The Tally program files reside in this directory.
Data Directory The Tally data resides in Data directory. The default directory where data is stored is C:\Tally\Data. To change click on Change Data Directory button and enter the new directory. When Tally is installed in a directory with an earlier version, it detects and retains the data configuration path of the previous installation.
Configuration Directory Tally configuration files reside in this directory. Specify the path of the directory where configuration files should be saved. It is usually the same path as that of the Application directory.
Language Directory Tally Language files (.dct) reside in this directory. Specify the path of the directory where the Language files will be maintained. It is usually the same path as that of the Application Directory. Note:
If
you
are
a
Multi-License
,
select
the
Run
Tally
License
Server
at
Windows
Startup
check
box.
During installation, you are prompted to specify the path and the OS files to install the Indic languages. 5.
Click Install Operating System Language to enable Language .
6.
Select your Country name in Country Selection.
7.
Select the Initial Startup Language from the list. When you start Tally for the first time, Tally will appear in the language selected as the Initial Startup Language (screen).
8.
Once you select the Initial Startup Language, Click Install to proceed with the installation.
9.
The installation progress status is displayed as shown below.
9.
10.
Insert Windows CD to install language or Browse for the i386 folder in your system.
N o t e: You will be available in your
prompted system
to
install
the
i386
language
folder
only
if
it
is
not
11.
Click Finish to complete Setup.
After completing installation, double click Tally icon on the desktop to start working on Tally.
Tally.ini
The Installation program loads the Tally.ini file in the Tally programs or applications directory. This is a CONFIGURATION SETTINGS file, which Tally refers to, for some basic settings when starting. The file content appears as shown:
1.
The Data, Configuration and Language directories appear in the Tally.ini file as specified at the time of installation. However, you can change the respective directory paths by specifying it in the Tally.ini .
2.
If you want to load a company automatically on starting Tally, enter the number in the line Load as per the information available in the data directory.
3.
2.
3.
You can specify the name or path of the T(s) (Tally Compliant Product), if any, after the TDL field.
4.
You can set Color to NO, if you do not want to view the screens with the default colours of Tally.
N o t e : The lines in the T a l l y . i n i file prefixed by two semi-colons indicate that features are not enabled. The only way to override these defaults is removing colons in the T a l l y . i n i .
those the semi-
Tally introduces three attributes to the .ini file.
OptimizeNetwork
LoadBuffering
FlushFile
OptimizeNetwork in Tally.ini Setting OptimizeNetwork to No in Tally.ini reduces memory requirements and prevents the system from going into a virtual memory mode although it slows down the generation of reports. However, for s with a large volume of data, it is advised to use more than 500 MB of free memory and set OptimizeNetwork to Yes . This increases load speed dramatically and generates reports faster. The settings can be changed in accordance with client memory available. By default, Optimize Network in Tally.ini is set to No.
LoadBuffering in Tally.ini Certain types of data (such as, a large number of Batches, Godowns and Tracking numbers) very quickly exhaust the available memory, when information is cached during loading. Set LoadBuffering in the Tally.ini to No , to reduce this buffering, although it will result in a marked increase in network traffic. For a lower volume of data (such as, a large number of masters and stock items, but a smaller number of batches, Godowns and Tracking numbers), it is advised to set LoadBuffering to Yes By default, LoadBuffering in Tally.ini is set to Yes.
FlushFile in Tally.ini For both Single and Multi s of Tally, it is practical to set FlushFile to No to facilitate Faster acceptance of Masters and Vouchers as well as a marked improvement in accessing network data. However, this could be risky in places with frequent power problems and without Power Backups. In which case, it is advised to continue with the Tally.ini default setting FlushFile to Yes By default, FlushFile in Tally.ini is set to Yes .
Shortcut keys in Tally
The shortcut keys appear in button names in the button bar (right side of the Tally screen). You can either click the button from the button bar or press the relevant function key or character underlined/double-underlined. The buttons have a function key before the button names ( Eg: F1 key (Function Key) to select the 'Select Company' screen
F1: Select Cmp) which means you need to press
The buttons have an underlined character ( Eg: F3: Cmp Info), which means you need to press ALT + F3 to select the 'Company Info' screen. Some buttons have a double-underlined character (Eg: V: As Voucher) which means you need to press CTRL + V to select the 'Voucher' in voucher mode.
More: Function Key Combination Special Key Combination Special Function Key Combination Key Combination used for navigation
Function Key Combination
Windows
Functionality
Availability
F1
To select a company
At all masters menu screen
F1
To select the s Button
At the ing alteration screen
F1 (ALT+F1)
To select the Inventory Button
At the Inventory/Payroll Voucher creation and alteration screen
F1 (CTRL F1)
To select Payroll Vouchers to alter
At the ing/Inventory voucher creation or alteration screen.
To change the current date
At almost all screens in TALLY
To select company inventory features
At the F11: Features screen
To select the company
At almost all screens in TALLY
To select Company Statutory & Taxation features
At F11: Features screen
F4
To select the Contra voucher
At ing / Inventory Voucher creation and alteration screen
F5
To select the Payment voucher
At ing / Inventory Voucher creation and alteration screen
F6
To select the Receipt voucher
At ing / Inventory Voucher creation and alteration screen
F7
To select the Journal voucher
At ing / Inventory Voucher creation and alteration screen
F8
To select the Sales voucher
At ing / Inventory Voucher creation and alteration screen
F8 (CTRL+F8)
To select the Credit Note voucher
At ing / Inventory Voucher creation and alteration screen
+
F2
F3
Voucher
creation
and
F9
To select the Purchase voucher
At ing / Inventory Voucher creation and alteration screen
F9 (CTRL+F9)
To select the Debit Note voucher
At ing / Inventory Voucher creation and alteration screen
F10
To select the Reversing Journal voucher
At ing / Inventory Voucher creation and alteration screen
To select the Memorandum voucher
At ing / Inventory Voucher creation and alteration screen
F11
To select screen
At almost all screens in TALLY
F12
To select the Configure screen
F10 (Ctrl F10)
+
the
Functions
and
Features
At almost all screens in TALLY
Special Key Combination
Windows
Functionality
Availability
ALT + 2
To Duplicate a voucher
At List of Vouchers – creates a voucher similar to the one where you positioned the cursor and used this key combination
ALT + A
To Add a voucher
At List of Vouchers – adds a voucher after the one where you positioned the cursor and used this key combination.
To Alter the column in columnar report
Alters the column in all the reports which can be viewed in columnar format
To create a master at a voucher screen (if it has not been already assigned a different function, as in reports like Balance Sheet, where it adds a new column to the report)
At voucher entry and alteration screens, at a field where you have to select a master from a list. If the necessary has not been created already, use this key combination to create the master without quitting from the voucher screen.
To access Auto Value Calculator in the amount field during voucher entry
At all voucher entry screens in the Amount field
To delete a voucher
At Voucher and Master (Single) alteration screens. Masters can be deleted subject to conditions, as explained in the manual.
ALT + C
ALT + D
To delete a master To delete a column in any columnar report
All the reports screen which can be viewed in columnar format
(if it has not been already assigned a different function, as explained above) ALT + E
To export the report in ASCII, Excel, HTML OR XML format
At all reports screens in TALLY
ALT + I
To insert a voucher
At List of Vouchers – inserts a voucher before the one where you positioned the cursor and used this key combination.
To toggle between Item and ing invoice
At creation of sales and purchase invoice
ALT + L
To select the Language Configuration
At almost all screens in TALLY.
ALT + K
To select the Keyboard Configuration
At almost all screens in TALLY.
ALT + O
To the report at your website
At all reports screens in TALLY
ALT + L
To select language for Tally Interface
At almost all screens of TALLY
ALT + M
To Email the report
At all reports screens in TALLY
ALT + N
To view the report in automatic columns
At all the reports where columns can be added
ALT + P
To print the report
At all reports screens in TALLY
ALT + R
To remove a line in a report
At all reports screens in TALLY
ALT + S
To bring back a line you removed using ALT + R
At all reports screens in TALLY
ALT + U
To retrieve the last line which is deleted using Alt + R
At all reports screens in Tally
ALT+ V
From Invoice Journal screen
At Invoice screen à Quantity Field à Press Alt + V to select the Stock Journal.
ALT + W
To view the Tally Web browser.
At all reports screens in TALLY
ALT + X
To cancel a voucher in Day Book/List of Vouchers
At all voucher screens in TALLY
ALT + R
To Tally
At almost all screens in TALLY.
CTRL + A
To accept a form – wherever you use this key combination, that screen or report gets accepted as it is.
At almost all screens in TALLY, except where a specific detail has to be given before accepting.
CTRL + B
To select the Budget
At Groups/Ledgers/Cost Centres/ Budgets/Scenarios/Voucher Types/ Currencies (s Info) creation and alteration screen
CTRL + ALT +B
To check the Company Statutory details
At all the menu screens
CTRL + C
To select the Cost Centre
At Groups/Ledgers/Cost Centres/ Budgets/Scenarios/Voucher Types/ Currencies (s Info) creation and alteration screen
To select the Cost Category
At Stock Groups/ Stock Categories/ Stock Items/ Reorder Levels/ Godowns/ Voucher Types / Units of Measure ( Inventory Info) creation/alteration screen
To select the Currencies
At Groups/Ledgers/Cost Centres/ Budgets/Scenarios/Voucher Types/ Currencies (s Info) creation and alteration screen
CTRL+ E
screen
to
bring
Stock
CTRL + G
To select the Group
At Groups/Ledgers/Cost Centres/ Budgets/Scenarios/Voucher Types/ Currencies (s Info) creation and alteration screen
CTRL + I
To select the Stock Items
At Stock Group/ Stock Categories/ Stock Items/ Reorder Levels/ Godowns/ Voucher Types / Units of Measure ( Inventory Info) creation/alteration screen
Ctrl + Alt + I
To import statutory masters
At all menu screens
CTRL + L
To select the Ledger
At Groups/Ledgers/Cost Centres/ Budgets/Scenarios/Voucher Types/ Currencies (s Info) creation and alteration screen
To mark a Voucher as Optional
At the creation and alteration of Vouchers
CTRL + O
To select the Godowns
At Stock Group/ Stock Categories/ Stock Items/ Reorder Levels/ Godowns/ Voucher Types / Units of Measure ( Inventory Info) creation/alteration screen
CTRL + Q
To abandon a form – wherever you use this key combination, it quits that screen without making any changes to it.
At almost all screens in TALLY.
CTRL + R
To repeat narration in the same voucher type
At creation/alteration of voucher screen
CTRL + Alt +R
Rewrite data for a Company
From Gateway of Tally screen
CTRL + S
Allows you to alter Stock Item master
At Stock Voucher Report and Godown Voucher Report
CTRL + U
To select the Units
At Stock Groups/ Stock Categories/ Stock Items/ Reorder Levels/ Godowns/ Voucher Types / Units of Measure ( Inventory Info) creation/alteration screen
CTRL + V
To select the Voucher Types
At Groups/Ledgers/Cost Centres/ Budgets/Scenarios/Voucher Types/ Currencies (s Info) creation and alteration screen
To toggle between Invoice and Voucher
At creation of Sales/Purchase Voucher screen
Special Function Key Combination
Windows
Functionality
Availability
ALT + F1
To close a company
At all menu screens
To view detailed report
At almost all report screens
To explode a line into its details
At almost all screens in TALLY
To select Inventory vouchers to alter
At the Inventory/ Payroll voucher creation or alteration screen.
ALT + F2
To change the period
At almost all screens in TALLY
ALT + F3
To select the company info menu
At Gateway of Tally screen
To create/alter/shut a Company ALT + F4
To select the Purchase Order Voucher Type
At ing / Inventory Voucher creation and alteration screens
ALT + F5
To select the Sales Order Voucher Type
At ing / Inventory Voucher creation and alteration screens
To view monthly and quarterly report At almost all report screens in TALLY ALT + F6
To select the Rejection Out Voucher Type
At ing / Inventory Voucher creation and alteration screens
To change the Sales Order Voucher Type ALT + F7
To select the Stock Journal Voucher Type
At ing / Inventory Voucher creation and alteration screens
To accept all the Audit lists At TallyAudit Listing screen ALT + F8
To select the Delivery Note Voucher Type
At ing / Inventory Voucher creation and alteration screens
To view the Columnar report At Ledger Voucher screen ALT + F9
To select the Receipt Note Voucher Type
At ing / Inventory Voucher creation and alteration screens
ALT + F10
To select the Physical Stock Voucher Type
At ing / Inventory Voucher creation and alteration screens
ALT + F12
To filter the information monetary value
At almost all report screens
based
on
Ctrl + F1
To select payroll vouchers for alteration
At the ing/Inventory Voucher creation or alteration screen
CTRL + ALT + F12
Advanced Config
At Gateway of Tally
Key Combination used for navigation
Windows
Functionality
Availability
PgUp
Display previous voucher during voucher entry/alter
At voucher entry and alteration screens
PgDn
Display next entry/alter
At voucher entry and alteration screens
ENTER
To accept anything you type into a field.
You have to use this key at most areas in TALLY
To accept a voucher or master To get a report with further details of an item in a report.
At the receivables report – press Enter at a pending bill to get transactions relating to this bill (e.g., original sale bill, receipts and payments against this bill, etc)
To remove what you typed into a field
At almost all screens in TALLY.
ESC
voucher
during
voucher
To come out of a screen To indicate you do not want to accept a voucher or master. SHIFT ENTER
+
Collapse next level details
At Voucher screen and Trial Balance report
SHIFT ENTER
+
To explode a line into its details
In almost all Reports: At a Group/Stock Group/Cost Category/Godown/Stock Category – displays Sub Groups and Ledgers/Stock Items/Cost Centres/Secondary Godowns/Secondary Stock Categories At a Voucher – displays its entries and narration At a Stock Item- displays its godowns and batch details At Voucher screen – displays the next level details At Trial Balance report - displays the next level details
CTRL ENTER
+
To alter a master while making an entry or viewing a report
At voucher entry and alteration screens At all reports
Licensing
Introduction Tally provides you with two types of licensing options:
Single- Licensing
Multi- Licensing
TallySilver for Single- Single- Licensing allows the deployment of Tally on a SINGLE computer with an option of activating it Online or Offline. You can also choose to use the same Tally license on another computer, by surrendering the license activated on a computer and reactivating it on the other. An Offline takes the request file generated by Tally, to a computer, which has Internet connectivity, and activates the license.
TallyGold for Multi- Multi- Licensing feature facilitates the use of Tally on ANY NUMBER of computers connected to a local area network (LAN). The method of activation is similar to that of a Single- License Once a Multi- license is successfully installed on computer designated as the License Server, you can start up Tally when Windows starts and run as a service in the background. The other computers, designated as License clients can install Tally, and set the parameter TallyLicenseServer (E.g Servername:Port Number) in the configuration file also known as the Tally.ini file. Note: 1. If you work on Windows XP and have a firewall installed, ensure that the firewall allows license clients access to the Server Port. 2. On the Client computer, there are few significant parameters set by default in Tally.ini file viz., TallyLicense = Connect and T a l l y L i c e n s e S e r v e r = server:port
Activation Form
The Activation Form is displayed, when you run Tally after installation for both Single and Multi licensing systems.
Enter the Serial, Key and E-mail, if you are connected to Internet. Else, press Esc or Ctrl+Q to quit this form. More: For s Connected to the Internet For s not Connected to the Internet
Licensing Menu
To view the licensing menu, Go to Gateway of Tally > F12: Configure > Licensing
Single- The License menu displays as shown
List Add-ons To view additional features enabled in Tally. Go to Gateway of Tally > F12: Configure > Licensing > Add-ons
Online This option allows you to activate Tally License Online. The term online indicates that your computer is connected to the Internet.
Offline This option allows you to activate Tally License Offline. The term Offline indicates that your computer is not connected to the Internet.
Quit This option enables you to quit the licensing menu.
Multi-
In multi- environment, the License menu on the License server displays all the options available to a single. On the License client computers, the options Online and Offline do not exist, as shown:
To view the licensing menu Go to Gateway of Tally > F12: Configure > Licensing
Activating Tally
This section explains how to activate Tally for Single- and Multi- systems: Activating Tally for Single- Activating Tally for Multi-
Activating Tally for Single-
For s Connected to the Internet Activate your license by using the Online option available in F12: Configure > Licensing > Online> Activate To activate your license: 1.
Start Tally. Tally displays Online Activation Form with three fields.
2.
Enter the correct Serial and Key, and Email - ID in the Activation form that displays and press Enter to proceed.
3.
Tally connects to the Tally Internet Services Server to validate your registration information.
4.
On entering the correct Serial and Key, a message displays indicating that your license is activated.
Once the license is activated, go to F12: Configure > Licensing > Online to view the Online Menu
The Online menu has two options: Update: This option helps you to update new features of Tally and validate your Tally License. Surrender: This option helps you to surrender the Tally License.
For s not Connected to the Internet
If your computer does not have an Internet connection, you can activate your Tally license using the Offline option. Go to F12: Configure > Licensing > Offline > Activate
To activate your license: 1.
When you start Tally, an Activation Form dialog window will be displayed. As you do not have an Internet connection, press Esc or Ctrl+Q to quit this form.
2.
Press F12: Configure > Licensing > Offline> Activate
3.
Tally displays the Offline Activate Form with three fields. If the Serial, Key and Email Id are correct, a message displays indicating that the tally_req.lic file has been successfully generated.
4.
Copy the tally_req.lic file in the Tally folder on a floppy/CD and take it to any computer with Internet connectivity.
Important: Tally must be installed in the computer with Internet Connectivity. 5.
Paste the tally_req.lic file to the Tally folder on this computer, start Tally and go to F12: Configure > Licensing > Offline
6.
Click on the Send External Request option to send the request to Tally Internet Services server. The response will be saved in a new file called tally_resp.lic, which will be generated in the Tally folder.
7.
Copy the tally_resp.lic file into a floppy or CD, from the Internet connected computer and paste the file into the Tally folder of your computer.
8.
Start Tally, Tally will display the below screen:
8.
You are now ready to use Tally. Important: If you desire to make any changes to your Hardware, such as Hard Disk or Removable Storage Devices, it is recommended that you surrender the License from your computer, before initiating these changes. Else, Tally will switch to Educational mode.
Activating Tally for Multi-
The method of activation is similar to that of a single . The license is first installed and activated on the computer designated as the License Server and later on other computers on the network designated as License Clients.
Setting Tally License Server During the installation of Tally, select the Run Tally License Server at Windows Startup (For TallyGold s) check box. This will enable the to have Tally start when Windows starts and run as a service in the background on the server computer. If you fail to select the Run Tally License Server at Windows Startup (For TallyGold s) check box, you can use this alternative method to activate Tally: 1.
Double-click TallyLicServer.exe found in Tally directory. A dialog box appears which comprises the following elements:
Install
To install the multi- license on the server, press Install button
Uninstall
To uninstall the multi- license previously installed, if any, press Uninstall button. 2.
Click on Install button
3.
After installation of Tally on the client computer, open Tally.ini file found in Tally directory and set the following parameters:
TallyLicenseServer = Name of the License Server Computer or IP Address of the Server . Important: If you desire to make any changes to your Hardware, such as Hard Disk or Removable Storage Devices, it is recommended that you surrender the License from your computer, before initiating these changes. Else, Tally will switch to Educational mode.
Converting Tally Hard Lock to Tally Soft Lock
This section provides information on how Hard Lock s of Tally can convert to the more secure environment of Tally Soft Lock. It is applicable for both Single- and Multi- licenses. Pre-requisites for conversion: In a multi- environment, the Hard Lock should be present on the computer where you want to run Tally License. If Tally Hard Lock is not connected to the Computer on which you want a Soft Lock, the following message displays:
Warning: The process of conversion of Hard Lock to Soft Lock is a one-time activity and cannot be reversed.
Single- Hard Lock Conversion
Single- with Internet Connection (online): Conversion Form: The Conversion Form is displayed when Tally starts. Tally looks for the Soft Lock in the system. If it is not found and if TallyLicense = Connect is not present or commented out in tally.ini file, it runs lockconverter.exe , which is present in Tally Installation folder.
Enter only the Email-ID and accept the screen. The Serial Number displayed on this screen is same as the Hard Lock Serial Number. The response goes to the TSPL server and the Hard Lock gets converted to a new Soft Lock . A Conversion Details screen is displayed showing the successful conversion with a new Serial Number and Activation Code .
N o t e : The Information regarding the newly generated Soft Lock can also Installation folder. If any error occurs file named Converter.Log, which can
Serial Number and the Activation Code of the be found in Conversion.txt file in the Tally during the process, it will be captured in a log be found in the Tally Installation folder.
Single without Internet Connection (Offline): The Conversion Form is displayed. Press Esc or CTRL + Q to quit this form and follow the steps given. Go to F12: Configure > Licensing > Offline > Convert 1.
An Offline conversion form is displayed prompting you to enter the Email ID . The serial number displayed on the form is the serial number of Hard Lock, which is connected to your machine and cannot be edited. Enter the Email ID and accept the form.
2.
If your Serial and Email are found correct, a message displays indicating your generated. This file available in the Tally folder.
3.
Copy the tally_req.lic file from the Tally Folder on to a floppy/CD and take it to any computer with Internet connection and having Tally installed on it.
4.
Paste the tally_req.lic file in the Tally folder on this computer, start Tally and go to F12: Configure > Licensing > Offline .
5.
Click on the Send External Request option to send the request to Tally Internet Services server. The response will be saved in a new file called tally_resp.lic .
6.
Copy the tally_resp.lic file into a floppy/CD and paste the file into the Tally folder of your computer.
7.
When you start Tally, a Conversion Details screen displays indicating successful conversion of Hard Lock to new Soft Lock with Serial Number and the Activation code.
tally_req.lic is successfully
Multi- Hard Lock Conversion
The Conversion procedure for Multi- environment is similar to Single- Conversion. The License Clients need to connect to the License Server to get the Soft Lock, once conversion is complete on the License Server.
ing Tally
To get , service and regular updates, s of Tally need to be ed. The procedure for ing Tally is the same for single and multi- systems. Tally provides you an option to later as well. Go to F12 > Licensing and click Yourself button from the button bar. The following screen is displayed on successful activation.
You can also set a reminder for registration for a later time. Set the optional field Remind me later to Yes and Tally will remind you to at periodic intervals. If you set this to No, reminders will not be generated. More: ing Tally-if you have an Internet connection ing Tally-if you do not have an Internet connection
If you have an Internet Connection
To Tally, Go to Gateway of Tally > F12: Configure > Licensing > Click Yourself button The screen displays 1.
Enter the Serial number printed on the CD cover.
2.
Enter the Key printed inside the CD cover.
3.
Click to proceed.
4.
The Registration screen is displayed. Enter your details in the form.
5.
Click Save.
You will get a message confirming your registration. You can also your Tally by clicking on the Yourself link at www.tallysolutions.com.
If you do not have an Internet connection
If your computer does not have an Internet connection, Tally from a computer connected to the Internet by clicking on the Tally link at www.tallysolutions.com. 1.
Enter the Serial number and Key in the screen
2.
Click the button
3.
The Registration screen displays. Enter your details in the form and click on Save
4.
A message displays confirming your registration
Validating Tally
The procedure for validating Tally is the same for single- and multi- systems. The license has to be validated within 45 days of activation. Tally will prompt you to validate the license, before the expiry period. More: Validating Tally-if you have an Internet connection Validating Tally-if you do not have an Internet connection
If you have an Internet connection
If you are an Online who connects to the Internet occasionally, Tally will display the message Your License is about to expire! Please re-activate. Connect to the Internet and validate the license manually using F12: Configure > Licensing > Online > Update
This is a one-time process.
If you do not validate within the time period, Tally will switch to Educational mode.
If you do not have an Internet connection
If you are not connected to the Internet, Tally will display Your License is about to expire! Please re-activate message. You can validate the license on any computer with an Internet connection. Follow the procedure explained in the section on If you do not have an internet connection in Activating TallySilver for Single-. Once the procedure is complete validate the license manually on your computer using F12: Configure > Licensing > Offline > Update License .
This is a one-time process.
If you do not validate within the time period, Tally will switch to Educational mode.
Note: T a l l y.
The
Offline
needs
to
use
a
computer
connected
to
the
Internet
to
Surrendering Tally License
If you want to use Tally on another computer, surrender the license activated on your computer using the option Surrender from F12 > Licensing > Online/Offline. Important: If you desire to make any changes to your Hardware, such as Hard Disk or Removable Storage Devices, it is recommended that you surrender the License from your computer, before initiating these changes. Else, Tally will switch to Educational mode. The procedure followed for surrendering the license is the same for both single- and multi- systems.
For Online s 1.
Go to F12: Configure > Licensing > Online > Surrender
2.
The surrender License request is sent to Tally Internet Services Server. If it gets a valid response, the license file in the Tally folder is deleted
3.
On surrendering the license, Tally will function in Educational mode
4.
You can now activate the same license on a different computer
For Offline s 1.
Go to F12: Configure > Licensing > Offline > Surrender
2.
Press Enter to proceed
3.
A message displays Offline Surrender Request tally_req.lic file is successfully generated
4.
Copy the tally_req.lic file that is available in the Tally folder to a floppy/CD and take it to any computer with Internet connectivity, having Tally installed on it
5.
Paste the tally_req.lic file to the Tally folder on this computer, start Tally and go to F12: Configure > Licensing > Offline
5.
6.
Click on the Send External Request option to send the surrender request to Tally Internet Services server
7.
Your Tally License is successfully surrendered and is ready for use on another computer.
Note: If you Surrender the license activated on Tally 9, both switch to Educational mode. You need to activate the license activating the license on Tally 7.2.
Tally 7.2 on Tally
and 8.1
Tally 9 before
will
Upgrading from Tally 8.1 to 9
Single Upgrade Process 1.
Install Tally 9 in a new folder on your computer
2.
Start Tally 9
3.
An Activation Form displays as shown
4.
Enter your Serial, Key, Email and Accept
5.
A Congratulations message displays as shown
6.
5.
6.
You are now ready to use Tally 9 in the licensed mode
Multi Upgrade process On the Server Computer 1.
Install Tally 9 in a new folder on the server computer
2.
Execute Tally 9
3.
An Activation Form appears as shown below
4.
Enter your Serial, Key, Email and Accept
5.
A Congratulations message appears as shown
5.
6.
You are now ready to use Tally 9 in the licensed mode.
On the Client Computer: 1.
Install Tally 9 into a new folder on your computer
2.
Open Tally.ini file found in Tally folder and set the following parameter
TallyLicenseServer = server : port (Where server is the Name or IP of License Server Computer and port is the being 9000) 3.
You are now ready to use Tally 9 in the licensed mode
Port Number, default port
Upgrading Hardlock s from Tally 6.3 / 7.2 to Tally 9
Hardlock s need to ensure that the TallyLock is connected to the computer, when upgrading to Tally 9 .
Single Upgrade Process 1.
Install Tally 9 in a new folder on your computer
2.
Edit TallyLicense parameter by placing two semicolons and specify the TallyLock path in Tally.ini file as shown
3.
Save the changes made in the Tally.ini file
4.
Start Tally 9 and the conversion form appears as shown
5.
If you wish to convert your license to SoftLock, enter your Email-ID and accept to display a Congratulations message.
6.
You are now ready to use Tally 9 in the licensed mode
Multi Upgrade process On the Server Computer to convert from Hardlock to Softlock 1.
1.
Install Tally 9 in a new folder on the server computer
2.
Edit TallyLicense parameter by placing two semicolons and specify the TallyLock path in Tally.ini file as shown
3.
Save the changes made in the Tally.ini file and start Tally 9 .
4.
A Conversion Form displays as shown
5.
If you wish to convert your license to SoftLock, enter your Email-ID and accept.
6.
A Congratulations message displays
7.
You are now ready to use Tally 9 in the licensed mode
On the Client Computer: 1.
Install Tally 9 in a new folder on your computer.
2.
Open Tally.ini file from the Tally folder and edit the following parameters.
TallyLicenseServer = server : port (Enter the Name or IP address of License Server Computer instead of server and the Port Number instead of port (default port being 9000)) 3. 4.
Save the changes made in Tally.ini file.
3. 4.
You are now ready to use Tally 9 in the licensed mode
Upgrading Softlock s from Tally 6.3 / 7.2 to Tally 9
Single Upgrade Process 1.
Install Tally 9 in a new folder on your computer
2.
Start Tally 9
3.
An Activation Form displays as shown
4.
Enter your serial, Key, email-ID and accept
5.
A Congratulations message displays as shown
6.
5.
6.
You are now ready to use Tally 9 in the licensed mode
Multi Upgrade process On the Server Computer 1.
Install Tally 9 in a new folder on the server computer
2.
Execute Tally 9
3.
An Activation Form appears as shown below
4.
Enter your Serial, Key, Email and Accept
5.
A Congratulations message appears as shown
5.
6.
You are now ready to use Tally 9 in the licensed mode.
On the Client Computer: 1.
Install Tally 9 into a new folder on your computer
2.
Open Tally.ini file found in Tally folder and set the following parameter
TallyLicenseServer = server : port (Where server is the Name or IP of License Server Computer and port is the being 9000) 3.
You are now ready to use Tally 9 in the licensed mode
Port Number, default port
Co-existence of Tally 7.2 and Tally 8.1 along with Tally 9
Single Upgrade Process 1.
Install Tally 9 in a new folder on your computer
2.
Start Tally 9
3.
An Activation Form displays as shown
4.
Enter the Serial , Key , Email and Accept
5.
A Congratulations message displays as shown
6.
5.
6.
You can now use Tally 9 , Tally 8.1 and Tally 7.2 in the licensed mode.
Multi Upgrade process On the Server Computer 1.
Install Tally 9 in a new folder on your computer
2.
Execute Tally 9
3.
An Activation Form appears as shown below
4.
Enter the Serial , Key , Email and Accept
5.
A Congratulations message appears as shown
5.
If you wish to run Tally 7.2 and Tally 8.1 services in the background as license servers along with Tally 9 license server on the same computer: tally72lic9xserver.exe and tally72licserver.exe from www.tallysolutions.com and paste it in the folder of the server computer where Tally 7.2. exe resides. Edit the Tally.ini in the Tally 7.2 folder, in order to run the license server for both versions. Server port = 9090 Depending on the Operating System, double click the license server and Install the service. This enables you to run Tally 7.2 and Tally 8.1 in the licensed mode to run as a service in the background on the server computer along with Tally 9 license server on the same computer.
You can now use Tally 9, Tally 8.1 and Tally 7.2 in the licensed mode.
On the Client Computer: 1.
Install Tally 9 into a new folder on your computer
2.
Open Tally.ini file found in Tally folder and set the following parameter
TallyLicenseServer = server : port (Where server is the Name or IP of License Server Computer and port is the Port Number, default port being 9000) You can now use Tally 9 , Tally 8.1 and Tally 7.2 in the licensed mode.
Note : If your Operating System is of a Windows 2000 or higher version, tally72licserver.exe from www.tallysolutions.com to run as a service in the background on the server computer. This enables you to run Tally 7.2 in the licensed mode. If your Operating System is of a version lower than Windows 2000, tally72lic9xserver.exe from www.tallysolutions.com to run as a service in the background on the server computer. This enables you to run Tally 7.2 in the licensed mode. It is advisable to remove the existing tallylicserver.exe from the folder where the Tally 7.2 exe resides, before ing tally72lic9xserver.exe and tally72licserver.exe from www.tallysolutions.com.
Additional Information In order to use Tally 7.2 and Tally 8.1 along with 9 on the same computer, it is mandatory that Tally 9 is active on the computer
For s who wish to run Tally 8.1 and Tally 7.2 along with Tally 9 1.
Both Tally 8.1 and Tally 7.2 s can Activate and Tally 9 . On successful upgrade or activation, you can run all three versions on the same computer, in the licensed mode. Tally 8.1 and Tally 7.2 will co-exist with Tally 9 for 90 days from the date of activation.
2.
If you try to Surrender the license from Tally 8.1 or 7.2, all three versions will switch to Educational mode and Tally will display the message Surrender successful . All versions of Tally running on your system will turn into educational.
3.
If you re-activate the license on Tally 8.1 or Tally 7.2, Tally 9 will be activated automatically.
4.
But if you choose to activate the license on Tally 9 first, you need to re-activate Tally 8.1 and 7.2
3. 4. individually for the co-existence of the three versions.
N o t e : You cannot activate the license on surrendered the license from Tally 9.
Tally
8.1 or Tally
7.2 , if you have
For s who Update from Tally 8.1 to Tally 9 Tally 8.1 s can Activate and Tally 9 . On successful upgrade or activation, you can run both versions on the same computer, in the licensed mode. Tally 8.1 will co-exist with Tally 9 for 90 days from the date of activation.
For Softlock s who migrate from Tally 7.2 to Tally 9 Tally 7.2 Softlock s can Activate and Tally 9 . On successful upgrade or activation, you can run both versions on the same computer, in the licensed mode. Tally 7.2 will co-exist with Tally 9 for 90 days from the date of activation.
For Hardlock s who migrate from Tally 7.2 to Tally 9 On migration to Tally 9 , the Hardlock becomes defunct. To run Tally 7.2 , you need to activate the license on Tally 7.2 in the Softlock mode. For additional information on activating the license click here.. N o t e : In case you are connected to the Tally 8.1 resides, Tally will update the
internet license
and install Tally automatically.
9
in
the
same
folder
where
Introduction
The Tally Data Migration Tool helps you upgrade from Tally 7.2 to Tally 9 , by migrating Data and T (Tally Compliant Product ) files. It also restores 7.2 backup files . Using the Tally Data migration Tool, you can migrate Payroll data also Tally 7.2 Data and T files cannot be used on Tally 9 unless you migrate them, for which you need to be a licensed of Tally 9. Tally 6.3 s can also use the migration tool, which will rewrite the version to Tally 7.2 and then migrate the data to Tally 9.
Tally Data Migration Tool The Tally Data Migration Tool works with the t ally 9. exe and helps you migrate Tally 7.2 company data. It also helps you migrate Tally 7.2 T files. A brief explanation on Tally Data Migration and Tally 9 screen follows, as both screens open simultaneously during migration.
Migrate Company Menu The Migrate Company menu displays the following: Migrate Data
Migrate T Restore 7.2 Backup
Migration Messages Pane The migration status displays in the Migration Messages Pane when the migration is in progress.
Calculator Pane If errors occur during migration, then an error message displays in the Calculator Pane. N o t e : The Data Migration Tool is resource intensive. It all other applications when you migrate Data or T during the migration process, the migrated or partially and you have to repeat migration for the same.
is recommended that you close files. If an interruption occurs migrated data will be deleted
Migrating Data
If you have enabled and used Payroll in Tally 7.2, before migrating data, ensure that the Payroll process for the previous month is complete and processed because Payroll in Tally 9 will be effective from the date of migration. Migrating Data from Tally 7.2 to Tally 9 Migrating Group company data from Tally 7.2 to Tally 9 Post Migration Steps for Payroll data in Tally 9
Advantages of Migrating Payroll data from Tally 7.2 to 9 1.
Processing Payroll in Tally 9 has now become so easy that you can generate a Pay slip in four steps.
2.
Pay Head and Salary details creation has become -friendly and can be defined at the master level.
3.
Though there is a hierarchy change in Pay Heads, after migration to Tally 9 the migration tool allows you migrate the calculation type specified in Tally 7.2, thus allowing you to continue generating Payroll reports.
4.
A simple re-configuration of the Pay Heads after migration allows you to continue with the Payroll processing in Tally 9.
Migrating Data from Tally 7.2 to Tally 9
For an existing 7.2 customer, the migration process takes place as explained below. 1.
Click the tallymigration icon to start the migration.
2.
Tally Data Migration and Tally 9 start simultaneously, in separate screens.
3.
As soon as Tally 9 is loaded, the message ‘Ready for Migration ’ displays in the Migration Messages Pane .
3.
4.
Click the Migrate Data option to select the company whose data is to be migrated from Tally 7.2 to Tally 9 .
5.
Specify the data path in the Directory field.
5.
6. On selecting the company, the company is loaded.
N o t e : If you have placed the data to be migrated from Tally 7.2 to Tally 9 in the T a l l y 9 folder, you have to only specify the path and need not select the company. 7. If the company selected has Payroll data, the following screen appears.
8. To continue with the migration, press Enter .
9. Accept to migrate the selected company.
9.
10. In the Migration Information screen on the left hand side, you can view the to be migrated from Tally 7.2 .
Types of Masters and Vouchers
11. During the migration from Tally 7.2 to 9 , the status of the migration appears in the screen on the right hand side, which displays the number of Masters and Vouchers that have migrated to Tally 9 .
11.
Note: As certain voucher be a difference of 3 in of Unit Masters. 12.
types and units the total number
have been of Voucher
removed from Tally Type Masters and 1
9 , there will in the number
12. When the migration is complete, an Information pop-up message appears as shown below.
13. On pressing any key, a Congratulations message appears as shown below.
13.
14. If errors occur during migration, they are displayed in red in the Migration Messages Pane as shown in the following screen.
14.
N o t e : If an error “The Cost Centre 'ABC' during migration, rewrite Tally 7.2 data with R and then migrate the data to 9.
does Tally
not belong to Data Migration
the Category 'XYZ' appears Tool using Ctrl + Alt +
15.
The migrated companies are saved in the Tally 7.2 data folder. The migrated data is prefixed with a ‘0’ and appears as a 5 digit number as shown.
16.
Now you can work on Tally 9 with the migrated data.
Note
:
The
migrated
data
will
reside
in
the
folder
where
it
was
at
the
time
of
migration.
Caution: If you try to migrate a company that has already been migrated from as shown below.
7.2 to 9 , you will get a warning message
Changes that occur after successful migration process are: The Payroll Deduction ledgers created under the group Duties and Taxes in Tally 7.2 , after migration
will become a Pay Head grouped under Current Liabilities in Tally 9 . The Payroll Deduction ledgers created under the group Direct or Indirect Expenses in Tally 7.2 , after migration will become a Pay Head grouped under Current Liabilities in Tally 9 . The Payroll Deduction ledgers created under the group Loans & Advances (Assets) in Tally 7.2 , after migration will become a Pay Head grouped under the Pay Head Type Loans and Advances in Tally 9 . Any Attendance Type created with unit Mth will appear prefixed with ATTD- followed by the name of the Attendance Type. If you have migrated data containing attendance entries for the current month, whose Payroll is yet to be processed, those entries will become Production Type Entries. So it is suggested that you re-enter the attendance entries for the current month after migration and then process the Payroll. After migration, by default the Attendance Types will change to Production Types and therefore the YTD details will not be retained. All migrated Attendance types will be pre-fixed by ATTD-
Follow the procedure to display the accurate YTD details in the Payslip : 1.
To generate a Payslip with YTD Details for any of the earlier months:
Create/Alter the Attendance Voucher for the respective month Select the Employee To Nullify YTD details , select the ATTD- prefixed Attendance Type and enter the Cur Bal value with a negative sign in the Value field. Select the Employee and the Attendance type Enter the Cur Bal amount as the Value and Accept the Voucher
2.
To generate a Payslip with YTD Details from the Current month onwards:
Create/Alter the Attendance Voucher for the previous month Select the Employee To Nullify YTD details, select the ATTD- prefixed Attendance Type and enter the Cur Bal value with a negative sign in the Value field. Select the Employee and the Attendance type Enter the Cur Bal amount as the Value and Accept the Voucher.
Migrating Group company data from Tally 7.2 to Tally 9
To migrate Group companies: 1.
Migrate each member individually from Tally 7.2 to 9
2.
On successful migration of the companies, re-create the Group company in Tally 9
Post Migration Steps for Payroll data in Tally 9
After migrating Payroll data from Tally 7.2 to Tally 9, you have to re-configure the Pay Heads and enter the Rates against the respective Pay Heads in the salary details screen for the Employees/Employee Groups in Tally 9. By default after migration, the Calculation type for all the Pay Heads migrated to Tally 9 will change to As Defined Value . Follow the steps given below: Go to Gateway of Tally> Payroll Info.> Salary Details> Alter> Select the Employee/Employee Group from the List of Groups/Employees .
In the Salary Details Alteration screen, move the cursor to the Pay Head field and press Ctrl + Enter to reconfigure the Pay Heads as in Tally 7.2 Consider an example where ABC Company migrates its Payroll data from Tally 7.2 to Tally 9. The Payroll is completed and processed for the previous month. To migrate data refer to Migrating Data from Tally 7.2 to 9 1.
Before migration, Salary Details for Employee A in Tally 7.2 appears as shown below. (Go to Gateway of Tally> Payroll Info.> Employees> Alter> Employee A )
1.
2.
After migration the Salary Details screen in Tally 9 for Employee A will appear displaying As Defined Value as the Calculation Type for all the Pay Heads specified. (Go to Gateway of Tally> Payroll Info.> Salary Details> Alter> Select Employee A from the List of Groups/Employees)
3.
In the Salary Details Alteration screen, change the Effective From date if required
4.
To alter the Pay head Basic Salary from the same screen, move the cursor to the Pay head and press Ctrl + Enter
5.
In the Pay Head Alteration (Secondary) screen, select the Calculation Type from the list as provided in Tally 7.2
5.
6.
A ccept to save the Pay Head
7.
Enter the Rate in the Salary Details Alteration screen, if applicable
8.
Similarly you can modify the remaining Pay Heads
9.
Accept to save the changes made
10.
The Salary Details Alteration screen for Employee A with the changes made in Tally 9 will appear as shown below
10.
N o t e : As the number of Pay Heads will increase is retained as provided in Tally 7.2, the Pay Heads Calculation Type As Defined Value
after migration, if the are migrated to Tally
Calculation 9 with
Type
Migrating T
Migrating T from Tally 7.2 to Tally 9 1.
Click the Migrate T option to migrate the T files from Tally 7.2 to Tally 9
1.
2.
A window displays as shown. Accept to Migrate T
2.
3.
In the Migration Messages Pane, messages display, indicating that the T files are in the process of migration
4.
Once the process of migration ends, a message appears as shown below
4.
5. The migrated T files are saved in the folder where Tally 7.2 T files reside. The migrated T files are suffixed with 9 as shown and appear with the 9 suffixed in the Tally.ini.file also
5.
6.
Now, you can work on Tally 9 with the migrated T files
N o t e : During migration, only those T files mentioned in the Tally.ini migrated from Tally 7.2 to 9. The migrated T will reside in the folder the time of migration.
file will where it
be was
at
Restoring 7.2 Backup
Follow the below steps to Restore 7.2 backup data to 9 . 1.
Click Restore 7.2 Backup option to migrate 7.2 Backup data
1.
2.
In Select Companies to Restore screen specify the Destination and Source path. Select the company from the List of Companies as shown
2.
Note folder,
: If you
you have placed the data to be migrated from Tally 7.2 to have to only specify the path and need not select the
3.
Click Migrate Data to migrate the 7.2 data to 9. Refer to Migrate Data
4.
Select the company to be migrated from the list of companies provided
5.
Click Yes to continue the migration process
6.
Click Quit to close the Tally Data Migration Tool
Tally 9 in company.
the
Tally
9
The migrated companies are saved in the Tally 7.2 data folder. The migrated data is prefixed with a ‘0 ’ and appears as a 5 digit number You can now work on Tally 9 with the restored and migrated 7.2 backup data
Additional Information Once the migration of Data or T files from Tally 7.2 to 9 is complete, two important log files display in the folder containing the tally migration exe .
migration.err The migration.err file displays the errors if any occur during migration
migration.log The migration.log file provides the following details: Migrating Data
1.
Date of Migration
2.
The Name of the company opened for migration
3.
Migration Start time
4.
Time taken and the Migrate data information, i.e., Masters, Vouchers and Reports from Tally 7.2 to 9
5.
3. 4. 5.
Lists the number of errors, if any
6.
Migration End time
7.
The Migration tool closing 7.2 company ABC Company and Closed information of the migrated company
Migrating T files
1.
Date and Start Time to migrate the T files from Tally 7.2 to 9
2.
Migrate T information
3.
Migrating T files End details
Error Occurrence during Migration Error Occurrence during Migration of Masters If an error occurs during the migration of Masters, the migration process stops immediately and an importerror.log file is created in the folder where the tally72migration. exe resides. The XML tags of those masters, which did not migrate, appear in the importerror.log file.
Error Occurrence during Migration of Transactions If an error occurs during the migration of transactions, the migration continues and the XML tags of those transactions, which did not migrate, appear in an importerror.log file. Rectify the transactions and copy the XML tags into a file with an .XML extension . Now, import the .XML file to Tally 9 . N o t e : As alter these
manually importing transactions again
transactions create new Alter after Synchronization .
ID
s,
you
have
to
create
or
Introduction
Tally comes with the World’s First Concurrent Multilingual Business ing & Inventory Management Software for small and medium businesses. The interface for the software is available in Hindi, Marathi, Gujarati, Bengali, Kannada, Tamil, Telugu, Malayalam, Hinglish (colloquial English) and Punjabi, and in Bahasa Melayu and Bahasa Indonesia allowing you to interact with Tally, in a language of your choice. Thus, Tally gives you tremendous freedom to maintain s, as well as view and print in any of the above mentioned Indian languages. Tally enables you to enter data in one language and have it transliterated into different languages. You can generate invoices, purchase orders or delivery notes in different languages after entering data for the same in a different language.
Features of Tally Multilingual
Tally is a concurrent Multilingual software that Can display Tally in any language that the chooses from any screen in Tally. s Translation of Pre-Defined Masters s Transliteration for the allowed languages Can capture data entered using the phonetic language or system language. Can capture language specific Names and Aliases. Can print and display Reports, Vouchers and Invoices in any language. Can copy text from Tally to Windows and vice versa. Use Ctrl +Alt +C to copy and Ctrl +Alt +V to paste.
Operating System Requirements for Tally Multilingual
Operating System
for Indian Scripts in Windows version
Windows 95 Windows 98 Windows ME
Does not Unicode
Windows NT
s Unicode but not Indic languages
Windows 2000
s Unicode and the following Indic languages:
Hindi
Marathi
Tamil
Windows XP
s Unicode and the following Indic languages:
Hindi
Marathi
Tamil
Telugu
Kannada
Punjabi
Gujarati
Windows 2003
s Unicode and the following Indic languages:
Hindi
Marathi
Tamil
Telugu
Kannada
Punjabi
Gujarati
Windows XP SP2
s Unicode and the following Indic languages:
Hindi
Marathi
Tamil
Telugu
Kannada
Punjabi
Gujarati
Bengali
Malayalam
Interface in Tally
The Tally interface displays in the language selected as Initial Startup Language , at the time of installation. For example, if you have selected Hindi as Initial Startup Language , the Tally interface displays as shown.
Configuring F12: Configure for Multilingual
Configuring F12 for Multilingual Go to Gateway of Tally > F12:Configure > General
Show tables with Masters only in Current Language If this option is set to Yes , Tally displays the Pre-defined and defined Masters in the Language selected. If this option is set to No , Tally displays the Pre-defined and defined Masters in English and in the selected Language , along with Aliases created in other languages, if any.
C reating a Company in any language Create your company in any language. The Company Creation screen, if Hindi is selected as your language, displays as shown.
N o t e : The Name of or transliterated but
the will
Company , Unit appear in the
of Measure and C u r r e n c y Language created.
cannot
be
translated
Language Configuration in Tally
Configure your language as given. 1.
Click L: Language from the horizontal toolbar or press ALT + L
2.
In Language Configuration screen, select the language from the List of Languages.
3.
The interface displays in the language selected.
Keyboard Configuration in Tally
Tally provides the exceptional option of choosing between multiple keyboards. 1.
Tally’s Phonetic Keyboard
2.
Operating System Keyboard
Tally's Phonetic Keyboard
Tally’s Phonetic keyboard is useful for those who speak the language but do not know how to type the same using the keyboard. This keyboard will allow you to spell the term phonetically based on how it sounds and Tally will display the data in the language selected after transliteration. The keyboard layout is the same as that of the English characters, which makes it friendly and comfortable. With a phonetically enabled keyboard, you can enter the information or data in any Indian language to generate bills, invoices and other reports. A few examples using Tally’s Phonetic Keyboard are given below:
Word in English
Purchase Sales Item Inventory Conveyance Salary Postage & Telegram Commission Discount Debtors Creditors Capital Ledger Ramjilal Cash Shyamlal Godown Branch Loan Customer Supplier Company s
Keys for Phonetic Representation of Indic Languages parachej sels AiiTam inventrii Kanveyns selarii posTej end Teligram kmiishiin DiskaunT DeTaras kreDiiTars kaipiTal lejar rAmajiilAl kaish shyAmalAl goDAun braAnch lon kasTamar saplAyar kampanii EkAunTas
Key Combinations for Hindi
Vowel Signs
Symbols
Special / Accent Keys
Key Combinations for Bengali
Vowel Signs
Symbols
Key Combinations for Punjabi
Vowel Signs
Symbols
Key Combinations for Gujarati
Vowel Signs
Symbols
Key Combinations for Tamil
Vowel Signs
Symbols
Key Combinations for Telugu
Vowel Signs
Symbols
Key Combinations for Kannada
Vowel Signs
Symbols
Key Combinations for Malayalam
Vowel Signs
Symbols
The Character
is presently not ed in Tally.
Key Combinations for Marathi
Vowel Signs
Symbols
Special / Accent Keys
Configuring Masters in F12
Go to Gateway of Tally> F12: Configure> Accts/Inv Info.
Allow Language ALIASES along with Names This option has a significant value when creating masters like Ledgers and Stock Items , as it enables you to enter aliases in Indic languages along with the Name , as well as the Interface Language . For example, create a Stock Item (Cement) in Hindi and Name it in different languages with Aliases . The screen displays as shown.
Masters created with more than one Indic language as Name Masters created in more than one Indic language, when viewed in a Report or Master will display based on the Language Precedence order allotted in Tally. The default Language Precedence order is English , Hindi , Bengali, Punjabi , Gujarati , Tamil , Telugu, Kannada , Malayalam and Marathi . For example say you have created the Master in Hindi , Kannada and Gujarati . You can view it in any of the three languages, but if you choose to view it in a Report or Master in any other language, then the transliteration of the Name will appear in Hindi. This is on of the fact that Hindi appears before Kannada and Gujarati in the Language Precedence .
Creating, Displaying and Printing in Multi Language
Consider a scenario where a firm based in Maharashtra creates a Sales Invoice in Hindi on 16-6-2006 and issues the same Sales Invoice in Kannada to his customer (e.g. Royal Group ) , which is based in Karnataka . The Sales Voucher entered in Hindi appears as shown.
To print the Sales Invoice in Hindi . 1.
Press Alt+P to print the voucher.
2.
Press Alt+L to get the List of Languages in the Print Language Configuration screen.
3.
Select Hindi from the List of Languages .
4.
2. 3. 4.
Accept to print the voucher.
Preview of Sales Invoice in Hindi will be as shown.
N o t e : You can view the data in any of the Indic languages in Tally, provided the Masters are made in any one of the Indic languages. Similarly, to view a Master in English, it must be created in English also apart from the Indic languages.
To preview the Sales Invoice in Kannada: Go to Gateway of Tally > Display > Daybook > Select the Sales invoice dated 16-6-2006 from the list. 1.
Press Alt+P to print the voucher.
2.
Press Alt+L to get the List of Languages in the Print Language Configuration screen.
3.
Select Kannada from the List of Languages .
3.
4. Accept to print the voucher.
The Sales invoice Print Preview in Kannada displays as shown.
View the Stock Summary of the Stock Items sold to Royal Group in Karnataka , in Kannada. The Stock Summary screen displays as shown.
To Manually Setup Language
Windows needs to be manually configured for the language that you want to use. All versions of Windows 2000, Windows XP and Windows 2003 operating systems have built-in for Indic languages. However, if you have not selected Language at the time of installation, you will not be able to use the multilingual feature in Tally. 1.
Click Control from the Start menu or click on My Computer.
2.
Double-click the icon Regional and Language Options.
3.
In the Regional and Language Options window, select Languages tab.
4.
Select Install files for complex script and right-to-left languages (including Thai) under Supplemental language .
5.
Click Details to display Text Services and Input Languages window.
5.
6.
Click Add from Settings to display Add Input language dialog box.
7.
Select the language from the Input language drop-down list. Select Hindi as an example.
8.
Select Hindi Traditional from the Keyboard layout/IME drop-down list and click OK.
9.
Click Apply and OK in Text Services and Input Languages window.
10.
8. 9. 10.
Click Apply and OK in Regional and Language Options window.
11.
Change Regional Options dialog box is displayed with a prompt to Restart the computer for the changes to take effect.
12.
Click Yes to restart.
Windows has now been configured to enter text in Hindi.
Operating System Keyboard
The Operating System Keyboard is used by those who know to read and write in the language of their choice. Entering data in Tally using the Operating System Keyboard is different from using the phonetic keyboard as the keyboard layout differs. To configure the Keyboard for an Operating System Keyboard. 1.
Click K : Keyboard from the horizontal toolbar or press ALT +K
2.
In Keyboard Configuration screen, select Hindi Traditional (System) from the List of Languages .
Note : depends
The upon
Languages Operating
displayed System.
in
the
List
of
Languages
for
Keyboard
Configuration
Using On-Screen Keyboard in Tally The On-Screen keyboard is a virtual keyboard which displays on the computer screen. Using the On-Screen keyboard will familiarise you with the Operating System keyboard’s layout. Configuring On-Screen Keyboard 1.
Go to Start > Programs > Accessories > Accessibility
2.
Select Onscreen Keyboard
2.
3.
The On-Screen Keyboard will appear as shown below.
4.
Use Alt + Shift to configure the language of choice. For example, if you wish to enter data in Hindi, select Hindi using Alt + Shift or select the same from the Language bar as shown.
5.
The On-Screen Keyboard will appear in Hindi as shown, as you place the cursor on it.
5.
Tally Value Pack
Tally Value Pack (TVP) is an annual Product Upgrade Assurance offer for licensed Tally customers. The TVP is available only for the current version of Tally being sold in the market. Tally Value Pack has a validity period of 12 months. When you buy a Tally Value Pack, you will get: 1.
Free the next version of Tally
2.
Free Major Release Update to new release of Tally
3.
Up to 50% discount on Add-On purchases
All the above are subject to availability during the validity period of your TVP. N o t e: Tally Value Pack www.tallysolutions.com
benefits are subject for latest benefits.
to
change:
please
visit
For a TVP customer purchasing Add-ons
View Price List View Price List screen displays the Add-Ons , TVP Customer Price and Your price details of a specific serial number It is a display screen and cannot be modified.
Buy You can make the purchase as per the instructions given for online s and Accept the purchase. For a TVP customer, Tally displays a text in green as Since you are a TVP customer, you have saved: along with an amount. As you are a TVP customer , your purchase is billed at Your Price . The difference between MRP and Your Price is the amount displayed in Since you are a TVP customer, you have saved: field. The MRP is the actual price and the Your Price is the discounted price for purchasing the Add-on. For a TVP customer, the Shop screen displays as shown:
Shop
The Shop option in Tally is an interface between Tally and its customer. It allows you to select and purchase Tally Add-Ons using the Online/Offline options. You can purchase the currencies to buy the Add-Ons from Tally Resellers, distribution partners or Tally Authorised Service Centres. The Add-Ons include paid modules of Tally, Tally Value Pack, Upgrades and Updates. To locate your nearest Tally vendor, visit www.tallysolutions.com The procedure for using Shop is different for Online and Offline s. Go to Gateway of Tally > F12: Configure > Shop The Shop menu appears as shown.
Online Offline
Online
If you are an Online , Go to Gateway of Tally > F12: Configure > Shop > Online
The Online menu displays the following options: 1. View Price List 2. Buy
View Price List View Price List screen displays the Add-Ons and price details for a specific serial number that you have selected. It is a display screen and cannot be modified.
Buy When you select the Buy option, the serial number that you are shopping for displays at the top of the screen as You are shopping for Serial Number: Your Serial Number. To shop for Add-Ons: 1. Select the currency in the Select Currency field. 2. Select the name of the Category from the list in the Category field. N o t e : If you are not sure of from the List of Category, all displayed Category-wise.
the Category of Add-ons, select A n y. When you select A n y the A d d - O n s will be displayed at once instead of being
3. Select the Add-On that you wish to purchase from the list, Name of Add-on. The Add-ons for the selected category are displayed in the list. Note:
1. If you are shopping for Tally Value Pack first from the list needed for shopping.
Value Pack along with other A d d - O n s ,, select Tally of Add-Ons. Then you will know the exact currency value
2. When you select the Name of Add-On and Your Price of the A d d - O n s will be fields. These fields cannot be modified.
from the list, the Qty, displayed automatically
TVP Customer Price against the respective
4. Select End of List once you finish selecting Add-Ons 5. For a non TVP customer, Tally displays a text in red as If you were a TVP customer, you could have saved along with the amount. As you are a non TVP customer, your purchase is billed at Your Price. The difference between Your Price and TVP Customer Price is the amount displayed in If you were a TVP customer, you could have saved field. 6. The TVP Customer Price is the discounted price for the Add-on applicable for a TVP Customer. Your Price is the price that you need to pay for the Add-on. 7. After selecting all the Add-Ons, enter the TallyCurrency key No. (that is displayed on the currency card) in the TallyCurrency key No. field and press Enter. 8. Select Yes to accept the transaction. To cancel, select No. 9.A Congratulations message is displayed to confirm your purchase. N o t e : The TallyCurrency Key No. used and the along with the C o n g r a t u l a t i o n s note. If there is TallyCurrency Key No. has been fully consumed
remaining amount (if any) is displayed an inadequate balance, you will get message.
10. Press any key to proceed. 11. The license gets automatically updated (for an Online ) in the background and a License Updated Successfully message is displayed.
Offline
If you are an offline , you need to first generate a request file. Go to Gateway of Tally > F12: Configure > Shop > Offline
Buy 1.
Selecting the Buy option displays a message tally_req.lic is generated successfully. This generates a tally_req.lic and stores it in the Tally folder.
2.
Copy the tally_req.lic into a floppy or a CD. Paste tally_req.lic file into the Tally folder of a computer connected to the Internet.
3.
Run Tally. Go to Gateway of Tally > F12: Configure > Shop > Offline
The Offline menu is displayed.
4. Once tally_req.lic is copied in the Tally folder in a computer connected to the Internet, two additional menus, View Price List and Send External Shopping Request are displayed in the Offline menu.
View Price List View Price List screen displays the Add-On and price details (i.e., TVP Customer Price and Your Price) for your selection. It is a display screen and cannot be modified.
Send External Shopping Request To shop for the Add-ons, select Send External Shopping Request The Shop screen is displayed, showing the Serial Number of the Tally license for which the tally_req.lic is generated at the top of the screen. Make the purchase as per the instructions given for Online s and Accept it. Note: 1. You can Shop Offline even if T a l l y runs on Educational Mode. 2. If you are shopping for Tally Value Pack along with other A d d - O n s, select Tally Value Pack first from the list of A d d - O n s. Then you will know the exact currency value needed for shopping.
To update the license Go to Gateway of Tally > F12: Configure > Licensing > Offline > Send External Request 1.
You get a message indicating Offline Response file tally_resp.lic is generated successfully. This generates a tally_resp.lic in the Tally folder.
2.
Copy the tally_resp.lic file to the computer, which has generated the request file (tally_req.lic).
3.
Run Tally. Tally will read the response file (tally_resp.lic) from the Tally folder and a message License Updated Successfully is displayed.
3.
List Add-Ons
To view the Add-Ons purchased: Go to Gateway of Tally > F12: Configure> Licensing > List Add-Ons By default, Tally will list the Add-Ons enabled for the Serial Number and also displays the Add-Ons purchased using the Shop feature. The Name column displays the names of the Add-Ons and the Add-On Expiry column displays the expiry date of the Add-Ons.
Operations Configuration
Configuring has to be done before creating and starting work on the company. Click F12: Configure button or press F12, which will bring up the operations configuration menu:
General
Go to Gateway of Tally > F12:Configure > General
The Configuration settings of Country Details, Style of Names, Style of Dates and Configuration of Numbers are self-explanatory. Other configuration options are explained.
Show Monthly reports with Graphs This option is set to Yes by default. The reports are configured to display the Graphs in accordance with the numeric information. The graphs in reports will not be displayed if this option is set to No.
Use separate Menu for Final A/c Statements By default, this option is set to No. If you set this to No, Tally displays the final statements of Balance Sheet and Profit & Loss A/c directly on the Gateway of Tally menu. However, if you set this option to Yes, the final statements of Balance Sheet and Profit & Loss A/c can be accessed from Gateway of Tally > Final s instead of directly from the Gateway of Tally menu
Ignore errors & continue during data import
By default, this option is set to No. Set this option to Yes, to import even if an error is reported.
Export Base Currency Symbol along with Amount This facilitates the to export the currency symbol along with the amount while exporting in XML format.
Show tables with Masters only in Current Language If this option is set to Yes, Tally displays all the Masters ( Default Masters and Defined) in the language selected in the L: Language configuration. Setting this option to No, Tally displays the default list of Masters in English and in any of the Indian languages selected in the L: Language configuration. Note: * For further
details
on
* International s can C o u n t r i e s in the Use
Multilingual
Feature,
refer
enable Indian VAT by ing terminology
to
selecting field.
Using
Multilingual
Feature
in
I n d i a / S A A R C from the List
Tally. of
Numeric Symbols
This enables you to set the number styles. The default styles and symbols are specified. However, you have the option of overwriting them in the respective fields according to your preference. For example, change negative sign from (-) to (+).
Accts/ Inventory Info.
Go to Gateway of Tally > F12: Configure > Accts/Inventory Info. This allows you to configure the details you want in the masters over and above those provided. You can access the F12: Configure screen from s Masters and Inventory Masters when required.
Master Configuration This section allows you to set the multilingual features in the Masters Creation screen.
Allow Aliases along with Names Set this option to Yes to enter the Alias names in the Master Creation screen.
Allow Language Aliases along with Names Set this option to Yes to enter the Alias Names in any of the Indic Languages.
s Masters
This section allows you to set the ing features in the Masters Creation screen.
Allow Advanced Entries in Masters Set this option to Yes, to enter some of the advanced information in the Ledger Master creation and the Group Creation screens. This information will reflect in the reports.
Add Notes to Ledger s Set this option to Yes and a new field to enter Notes appears in the Ledger creation screen. This field allows you to enter any additional information about the ledger you are creating.
Use Addresses for Ledger s Set this option to Yes to enter the Mailing Details in the ledger Creation Screen. It is useful if you are creating a Customer ledger, a Party ledgers or Bank s. Mailing Details like Name, Address, State, PIN Code and PAN / IT No. is entered in this section. These details will appear in the reports, when they are printed.
Use Details for Ledger s Set this option to Yes to specify the details of person (if any) in the ledger creation screen. You can specify the details like the Name of the Person, Telephone Number, Fax Number and the EMail Id. N o t e: The Details A c c o u n t s is set to Y e s
for
the
ledgers
appear
only
if
Use
Addresses
for
Ledger
Inventory Masters This section allows you to specify the required Inventory features in the Masters Creation screen.
Allow Advanced entries in Masters Set this option to Yes to specify the Behaviour of the Stock Item, in the Stock Item Creation screen. For further details, please refer the section Stock Items.
Use Part Numbers for Stock Items Set this option to Yes, to enter the Part Numbers of the Stock Item.
Use Description for Stock Items Set this option to Yes to enter any Description about the Stock Item in the Stock Item Creation screen.
Use Remarks for Stock Items Set this option to Yes to enter your remarks or comments about the stock Item.
Specify Default Ledger Allocation for Invoicing Set this option to Yes, to Set or Modify Default Ledgers for Invoicing for the Stock Item.
This allows you to allocate default Sales/Purchase Ledgers which will be credited when a Stock Item is invoiced.
Use Alternate Units for Stock Items Set this option to Yes to define an Alternate Unit for the Stock Item.
Allow Std. Rates for Stock Items Set this option to Yes, to specify the Standard Purchase Cost and Standard Sales Price of the Stock Item.
Allow Component list details (Bill of Materials) Set this option to Yes, to define the Components (BOM) for the Stock Item. For further details, refer to the section Bill of Material.
Use addresses for Godowns Set this option to Yes, to enter the godown address in the Godown Creation Screen.
Voucher Entry
Go to Gateway of Tally > F12: Configure > Voucher Entry Configure different features of your voucher entry screen.
Other features of convenience, e.g., Use Payment/Receipt as Contra are enabled to effect transactions for funds transfer. Tally allows such transactions only through Contra Vouchers. Take another instance where, you are not permitted to use Journal Vouchers for Cash or Bank transactions. However, recognising exceptional needs, you can override that restriction by enabling the facility here. Refer Allow Alteration of TDS Rates and Values for more information.
Invoice/Orders Entry
Configure details for Invoices, Sales and Purchase Order entry. The options are country specific to International. The options are in the form of questions to which you need to state Yes or No. They have also been explained in detail at the relevant invoice entry sections.
For India/SAARC, the options would automatically change to Use Excise Format instead of Use Intrastat Details provided you have set your General Configuration accordingly.
The option to Use Excise Duty or British Style VAT depends on the General configuration. Go to F12: Configure > General Set Use ing Terminology of to International to British Style VAT handling apart from Asian countries. F11: Features > F2: Inventory will now display the option Prepare and Follow British Style VAT Returns . Select India/SAARC in F12: Configure > General for Excise Duty handling. F11: Features> F3: Statutory & Taxation displays an option Follow Excise Rules for Invoicing . For additional information on setting up Excise Duty/British Style VAT refer to Activate Company Features (F11)
Printing
The printing option allows you to configure the printing of Voucher, Invoice and Statement layouts before printing. Go to Gateway of Tally > F12: Configure > Printing
General
This configuration is applicable for all print reports.
Print Date & Time of Report This option enables printing of system date and time on each report. These are printed on the top right corner of the report as a control mechanism. It should not be confused with the date range of the report. Note:
Vouchers
and
Invoices
are
not
reports.
Print State and PIN Code with Address By default, this option is set to No. Set this option to Yes, to print the reports with State and PIN Code details entered in the company Creation screen. N o t e : If you already have a company created then you need to set this option to N o.
with
State
and
PIN
Code
in
the
address
field,
Stop printing Vertical Lines/Borders: Set this to Yes to avoid printing of vertical lines and borders in dotmatrix printer. This helps in faster printing. Standard Space on Top of pages (Inches): This field is set to 0.5 inch by default. However, you can change it as per your requirement.
Settings for ‘Quick Format’ Tally prints in two formats – Neat and Quick. Neat printing takes advantage of fonts of the printer and is the default. It also compresses long data like long names and amounts and auto-fits them according to space. Quick printing is suitable for Dot Matrix printers where speed is an issue. Hence, quick printing does not print fancy fonts. The auto-fit facility is, thus, not possible in quick printing. Therefore, it will truncate data longer than the allotted space. To prevent this, set the two fields under for ‘Quick Format’ to Yes.
Settings
Purchase Voucher/Invoice and Purchase Order
Purchase voucher/Invoice, Receipt Note and Purchase Order are printed to maintain continuity in voucher numbers and to provide a document to record a transaction. To configure, select Purchase Transactions under Printing.
Purchase Voucher/Invoice
Purchase Orders Purchase Orders are required to be printed and sent to suppliers.
Receipt Notes Receipt Notes are entered in the same format as Delivery Notes, and if Purchase Orders are enabled, the details of the order would automatically get filled-up. Further, Purchase Invoices would also auto-fill with the Receipt Note or Purchase Order details as relevant.
Payment /Receipt/Journal Vouchers, Credit Note/Debit Note
Configure the dimensions and details as per your requirements to print
The above options pertain to Payment Vouchers. The options for Receipt vouchers, Journal/Contra, Debit/Credit Note are similar.
Amount in words To print the amount in words on the Payment, Receipt, Journal, Credit Note/ Debit Note voucher in any language apart from the language selected as Interface: Select the Output Language at the Report Generation screen from the voucher Click F12: Configure and set Print Amount in Words to Yes and Print Amount in Words in English to No for the amount to appear in the selected Output Language
N o t e: If you set Print Amount Y e s, the amount will appear in
in Words and Print E n g l i s h only.
Amount
in
Words
in
English to
Sales Invoice, POS Invoice, Delivery Note and Sale Order/Quotation
Printing configuration for all Sales vouchers like Sales Invoices, POS Invoice, Delivery notes and Sales Orders/Quotations are accessible through Sales Transactions under Printing menu. Each transaction type can separately configured and selected from the sub-menu.
The different configuration screens are as given:
Sales Invoice This is the configuration for the Sales invoice. You can change the setting as per your requirement.
Details of the above configuration options have been discussed in Invoice Entry section.
POS Invoice The Print Configuration for a POS Invoice displays as shown. You can configure the options as per your requirement.
Delivery Note Delivery Note appears similar to Invoices. Fields like Rate and Amount may be required by some companies to be printed out on Delivery Notes. Select the options as relevant to your company.
Sales Order/Quotation Sales Orders, if marked Optional, during voucher entry, are printed as Quotations.
Reminder Letters
The Reminder Letters feature in Tally can be used to remind any customer or supplier of their overdue bills.
Space to leave on top (default 0.5 inch) and Space to leave on left (default 0.5 inch) : These fields are set to 0.5 inch by default. However, you can change it as per your requirement. Information in First Paragraph and Information in Second Paragraph: The information provided in these two fields can be used as such, modified or extended.
Confirmation Statements
Confirmation Statements are not the same as Reminder Letters. They serve to confirm the balances with customers, suppliers, lenders and borrowers. This is used mostly at the end of a period but can be produced at anytime.
Space to leave on top (default 0.5 inch): This field is set to 0.5 inch by default. However, you can change it as per your requirement. Titling for ‘Subject’ in Letter: The default text is Confirmation of s. You have the option of changing it as per your requirement. Information in First Paragraph and Information in Second Paragraph: The information provided in these two fields can be used as such or modified or extended. Sign-off used for the Letter: The default text can be changed in this field also.
Introduction
Go to Gateway of Tally > F12: Configure > Connectivity The Connectivity menu consists of three options.
Sync Configuration Proxy Configuration Auto-dial Configuration
Sync Configuration
This configuration is usually done when data from different locations needs to be synchronized. For detailed information, refer to Synchronization section. N o t e : Sync Configuration option in F 1 2 : C o n f i g u r e screen clientserver=client or clientserver=server in Tally.ini file.
will
appear
only
if
you
enter
Proxy Configuration
This configuration is usually done when data from different locations needs to be synchronized and while activating the License. Proxy configuration is required for those s who are behind a proxy server and use Synchronization feature of Tally as a Client. If TallyClient accesses a TallyServer through a proxy server, then proxy server details must be provided.
If your computer is on a network and connected to the Internet. Use HTTP Proxy Server: Select Yes if your computer is connected to a proxy server URL: Enter the IP address and port number of the proxy server used. Ensure that the IP address and Port is separated by a colon. For eg. 198.162.2.1:8080 Authentication Required: Set this to Yes if you want authentication. Specify a name and in the respective fields.
Auto-Dial Configuration
Auto Dial configuration feature can be enabled, when you are in need of any of the Internet Services while working on Tally, like Licensing or Synchronization. Gateway of Tally> F12: Configure> Connectivity > Auto-Dial Configuration
Set Use Specific Dial-Up Connection to Yes. In the field Dial-Up Connection, select the appropriate Dial-Up Connection from the List of Dial-Up Connections.
Once when this configuration is enabled, you get connected to the internet spontaneously. Note:
The
Auto
Dial
Configuration
is
only
for
those
s
who
have
Dial-Up
Connections.
Licensing
This option allows you to activate your Tally License Online or Offline Go to Gateway of Tally > F12: Configure > Licensing The screen appears as shown:
List Add-ons allows you to view the additional features enabled in Tally. Online option allows you to activate Tally License Online. The term online indicates that your computer is connected to the Internet. Offline option allows you to activate Tally License Offline. The term Offline indicates that your computer is not connected to the Internet.
Shop
This option allows you to Shop for Tally Add Ons Online or Offline Go to Gateway of Tally > F12: Configure > Shop The screen appears as shown:
Company Information
The first step to get started in Tally, is to Create a Company . The initial screen appears as shown:
The Gateway of Tally screen is separated into six sections, namely Title Area , Horizontal Button Bar , Main Area (Ctrl+M) , Calculator Area (Ctrl+N) , Button Bar and the Bottom Pane . The elements of the Gateway of Tally screen are explained below:
Title Area Title Area contains the Tally Copyright and Tally website link . You can access the Tally website directly from the Tally screen. You must have access to the Internet and Internet Explorer Web browser installed on your computer. Click on the http://www.tallysolutions.com link on the top frame of the screen to enter our website. The link appears in all screens of Tally. Tally logo is displayed at the centre of the Title Area. The Product type (Tally Gold, Tally Silver, Tally Bronze or Educational) and Tally Serial Number appears on the upper-right corner. The software serial number is usually a unique number.
Horizontal Button Bar The Buttons, Print (Alt+P), Export (Alt+E), E-mail (Alt+M), (Alt+O), Language (Ctrl+L), Keyboard (Ctrl+K) and Help (Alt+H) can be seen in the Horizontal Button Bar .
Bottom Pane The Bottom Pane contains the Version number, Release details (every time a new release of Tally is made, it is identified with a different release name like Release 3.14) and the Current Date (the date configured in the computer). The name of the day, date, month and year is displayed in DD , MM and YYYY format on the righthand side. System time (the time configured in the computer) appears on the lower-right corner in Hour: Seconds: Minutes (HH/MM/SS) format. The Path appears in the lower left corner in the Bottom pane.
Close Button The Close Button in the upper right corner functions similar to the use of ‘Esc’ in Tally. It brings you to back to the Gateway of Tally from any screen.
Minimise Button The Minimise button performs the standard Windows Operating System’s function (Windows 95 onwards),
allowing you to minimize Tally and work on other applications. To restore Tally, click on the Tally icon on the taskbar.
Main Area (Gateway of Tally) The Main Area is separated into two: 1.
Left-hand side area
2.
Right-hand side area
The left-hand side provides information on Current Period , Current Date and List of Selected Companies (Name of the company and the date when last entry has been made). The right-hand side displays the Company Information menu such as Select a Company, Create a Company, Backup a Company or Restore a Company and so on.
Hot Keys Hot keys are capitalized and are red in colour on all the menu screens. Using the Hot Keys in the Screen will take you to that particular screen or display the sub - menus within that Option.
Company Info
Calculator Area Press [Ctrl + N ] to activate the calculator. Calculator Area is used for calculator functions. Any type of independent calculation can also be done using the calculator.
Button Bar The buttons are designed to make the work easier and faster and vary from one screen to another based on the screen functionality. They appear on the right hand side of the Tally screen and the inactive buttons are greyed out. You can either click these buttons or press the shortcut keys to access the relevant screen. The following are some of the buttons and their functions: Help (Alt+H) – To access Tally's online context-sensitive help F1: Select Cmp – To select the company from the List of Companies and access data from other data directories on the local system or through the network. You can also access the Directory field by pressing [Backspace]. F12: Configure – To access the configuration settings to manage the information entered in Tally. For example, you can access the General Configuration to set country specific defaults, before creating a company. Buttons where a character or function key is underlined indicates that you have to press underlined character or the function key along with [ALT ] key. Buttons where a character or function key is double underlined indicates, you have to press the character or the function key along with [CTRL ] key.
F1: Press the shortcut function key [F1] to select a company
F1 : Press [ALT+F1] to shut a company
F8 : Press [CTRL+F8] to select the Credit Note voucher
Ctrl+M: Press Ctrl+M to access the Gateway of Tally.
Ctrl+N: Press Ctrl+N to access the Calculator/ODBC Server frame
Country Specific Configuration
The options available are Country Details, Style of Names, Style of Dates, Configuration of Numbers and Other Options. Go to Gateway of Tally > F12:Configure > General
The Configuration settings of Country Details, Style of Names, Style of Dates and Configuration of Numbers are self-explanatory. The prime differences are in the use of like VAT in Europe and Sales Tax in Asia and America that have to be configured before creating a company. Refer the section Operations Configuration for details on the other fields.
Creating a Company
C reating a Company involves providing basic information about the company whose books of s are to be maintained in Tally. Go to Gateway of Tally > (Alt+F3) Company Info. > Create Company
Above is displayed an International Company Creation Screen. Note that the State and PIN Code fields are not available. The screen for India/SAARC would be:
A detailed explanation on each field is given: Directory T he data path where you want the company to be created is specified in the Directory field. This field is skipped by default when you create the company in the data path given in the want to change it, use the backspace key and modify it to the path required.
Tally.INI file. If you
This is referred to as the TallyAnywhere concept – which is the ability to create/load companies in separate directories. The Directory field is displayed while selecting Select , Create , Backup , Restore and Rewrite options for a company. By default, the cursor will skip the field, presuming that you wish to use the default data directory for your work. You may press Backspace to give a new path and work from there. For example, the default Tally data directory could be C:\TALLY\DATA . You may now wish to create a new company on C:\TALLY\PERSONAL , and some other companies on C:\TALLY\BRANCHES . The next time, the default directory displays C:\TALLY\DATA , and if you wish to work on the data of your branches, press Backspace and enter C:\TALLY\BRANCHES for the directory name. This displays the companies whose data is stored in that location in the List of Companies . You can even give the path of a network server or any other storage device. Name
Enter the name of the company whose books are being opened. If you are a professional ant and are maintaining the books of your clients, give the Client Company's name. Mailing Name and Address In addition to the Company Name, Tally provides the facility to enter the Mailing Name field. It displays the Company Name by default. You may change it as required, if the mailing name is different from the Company Name. The mailing name and address details are picked up for inclusion in any report that needs the company name and address as heading. For example:Balance Sheets, Statement of s, and so on.
Tally's reports print the mailing name and address as given:
T ally does NOT restrict the number of lines for the address details. Tally accommodates all the entered information and vertically compresses the same. Note: 1. In the space provided for the A d d r e s s details, observe the vertical compression as compared to the Mailing Name field where there is horizontal compression. 2. You can specify any length for the mailing name and you are permitted to give any number of lines for the address. The information is completely visible. 3. Tally handles compressed information correctly while printing. It adjusts the reports accordingly. Statutory compliance for Select the Country from the List of Countries . The Statutory Features and Base Currency Symbol are enabled in accordance with the country selected. For example, if the s belong to a company in India, the base currency would be Indian Rupees. The Base Currency will appear with respect to the Country selected. Selecting India from the List of Countrie s brings up a State , Pin Code and Telephone No . field. State You can select the appropriate state from the predefined list. PIN Code Specify the PIN Code (Postal Index Number) of the specified address. Telephone Enter the Telephon e number. E-mail Address Enter the E-mail address that will be used to e-mail documents, reports and data from Tally.
Currency Currency symbol is the symbol of the base currency, that is, the currency that will be used to maintain the books of . The symbol Rs. appears by default for India/SAARC Companies and the field is left blank for International Companies. Maintain Tally displays a drop down for the Type of Company with two options s only and s with Inventory Select s only if you do not have any inventory transactions (suitable for professionals and corporate offices). However, at a later date (if required) you can choose to alter the information as s-with-Inventory . Select s-with-Inventory , to maintain both financial s and inventory. Financial Year From In most countries, the books of s of a company are maintained for a stipulated period like, 12 months, 15 months, and so on. This stipulated period is referred to as the Financial Year . The stipulated period of the financial year is 12 months in most countries. Tally automatically considers 12 months from the date you give here as the Financial Year. For example, if you enter April 1, 2005 as the date, the Financial Year will be from April to March ending with March 31, 2006. If you enter October 1, 2005 as the Financial Year From then the financial year will be from October 2005 to September 2006 ending with 30th of September every year. Tally allows you to maintain data for multiple years by changing the period ( Alt+F2 ) at the Gateway of Tally . In addition, you can also specify the date of actual establishment of the company (date of incorporation) Books Beginning From Tally presumes that you wish to maintain books from the beginning of the financial year. Hence, Tally displays the date given in Financial Year From field automatically. The date for Books beginning from can be changed, in case of companies, which are incorporated in the middle of the year. If your company is new, you can opt to start the books of s from the date of actual establishment of the company (date of incorporation) but close books according to the Financial Year as specified by you. Tally provides the required flexibility in such a case by allowing you to give the date when the books of s actually began. Tally will open books from this date and close as on the last day of the Financial Year. For example, if your company is established on August 19, 2005, the opening balances for all the s can be given as on August 19, 2005 even though the Financial Year given is April 1, 2005 (April to March financial year). The company's books will begin on August 19, 2005 and close on March 31, 2006, which ensures smooth transition to the next year. This concept can be applied even when you are migrating to Tally from any other system or from a manual ing system on any day during the Financial Year. Close books in that other system on the previous day and start books on Tally from this day. You are allowed to give opening balances of all Ledger s including Revenue s. TallyVault TallyVault is an enhanced security system, which allows for encryption of the company data. Encryption involves converting normally accessible Tally information into unrecognisable information, which can only be reconverted by authorised persons. Give a here and repeat the same in the Repeat field. This basically results in the creation of an encrypted company whose information is not accessible to s other than the holder.
Use Security Control? Set this to Yes , if you want to initiate a -protected system to control access to Tally data. Else, set this to No . If you opt for security control, Tally offers a comprehensive based access control to different features of Tally based on authority lists created by the . (The section on Security Control under ister Tally contains details on authority lists)
Name of , , Repeat Assuming the Tally Vault and Use Security Control is set to Yes enter the Name of , and Repeat in the respective fields. Use TallyAudit Features Tally Audit allows the or an auditor profile to track changes in ing information. If you wish to use this facility, select Yes . Tally Audit will be available only to the /auditor, through Display of Statements of s . It will be discussed in greater detail under the Security Control section in ister Tally. On accepting the company creation screen, if you have specified Tally Vault , Tally prompts you to enter the TallyVault as appears:
Then Tally prompts you to enter the Name of and (if any) .
After verification Tally imports the latest statutory masters. Wait till the screen shows that 100% of import is complete.
This completes the Company Creation process in Tally. An explanation on the fields on the bottom of the Company creation screen follows: Base Currency Information The Base Currency Information is found in the bottom frame of the Company creation Screen. Base Currency is the currency in which your s would be maintained. Financial statements are prepared in the base currency by default and these are normally required to be submitted to local statutory authorities. The Base Currency information in Tally varies with the country selected for Statutory Compliance. You can record transactions and raise invoices in foreign currency; and also maintain bank s or ledgers in foreign exchange, when required.
Base Currency Symbol The currency symbol given earlier in the Company Creation screen is displayed here automatically. Tally uses this currency symbol in reports, wherever necessary.
Formal Name Formal Name is the full name of the currency specified. The Formal Name for the base currency is set to Indian Rupees for Indian Companies .
Number of decimal places The number of decimal places for the base currency is set to 2 by default. However, you have the option of specifying up to 4 decimal places. Indian currency has 2 decimal places whereas certain other countries require 3 decimal places and so on.
Show Amounts in Millions This is useful for companies, which require reporting the financial statements in millions. This is possible only if Allow Multi-Currency is enabled in F11: Features .
Is Symbol Suffixed to Amounts For countries, which specify the symbol after the amount (value) – this facility is provided. For example, Yen is specified after the amount (5000 Yen) unlike in India where the symbol is specified before the amount (Rs.5000)
Put a space between Amounts and Symbol This facility is provided to s who require a space between the amount and the symbol. However, putting a space between the amount and symbol could give an opportunity for misuse incase of cheque printing. Hence, the flexibility to turn this option on and off as required is provided.
Symbol for Decimal Portion Enter the symbol for decimal portion.
Decimal Places for Printing Amounts in Words You can specify the number of decimal places for printing the amount in words. This number should be equal to or lesser than the number specified in Number of Decimal places field in company creation or currency master screen which will appear in Invoice and Cheque printing screen. For example, if the currency is expressed upto 3 decimal places, the numeric to be printed in words can be restricted to 2 decimal places N o t e : The Name
of
the
Company
,
cannot
be
translated
or
transliterated
but
will
appear
in
the
Language
created.
Loading a company
A newly created company loads automatically. However, for subsequent working, you must load or select the company you want to work with from the List of Companies. (Select and Load are synonymous). A company can be loaded in two ways: 1.
Automatically by Tally.
2.
Using the Select Company option
Tally Loading the Company Automatically
When creating a company, Tally creates a sub-directory under its \DATA directory for the company. The directory is allotted a number in serial order starting with 0001 (example – 10001, 10002…10009...10020, etc these are system generated codes for the company). In order to automatically load a company, Tally has to be configured appropriately by setting the Tally.ini file (available in the Tally directory). Ensure that Default Companies is set to Yes and specify the company number which has to be loaded automatically, for example, Load = 10000 N o t e : You can specify any number ( 1 0 0 0 0 or 1 0 0 0 2 or 1 0 0 0 3, e t c )
here
as
per
the
information
Example of sub-directories created by Tally for different companies:
available
in
the
data
directory
Loading a Company using the Select Company option
In order to load a company using the Select Company option, disable the default loading of a company in Tally.ini file. Set Default Companies to No OR place a semi-colon before Load = 0001 (company number placing a semicolon means that the words following it in that line would not be executed. Each line is a separate command). On double-clicking the Tally icon, the screen appears as:
You can use the Select Company option in two ways, from the Company Info. Menu OR by using the button F1: Select Cmp (available on the Gateway of Tally screen).
Select Company
Press Enter on Select Company or use the button F1: Select Cmp. Tally displays this screen
Tally displays 1.
Company Name (All the companies created are displayed)
2.
System-generated code for each company displayed
3.
The Financial Year information relating to the number of years data present in the company
N o t e : The system-generated code for each company is displayed to identifying which company you wish to work on in case you have the same name (as displayed in the above screen). Select the required company to go to the Gateway of Tally for that company.
assist you in multiple companies
with
Gateway of Tally
Gateway of Tally is the screen that appears on selecting a company. The Gateway of Tally menu differs based on the type of company selected. An s Only Company has a different Gateway of Tally menu from that of an s-with-Inventory Company.
Gateway of Tally of an s Only Company
The Gateway of Tally menu of an s Only company appears as shown below:
The Gateway of Tally screen is separated into four sections – Title Area , Main Area (Ctrl+M) , Calculator Area (Ctrl+N) and the Button Bar .
Main Area The left side of the Main Area gives information on: 1.
Current Period – which is the currently loaded company's ing period.
2.
Current Date – This is the date of the last Voucher Entry for the selected company.
3.
1. 2. 3.
List of Selected Companies – This displays the name of the loaded company.
The Main Area gives information on: 1.
Creation of ing Masters and Importing Master information
2.
Creation of ing Vouchers and Importing transaction information
3.
Viewing and printing financial reports using the information given in Masters and Transactions.
Button Bar The Button Bar displays the following buttons (keys): 1.
Help (Alt + H) – To access Tally's online context-sensitive help
2.
F1: Select Cmp – To select a company
3.
F1 : Shut Cmp – To shut or close the company
4.
F2: Date – To change the current date
5.
F2 : Period – To change the period
6.
F3: Company – To select a different company.
7.
F3 : Cmp Info – To access the Company Info. Menu
8.
F11: Features – To access the Company features for a company
9.
F12: Configure – To access the configuration settings
Note: You cannot load companies with the same name at the selected company will have to be shut first in order to load
same time. The loaded the other company.
or
Gateway of Tally of an s-with-Inventory Company
The Gateway of Tally menu of an s-with-Inventory company appears as shown below:
The Gateway of Tally screen is separated into four sections - Title Area , Main Area (Ctrl+M) , Calculator Area (Ctrl+N) and the Button Bar .
Main Area The left-hand side of the Main Area gives information of 1.
Current Period – The currently loaded or selected company's ing period.
2.
Current Date – The date of the last Voucher Entry of the selected company (this is NOT the calendar date).
3.
1. 2. 3.
List of Selected Companies – This displays the name of the loaded or selected company.
4.
Masters – This is for creation of ing Masters and Inventory Masters and Importing Master information.
5.
Transactions/Vouchers - This is for creation of ing Vouchers and Inventory Vouchers and Importing transaction information.
6.
Reports – This is for viewing and printing financial and inventory reports using the information given in Masters and Transactions.
Button Bar The Buttons on this screen and their function: 1.
Help (Alt + H) – To access Tally's online context-sensitive help
2.
F1: Select Cmp – To select a company
3.
F1 : Shut Cmp – To shut or close the company
4.
F2: Date – To change the current date
5.
F2 : Period – To change the period
6.
F3: Company – To select a different company
7.
F3 : Cmp Info – To access the Company Information Menu
8.
F11: Features – To access the Company features for a company
9.
F12: Configure – To access the configuration settings to manage the information in Tally.
N o t e : You cannot load more than one company at one company will be shut first and then the other company
time. The is loaded.
loaded
or
selected
Company Info. Menu
The Company Info.(Information) menu appears as shown below::
The menu options in the Company Info. are as follows
Select Company Allows you to Select or load a company.
Shut Company Allows you to shut a company.
Create Company Allows you to create a Company.
Alter Allows you to alter a company.
Change TallyVault Allows you to secure the data by providing a TallyVault .
Backup Allows you to take a backup of the company data.
Restore Allows you to restore a data backup.
Shut a Company
Shut a Company is to unload it. It does not mean that you have deleted it. Simply select it again to load and work on it again. You can shut a company in two ways – either using the button Shut Company menu option on the Company Info. Menu.
F1 : Shut Cmp (Alt + F1) or pressing Enter on
The screen appears as shown below:
Select the company to be shut from the List of Primary Companies .
Alter a Company
You can modify any information at any time that is set while creating a company. 1.
Go to Gateway of Tally
2.
Select F3 : Cmp Info. (ALT+F3) from the button bar
3.
Select Alter and press Enter and the screen appears as shown below:
Make the necessary changes in the required fields. To change the if Use Security Control is set to Yes : 4.
Enter the Name of .
5.
Enter the new .
6.
Re-enter the in the Repeat field to confirm.
7.
Enter the Old and Accept the screen to alter the company.
Delete a Company
To delete a company, you have to load the company first. 1.
Select F3: Cmp Info. (ALT+F3) from the Gateway of Tally to proceed to the Company Information menu.
2.
Select Alter and press Enter.
3.
Select the company to be deleted. The Company Alteration screen is displayed.
4.
Use Alt + D to delete. Tally will prompt for a confirmation on deleting the company.
5.
Press enter to delete the company.
N o t e : Deletion the system.
of
a
company
is
irreversible.
The
company
is
permanently
deleted
from
Group Company
The books of of different companies belonging to the same management or owners are required to be consolidated to present the financial position of the group of companies as a whole. This is mandatory in many developed countries and currently shareholders would rather know the performance of the group as a whole and not the performance of individual constituent companies. Tally makes consolidation of s a simple task. You can consolidate the s of any number of companies as well as keep them separate. You also have the option of bringing the companies into the group and separating them at will. The first step is to create a Group Company, which is simply a name and identity given to the merged s of constituent (member) companies of the group. A group company may also include other group companies. N o t e : Do not confuse the contains the consolidated
word Group to refer to s of member
a member companies.
of
the
group!
It
simply
Assume that yours is a global, trans-national organisation (or a 'group') headquartered in the UK having subsidiary companies in countries around the world. The group has different lines of business. Let's say the businesses are Thread, Fashion Retail, Home Fabrics and Accessories. You would prefer to present your group s in groups according to their line of businesses, which in turn are grouped s of the individual companies around the world. The s structure would look something like this:
Creating a Group Company
A group company can be created only for companies that have already been loaded. The first step is to load the companies whose s are to be grouped. The companies can be loaded automatically if specified in the Tally.ini file. Alternatively, select the companies using F1: Select Cmp button, as shown:
Press
The Group company Thread will be created and loaded. It also becomes the active company. Notice that the constituent companies are given below the group company and are slightly indented to distinguish the Group company.
You can now display and print Group s through the Thread Company.
Altering a Group Company
Use Alter to change/modify the details of a Group Company.
A Group Company is marked with an asterisk. You can select or reject using the Alter Mode. Any change will come in to effect only on shutting the group company and then reloading it.
The Group Company must contain at least two .
It is possible to combine s of different companies.
Create as many Group companies as you need.
A constituent company can be a member of more than one group.
A group company can also be a constituent of another group company.
Note: * It is advisable * If the member Company cannot
not to delete the member company, which belongs to Group company has a then without entering the be opened.
Company the Group
For example, by selecting the two group companies Thread and Fashion Retail, the new group company The World-wide Textiles Inc. becomes the overall holding company, as shown.
Security Control
In an ideal company scenario, there will be more than one person working on Tally. In such a case, not every person needs to be given the full access. The head of the department/ should be able to create different s and assign their rights to them. Tally has a very customisable security system. You can set up Security Levels and s who are placed at these levels. The authority levels or Types of Security decides the rights of the s while using Tally.
To create Security Levels 1.
Go to Gateway of Tally, select F3: Cmp Info. > Create/Alter Company
2.
In the Company Creation screen set Use Security Control to Yes.
3.
Enter the Name of the .
4.
Enter your and reenter the for verification. The is not displayed for security reasons.
5.
Accept Yes to save the changes made.
More: Types of Security (security or authority levels)
Types of Security (security or authority levels)
Tally has two default Security Levels. One is Owner and the other Data Entry. Owner has full access and rights to all features of Tally, except Tally Audit & Company Alteration screen, which are reserved for the alone. Data Entry has restricted rights. You are allowed to create other security levels based on these pre-defined types and allow or restrict rights as required.
Create a New Security Level
You can create New Security Levels and define task wise access rights. To create New Security Level: Go to Gateway of Tally, select F3: Cmp Info. > Security Control> Types of Security The Security Levels screen is displayed as shown below:
1.
Type the New Security Level, e.g. Manager
2.
Press [Enter] to display the Level Definition screen
More: The level definition screen
The Level Definition Screen
A brief description on all the fields in the Level Definition screen follows:
Name of security level This defaults to the name you have created.
Use Basic Facilities of The default is Owner . You can select the other option Data Entry from the Security List . If the company has other defined Security Levels, these are also displayed in the Security List . The new level created will be available in the Security List the next time you create a Security Level.
Days allowed for Backdated vouchers This is the number of days the s of this Level are allowed to create backdated vouchers. Specifying 0 will indicate that back-dated vouchers are not allowed, and 7 will allow the at this level to insert vouchers going back 7 days.
Cut-off date for Backdated vouchers. Specify the date before which s of this Security Level may not create or alter vouchers. This is additional control over and above the previous Days allowed for Backdated vouchers . This is useful in cases where you have completed your Tax Assessment for a period and no changes are desired in the data for that period.
Disallow the following facilities/Allow the following facilities The screen is now divided into two broad columns each having two sub-columns. The left side of the screen is to disallow access to the various options of Tally. The right side allows the Security Level access for the different options. When the cursor is on an access rights filed, the Type of Access list is displayed. Select an option from the list. The options sought to be controlled like s Masters, Balance Sheet etc. are on the right (the second column from the left)
To disallow access to different options, first select the type of access from the Type of Access list. Then select the reports for which the access rights are restricted from the List of Reports . Repeat the procedure till you have set access rights for different reports. When you select a type of access, this type of access would be restricted for the corresponding report selected. For E.g if you select Full Access for Balance Sheet , the will not have any access to Balance Sheet by this security level. Conversely, under Allow the following facilities , if you select Full Access for Balance Sheet , the will have full access. Select [End of List] at the Type of Access field to complete the process. You are taken back to the screen Security Levels for Company at a blank field following the one you just created. To create the next level, type the name and follow the same procedure. Otherwise press Enter key at the blank field and Accept , Yes to save.
s and s
To create different s who belong to one or more different Security Levels or Types of Security Go to Gateway of Tally, select F3: Cmp Info > Security Control > s and s The List of s for Company screen is displayed.
A brief description of all the fields in the List of s for Company screen follows: Name: The selected company name is displayed here automatically. Name of : Enter the name of the . (if any): Enter the if required. Security Level: Select the security level from the Security List. N o t e : You need to create Security Levels before levels available viz. Owner and Data Entry.
creating
s
or
the
default
security
Altering/Displaying s and s and Types of Security There is no separate menu option to alter or display s and s and Types of Security options. Use the same menu to display or alter or security level set-up. To delete a , delete the Name of and and Accept, Yes to save. Do the same for deleting a security level. If you have defined a under a security level, then the security level cannot be deleted before deleting the s under it.
Tally Audit
Tally Audit provides the capability to the /auditor to track changes in the s following his previous review. Changes of two areas are very important – changes in Transactions or Vouchers and changes in Ledger Masters. Only changes that affect the integrity of a transaction are considered. For e.g. a change in the narration does not affect the integrity of a transaction and will not be considered as a change. Any material change in a voucher is logged. The name of a ledger if changed is material and hence it would be tracked. Tally Audit feature should be enabled while creating the Company and creating Security levels. Only a designated as an auditor or the can view the audit list and act upon it.
To enable Tally Audit: 1.
Go to Gateway of Tally
2.
Select F3: Cmp Info. from the button bar
3.
In the Company Creation/Alteration screen set Use Tally Audit Features to Yes.
You are not required to make any additional input of data. The authorised needs to just display Tally Audit lists and may print out the lists. If he is satisfied with the authenticity of the changes, he accepts the changes either selectively or all of them (by clicking on the relevant button). Once the changes are accepted, they are removed from the audit list and will not be displayed again. More: Viewing TallyAudit Lists
Viewing Tally Audit Lists
Go to Gateway of Tally > Display > Statements of s >Tally Audit
You can view changes made to Vouchers and Ledgers. More: Displaying Audit List for Vouchers Displaying Audit List for Ledgers
Displaying Audit List for Vouchers
T his option tracks changes in vouchers, which are more than 30 days old. Go to Gateway of Tally > Display > Statements of s > TallyAudit > Vouchers The Tally Audit Listing screen is displayed as shown below
The three buttons relevant to the audit list. 1.
F7: Accept one
2.
F7 : Accept All
3.
F12: Configure
F 12: Configure Select F12: Configure or press [F12] from the Tally Audit Listing screen
Set Show Entered/Altered By to Yes . The listing now incorporates the 's name.
Print the list if necessary. Assess each of the entries for authenticity and accept. To accept the entries one by one, place the cursor bar on the relevant voucher and press F7: Accept One button. This accepts the voucher as valid and removes from Tally Audit List. To accept all the vouchers at a time, press F7 : Accept All . N o t e : Do a disciplined verification of the list so that it is periodically cleared and vouchers that are of concern remains. Once you accept an entry it is not available listing. Hence it is recommended that you take a print before acceptance.
only for
Displaying Audit List for Ledgers
To display the changes made to Ledger Masters : Go to Gateway of Tally> display> Statements of s> Tally Audit> Ledgers The Audit Ledgers screen is displayed. The listing here differs from the vouchers by two ways: 1.
It allows you to display all Ledger s and toggle between the ones that have been changed – (by pressing the toggle button F6:All Accts/Audit List )
2.
The F12: Configure button is not available; but the list displays names if available. (If you activate Tally Audit sometime after you are well through the s, the names will not be displayed. In such cases, accept the list after verification. Any changes henceforth, would give the names).
The modification could be in the Name or in the Opening Balance of the Ledger. The name is considered important as a creditor's name could be changed to some other name with malafide intentions. Please note that you need to identify a change even in cases where two names are interchanged. This would enable identification of fraudulent transfer of balances. You can identify the Ledger by the ID assigned to each of them. You must first take a print of all the Ledger s with their original ID with which you can match subsequent audit lists.
Introduction
The security of data, financial or otherwise, has always been a matter of concern. Most business depend on the confidentiality of information. Tally Vault is an enhanced security system, which allows for encryption of the company data with the most secure method of encryption being used. Tally Vault ensures that under no circumstances, the original information is available in any form to anyone other than the . The technique could be likened to "encryption-decryption-on-the-fly", and the decrypted form of data is never stored in the system. Apart from this, it uses the "non-stored " mechanism and highly advanced mechanisms to validate a new without any prior knowledge of the original . The combination of these facilities ensures that Tally Vault becomes one of the most secure means of information storage.
Enabling Tally Vault for Existing Companies
Tally Vault can be given in the Company Creation screen at the time of creating a company. For existing companies, which do not have a Tally Vault , the procedure is: 1.
Load the desired company
2.
From Gateway of Tally , select F3 : Cmp Info > Change Tally Vault .
3.
The Change TallyVault screen is displayed prompting you to select the company from the List of Simple Companies in the Name field. Select the company from the list.
4.
Enter the new Tally Vault in the New field.
5.
Re-enter the in the Repeat New field.
6.
Once you encrypt the data, the company name no longer becomes visible to anyone and appears as shown below:
7.
7.
Now if you select the company, Tally will prompt you for the Tally Vault .
8.
By following the above procedure, one can ensure that data is kept confidential and is available only to (initiator of the Tally Vault! ).
Changing Tally Vault To change the Tally Vault of a company: Go to Gateway of Tally , select F3 : Cmp Info > Change Tally Vault The procedure is the same as described in Enabling Tally Vault for Existing Companies . An additional field Current is displayed. Enter the existing in this field. Enter the new in the Repeat and Repeat New fields and save the changes.
Backup
Tally has a flexible backup mechanism where in you can take a backup of the data from virtually any storage medium into any other medium. The more commonly used media are floppy drive, hard disk drive, zip drive, tape drive, etc - installed either locally or on a network. In the backup screen, the source of the backup and the destination of where it has to be stored have to be given and Tally will do as required. More: Taking a Backup Backup Precautions
Taking a Backup
T he procedure for taking a backup is as follows 1.
Go to Gateway of Tally , select F3 : Cmp Info > Backup
2.
The Backup Companies on Disk screen is displayed.
3.
To change either the Source or the Destination paths, use the [Backspace ] key and change the path as required. Specify the paths of the Source and Destination drives. Incase we want to take a backup onto another system on the network the Destination path will be \\machinename\drivename\directoryname. The process of backing up data begins when at least one company is selected for the same from the List of Companies . To stop selecting companies, select the option End of List , which appears at the top of the selection list.
4.
The backup file is stored as TBK900.001 . If the backup is taken in a medium likely to extend more than one – for example, floppy, then the extension digits (10001, 10002 and so on) will be stored accordingly.
The Backup screen appears as:
N o t e : If TallyVault only one company at a time
is enabled for a company, from the list for a backup.
Tally
will
allow
you
to
select
Backup Precautions
Data on a computer is vulnerable to all types of difficulties. Considering the same, it is important that we do not overlook the importance of regular backing-up of data regardless of the stability of the database. With a little planning and forethought, we can ensure that maintenance of the important data is continuous and hassle-free. Depending on the volume of data entry, an appropriate backup mechanism will have to be devised. One method of achieving it will be by maintaining a backup directory in the local hard disk or the server (external storage media such as the floppy disk, zip diskette can also be used). We can have sub-directories for every day of the week under the main backup directory and regularly take data backups in the following manner depending on the day of the week. Monday – C:\TallyBackup\Monday Tuesday - C:\TallyBackup\Tuesday and so on till Saturday. N o t e : Tally backup facility is not limited data onto other storage devices also
to
the
Hard
Disk
drive
alone.
You
can
backup
The above procedure ensures that there exists a reliable data backup at any given time. In order to use that reliable data backup or bring back the data from that existing data backup you have to use the Restore option. Important: It is preferable NOT to restore a backup onto the original data directory primarily to ensure that No data is overwritten unintentionally.
Restore
Restore literally means to bring back. Similar to backing up of data, Tally allows restoring of data from any medium into any other storage medium. The Restore Companies on Disk screen is displayed as shown below:
More: Restoring Data: Restore Precautions
Restoring Data
The procedure for restoring data is as follows 1.
Go to Gateway of Tally, select F3: Cmp Info > Restore
2.
The Restore Companies on Disk screen appears.
3.
The Source and Destination paths displayed in the screen are those that were used last.
4.
The Source field has to have the appropriate path. It is the path from which you intend to bring back the previous data. Accepting the path will read the contents of the particular file and will then display the list of companies available.
5.
Select as required and restore the data accordingly.
Restore Precautions
It is preferable NOT to restore a backup onto the original data directory primarily to ensure that No data is overwritten unintentionally.
Split Financial Years
Tally's flexible period less ing permits entry of data for any number of years. This in itself has tremendous benefits. However, presence of old data in cases where they are voluminous causes greater overhead on the system. Splitting financial years enables you to retain most benefits while overcoming this overhead. When you split the data, two things happen: 1.
New companies are created for the respective split periods.
2.
Full data is retained in the original company.
Important pre-split activity Note:
Not
carrying
out
these
will
result
in
mismatched
information.
Before you split data, ensure that: 1.
All unadjusted Forex gains/losses have been fully adjusted by journal entries. that the item does not appear in the Balance Sheet.
2.
There are no Purchase Bills/Sales Bills due. Check the Profit & Loss and Inventory Statements – Purchase/Sales Bills Pending. You may them to the respective party s or to respective 'Bills Pending' .
3.
Ensure that a backup of the data exists.
N o t e : For s of Sales/Purchase Order not carried forward, you should not split data the outstanding orders afresh More: Splitting Financial Years
Processing if you do,
features: Since be aware that
open orders are you have to enter
Splitting Financial Years
The procedure for splitting financial years is as follows: 1.
Go to Gateway of Tally, select F3: Cmp Info
2.
Select Split Company Data.
3.
Select the Company whose data is to be split from the List of Simple companies .
4.
Tally recommends the split-off date based on the data existing. It is recommended that the Split from date is set as the beginning of the latest financial year though Tally permits any date.
5.
Splits occur in sets of two periods. Hence, start with the latest. For example to split three year’s data of a company from 1-1-2003 to 31-12-2005 into three separate 'companies' each with a financial year select the beginning of the latest financial year (this is what Tally prompts you to do).
6.
On confirming the activity, two new companies will be created – one with data from 1-1-2003 to 31-122004, i.e., two years, and the other for 1-1-2005 to 31-12-2005.
Typically, this is all you need to do. Your historical data, whether of 1 or more financial years, will be preserved as one company, and your current financial year, as the other. There is normally no reason or benefit to split the prior years again into separate years. However, should you wish to do so, repeat the above steps for the prior period. All the companies are full companies in their own right. Data can be entered, displayed and altered. Please display or print the key financial reports (Trial Balance, Balance Sheet, Profit & Loss, Stock Summary etc.) from each of the companies for the relevant periods and compare them for accuracy. Once you are satisfied that you have a successful split, it is advisable to backup the original company onto diskettes and permanently delete its data from your hard-disk. This will ensure that you do not accidentally use it to enter fresh data. To delete a company, press Alt+F3 at the Gateway of Tally, select to Alter it, and at the point where you can modify the Company Information, press Alt+D. You will also need to alter the names of the two freshly created companies to suit you.
Activate Company Features (F11: Features)
The different features of a company can be selected or modified by F11: Features button. This button is available in almost all screens of Tally as you might wish to modify it as your requirements change. Unlike F12: Configure , F11: Company Features is specific to the current company only. Therefore, each company may have different features active. For example, a company in your group may need multi-currency whereas another company may not. Configuration options, on the other hand, affect all companies maintained in the same Tally directory and setting configuration for one company will affect other companies in that data directory. Note: Certain features like multi-currency and multi-locations, once set to Y e s , cannot be modified if the feature has been used. However, other features like Cost Centres and Bill-wise details can be modified even if they are used. If you reset the option after having used the feature in transactions, it is advisable to rewrite the company by using CTRL + ALT + R . Go to Gateway of Tally > F11: Features The F11: Features menu displays as shown
The menu consists of the following options. ing Features Inventory Features Statutory & Taxation
There are various settings available under ing Features , Inventory Features and Statutory & Taxation Features in Company Operations Alteration screen, which determine the information to be keyed in during transaction entries. A discussion on each of the options follows.
ing Features
This feature enables you to set the various ing Features required for the transaction entries. Go to Gateway of Tally > F11: Features > F1: s
General Integrate s and Inventory This option has a significant effect on the Balance Sheet and Profit & Loss . If set to Yes , it brings the stock/inventory balance figures from the inventory records and provides a drill down to the Stock s from the Balance Sheet. If set to No , it ignores the inventory books figures and picks up manually entered closing stock balances from the ledger created. This provides the facility to maintain s separately and inventory separately. Stock records often contain compensating errors caused by wrong allocation to items and the like. This feature enables finalisation of financial books without waiting for reconciliation of stocks that may take time.
Income/Expense Stmt Instead of P & L Enable this option if you need an Income & Expenditure Statement for Non-Trading s. Profit & Loss statements are generally used for trading s.
Allow Multi-Currency Set this option to Yes , if you want to create multiple currencies. The option Currencies is displayed in Gateway of Tally > s Info. menu only if you set this option to Yes .
Outstandings Management Maintain Bill wise Details The Bill-wise facility is turned on by setting this option to Yes . By activating the Billwise feature in F11: Features , the ledger masters under Sundry Debtors and Sundry Creditors automatically displays an additional option called Maintain balances bill-by-bil l. On setting this option to Yes , you get an additional option Default Credit Period . When you enter details of sales and purchases with Bill-wise turned on, Tally prompts you to identify the invoice with an appropriate reference number. The reference can then be used to allocate payments to the correct invoice to maintain an accurate of outstanding.
(For Non-Trading A/cs also)
If you want to maintain bill wise details for Non-Trading s also, set this option to Yes . Bill wise Details for Non-Trading s is useful in those cases where one needs to track either an installment to be paid or a loan amount to be received over a certain period of time.
Activate Interest calculation Set this option to Yes to enable Tally to calculate interest automatically based on the interest rate and style of calculation specified. Enabling this option allows interest calculation on outstanding balances for any ledger or on each invoice for the period it is outstanding completely or partly.
Use advanced parameters
The advanced parameters are particularly useful where interest rates change from time to time. Set this option to Yes to enable this.
Cost/Profit Centres Management Maintain Cost Centres A Cost Center can be defined as a unit of an organization to which transactions can be allocated. When only costs or expenses are allocated to these units, they are referred to as Cost Centres . The Cost Centre feature is activated by setting this option to Yes .
Use Cost Center for Job Costing
To track all income and expenses for a project, set this option to Yes.
More than ONE Cost category
To create more than one Payroll or Cost Category, set this option to Yes.
Use Pre-defined Cost Centre Allocations during Entry
Set this option to Yes to define Cost Centre Allocations. Refer Set up Cost Centre Classes for more details
Invoicing Allow Invoicing Set this option to Yes , to create Sales and Purchase vouchers in invoice format. The advantage of using the invoice format for sales invoice entry is that it enables automatic calculations of Duties and Taxes s.
Enter Purchases in Invoice Format
Set this option to Yes , to make the invoice mode as the default voucher mode for purchase vouchers.
Use Debit/Credit Notes The Debit Note and Credit Note voucher types are made available only if this feature is set to Yes.
Use Invoice Mode for Credit Notes
Set this option to Yes to create Credit Notes in Invoice Mode.
Use Invoice Mode for Debit Notes
Set this option to Yes to create Debit Notes in Invoice Mode.
Budgets & Scenario Management Maintain Budgets and Controls Set this option to Yes, to create multiple budgets. The Budgets menu option is displayed in Gateway of Tally > Masters Info. > s Info. menu only if this option is set to Yes .
Use Reversing Journals & Optional Vouchers Setting this option to Yes displays the Scenario option in s Info menu. You will now be able to create and alter Scenarios. You can enter the Reversing Journal and make it to Optional for entries not to affect the books.
Other Features Enable Cheque Printing Set this option to Yes , to enable Cheque Printing. Refer Cheque Printing for details.
Set/Alter Cheque Printing Configuration
Setting this option to Yes , Tally will allow you to Alter the Cheque Printing Configuration
Allow Zero Valued Entries in Vouchers Set this option to Yes , to allow Zero valued entries in vouchers. N o t e : You using F1, F2
can toggle between the s, and F3 keys or using the options
Inventory on the
and the Statutory features Button Bar respectively.
Inventory Features This feature enables you to set the Inventory Features required for the transactions. Go to Gateway of Tally > F11: Features > F2: Inventory
screen
General I ntegrate s and Inventory This field performs the same function as explained in ing Features .
Allow Zero Valued Entries in Vouchers Set this option to Yes , to allow zero valued entries in vouchers.
Storage & Classification Maintain Multiple Godowns Set this option to Yes , if you have more than one stock point/storage Locations/ Godowns, and you want to track stock movement in these Locations. You can create any number of Stock Locations/Godowns. The Godowns/Locations option is displayed in Gateway of Tally > Inventory Info. menu only if you set this option to Yes. You will be able to know your stocks at each location as well as assign stock movement to one or more
locations during voucher entry.
Maintain Stock Categories Set this option to Yes , if you wish to create and maintain Stock Categories. This creates a new field Category in the Stock Item Creation screen.
Maintain Batch-Wise Details Set this option to Yes , to maintain batch information pertaining to Stock Items. A new field Maintain in Batches is displayed in the Stock Item Creation screen. N o t e : Batches should be used where they are small in number and remain constant. Do not use the batch option for tracking of lots through manufacturing processes. If that is done, you will soon have a large number of batches that are not deleted. You will not be able to assign costs to particular lots, as may be the intention.
Set Expiry Dates for Batches
Set this option to Yes , if you want to set expiry dates for the batches. This displays an additional field Use Expiry Dates in the Stock Item Creation screen. This is useful for businesses that deal in goods that have expiry dates like medicines, food and other perishables. During voucher entry, date of manufacture of the product by default takes the date of the voucher. This date can be changed, but not to a date later than the voucher date. Expiry date cannot be a date prior to the voucher date.
Use different Actual & Billed Quantity Set this option to Yes , if you want to specify quantities, that are different from that delivered/ received, when invoicing. For example, you have delivered goods but some of them are in disagreement. So, your customer wants to be invoiced only for the undisputed quantity. He/She might consider the rest later and would then like to be invoiced. On the other hand, the rest might be so bad that it is useless even for you to take it back. Hence, you can record the fact while raising the invoice without altering the delivery note or ing a rejection entry.
Order Processing Allow Purchase Order Processing Set this option to Yes , to create Purchase Orders.
Allow Sales Order Processing Set this option to Yes , to create Sales Orders.
Invoicing Allow Invoicing This field performs the same function as explained in
ing Features .
Enter Purchases in Invoice Format
This field performs the same function as explained in
ing Features .
Use Debit/Credit Notes This field performs the same function as explained in
ing Features .
Use Invoice Mode for Credit Notes
This field performs the same function as explained in ing Features .
Use Invoice Mode for Debit Notes
This field performs the same function as explained in ing Features .
Separate Discount Column on Invoices This option is active only if Allow invoicing is set to Yes . Set this option to Yes , if you want a separate column for discount in invoices.
Purchase Management Track Additional Costs of Purchase Set this option to Yes , to obtain a break-up of purchase costs, without the need to separately debit ledger s for expenses. Typically, on purchases, one is interested in total costs and the breakup is of interest while doing analysis (except for expenses like VAT or Modvat, which can be claimed). In such cases, ing of ing entries for expenses will have no consequences other than lengthening your ledgers. Example : Purchases from ABC & Co: 10 Pcs of [email protected] = Rs.200. Expenses incurred= Tax-Rs.20, Packing charges – Rs.15.40, Total purchase cost – Rs.235. If you activate Track additional costs , you can the entry in any of the following methods:
From an ing perspective, both entries are identical. The ledger s Purchase Tax and Packing charges are not debited with the amounts. Hence these figures are reflected only as breakup or analysis figures of Purchases . The Actuals figure reveals the total cost incurred on the Purchase and will also affect the stock value. You may also allocate additional costs on Purchases through subsequent entries or vouchers. The rules for including subsequent vouchers in purchase costs that Tally follows are: Basic Cost + Additional costs allocated (if any) + All costs in subsequent vouchers that have zero quantity, up to the first voucher that has a non-zero quantity.
Sales Management Use Multiple Price Levels Set this option to Yes to create Multiple Price Levels. Refer Enable and Create Price Lists for more details.
Additional Inventory Vouchers Use Tracking Numbers (Delivery/Receipt Notes) Set this option to Yes , if you want to use tracking numbers to maintain the relation between delivery notes and invoices/bills. This is available for both purchases as well as sales. Hence, if your business is affected by this situation either for goods received or goods sold, set this option to Yes . If you set it to No , you will not need the facility of separate delivery notes recording, as your Purchase and Sales Vouchers would double up as delivery notes.
Use Rejection Inward/Outward Notes Set this option to Yes , if you wish to record rejection of goods separately and not through a common Debit Note or Credit Note.
Prepare and Follow British Style VAT Returns If the Country Specific Configuration is set to International in the F12 Configure , then an additional field Prepare and Follow British Style VAT Returns is displayed. Set this option to Yes , to follow British Style VAT Returns. Unlike Excise Duty, this option simply controls the VAT Return preparation. More ledger level set up may be required, which is discussed under UK VAT Analysis .
The Company VAT Returns screen is displayed.
If you deal with EEC countries, select a group for the fields Group Name under which ‘EEC Debtors’ are Classified and Group Name under which ‘EEC Creditors’ are classified from the list. It is advisable to group your EEC Customers separately under a sub-group under Sundry Debtors. Likewise, group EEC Suppliers under a separate sub-group of Sundry Creditors. Take care to group only VAT ed companies in these groups as they would affect Box 8 and 9 as well as the EC Sales List. Uned companies or individuals (Distance Sales) should be grouped separately and treated like UK companies.) If you do not deal with EEC countries, Select Not Applicable .
Statutory & Taxation This feature enables you to set the Statutory Features required for the Company Operations. This option is enabled only if a country is selected from the list of countries under the field Statutory Compliance for in the Company Creation screen .. Go to Gateway of Tally > F11: Features > F3: Statutory & Taxation
Note: The different features are available in the Company Creation screen.
depending
on
the
country
you
have
selected
The following features are available on selecting India in the Company Creation screen.
Enable Dealer – Excise (Set/Alter Dealer – Excise Details) Set these options to Yes , to enable/alter the Excise for Dealers feature. Refer Excise for Dealers for further information.
Follow Excise rules for Invoicing Set this option to Yes , to follow Excise rules for invoicing. The shown:
Company Excise Details screen is displayed as
Provide the above Excise information, for it to be printed on invoices and Accept , Yes to save.
Enable Value Added Tax (VAT) Set/Alter VAT Details Set these option to Yes , to enable the VAT features for the company. Refer Value Added Tax for more details.
Enable Service Tax Set/Alter Service Tax Details Set these option to Yes to enable the Service Tax features for the company. Refer Service Tax for further details.
Enable Tax Deducted at Source (TDS) Set/ Alter TDS Details Set these option to Yes to enable the TDS features for the company. Refer TDS for further details.
Enable Tax Collected at Source (TCS) Set/Alter TCS Details Set these option to Yes to enable the TCS features for the company. Refer TCS for further details.
Enable Fringe Benefit Tax (FBT) Set/Alter FBT Details Set these option to Yes to enable the FBT features for the company. Refer FBT for further details.
Tax Information Set this option to Yes to enter the Tax details of the Company.
Local Sales Tax Number The Local Sales Tax Number entered during the Company Creation is automatically displayed in this field.
Inter-State Sales Tax Number The details given here comprises of a number and date of registration (in India). This information, if given, can be printed on invoices. It is not compulsory to give this information and you may leave it blank.
PAN/ Income – Tax Number The PAN/ Income Tax Number is the number allotted by the Income Tax Authorities. This number comprises of 10 digits and may be alphanumerical. The information entered here will appear in Confirmation Statements. It is NOT compulsory to provide this information – this field can also be left blank.
Introduction
s Info menu lists the masters through which you can provide Tally the details of your company’s s. Go to Gateway of Tally > s Info.
More: Main functions in Masters menu
Configuring F12: Configure and Setting F11: Features
F12: Configure and F11: Features > ing Features help you to organize the information and the level of details as per requirement. You can modify/alter the settings in F12: Configure and F11: Features at any point of time.
F12: Configure To set F12: Configure for s and Inventory Masters Go to Gateway of Tally > F12: Configure > Accts/Inv Info. By default, s/Inventory Masters settings are set to No. You can set the features that you may require to Yes. Typically, they are additional fields that appear during Masters creation which enable you to obtain more information and detailed analysis.
Refer Accts/Inv Info Configuration for more details.
F11: Features
There are various settings available under ing/Inventory/Statutory Features, which determine the information that needs to be entered in transaction entries. Refer Activate Company Features for more details
Main Functions in Masters Menu
s Information contains the masters. Each master has create, alter and display functions. Single Group option is useful when you wish to work on one Group at a time. Multiple Group option is very useful when you are working on many sub-groups at a time and saves a lot of time. Once a sub-group is created, it behaves exactly like a Group.
Create The Create option is used to create new masters. Any modification to the masters can be done only through Alter mode.
Display The Display option is used to view the Master information. Master information cannot be modified in Display mode.
Alter The Alter option allows you to view and make the necessary changes to the master information. This does not allow creation of masters.
Introduction
Tally follows the modern way of managing s called 'Single Ledger' concept of ing. This is in direct contrast to Subsidiary Ledger ing. All financial entries are made using ledgers or heads. Ledger s are created to identify transactions. The single ledger concept avoids the need for sub-ledgers and corresponding control s in General Ledger. Tally allows you to group ledger information to generate meaningful reports that are compliant with laws. Groups in Tally classify and identify heads according to their nature. This helps in presenting summarized information. Gateway of Tally > s Info. > Groups
Classification of Heads Usually, grouping of s is done only when reports are needed. This may result in delay in preparing the reports. Tally allows you set up chart of s. You can group the ledger s while creating them. This will enable your reports and statements to reflect the desired classification at any point. In Tally, you can also re-group the ledgers (with some minimal restrictions) if re-classification is necessary. Re-grouping becomes necessary whenever there is a change in the nature of information. However, re-grouping can be done only by s who have authorised rights. At the highest level of grouping, s are classified into capital or revenue — specifically into assets, liabilities, income and expenditure. Based on mercantile ing principles, Tally provides a set of reserved groups and allows you to modify their names or create sub-groups.
Sub-Groups A Sub-Group behaves exactly like a group and is created under a group.
Concept of Sub-Groups Groups have a hierarchical structure. The main group of s that determine the entire ing and their presentation are the asset, liability, income or the expenditure. These main groups ascertain whether a ledger affects Profit & Loss as a revenue item or if it affects the Balance Sheet. The Reserved Primary Groups and subgroups are: Primary Groups of Capital Nature 1. Capital a) Reserves and Surplus [Retained Earnings] 2. Current Assets a) Bank s b) Cash-in hand c) Deposits (Asset) d) Loans & Advances (Asset) e) Stock-in-hand f) Sundry Debtors 3. Current Liabilities a) Duties and Taxes b) Provisions c) Sundry Creditors d) Fixed Assets 4. Investments 5. Loans (Liability) Bank OD s [Bank OCC s]
a) Secured Loans b) Unsecured Loans 6. Suspense 7. Miscellaneous Expenses (Asset) 8. Branch/Divisions 9. Sales 10. Purchase 11. Direct Income [Income Direct] 12. Indirect Income [Income Indirect]
13. Direct Expenses [Expenses Direct] 14. Indirect Expenses [Expenses Indirect] Note:
Aliases
for
the
groups
are
given
in
square
More: A discussion on each of the reserved groups: Common and possible errors in Grouping and classification
brackets
[
].
Common and Possible Errors in Grouping and Classification
Debtor/Creditor classification Placing individual party s under Sales or Purchase s groups s of parties with whom your company is trading should be opened under any of the following groups (or sub-groups under them): Sundry Debtors Sundry Creditors Branch/Divisions
Sales and Purchase groups are meant for revenue s and are reflected in the Profit & Loss . If you open party s under these groups, it becomes difficult to sales or purchase voucher transactions. For example, in a sales voucher transaction entry, you must debit an , which can be sundry debtor, branch/division or even a sundry creditor. Moreover, other facilities like bill-wise allocation and tracking will not be available unless the s belong to one of these groups.
Opening two s of the same party Tally classifies debtors, creditors and branch/divisions for convenience. This helps in the purpose of keeping the s of a particular group together during displays and analysis. Thus you can both sales and purchase entries for a party placed under Sundry Debtors. Use the classification depending on the most natural group for the party. For example, parties from whom you buy more frequently then you sell them can be placed under Sundry Creditors, as that is the natural place to look for their . Tally does not restrict the s from having obverse balances. Thus, a Sundry Debtor can have a credit balance depending on the state of his . Therefore, you need not open two s for the same party - one under Sundry Debtors and another under Sundry Creditors. Tally restricts opening of two identical ledger s. In such cases, you may decide to circumvent by marking one as "A & Co - S/Dr" and another "A & Co - S/Cr". This will allow you to have two s of the same party under two groups, but you will lose the advantage of analysing net position at one place. It is always better to maintain a single to obtain best benefits. Expenditure items are entered under Liabilities group. For example, the expenditure item Rates & Taxes under the group Duties and Taxes. The group Duties and Taxes is specifically meant to handle taxation liabilities of your company. Rates & Taxes and other statutory expenses should be placed under Indirect Expenses. Simply adhering to the reserved groups may be sufficient for many organisations. For greater diversity, Tally allows you to create your own groups, either as sub-groups or primary groups. Groups can be sub-classified to practically an unlimited level, to give a virtual ing tree. At the lowest level, of course, would be the ledger . An example of sub-groups would help illustrate the power of this facility, the group Indirect Expenses can be subclassified under ledgers (given in italics) as shown below.
During voucher entry, only the ledger s are used and the group structure remains transparent, irrespective of the use of sub-classification. The same principle can be applied to Sundry Debtors, Sales s, Purchase s and so on. You can classify Debtors and Creditors according to geographical areas as shown below. You can classify creditors according to their tax status as shown below. You can create unlimited levels of sub-groups (like branches) or ledgers only if they are two or more in number. You can simply create ledgers directly under Marketing Expenses as shown below.
Note: While it is necessary to assign every ledger to a group/sub-group, it is not essential to have your own sub-classification of s; you may simply use the reserved groups for grouping your ledger s.
A Discussion on Each of the Reserved Groups
1. Capital This records the Capital and Reserves of the company. The ledgers that belong to Capital s are Share Capital, Partners' Capital A/c, Proprietor's Capital and so on. Reserves and Surplus [Retained Earnings] This contains ledgers like Capital Reserve, General Reserve, Reserve for Depreciation and so on.
2. Current Assets Current Assets record the assets that do not belong to either Bank s or Cash-in-Hand sub-groups.
Bank s Current , savings , short term deposit s and so on.
Cash-in hand Tally automatically creates Cash A/c in this group. You can open more than one cash , if necessary. N o t e : An under Cash-in-hand group or printed as separate Cash Book in the traditional part of the Ledger.
Bank Cash
s/Bank Book format
OCC A/c and does
group is not form
Deposits (Asset) Deposits contain Fixed Deposits, Security Deposits or any deposit made by the company (not received by the company, which is a liability).
Loans & Advances (Asset) This records all loans given by the company and advances of a non-trading nature (example: advance against salaries) or even for purchase of Fixed Assets. We do not recommend you to open Advances to Suppliers’ under this Group. For further details, please refer to the section on Common Errors.
Stock-in-hand This group contains s like Raw Materials, Work-in-Progress and Finished Goods. The balance control depends on whether you have selected Integrated -cum-Inventory option while creating the company. (refer to Company creation section for more details) Let's consider the options:
Integrated s-cum-Inventory This option has a significant effect on the Balance Sheet and Profit & Loss . If set to Yes, it brings the stock/inventory balance figures from the inventory records and provides a drill down to the Stock s from the Balance Sheet. You are not allowed to directly change the closing balance of an under this group. You are allowed to
transactions in Inventory records and the balances are automatically reflected in the Balance Sheet as Closing Stock.
Non-integrated s-cum-Inventory If Integrated -cum-Inventory option is set to No, it ignores the inventory books figures and picks up manually entered closing stock balances from the ledger created. This provides the facility to maintain s separately and inventory separately. You are not allowed to transactions if your s that come under this Group. It allows you to hold opening and closing balances only. Since no vouchers can be ed for these s, they are the only s for which the closing balances can be directly altered (by an authorised only).
Sundry Debtors For customer s refer to common and possible errors in grouping of s section.
3. Current Liabilities s like Outstanding Liabilities, Statutory Liabilities and other minor liabilities can be created directly under this group. Sub-groups under Current Liabilities are Duties and Taxes, Provisions and Sundry Creditors
Duties and Taxes Duties and Taxes contain all tax s like VAT, MODVAT, Excise, Sales and other trade taxes and the total liability (or asset in case of advances paid) and the break-up of individual items.
Provisions s like Provision for Taxation, Provision for Depreciation and so on are recorded under Provisions.
Sundry Creditors For trade creditors, refer to common and possible errors in grouping of s section.
4. Investments Group your investment s like Investment in Shares, Bonds, Govt. securities, long term Bank deposit s and so on. This allows you to view the total investments made by the company.
5. Loans (Liability) Loans that a company has borrowed, typically long- loans.
Bank OD s [Bank OCC s] Tally provides you with distinct types of Bank s,
Bank OCC A/c To record the company's overdraft s with banks. For example, Bill Discounted A/cs and Hypothecation A/cs etc. Note:
An
under
Bank
OCC
A/c
group
is
printed
as
separate
Cash
Book
in
the
traditional
Cash
Book
format
and
does
not
form
part
of
the
Ledger.
Secured Loans Term loans or other long/medium term loans, which are obtained against security of some asset. Tally does not the existence of the security. Typical s are Debentures, Term Loans, and so on.
Unsecured Loans Loans obtained without any security. Example: Loans from Directors/partners or outside parties.
6. Suspense In modern ing, many large corporations use Suspense Ledger to track the money paid or recovered, the nature of which is not yet known. The most common example is money paid for Traveling Advance whose details will be known only upon submission of the TA bill. Some companies may prefer to open such s under Suspense .
Loans and Advances (Asset) group. The Suspense is a Balance Sheet item. Any expense even if it has 'suspense' in its name, it should be opened under Revenue group like Indirect Expenses and not under Suspense group.
7. Miscellaneous Expenses (Asset) This group is typically used for legal disclosure requirements such as Schedule VI of the Indian Companies Act. It should hold incorporation and pre-operative expenses. Companies would write off a permissible portion of the every year. A balance remains to an extent that cannot be written off in Profit & Loss . Tally does not show loss, carried forward in the Profit & Loss , under this group. The Profit & Loss balance is displayed separately in the Balance Sheet.
8. Branch/Divisions This maintains ledger s of all your company's branches, divisions, s, sister concerns, subsidiaries and so on. Tally permits Sales and Purchase transactions to take place with s opened here. , these are their s in your books and not their books of s. Just treat them as any other party . If you wish to maintain the books of a branch/division on your computer, you must open a separate company. (Tally allows maintenance of multiple company s).
Revenue — Primary Groups 9. Sales You can classify your sales s based on Tax slabs or type of sales. This also becomes a simple mechanism for preparation of Tax returns. Examples: Domestic Sales Export Sales
Now under Domestic Sales open the following ledgers:
Sales (10%) Sales (5%) Sales (exempt)
You can even open an as Sales Returns under the group Domestic Sales to view your net sales after returns (or the returns may be directly ed through Journal against the specific Sales ). N o t e : Do not open common and possible
customer s under errors in grouping of
this group. For more s section.
details,
refer
to
10. Purchase This is similar to sales s, except for the type of transactions.
11. Direct Income [Income Direct] These are Non-trade income s that affect Gross Profit. All trade income s fall under Sales s. You may also use this group for s like Servicing, Contract Charges that follow sales of equipment. For a professional services company, you may not use Sales group at all. Instead, open s like Professional Fees under this group.
12. Indirect Income [Income Indirect] These are miscellaneous non-sale income s. Example: Rent Received and Interest Received.
13. Direct Expenses [Expenses Direct] These are Manufacturing or direct trading expenses. These s determine the Gross Profit of the company.
14. Indirect Expenses [Expenses Indirect] All istrative, selling or non-direct expenses. Profit & Loss is a reserved primary in Tally. You can use this to adjustment entries through journal vouchers. For example, transfer of profit or loss to Capital or Reserve .
Creating a Group
Go to Gateway of Tally > s Info. > Groups > Create (under Single Group) The Group Creation screen displays
Name of Group Enter the name of the Group to be created. For example, istrative Expenses.
Alias Enter an alias name to allow access to the group using the Alias in addition to its name or leave it blank. For example, for istrative expenses, you can enter Office Expense or even an alphanumeric code, say E001, as an alias
Under Specify under which existing (Parent) group the sub-classification is required. If it is a new primary group, select Primary (requirement of a new primary group is very rare, but the option exists). You can also create a new Parent Group by using Alt+C. N o t e : Creation of new P r i m a r y Group is not M a s t e r s is set to N o in F12: Configure.
allowed
if
Allow
Advanced
entries
in
Additional Information If a group (e.g Printing) is created under Primary, you must select the appropriate option from the list whether it is an asset, liability, income or expenses. If you select an income or expenses you should specify whether it will affect the gross profits or not by suitably setting the option Does it affect Gross Profits? to Yes/No.
You can use this concept when you wish to segregate your profits into Operative Profit and Net Profit. This helps you when you want to consider other revenue s in addition to Direct instead of Gross and Net Profit). Normally, Tally calculates Gross Profit using Opening Stock, Purchase s, Direct Expenses, Sales s, Direct Incomes and Closing Stock only. To make other s contribute to this, without classifying under these reserved heads, set this option to Yes.
Group behaves like sub-ledger? This option is applicable to Sundry Debtors group, you can set this to Yes to display Sundry Debtors without Ledger break-up in statements. Normally, Sundry Debtors will have a large number of ledger s under it and it can be expanded during display to show ledger balances. To disable this detailed display set this option to No.
Nett Debit/Credit Balances for Reporting? Setting this option to Yes will display either the net debit or credit balance in the report (whichever is higher). If this is set to No, both debit and credit balances will displayed in the report.
Used for Calculation (e.g. taxes, discounts)? Set this option to Yes if ledgers under this group would have percentages for discounts/taxes to be used for invoice entry. This gets reflected while ing voucher entry in Invoice mode, it uses the automatic calculation capability.
Method to allocate when used in purchase invoice Select the appropriate allocation method from the list. This is used to allocate the expense of the Item in the ratio of the quantity or value.
Buttons in single group screens F3: Company
This button helps you to open a different company. In the creation mode, you can create groups in the other company. In alter mode, you can copy the information by accepting the screen (enter or Ctrl+A). The old company's information remains. This feature is not available in Display mode.
Groups, Ledgers, Cost Categories, Cost Centres, Voucher Types, Currency, Budgets This button enables you to switch to the appropriate area without quitting from the current screen.
F11: Features This allows you to set or modify the company features.
F12: Configure This enables you to set or modify configuration of the master screen. Note: only
Configuration the current
changes company.
affect
all
companies
and
changes
made
in
Features
affect
Creating Multiple Groups
In multiple group creation, the sub-groups will automatically inherit the characteristics of their parent groups. Go to Gateway of Tally > s Info. > Groups > Create (under Multiple Groups)
Select the parent group under which you want the new groups to be created from the List of Groups . The group selected is displayed in the Under Group field.
Name of Group Enter the name of the Group.
Under If you select any group other than All Items in the Under Group field, then this column is filled in automatically with the selected Group name and the cursor skips this column. This speeds up data entry. If you select All Items in the Under Group field, the cursor does not skip this field and allows you to enter the parent group of each of them. Note: To group/alter'
change individual option.
group
behaviour
created
using
multiple
groups,
use
'single
Buttons in Multiple mode Group creation F3: Company This button helps you to open a different company. In the creation mode, you can create groups in the other company. In alter mode, you can copy the information by accepting the screen (enter or Ctrl+A ). The old company's information remains. This feature is not available in Display mode.
Groups, Ledgers, Cost Categories, Cost Centres, Voucher Types, Currency, Budgets: This button enables you to switch to the appropriate area without quitting from the current screen.
F4: Change Parent To change parent of the selected group, select the group from Names of Groups list. For example, you are currently altering groups classified under Loans Liability and wish them all to be re-classified
under 'Bank OCC A/c'. Instead of altering individual name, you can achieve this using F4:Chg Parent.
F4: Parent This allows you to quit from the current screen and modify a different group (relevant in Alteration/Display mode only). For example, you are currently altering groups classified under Loans Liability and now wish to ABANDON the current activity and alter groups under Bank OCC instead
F6: Skip Names/Edit Names It is used for faster data entry when you need to alter only the Group and the Parent Group, but not the names. When you skip names, you might change the Group or the Parent Group to one, which belongs to another Group. Since this violates categorization rules, Tally displays an error message after you accept the screen.
F7: Skip Parent/Edit Parent This button is used for faster data entry when there is no need to alter the parent of sub-groups.
F10: Edit Sort/Skip Sort You can use this button to toggle for altering the Sort Position
F11: Features This enables you to change any company features.
Creating a Group - Advanced Usage
This section assumes that you have configured all advanced features of the s Master in F12: Configure and enabled advanced F11: Features . It deals with the additional fields that you would require while creating a Group. N o t e : Use F12: Configure and F11: Feature entire setup according to your preferences.
to
add/remove
fields
and
configure
the
Go to Gateway of Tally > s Info. > Group > Alter (under Single Group)
Position index in reports Position index is the primary key for sorting groups and ledgers for reports; the group name being the secondary key. It determines the position of the group in relation to other groups in a report. It is the default sorting method in most reports. At the time of its creation, a group is automatically assigned the position of its parent (or 500 if it is a new primary group) and hence there is no need to give the index field while creating a group. All reports are sorted according to the position index in increasing order. This may not be in alphabetic order. The positions have been ascribed for the Balance Sheet and Profit & Loss , which is based roughly on the liquidity concept and company law. These indices may be changed to effect a shift in the location of an , as illustrated in the following example. IF a same index number can be assigned to more than one group, they will appear one after another in alphabetic order (sorted on the secondary key). Create a Group My Own Group under Primary as an Asset. By default, index will be 500. Using single alteration of the group My Own Group the index can be verified.
Create a ledger My Own Ledger under this group with opening balance of 10,000. The group's position in the Balance Sheet would be thus:
Now, alter the Position Index (sort position) of the group "My Own Group" to 45. (You may do this quickly by positioning the cursor on 'My Own Group' and pressing Ctrl+Enter). The Balance Sheet gets rearranged and you can decide the position of an item in your reports.
Though position indices can be altered, it is not advisable to do this without being absolutely sure of its effect. Please that the change affects all reports. If you do not want the changed index, you may revert to the default settings through group alteration. N o t e : Press F12: change the sorting
Configure and select method while viewing
the appropriate the report.
sorting
method
from
the
list
to
Displaying and Altering Group
You can display and alter the Groups in Single mode or Multiple mode.
Displaying a Single Group Go to Gateway of Tally > s Info. > Group > Display (under Single Group) Select the name of the Group from the List of Items. You cannot make any changes in Display mode.
Altering a Single Group Go to Gateway of Tally > s Info. > Group > Alter (under Single Group) Select the Group that you wish to alter from the List of Groups. Make the necessary changes and click Yes to save the changes.
Displaying Multiple Groups Go to Gateway of Tally > s Info > Group > Display (under Multiple Group) Select the Group from the List of Groups to display all the Groups under the selected Group or select All Items to display all Groups. The Multi Group Display screen lists Groups and the corresponding details of the Groups.
Altering Multiple Group Go to Gateway of Tally > s Info. > Group > Alter (under Multi Group) Select the Group for which you want to alter from the List of Groups. In Multi Group Alteration screen, make the necessary changes and click Yes to save changes.
Deleting a Group Gateway of Tally > s Info > Groups > Single/Alter The Delete function is performed through the single alteration mode. You cannot delete groups from the Multiple Alteration mode. 1.
Select the group to be deleted.
2.
Press Alt+D to delete.
Note: ledgers
You cannot in it.
delete
a
group
if
it
is
Note: A new group created under primary masters/transactions for that group
a
will
reserved
not
group
reflect
or
in
a
group
reports
has
until
sub-groups
you
or
Managing Groups in multiple companies
Copy masters from one company to another Master information is the same for most group companies and it is certainly beneficial to maintain same group structure and ledgers. This becomes necessary if you have a parent company with subsidiaries or branches. This ensures uniformity of reports in all companies and proper consolidation of s. To avoid the tedious task of re-creating masters in other companies, Tally enables you to copy the groups created in one company to another. The companies must be selected to allow switching of companies. Gateway of Tally > Select Company A Gateway of Tally > Select Company B
Copy a single group from one company to another First select the source company F1. Gateway of Tally > Select Company A Gateway of Tally > s Info. > Groups > Single Group > Alter Select a particular group, for example select Southern Debtors created under Sundry Debtors F3: Change to destination company (Company B) > Accept the screen, after making alterations, if any. If the parent of the group does not exist, you will not be able to accept the screen without selecting a parent in the destination company. Once you accept the screen, you are returned to the source company list of groups. The same group now exists in the destination company also.
Copy multiple groups from one company to another 1.
Click on F1: Select Company to select the source company (Company A)
2.
Gateway of Tally > s Info > Groups > Multiple Groups or All Items from the list
3.
Click on F3: Company button or press F3 key to change to the current company i.e switch over to the destination company > Accept the screen, after making additions/alterations, if any.
4.
Once you accept the screen, you are returned to the source company List of Groups. The same group now exists in the destination company. The above method of copying masters is possible only if the books of s are maintained on the same computer.
> Alter > Select a particular Group
The above methods can be used for copying other masters like ledgers, cost categories and cost centres. Note: The alternate mechanism to transfer information between the Export of Data and Import of Data. Export/import is more
companies is to flexible where
use
export/import allows incoming information from companies, system. For example, you can export your Masters and branches for their initial master creation.
which do not exist on send the resultant files to
your your
Introduction
A Ledger is the actual head to which you identify a transaction. In Tally, you all ing vouchers using Ledgers. However, all Ledgers have to be classified into Groups. Hence a thorough understanding of classification is important for working with Ledgers. The creation and usage of Groups in Tally has been explained earlier. Now you will learn how Tally works with Ledgers. Go to Gateway of Tally > s Info. > Ledgers
Creating a Ledger
Ledgers can be created in single and multiple modes. In multiple mode you can create multiple ledgers at a time.
Creating a Single Ledger The creation of Ledger depends on the features you opt for in the F11: Features of your company and F12: Configure. It is advisable to set F11: Features and configure the F12: Configure screen before creating any Ledgers. You may configure or set your Ledgers to enable or disable advanced mode. Click here for details on Creating Ledgers in Advanced Mode. Tally automatically creates two Ledger s namely, Cash (Under Cash-in- Hand) and Profit and Loss (direct Primary ). You need to create all other s heads. There are no restrictions in Ledger creation except that you cannot create another Profit & Loss A/c . Any number of Cash s may be created in any other name like Petty Cash. Creating a Ledger with minimal information: Go to Gateway of Tally> s Info. > Ledgers> Create (under Single Ledger)
Name Enter the Name of the . You can provide the full name of the . Tally fits it all in. Press Enter to move to the next field. Tally does not allow entry of duplicate names. The uniqueness check is made here itself. Note that punctuation and other non-relevant information are ignored by Tally in its recognition of a name. Thus, CST, C.S.T. and C. S. T. are all considered as same. Tally converts the first letter of all relevant words to upper case, which helps you; speed up data entry. You need not bother about changing the case every time it is a different word.
Alias Enter an alias name if required. You can access the Ledgers using the original name or the alias name.
Under All s must be classified under their appropriate Groups. Select the Group under which the Ledger is created from the List of Groups. To create a new Group from this field press [ATL + C]
A Group is not important by itself, but because it controls the usage of Ledger s. A wrong classification would affect the treatment of the Ledger in final statements and during voucher entry. You can, alter a Ledger to change its group classification at any time. Refer in Grouping and classification for more details in Grouping.
Common and possible errors
Opening Balance If yours is an existing company whose books you are entering onto Tally, Opening Balance would be applicable in circumstances such as when the Ledger is an asset or a liability and if it has a balance in the as on the date of beginning of books in Tally. Tally recognises normal ing principles of debit balances for Assets and credit balances for Liabilities. It accepts the reverse for obverse balances. Revenue s normally do not have balances. Tally, however, permits you to give balances even for such s - You may be transferring your books on to Tally in the middle of the year and may not have closed them in your earlier system. Hence, you may specify whether the balance is Debit or Credit. Simply D or C also would suffice. N o t e: Use Ctrl be changed.
+A
at
the
field
following
which
the
information
More: Common and possible errors in Grouping and classification Groups - a revisit
in
other
fields
do
not
need
to
Creating Multiple Ledgers
You can create multiple Ledgers at a time in this mode. You can first create a Ledger under each group in single Ledger mode and then the rest of the Ledgers in multiple mode. Tally will set the settings of the Ledger created as default for other Ledger to be created in multiple mode. Go to Gateway of Tally> s Info > Ledgers > Create (under Multiple Ledgers)
The Multiple Ledger Creation screen is displayed. A brief description on each of the fields in the Multiple Ledger Creation screen follows:
Under Group Select the name of the group under which you want to create the Ledgers from the List of Groups . Below this field, the other fields are arranged in a table. The cursor rests at the field Name of Ledger . The other fields in the column are:
S.No This is auto generated.
Name of Ledger Enter the name of the Ledger.
Under This field defaults to the parent group selected in Under Group . The selected group in Under Group gets displayed here automatically and the cursor skips this column. However, if you select All Items in Under Group field, the cursor does not skip this column and you have the option to select the group. You can even create a new group from this field by pressing Alt +C .
Opening Balance This is the balance remaining when you first enter your books on Tally, i.e., the date of beginning of books. If you have opted to maintain balances bill-by-bill, you must give the bill details. (Refer Creating a Ledger- Advanced
Usage for more details on this)
Dr Specify whether the Opening Balance is Debit or Credit . Tally follows the normal ing principals of ing. (Refer Creating a Ledger - Advanced Usage for more details on this). N o t e : While creating Ledgers in multiple mode, the field Cost Centres are applicable, is set to Y e s for Revenue s and N o for Non-Revenue s by default. The field Inventory values are affected is set to Y e s for Sales and Purchase s and N o for the o t h e r s by default.
Creating a Ledger - Advanced Usage
The information required for creating Ledgers depends on the features opted by you in the F11: Features and F12: Configure . The Ledger Creation screen will have additional fields depending on your feature settings for your company. If you set the field Allow ADVANCED entries in Masters in F12: Configure as Yes , you can work in Advanced Mode. Set the company features in F11: Features> F1: s as shown in the screen below to enable advanced features.
After configuring F12: Configure and enabling F11: Features as described in the above sections, the Ledger Creation screen will appear with the following additional fields.
An explanation on each of the additional field follows. For explanation on the default fields refer Creating a Single Ledger
Currency of Ledger Tally allows you to maintain Ledgers in any currency and the amount will reflect in the selected currency. But it is strongly advisable that you maintain the currency of the Ledger as the Base currency. Only foreign currency bank s are maintained in foreign currency and other ledgers are maintained in Base Currency. Nevertheless you can enter transactions in any other currency. To create/maintain ledgers in multiple currency, set Allow Multi Currencies to Yes in F11: Features. You can always create a new currency from this field by pressing Alt+C For more information on Currencies, refer Currency N o t e : The Advanced currency. The relevant
Information is applicable ONLY if the options should be enabled in the
ledger is maintained company features.
in
base
Maintain Balances Bill-by-Bill Set this option to Yes , if you wish to give a Bill-by-Bill break-up of the Ledger balance for Sundry Debtors and Sundry Creditors group including the opening balance. You may allot any number of bills. The option here would also determine the ability to track transactions according to Bill references. The Bill-by-Bill concept in transactions would be discussed in detail in the Vouchers chapter. If you set this option to Yes , while entering the opening balance in the Opening Balance field at the end of Ledger Creation screen and pressing Enter , the Bill-wise Breakup screen of the Ledger created is displayed.
A brief explanation on each of the fields in the Bill-wise breakup screen follows: The following information for all pending bills of the previous ing period would be required.
Date Since you are giving the break-up of the Opening Balance, the date of the bill would naturally be prior to the ing period. Tally defaults to the last date of your previous ing period, e.g., 31 March 2006. Change it, if necessary, to the actual date. To end your list of entries, leave the Date or Name blank.
Name Enter a Name to which you can later refer when adjusting the bill. Typically, you can enter the Bill number or Document number. The purpose of the break-up is to enable you to adjust it later when the relevant transaction is squared off.
Due date (or credit days) For the Ledgers under Sundry Debtors and Creditors, give the credit period or the date when the bill is due. Tally automatically calculates the other.
N o t e : During transaction entry, there would opt for "using effective dates" instead of "bill accordingly.
be another dates" the
concept-that of effective date. If due date would be calculated
you
Amount For the amount of the bill due, you will give particulars of all the pending bills one by one. Tally fills in the difference between your Opening Balance, and the sum of the Bills, and reflects it as On at the bottom of the screen. If all your bills cover the Opening Balance , the On becomes NIL. You may have Bills totaling beyond the Opening Balance , in which case the On will accumulate adversely. In the screen given below, we have shown two bills 50,000, 25,000. Now, if the balance brought forward is 1,00,000/- , the On amount will reflect 25,000/-. If you obtain the bill particulars at a later date, you can always alter the ledger to put in the details, which will nullify the On .
Inventory values affected This is applicable only if your s are integrated with inventory. s like sales and purchases would normally affect inventory values in which case set Inventory values affected to Yes . For other s, set it to No . Tally does not restrict you to particular s as you may have the need to affect inventory with s like Customs Duty, and perhaps, direct expenses related to purchases such as Freight Inwards.
Cost Centres are applicable Tally's concept of Cost Centres allows an additional dimension to a transaction. This field is displayed in the Ledger Creation screen only if you have enabled Cost-Centres in F11 > ing Features . Set this field to Yes in Ledger creation screen to enable Cost centres. Tally will presume that you want Cost Centers for Revenue s and not for non-revenue s like Assets and Liabilities.
Activate Interest calculation Set this option to Yes to enable Tally to calculate interest automatically based on the interest rate and style of calculation specified. Use advanced parameters The advanced parameters are particularly useful where interest rates change from time to time. Set this option to Yes to enable this.
Statutory Information This option is available only if you have enabled at least one the options in F11: Features> F3: Statutory & Taxation . Based on the options enabled in F3: Statutory & Taxation , the respective fields will appear in the Statutory Information section.
Mailing Details Mailing Details is applicable only for party s like Sundry Debtors , Creditors and Branch Divisions . This is also available for loan s. Enter the party's particulars here. These are used in mailing outputs like statement of s.
Tax Information The Tax Information consists of the default fields PAN/IT No. and the TIN/SALES Tax No. Based on the features you enable in F11: Features> F3: Statutory & Taxation , additional fields will appear under Taxation.
Percentage of Calculation This field is applicable only for Ledgers created under the Group Duties and Taxes , or for Ledgers created under any Group for which Used for Calculation is enabled in Group Creation screen. The Group Duties and Taxes is used for automatic tax calculation. . You need to specify the rate of tax e.g. 5, 10, 12.5 etc. as a percentage. Do not give the percent symbol. You may use an automatic Discount calculation facility by specifying a negative percentage in this field. On entering a percentage, a new field Method of Calculation is displayed.
Method of Calculation
There are four methods of calculating a duty. 1.
Duty Based on Items – Tax based on Item Rate
2.
Additional Duty
3.
On Total Sales
4.
Surcharge on Tax
Tax or Duty Based on Items Rate (or Excise Duty) This type of is suitable in cases where there are differential rates of duty/tax on items. In India, excise duty s would normally adopt this method. In the UK, VAT s would do likewise. When creating your Inventory item masters, you might specify Rate of Duty for each item. In your books, you would open a ledger for the duty, possibly by the name VAT 17.5% or Excise Duty 12.5%. You will select this method to instruct Tally to pick up the Rate of Duty specified in your Inventory item master during invoice entry. If one or more items exist with the same rate of duty, then the amount is calculated using the total. Otherwise, it is calculated on total sales. For example, Your invoice lists: Item A (Rate 10%) for 10000/Item B (Rate 12%) for 15000/Item C (Rate 10%) for 18000/Duty (VAT or Excise) will be calculated as follows:
10% on 28000/-
2800/- (Item A & C)
12% on 15000/-
1800/- (Item B)
Total Duty
4600/-
Additional Duty When excise duty is not enabled for invoicing purposes in Company Features [F11] (as applicable for many products in India), Additional Duty and Surcharge function alike. In case it is enabled, then Additional Duty is added to the 'Duty Based on Items' in the invoice to reflect the 'Total Duty payable'. Its method of calculation is explained under 'Surcharge'.
On Total Sales As the type suggests, duty will be calculated on the total of individual values of the items. It does not consider the Rate of Duty specified for each item in your inventory masters. It does not calculate duty on the current sub-total unless you have specifically opted for it in the company features. Hence, the two scenarios could be as follows:
When you have not opted for calculation on current sub-total: Assuming that there are two items in the invoice: Item A 10000/Item B 15000/Tax 2% will be calculated at 2% on total sales of 25000/- = 500/- tax amount following which you obtain a current sub-total of 25500/-. If you now add another line, Tax 4%, it will calculate 4% also on 25000/- (on total sales) giving another 1000/- as tax.
If you opt for calculating on current sub-total: The above Tax 4% will be calculated on 25500/- (25000+500) giving 1020/- .
Surcharge on Tax Surcharge and Additional Duty are charged on the immediately preceding entry. A surcharge is treated as a percentage of the duty levied. Tally expects the preceding line in the invoice to be the duty on which surcharge is to be calculated. Hence, in the above example if you have added a line Surcharge 10% it will appear as:
Item A
10000/-
Item B
15000/25000/-
Tax 2%
500/-
Surcharge 10%
50/- (10% of 500)
If your invoice is as below:
Item A
10000/-
Item B
15000/25000/-
Tax 2%
500/-
Surcharge 10%
50/- (10% of 500)
Addl.Surcharge8%
4/- (8% of 50)
During invoice creation, this figure is used to calculate tax amount based on the method of calculation as well as specified in invoicing configuration. ( [F12] configure > Invoice Entry > Calculate tax on current sub-total?). Though invoicing has been discussed separately in greater detail, we shall touch upon relevant aspects here.
Calculate tax on current sub-total: (Yes/No) Tax here refers to VAT or sales tax. During voucher entry in Invoicing mode, you may enter additional ledger s after giving the list of items in the invoice. Typically, the ledgers would pertain to duties, taxes, delivery charges, other charges and discounts. Sales Tax may be calculated on the total of item values, viz., Inventory sub-total, or you may specify it to calculate on the immediately preceding sub-total. In the latter case, the immediately preceding sub-total could include any entry that you may have ed, e.g. Delivery Charges. Tally
does not make any presumptions and would not its appropriateness or otherwise. Normally, you would not answer Yes to this option. The facility of Surcharge being available, the need to calculate on current sub-total is fulfilled by it. Hence, use it sparingly, maybe only when you have both Excise Duty and Sales Tax (on Excise Duty) applicable on an item.
Display or Alter a Ledger
Information in display and alter is the same, hence only alter is discussed. Display option does not permit any modification. Alter option is accessible only to authorised s. Gateway of Tally > s Info. > Ledgers > Single Alter > select ledger
You are allowed to alter any information of the ledger master with the exception of the Closing Balance of a ledger , if any, other than closing balance of s under the group 'Stock-in-hand'. Please refer to Advanced Usage for specifying closing stock values.
Deleting a ledger You can delete a ledger from the alteration mode by pressing
s that have transactions. Therefore, should you wish to delete an , which has transactions, you must first delete all its voucher entries.
Interest Calculations
Tally allows you to obtain reports on interest calculated by Tally based on the instructions you furnish. Interest figures are typically desired in the following situations: 1.
On outstanding balance amounts
2.
On outstanding bills/invoices/transactions (Receivable and payable)
Tally gives you an exhaustive capability to obtain interest implications on both.
Activate Interest Calculations Interest is a legitimate return on money invested and chargeable in the business world on loans and also on delayed payments. Interest can be calculated on the basis of Simple or Compound Interest. Tally allows you to obtain reports on interest calculated based on the instructions you furnish. Interest figures are typically desired in the following situations: On Outstanding Balance amounts. Outstanding Bills /Invoices/Transactions (Receivables and Payables)
The Activate Interest Calculation field is displayed in the Ledger Creation screen only if Activate Interest Calculations is set to Yes in F11: Features. Set this field to Yes for each specific ledger for which interest is to be calculated. More: Simple Mode - where advanced parameters are not applicable Advanced Mode Interest Calculation Reports Interest calculation on Ledger Balances (e.g. Loans) Statement of Interest due on invoices Group Interest Calculation
Simple Mode (Where advanced parameters are not applicable)
To calculate Interest in the Simple Mode: 1.
Go to Gateway of Tally> F11: Features > Set Activate Interest Calculation to Yes. > Set Use Advanced Parameters to No.
2.
In the Ledger Creation screen set Activate Interest Calculation to Yes.
3.
The Interest Parameters sub screen is displayed. Enter the Rate and select the interest style from the list.
Interest calculations on outstanding balances Enter Interest details in Vouchers (only in case of transaction by transaction/Bill-by-bill). View Interest reports. You will have to alter existing ledger s to permit interest calculations on them. The same operation will apply when creating a new ledger . Interest calculation on outstanding balances is allowed for any ledger . You simply specify the interest rate and style of calculation. Nothing is required to be done for interest during voucher entry. Let's take an example: Interest calculated on Outstanding Balances. 1.
Go to Gateway of Tally> s Info.> Ledgers> Alter (Single)> Bank Ltd (bank )
2.
Set Activate interest Calculation to Yes.
3.
On activation, the Interest Parameters must be set. It is the basis on which interest will be calculated for this Ledger .
4.
Rate: This is the rate at which the interest has to be calculated. In this case, specify 15%.
5.
Interest Style: It is the basis on which the rate is applied. Of the four options, select 365-Day Year.
6.
Accept the screen.
You can now view the amount of interest that could be charged by the Bank.
Report on Interest Calculated on outstanding balances The Interest Calculations Report can be displayed and printed. Go to Gateway of Tally> Display> Statements of s> Interest Calculations> Ledger> Bank
Interest calculation transaction by transaction
Activate and specify interest calculations in ledger masters. Transaction by transaction or Bill-by-Bill interest calculation is permitted for 'Party' s like s falling under the groups Sundry Debtors and Sundry Creditors. For example: 1.
Alter a Customer (under the group Sundry Debtors or one of its sub-groups).
2.
Set Activate Interest Calculation to Yes. In the Interest Parameters now you have three lines to answer.
3.
Set Calculate Interest Transaction-by-transaction to Yes.
4.
Set Over-ride Parameters for each transaction to No.
If set to No, you are not allowed to change interest parameters in voucher/invoice entry. If set to Yes, you can change the interest parameters during entry.
Report on Interest Calculated on outstanding transactions/bills To view the Interest calculated Go to Gateway of Tally> Display> Statements of s> Interest Calculations> Ledger> Ltd The report is similar to the Bill-wise Outstanding Statement. The last column gives the interest amount on the transaction. Select the line to be viewed in detail for its calculations.
Advanced Mode
The advanced parameters are particularly useful where interest rates change from time to time. 1.
Go to Gateway of Tally> F11: Features > ing Features > Set Activate Interest Calculation to Yes. > Set Use Advanced Parameters to Yes.
2.
The Interest Parameters sub-screen is displayed For Ledgers created under the Group Sundry Debtors/Sundry Creditors, the Interest Parameters subscreen is displayed as shown below:
3.
Set Calculate Interest Transaction-by-Transaction to Yes , if you want to calculate interest for each transaction.
4.
Set Override Parameters for each Transaction to Yes , if you want to override the interest rates and parameters set here during voucher entry.
5.
Enter the interest rate in the Rate field.
6.
Select the interest rate calculation period from the Interest Style list in the Per field.
7.
Select the choice of balances for which the interest has to be calculated from the Interest Balances list in the On field. The balances are All Balances, Credit Balances only and Debit balances only. Interest can be calculated on all outstanding balances, whether debit or credit. You would like to select only credit balances in case of s like Bank s, if you want to know the interest that the bank might charge on overdrawn balances.
8.
8.
Select the rounding method applicable from the Rounding Methods list. The amount can be rounded off normally or upward or downward. If you do not want any rounding method, select Not Applicable .
For Ledgers created under the Group Bank s , or if the option Calculate Interest Transaction by Transaction is set to No , then the Interest Parameters sub-screen is displayed as shown below.
1.
Enter the interest rate in the Rate field.
2.
Select the interest rate calculation period from the Interest Style list in the Per field.
3.
Select the choice of balances for which the interest has to be calculated from the Interest Balances list in the On field. The balances are All Balances, Credit Balances only and Debit balances only. Interest can be calculated on all outstanding balances, whether debit or credit. You would like to select only credit balances in case of s like Bank s, if you want to know the interest that the bank might charge on overdrawn balances.
4.
Specify the interest rate applicable period from the Applicable From: and To: fields.
5.
Select the rounding method applicable from the Rounding Methods list. The amount can be rounded off normally or upward or downward. If you do not want any rounding method, select Not Applicable .
Display Report – Interest on Outstanding Balances To view the report on Outstanding balances: Go to Gateway of Tally> Display> Statements of s.> Interest Calculations> Ledgers> Bank Ltd.
Advanced Parameters - Interest calculation transaction by transaction A ctivate and specify interest calculations in ledger masters. The following extra options now become available: 1.
You can now have Multiple Rates of Interest .
2.
You can Override Advanced Parameters during voucher entry. Hence, each entry could have different parameters.
3.
Choice of Balances – All Balances , Credit Balances only, Debit Balances only.
4.
Applicability - This actually applies to the viewing of the statement and not the levy of interest.
5.
Calculate from - You can decide whether interest is to be levied from the Due Date or from the Effective Date of the transaction (or the voucher date if effective date is not activated) or even Date ranges specified during Voucher Entry.
6.
5.
6.
Choice of methods for Rounding off of interest amounts .
Note: * To obtain the option 'Calculate from Date Specified during Entry', you must have Override advanced parameters set to Yes. The option is required if you want to specify interest to be calculated at different rates for different periods. * If you choose to override parameters then information would be asked during voucher/invoice entry. The interest information is required after the bill-wise details have been entered.
Report on Interest Calculated on outstanding transactions/bills Go to Gateway of Tally> Display> Statements of s> Interest Calculations> Ledger> Ltd Press the button F1: Detailed on the Button bar to see the calculation and the period. Previous transactions are calculated from Effective date of Transaction as default. Date Specified during Entry has not been used. N o t e : Part balance.
monies
received
have
been
ed
for
and
interest
calculated
on
the
A look at Calculate From Dates Specified during Voucher Entry You have set up the Interest Parameters for Ltd to calculate on Dates specified during Voucher Entry. We will take one invoice and put in the interest information.
Display> Statements of s> Interest Calculations> Ledger> Ltd
Book Entries and adjustment of interest We have seen the reports on interest amounts calculated in different ways but these have not been brought into books! They simply give you the interest implications. You must book them now.
How to enter the calculated interest amounts? Use Debit Notes and Credit Notes with Voucher Classes Use Debit notes for Interest receivable and Credit Notes for Interest Payable . Interest is calculated on Simple or Compound basis and separate classes should be used for them.
Set-up Debit/Credit Note Classes for interest entries Set up Debit Notes . Credit Notes will behave the same way. Go to Gateway of Tally> s Info.> Voucher Types> Create/Alter 1. 2.
1.
Alter the Voucher Type Debit Note.
2.
Tab down to the field Class .
3.
Type the name of the Class .
4.
Type Simple Interest .
Likewise, create a Class – Compound Interest and set Yes to Amounts to be treated as Compound Interest . Accept the Voucher Type and return to the Gateway of Tally . Create a ledger Interest Received under Group Indirect Income.
Voucher Entry for booking Interest 1.
Go to Gateway of Tally> ing Voucher> Voucher Entry
2.
Select F7:Journal > Debit Note
3.
A Cost Centre Class is also selected if required. Marketing Expenses Class has been selected here.
4.
There are two situations for interest adjustment:-
Billwise interest Simple Interest – Interest amounts are not debited onto the same bills. Create a fresh reference for it. Compound Interest – Amounts are auto-debited to the selected bills. Bill-wise details will not appear in this case.
5.
Interest on balances only
Bill-wise interest entry Debit Ltd Credit Interest Received When you debit the party , a list of bills for which interest is applicable pops up. Select the bills to adjust. Note that even cleared bills appear.
Select the respective interest bills from the list . The debit amount is filled up with the total. Select New Ref in the bill-wise allocation. In the interest sub-screen, ensure that the rate of interest is 0. Now Credit Interest Received. The amount is already filled in. Your voucher will resemble the one below:
Entries for compound interest are exactly the same as for Simple Interest where all you do is select the Voucher Class Compound Interest. Also the Bill-wise details popup sub-screen does not come up as the amounts are added onto the bills. Select Demo from the list and complete a Debit Note.
Now display Outstandings for Ltd Note the contents:
The Bill references Demo/28/01 and Demo/31/01 are invoices onto which interest has been compounded. A new Reference no 2 has been created for Simple Interest due from Ltd.
Entries for Interest on Balances only Again, the issues are Simple and Compound Interest
Compound Interest Make the following entries in a Debit note with Compound Interest Voucher Class Debit Bank Ltd the amount is automatically filled up with the calculated interest Credit Interest Received And nothing needs to be done! The Bank has been increased by the amount of interest due and the Income of Interest Received also credited.
Simple Interest Make the same entry as above. However, since it has the effect of increasing the Bank Ltd with the amount due (compound effect), you must make a journal entry to reverse it. The reversal entry would be something like this: Debit Interest Receivable (a current asset ) Credit Bank Ltd Use a normal Journal voucher for this entry. We have to necessary go this route to take advantage of the auto filling of the interest amount which can appear only when we use the Bank Ltd in Debit Note in the first place.
Interest Calculation Reports
Interest Calculation reports are automatically produced if the feature is activated In F11: Features and the parameters are set for individual ledger s. There are two types of reports, one pertaining to interest on balances of s like loans, and the other interest on overdue invoices. Interest reports are available for individual ledger s as well as for Groups
Interest Calculation on Ledger Balances (e.g. Loans)
You can get a report on the Ledger balances for the interest calculated. Go to Gateway of Tally> Display> Statements of s> Interest Calculations> Ledger Select E.g. Bank Loan . Interest is re-calculated with every change in balance outstanding. The Cr in the interest amount should not be confused to resemble an Income. It only means that it is payable and is a Liability. To ease interest recording, Tally has an interest template, a special voucher class in Debit Note and Credit Notes. The interest screen will appear similar to the one below: Interest calculation on Bank Loan
Statement of Interest Due on Invoices
You can calculate interest on each invoice for the period it is outstanding, wholly or partly. Transaction by transaction or bill-by-bill interest calculation is permitted for 'Party' s like s falling under the groups Sundry Debtors and Sundry Creditors. Bill-wise details should be active for the company and the party. The report is similar to the Bill-wise Outstandings Statement. The last column gives the interest amount on the transaction. Press F1: Detailed to see the calculation. Go to Gateway of Tally > Display > Statements of s > Interest Calculations > Ledger Select the ledger Peutronics Bangalore
Interest is re-calculated with every change in balance outstanding. The Cr in the interest amount should not be confused to mean an Income. It only means that it is payable and is a liability. The figure is illustrative only and you will need to for the interest expense and liability through a journal entry.
To ease interest recording, Tally has an interest template, a special voucher class in Debit Note and Credit Notes.
Group Interest Calculation
The Group Interest Calculation statement is a list of all s and sub-groups belonging to the selected group that displays the current balance in each or sub-group and the total interest. Go to Gateway of Tally> Display > Statements of s > Interest Calculations > Group Select a Group, Eg. Loans (Liability)
The Cr in the interest amount should not be confused to mean an Income. It only means that it is payable and is a liability. To ease interest recording, Tally has an interest template, a special voucher class in Debit Note and Credit Notes. Drill down to the Ledger level Interest report.
Specifying Closing Stock Values
Closing stock values have to be specified when s and inventory are not integrated. Tally allows you to specify closing stock values even if your books are integrated. It would simply ignore the specified figure so long as you maintain the integration. If and when you select to separate the books, the specified values would automatically be considered. To enter the closing stock as on a specific date, you must alter the ledger . Simply follow the ledger alteration procedure or go from the Balance Sheet via Current Assets. Go to Gateway of Tally> Balance Sheet> Current Assets> Group Summary (or) Go to Gateway of Tally> Info.> Ledgers> Alter (Single) Assuming that you had a ledger 'Stock ' under the group Stock-in-hand the information would be as follows
You are allowed to alter the opening balance as well as specify/alter closing balances on different dates. You would typically specify Balance Sheet dates so that the Balance Sheet reflects the amount of that date.
Effective Date for Reconciliation (Bank s only)
The Effective Date for Reconciliation is given for s falling under the OCC a/c). By default it is the books beginning date.
Bank s Group (or Bank
This is the date from which you can reconcile your bank in your books with the bank statements. Normally, it would be the books beginning date. However, you can import data from a previous version of Tally or from any other system (where the reconciliation process was not available or was different). In that case, you may not need to reconcile the bank with your bank statements from the very beginning. Give the date from which you want the reconciliation facility to be activated. Then, previous entries will not appear for reconciliation.
Position Index in Reports
This is viewed when you press F10: Chg Sort when the ledger is in the alteration mode. If this is done, it remains so till you deactivate it by pressing F10: Skip Sort. The topic has been discussed under the chapter "Groups" under Advanced Usage. The default setting is 1000 for all ledgers. Please note that the index is relative to other ledgers and groups within a parent group. Hence, the position of a ledger may be changed within the Group, to which it belongs, by changing the number 1000. Any change would not position the ledger outside the parent group. If a group comprises of many groups (subgroups) and ledgers, the position index would determine their position within the parent group. For example: Prior to any change in their indices, the ledgers and the sole group 'Communication Expenses' under the group 'Indirect Expenses' are displayed as below. (Ledgers are directly under the group Indirect Expenses and not under Communication Expenses sub-group): Gateway of Tally > Display> Books> Group Summary> Indirect Expenses
The position index of Communication Expenses (it is a group as indicated by its bold font) is 290 and all ledgers 1000. You would notice that because of this, Communication Expenses is at the top, and the others sorted alphabetically as they have the same index of 1000.
We now change the index of General Maintenance to 280 and of Staff Welfare to 900. We now see General Maintenance at the top, followed by Communication Expenses and Staff Welfare. Then the rest with 1000 would be in alphabetic order. You can change the index from the display screen itself by positioning the cursor on the particular and pressing Ctrl+Enter to bring up its master to alter.
Indirect Expenses
Displaying and Altering Ledgers
Displaying and Altering Ledgers can be done in Single mode and Multiple mode. The Multiple mode allows you to display and alter multiple Ledgers at a time.
Displaying and Altering a Single Ledger You can view the details of the Ledger Masters in Display mode. Display does not permit any modification. However you can make changes to Ledger Masters in Alter mode.
Displaying a Single Ledger Go to Gateway of Tally > s Info. > Ledgers > Display (under Single Ledger). Select the Ledger from the List of Ledgers. The Ledger Display screen is displayed. You will be able to view the details of the selected Ledger Master.
Altering a Single Ledger Go to Gateway of Tally > s Info. > Ledgers > Alter (under Single Ledger) Select the Ledger from the List of Ledgers. The Ledger Alteration screen is displayed. You are allowed to alter any information. Make the necessary changes and Accept Yes to save. Specifying Closing Stock Values of a Ledger under the group Stock in Hand This is possible only in Ledger alteration mode. Closing stock values have to be specified when s and inventory are not integrated. Tally allows you to specify closing stock values even if your books are integrated. It would simply ignore the specified figure so long as you maintain the integration. If and when you select to separate the books, the specified values would automatically be considered. To enter the closing stock as on a specific date, you must alter the ledger . Simply follow the ledger alteration procedure or go from the Balance Sheet via Current Assets. Go to Gateway of Tally> Info.> Ledgers> Alter (under Single Ledger) (Or) Go to Gateway of Tally> Balance Sheet> Current Assets> Group Summary Assuming that you had a ledger Stock under the group Stock-in-hand the information would be as follows:
You are allowed to alter the opening balance as well as specify closing balances on different dates. You would typically specify Balance Sheet dates so that the Balance Sheet reflects the amount of that date.
Deleting a Single Ledger You can delete a Ledger from the Ledger Alteration screen by pressing ATL + D. Tally does not allow deletion of s that have transactions. Therefore, should you wish to delete an , which has transactions, you must first delete all its voucher entries.
Displaying and Altering Multiple Ledgers
Displaying Multiple Ledgers Go to Gateway of Tally > s Info. > Ledgers > Display (under Multiple Ledgers) Select All Items from the List of Groups to view the details of all the Ledgers in Tally. If you want to view the details of all the Ledgers created under a Group select the Group from the List of Groups. The Multiple Ledger Display screen is displayed.
Altering Ledgers in Multiple Mode Go to Gateway of Tally > s Info. > Ledgers > Alter (under Multiple Ledgers) Select any Group or All Items from the List of Groups. The Multi Ledger Alteration screen is displayed. Make the necessary changes and Accept Yes to save. N o t e : You to delete.
are
not
allowed
to
delete
a
ledger
from
this
mode.
Select
single
alter
mode
Explanation on Buttons F3:Company: To work with a different company. In the creation mode, you can create cost categories in the other company. In alter mode, you can copy the information by accepting the screen (<enter> or
Credit Limits
Credit Limits can be specified for any falling under the groups Sundry Debtors and Sundry Creditors. s under Sundry Creditors are permitted because there can be a two-way trade with a party even if it is classified as a creditor or debtor. Classification is done on the basis of the major role. More: Setting Credit Limits Effect of setting credit limits Exceeding Credit Limits
Setting Credit Limits
If you do not set credit limits, you can still make invoices and give credit periods at the time of invoicing. However, that may not be desirable, especially in a decentralized environment. Therefore, to minimise errors during invoicing, you might prefer to set these important beforehand. To set credit limits: Go to F11 Features > ing Features > Set Maintain Budgets and Controls to Yes Go to Gateway of Tally> s Info> Ledgers> Credit Limits (under Multiple Ledgers) Select the group of ledgers from the List of Groups for which to set credit . The Multi Ledger Limit Alteration screen is displayed. The list of ledger s is displayed. You can set credit limits for both amounts and periods here.
Credit Limit Specify the amount of credit limit against the ledger in this field. You can set the amount limits in foreign currency if you wish, for customers who are usually invoiced in foreign currency.
Credit Period Credit Periods are in days only and are calculated from the effective date. If a separate effective date field appears in your voucher, the credit period is from the effective date, which might differ from the voucher date. If the voucher date is the only date field in the voucher, then it is also the effective date and the credit period is from this date.
Effect of Setting Credit Limits
The effect of setting credit limits is that during voucher entry (also invoice entry), the credit are filled up by the pre-set figures. If the voucher configuration (through F12: Configure) is set to disallow modifications of all fields during voucher entry, the cursor skips these fields and modification is not permitted. However, the configuration is set to permit modifications to all fields - alteration of the pre-filled fields is allowed. The current balance and the credit limit of the party are displayed in the order and invoice entry forms, which is helpful to assess the amount acceptable.
Exceeding Credit Limits
During invoice or order entry, if the credit amount limit is exceeded, the voucher entry does not proceed further. You have two choices at this stage: 1.
Enter a lower value so that the entry can be completed.
2.
Abandon the current entry and obtain authorization to increase the credit amount limit in the Multi Ledger Limit Alteration screen.
This is a controlled activity and will depend on the security permissions for altering credit limits.
Cost Centres
A Cost Centre is any unit of an organisation to which transactions (generally, revenue) can be allocated. When only costs or expenses are allocated to these units, they are referred to as Cost Centres. When profits are also allocated to these units, they become Profit Centres. You can now obtain a Profit and Loss of each such Profit Centre. Cost Centre in Tally allows an additional dimension to a transaction where a Ledger indicates the nature of the transaction. It does not readily disclose, except in the narration field, which part of the organisation was involved in the transaction. By providing Cost Centres, a transaction can be allocated to it, which would then enable extraction of all transactions for a Cost Centre. Tally gives you the Cost Centre break-up of each transaction as well as details of transactions for each Cost Centre. Some examples of Cost Centres are
Departments of an organisation - Finance, Manufacturing, Marketing, and so on.
Products of a company.
Individuals such as Salesman A, Salesman B.
Use of Cost Centres You can classify Cost Centres just as how you classified Group/Ledger s. You can have Primary Cost Centres and several levels of Cost Centres under each Primary Cost Centre. Consider the following example. Primary Cost Centres - Finance, Manufacturing, Marketing. Under Marketing, classify the company's sales executives as Cost Centres. This will help you track a sales executive's performance, in of cost and revenue generated. You will then have the following Cost Centre structure (shown here only for the Marketing Department): Primary Cost Centre - Marketing Under Marketing: Salesman A Salesman B Salesman C Allocate expenditure incurred on sales by the salesmen, as well as the sales generated by them, directly to their Cost Centres. The allocation is done online at the time of transaction entry. This prevents allocation problems at the end of the period, when you find a large number of transactions not allocated. By allocating expenses and sales transactions to the salesmen, you are setting up a valuable information system that tracks the performance of your salesmen.
More: Creating a Single Cost Centres Altering a Cost Centre
Creating a Single Cost Centre
To create a Cost Centre, set Maintain Cost Centres to Yes in F11: Features. It is advisable not to set More than ONE Payroll/Cost Category to Yes, unless required. By default, Tally activates the Cost Centre feature for Ledger s under Sales s, Purchase s, Expense and Income groups. Go to Gateway of Tally> s Info.> Cost Centres> Create (Single Cost Centre) The Cost Centre Creation screen displays.
A brief explanation on each of the fields in the Cost Centre Creation screen follows.
Name Enter the name of the Cost Centre in this field. For example, Bangalore.
alias Enter an alternative name, if required. For example, the Cost Centre Bangalore can be referred to as Head Office or by a code number.
Under Select the parent Cost Centre under which the Cost Centre needs to be created from the List of Cost Centres. If you want the Cost Centre to be a Primary Cost Centre, select Primary from the list. Refer Creating Cost Centres for Job Costing for details on using Cost Centres for Job Costing. Note: Unlike Groups, you can allocate transactions to Primary Cost Centres. However, you should do so when you do not have Sub Cost Centres under the Primary Cost Centre. It is suggested that you allocate transactions to the lowest levels (similar to ledgers).
Displaying a Single Cost Centre To display the details of Cost Centre masters
Go to Gateway of Tally > s Info. > Cost Centres > Display (under Single Cost Centre) The Cost Centre Display screen appears. It is not possible to make any modifications to the Cost Centre master in the Display mode. You can only view the details in this mode.
Altering a Cost Centre
To alter an existing Cost Centre Go to Gateway of Tally> s Info.> Cost Centres> Alter (under Single Cost Centre) The Cost Centre Alteration screen appears. Make the necessary changes and Accept to save.
Deleting a Cost Centre You can delete a Cost Centre from the Cost Centre Alteration screen by pressing ALT+D. You can delete a Cost Centre only if
It does not have any Cost Centres created under it.
It is not used in any transactions.
Explanation on Buttons for Cost Centres in Single Mode Groups, Ledgers, Voucher Types It enables you to switch to these areas without having to quit from the current screen. F11: Features To change company features. Refer Activate Company Features [F11] for more details. F12: Configure To change the configuration of master information. Note: Features
Configuration changes changes affect the
affect all companies in current company only.
the
data
directory,
whereas
Creating Multiple Cost Centres
You can create multiple Cost Centres in this mode. Go to Gateway of Tally> s Info.> Cost Centres> Create (under Multiple Ledgers) The Multi Cost Centre Creation screen displays.
A brief explanation on each of the fields in the Multi Cost Centre Creation screen follows.
Under Cost Centre Select a particular Cost Centre as the parent Cost Centre if you wish to create a number of cost centres under it. If you do not want to be limited/ restricted to one parent Cost Centre while creating Cost Centres, choose All Items .
Name of Cost Centre Enter the name of the Cost Centre to be created. The alias option is not available in this mode. Select single alter to give aliases to Cost Centres created in multiple mode.
Under The Parent Cost Centre selected from Under Cost Category field displays automatically. If All Items is selected from Under Cost Category , you have the option of selecting the Cost Centre from the List of Cost Centres . Refer Cost Category for further details
Displaying Cost Centres in Multiple Mode You can display the details of multiple Cost Centres at a time in this mode. Go to Gateway of Tally> s Info.> Cost Centres> Display (under Multiple Cost Centres) Select a Cost Centre or All Items to display the details of all the Cost Centres under it. It is not possible to make changes to any of the fields in the Display mode.
More: Altering Cost Centres in multiple mode
Altering Cost Centres in Multiple Mode
F11: Features: To change Company features, refer Activate Company Features [F11] for more details.
Cost Category
Cost Categories are useful for organisations that require allocation of resources to parallel sets of Cost Centres. Such organisations would usually be project oriented. Most organisations would not need Cost Categories. The proper use of Cost Centres itself would offer the same benefits. Cost Categories could increase data entry work and make it more complicated. Hence, before opting for Cost Categories, evaluate whether you actually need this option. Always attempt to first use Cost Centres.
Use of Cost Categories By using Cost Categories you may allocate, in parallel, a transaction to more than one set of Cost Centres. The following example illustrates the use of Cost Categories. The Primary Cost Centres such as Marketing, Finance and Manufacturing can now belong to a category Departments. The Salesmen A, B and C can be Cost Centres under a Category - Executives. Similarly, you can create a new Cost Category 'Projects' under which Cost Centres such as Airport construction, Road construction and Buildings may be created. The classification appears as in the following matrix.
Specify a Cost Category to allow allocation of only revenue items or items of both revenue and capital nature. In this example, allow both for Departments and Projects Categories and only revenue for Executives. Salesman A incurs conveyance expenses of Rs. 1000. If he has incurred it for marketing, allocate this amount to the Cost Centre - Marketing and his own Cost Centre - Salesman A. (Allocate this while entering a payment voucher debiting Conveyance and crediting Cash.) If the salesman now incurs expense for the project Buildings, allocate to the Cost Centres - Salesman A and Buildings. Allocate an expense to one or more Cost Centres. It is not essential to always allocate expenses to all Cost Centres. If you did not create Cost Categories, you would have been able to allocate the expense to either the Project Buildings cost centre or Salesman A, not to both. You can obtain details of conveyance expenses incurred by Salesman A on Marketing as well as on the Buildings project when you have Cost Categories. You cannot, however, extract a single report giving details of marketing expenses incurred by Salesman A on the Project Buildings. These are different Cost Categories and cannot be merged. If such reports are required, you must create ledgers such as Conveyance - Marketing which will help you generate the desired report. By allocating expenses to parallel Cost Centres under different categories, you are simply asg the amounts to them; the amount does not increase. In the above example, the conveyance of Rs. 1000 remains an expense of Rs. 1000 only. Tally performs an automatic reconciliation on real-time basis, saving you the effort of reconciling Ledgers and Cost Centres. Note:
Transactions
are
not
allocated
to
Cost
Categories
but
to
Cost
Centres
only.
Creating a Single Cost Category
To create a Cost Category, set Maintain Cost Centres to Yes in F11: Features and then set More than ONE Payroll/Cost Category to Yes.
By default, it is set to No. Tally creates a single Cost Category called Primary Cost Category and allocates all Cost Centres created, prior to enabling this feature, to this category. You can create new cost categories, and alter the existing Cost Centres to allocate them under required Cost Categories. To create a Cost Category Go to Gateway of Tally > s Info. > Cost Categories > Create (under Single Cost Category) The Cost Category Creation screen displays.
A brief description on each of the fields in the Cost Category Creation screen follows.
Name Enter the name of the Cost Category. For example, Products. N o t e: There is no sub-classification of Cost Categories and U n d e r option. Though there is a Primary Cost Category, it categories.
hence you do not is not a parent of
find an other
(alias) Enter an alias if you wish to call the Category by another name or even by a code number. This field displays only if you set Allow ADVANCED entries in Masters in Gateway of Tally >F12: Configure> Accts/Inv Info. to Yes.
Allocate Revenue Items Set this option to Yes, to allocate all sales, purchase, expenses and income related transactions to Cost Centres
that you create under the Cost Category. Normally, you would enable this option. However, should you need to allocate only capital/non-revenue items only to Cost Centres in that cost category, set this to No.
Allocate Non-Revenue Items You would, usually, disable this option by setting it to No as most Cost Centres need only revenue allocation. However, should you wish to allocate items of non-revenue (capital) or Balance Sheet items, you may set it to Yes. Organisations increasingly require allocation of capital items to Cost Centres. They wish to monitor the capital expenditure incurred on Cost Centres and measure them against revenue earned. Recognising this trend, Tally has provided this option. N o t e : Enable sets Yes, by
either revenue or non-revenue items, or default, for revenue items and No for
both. Do not disable Non-revenue items.
both.
Displaying a Single Cost Category To view the details of the selected Cost Category masters from this mode Go to Gateway of Tally> s Info.> Cost Categories> Display (under Single Cost Category) Select a Cost Category from the List of Categories. The Cost Category Display screen displays. You cannot make any changes to the fields in the Display mode.
Tally
Altering a Single Cost Category
To alter an existing Cost Category Go to Gateway of Tally> s Info.> Cost Categories> Alter (under Single Cost Category) Select the Cost Category from the List of Categories. The Cost Category Alteration screen displays. Make the changes in the required fields and Accept to save.
Deleting a Cost Category You may delete a Cost Category that does not have any cost centre under it from the Cost Category Alteration screen. Use ALT+D to delete it. Tally does not allow deletion of a Cost Category that has Cost Centres.
Buttons in Single Cost Category screens Groups, Ledgers, Vch Types It enables you to switch to these areas without having to quit from the current screen.
F11: Features To change company features. A detailed explanation on features has been given in the earlier section under Gateway of Tally. Note: Configuration changes only the current company.
affect
all
companies,
whereas
Features
changes
affect
Creating Multiple Cost Categories
You can create multiple Cost Categories at a time using the multiple mode. Go to Gateway of Tally > s Info. > Cost Categories > Create (under Multiple Cost categories) The Multi Cost Category Creation screen displays.
An explanation on each of the fields in Multi Cost Category Creation screen follows.
S. No. This is an auto-generated serial number.
Name of Category Enter the name of the Cost Category.
Allocations for Revenue Items This is set to Yes , by default. However, you have the option of altering it. This denotes whether you want to allocate revenue items to Cost Centres under it.
Non-revenue Items This is set to No , by default. You can alter it if you want to allocate non-revenue items to Cost Centres under it. N o t e : There is Categories have
no Under field Cost Centres
as as
you cannot sub-classify their sub-classification.
Cost
Categories.
Cost
Displaying Cost Categories in multiple mode You can display multiple Cost Categories at a time in this mode. To display Cost Categories in the multiple mode Go to Gateway of Tally> s Info.> Cost Categories > Display (under Multiple Cost Categories) The Multi Cost Category Display screen appears. View the details of all the Cost Categories created. It is not possible to make any changes in this mode.
Altering Cost Categories in multiple mode
You can alter multiple Cost Categories at a time in this mode. To alter Cost Categories in the multiple mode Go to Gateway of Tally> s Info.> Cost Categories > Alter (under Multiple Cost Categories) The Multi Cost Category Alteration screen displays. Make the necessary changes and Accept to save.
Note:
You
cannot
delete
a
Cost
Category
in
multiple
mode.
Buttons in Single Multiple Cost Category screens F6: Skip names It is used for quicker data entry when you need to alter only the Allocation details and not the names of the Cost Categories.
F8: Skip Details It is used for faster data entry when you do not need to alter the Allocation (Revenue and Non- revenue) details. You need to give only the names and the default allocations of Yes for Revenue and No for Non-revenue display automatically when you are creating Cost Categories. If you are in alter mode, the allocations that you opted for when creating the Categories are retained.
Groups, Ledgers It enables you to switch to these areas, without having to quit from the current screen.
F11: Features It is used to change company features. A detailed explanation on features has been given in the earlier section under Gateway of Tally . Note: Configuration changes only the current company.
affect
all
companies,
whereas
Features
changes
affect
Creating Cost Centres under Cost Categories
To create a Cost Centre under a Cost Category, set More than ONE Payroll/Cost Category to Yes Go to Gateway of Tally > s Info. > Cost Centre > Create (under Single Cost Centres)
Category This field appears only when you have opted for More than ONE Payroll/Cost Category in F11: Features. Else, Tally automatically creates a Primary Cost Category to which all cost centres are assigned. You will usually not need more than one cost category and should not use it until you are absolutely sure that the same information is not available in Cost Centres. Create a primary cost centre, Bangalore. All the other fields are described in detail in the section Creating Cost Centres in Single mode Displaying and Altering Cost Centres under Cost Categories in Single mode is similar to Displaying and Altering Cost Centres in Single mode explained previously. The only additional field is Category.
Creating Multiple Cost Centres under Cost Categories
Go to Gateway of Tally> s Info.> Cost Centres> Create (under Multiple Cost Centres)
This is a quick way to create a number of Cost Centres at a time.
Under Cost Centre Select a particular Cost Centre as the parent cost centre if you wish to create a number of Cost Centres under it. In the above screen, Finance has been selected and the cost centres Taxation, Management s and Treasury are created under it. If you do not want to be restricted to one parent cost centre while creating cost centres, choose All Items . The table Under Cost Centre has the columns Category, Name of Cost Centre and Under. If the parent Cost Centre (the field 'Under Cost Centre') is not 'All Items', the cursor skips the Under field.
Category Select the Category under which the Cost Centre will be created from the List of Categories or create a new category by pressing [Alt+C]
Name of Cost Centre Enter the name of the new cost centre. The alias facility is not available in this mode. Select aliases to Cost Centres created in multiple mode.
single alter to give
Under Select the parent Cost Centre from the List of Cost Centres . The list displays only the Cost Centres that belong to the selected Category.
Displaying and Altering Cost Centres under Cost Categories in Multiple mode is similar to Displaying and Altering Cost Centres in Multiple mode explained in the respective chapters. The only additional field is Category.
Error in Categorisation of Cost Centres: PARENT BELONGS TO ANOTHER CATEGORY! This error occurs when you try to assign a cost centre to a parent cost centre belonging to a different category. In most places, Tally prevents you from making this error, by not displaying a cost centre belonging to a different category. However, this action is not possible when you are altering a cost centre in multiple mode, selecting 'All Items' from Under Cost Centre (You may have chosen to skip either or both). You would have changed the Category without changing the name and the parent. However, Tally is able to ascertain this error only when you accept the screen.
Budgets
A budget is a plan prepared for the flow of funds in an organisation. It contains financial guidelines for the future plan of action for a selected period of time. A budget helps to refine goals and use funds efficiently. It provides accurate information for evaluation of financial activities, aids in decision making and provides a reference for future planning.
Multiple budgets can be created for specific purposes in Tally. Budgets for Banks, Head offices, Optimistic budgets, Realistic budgets, Pessimistic budgets, and so on can be created. Departmental budgets like Marketing Budgets, Finance Budgets, and so on, can also be created. Budget figures can be used in Tally to compare actuals and variances.
In Tally, you can create, alter and delete a budget.
Activating Budgets Feature To activate the Budgets feature in Tally:
Select F11: Features > ing Features
Set Maintain Budgets and Controls? to Yes.
Accept to save.
More: Creating a Budget Alter a Budget
Creating a Budget
To create a Budget in Tally
Go to Gateway of Tally > s Info > Budgets > Create
In the Budget Creation screen enter a Name for your budget.
Select from the List of Budgets for Under field. You can have a hierarchical setup for budgets. In the List of Budgets, Primary is at the top of the hierarchy and you can create more primary budgets. Sub-budgets can be created under Primary budgets.
Enter the period of the budget in the From and To fields. The period entered can be a month, a year or any other period.
In Set/Alter Budgets of, select
Groups - To create a budget for a Group of ledger s. Ledgers - To create a budget for Ledgers. Cost Centres - To create a budget for Cost Centres.
Accept to save.
More: Budget for Groups Budget for Ledger s
Budgets for Cost Centres
Budget for Groups
Set Yes in the Groups field in the Budget Creation/Alteration screen to set budgets for a group or group of ledgers. In the Group Budget screen, select a Group from the List of Groups and enter Name . Enter the cost centre for a group in Cost Centre . Select Not Applicable , if the budget is not for a particular cost centre, but for the company. In Type of Budget , select from the following two types. 1.
On Nett Transactions
Select this option to monitor the transaction amounts, not the balances. Nett is net of debits and credits for the specified period. For example, Nett transactions for Indirect Expenses are the debit amount for the specified period after reducing the credits for the same period. Opening and closing balances are not considered. 2.
On Closing Balance
Select this option to monitor the balance of the s, not the transactions. For example, balances of bank s, balances of debtors. Enter the budget amount in the Amount field.
Budget for Ledger s
Group Budgets do not get apportioned. Hence, Budget for Current Assets does not automatically flow to sub-groups.
Closing Balances Budget: Each month will have the same budget value except that the actual Opening Balance is taken into .
Nett transactions Budgets specified for a period get equally apportioned over the period.
Enter the budget amount for the specific ledger.
You can set the Budget for as many ledger s as required and accept to save.
Use Columns and Variance options to compare budget figures with actuals in most statements.
Budgets for Cost Centres
The purpose of a budget is to control expenditure. You can create multiple budgets in Tally, each for a specific purpose such as for the Bank, for the Head Office, Marketing budgets, Finance budgets, and so on.
Set Yes in the Cost Centres field in the Budget Creation/Alteration screen to set budgets for cost centres.
In the Cost Centre Budget screen, select a Cost Centre from the List of Cost Centres and enter Cost Centre .
Enter a budget figure in Expenses for the cost centre.
Enter a budget figure in Income for the cost centre.
Enter Closing Balance.
Enter more cost centres, if required, and accept to save.
Alter a Budget
You can modify a budget, using the alter option.
Go to Gateway of Tally > s Info > Budgets > Alter
In the Budget Alteration screen, modify the fields as required. Change the period or change budgets of Groups, Ledgers and Cost Centres.
Note:
Set/Alter
Budgets
is
set
to
No
by
default.
Set
Deleting a Budget To delete a budget
Go to Gateway of Tally > s Info > Budgets > Alter
Press Alt+D.
this
option
to
Yes
to
alter.
Budget Variance
Trial Balance and Group Summary have a feature called Budget Variance. The Budget Variance button (Alt+B) is active if Budgets feature is enabled and at least one budget created. Budget Variance displays Budgets, Actuals with percentage and Variance from the budget with percentage. 1.
Budget Variance can be accessed from:
Gateway of Tally > Display > Trial Balance to display the Trial Balance screen. Gateway of Tally > Display > Books > Group Summary and select a group from List of Groups to display the Group Summary screen.
2.
Click on Budget Variance (Alt+B) from the toolbar to display the Budget Analysis screen.
3.
Select from the List of Budgets for Budgets/Scenario.
4.
Three columns display Budget, Actuals and Budget Variance, respectively.
Introduction
A voucher is the primary online document for recording transactions. Transaction recording and analysis are greatly facilitated by having specific formats for different types of transactions. Tally provides 16 different predefined voucher formats or what it calls predefined types of vouchers. These are used for recording various transactions. A payment voucher is used for all types of payments, a receipt voucher for all types of money receipts, a sales voucher for recording sales transactions, and so on. These predefined vouchers fulfil your normal transaction needs. They pertain to both ing and inventory. Some of these vouchers can also be used differently according to the situation, e.g., sales vouchers can be used as invoices, vouchers can be post-dated, etc. Such use can be decided at the time of voucher entry by selecting the appropriate button. The predefined voucher types can be displayed as follows: Gateway of Tally > Display > List of s >
Tally acknowledges the special requirements of some s for more voucher types. These arise in cases like when you need the same voucher but in different names or separate series of numbers. Examples include Cash Payment Vouchers and Bank Payment vouchers where the relevant predefined voucher is Payment Voucher. You may have two or more sets of Sales Vouchers for different kinds of sales transactions e.g. Credit Sales, Cash Sales, etc. You would need to alter a voucher type to change default settings for different information appearing in vouchers. Using F12: Configure, you can further configure a voucher.
Alter a predefined voucher type
Even if you do not need extra voucher types, you would normally alter the predefined voucher types to customise them according to your needs, e.g., to control their numbers. Display or alter each voucher type (by pressing enter or double clicking) after Gateway of Tally > Display > List of s > Ctrl+V Voucher Types We shall create a new voucher type to explain the different features. It would also be applicable to alteration of voucher types including predefined types. More: Create a Voucher Type
Creating a Voucher Type
Go to Gateway of Tally > s Info. > Voucher Type > Create N
ote :
A
new
voucher
type
must
assume
the
functions
of
a
predefined
voucher
The Voucher Type creation screen is divided into three sections depending on the various settings.
Name Give the name of the new voucher type, e.g., Sales Invoice.
General Type of Voucher
type
The type of voucher should be any one of the predefined voucher types (already listed in introduction). The new voucher type would inherit the properties of this predefined voucher type. It would function exactly like the predefined voucher.
Abbreviation A n abbreviation is required particularly for unformatted reports, which do not use compressing techniques. (Tally allows printing of both formatted and unformatted reports). Even if the Abbreviation is not specified, Tally automatically sets a default name to the Voucher. In this example, give ‘Purch’ as the abbreviation. Though there is no restriction on the length of the abbreviation, it should preferably be five characters or less.
Method of Voucher Numbering This is, perhaps, one reason for your opting for a new voucher type. There are three methods available: None This will disable numbering of such vouchers. If you select this method, no further information is required. Manual This method will allow you to number vouchers of this type yourself. It does not check for sequence of the numbers and permits you to specify anything you wish in the voucher number field. However, you may choose to prevent entry of duplicate numbers. If you do, enable the next field 'Prevent Duplicates'. 1. Prevention of Duplicates is possible if you enable the option at the time of creation. You may enable it later (by alteration) only if there are no transactions of this voucher type. 2. If you face difficulty because transactions now exist, simply create another voucher type for preventing duplicates of subsequent voucher numbers. No further information is required for manual numbering method. Automatic This method is both flexible and exhaustive. Use it carefully to give you your desired numbering system. Select this option to let Tally number the vouchers automatically for you.
Use Advance Configuration If the Method of Voucher Numbering is set to Automatic, then an additional field to set the advanced configuration for the Voucher type appears. Setting this field to Yes , Voucher Type Creation (Secondary) screen appears. Refer to Use Advance Configuration for more details. A further discussion on these options is necessary.
Use EFFECTIVE dates for vouchers? Select Yes if you want to enter effective dates for vouchers. You would opt for this if you have instances where a transaction under consideration for overdue/ageing analysis is recorded currently but will take effect from another date. If effective date is entered, the overdue/ageing will be considered from the effective date and not from voucher date.
Make Optional as Default Setting this option to Yes , will set your Voucher to Optional Voucher by default. Refer to Optional Vouchers for further details.
Use common narration? Select Yes to give a common narration for the entire voucher. Tally vouchers can have multiple entries. Hence,
you may wish to give a common narration for all the entries of the voucher or a separate narration for each entry or both. Select Yes even when you want both. Select No if you do not want a common narration. Example of common narration in a voucher:
Narrations for each entry Select Yes if you want to give a separate narration for each entry of a voucher. This would be applicable for a multiple entry voucher where you want separate details for each entry. Select No if you do not want separate narration for each entry.
Note Excise
:
The feature
option to create is enabled in
an Excise Voucher F11 features.
type
appears
in
the
General
section
if,
the
Printing Print after saving voucher? If you want to print every voucher after entering it, select Yes , else select No . This is suitable for an online environment where you use the Tally printed voucher as the formal voucher. , however, that the transaction is already recorded and posted and should you wish to make corrections to the printed voucher, you must alter the Tally voucher online and print it out again. N o t e : Depending on the printing features appear in
Type this
of Voucher field.
you
have
selected
to
create
or
alter,
different
Name of Class You can create classes by entering the class name in this section. A detailed discussion on Voucher class creation
is covered in Voucher Classes .
Use Advance Configuration
I f the Method of Voucher Numbering is set to Automatic, then an additional field to set the advanced configuration for the Voucher type appears. Setting this field to Yes, Voucher Type Creation (Secondary) screen appears.
Starting number Give the number for the first voucher. Usually it is 1. You can set it to any number you want. Tally will autoincrement from this number for subsequent vouchers. However, the numbering of vouchers also depends on other variables supplied by you, which follow hereafter.
Width of Numerical Part You may leave it blank to let Tally automatically adjust the width according to the number. However, for more aesthetically aligned look in reports, you may keep a fixed width, e.g., 3.
Prefill with ZERO? When the width is specified, the digits before the number is blank if 'No' and zeroes if 'Yes'. E.g. 001 1 010 10 PEU/001/06-07 PEU/1/06-07 PEU/ 1/06-07
Restart Numbering Voucher Numbering may be restarted with the starting number (as specified) at intervals selected by you - Daily, Monthly, Never, Weekly or Yearly. You must give the date whence numbering should restart under the field Applicable from. The date must be the first day of the month. You may specify more than one Restart dates. For example, should you wish to renumber your vouchers from 01 June 06 on yearly basis, you must specify it in the next field. This would retain the numbering system in the prior period. If, however, you want to change the numbers from the beginning from monthly to yearly basis, simply alter the first field itself.
Prefix Details If you want the voucher numbers to be prefixed with some fixed information, give the information here. Examples of prefix details are: 1.
month of the voucher as given above- 'April/'
2.
company info like 'TSPL/'
3.
even fixed number series like '1000'
Note: The numeric portion begins immediately after the prefix information. Therefore, be sure to give a space or a slash '/' or some such character should you want a separation, e.g. we have specified April/. The slash would cause the voucher number to appear as April/001, otherwise it would be April001. This facilitates simple usage for fixed number series appearing as 200100001 where 2001 is the prefix, and 00001 is the starting number with a width of 5, and with leading zeros. You can choose different prefix information for different periods or let one continue. The prefix continues from the date you mention under 'Applicable from' till the next date that you may give under 'Applicable from'. Hence, we have chosen to change the prefix from April to May when the month changes. Please note, however, that if we omit to change the prefix for the subsequent months (i.e. do not give 'Applicable from' date for the month), your voucher numbers for even June, July etc would contain the prefix 'May/'.
Suffix Details You can also give fixed suffix information for the voucher number. The same rules and effects as for Prefix Details apply.
Voucher Classes
Voucher Classes are available for all major voucher types and the Cost Centres can be allocated if classes are used. Automation of cost centre allocation has met the need of 'percentage allocation' based on predefined figures. Cost centre classes affect all voucher types. For further details refer to Cost Centre Classes.
Voucher Classes for Payment, Receipt and Contra Vouchers The primary intention of using classes for payment, receipt and contra vouchers is to enable data input in 'single entry' or list mode rather than in Tally's traditional double entry mode. You can also use it to have a separate form for each cash and bank . Let us take an example of a Payment Voucher. You can either alter the existing Payment Voucher Type or create a new voucher type based on it. (From Gateway of Tally > s Info > Voucher Types ) The item Name of Class is below Effective Dates for Vouchers and above the Numbering Table. Give a name to the class by simply typing it, e.g. Barclays Bank Payment. You may create more than one class. Hence, you might want to have one more for Cash Payment.
The Class Table
Exclude these Groups Groups other than Bank or Cash groups should not be selected. This is used to exclude Cash or Bank Groups that are not to be used in this class to pay out the money. In our example, we want to exclude Cash and Credit Cards.
Include these Groups Groups other than Bank or Cash groups should not be selected. You might exclude a top level group but include its sub-group.
Ledger Name Selecting the ledger that will be used to pay out the money will eliminate the need to select it during entry. In this case, it is BarcSlays Bank. In a receipt voucher, you will select the ledger into which monies will be received. You may even select 'Not Applicable'. The purpose of selecting 'Not Applicable' will be to permit Single Entry mode and at the same time retaining the option of selecting the during entry. Note: Exclude which the class
or is
Include Groups are irrelevant when you specify a Ledger Name created. They are useful when you select 'Not Applicable' .
for
In case you do not require split payments, you could create only one class with nothing in include/exclude Groups and without any ledger Name. A single class does not require class selection and is a rapid way of using Single Entry mode with full functionality of all ledgers available. Accept the class table and the voucher type alteration. You may use [CTRL]+[A] combination. More: Payment Voucher Entry with Classes Purchase Entries in Invoice mode (without classes) Purchase Voucher Classes Additional ing Entries Voucher Classes for Journals
Payment Voucher Entry with Classes
Select Voucher Entry at the Gateway of Tally. Press F5:Payment . You have to select a class or Not Applicable if no class is desired for this entry. If Cost Centre Class has been set, it can be selected too.
The entries will be made as follows:
The Voucher Class is Barclays Bank Payment. We have selected a Cost Centre Class called Departments too. That will be discussed later. Note that you do not have to select the bank and the entries are not in the regular Dr/Cr format. Data entry in Tally was already very rapid. It is now faster than before!
Purchase Entries in Invoice mode (without classes)
Purchase Vouchers can now be created in Invoice mode. You can enter the suppliers' invoices in the same way as they physically appear.
Set-up Invoice Mode entry for Purchase transactions 1.
Select F11:Company Features .
2.
Select F1: ing Features
3.
Set the option 'Allow Invoicing' to Yes
4.
Enter Purchases in Invoice Format? Set it to Yes
5.
Accept the screen using Ctrl+A.
Entry of Purchase vouchers in Invoice mode Select F9:Purchases . Select As Invoice button or use CTRL+V . This button is a toggle for Invoice and Voucher modes. You may want to use the voucher mode for more complex entries. Entries are exactly like sales invoices and hence are not discussed.
The treatment of additional cost of purchases needs elaborating.
Additional Cost of Purchases If it is desired to add the other purchase expenses like freight and import duty to the cost of the item, you would have activated the option in F11:Company Features 'Track Additional Costs of Purchases'. In voucher mode, the additional cost details have to be filled in after the allocation of each purchase item. In Invoice mode, the treatment of additional costs on stock items is automated by altering the parent group master details of the expenses. In many situations, more than one item is purchased where the expense that is incurred for them is charged as a lump-sum. However, to give an effective cost including the expense to each purchased item, you would earlier give additional costs of purchase for each item. That method though very flexible and practical could be tedious. That process is now automated and allocation of the expense to stock item can be done on a predefined basis. The following set-up activity is required to be carried out: 1.
Alter the Parent Group of the expense ledger s, e.g. Direct Expenses. You will find a new option Method to Allocate when used in Purchase Invoice. If you want to appropriate the ledger s under
1. this group to stock items by either Quantity or value, you must select the option. Select Appropriate by Qty for our example.
Now if freight belongs to the group Direct Expenses, the amount will be apportioned by quantity, i.e., in the ratio of 1:5. If however, the parent group does not have an allocation method or is set to No Appropriation or Not Applicable, the amount of freight will not be apportioned to the items and will simply remain in the financial books as expense. N o t e : In Invoice mode, Purchases can be allocated to Cost Centres only when Cost Centre classes are used, i.e., you have to auto-allocate purchases to cost centres if you are using the Invoice mode of entry. Using the voucher mode of entry for purchases allows manual allocation of purchases to cost centres.
Purchase Voucher Classes
Purchase Voucher Classes are templates where you can restrict s to be used in entries as well as automate ing entries for items and expenses. You can either alter the existing Purchase Voucher Type or create a new voucher type based on it. From Gateway of Tally > s Info > Voucher Types The item Name of Class is below Effective Dates for Vouchers and above the Numbering Table. Give a name to the class by simply typing it, e.g. Imports. You may create more than one class. The class table is now to be completed.
Exclude and Include Groups have been discussed before and do not require further elaboration.
Default ing Allocations Each Stock Item in the invoice can be allocated to the financial (nominal) mentioned here. Hence, all the stock items that will be entered in this class will automatically affect the Nominal ledger Purchase – Imports. Of course, the stock item record remains as it is and can be viewed separately. The allocation cannot be split up at present but in future releases you will be able to split this to cater to Tax inclusive prices.
Additional ing Entries
Expenses and other charges like Import Duty, Freight, VAT, Sales Tax can be specified here which will be calculated automatically on the Type of Calculation and Value basis. For explanation on each Type of Calculation , refer the Appendix. We have selected Freight which is an under the group Direct Expenses.
Type of Calculation We select defined value as we would like to input the amount of freight charged on the invoice.
However, we would like Freight expenses to be apportioned to each stock item based quantity and we want the apportionment done automatically.
Auto-allocation of Additional Entries to Stock Items Purchased (This method is not applicable for sales invoices) The Group Direct Expenses had been altered earlier to allocate by quantity. Hence, the allocation will be done automatically based on quantity. Your purchase voucher class has been set-up. You can have more than one additional ing entries. You can also have more than one Class.
Voucher Classes for Journals
Classes allow Journals to handle Forex Gain Loss Adjustments for companies having Multi-Currency s. You would create a 'class' in the normal way (s Info > Voucher Types > Alter > Journal). And having selected the class during Voucher Entry, will find only those Ledger s appearing which have a Gain/Loss to be adjusted as of the date of voucher and auto-calculation of these amounts.
Voucher Classes for Debit Notes and Credit Notes Voucher classes for Credit Notes are similar to sales invoices except for one important inclusion. You can set the class for interest entries to enable adjustment of interest payable. If the Interest option is selected, the other sales invoice-like options will not be available. A separate class may to be created for entries like Sales Returns. Since Sales and Purchase Invoice classes have already been dealt with, we shall not elaborate on this behavior anymore. Debit Note classes can be set for interest entries only. Classes for other entries are not available as the invoice mode of entry is not possible for Debit Notes. Classes for interest entries are covered under Interest Calculations.
Voucher Classes for Stock Journal
Stock Journal classes allow you to handle transfers from one location (Godown) to another, for companies having Multi-Location Inventory and at least two location/Godowns created. Once the class is selected, you will need to specify the Destination and simply provide the list of items to be transferred. Through this class all items/batches thus selected will be exactly mirrored to the destination, including Batch Number, Rate and Value. Go to s Info > Voucher Types > Create Select the Stock Journal Voucher from the List of Voucher Types. Enter all the fields as per your requirement. Refer Creating a Voucher Type for more details. To create a Stock Journal Voucher Class , enter a name in the Name of Class field. (Eg: Transfer)
The Class: Transfer screen is displayed. To create a class for inter-godown transfer set the option Use Class for Inter-Godown Transfer to Yes.
Additional Information Refer Voucher Classes for Stock Journals in Job Costing for more details.
Cost Centre Classes
The purpose of Cost Centre Classes is to facilitate predetermined allocation of ledger s (like expenses and incomes) to cost centres during voucher entry. Allocation to cost centres can be made while using voucher classes and the cost centres can be 'classed' too.
How does it work? Automation of cost centre allocation involves 'percentage allocation' based on predefined figures. Cost Centre Classes are defined where percentages at which allocation is to be made are given. Cost centre classes affect all voucher types. In voucher entry, depending upon the cost centre class, the allocation will be carried out in the background without the allocation screen appearing at all. More: Set up required for Cost Centre Classes Voucher Entry with Cost Classes An explanation of 'Types of Calculation'
Set up Required for Cost Centre Classes
Before you select classes, it is advisable to create the cost centre structure. Hence, create your cost categories and cost centres before creating classes. Draw out on paper the Classes required and indicate which cost centres will be affected for each class. For example, You might have the following structure:
Divisions 1.
Export
2.
Wholesale
3.
Retail Departments -
4.
Finance
5.
Marketing Where Divisions and Departments are Cost Categories the others are cost centres. Now, you want to allocate sales to the following Cost Centre Classes:
6.
Export - to allocate 100% of Export sales to the cost centre Export
7.
Wholesale - to allocate 100% of wholesale sales to the cost centre Wholesale
8.
Retail - to allocate 100% of retail sales to the cost centre Retail You also want to allocate all the sales to the Marketing Department You want to allocate Marketing Expenses pro-rata in the following manner : 1.
Export – 60%
2.
Wholesale – 25%
3.
Retail-15%
100% to Marketing Department With this structure, let us now set up the classes.
Set up Cost Centre Classes At the Gateway of Tally, select F11: Features > ing Features
Set Use Pre-defined Cost Centre Allocations during Entry to Yes
(The other options can remain as previously set and are not discussed here.) You now bring up the Cost Centre Classes creation screen. Type in the Class names and select the Categories and the respective cost centres. Specify the percentage of allocation. After entry, your auto-cost allocation screen will appear as follows :
We have created the Cost Classes as Export, Wholesale, Retail and Marketing Expenses. Divisions and Departments are cost categories. Export, Wholesale and Retail are cost centres under Divisions. Marketing Group is a cost centre under Departments. Although the names of the class and the cost centres are the same in the example, you need not have them with same names.
Voucher Entry with Cost Classes
Each voucher now contains the Cost Class option at its head. Select Not Applicable in case you want to allocate manually. Select a cost class to auto-allocate according to the predefined percentages set in that class. We will take two examples, sales and payment. In sales, we will select Export as the Cost Class. Go to the Voucher Entry Screen Select F8: Sales You have the following options:
Your voucher type : Sales. You could select another voucher type if required.
Class This is the Voucher Class which automates ledger allocation and additional ing entries
Cost Centre Class Select one of the classes created earlier, Export in this case. Now enter the sales invoice as usual. The cost centre allocation sub-screen will not come up and the allocation will be done automatically in the background. After accepting the entry, check the cost centre displays to whether the allocation was done correctly. Similarly, when you press F5:Payment , you are presented with similar options. Select Marketing Expenses in that case. The cost centre allocation sub-screen will not come up and the allocation will be done automatically in the background. Check the cost centre reports for allocation. You may even use PgUp or alter the voucher to display the allocation made. It would show the allocation in the voucher. Example
You could combine Voucher Class and Cost centre class to maximize automation!
An Explanation of Types of Calculation
As Additional Excise In the Indian sub-continent, a manufacturing tax, or Excise is levied. For some products, a supplementary levy on the 'Basic Excise Duty' is charged, or 'Additional Excise Duty'. This is a surcharge calculation. For example, an Additional Excise Duty of 10% on the Basic Duty. While the calculation method is identical to 'As Surcharge' (see below), the result is to provide a 'Total Excise Payable' calculation accurately during Invoice printing.
As a Flat Rate When you wish to specify a standard mark-up/down on an invoice. For example, 100.00 for every invoice, independent of the qty/value of the invoice.
As Surcharge When you wish to calculate the value based on the immediately preceding figure. For example, a Sales Tax of 10% is applicable on an invoice, which would be calculated on the value of goods sold. On this, a 'Surcharge' of 5% - i.e. 5% of the Sales Tax value is applicable.
As Total Amount Rounding Typically, the last line in an invoice. You would need to create an which would carry the 'rounding difference'. Now, as the other values of the invoice are calculated, this would automatically get adjusted to keep the Total Invoice Value to the desired rounding limits. Normally, you would also mark this invoice as 'Remove if Zero ? Yes', so that the head is not retained in the invoice print-outs if no rounding was applicable.
As Defined Value This allows you to specify a value while creating the invoice itself. Normally, you would use this when the basis of calculation is neither Value nor Qty dependent, and therefore, needs to be entered every time you create an invoice.
Based on Quantity In case of calculations based on the 'Total Qty' supplied. For example, you may have Freight or Forwarding charges as 2.00/Kg, and if the total qty supplied in the invoice is 200.000 Kg, then the amount should become 400.00. The 'Value Basis' will also need to be provided as '2.00/Kg' or '0.50/Pc' as the case may be.
On Current Sub Total In certain environments, taxes are applicable on the Total Goods Value as well as supplementary charges such as 'Excise Duty', 'Packing Charges' etc. Normally, when the tax calculation method is specified as 'On Total Sales' (see below), the calculations are based on the Total Goods Value only. When you wish the supplementary charges to be included, then you would set 'On Current Sub Total' as the type of calculation.
On Item Rate
Typically used for both VAT as well as Excise Duty style calculations. Here, you would have specified the Rate of Tax applicable for each Stock Item, and you would want only those items to be used for calculation purposes which equals this Rate of Tax. The advantage is to be able to mix multiple Tax Rate products in the same Invoice, and yet get the correct ones picked up for each Tax bracket.
On Total Sales The most common basis of Tax Calculation is on the total value of goods/services. This method would calculate using the sum of Stock Items used in the invoice.
Currencies (Multiple currencies and foreign exchange)
Many Organisations have transactions in more than one currency. Such transactions have to be recorded either in the base (home) currency or in the foreign currency. If the transactions are recorded in home currency, the rate at which the foreign currency is exchanged should be recorded as well. At times you need to record the transaction in the foreign currency itself when you maintain the balance of the concerned in foreign currency. Tally uses the term base currency for the currency in which your books are kept. Foreign Exchange is used interchangeably with foreign currency. The base currency is specified while creating the company. Tally makes it easy to manage multiple currencies, automatic calculations of exchange rates, automatic conversion of any currency used to record a transaction to the currency of the , etc. The Balance Sheet and Profit & Loss of the company is maintained in the base currency. Conversion of foreign currency balances is done as per rules set by you. More: Enabling Multiple Currency in Tally
Enabling multiple currency in Tally
Enable Multi-Currency feature to view and enter transactions in multiple currencies. 1.
Go to Gateway of Tally
2.
Select F11: Features > ing Features > to display the Company Operations Alteration screen
3.
Set Allow Multi-Currency? to Yes
4.
Accept to Save.
Multi Currency feature is now enabled.
Currencies menu View the Currencies menu from Gateway of Tally > s Info > Currencies .
More: Create a Currency Alter Currency Rates of Exchange
Creating a Currency
Use ASCII Special Characters with [Alt] key combination if your keyboard does not have the symbol. Utilities like Character Map (Start > All Programs > Accessories > System Tools) in Windows shows the key combination for most symbols. This might be different on some notebook computers, refer to the computer's manual or the vendor. You cannot assign a duplicate currency symbol for a company in Tally. The Key combinations for a few currency symbols are given below: 1.
Alt + 156 –Pound Sterling - £
2.
Alt + 0165 – Japanese Yen - ¥
3.
Alt + 0128 – Euro - €
4.
Use the Dollar and the Rs. Symbol from the keyboard
To create a foreign currency 1.
Go to Gateway of Tally > s Info. > Currencies > Create
2.
Enter the currency symbol in Symbol. This symbol appears in your reports wherever applicable.
3.
Enter the name of the currency in Formal Name.
A formal name is required to distinguish different currencies with the same symbols. For e.g. you have created two companies (ABC and PQR) in Tally. ABC and PQR have different set of currencies. ABC uses symbol $ for Australian Dollars and PQR uses the symbol $ for U.S. Dollars. The formal name distinguishes
two different currencies with the same symbol when you compare s of two companies. The company that is loaded first retains the original symbol for display purposes. The other company's currency symbol will be prefixed with the first letter/first few letters (to make it unique) of the formal name. Here, if ABC is loaded first then the symbol $ is for Australian Dollars and in PQR (loaded next) the symbol $ is prefixed with the letter U (first letter of its formal name). e.g., US Dollars, Pound Sterling, Indian Rupees, Omani Rial, etc. Note:
You
cannot
assign
a
duplicate
Formal
Name
for
a
company
in
Tally.
4.
Enter the number of decimal places for the currency in Number of Decimal Places. E.g. Currencies with 2 decimal places like paisa and currencies with three decimal places like dinar. There are currencies that do not have decimal places, e.g., Vietnamese Dong.
5.
Tally has two formats for displaying an amount, viz., in millions and in lakhs. 1000000 (one followed by six zeroes) in millions format would appear as 1,000,000 and lakhs would appear as 10,00,000.
Selecting No means you want amounts to appear in lakhs. N o t e: You can always specify the Loss display, press [F12]:
appearance Configure
of to
numbers in specific reports, e.g. In change scale factors for values.
Profit
&
6.
Set Is Symbol SUFFIXED to Amounts? to Yes for the symbol to appear after the amount. Set to No for the symbol to be prefixed to the amount.
7.
Set Put a SPACE between Amounts and symbol? to Yes to apply a space between amounts and symbol.
8.
Enter the symbol for decimal portion of currency in Symbol for Decimal Portion of Amount. E.g. Ps. for Paisa.
9.
Enter the number of decimal places for printing the amounts in words in Decimal Places for Printing Amounts in Words. This number should be equal to or lesser than the number specified in Number of Decimal Places field.
N o t e : The C u r r e n c y Language created.
cannot
be
translated
or
transliterated
but
will
appear
in
the
Alter Currency
You can modify or delete a currency master using the Alter option. Rates of Exchange can also be altered from here. To alter a currency master: 1.
Go to Gateway of Tally > s Info. > Currencies > Alter
2.
Select a C urrency from the Currencies list (displayed if there is more than 1 currency)
3.
In the Currency Alteration screen alter details as required. For details see Creating a Currency Master
Displaying a Currency The Currency Display screen displays the details and rates of exchange for a selected currency. To display the Currency screen: 1. Go to Gateway of Tally > s Info. > Currencies > Display 2. Select a C urrency from Currencies list (displayed if there is more than 1 currency) 3. Enter to view the details
Deleting a Currency
1.
To delete a Currency: 1.
Go to Gateway of Tally > s Info. > Currencies > Alter
2.
Select a currency from the Currencies list (displayed if there is more than 1 currency)
3.
Press Alt + D in the Currency Alteration screen to delete
Note
:
You
cannot
delete
a
Currency
that
has
been
used
in
a
voucher
transaction.
Rates of Exchange
Rates of Exchange is a feature wherein you can enter the rate of foreign currency for a specific date. Foreign exchange variations occur every day with different selling and buying rates. Rates of Exchange helps you apply the rate for the given date in your transactions.
To open Rates of Exchange : 1.
Go to Gateway of Tally > s Info. > Currencies > Rates of Exchange
2.
The Multi-Currency Alteration screen is displayed
3.
Enter the date for which the exchange rate is applicable
4.
Enter the Standard Rate (optional) which is used to calculate variances from the actual transaction rates
5.
Enter the Selling Rate (your selling rate)
6.
Enter the Buying Rate (your buying rate)
7.
Accept to Save
N
ote
:
Last
Voucher
Rate
is
displayed
if
any
voucher
has
been
entered
earlier.
S elling Rate – Specified Rate Selling rate is your selling rate (as opposed to bank's selling rate) used for receipt voucher entry where you receive foreign exchange.
This is the rate obtained from the daily newspaper or your banker. If you input this rate before any transaction entry, while entering a foreign exchange transaction, this rate will be brought up by default. (You can still change the actual rate). The actual rate at which the currency was last used is displayed and cannot be changed. The specified rate is used for calculating foreign exchange variances only in case there is no standard rate.
Buying Rate – Specified Rate Buying Rate is your buying rate (as opposed to bank's buying rate) used in payment vouchers. The actual rate at which the currency was last used is displayed and cannot be changed. The specified rate is used for calculating foreign exchange variances only in case there is no standard rate. N ote: Tally the standard
calculates Gain or Loss rates, specified rates
in foreign and actual
exchange transaction
transactions rates.
automatically
using
Inventory Information
The Inventory Info menu lists the masters, through which you can provide Tally the details of your company’s inventory. Go to Gateway of Tally > Inventory Info. N o t e: The Inventory Maintain s Creation screen.
Info with
menu is displayed in Gateway of Tally, only if you select Inventory from the Type of Company list in the C o m p a n y
Configuring F12:Configure and Setting F11: Features
You can organise the type of information and the level of details that you require, using F12: Configure and F11: Features. You can enable the desired settings. Tally allows you to alter most of the settings at any point of time.
F12: Configure To configure the settings for Inventory Masters Go to Gateway of Tally > F12: Configure > Accts/Inv Info. The settings pertaining to Inventory Masters are set to No, by default. If you reset them to Yes, the features would become available. Typically, they are additional fields that appear during Masters creation which enable you to obtain more information and detailed analyses. Refer Accts/Inv Info Configuration for more details.
F11: Features There are various settings available under Inventory Features, which determine the information to be entered during transaction entries. Refer Activate Company Features for more details.
Stock Groups
Stock Groups in Inventory are similar to Groups in ing Masters. They are helpful in the classification of Stock Items. Classification is based on some common behaviour. Stock Groups enable easy identification and reporting of Stock Items in statements. You can group Stock Items under different Stock Groups to reflect their classification based on some common functionality. Grouping enables you to locate Stock Items easily and report their details in statements. You can group the items of a particular brand to extract stock of all items of that brand. Consider that the Stock Items in your inventory are Sony 3.5" disks, Maxell 3.5" disks, Sony tapes, Maxell tapes, and so on. Create Stock Groups, Sony and Maxell, and classify Sony products under the group Sony and Maxell products under Maxell. You now have ready details of all Sony and Maxell products, duly classified. Create sub-groups under Stock Groups for deeper analysis. Go to Gateway of Tally > Inventory Info. > Stock Groups More: Creating a Stock Group Creating Multiple Stock Groups Displaying or Altering a Stock Groups
Creating a Stock Group
Go to Gateway of Tally > Inventory Info. > Stock Groups > Create (under Single Stock Group) The Stock Group Creation screen displays.
A brief description on each of the fields in the Stock Group Creation screen follows.
Name Enter the name of the Stock Group to be created. For example, Building Materials.
Under Specify whether it is a primary group or a sub-group of another group, by selecting from the list. For example, Primary. Press Alt + C to create a parent group, if you do not have it in the list.
Can quantities of items be ADDED? This field pertains to information on measuring the units of the Stock Items that you would categorise under the Stock Group. The Stock Items categorised under the group should have similar units for them to be added up. You cannot add quantities in Kgs to quantities in Pcs. N o t e : You can always items in the group.
go
back
and
reset
this
option
after
assessing
the
units
of
Buttons in single mode stock group creation From the Stock Group Creation screen, you can create any of the Masters listed below with a single click.
Category
Items
the
Units
Godown
Vch Types
The buttons. F e a t u r e s.
C u r r e n c y and B u d g e t, a r e
available
only
if
you
opted
for
the
same
in
F11:
Creating Multiple Stock Groups
Go to Gateway of Tally > Inventory Info. > Stock Groups > Create (under Multiple Stock Groups )
Select the parent group under which you want the new groups to be created from the List of Groups . The group selected is displayed in the Under Group field. A brief description on each of the fields in the Multi Stock Group Creation screen follows.
Name of Stock Group Enter the name of the Stock Group.
Under If you select any group other than All Items in the Under Group field, then this column is filled in automatically with the selected Group name and the cursor skips this column. This speeds up data entry. If you select All Items in the Under Group field, the cursor does not skip this field and allows you to enter the parent group of each of them.
Items are Addable? (Y/N) This pertains to information on the Stock Items that you would create under this Stock Group. The Stock Items created under the group should have similar units to be 'addable'.
Buttons specific to Multi Stock Group Creation screen F4:Parent To change the parent entered in the field Under Group when you have sub-groups created under it. The change affects all the sub-groups created under the parent, meaning, they would now belong to the new parent.
F8:Skip Details If Items are addable is to remain the default, that is, remain the same as specified for the parent Stock Group, use this button. The cursor skips that column which speeds up data entry.
From the Multi Stock Group Creation screen, you can create any of the Masters listed below with a single click.
C ategory
I tems
Go down
More: Displaying and Altering Stock Groups
Displaying and Altering Stock Groups
You can display and alter Stock Group in Single mode and Multiple mode.
Displaying Single Stock Group Go to Gateway of Tally > Inventory Info. > Stock Groups > Display (under Single Stock Group) Select the Stock Group whose particulars you want to display from the List of Groups. The Stock Group Display screen is displayed. This gives information only on the Stock Group Master and not on any of the balances.
Altering Single Stock Group Go to Gateway of Tally > Inventory Info. > Stock Groups > Alter (under Single Stock Group) Select the Stock Group from the List of Groups. The Stock Group Alteration screen displays. Make the necessary changes and accept Yes to save. You can delete a Stock Group only from the Stock Group Alteration screen. Select a stock group from the list and press ALT+D to delete it. N o t e : You cannot delete a Stock under it. You need to first delete Group.
Group if the sub
it has any sub groups groups and Stock Items
or to
Stock Items created delete the Stock
Displaying Multiple Stock Groups Go to Gateway of Tally > Inventory Info. > Stock Groups > Display (under Multiple Stock Groups) Select the Stock Group from the List of Groups. The Multi Stock Group Display screen displays. It displays the entire sub groups of the selected Group. If you select All Items from the List of Groups, all the groups and sub Groups created are displayed.
Altering Multiple Stock Groups Go to Gateway of Tally > Inventory Info. > Stock Groups > Alter (under Multiple Stock Groups) The Multi Stock Group Alteration screen displays. Make the necessary changes and accept Yes to save. Note:
You
cannot
delete
a
Stock
Group
from
multiple
mode.
Stock Categories
The concept of Stock Categories is similar to that of Cost Categories. Refer the section on Cost Categories to understand the similarity/differences. N o t e : This option Maintain Stock
becomes available in the Categories to Y e s in F11:
Inventory Info. Features.
menu
only
if
you
Se t
Stock Categories offers a parallel classification of Stock Items. You can create Stock Categories like Floppy Disks and Floppy Drives. Consider the example given in the Stock Groups. You would know how many 3.5" floppies of Sony and Maxell are in stock. To know the total stock of floppy disks or any alternative item that could be used, Stock Categories would be the best option to use. Create a Stock Category called Floppy Disks and classify both Sony 3.5" diskettes as well as Maxell 3.5" diskettes under the same. Since the items are substitutes of each other, if one is out of stock, you can offer the other of the same category. Stock Query option available under Statements of Inventory (Gateway of Tally > Display) reveals the strength of Stock Categories. Note: features
While configuring F12: that you do not need.
Configure
and
setting
F11:
Features
do
not
enable
Go to Gateway of Tally > Inventory Info > Stock Categories Note: Cost
This option is displayed in Categories to Y e s in F11:
More: Creating a Stock Category Creating Multiple Stock Categories Display or Alter a Stock Category
the Inventory Features.
Info. menu only if you set M a i n t a i n
Creating a Stock Category
You can create Stock Categories and sub categories of Stock Categories to organise your information. Gateway of Tally > Inventory Info. > Stock Categories > Create (under Single Stock Category) The Stock Category Creation screen displays.
A brief description on each of the fields in the Stock Category Creation screen follows.
Name Enter the name of the Stock Category. Eg: Tablets.
Under Specify whether it is a primary category or a sub-category of another category. Select Primary from the list, if you do not have a parent group. Use ALT + C to create a parent if you do not have the required category in the list.
Buttons in single mode stock category creation
Groups
Items
Godown
Budget
Vch Types
Units
Currency
From the Stock Categories Creation screen, you can create any of the Masters listed above with a single click. Note: The features in
buttons F11:
for Currency Features.
Displaying and Altering Stock Categories
and
Budget,
only
if
you
have
enabled
the
respective
Creating Multiple Stock Categories
Go to Gateway of Tally > Inventory Info. > Stock Categories > Create (under Single Stock Category )
A brief description on each of the fields in the Multi Stock Category Creation screen follows.
Under Category Select the parent category under which you want the new categories to be created. If you select any category other than All Items , all the new categories being created will be created under the selected category. The column Under is filled in automatically with the selected category and the cursor skips this column, which in turn speeds up data entry. Selecting All Items gives you the flexibility of specifying the parent of each new category created.
S No. The serial number of the stock category is auto generated.
Name of the category Specify the name of the Stock Category.
Under If you have selected All Items in Under Category , you must specify a parent category in this column.
Buttons specific to Multi Stock Category screen F4:Parent To change the parent entered in the field Under Category when you have sub-categories created under it. The change affects all the sub-categories created under the parent, meaning they would now belong to the new parent.
F8:Skip Details If the field Under is to remain the same as specified for the parent Stock Category, use this button. The cursor will skip that column, which speeds up data entry.
From the Multi Stock Category Creation screen, you can create any of the Masters listed below with a single click.
G roups
I tems
Go down
More: Displaying and Altering Stock Categories
Displaying and Altering Stock Categories
You can display and alter Stock categories from Single and Multiple mode.
Displaying Single Stock Category Go to Gateway of Tally > Inventory Info. > Stock Categories > Display (under Single Stock Group) Select the Category for which you want to view the display details from the List of Categories. The Stock Category Display screen displays for you to view the details entered in Stock Category Master.
Altering Single Stock Category Go to Gateway of Tally > Inventory Info. > Stock Categories > Alter (under Single Stock Category) Select the Category for which you want to alter from the List of Categories. The Stock Category Alteration screen displays. Make the necessary changes and accept Yes to save.
Deleting a Stock Category You can delete a Stock Category only if it does not have any sub categories or Stock Items under it. Select a Stock Category from the list and press ALT + D to delete it.
Displaying Multiple Stock Categories Go to Gateway of Tally > Inventory Info. > Stock categories > Display (under Multiple Stock Categories) Select the Category for which you want to view the details or select All Items to view the details of all the Categories created, from the List of Categories. The Multi Stock Category screen displays. You can view the entire details of the Category and that of sub categories if any, in this screen.
Altering Multiple Stock Categories Go to Gateway of Tally > Inventory Info. > Stock Categories > Alter (under Multiple Stock Categories) Select the Category for which you want to alter from the List of Categories. The Multi Stock Category Alteration screen displays. You can make changes in the Masters of the selected Category and also of the sub categories. Select All Item to make changes in any desired Category Masters as all the Categories created are displayed in this screen. Note:
You
cannot
delete
a
Stock
Category
from
multiple
mode.
Delete a Stock Category You can delete a stock category only if it does not have any children under it. The children could be stock category or stock item or both.
Gateway of Tally > Inventory Info > Stock Categories > Single Alter Press [ALT]+[D] to delete the stock category Note:
You
cannot
delete
a
stock
category
from
multiple
mode.
Stock Items
Stock Item refers to goods that you manufacture or trade. It is the primary inventory entity and the lowest level of information on your inventory. You have to create a Stock Item in Tally for each inventory item that you want to for. In other words, you have to create a stock ledger for each item and Tally calls it Stock Item. Go to Gateway of Tally > Inventory Info. > Stock Items More: Creating a Stock Item Creating Multiple Stock Items Creating a Stock Item - Advanced Usage Displaying and Altering Stock Items
Creating a Stock Item
If you are creating Stock Items for the first time, it is advisable to configure the F12: Configure screen before creating any items. You may configure your groups to enable/disable advanced mode. Click here for details on Creating Stock Items in Advanced Mode. Go to Gateway of Tally > Inventory Info > Stock Item > Single Create (under Single Stock Item)
A brief description on each of the fields in the Stock Category Creation screen follows
Name Specify the name of the Stock Item.
Under Select the group from the List of Groups. If you do not want to categorise it under any particular group that you created, choose Primary. Press Alt + C to create a parent Group from this field.
Units Give the unit of measurement of the item in this field. You would normally use this unit for trading this item. Use Alt + C to create a new unit, if you do not have one in the list. Refer the section on
Units for an explanation
on how to create and alter units of measurement.
Opening Balance If you already have stock of this item at the time of creating its in Tally, specify its balance particulars, i.e., quantity, rate and value.
Buttons in single mode stock item creation F3:Companies To switch to another loaded company to create Stock Item.
Groups
Category
Godown
Budget
Vch Types
Units
Currency
You may choose to create any of the masters listed above with a single click of the buttons. Note: The buttons the same in F11:
Category, Currency Features.
More: Displaying and Altering Stock Item
and
Budget
are
available,
only
if
you
opted
for
Creating Multiple Stock Items
You can create multiple Stock Items at a time using this option. Go to Gateway of Tally > Inventory Info > Stock Items > Multi Create (under Multiple Stock Items )
Under Group Select the parent group under which you want the new items to be created. If you select any category other than All Items, then all the new items being created, will be created under this Group. Selecting All Items gives you the flexibility of specifying the parent of each new item created.
S No. The serial number is auto generated.
Name of Item Specify the name of the stock item. For example, HP Laserjet
Under If you select All Items in Under Group field, you must specify a parent group here. Use Alt + C to create a new parent from this field. If you select a Group in Under Group field, that group displays automatically in this column.
Opening Balance If you already have stock of this item at the time of creating its in Tally, specify the balance particulars, i.e., quantity, rate and value.
Buttons in Multi Stock Item Creation screen
F4:Parent To change the parent entered in the field Under Group when you have items categorised under it. The change affects all the items created under the parent, meaning they would now belong to the new parent.
F8:Skip Details To avoid the cursor entering the field Opening Qty , use this button. It toggles with Edit Details , which allows you to enter the opening details.
F9:Skip Category Use this button to avoid the cursor entering the Category field. It toggles with Edit Category , which allows entry of Category details. From the Multi Stock Item Creation screen, choosing to create any of the masters listed below is just a single click away.
G roups
C ategory (if activated)
G o down
More: Creating a Stock Item - Advanced Usage Displaying and Altering Stock Items
Creating a Stock Item - Advanced Usage
This section assumes that you have configured all advanced features of the inventory in F12: Configure and enabled advanced F11: Features . It deals with the additional fields that you would require while creating a Stock Item. N o t e : Use F12: Configure and F11: Features entire setup according to your preferences.
to
add/remove
fields
and
configure
the
Go to Gateway of Tally > Inventory Info > Stock Items > Create (under Single Stock Item )
A brief description on each of the additional fields in Stock Item Creation screen follows.
Name Specify the name of the Stock Item.
Alias You can give aliases for the part number. There may be situations where, the manufacturer specifies his Part No., but you understand it better by its Bin Card number allotted to it.
Part No. This is optional. Enter the Part No. of the item being created, for easy identification. (In certain industries, (e.g. Automobiles), various parts are better identified by their part numbers). You can alternatively use this field for Bin Card No., Code No., etc. Description Enter the description of the Stock Item that would appear in your invoices. This is optional.
Remarks Remarks help to identify the product and its applications. You can give some particulars of the Stock Item created. When you post a query for the stock of this item, remarks help to decide if the item is suitable for a particular requirement.
Set /Modify Default Ledgers for Invoicing You can define the default ledger (usually the sales ), during alteration or creation of a Stock Item that will automatically be credited when you invoice the item.
Under Select the group from the List of Groups . If you do not want to categorize it under any particular group that you created, choose Primary . Press Alt + C to create a parent Group from this field.
Units Give the unit of measurement of the item here. The item would be traded using this unit of measurement.
Alternate Units This is another unit, apart from the main unit, which you can use for the Stock Item. This is particularly useful when you need to handle different units at different times. For example, you buy Data Cables in pieces but sell in packets of 5 pieces each. For alternate units, you are asked to give a conversion factor (e.g. 5) so that a link is maintained between the two. What you give here is simply a conversion factor that comes up as default during voucher entry. You may specify a different factor during voucher entry.
Maintain in Batches? Set this option to Yes if you want to maintain the batch information of Stock Items. The batch does not destroy itself after it is disposed; it remains on records and is quite like a Ledger in behavior. For example, Stock Item – Cloth, Batches – red, white, and blue. You can extract all sales of blue cloth at any given point of time.
Use Components BoM? This has been dealt with in Bill of Materials section under Voucher Entry. It is however pertinent to mention here that BoM should be used only for items that have sub-assemblies or are manufactured.
Set Standard Rates? Set this to Yes , if you want to specify standard purchase and sales rates for the item. Standard rates enable the valuation of inventory at standard purchase or standard sales price. Moreover, these prices come up by default during voucher entry (you may choose to override them if required). The standards are effective from the
specified dates and they continue to be used at these rates until the next date, where the standard rate changes.
In the screen that appears above set the Standard Cost/Standard Selling Price against the date in the Applicable From column respectively.
Rate column and the
Suppose you value your inventory based on standard cost or the market valuation based on standard price. For valuation on any date between the specified date, only the rate specified against Applicable From column is considered. This rate will be brought up by default during voucher entry on any day during this period. Use the Standard Selling Price as simple pricelist.
Tax Information Rate of Duty Rate of VAT/Duty (Sales Tax/ Duty) (e.g. 17.5 or 5) Give the rate of tax applicable for the item. The rate specified here would be picked up when invoicing, if you selected the method of calculation as Tax Based on Item Rate for your relevant ing ledger . Typically, this ing ledger would be 'VAT ' under the Group Duties & Taxes . In such cases, the VAT or duty in invoice entry will be automatically calculated. Specify the rate of duty.
Behaviour Costing Method Select the method of valuation for the inventory. Tally provides you with different valuation methods for different items, from which you can select the appropriate one. You may, of course, choose to use the market valuation
method to value the inventory. It would be interesting to know the value of your stock, both on cost as well as sale basis. The different costing methods are:
At Zero Cost Tally considers at Zero Cost Valuation for this particular item for all sales. Avg. Cost (Price) Tally recalculates the value after each purchase or sale. FIFO (First In First Out) Tally assumes the sale of the oldest goods first. Last Purchase Cost / Sale Price The stock is valued at the latest price. LIFO Annual (Last In First Out Annual) Tally assumes the sale of the newest goods, first taking into the current financial year. LIFO Perpetual (Last In First Out Perpetual) This works like LIFO Annual except that the last purchase starts from the previous financial year. Monthly Avg. Cost Tally calculates the average price based on the purchase of item in that particular month. Std. Cost / Price
A pre-determined value which you entered.
Market Valuation Methods There are four market valuation methods, At Zero Price, Avg. Price, Last Sale Price, Std. Price. Select whichever is applicable from the Valuation Methods list.
Ignore Diff. due to Physical Counting? In Tally, you can record the physical stock as counted, using a physical stock voucher. There is, usually, a difference between physically counted stock and the one appearing in the records. If you wish to ignore the difference and continue with the stock as per books, set this option to Yes. It is, however, advisable not to ignore the difference and let Tally consider stocks as per physical count for subsequent transactions.
Ignore Negative Balances (Y/N)? If you set this to Yes , Tally ignores the item in the stock reports, in case it has a negative balance.
Treat all Sales as New Manufacture? Set this to Yes , if you want to avoid the need of ing entries for manufacture of goods and have them automatically done when goods are sold. This way, you also avoid negative balances in the stock records. It is particularly useful for smaller manufacturing companies that make things but do not want the problem of receipting stocks.
Treat all Purchases as Consumed? This is quite the reverse of the previous option. If you set this to Yes, issues are automatically raised for all goods purchased. This is particularly useful in case of consumables. The book stock of this item would always be nil.
Treat all Rejections inward as Scrap? Set this to Yes , if you do not want to take the rejected goods back into stock. Otherwise, rejected goods, though recorded separately through a Rejection Note, would be taken back into stock.
Displaying and Altering Stock Items
You can display and alter Stock Items in Single mode and Multiple mode.
Displaying a Single Stock Item Go to Gateway of Tally > Inventory Info. > Stock Items > Display (under Single Stock Item) Select the name of the Stock Item from the List of Items. The Stock Item Display screen displays. You cannot make any changes in this screen.
Displaying Multiple Stock Items Go to Gateway of Tally > Inventory Info > Stock Items > Display (under Multiple Stock Items) Select a Group from the List of Groups to display all the Stock Items under the selected Group, or select All Items to display all the Stock Items, as the case may be. The Multi Stock Item Display screen displays, listing the Stock Items and the corresponding details of the Stock Items.
Altering a Single Stock Item Go to Gateway of Tally > Inventory Info > Stock Items > Alter (under Single Stock Item) Select the Stock Item you want to alter from the List of Items. The Stock Item Alteration screen displays. Make the necessary changes and accept Yes to save. You can delete a Stock Item only if you have not used it in any transaction entry. Press ALT + D from the Stock Item Alteration screen to delete the Stock Item.
Altering Multiple Stock Items Go to Gateway of Tally > Inventory Info > Stock Items > Alter (under Single Stock Item) Select a Group to alter the Stock Item under the selected group. The Multi Stock Item Alteration screen displays. Make the necessary changes and accept Yes to save. N ote:
You
cannot
delete
a
Stock
Item
from
multiple
mode.
Reorder Levels
Reorder Level signifies the quantity of a Stock Item in hand, after reaching which you must place orders for your supplies. The importance of Reorder Level arises from the desire to have sufficient stocks to service customer orders and, at the same time, not to unnecessarily accumulate stock. Therefore, the points to be considered while deciding the reorder levels are as follows.
The lead-time for suppliers to deliver the stock.
The delivery time specified by the customer.
The stock-in-hand to satisfy orders in the meantime.
In simple mode, Tally accepts the quantities that you specify. In advanced mode, it considers the past consumption patterns to suggest reorder levels. You can however, choose to define your own reorder levels. You may also specify the minimum quantity of the item to be ordered, either in simple or advanced mode. The purpose of specifying reorder levels is to obtain a report that indicates the quantity of a Stock Item that you must order. More: Specifying Reorder Levels Alter Reorder Levels and minimum quantities Obtain Reorder Status and Quantities to order
Specifying Reorder Levels
Go to Gateway of Tally > Inventory Info > Reorder Levels Select a group of Stock Items from the List of Groups , to specify Reorder Levels for the Stock Items in the Specify Reorder Levels screen. For each item in stock, you can define a Reorder Level and the Minimum Order Quantity. If you click Simple R eorder button, the consumption alternatives will not be available and hence you have to input the quantities. N o t e : The option Purchase Order
Reorder Levels is displayed in Processing is enabled in F11:
the Inventory Features .
Info. menu only if A l l o w
The Reorder level screen appears as follows:
The options that you have while defining Reorder Level and Minimum Order Quantity for individual stock items are
as follows.
Reorder Level/Quantity Enter the level/quantity in this field.
Advance Parameter for Reorder Level (Consumption for the Last) This field lets Tally calculate the reorder level/order quantity based on the total consumption in the past for a chosen period.
Period The choices for periods are: Days, Weeks, Months and Years. Note that it is not the average consumption for the period but the total consumption. Enter zero (0), if you do not want Tally to calculate the reorder level based on the consumption of the item in the past.
Criteria Choose whether you want the higher/lower of the two, i.e., input/calculated level/quantity.
Rounding Method Specify whether the calculated level/quantity must be rounded and also the method of rounding.
Minimum order quantity You can specify the minimum order quantity required.
Altering Reorder Levels and Minimum Quantities
There are two ways of altering the Reorder Levels and the Minimum Order Quantities defined earlier. 1.
Go to Gateway of Tally > Inventory Info > Reorder Levels
Select the Group of the Stock Items from the List of Groups to display the Specify Reorder Levels screen. Make the necessary changes and accept Yes to save. OR 2.
Go to Gateway of Tally > Display > Statements of Inventory > Reorder Status
Select the Group of the Stock Items for which you want to make changes to display the Inventory Reorder Status screen. Drill down the fields Reorder Level/Minimum Order Quantity to display the Specify Reorder Levels screen. Make the necessary changes and accept Yes to save.
Obtain Reorder Status and Quantities to Order
G o to Gateway of Tally > Display > Statements of Inventory > Reorder Status Select a Group of Stock Items from the List of Groups. The Inventory Reorder Status screen displays.
This report gives you the reorder status of Stock Items categorised under the selected Group. Click the button A : Reorder On l y to remove those items for which there are no orders to be placed. Apart from identifying the quantity to be ordered, you can move your cursor on the fields and drill down for more information.
Name of Item Press Enter on this field for information on suppliers of this Stock Item and the details of their previous supplies.
Closing Stock Drill down for Item Monthly Summary (Inwards and Outwards) and other details.
Purc Orders Pending Press Enter on this field for details on the pending purchase orders.
Sales Orders Due
Drill down to know the details on the sales orders, which are due, in other words, free stock available for sale.
Reorder Level Drill down by pressing [Enter] to display the Reorder Level Specification screen for the Stock Item.
Short fall Tally calculates this value.
Min Reorder Quantity Drill down by pressing [Enter] to display the Reorder Level Specification screen for the Stock Item.
Locations/Godowns
Locations/Godowns are places where Stock Items are stored. You can specify names where Stock Items are stored such as warehouse, shelf, and so on. In a business, it always becomes necessary to distinguish between the stock held onsite and in the warehouse. You can do this by creating two separate godowns. Tally had a default Godown named Main Location. You may even alter Tally's default godown and create a new one. Tally permits creating any number of godowns, which you can group and subgroup to match the structure you need. Go to Gateway of Tally > Inventory Info. > Locations/Godowns N o t e 1 : The term Locations is displayed in the Inventory selected in Use ing Terminology of in Gateway screen. If I n d i a / S A A R C is selected, the term G o d o w n s N o t e 2 : You can enabled in F11:
Info. menu if I n t e r n a t i o n a l is of Tally > F12:Configure displays.
create L o c a t i o n s / G o d o w n s only if Maintain Features.
More: Creating Locations/Godowns Displaying and Altering Stock Locations/Godowns
Multiple
Godowns is
Creating Locations/Godowns
You can create Locations/Godowns in Single mode and Multiple mode
Creating a Single Location/Godown G o to Gateway of Tally > Inventory Info. > Locations/Godowns > Create (under Single Godown ) The Location/Godown Creation screen displays:
A brief explanation on each of the fields in Location/Godown Creation screen follows.
Name Specify the name of the Location/Godown.
Alias Enter an alias name for the Location/Godown name, if required.
Under Specify the Location/Godown under which the Location/Godown is to be categorised. Use Alt + C to create the parent Location/Godown if it is not in the list. Select Primary , if it is not a sub Location/Godown of any Location/Godown.
Allow Storage of Materials Tally permits you to create a Location/Godown, where you may not store materials but treat it as a virtual Location/Godown. Virtual Location/Godown is useful in cases like Head Office, which may have many different stock points under it that store materials. Hence, Head Office acts like a primary Godown. For instance, designate London as a virtual Godown with Wimbledon Warehouse, Harrow Warehouse and Brixton Warehouse as subGodowns. These sub-Godowns will allow storage of materials.
Creating Multiple Locations/Godowns G o to Gateway of Tally > Inventory Info. > Locations/Godowns > Create (under Multiple Godowns )
The Multi Godown Creation screen displays:
Under Select the parent group under which you want the new Godowns to be created. If you select any Godown other than All Items , then all the new Godowns being created, will be created under this Godown. Selecting All Items gives you the flexibility of specifying the parent of each new Godown created.
S No. The serial number is auto generated.
Name Specify the name of the Godown.
Under If you select All Items in Under field at the top, you must specify a parent Godown here. Use Alt + C to create a new parent from this field. If you select a Godown in Under field, that Godown displays automatically in this column.
Displaying and Altering Stock Locations
You can display/alter the Godowns in single and multiple modes. It is similar to Displaying/Altering Stock Groups in single and multiple modes. Refer Displaying/Altering Stock Groups for more details.
To display a single stock Location/Godown Go to Gateway of Location/Godown)
Tally
>
Inventory
Info.
>
Locations/Godowns
>
Display
(under
Single
To display multiple stock Locations/Godowns at a time Go to Gateway of Tally > Inventory Info. > Locations/Godowns > Display (under Multiple Locations/Godowns)
To alter a single stock Location/Godown Go to Gateway of Location/Godown)
Tally
>
Inventory
Info.
>
Locations/Godowns
>
Alter
(under
Single
To alter multiple stock Locations/Godowns at a time Go to Gateway of Tally Locations/Godowns)
>
Inventory
Info.
>
Locations/Godowns
>
Alter
(under
Multiple
You can delete a stock location via Single Location Alter by pressing [Alt]+[D]. However, you cannot delete a stock location with sub-locations. The lower levels must be deleted first.
Voucher Types
Refer the section on Voucher Types in ing Information because the voucher types available in inventory are similar to the ones in ing. You may alter the existing inventory voucher types or create new ones based on the existing ones. Go to Gateway of Tally > Inventory Info. > Voucher Types > Create/Display/Alter Note: Refer
You can use the Stock the chapter on Bill of
Journal voucher type to create Materials for more details.
a
Manufacturing
Journal.
Units of Measure
Stock Items are purchased or sold on the basis of quantity. The quantity is measured by Units. Hence, it is necessary to create Units of Measure. You need to create Units of Measure for all the Stock Items. You can have simple units such as numbers, meters, kilograms, and pieces or compound units like box, where, say, one box equals ten pieces. Go to Gateway of Tally > Inventory Info. > Units of Measure
More: Creating a Unit of Measure Compound Units
Creating a Unit of Measure
Go to Gateway of Tally > Inventory Info > Units of Measure > Create The Unit Creation screen displays.
A brief explanation on each of the fields in Unit Creation screen follows.
Type Symbols are of two types: Simple and Compound. Simple units are considered as specified by you; Tally just checks for duplication. Tally defaults to Simple, and if you want to change to Compound, use [Backspace] to go back and select Compound from the Types of Units list.
Symbol Define the symbol of the unit, e.g., Nos. This symbol is used in all displays and printouts.
Formal Name Specify the formal name of the symbol, e.g. Numbers. This explains the symbol, which is also used during the consolidation of data of different companies, where the symbols might be the same but are assigned to different units. The formal name will be used to match them.
Number of decimal places If you want to use the unit in fractions, say for a kilogram you may have to use grams as well, specify the number of decimal places. For kilograms, you would give three decimal places to accommodate up to 999 grams. You do not normally want a decimal place for units like numbers; you can specify 0 in such cases. N o t e : You can specify 0 to 4 decimal places. The Unit of Measure or transliterated but will appear in the Language created.
cannot
be
translated
Compound Units
A Compound Unit is a relation between two Simple Units. Hence, before you create a Compound Unit, ensure that you have already created two Simple Units. For example, there are two Simple Units Nos (Numbers) and Doz (Dozen). Now define the relation between Nos and Doz, as one dozen equals twelve numbers. N o t e : Use the U p arrow or C o m p o u n d from the popup
Backspace menu.
key
to
highlight
the
Type
field.
Select
Select Compound from the Types of Units in the Type field. Select Doz in the First Unit from the Units list. Enter 12 in the Conversion field and select Nos in the Second Unit field. Accept Yes to save. More: Displaying and Altering Units of Measure
Displaying and Altering Units of Measure
To display Units of Measure, Go to Gateway of Tally > Inventory Info. > Units of Measure > Display Select the Unit of Measure you would like to view from the Units list. You can select a compound unit or a simple unit from the list. The Unit Display screen displays. In display mode it is not possible to make any changes. To alter Units of Measure Go to Gateway of Tally > Inventory Info. > Units of Measure > Alter Select the Unit of Measure you want to alter from the necessary changes and accept Yes to save.
Units list. The Unit Alteration screen displays. Make the
You can delete a Unit of Measure from this screen by pressing Alt + D. However, you cannot delete a Unit of Measure that is part of a compound measure. You must delete the compound measure first.
Price List
Price Lists are useful for orders and invoices. An up-to-date price list helps in decision-making even at the lower levels of the organisation and quickens the sales process. Tally assists in creating quantity based pricing with complex discount structure. Price Lists are available only for inventory items and hence the feature is available only if inventory and invoicing are activated for the company. You can have one or more price lists. You require more than one price list, when you have different price structures/levels for different purposes, usually, different groups of customers requiring different discounts or dealing in different products.
Price Levels
In Tally, you can assign specific price lists called Price Levels to customers, so that only the relevant prices are used during entry of orders and invoices. Before you begin to create Price Lists, you should decide whether you want different price levels. You might want different price levels for various purposes, such as different types of customers like wholesale customers, retail customers, export customers and so on. Each customer type could have a different discount structure.
Creating Price Levels
Ensure that you have set the company for s with Inventory. Set the following fields to Yes in F11: Features > F2: Inventory screen. 1.
Allow Invoicing (If you do not set this field to Yes, the options for Price Lists will not be available.)
2.
Set Use Multiple Price Levels to Yes.
3.
Type out the price levels, one by one, in the Company Price Levels screen.
4.
Press CTRL+A to accept the screen and return to the Company Operations Alteration screen (F11: Features). Set the other options as required and accept Yes to save.
Alter Price Level names Follow the same procedure to alter the name of a price level. You can simply overwrite the names you specified previously and save the changes.
Asg Ledger s to Price Levels
Creating Price Lists in Tally provides an option in party (debtor and creditor) ledger s, with the help of which you can assign/tag a specific Price Level to the . You can assign only one Price Level to an . You can choose the Price Level that you want to assign to the Ledger by selecting the Price Level from the Price Levels list in the Pricing Level Applicable field. Select Not Applicable if you do not want to assign any Price Levels to the Ledger. If you want to assign Price Levels to ledgers created earlier, alter the ledger , tab down to Applicable field and select the applicable price level from the list.
Pricing Level
Tab down to Pricing Level Applicable and select Export. Set the other options required. Accept Yes to save. The Pricing Level can be changed to reflect the current circumstances. For this, simply alter the ledger and select a different Pricing Level option.
Creating and Using Price Lists
The Price List option appears in the Inventory Info. menu only if you have already created Price Levels . Go to Gateway of Tally > Inventory Info > Price List Select a group from the List of Groups .
Under Group This is the stock group of the Stock Items for which you want to define the Price Lists.
Price Level Select a Price Level to assign to the Stock Group.
Applicable From Specify the date from which the Price List is applicable.
The columns you see are as follows.
Sl. No This column has auto-generated serial numbers to track the number of items in the Price List.
Name of Item This column has the name of the Stock Item. You can define the Price List for each item.
Quantities - From & Less Than These fields are repeated for an item and begin with a blank for 0 items and end with a blank for any number of items. This is useful for quantity based pricing and discounts. You can create a staggered quantity price structure, if required. If you do not require quantity based pricing, leave From and Less Than fields blank.
Rate & Discount (if any) For each quantity band, give a specific price or maintain the same price for all bands, but define different discounts. You can use different methods for different items.
Historical Details (Rate and Disc%) If you have a different Price List on a date before the Applicable From date, Tally displays it here.
Cost Price In this column, the Cost Price (based on the Costing Method set for it) of the item is displayed to help decide the prices.
Price Levels in Voucher Entry - Invoicing
The price levels that you define automate the invoice pricing and help to avoid errors. You can configure the entry so as to prevent the usage of a different price list than the one that is set. To configure for preventing changes made to the price level settings in a voucher Go to Gateway of Tally > F12: Configure > Invoice/Orders Entry
Set Allow modification of ALL fields during entry to No to prevent changes made to prices. If you set it to Yes , you can override the prices already defined. Consider the following example 1.
Go to Gateway of Tally > ing Vouchers > F8: Sales
2.
Select As Invoice
2.
During voucher creation, there is an additional field Price Level and it is already set for the selected party on the basis of assignment made earlier (the cursor skips the field). If you had not assigned any Price Level for the ledger earlier, the cursor moves to this field, allowing you to make a choice. On selecting the stock item and the quantity, the price is filled in automatically and the cursor skips the Rate and Amount fields also.
Voucher Entry
A Voucher is a document that contains details of a financial transaction. For every transaction, you can use appropriate Tally Voucher to enter the details into the ledgers and update the financial position of the company. Mainly there are two types of Voucher Entry:
ing Vouchers
Inventory Vouchers
You can set the configuration for entry to allow only those features, which you require while entering vouchers. In the Voucher entry configuration, Selectively set only those features to Yes. (This is further explained under advanced usage). Go to Gateway of Tally > F12: Configure > Voucher Entry
More:
The Voucher Creation screen Special keys for voucher narration field
Voucher Creation Screen
This screen is divided into three parts Main Voucher Entry Area Button Bar Area Calculator Area
Main Voucher Entry Area The Main Voucher Entry Area is where you enter all your transactions. This area provides fields for Date, Ledger Name and Amount as well as additional pop-up screens that are dependent on your voucher configuration and the nature of transactions you make.
Button Bar Area The Button Bar area displays buttons that provide quick interaction with Tally. Buttons that are relevant to the current task are enabled and the other buttons are disabled.
Calculator Area The Calculator area provides the calculator functions where you can enter any number of mathematical formulae for complex calculations.
Mouse conventions
Command Click
Action Press the left mouse button
Double-click
Press and release the left mouse button twice, without moving the mouse pointer off the item
Choose
Position the mouse pointer on the item and click the left mouse button.
Select
Position the mouse pointer on the item and double-click the left mouse button.
Switching between Screen Areas
Press
Use the keys on the keyboard in the combination shown.
Switching between Screen Areas The Main Voucher Entry Area is the active area by default on the Voucher Creation screen. Press Ctrl+N to navigate to the Calculator Area and press Ctrl+M to toggle back to Main Voucher Entry Area . A green bar highlights the active area of the screen. N o t e : Press A l t + C
to
use
calculator
when
at
amount
field.
Special Keys for Voucher Narration Field
ALT+R: Recalls the Last narration saved for the first ledger in the voucher, irrespective of the voucher type. CTRL+R: Recalls the Last narration saved for a specific voucher type, irrespective of the ledger.
Checking the accuracy of the vouchers To check the accuracy of the vouchers that you have entered: 1. Go to Gateway of Tally > Display > Day Book 2. Select F2: Period from Button Bar and enter the period for which you want to view Vouchers. N o t e : It particular
defaults to period.
the
current
date
only
but
you
may
display
all
the
transactions
for
a
3. Select F1: Detailed You can check the vouchers for correctness. To correct a mistake, position the cursor on the item where you have found the error and press Enter. Tally displays the voucher details for alteration. The alteration facility is subject to security and access rights. All alterations are available for audit.
Types of Vouchers
Tally is pre-programmed with a variety of ing vouchers, each designed to perform a different job. The standard vouchers are: 1.
Payment Voucher
2.
Receipt Voucher
3.
Contra Voucher
4.
Sales voucher
Sales Orders Sales Vouchers/Invoices Delivery Notes Rejection In
5.
Purchase Voucher
Purchase Orders Purchase Vouchers Goods Receipt Notes Rejection Out
6.
Journal Voucher
Credit Notes Debit Notes Journal Memo Voucher Reversing Journal
Stock Journal Physical Stock
You can alter these vouchers to suit your requirement and also create new vouchers. For example, if you wish to distinguish between cash and bank payments you can create vouchers to do this. The function of each voucher type is explained.
More: Contra Entry (F4) Payment Entry (F5) Receipt Entry (F6) Journal Entry (F7) Sales Entry (F8) Sales and Purchase Voucher Entry Unconventional Vouchers Creating ing Vouchers in Tally Sales and Purchase Voucher Entry
Contra Entry (F4)
According to ing rules, Contra Entry is a transaction indicating transfer of funds from: Cash to Bank Bank to Cash Bank to Bank
To view the Contra Voucher Entry Screen: 1. Go to Gateway of Tally > ing Vouchers 2. Select F4: Contra from the button bar or press F4 More: Contra Entry - Single Entry Mode Contra Entry - Double Entry Mode Note: 1. Use the buttons on the right-hand side of the Tally. 2. Press [Enter] wherever the cursor is placed to
screen know
to the
Explore Depth
the of
Potential
Tally!
of
Contra Entry - Single Entry Mode
Contra Voucher creation screen appears in Single Entry Mode by default. You are prompted to choose the , which will receive the amount (the ledger that has to be debited). To view Contra Voucher creation screen in Single Entry mode Go to Gateway of Tally > ing Vouchers > Select F4: Contra For example, to transfer funds from Cash to Bank : 1.
Debit the Bank
2.
Credit the Cash
The entry appears as shown.
The ledger selected in State Bank of India is the destination ledger and it is debited Advantages of Single Entry Mode: 1.
Faster data entry.
2.
Selection of:
Multiple Ledgers (to be credited) with a Single Ledger (to be Debited) OR Multiple Ledgers (to be debited) with a Single Ledger (to be Credited) - depending on the nature of transaction.
Contra Entry - Double Entry Mode
To select multiple Debit and Credit ledgers in the Double entry mode, set Use Single Entry Mode for Payment/Receipt/Contra to No in F12: Configure . Entering in Double Entry Mode 1.
Go to Gateway of Tally > ing Vouchers
2.
Select F4: Contra from the Button Bar or press F4 .
The entry displayed in Single Mode appears as follows in Double entry mode: Here cash is transferred from Cash to Bank .
Use F2: Date to change the date of the voucher. If you require Dr/Cr instead of To/By –> as explained in the Configuration section, activate the required feature in F12: Configure .
1.
In the above example, we have changed the date to 2nd April 2001 and we have Dr/Cr instead of To/By .
2.
As the Contra voucher is active, the Buttons of the other voucher types of Payment, Receipt, Journal, Sales and Purchase are visible.
Payment Entry (F5)
To view the Payment Voucher entry screen: 1.
Go to Gateway of Tally > ing Vouchers
2.
Select F5: Payment from the Button Bar or press F5
By Default, the Payment Entry screen appears in Single Entry Mode (The option Use Single Entry mode for Pymt/Rt/Contra is set to Yes in F12: Configure). For example, the company settles expenses of conveyance, staff welfare, postage and stationery through cash all in one voucher. The entry appears as shown below.
You are prompted to choose the cash or bank ledger, which will pay the amount (the credit ledger). More: Payment Entry - Double Mode Payment Entry – Single Narration Payment / Receipt as Contra Warn on Negative Cash Balance Cheque Printing How to print Cheques Trouble-shooting Cheque printing TDS Payment
Payment Entry - Double Mode
If you want the payment entries to be entered in double entry mode, then set Use Single Entry Mode for Payment/Receipt/Contra to No in F12: Configure To enter the payment entry in Double Entry Mode, Go to Gateway of Tally > ing Vouchers > F5: Payment A Payment entry entered in double entry mode appears as shown,
Advantages of Double Entry Mode You can select any number of ledgers to be debited and credited in the payment voucher. You can view on the screen whether a ledger is debited or credited thus allowing you to cross-.
Payment Entry – Single Narration
If you want the narration details for every ledger you debit or credit (Single narration), you can configure Tally's Narration details accordingly. To do so, 1.
Go to Gateway of Tally > s Information > Voucher Types > Alter
2.
Select the required Voucher Type .
3.
Enable the option Narrations for each Entry and accept the details.
4.
Return to ing Vouchers on Gateway of Tally and enter a payment voucher as required.
Given below is an example of a Payment transaction with narrations for each entry:
The entry consists of both common narration and narrations for each entry. In case of multiple debit/credit entries, you can give single line narration separately for every ledger selected.
Payment / Receipt as Contra
The Contra Voucher is used to indicate transfer of funds from Bank to Cash Bank to Bank Cash to Bank .
However, for s who wish to use the Payment and Receipt vouchers for this nature of transaction, Tally has the flexibility of defining Payment and Receipt behaviour as per Contra voucher. 1.
Go to Gateway of Tally > ing Vouchers
2.
Select F5: Payment from the Button Bar or press F5 .
3.
Activate the option Use Payment/Receipt as Contra to Yes in F12: Configuration screen.
4.
Accept the screen and save.
The Screen appears as shown.
If Use Payment/Receipt as Contra option is set to No in F12: Configure screen, the cash and bank s will not be displayed.
Warn on Negative Cash Balance
You can configure Tally to prompt you with a warning when the Cash ledger reaches a negative balance. To activate Warning on Negative Cash Balance : 1.
Go to Gateway of Tally > ing Vouchers
2.
Activate the option Warn on Negative Cash Balance to Yes on the F12: Configure screen.
3.
Accept the screen to save.
Example: Let us assume a cash balance of Rs.54000 and you need to make a payment of Rs.55000 towards advertising expenses. This results in a negative balance. The entry is displayed as:
Tally prompts you with a box that displays the warning and also the credit cash balance in RED colour. This will help you decide whether to proceed with the entry or not.
Cheque Printing
You can choose to print cheques directly from Tally. Cheques will be printed while printing a Payment Voucher.
Enabling Cheque Printing 1.
Go to Gateway of Tally > F11: Features > ing Features
2.
Set Enable Cheque Printing and Set/Alter Cheque Printing Configuration to Yes.
Company Operations Alteration screen appears as shown.
Once the option Set/Alter Cheque Printing Configuration is activated to Yes, you will get the following screen.
Company Name on Cheque: To print the company name on the cheque for signature purposes, mention the name of the Company (for example, ABC Company). If you do not want Tally to print the name, you can leave it blank. Many banks give cheques with your company name printed. Name of Banks Select the Bank from the Bank s list. You will have to fill in the dimensions of the cheque. Tally accepts defined cheque dimensions. Take the bank’s cheque book and measure the dimensions of a cheque leaf carefully in millimeters and fill in the above form. You may need to correct it after trying out a couple of cheques so that the positioning is accurate. The placing of the cheque in the printer also determines the printing. To avoid mistakes trial could be made on photocopies of a cheque before using an actual cheque leaf.
N o t e : Salutation fields example, Director) Note:
All
dimensions
are
must
for
be
signatures
more
than
and
0
for
naturally
cheques
follow
to
the
be
Company
successfully
name
(for
printed.
For ABC & Company Director If your cheque has two signatories, both can be specified. Both could be the same salutation or different. For example, one could be Director, the other could be Secretary. Give details of whatever you are using currently. Many banks will pre-print both the company name and the salutation in their cheques, in which case you can leave them blank. You are now ready to print the cheque. that this option is available only for the banks for which you have Ledger .
Printing Cheques
A fter making the desired settings to print the cheque, Go to Gateway of Tally > Voucher Entry > F5: Payment Note:
Cheque
Printing
option
is
available
only
from
Payment
Voucher.
Name on the Cheque You debit the party and give the bill reference details if any. Credit the bank for which the cheque dimensions were set up. In this example it is the State Bank of India. The name of the Debited party appears next to the field Name on the cheque by default. You can change the name on the cheque if necessary. Cross Cheque using This is filled in by the most common words used - payee. You may change it if required.
Enter the Cheque Number (Ch. No.) and save the Voucher. Then, you will get the Cheque Printing sub-screen appears as shown below:
Select Yes to print the cheque.
Trouble-shooting Cheque Printing
1.
Go to Gateway of Tally
2.
Select F11: Features and check the dimensions.
3.
Ensure that you have not left any field blank other than the salutation fields.
Trial and error is the only way to get the printing in the right positions. Therefore do not panic if some words do not get printed in the correct positions. Change the set-up a couple of times to set it right. This is necessary to be able to print correctly on different cheque styles used by different banks.
Receipt Entry (F6)
Transactions ing for money received are entered into Tally through the receipt voucher. To view the Receipt Entry screen: 1.
Go to Gateway of Tally > ing Vouchers
2.
Select F6: Receipt from the button bar or press F6
Similar to Payment and Contra vouchers, the Single Entry Mode appears for Receipt Entry as well. For example, if your company receives money from a customer for an earlier transaction: Credit the customer and debit the Cash , if you receive cash or Debit the Bank where you need to deposit the money, if you receive cheque.
The entry in double-entry mode is displayed as shown below:
More: Printing Receipt Voucher and Formal Receipt
Printing Receipt Voucher and Formal Receipt
For example, the company receives a certain amount from the customer against a particular invoice and a Formal Receipt has to be issued acknowledging receipt for the same. If you want the Receipt voucher to be printed: 1.
Go to Gateway of Tally > s Info > Voucher Types > Alter
2.
Select the Voucher Type Receipt
3.
Set the option Print after saving voucher to Yes.
The voucher prints as:
Note: Print
The information Command.
required
can
be
configured
in
F12:
Configure
after
giving
the
When you enter a receipt voucher, Tally prompts you to print the Formal Receipt (to be issued). Tally's Formal Receipt printing fulfils this requirement. To activate this facility: 1.
Go to Gateway of Tally > s Info > Voucher Types > Alter
2.
Select the Voucher Type Receipt
3.
Set the option Print Formal Receipt after saving to Yes
4.
3. 4.
Accept the same
The Formal Receipt prints as
N o t e : An additional field Name on Receipt appears in the Receipt The receipt will be printed either with the Ledger Name or the name on Receipt field.
Voucher screen. given in the N a m e
Journal Entry (F7)
Journal entries are used to adjust the debit and credit amounts without involving the cash or bank s. Hence, they are referred to as adjustment entries. To go to the Journal Entry Screen: 1.
Go to Gateway of Tally > ing Vouchers
2.
Click on F7: Journal on the Button Bar or press F7 key
For example, there may be entries made for interest accrued or interest to be paid. If a party is involved in such a transaction the entry will be: 1.
Debit the Party
2.
Credit the Interest
The entry appears as shown below:
Note:
Journal
More: Cash s in Journals TDS Deduction in Journals VAT in Journal
entries
are
usually
used
for
finalization
of
s.
Cash s in Journals
Journals are adjustment entries, which do not involve Cash and Bank . However in many cases companies use journals to for day-to-day transactions where Cash or Bank s are required. 1.
Set Allow Cash s in Journals to Yes in F12: Configuration .
2.
Go to Gateway of Tally > ing Vouchers > Select F7: Journal
3.
Press the spacebar at the Debit or Credit fields.
N o t e : All Cash s and Bank s. Accordingly the journal entry
s has to
are be
displayed made.
in
the
List
of
Ledger
Sales Entry (F8)
Sales vouchers are used when the company sells some goods to customers. To view the Sales Voucher Creation Screen: Go to Gateway of Tally > ing Vouchers > Select F8: Sales. For example, the company sells some software on credit. In this case, the company has to for Sales and Sales Tax separately, if tax has been collected on the transaction. The screen appears as shown below:
When a sales transaction is made, a document detailing the transaction (item name, tax, etc) has to be given to the buyer or debtor as proof of purchase by him. This document is called "Invoice" or "Bill" or "Cash Memo". Tally provides the option of creating Invoices.
Enabling Invoicing 1.
Set Allow Invoicing to Yes in F11: Features
2.
The Sales Voucher Creation Screen appears as Invoice by default.
3.
Go to Gateway of Tally > ing Vouchers > select F8: Sales
Sales entries can be made in the Voucher as well as Invoice Formats. Invoicing and sales invoicing are almost the same as sales voucher entry. The advantage of using the invoice format for sales entry is that it allows automatic calculations of taxes and duties (ledger s classified under the group 'Duties & Taxes').
To enable automatic calculations of taxes and duties: 1.
Set Calculate Tax on Current Sub-total to Yes in F12: Configure on the sales invoice screen
2.
Accept the screen to save the voucher.
The default Sales Invoice screen appears as shown below.
When you start entering the voucher, Tally prompts for the Sales Ledger to be allocated. Any number of stock items or ledgers can be selected one after another to enable faster data entry. To activate this: 1.
Set Use Common Ledger A/c for Item Allocation to Yes in F12: Configure on the invoice entry screen.
2.
Accept the screen to save the voucher.
Types of Invoice There are two types of Invoices: Sales Item Invoice - allows you to select Items for invoicing Sales Invoice - allows you to select Ledgers for invoicing
Sales Item Invoice
Invoicing is generally used for sale of stock where the details of the items sold are listed. Selecting the Item Invoice allows you to select the stock items that need to be invoiced. Trading and manufacturing organisations commonly use this format. On the Sales invoice screen, click on the button Item Invoice which is displayed on the Button Bar on the right side of the screen and the Sales Item Invoice appears as shown below:
Tally's Item Invoice mode displays the list of stock items, which can be invoiced as required. N o t e : The Item
Invoice
button
toggles
with
Invoice .
Sales Invoice
Sales Invoice is generally used by professionals such as doctors and consultants who require to invoice for certain services provided such as consultancy charges, professional fees. Trading and manufacturing organisations also use the Invoice for invoicing service charges. On the Sales entry screen, click on Acct Invoice button which is displayed on the Button Bar on the right-hand side of the screen to display the Sales Invoice screen as shown.
T ally's Invoice mode displays the list of ledger s, which can be invoiced as required. This is unlike Item Invoice where Tally displays the list of stock items. N o t e : The Acct
Invoice
button
toggles
with
Item
Invoice.
Sales and Purchase Voucher Entry
In s-with-Inventory Companies where Tracking Numbers is NOT activated You do not get the voucher types Receipt Note and Delivery Note in the Sales and Purchase Voucher submenus. In addition to the above particulars that are applicable for all types of vouchers, sales and purchase vouchers have special inventory considerations for s-with inventory companies. Sales and Purchase ledger s must have the option Are Inventory Values Affected set to Yes for this section. Unless this option is set to Yes in the Ledger creation screen, it is not possible to make a Sales entry or a Purchase entry. Similarly, Sales and Purchase s affect inventory. Hence, when you enter a Sales or a Purchase Voucher, an Inventory Allocations for sub-screen pops up as soon as you enter the ledger requiring you to give inventory item details. The inventory details that you mention in an ing voucher (like Sales and Purchase Voucher), affects stocks by immediately updating them, only if Tracking Numbers are not activated in [F11]: Features. The information that you need to give in the inventory allocation sub-screen depends upon the features enabled for the company. More: Inventory allocations VAT
Inventory allocations
Inventory items need to be considered in financial vouchers if you are using ledger heads that have the option Are Inventory Values affected set to Yes. The inventory details that you give in an ing voucher (like Sales and Purchase Voucher), affects stocks by immediately updating them, only if Tracking Numbers are not activated in F11: Features. The information that you need to give in the inventory allocation sub-screen depends on the features enabled for the company. A typical inventory allocation sub-screen appears as shown.
Name of Item Select item from the list of items or create a new item by pressing Alt+C Location If you have more than one location you must specify the location to which this item relates. 1.
Set Maintain Multiple Godowns to Yes in the F11: Features.
2.
Specify the Godown, Quantity, Rate and Amount for the item.
You can have different Godown locations.
Quantity
Enable the option Actual and Billed Quantities to Yes. The actual quantity updates stock and the billed quantity affects the s. Give the quantity either in the main unit or the alternate unit. You may even specify quantities in both units, for example 100 bars=150 Kgs. Rate Enter the rate for the Stock Item. If you have entered Standard Rate for the item (Standard Cost and Standard Selling Price – see Item Master), the voucher will select the relevant standard rate for that date by default. You can modify it while entering the voucher. Per Enter the unit of measure for the quantity of the item here. This can be the main unit or even the alternate unit. Amount The quantity multiplied by the rate per unit is the amount. End of List In all multiple allocations or selections, you have to select the option End of List or press Enter at the first blank field. This would accept the multiple allocations and take you back to the parent screen. For example, Multiple Locations, Batches or Items. Batch Wise Details If you wish to maintain the Inventory in Batches, you need to set the option Maintain Batch-wise Details to Yes in F11: Features. If required, you can also set the option Set Expiry Dates for Batches to Yes. Once you do this, you will see the option Maintain in Batches in the Stock Item Creation Screen. If you set this to Yes, you will find the following in the Item Allocation screen: Track Date of Mfg Use expiry dates
Batch Number Select a batch number from the list of existing batch numbers, or create a new number for a new batch. Mfg. Date Mfg Date appears only if it is activated. Enter the date of manufacture. This enables you to set expiry date for the
batch as a period from the date of manufacturing. For example, three months from the date of manufacture. Expires on This field appears only if it is activated. Enter the date of expiry or a period from the date of manufacture. If you have set Allow Use of Expired Batches to Yes for an item, you cannot issue them after the expiry date.
Additional Information Manufacturers and traders, who deal in perishable products, need to maintain batch-wise details of stock items. The manufacturing date and expiry date options are entered in Tally to maintain batch-wise details. To ensure that the expired items do not appear in your Stock Journals and Sales Invoices, set Honor Expiry Dates usage for Batches to Yes in F12: Configure of the Sales Invoice screen. This keeps track of the batches. If you have two batches of the same product in stock, and one batch has crossed the date of expiry, the sales invoice will not display the balance amount of the expired stock, thus honouring the expiry dates which you have set for your stock items. Refer Activating batch-wise details, Setting manufacturing date and Expiry dates for more details.
Unconventional Vouchers
Unconventional Vouchers are the special vouchers that are used to record provisional or non-ing transactions. Use unconventional vouchers to remove unnecessary entries from the main books of s and make information available. These vouchers enable valuable reports in of provisional s and forecasting. Refer to Scenario Management for more information. More: Memo Voucher Memorandum Voucher Optional Voucher Optional Vouchers Reversing Journals Reversing Journal Post-dated Vouchers Post-dated Vouchers
Memo Voucher
This is a non-ing voucher and the entries made using memo voucher will not affect your s. In other words, Tally does not post these entries to ledgers but stores them in a separate Memorandum .
Uses of Memo Vouchers Making suspense payments Consider a company gives its employee cash to buy office supplies, the exact nature and cost of which are unknown. For this transaction you can enter a voucher for the petty cash advance, a voucher to record the actual expenditure details when they are known, and another voucher to record the return of surplus cash. However, a simpler way of doing it is to enter a Memo voucher when the cash is advanced, and then turn it into a Payment voucher for the actual amount spent, when the details are known. Consider the following Example. The Company pays its employee Rs. 500 as petty cash advance for Office Expenses. The following entry has to be ed. 1.
Enter Date
2.
Debit office supplies
2.
Vouchers not verified at the time of entry If you do not understand the details of a voucher you are entering, you can enter it as a Memo voucher and amend it later when the details are available.
Items given on approval Generally completed sales are entered into books. Incase items are given on approval , use a Memo voucher to track and convert it into a proper Sales voucher. You can delete the memo voucher if the sale is not made.
Memorandum Voucher
To view all the memorandum vouchers: Go to Gateway of Tally > Display > Exception Reports > Memorandum Vouchers.
Note:
You
can
also
view
memorandum
vouchers
from
the
Day
Book.
You can alter and convert a Memo voucher into a regular voucher when you decide to consider the entry into your books. Use Scenarios to see the effect of Memo entries on reports and statements.
Optional Voucher
This is also a non-ing voucher. Unlike a Memo voucher, this is not a separate voucher type. You can mark an existing voucher (for example, a payment voucher or a receipt voucher) as Optional . Press CTRL + L or click on Optional from the Button Bar. This button toggles with Regular . By marking a voucher Optional , the voucher does not get posted anywhere but remains in the Optional . You can make a voucher type default to Optional if you need to create a new voucher type or alter an existing voucher type. Go to Gateway of Tally > s Info > Voucher Types> select a Voucher Type > Set Make Optional as default to Yes .
Enabling Optional Vouchers 1.
Go to Gateway of Tally
2.
Select F11:Features > ing Features to display Company Operations Alteration screen
3.
Set Use Rev. Journals & Optional Vouchers? to Yes .
4.
Accept the screen to save.
Use of Optional Vouchers If you do not want a transaction that is incomplete to affect the s, you can mark this as an Optional Voucher. Once the transaction is complete, modify the voucher and post it as Regular Voucher. For example, Performa sales invoice. In fact, an optional sales invoice prints as a Performa Invoice. Optional Vouchers allow you to see the impact of transactions without actually posting them. Optional Vouchers can be used to forecast future sales. For example, create a New Voucher Type - Sales Forecast. Record future sales projections using this voucher type.
Let us consider the following example. On 30th June you want to view the Balance Sheet as of today but June rent is not due for payment until the first week of July. This liability is not reflected in the Balance Sheet. To overcome this, enter an Optional Voucher dated 30th June. The above entry is made as shown below 1.
Enter Date
2.
Select Optional from the button bar
3.
Debit Rent
3.
When you view the Balance Sheet, generate a report with the Optional Voucher included. The Optional Voucher should be already defined as a Scenario (Refer section on Scenario Management for more details). The voucher affects the report temporarily. Once you quit the report, Tally does not retain the Scenario details. The next time you view the balance sheet, it will not include the effect of the Optional Voucher unless you include it. N o t e : Use S c e n a r i o s statements
to
see
the
effect
of
Optional
voucher
entries
on
reports
and
Optional Vouchers
You can view all optional vouchers in the Optional Vouchers Go to Gateway of Tally > Display > Exception Reports > Optional Vouchers. Note:
You
can
view
them
from
the
Day
Book
as
well.
Reversing Journals
Reversing Journals are special journals that are automatically reversed after a specified date. They exist only till that date and are effective only when they are included in reports like the Balance Sheet . These are used in interim reporting in the course of the financial year where accruals are to be reported. These accruals are usually short term and are cleared in the subsequent period. However, to get a proper perspective, decision makers require the reports with full impact of all aspects and transactions.
Activating Reversing Journals To activate Reversing Journals 1.
Go to Gateway of Tally
2.
Select F11: Features > ing Features to display Company Operations Alteration screen
3.
Set Yes in Use Rev. Journals & Optional Vouchers?
4.
Accept the screen to save.
An example is - the provision for depreciation. Depreciation is usually provided for at the end of the year. However, including it for monthly reporting would give a more accurate status. Let us take another example: On 30th June you want to view the Balance Sheet as of today but June salaries are not paid until the first week of July. There is, therefore, a large liability, which would not be reflected in the Balance Sheet. To overcome this, you enter a Reversing Journal Voucher dated 30th June, which would look like this:
When you view the Balance Sheet, Tally displays the report with the reversing journals included. The voucher affects the report only for that day, 30th June.
Applicable up to This is the date up to which the Reversing Journal is available for inclusion in a scenario report . The Reversing Journal can be created as of a particular date and made Applicable up to a different date. For example the depreciation entry could be dated October 1, 2005 and applicable up to October 31, 2005. The journal will be available for inclusion in a scenario for any day from October 1, 2000 till October 31, 2000. It will not exist before 1st Oct and will be reversed automatically after 31st Oct and consequently unavailable.
Reversing Journal
All vouchers are maintained in a Reversing Journal . These are not posted to any books of s and cannot be included in regular reports. They can only be seen through a scenario. Go to Gateway of Tally> Display> Exception Reports> Reversing Journals
Post-dated Vouchers
While entering vouchers, you can mark them as post dated. Tally will not update the vouchers in ledgers until the specified date is approached. This is useful to enter transactions that take place on a regular basis. For example, if you pay for something by installments, you can set up the payments in advance, and Tally will only enter them in the ledgers as they fall due. Mark vouchers Post Dated by using CTRL + T or click on Post dated button from the Button Bar. This button toggles with Current.
Post-dated Vouchers
All Post-dated vouchers are maintained in a Post-dated voucher . Go to Gateway of Tally> Display> Exception Reports> Post-Dated Vouchers
Difference in the treatment of Post-dated Vouchers and other Unconventional Vouchers The major difference between post dated vouchers and other Unconventional vouchers is that post dated Vouchers affect regular books of s on the date of the voucher. Post-dated vouchers are not available for selection in Scenarios.
Creating ing Vouchers in Tally
To view the ing Vouchers screen: Go to Gateway of Tally > ing Vouchers Note : Company
The Voucher Features and
Entry the
screen Voucher
display Type
depends settings.
on
the
Voucher
Configuration,
The default voucher entry screen that is displayed is the Payment Voucher screen. To go to the next voucher screen you can simply switch the vouchers using the buttons from the Button Bar or by using the Function keys. Consider a simple payment voucher screen.
More:
Type of Voucher Voucher Number Reference Date of Voucher Particulars – To /By or Dr/Cr Narrations Particulars – Ledger name and amount Buttons in a typical Voucher Entry screen
Type of Voucher
You need to check whether you are using the right voucher for the transaction. You change the voucher type by selecting the new type from the Button Bar. In some cases, Sales, Purchase and Journal, as well as where you have created your own voucher types. For example, under Payment, Tally will display a List of Vouchers for the type you select, from which you make a further choice.
Voucher Number
If you have set Method of Voucher Numbering to Automatic in Voucher Type screen, Tally will automatically enter the voucher number and if you have set Method of Voucher Numbering to Manual, Tally allows you to enter the voucher number manually.
Reference
You can enter a reference such as Purchase Order Number or Invoice Number in the Ref: Field. Note:
Reference
is
not
available
for
receipt
and
payment
vouchers.
Date of Voucher
The date of the voucher you enter is displayed at the top-right of the Voucher Creation screen. The date is taken initially from the Current Date in the Gateway of Tally. However, you can change the date to ensure vouchers are entered with the appropriate date using the F2: Date button.
Note:
You
change
the
date
using
the
F2:
Date
button
from
the
button
bar.
Narrations
You can type any comment that is appropriate for the transaction in Narrations. You can configure Tally's Narration details as per the type of narration for the transaction. The types of Narrations are: Common Narration – Common narration details for the entire Voucher at the end. Single Narration – Narration details for every debit or credit transactions made.
Enabling Narrations Common Narration is enabled by default in Tally. To activate Narrations on the voucher screen 1.
Go to Gateway of Tally > s Information > Voucher Types > Alter
2.
Select the required Voucher
3.
Set the option Narrations for each Entry to Yes
4.
Accept the details.
5.
Return to ing Vouchers on Gateway of Tally and make a payment voucher entry as required.
Following examples demonstrate a Payment transaction that has both common narration and narrations for each entry. The advantage of this being that you can give single line narration separately for every ledger selected in case of multiple debit/credit entries.
Particulars To/By or Dr/Cr
To/By or Dr/Cr By default Tally displays To/By which can be changed to Dr/Cr. 1.
Set Use Cr/Dr instead of To/By during entry to Yes in F12:Configure
2.
Accept to Save
Each voucher line displays a prompt of Dr/By for debit entries or Cr/To for credits. N o t e : Depending on the voucher type, Tally selects either D r or Cr/ Thereafter, you can change the prompt (if required) by typing over it or B .
To or B y. with a D or C / T
Particulars – Ledger name and amount
Ledger name and amount After To/By or Dr/Cr, you enter the ledger names that are already created and the debit and credit amounts. To select a ledger, type the first letter of its name and Tally displays a List of Ledger s. The ledgers starting with the typed letter are highlighted. Only ledgers suitable for the voucher type are displayed. As you continue typing, the highlights reduce until a match is found. The first ledger name prompt depends upon the voucher type. For example, in a Payment Voucher you have to first debit a personal like a creditor or a nominal like Rent. Hence you are not allowed to enter Cash or Bank as that would determine money received. N o t e : In special case where as C o n t r a in the Voucher
in you have activated the option Allow Configuration you are permitted to do so.
Payment/Receipt
Likewise, in a Sales Voucher, you must first debit a personal name like a customer and not a nominal name. When you select the ledger, the current balance is displayed (only if F12: Configure is configured). When you enter the amount, the revised current balance is shown. After selecting the next ledger, Tally suggests the balancing amount as the value to enter, which may be accepted or typed over. You cannot complete the voucher entry until the debit is equal to the credit. More: Buttons in a typical Voucher Entry screen
Buttons in a Typical Voucher Entry screen
F2: Date - You can use this button to change the date of the voucher. F3: Company - This would allow you to switch to another loaded company and enter a voucher in it. Therefore, you can, almost simultaneously enter vouchers for more than one company.
ing Vouchers F4: Contra F5: Payment F6: Receipt F7: Journal F8: Sales F9: Purchase F10: Memos F7: Stock Journal F10: Phys Stock - This allows recording of physical stock in hand as distinct from computed stock figures.
Other Buttons As Voucher/As Invoice: This button is available only for Sales/Purchase Vouchers and invoices. Post Dated -To mark the current voucher post dated. Toggles with Current Optional - To mark the current voucher optional. Toggles with Regular F11: Features - The different features of a company can be selected or modified by using the F11: Features button. This button is available in almost all screens of Tally. You can modify it as and when based on the requirements. F12: Configure - The F12: Configure button allows you define and enable the report-specific options which are required. For example, depending on the report that you are viewing, you can specify whether it should be in horizontal or vertical format, show percentages, show gross profit, show opening and/or closing balances, change the periodicity, change the sorting method. N o t e : To check the accuracy of the vouchers entered, select Day Book from the Display Menu. Then Select F2: Period from the Button Bar and enter the period of display (it defaults to the current date only, but you may display all the transactions for a particular period). Select F1: Detailed. Check the vouchers against what you were asked to do. If you find a mistake, position the highlight bar over the incorrect item and press E n t e r for Tally to display the voucher details for alteration. N o t e: The alteration available for audit.
facility
is
subject
to
security
and
access
rights.
All
alterations
are
Voucher Classes
Voucher Class is a method of automating ing allocations during Invoice entry. It is a table for predefining the entries to make invoice entry a simple task. This is particularly useful in sales invoicing where the nominal ledger , to be credited for each item of sale is defined once. During voucher entry, the ing credits for items sold are done automatically. Additional ing entries like Tax, Freight and other charges can also be predefined to be brought up during actual invoicing. This will have restriction on a data entry operator to alter or modify the vouchers. The total control rests with senior management to set the class parameters. It also reduces chances of errors during voucher entry. You can still continue to use Tally as before without classes if you do not require it. Classes can also be used to automate the rounding off the values. The rounding-off method can be preset when defining a class for a single line or for the entire voucher or invoice. Voucher Class permits: 1.
Automation of entries to predefined ledger s.
2.
Automatic rounding off to preset value limits.
Another additional feature is the ability to define default sales ledger to be affected for each Stock Item. This capability is available for companies maintaining s with inventory. 1. Go to Gateway of Tally 2. Select the Button F12: Configure 3. Select the option Accts/Inv Info. 4. Set Specify Default Ledgers for Invoicing to Yes Now, when you alter or create a Stock Item, you can define the nominal ledger (usually the sales ), which should automatically be credited when you invoice this item. Example: You might have Sales Ledgers broken up as Sale of Finished Goods and Sale of Intermediates. Let us assume that your finished goods are Computers and intermediate goods are CD ROM drives. Against the Stock Item Computers, specify Sale of Finished Goods as the default Sales Ledger to be affected. Against CD ROM drive specify Sale of Intermediates as the default Sales Ledger . These will be the default sales ledger s that will be affected only when invoicing. They can be overridden by the that you set in the Class table. The dual facility of ledger allocation with Stock Item and ledger allocation defined in a Class provides the flexibility to permit allocation of different Stock Items to different sales s as set up in the Class table. You can either alter the existing Sales Voucher Type or create a new Voucher Type based on Sales. 1.
Go to Gateway of Tally > s Info > Voucher Types > Alter
2.
Select any Voucher Type from the list, say, Sales.
3.
Go to the field Name of Class and enter a name
3.
This displays a sub screen where you can define the Default ing Allocations for Sales Invoice and the Default ing Allocations for Purchase Invoice. You can specify the Ledger Name, the Percentage (%) of the amount to go into the ledger and the Rounding Method and the Rounding Limit if any. The Type Class screen appears as shown below.
The Class Table is split horizontally for ing allocations and additional ing entries. More: Default ing Allocations Type of Calculation An explanation of 'Types of Calculation' VAT
Default ing Allocations
Ledger Name Select the ledger to be credited for each Stock Item sold in the invoice. More than one ledger may be affected for each item. For example, for Tax-inclusive items, the ledgers to be credited will be Sales and Tax in a definite proportion. This is where percentage helps.
Percentage % This is useful in tax-inclusive price cases. You can allocate say 82.5% for the sales ledger and the balance can be allocated for Tax . Normally, for tax-exclusive prices, you will give 100% for the Sales . The percentage (%) symbol has to be mentioned. While creating or altering classes for the Voucher Types Credit Note, Delivery Note, Sales and Sales order in the Voucher Type Class screen, for the Column Percentage % under Default ing Allocations for each Item in Invoice, the number of decimal places allowed for the numbers input in this column has been increased from two to three irrespective of the number of decimal places defined for the company.
Rounding Method The Rounding Method may be used only where the sales is NOT 100%. The amounts that are calculated may be required to be rounded off either under Upward Rounding or Downward Rounding or Normal Rounding. Normal Rounding is rounding to the number of decimal places specified for the currency based on the less than 5 and greater than 5 rules. You can set your own rounding off rule. For example, round off to the next whole number. In such cases, you can round off Upwards.
Rounding Limit When any of the rounding method is selected from the list, you can round off (Upwards/Downwards/Normal). For example: set it to 1 to obtain the amount to the next whole number. To round off upwards to the nearest 50P, set it to 0.50.
Override using Item Default? Select Yes or No. Item default refers to the Default Ledger that you had set for a Stock Item. For example, Computers – Sale of Finished Goods. If in the Class Table, you mention Sales –Local, and set No to this question, then Sales –Local will be the affected and not Sale of Finished Goods. Setting it to Yes will affect Sale of Finished Goods. The advantage of this is that you can use different classes to affect different sales s.
Additional ing Entries This part is relevant for Tax and other charges like freight and insurance. Ledger Name - Select other Additional Ledgers if any, one by one. Type of Calculation - Select the suitable method of calculation from the drop-down menu. The Value Basis that you will provide in the next column will calculate using the type of calculation specified. For more details refer Type of Calculation. Value Basis - Enter the amount, which is to be used for the Type of Calculation. For percentage, you can use the symbol %. In the example, 17.5% is specified for Tax on Sales on Item Rate, to use the rate given in the Stock Item. Remove if Zero? - Enter Yes for Tally to ignore the and not to make any entry in it if its value is zero. If
Yes, ensure that Allow 0 valued entries in vouchers in F11: Features is set to No. On Setting No Tally will record the invoice in the ledger with nil amounts. Under normal circumstances, you will probably wish to set this value to Yes. However, in cases such as 'Zero Rated VAT', you may wish to retain the Ledger line, even though the calculation yields a nil amount. Additional Information Effect on Cost Centres - Cost Centres will remain un-allocated when Classes are used to allocate entries. Cost centres can also be predefined under Cost Centre Classes. Refer to Cost Centre Classes for further information.
Types of Calculation
As Additional Excise In the Indian sub-continent, a manufacturing tax or Excise is levied. For some products, a supplementary levy on the Basic Excise Duty is charged or Additional Excise Duty. This is a surcharge calculation. For example, an Additional Excise Duty of 10% on the Basic Duty. While the calculation method is identical to Surcharge, the result is to provide a Total Excise Payable calculation accurately during Invoice printing.
As
As a Flat Rate This is helpful when you wish to specify a standard mark-up/down on an invoice - say 100 for every invoice, independent of the quantity/value of the invoice.
As Surcharge This helps you to calculate the value based on the immediately preceding figure. For example, a Sales Tax of 10% is applicable on an invoice, which would be calculated on the value of goods sold. On this, a 'Surcharge' of 5% i.e. 5% of the Sales Tax value is applicable.
As Total Amount Rounding This is the last line in an invoice. You will have to create an , which would carry the rounding difference. As the other values of the invoice are calculated, this would automatically get adjusted to keep the Total Invoice Value to the desired rounding limits. You have to mark this invoice as Remove if Zero? Yes so that the head is not retained in the invoice printouts if no rounding is applicable.
As Defined Value This allows you to specify a value while creating the invoice. You will use this when the basis of calculation is neither Value nor Quantity dependent and therefore needs to be entered every time you create an invoice.
Based on Quantity Use this for calculations that are based on the 'Total Qty' supplied. For example, you may have Freight or Forwarding charges as 2.00 per Kg, and if the total qty supplied in the invoice is 200.000 Kg, then the amount should become 400.00. The Value Basis also needs to be provided as '2.00/Kg' or '0.50/Pc' as the case may be.
On Current Sub Total In certain environments, taxes are applicable on the Total Goods Value as well as supplementary charges like Excise Duty, Packing Charges. Normally, when the tax calculation method is specified as On Total Sales the calculations are based on the Total Goods Value only. If you want to include supplementary charges, then set On Current Sub Total as the type of calculation.
On Item Rate This is used for both VAT as well as Excise Duty style calculations. You can specify the Rate of Tax applicable for each Stock Item. The advantage is that it enables you to combine multiple Tax Rate products in the same Invoice and yet get the correct ones picked up for each Tax bracket.
On Total Sales The most common basis of Tax Calculation is on the total value of goods/services. This method uses the sum of Stock Items used in the invoice for calculations.
Inventory Vouchers
Inventory Vouchers perform the same function in the inventory system just as ing vouchers do in the ing system. Inventory Vouchers are also means of entering transactions. Inventory vouchers record the receipt and issue of goods/stock, the transfer of stock between locations and physical stock adjustments. If you have not integrated s with inventory, inventory vouchers will not have any impact on the Balance Sheet stock figures. They will maintain the stock balances separately. To view Inventory Vouchers: Go to Gateway of Tally > Inventory Vouchers
Configuration on Tally Set the option Integrate s and Inventory to Yes in F11: Features. You can trace an entire transaction from the beginning i.e., goods transfer stage to the financial ing irrespective of integration status. For example, the purchase of stock can be tracked from the purchase voucher through the receipt note, through invoice from the supplier and also through eventual payment. More: Types of Inventory Vouchers How to enter pure Inventory Vouchers How to create a Stock Journal
Types of Inventory Vouchers
Tally is pre-programmed with Inventory Vouchers of various natures, each designed to perform a different task. The following table displays the standard ing Vouchers provided in Tally and their corresponding activation key combination and buttons. You can either use the key combination given in the table below or the buttons on the Button Bar. Key Combination
Buttons
Voucher Type
ALT+F9
F9: Rt Note
Receipt Note Voucher
ALT+F8
F8: Dely Note
Delivery Note
ALT+F6
F6: Rej.Out
Rejections Out
CTRL+F6
F6: Rej.In
Rejections In
ALT+F7
F7: Stk Jrnl
Stock Journal Voucher
Alt+F10
F10:Phys Stk
ALT+F5
F5: Sales Order
ALT+F4
F4: Purc. Order
Physical Stock Sales Order Purchase Order
Set the option Use Tracking Numbers to Yes in F11: Company Features to activate Goods In Receipt Note and Goods Out Delivery Note vouchers. Tally will assume that goods are received along with Purchase Vouchers and Goods are delivered along with Sales Vouchers/Invoices. Activating Tracking Numbers denote that you may receive goods that are not accompanied by a Supplier's invoice, i.e. the invoice will arrive separately and that you may not deliver the goods along with the invoice but will invoice it later. N o t e : In a voucher you are allowed to select Not Applicable when the Tracking Number sub-screen appears. This would update inventory immediately without ing a separate inventory voucher and vice-versa. For more details refer Advanced voucher entry. You can alter these vouchers to suit company requirements as well as create new Inventory Vouchers. For example, if you wish to distinguish between delivery notes for stock delivered from different locations you can create vouchers to do this. More: Receipt note Voucher Rejections-in Voucher Delivery note Voucher Rejections-out Voucher
Stock Journal Voucher Physical Stock Voucher
Receipt Note Voucher
This voucher type is used for recording goods received. To view the Receipt Note Voucher: 1.
Go to Gateway of Tally > Inventory Vouchers
2.
Press the button Alt+F9 or Select the button F9: Rt Note from the button bar.
For example, consider the company receives new stock items from a supplier. If a Purchase Order exists for that Supplier, select the Order Number from the List of Orders pop up menu to bring up the order particulars automatically. Receipt Note Description Details Recorded
Records receipt of new stock from suppliers Reference, Ledger , Supplier’s Name, Address and Despatch Details (If Accept Supplementary Details option is set to Yes in F12: Configure), Name of Stock Item, Tracking Details, Godown, Quantity, Rate (Optional), Amount (Optional), Narration
Rejections-In Voucher (Sales Returns)
A Rejections In Voucher is used to record goods that are rejected and returned back by the customer. To view the Rejections In Voucher 1.
Go to Gateway of Tally > Inventory Vouchers
2.
Press the Ctrl+F6
Rejections In Voucher Description Details Recorded
Records return of goods from customers. Ledger , Customer’s Name, Address (If Accept Supplementary Details option is set to Yes in F12: Configure), Name of Stock Item, Tracking Details, Order details, Godown, batch details, Quantity, Rate (Optional),Amount (Optional), Narration.
Delivery Note Voucher
The Delivery Note voucher is used for recording goods delivered to a customer. To view the Delivery Note Voucher 1.
Go to Gateway of Tally > Inventory Vouchers
2.
Press Alt+F8 or select the button F8: Dely Note from the button bar.
For example, the company delivers goods from Stock to a customer. If a Sales Order exists for that customer, selecting the appropriate Order Number from the List of Orders pop-up menu will automatically bring up the relevant particulars. Delivery Note Description
Records the delivery of goods to customers
Details Recorded
Reference, Ledger , Customer’s Name, Address and Despatch Details (If Accept Supplementary Details option is set to Yes in F12: Configure), Name of Stock Item, Tracking Details, Godown, Quantity, Rate (Optional), Amount (Optional), Narration
Rejections-Out Voucher (Purchase Returns)
The Rejections Out Voucher records goods that are rejected and returned to a supplier. To view Rejections Out Voucher: 1.
Go to Gateway of Tally > Inventory Vouchers
2.
Press Alt+F6 or Select the button F6: Rej. Out from the Button Bar
For example, the company returns items that had previously been taken into stock from the supplier Rejections Out Voucher Description
Records return of goods to suppliers
Details Recorded
Ledger , Supplier’s Name, Address and Despatch (If Accept Supplementary Details option is set to Yes in F12:Configure), Name of Stock Item, Tracking Details, Order details, Godown, Quantity, Rate (Optional), Amount (Optional), Narration
Stock Journal Voucher
Stock Journal Voucher is used to record stock transfers from one location to another. To view the Stock Journal Voucher: 1.
Go to Gateway of Tally > Inventory Vouchers
2.
Press the buttons Alt + F7 or Select the button F7: Stk Jrnl from the Button Bar
For example, the company transfers items of stock from the warehouse to the shop. Stock Journal Voucher Description
Records the transfer of stock from one Location to another
Details Recorded
Reference, Name of Source and Destination Locations, Name of Stock Item, Godown, Batch, Quantity, Rate, Amount, Narration
More: How to Create a Stock Journal?
Physical Stock Voucher
Physical Stock Voucher is used for recording actual stock physically verified or counted. To view the Physical Stock Voucher 1.
Go to Gateway of Tally > Inventory Vouchers
2.
Select the button F10: Phys Stk from Button Bar or press Alt+F10
For example, Physical Stock is the stock found on conducting a stock check. It is not unusual that the company finds a discrepancy between actual stock and computer stock figure. Physical vouchers will be useful for recording purposes only if you have configured inventory vouchers to ignore physical stock differences. If you have configured the vouchers so that physical stock difference is not ignored, then all transactions subsequent to the physical stock voucher will use the balance as mentioned in that voucher. Physical Stock Voucher Description
Records the physical stock count as the new stock balance
Details Recorded
Stock Item, Location, Batch details and Quantity.
Entering Pure Inventory Vouchers in Tally
Selecting and Entering the Voucher There are five kinds of inventory vouchers: Receipt Notes and Delivery Notes Rejections - in and Rejections - out Sales Order and Purchase Order Stock journal Physical stock
Note: Vouchers involving pop-up be assumed that these settings
screens depend upon have been activated.
configuration
settings
and
it
will
The basic procedure to enter each voucher is: 1.
Go to Gateway of Tally >Inventory Vouchers
2.
Change the date if necessary.
3.
Select the V oucher type from the Button Bar
Enabling F11: Features Set Use Tracking Numbers to Yes to activate Delivery Note and Receipt Note vouchers. Set Use Rejection Notes to Yes to activate Rejections In and Rejections Out vouchers. Set Allow Purchase Order Processing and Allow Sales Order Processing to Yes to activate Purchase Order and Sales Order vouchers.
A typical Receipt Note inventory voucher screen appears as shown below:
The screen is divided into three sections: 1.
The Type, Reference and Date of the Voucher.
2.
Party's Particulars and Ledger .
3.
Inventory Item Details.
You can change the voucher type by selecting the required type from the Button Bar. N o t e : In some notes in F11 ) More: Type of Voucher Tracking Number
cases such as Receipt you will see a pop-up
Notes (where you screen from which
have opted for Use you select the right
rejection voucher.
Default Voucher number Order Details (in case Purchase Order Processing is active)
Type of Voucher
Select the Voucher required form the Button bar. Prior to making a voucher entry, ensure that you are using the right voucher. You can change the voucher type by selecting the new type from the Button Bar. In some cases, like receipt notes (where you have opted for Use Rejection notes in F11: Features) you will see a pop-up screen from which you can select the appropriate voucher.
Voucher number Voucher numbering by default is automatic. It can be entered manually by setting it in Voucher Types.
Reference number This is optional. You can enter a reference such as Purchase Order Number or Supplier's Delivery Note Number.
Date of voucher The date of the voucher you are entering is displayed at the top-right of the Voucher Creation screen. By default, this will be the Current Date. You can change the date to the transaction date. Note:
You
can
change
the
date
using
the
F2:
Date
button
on
the
Button
Bar.
Ledger There are no To/By or Dr/Cr in inventory vouchers. To select a ledger, type the first letter of its name and Tally will display a List of Ledger s. As you continue typing, the highlights reduce until a match is found. Here you usually need a supplier's ledger .
Supplier's name and address Enter details of the supplier's name and address. This can be different from the ledger name or can be the same. This information is useful when printing out the Goods Receipt Note.
Name of the Item From the pop-up list of Stock Item, select the Stock Item that is being received. If it is not in the list, create it using ALT+C.
Tracking Number
Set Use Tracking Numbers to Yes in F11: Features > Inventory Features
The Tracking number is used to link the Receipt Note with the Supplier's Invoice that will be received later. (Supplier's Invoice is recorded through the Purchase Voucher). Hence, select the number which helps maintain the link. Tally gives the Receipt note number and the Reference number as default. However; you may opt to give your own number, in which case select New Number. If you do not wish to give a tracking number at all, select Not Applicable. Tracking numbers link the different ing vouchers with the inventory vouchers as follows: 1.
Receipt Note/Goods In vouchers are linked to Purchase Vouchers
2.
Goods Out /Delivery Note are linked to Sales Voucher/Invoice.
3.
Rejections-In is linked to Credit Note
4.
Rejections-Out is linked to Debit Note
New number Enter a new number that is not in the list. You can use this number to reconcile, while making a Purchase Voucher entry.
Not applicable You can select Not applicable if you do not want tracking number. This may be resorted in cases where you want to update stocks immediately with this entry and no goods inward entry is needed. If you select Not Applicable in an inventory voucher, it will update stocks and you need not make a separate ing/invoice entry.
Uses of the option Not Applicable If you need to raise a sales voucher/invoice that accompanies the goods and do not want to Goods Out entry, Not Applicable will update stocks without the Goods Out entry. When you record a purchase voucher and wish to update inventory without a separate Goods In entry, select Not Applicable for the tracking number.
The same applies to Debit Notes-Rejection Out and Credit Note-Rejection In. When you send out samples for approval, where you do not want to raise an invoice. When you receive samples, but no invoice will be forthcoming.
Default Voucher number
Reference number Tally lists the voucher number and the reference number of the current voucher for selection. Select the one that is easy to track later.
Pending tracking number If you have a pending tracking number from a previous voucher, it will be listed here together with details like location, quantity, rate and amount. Select a pending tracking number to adjust that with the current voucher entry. This could be a Purchase Voucher received and recorded, for which the goods are now being received.
Order Details (in case Purchase Order Processing is active)
If Purchase Order Processing is activated in F11: Features, an order field will be available. Select Not Applicable if there are no order particulars to adjust or record.
If the order exists, the fields are automatically filled up once you select the order number from the pop-up list. These are available for editing (can alternatively be set so that editing is not permitted through F12: Configure). Otherwise, select a new number to input order details at this point.
Location If you have more than one location, you must specify the location to which this item relates. The List of Locations will pop up to enable you to specify the location quantity, rate and amount for the item. You can give multiple locations.
Batch Number If batch number is enabled in F11: Features, the batch number can be given in the locations sub-screen. Select a batch number from the List of Active batches batch numbers, or give a new number for a new batch.
Mfg. Date The Manufacturing Date appears only if it has been activated. Specify the date of manufacture. This enables you to set expiry date for the batch as a period from the date of manufacture. For example, three months from the date of manufacture.
Expires on This field appears only if it is enabled. Enter the date of expiry or a period from the date of manufacture. If you have disallowed the use of expired goods for the Item, you cannot issue them after the expiry date.
Quantity You can set Company Features to allow Actual and Billed Quantities. You have to enter both quantities here. The actual quantity updates stock and the billed quantity affects the s. Give the quantity either in the main unit or the alternate unit. You may even specify quantities in both units. For example, 100 bars=150 Kgs.
Rate Specify the rate for the stock item. If you have entered Standard Rate for the item, the voucher will pick the relevant standard rate for that date by default. You can modify it while entering the voucher.
Per In this field, you can enter the unit of measure for the quantity of the item. This can be the main unit or even the alternate unit.
Amount The quantity multiplied by the rate per unit will be the amount.
End of List In all multiple allocations or selections, you should either select the option End of List or press Enter at the first blank field. This will accept the multiple allocations and take you back to the parent screen. For example, Multiple locations, batches or items.
Narration Here, you can type appropriate information for the transaction.
Creating a Stock Journal
A Stock Journal is used to transfer materials or stock from one location to another location. Stocks can also be shown as consumed. It can only be produced without consumption and production. Hence, it is not like other journals where debits and credits match. You can specify quantities that are moved, their rates and amounts. If standard rates are entered in the Stock Item masters, they will appear. In the target location, you can specify additional costs incurred without actually affecting ing at all. Only the stock value goes up. Hence, it is technically correct where an expense incurred on production or inward has been ing for in the cost of that item. To create a Stock Journal Voucher 1. Go to Gateway of Tally >Inventory Vouchers 2. Select the button
1.
F7 : Stk Jrnl from the button bar or press Alt+F7
The Stock Journal Screen has three parts 1.
The part at the top accepts general information.
2.
The left-hand side accepts the Source Godown or Consumption Part.
3.
The right-hand side accepts the Destination Godown or the Production Part.
You must furnish the common information required in the field that appears at the top. You may elect to give information for only the left or the right part or both. More: Common Information
Common Information
Reference, date and voucher number Reference field will be displayed if this is option is activated for the voucher. Give a reference number, if required. Voucher number depends upon the settings in Voucher Type.
Source (Consumption) Select the name of the Stock Item and the Godown from which it moves or where it is consumed as well as the Quantity, rate and amount. If the rate is specified in the Stock Item master, it will be displayed when you indicate the Item name. Note:
The
effect
of
entry
in
this
part
is
to
reduce
stock
of
the
Items
specified.
Destination (Production) Mention the name of the item and the Godown to which the item is moved. It is not necessary that the Item names should match the names in the source part. This is because a totally new Item could be produced out of the materials consumed. You can specify the rate of the Item, Quantity and amount. If the rate is specified in the Stock Item master, it will be brought up when you indicate the Item name. N o t e : The specified in
effect this
of entry part.
in
the
Destination
Part
is
of
increasing
the
stock
of
the
Items
Additional cost details This is another interesting facility is available for the Destination Godown (Production). You can specify what additional costs were incurred in moving goods to the Godown or for producing them. Though these costs are strictly ing heads, they do not get posted in the relevant nominal ledger s but add to the cost of the Item. In the target Godown, you can specify additional costs incurred without actually affecting ing. Only the stock value goes up. Hence, it is technically correct where an expense incurred on production or inward has been ed for in the cost of that item. After entering the amount for an Item, the following Additional Cost Details entry box pops up.
You may specify additional costs for transferring or producing the item. The typically additional costs are wages, power, freight and so on. Ensure that you have ledger s opened for the additional costs. Moreover, additional costs entered for the ledgers, do not reflect in the relevant ledger with the amount but only add to the cost of the item.
Percentage (%-age)
You can specify the additional cost in percentage of the cost of the item, in which case enter the number, for example, 2 for 2% of the cost of the item. You may, alternatively, skip the percentage field and input an amount directly.
Actuals This displays the total additional cost for the item and the effective cost per unit of item/product produced.
Bill of Materials
A Bill of Materials is a list of constituent items along with quantity details that can be allotted towards manufacturing a certain product, by-product or likewise. This facilitates immediate reduction in stock of the item automatically. This process of listing the items that make up another item is made possible in Tally by enabling the Bill of Materials Facility.
Enabling Bill of Materials This is useful for manufacturing organisations and can be set up through F12: Configure. The Bill of Materials option now appears in the Stock Item Creation screen only after entering a unit of measure in the Units field. 1.
Go to Gateway of Tally > F12: Configure
2.
Select Accts/Inv Info from the Configuration Menu
3.
Set Allow Component List Details (Bill of Materials) to Yes
A Bill of Material should be available while manufacturing an item. This is done through a stock journal. It is advisable to create a new voucher type, say, Mfg Journal which is based on Stock Journal.
More: Stock Journal as Manufacturing Journal Creating a new Manufacturing Journal Creating a Bill of Material Input fields Advanced Usage
Stock Journal as Manufacturing Journal
Stock Journal vouchers have an option Use as a Manufacturing Journal, in the Voucher Type Creation screen which has to be set to Yes . 1.
Go to Gateway of Tally
2.
Select s Info. > Voucher Types > Alter
3.
Select the Stock Journal Voucher from the Voucher Types
4.
Set the option Use as a Manufacturing Journal to Yes
When you use a Stock Journal as a Manufacturing Journal, the Stock Journal voucher entry screen will be modified to accept Name and Quantity of the product being manufactured, its list of components and additional costs of
manufacture associated with it. For an end-product item, if you have specified a bill of material that contains the list of components, this list will be brought up automatically and filled in for the quantity of the end product.
Creating a New Manufacturing Journal
T o create a new Manufacturing Journal 1. Go to Gateway of Tally 2. Select Inventory. Info > Voucher Type > Create
Name Give a new name to the voucher type, for example, Manufacturing Journal.
Type of Voucher This must be Stock Journal. Select it from the pop-up list.
Abbr. Enter a suitable abbreviation. For example, Mfg Jrnl. This is the abbreviation to the voucher type name.
Use as a Manufacturing Journal Set this option to Yes . For more details on voucher type refer Create a Voucher Type .
Creating a Bill of Material
Bill of Material (BoM) is created only for those items that are being assembled in-house. For trading items, you do not need a BoM. Therefore, you need to specify a BoM at the time of creating a Stock Item or when altering its master. Let us create a new Stock Item Television Flatron and specify its BoM. Go to Gateway of Tally > Inventory Info. > Stock Items > Create The Stock Item Creation screen is displayed below.
Some information like Batches, Alt. Units etc. depend upon the company features, configuration and invoicing setup. For details on fields other than Set Components (BoM) refer to the Stock Item Creation section under Inventory Information. The difference for India/SAARC would be in the field Rate of VAT and MRP/Marginal.
Set the option Allow Component list details (Bill of Materials) to Yes in F12: Configure . A pop-up list for the components appears which has to be entered as shown below.
Unit of Manufacture Specify the appropriate number of the finished product items that will be made. While manufacturing and recording through a stock/manufacturing journal, record the item in multiples of this unit of manufacture. The components are multiplied by the same factor automatically. You are allowed to alter the components to reflect actual consumption, if there is a change from BoM. N o t e : Under certain circumstances, it is example, per 1000 Pcs of nails, as raw insignificant.
better to give a larger unit material consumed for 1 piece
of of
manufacture, nail is
for
Item, Godown (Location) and Quantity Enter the component name and quantity. If there are multiple Godowns or Locations, specify the storage location for the item. Enter the options for all appropriate fields for the stock item and accept the screen.
Manufacturing Journal Entry 1.
Go to Gateway of Tally > Inventory Vouchers
2.
Select the button F7 : Stk. Jrnl or press Alt + F7
1. 2.
If you are creating a new voucher type Manufacturing Journal, a pop-up menu is displayed with the options default Stock Journal and Manufacturing Journal.
Select Manufacturing Journal and the following screen will be displayed.
Input Fields
Reference Number Enter a reference number, if required.
Name of Product Enter the name of the Stock Item to be manufactured.
Location Enter the location where the Item is manufactured. This location will show the stock.
Qty Enter the quantity of the item to be manufactured.
Component (Consumption) The component list for manufacturing the product and the proportionate quantity of each component (based on the quantity specified for the product in BOM) is produced. For each component, the default location is given as specified in the BoM. The entire component list can be altered, components added or removed and locations amended. N o t e : Any this product. Stock Item
change If you master
made during this entry will not affect the original Bill of Material for want to make permanent change to the Bill of Material, alter the information of the product.
Cost of components The base cost of the components are automatically added and displayed on the screen.
Additional cost components Specify additional costs for producing an item. These are typically wages, power, and freight. Creating ledger s for the additional costs is a must. Moreover, additional costs entered for the ledgers are not reflected in the relevant ledger with the amount, but these additional costs only add to the cost of the item.
% age Additional costs can be entered in of percentage of cost of components, for example, 2 for 2% of the cost of components. You can also skip the percentage field and enter an amount directly.
Total additional cost This field displays the total additional cost for an Item.
Effective cost This is the sum of the total cost of components and additional costs.
Effective rate Effective cost per unit of item/product produced.
Advanced Usage
Stock Journal or Manufacturing Journal can be created directly while creating a sales invoice. This is very helpful in situations where the manufacture has not been recorded but the invoice is prepared. While creating an invoice, place cursor at the quantity field of the Stock Item (manufactured product), press ALT+V to bring up the Manufacturing Journal screen for the product/item. Once the details are entered, you are brought back to the next field in the invoice screen. The manufactured product is invoiced and the corresponding list of components reduced from stock in a single transaction entry. Thus, the item would be manufactured, its components reduced from stock, and also invoiced in a single transaction entry. ALT+V creates a new Stock Journal or Manufacturing Journal transaction voucher and is not to be used for allocation. If ALT+V is pressed again during alteration of the invoice, one more Manufacturing/Stock Journal will be created and it will not alter the previous Manufacturing Journal.
Alteration of Manufacturing/Stock Journal To alter the Manufacturing/Stock Journal 1.
Go to Gateway of Tally > Display
2.
Select Inventory Books from the Display Menu
3.
Select Stock Item
4.
Select the required Manufacturing Journal screen
Or 1.
Go to Gateway of Tally > Display
2.
Select Statement of s from the Display Menu
3.
Select Statistics > Mfg or Stock Journal
4.
Select the required Manufacturing Journal screen. Make necessary changes and accept the screen.
Checking the Vouchers Entered To check the accuracy of the vouchers entered: 1.
Select Day Book from the Display Menu.
2.
Select F2: Period from the button bar and enter the period of display
3.
Select F1: Detailed from the button bar or press the keys Alt + F1
4.
3. 4.
Check the vouchers and if you find any error, position the highlight bar over the error and press Tally to display the voucher details for alteration.
Note: * It defaults to the current particular period. * The alteration facility is available for audit.
date subject
only to
but
you
may
display
security
and
access
all
the
rights.
transactions All
Enter for
for
alterations
a are
Purchase and Sales Orders
Order Processing Order processing is the placing of orders with suppliers for purchase to be made from them or receive orders from customers for the purpose of selling. In Tally, Order Processing is linked to Inventories. This allows tracking of the order position for a Stock Item. Using this you can track arrival of goods ordered and also whether the ordered Stock Item are delivered on time etc. You can create Purchase and Sales Orders in Tally. Purchase Orders (PO) can be created, printed and sent to suppliers. Goods received are linked with the POs and Invoices. Outstanding Purchase Orders should be monitored. Stock Summary displays order position of any item. The Purchase Order Book lists out all the Purchase Orders placed. Likewise, Sales Orders received are recorded in Sales Order Entry screen. These details will be available during Delivery Note and Invoicing. The order position in the Stock Summary can be viewed. The Sales Order Book lists all Sales Order received.
Enabling Purchase and Sales Orders To enable Sales Order and Purchase Order vouchers, activate the following in F11: Features 1.
Set Allow Purchase Order Processing and Allow Sales Order Processing to Yes.
2.
Enable Use Tracking Numbers
More: Creating a Purchase Order Altering a Purchase Order Creating Sales Orders Altering a Sales Order View order position
Creating a Purchase Order
Purchase Order details depend on configuration settings. To create a Purchase Order : Go to Gateway of Tally> Inventory Vouchers> F4 : Purc. Order
Party's A/c Name Select the Supplier’s name from the List of Ledger s . Use Alt+C to create a new .
Order No Enter the purchase order number. Configure the voucher type through s Info > Voucher Types to set prefixes and suffixes for Purchase Orders. This particular Order No. field is an additional field to record order
number if it is different from the voucher number. The voucher number is automatically displayed here; it is also possible to change this number if needed.
Name of the Item Select the Stock Item that needs to be purchased from the List of Stock Items . The Item Allocations subscreen is displayed. Enter the details as shown below.
Due on Enter the due date for delivery of the item. This monitors outstanding deliveries. The order can be split for delivery on different dates. If the order is split, give the due date of the first lot to be delivered. After selecting the respective Godown and entering the Quantity, Rate and Amount , specify the due date for the second lot. If the whole lot is delivered at a time, press Enter in the Due on field to return to the Voucher Creation screen. The cursor then returns to the Item field once again. Now enter another item. If no other item is required, press Enter in the blank field to navigate to the next field. Press the space bar to display the List of Ledger s. You can also specify other expenses like freight, tax to be charged if any in the Purchase Order. The Tax and Expense has to exist as a ledger or it may be created using Alt +C
Location This field should be entered with required details if multiple-location feature is enabled, otherwise it does not appear.
Quantity, Rate and Amount Enter the quantity of the item required and its rate. The amount is calculated, but it can be modified to enable rounding off.
Additional Cost Details E nter any additional cost incurred on the item here. This can be either entered as a percentage of the item cost or a fixed amount. If not, select End of List. Additional costs increase the value of the item, but they do not appear independently in the nominal ledger or expense.
Next Item The cursor comes to the Item field once again and you can enter another item to order. If no other item is required, press Enter on the blank field to take the cursor to the tax/expense field.
Expense/Tax Once the item details have been entered, specify tax to be charged and other expenses like freight, if any. The tax
or expense has to exist as a ledger if they do not exist, create it using Alt+C. Here, consider tax @ 17.5% that is charged on the item values. The order entry screen appears as shown below.
Narration This field is optional. Enter necessary particulars about the order.
Altering a Purchase Order
To alter a Purchase Order Go to Gateway of Tally > Display > Day Book
Or Go to Gateway of Tally > Display > Inventory Books > Purchase Orders Book
Make the necessary alterations and save.
Delete a Purchase Order To delete a Purchase Order press Alt+D in the Purchase Order alteration screen.
Creating Sales Orders
Sales order entry is exactly like the Purchase Order Entry. Sales Order details will also depend on configuration settings. To create a Sales Order: Go to Gateway of Tally > Inventory Vouchers > F5 : Sales Order
Party's A/c Name Select the Customer’s name. Press Alt+C to create a new .
Order No The voucher number is automatically displayed. You can change this number if required. Enter the sales order number.
Name of the Item Select the Item for which the order is to be placed from the sub-screen is displayed. Enter the details as shown below.
List of Stock Items . Here, the Item Allocations
Due on Enter the due date for delivery of the item. This enables monitoring of outstanding deliveries. The order can be split for delivery on different dates. If the order is split, give the due date of the first lot to be delivered and after selecting the respective Godown and entering the Quantity, Rate and Amount specify the due date of the second lot. If the whole lot is delivered at a time, press Enter in the next Due on field to return back to the Voucher Creation screen. The cursor returns to the Item field once again and you can enter another item to be sold. Press Enter on the blank field to take the cursor to the next field if no more items are to be entered. Press the space bar to display the List of Ledger s . You can specify if there are any other expenses like freight or tax in the Sales Order. The Tax and Expense has to exist as a ledger (if not, press Alt+C to create them). Select the respective ledgers to make the entries and save the voucher.
Location In case multiple location features are active this field has to be mentioned. Otherwise it does not appear.
Quantity, Rate and Amount Enter the quantity of the item required, and also its rate. The amount is calculated and can be modified to round it off.
Additional Cost Details There are no additional cost details for sales orders. They exist only for Purchases as the values are added to the cost price. In case of sales, additional cost needs to be entered below the line along with tax.
Next Item After completion of entering the first item, the cursor comes to Item field once again and you can enter another item to order. If there is no other item, press Enter in the blank field to take the cursor to the tax/expense field.
Expense/Tax Once the item details have been entered, specify the tax to be charged and other expenses like freight, if any. The tax or expense has to exist as a ledger or it may be created using Alt+C . Let us consider tax @ 17.5% to be charged on the item values. The Sales order entry screen appears as shown below.
Narration T his field is optional. You can give some particulars about the order.
Altering a Sales Order
To alter a Sales Order Go to Gateway of Tally > Display > Day Book
Or Go to Gateway of Tally > Display > Inventory Books >Sales Orders Book
Make the necessary alterations and save.
Deleting a Sales Order To delete a Sales order press Alt + D in the Sales Order alteration screen.
View Order Position
View the order position in Stock Summary. 1.
Go to Gateway of Tally
2.
Select Stock Summary
3.
Select the button
F1 : Detailed from the button bar
The screen shows the Particulars, Quantity, Rate, Value and Period . However, you do not know how much stock is on order both inward and outward. 1.
Press Alt+ N or Auto-Column from the Button bar.
1.
You get the following menu.
2. Select Orders & Stock Details . Note:
Set
Remove
Rate
and
Value
to
3 . This will enable all columns to fit in one screen.
N o in F12:
Configure
4. You may further drill down each column to view further the details. 5. In the Stock Summary screen, you can even bring up a new column using Alt+C.
6. Sales Order Reports can be accessed through Alt+F7 or Alt+C of the stock Summary. Note: reports
Inventory Reports & ing Reports can also be accessed by pressing F9 or F10 (ing/Inventory Reports).
through
ALL
other
Invoice Entry
Invoicing or sales invoicing is almost similar to sales voucher entry. You will use the same voucher but select As Invoice option to turn it into a sales invoice. Purchase invoices are recorded through normal Purchase Voucher entry and it does not have the provision of being converted into an invoice format for entry purposes. Similarly, you can print the Purchase voucher as a Purchase Invoice or even a Purchase Order. The advantage of using the invoice format for sales and purchase voucher entry is that it enables automatic calculations of taxes and duties. This is possible for only those groups for which Used for Calculation is enabled under the group Duties and Taxes. This is also possible for other groups for which the field Used for Calculation is enabled in the Group Creation screen. In recording both sales and purchase invoice details, you can adjust ing and inventory balances and for Taxes simultaneously. The default invoice formats has various configuration options. Use them to print your invoices as per requirements. It is not necessary to create new invoice formats. It is recommended that you configure the default invoice as per requirements. You can also design a new invoice using Tally's Definition Language (TDL) Report Designer. TDL is quite an advanced language with which you can create new reports and screens. You can even modify existing reports and screens.
Settings for creating Sales and Purchase Invoice 1.
Ensure that Allow Invoicing is set to Yes in F11: Features to create sales invoice. This brings up another option. Set Separate Discount Column on Invoices to Yes if you want a separate column for discounts in invoices.
2.
To create purchase invoices, ensure that Allow Invoicing is set to Yes and also Enter Purchases in Invoice Format is set to Yes in F11: Features. If you want a separate column for discounts in invoices, follow the procedure described above.
3.
Go to Gateway of Tally > ing Vouchers. Select either sales or purchase voucher. If you set Show Inventory Details to Yes in F12: Configure, all inventory details will be displayed on voucher screen.
4.
While creating Ledgers under the group Sales and Purchase s, ensure that the option Inventory values are affected is set to Yes.
5.
If you want tax s (under the group Duties & Taxes ) to use automatic calculation, ensure that the Percentage of Calculation is entered (For example, 17.5) and the appropriate Method of Calculation is selected from the pop-up menu in the Ledger Creation screen. If it is to use Tax based on Item Rate, then the Stock Item must have the rate specified. For more details refer Ledgers.
More: Configuring the Invoice Printing Invoices and Vouchers
Configuring the Invoice
Before creating the invoice, you need to configure the invoice. 1.
Go to Gateway of Tally > ing Vouchers> F8: Sales/F9: Purchases (As Invoice)
2.
Select F12: Configure
Set the options as required. 1.
Complete ing Allocations in Order/Delivery notes? ing allocations are not normally made during order recording or delivery notes. Yet you can set it to Yes if necessary.
2.
Allow modification of ALL fields during entry: Default order/delivery note entries appearing in the invoice can be changed during invoice entry. Set this to Yes to permit modification of all fields.
Further, you can configure its printing as follows:
Go to Gateway of Tally > F12: Configure > Printing > Sales Transactions > Sales Invoice Invoice Printing Configuration appears as shown.
Set the print options as desired. You can configure the invoice as per your requirement. The options depend on the various F11: Features and F12: Configure options that have been set for your company and for the voucher either by you or by the . In the above screen, the options are tuned to International settings. These will change if you opt for India/SAARC in the basic company settings. The details that you give during invoice entry depend very much on the configuration settings. Likewise, the details that you give during invoice entry depend very much on the configuration settings. Consider a typical invoice entry screen.
During invoice entry, some of the information will be selected from the separate pop-up screens. The invoice format is different from the normal sales voucher where the ing information is the primary information and the stock information is secondary. In the invoice format, stock information is primary information and ing information is the secondary.
Sales Voucher number This number is controlled by the settings in the voucher type masters.
Date Change date using [F2], when you need to.
Reference This is an optional field. Give any reference particulars that can be later picked up using the range or filter mechanism. This has, traditionally, been used for tracking missing tax forms. Party's A/c name
Select the customer's ledger . This will be debited by the total invoice amount. You may select a party ledger (under the groups Sundry Debtors or Sundry Creditors) or even Cash or Bank (for cash sales). Party's other details This information is to be filled up in the secondary screen that pops up. You may have a different consignee name and address than the buyer (if configured for).
Delivery Note No(s) Select the Delivery Note number if there was any for the shipment, from the Pop-up List of Tracking numbers. This way you reconcile goods despatched with the invoice and financial records. Select Not Applicable if no separate delivery exists. The choice is required only if Tracking Numbers are active. More: Despatch, Order and Buyer Details VAT
Despatch, Order and Buyer Details
Enter the despatch details. These are printed on the invoice.
Order Details The order particulars are entered here. If a prior order is recorded for the customer, a pop-up list of pending orders appears. Select the relevant order or orders. Raise an invoice against a single order or even multiple orders. Select New Number if no prior order exists for this invoice, but you want to record the order particulars. Select Not Applicable if not applicable. Select End of List to move to the next item.
Buyer's Details The Buyer's Address as per the master records appears as default, but you may alter it. If you have configured to have the Consignee address as well as Buyer address, these details are also displayed. Accept or modify them as required. N o t e : The F e a t u r e s.
location
column
appears
only
if
Multiple
Location is enabled in F 1 1 :
Inventory allocations Enter the inventory items that need to be invoiced. Once you have selected the first item and the tracking number and you have multiple locations set up, a secondary screen appears for the item particulars.
Enter the quantity, rate and unit particulars. You can select more than one location from where the goods have been despatched. Press Enter at the first blank location field to accept the first item's allocation of location and other details. You now have to give the ing ledger that will be affected for the sale of this item.
ing details Enter this information in the secondary screen that pops up after allocation of each item. Select the relevant sales to be debited for the first item.
Where you have more than one Stock Item Each item will require item allocation and ing allocation. You must repeat the procedure till you have completed all the items for that invoice. Press Enter on blank item or select End of list to complete the cycle.
VAT/Tax or other expenses These s are entered after the total value of stock items. Select relevant ledgers for the list. These are ledger s and will affect ing ledgers. For s like VAT/Sales Tax that are under the group Duties & Taxes (or are otherwise specified as Calculate in invoice entry in their masters), the amounts are calculated automatically. Press Enter on blank item or select End of list when you have completed.
Bill Details You must give bill-wise particulars, if the feature is activated for this particular party ledger. After you give the narration, accept the invoice.
Printing Invoices and Vouchers
To print any voucher or invoice, press ALT+P or click on the button Print. You can configure the voucher type to print automatically after saving the voucher.
N o t e : You can configure the can give additional information, settings.
printing change
options titles,
by selecting the appropriate buttons. You print additional pages, change printer
The buttons Pre-Printed and Quick Format toggles for Plain Paper and Neat Format respectively. These are print specifications that you set. Pre-printed is for pre-printed stationery. Quick Format does not give fonts or other niceties but is ideal for fast printing. Select copies and give the number of copies to be printed, by default this is set to one copy. You can set the number of copies in Invoice Printing Configuration Go to Gateway of Tally > F12: Configure > Printing
View invoice as voucher and vice-versa Once you create the invoice, you can view it as a voucher by simply displaying it and clicking on the toggle button [As invoice] / [As Voucher] or pressing CTRL+V. The same can be done with a sales voucher to be brought up as an invoice
Display/Alter a Voucher/Invoice You can display a voucher or alter it (subject to authority), by simply drilling down any display screen. For example, from the Balance Sheet, press Enter on the group Sundry Debtors, then on the particular ledger, which brings up its monthly summary. Continue the selection process till you see the list of vouchers and then the voucher itself. You may to alter a voucher by going through the ledger display screen or the Day Book. N o t e : If you do not up for display only.
have
the
authority
to
alter
a
voucher,
the
voucher
would
be
brought
Advanced Voucher Entry
Advanced ing Vouchers Advanced usage in voucher entry involves using more features of Tally. This would mean entering of data in various pop-up and sub-screens depending on the context and configuration (both F12 and F11) settings.
Bill-wise details Bill-wise details are pertinent only for party s, viz., ledger s classified under Sundry Debtors, Sundry Creditors and Branch/Divisions. Activate Bill-wise details if you wish to track each invoice and adjust the bills and payments bill-by-bill. When you make a sales or purchase voucher with Bill-wise turned on, Tally prompts you to identify the invoice with an appropriate reference number. The reference can then be used to allocate payments to the correct invoice to maintain an accurate of outstanding. Hence, Bill-wise details sub-screen comes up for party s during receipt/payment voucher entry or purchase/sale voucher entry or debit note/credit note entry. To activate Bill-wise details: 1.
Set Maintain Bill-wise details to Yes in F11: Features
2.
Set Maintain Bill-wise details to Yes while creating the respective Ledger Masters. Setting this option to Yes displays an additional option Default Credit Period. Credit Period is the number of days allowed to the Sundry Debtor to pay back or assigned to the Sundry Creditor to remind us of our payables. Specifying the period here is automatically reflected in the transaction. However it can be altered during Voucher Entry.
Note: relevant
Bill-wise details sub-screen does not only for ing purposes.
appear
for
pure
inventory
vouchers.
It
is
Let us take an example of a Purchase Voucher where we credit the supplier XYZ Supplier with Rs. 2000. After the amount field, the Bill-wise sub-screen pops up. The sub-screen appears as shown below.
Type of Ref Bill reference can be of four types: 1. 2.
1.
Advance
2.
New Ref
3.
Against Ref
4.
On
You must select one or more of these to adjust the amount. The amount can be broken up and given different Reference Numbers and different Due Dates. For example, the Rs.2000 can be split into two parts say Rs.500 and Rs.1500. Give Reference Numbers 5 and 6 respectively and specify Due Date as 31st May and 15th June 2005. Thus you have the option of adjusting the amounts with different reference numbers and different Due Dates.
Advance This is relevant when the money is received or paid in advance. You can adjust this advance amount while making the sale or purchase entry.
New Reference You select this for new transactions. For example, for a new bill raised on your customer or raised on you by your supplier. If you mark the bill as a new reference, it is added to the list of outstanding. In the field, you can give the voucher number, the reference number, or any alphanumeric set of characters that would identify the reference and help set it off later using against reference. You are not allowed to give the same name for two new references. In other words, new references must be unique.
Against Reference Select this when adjusting against a previous reference, i.e., adjusting against a bill marked new reference. Mark a bill as new reference and adjust its payment by marking the payment against reference. When selecting against reference, a list of pending references (bills) for the party comes up from which you select. You may adjust the whole bill or part of it. The rest of the bill remains unadjusted. You can use Against Reference even to adjust advance with an invoice. You can do this when entering a purchase or sales voucher. If there are no pending bills, the option will not be available.
On On is selected when you are unable to mark a payment or a receipt against specific pending references. You need to do this in cases of lump sum payments where a number of bills are pending but you are not instructed against which bill the money should be adjusted. However, the can alter the payment/receipt voucher and select the relevant Agst references Name In this field you can give the voucher number, the reference number, or any alphanumeric set of characters that would identify the reference and help set it off later using against reference. You are not allowed to give the same name for two new references. In other words, new references must be unique. Due date or credit days This is applicable for new reference. Give the credit period for the bill or the date when it is due for payment. Give either one of them and Tally will calculate the other. Amount This is the amount for adjustment. The amount given in the voucher automatically appears here. You can break up the amount and adjust it in several installments giving different references.
Dr/Cr Specify whether the adjustment is debit or credit. It is usually Dr for sales New References and Cr for Purchase New references. It is usually the same as the voucher entry. Maintaining Bill-wise details helps you to obtain information on Pending Bills, Bills Due, Overdue Bills etc and reports such as Outstanding Analysis and Ageing Analysis. To get these reports Go to Gateway of Tally > Display > Statement of s > Outstandings Cost centre allocations Cost centre allocations will be relevant if you have opted for Cost Centres in F11: Features. To display relevant ledgers Go to Gateway of Tally > s Info. > Ledgers. By allocating ledgers to Cost Centres at the time of voucher entry, you do away with the need to reconcile them. They are reconciled from that very moment. Hence, you save time and effort when you need to use the information for analysis. Cost Centre analysis is a powerful tool that enables you to know the performance of the Cost Centres. To display Cost Centre information Go to Gateway of Tally > Display > Statement of s > Cost Centres. More: Cost Categories Inventory allocations Tracking Number Default voucher number and reference number Foreign Exchange transactions Zero Valued entries in vouchers
Cost Categories
Let us take an example: 1.
Create three Cost Categories named Departments, Executives and Projects.
2.
Create three Cost Centres named Marketing, Manufacturing and Finance under the Cost Category Departments. Create three Cost Centres Salesman A, Salesman B and Salesman C under the Cost Category Executives. Create three Cost Centres Airports, Roads and Buildings under the Cost Category Projects.
The structure for creating Cost Categories and Cost Centres are shown below:
Cost Categories:
Departments
Executives
Projects
Cost Centres:
Marketing
Salesman A
Airports
Manufacturing
Salesman B
Roads
Finance
Salesman C
Buildings
You can specify a Cost Category to allow allocation of only revenue items or items of both revenue and capital nature. In this example, allow allocation of items of both revenue and capital in nature for both Departments and Projects categories and items of only revenue in nature for Executives. Now, Salesman A incurs conveyance expenses. If he has incurred it for marketing, allocate this amount to the cost centres Marketing and his own cost centre Salesman A. (You would do it while entering a payment voucher debiting Conveyance and crediting Cash). If the salesman now incurs expense for the project Buildings, you would allocate to the Cost Centres Salesman A and Buildings. You may allocate an expense to one or more Cost Centres and it is not essential to always allocate to all Cost Centres. An expense can remain unallocated to other Cost Centres. In case Cost Categories are not enabled, you will be able to allocate the expense to either Buildings Cost Centre under Projects or Salesman A under Executives and not to both. In such a case, you would not obtain the third dimension. You may not have Cost Categories activated if you do not need to. Without Cost Categories, you will allocate the ledger amount to only one set of Cost Centres, and not to parallel sets. Hence, you would allocate the conveyance expense to Salesman A only and not to both Salesman A and Project Buildings. You can allocate the expense partly to Salesman A and partly to Project Buildings that adds up to the total amount. This information will not enable you to know how much Salesman A spent for the Project Buildings. Note: centres
You do not allocate only. The concept
transactions to cost categories is like group/ledger
you allocate them classification.
to
cost
Cost Centre allocations have to be done in pop-up sub-screens in the main voucher entry screen. The sub-screen pops up after the amount field pertaining to the ledger for which cost centres have been activated. Hence, the following is the sub-screen for the ledger Conveyance amount in a payment voucher:
Applying Cost Centres to Ledger s Activate Cost Centre for the Ledger s that are used in voucher entry. In this example, make a payment voucher for the amount Rs. 1, 00,500. Hence, enable Cost Centres for the ledger Conveyance. 1.
Go to Gateway of Tally
2.
Select s Info > Ledgers>Alter
3.
Select the ledger Conveyance from the List of Ledgers . Set Cost Centres are Applicable to Yes. If the ledger Conveyance is not available create a new one with Cost Centres enabled.
3.
Cost Centre Allocation in Voucher Entry The entire objective of creating Cost Centres is to allocate expenses and revenues to Cost Centres. Allocation is dynamic and done at one stage only, at the time of making voucher entries. For example, make a payment voucher for conveyance Go to Gateway of Tally > ing Vouchers > F5: Payment The voucher entry screen appears. Debit the amount to the Conveyance ledger. Cost Centre allocations have to be done in pop-up sub-screens in the main voucher entry screen. A sub-screen pops up after the amount field pertaining to the ledger for which cost centres have been activated. The sub-screen for the ledger Conveyance and in a payment voucher appears as shown below.
Inventory allocations
Inventory items need to be considered in financial vouchers where you use ledger heads that have the option Are Inventory Values affected? set to Yes. Similarly you will have the s of the type Sales and Purchases affecting inventory. When you enter a voucher (usually a Sales or a Purchase Voucher) a sub-screen pops up after the concerned ledger head and amount asking you to enter inventory item details. The inventory details that you give in an ing voucher (like Sales and Purchase Voucher) affects stocks by immediately updating them only if Tracking Numbers are not activated in F11: Features. Otherwise, the inventory allocation tracks against Goods In or Goods Out notes through tracking numbers. The information that you need to give in the inventory allocation sub-screen depends upon the features enabled for the company. A typical inventory allocation sub-screen appears as shown below.
Name of Item Select the item from the list of items or press ALT+C to create a new item.
Tracking Number
The tracking number pop-up list appears after you have entered the name of the item. A default list will contain the following:
1.
New number – Enter a number, which is not in the list. You will use this number to reconcile, when making goods inward entry.
2.
Not applicable – If you do not want a tracking number. This may be resorted to in cases where you want to update stocks immediately with this entry and no goods inward entry will be needed. Not Applicable option is important and the cases where you would use it are:
When you raise a sales voucher/invoice that accompanies the goods and you do not want to Goods Out entry. Not Applicable will update stocks without the Goods Out entry. When you send out samples for approval, where you do not want to raise an invoice. Likewise when you receive samples but no invoice will be forthcoming.
Default Voucher Number and Reference Number
The voucher number and the reference number of the current voucher are also listed and available for selection. Select the one that is easy to track later. By default the reference no. and the Delivery note number are highlighted in the receipt note and delivery note for tracking.
Pending Tracking Number If you have a pending tracking number from a previous voucher, it will be listed here together with details like location, quantity, rate and amount. Select a pending tracking number to adjust that with the current voucher entry. This helps in the following situations. 1.
When you a purchase voucher for an invoice that is towards a Goods Receipt Note that you had previously ed. (You would have given a new tracking number then).
2.
Likewise for a sales voucher/invoice.
Location If there is more than one location, you must specify the location to which the item relates. Hence, a sub-screen appears after the tracking number, to enable you to specify the location quantity, rate and amount for the item. You can give multiple locations. Batch Number In the locations sub-screen itself, the batch number can be given if batch numbers are activated in Company Features. Select a batch number from the list of existing batch numbers or give a new number for a new batch.
Mfg. Date This appears only if it is activated. Give the date of manufacture. This enables you to set expiry date for the batch as a period from the date of manufacture such as “three months from the date of manufacture”.
Expires on It appears only if it is activated. Give the date of expiry or a period from the date of manufacture. If, for the item, you had disallowed the use of expired goods; you cannot issue them after the expiry date. More: Quantity
Quantity
You have to enable the option Use different Actual & Billed Qty? to Yes in F11: Features to allow Actual and Billed Quantities. Then, you have to give both quantities here. The actual quantity updates stock and the billed quantity affects the s. Give the quantity either in the main unit or the alternate unit. You can even specify quantities in both units. For example, 100 bars=150 Kgs.
Rate Enter the rate for the stock item. If you have entered Standard Rate for the item (Standard Cost and Standard Selling Price – see item master), the voucher will pick the relevant standard rate for that date by default. This can be modified while entering the voucher.
Per Enter the unit of measure for the quantity of the item here. This can be the main unit or even the alternate unit.
Amount The quantity multiplied by the rate per unit is the amount.
End of List In all multiple allocations or selections, you must either be required to select the option End of List or press Enter at the first blank field. This would accept the multiple allocations and take you back to the parent screen. For example, Multiple locations, batches or items.
Foreign Exchange transactions
Enabling Foreign Currency To enable Foreign Currency Set the option Allow Multi-Currency to Yes in F11: Features
N o t e : Only genuine bank s that are maintained in foreign have their currency set up in that foreign currency otherwise all preferably be set to home/base currency only.
currencies need to other ledgers should
Based on the above settings, consider a Purchase Voucher entry of an import transaction in foreign exchange and then a payment entry made from a Forex Bank . More: Example 1: Foreign exchange transaction of an import transaction. Example 2: Voucher entry of a forex bank payment
Example 1: Foreign Exchange Transaction of an Import Transaction.
In the purchase voucher 1.
Enter the date, voucher number and reference.
2.
Ensure that you have created a supplier under Sundry Creditors with the foreign currency specified in the Currency of the Ledger field.
3.
Credit the supplier.
4.
In the Amount field, start with the foreign currency symbol to inform Tally that it is a forex transaction. In this case, type $ (base currency is £) and continue with the amount. $25000.
5.
A forex sub-screen displays. Enter the exchange rate as per the bank or as mentioned on the purchase invoice. (Tally gives the default exchange rate mentioned in the foreign currency master). You can change the rate, if required. Alternatively, change the amount and the rate will be adjusted automatically. If you want to give only the base currency, clear the Forex field and Rate of Exchange field and mention the Value in base currency. The exchange rate will then be ineffective.
6.
In inventory item allocation, consider a purchase of 50 rolls of paper. You can give the rate of the item in base currency or foreign currency. To mention it in foreign currency, start the rate entry with the forex symbol. Tally converts it to the base currency at the exchange rate previously mentioned.
N o t e : If you want to give only the base currency, clear the forex field and Rate of Exchange field and simply enter the Value in base currency. The exchange rate would then be ineffective. Of course, if you do not enter a foreign currency in the amount field, the amount is assumed to be in home/base currency.
Example 2: Voucher Entry of a Forex Bank Payment
It is assumed that the bank ledger is maintained in foreign currency. In a payment voucher (bank payment): 1.
Enter the date and voucher number.
2.
Debit the supplier
3.
In the amount field, begin with the forex symbol
4.
You can debit the supplier with the same amount and exchange the rate as before or even change the rate to the current rate. Here, the rate is changed to the current rate. Notice the display of pending bills in foreign exchange when you are asked to adjust the payment against previous reference (it would come up if you have bill-wise outstandings activated).
5.
The forex gain or loss in the transaction is automatically calculated and is shown as unadjusted Forex gain/loss in the Balance Sheet. You can a journal entry affecting the profit and loss with the forex gain/loss figure to bring it into the books.
When you display ledger of the supplier, you will notice that its has balanced out but a forex gain has accrued on the transaction due to a rise in the exchange rate for the dollar.
Advanced inventory vouchers There is no separate section on this. Normal inventory voucher entry includes a discussion on the advanced issues.
Zero Valued Entries in Vouchers
T o use zero values in vouchers, Set the option Allow 0 Valued entries in Vouchers to Yes in F11: Company Features > Inventory Features
There is no point in having a voucher that is totally without value. Zero values are required in the following situations: 1.
One of the entries may not have a value but yet needs to be shown in the records.
Example : Zero-rated VAT or Exempt from Tax . You are permitted to make such an entry. The Exempt Ledger can be viewed for all Exempt Sales. 2.
Zero valued vouchers are possible for sales and purchase vouchers as these permit invoicing for free samples. A whole Voucher could be of zero value in only sales and purchase vouchers but this is not possible in receipt, payment vouchers and journal vouchers.
Example 2 - Invoice for Free Samples
Display – Tally's Forte
Tally's Display of information is designed to allow a get the maximum benefit of the data that is entered. A gets a holistic picture of the data and is also able to present information using different options. The purpose of compiling data is to present it in comprehensible ing reports. On entering the vouchers, Tally uses the same data and provides you with the management control reports in addition to all books and statements. The display screens of Tally are dynamic and interactive. They are not spooled print files but are specially designed for the screen. Whatever you see on the screen can be printed as well depending upon your printer’s capabilities. To view the Display Menu: Go to Gateway of Tally > Display The following screen displays
Gateway of Tally displays only the Balance Sheet and Profit & Loss directly as these statements are considered the most important. All the other Tally reports are classified into two broad categories, namely. ing reports and Inventory reports conforming to the two major areas of operations. Each area is further grouped into books and statements. The Cash and Funds Flow display too has not been grouped under Statements of s. Trial Balance provides you a report on the balances sorted by groups, for all the s of the selected company. In other words, the Trial balance displays a collection of main groups and their closing balances. The Stock Summary is a statement of stock-in-hand on a particular date and gets updated every transaction so as to provide the current stock position.
The Ratio Analysis Statement is a single sheet report indicating the company’s performance based on values and key indicators, over a selected period. This report gives a manager an idea of the company's financial condition and where it is going in the short-term. The Day Book contains all vouchers for the day, including inventory vouchers. Its purpose is to show you a day's transactions, though you can display a report for any period using Change period option. The List of s gives the tree structure of all your masters, namely, Groups, Ledgers, Stock items, Cost Centers, Currencies, etc. Exception Reports are those reports that track unusual transactions or balances. More: Basic features of displaying reports Modifying reports
Basic Features of Displaying Reports
Tally creates the books of s and the financial statements based on the vouchers entered till date. You can then customise the appearance of reports as required. For example, you can compare different companies, periods of the financial year, groups and ledgers. Press Enter after highlighting the item in a report, to navigate to the next level of detail till you reach an individual voucher. Similarly, you can navigate back to higher levels by pressing Esc. The special features available for a displayed report are indicated on the button bar, which can be operated by a single- click of the mouse.
Accessing reports The Gateway of Tally menu provides access to all the financial reports listed in the Display Menu. For example, if you want to view the Sales , Go to Gateway of Tally > Display > Books > Sales . Tally will display the report for the currently selected period.
Modifying Reports
On selecting a report, the screen displays. Modify the display to suit your requirements using the appropriate buttons from the button bar. If you select the buttons using the keyboard, the conventions are: F (n) : - Press the F (n) key F (n) : - Press Alt + F (n) F (n) : - Press Ctrl + F (n) N o t e : Here n
is
used
as
an
example
of
a
function
key
(Eg:
F1,F2
and
so
on).
(Alt + F1) F1 : - Detailed/Condensed Adds a further level of detail to the report, or condenses the report.
F2: Period You can change the period of the report by specifying From/To dates.
F3: Company If you have more than one company selected, this button enables you to switch among them to display the new company data in the current screen format.
F4: to F10: The functions performed by these buttons vary from report to report.
F11: Company Features This button is not related to displaying reports but to setting the options that affect the voucher entry.
F12: Configure This button is very relevant to displaying reports and enables you to define the report-specific options. For example, depending on the report displayed you can specify whether it should be in horizontal or vertical
format, show percentages, show gross profit, show opening and/or closing balances, change the periodicity, change the sorting method, and so on. For instance, if you want to view graphs with monthly reports: 1.
Select the F12: Configure Button while in the Gateway of Tally screen and you will be taken to the Configuration menu.
2.
Select General and by default Show Monthly Reports with Graphs under Other Options is set to Yes . If this option is No set it to Yes .
(Alt + F12) F12 : Range This button enables you to filter the information displayed based on monetary values. For example, you can specify that you want Tally to display only Vouchers having Batch Names greater than $5,000 in a Day Book.
(Ctrl + F12) F12 : Value This button enables you to filter vouchers. For example, you can specify that you want vouchers having Employee-Attendance Entries with their Designation containing all the details about the employee.
New C olumn (Alt + C) This button enables you to add and display another column in the report to compare information.
A lter Column (Alt + a) This button enables you to alter the details of a new column added previously, for example, the date range. Select the column to be altered by positioning the cursor on it.
D el Column (Alt + d) Use this button to delete the columns, which you no longer wish to have in the report.
Auto Column (Alt + n) Use this button to add multiple columns to a report. For example, add columns for each month, or to accommodate other companies if more than one company has been selected. You can also have a total column.
Report specific options Report specific options, if any are displayed at the bottom-half of the screen and can be amended as per requirements.
Display Books and Statements
B ooks of Books of record the transaction details as entered. Although items are posted too many different ledgers, Tally brings all the transactions of a particular category together into a book of for viewing and printing. For example, Cash Book records all the transactions affecting cash and the Sales Book records all sales transactions.
Statements of s These pertain to cost centres and outstanding analysis . The Statements of s are derived from individual transactions but are not statutory requirements.
Financial Statements Financial Statements though derived from individual transactions tend to show summary totals, ratios and statistics, analyzing a company's financial data in a wide variety of ways. Financial statements include Balance Sheet , Profit & Loss A/c ,and Cash Flow Analysis and form part of the statutory requirements in most countries. 1.
All books are displayed as a monthly summary with opening and closing balances.
2.
Select a month and press Enter to display all transactions for the month. The opening and closing balances as well as the total of all transactions are displayed.
3.
Select a transaction to bring up the voucher. The voucher displays either in alteration mode or simply displays depending on your access rights.
3.
Let us see some typical examples of how to display the books of and financial statements. You will then be able to experiment with other statements for yourself. More: Viewing Cash/Bank Books Display Balance Sheet Display Profit & Loss Display Trial Balance Day Book Books and s Group Summary List of Vouchers Ratio Analysis
Cost Centre Reports Outstandings and Credit Control
Viewing Cash/Bank Books
T o view the Cash/Bank Summary 1.
Go to Gateway of Tally > Display > Books > Cash/Bank Book(s)
2.
If you have more than one bank , select one bank . Press Enter to display the Ledger Monthly Summary .
3.
Select F12: Configuration and activate the option Show with Graph to Yes .
3.
4.
5.
Highlight a month, press Enter and the Ledger Vouchers screen displays.
4.
5.
All the vouchers for the selected month are listed. Press Esc to return to the Ledger Monthly Summary screen.
6.
Select F12 : Value to bring up the Value to Calculate in Report screen. a.
Select Voucher Type from the Particulars menu.
b.
In the Particulars menu, select Narration .
c.
In the Range of Info. Menu select equal to .
d.
Type Contra in the next field and press Enter .
e.
In the Condition menu select End of List and press Enter twice.
e.
7.
In the display of the Ledger Monthly Summary the figures are now reduced as they show only Contra vouchers. To check this, position the highlight bar over the July figures and press Enter to display the details.
8.
Press Esc until you return to the Gateway of Tally menu.
Display Balance Sheet
The Balance Sheet is a report on the status of the financial affairs of a company at a given date. To view Balance Sheet: 1.
Go to Gateway of Tally > Balance Sheet
2.
Press F12: Configuration and set the required parameters to display the Balance Sheet according to your preferences.
Note: entered
Balance Sheet and saved.
gets
updated
instantly
with
every
transaction
voucher
that
is
Horizontal Form of Balance Sheet The Balance Sheet screen is displayed in the Horizontal form. See it in a Vertical form by activating Show Vertical Balance Sheet to Yes in F12: Configuration .
Extract information from the Balance sheet using options available in the Button Bar. 1.
Select F1: - Detailed/Condensed to explode the summarized information.
2.
Change the date of the Balance Sheet using F2: Period .
3.
Add up new columns and
Display a Balance Sheet for a different date to compare with current one
Display the Balance Sheet in a different currency
Display Budget figures and analyse the variances or
See the effect of different Stock Valuations on the Balance Sheet.
More: Configuring the Balance Sheet Integrate s with Inventory
Configuring the Balance Sheet
Show Vertical Balance Sheet? Setting this field to Yes displays the Balance Sheet in Vertical form. In the British/Europe configuration, the Vertical Balance Sheet has Liabilities and Assets , whereas the Indian/Asian configuration , it displays Sources of Funds and Application of Funds .
Profit or Loss, both as Liability? Set this to No , to move the Profit & Loss to the Asset side of the Balance Sheet. Note:
This
is
applicable
only
in
the
horizontal
form.
Show Percentages? Each line will be expressed as a percentage of the total in the Balance Sheet.
Show Working Capital figures? Set to Yes , to display Current Assets, less -Current Liabilities as shown
Method of Showing the Balance Sheet The options are
Liabilities/Assets
Assets/Liabilities.
Format of the Balance Sheet:
For Horizontal Balance Sheet: Left Hand Side/Right Hand Side
For Vertical Balance Sheet: Top/Bottom.
Vertical Form of Balance Sheet 1.
Set Show Vertical Balance Sheet to Yes in F12: Configuration .
2.
Go to Gateway of Tally > F12: Configuration > General
Set Use ing terminology of to India/SAARC or International under the Country Details to Yes .
If you have activated India/SAARC the Balance Sheet will display Sources of Funds and Application of Funds .
If you have activated International the Balance Sheet will display Assets and Liabilities
Columnar Balance Sheets
Select a Balance Sheet for a different date to compare alongside the current one
Press N ew Column on the Button bar or ALT+C and change the period.
The following is a comparison of Balance Sheet dated 1st October and Balance Sheet dated 2nd October.
Press N ew Column on the button bars or ALT+C and change only the currency to display the Balance Sheet with figures in a different currency.
Show Quarterly Balance Sheet To view a Quarterly Balance Sheet
Press Auto-column on the button bar or use the key ALT+N .
Select Quarterly from the list of periods.
The following screen displays
Integrate s with Inventory
Effect on Balance Sheet and Profit & Loss Integrate s with Inventory in F11: Features has a significant effect on the Balance Sheet and Profit & Loss .
If s with Inventory is set to Yes in F11: Features, it the stock/inventory balance figures are updated from the inventory records, which in turn enables you to drill down to the Stock s from the Balance Sheet.
If the option s with Inventory is set to No in F11: Features, the inventory books figures are ignored and closing stock balances are entered manually.
Note: Stock records often contain compensating errors caused by wrong allocation to items. This feature of Tally enables the finalisation of financial books without waiting for reconciliation of stocks that might take time.
Display Profit & Loss
The Profit and Loss shows the operational results over a given period. It lists out the Incomes and Expenditures based on the Primary Groups of Tally and the Profit & Loss in Tally is updated instantly with every transaction voucher that is entered and saved. To view the Profit & Loss Go to Gateway of Tally > Profit & Loss
N o t e : The it in F12:
Profit & Loss Configure.
Horizontal Form of Profit & Loss
is
displayed
according
to
the
configuration
set
up
for
The sample screen shown is in horizontal form which is the default display. You can also set it up to display in vertical form.
Using options in the Button Bar 1.
Select F1: - Detailed/Condensed to display more information or condense.
2.
Change the date of the Profit & Loss using F2: Period .
3.
Add new columns to
Display a Profit & Loss for a different period to compare with the current one
Display the Profit & Loss in a different currency
Display a column with Budget figures and analyse variances
See the effect of different Stock Valuations on the Profit/Loss .
Select and compare Profit & Loss of different companies.
More: Configuring the Profit & Loss Income/Expense Stmt instead of P&L?
Configuring the Profit & Loss
Show Vertical Profit & Loss?
The Profit and Loss will be displayed in the Horizontal (default) form if you set the option Show Vertical Profit & Loss? to No .
Set to Yes to display in the Vertical form.
The Vertical Form shows the Trading and the Income Statements separately.
Show Percentages? Each line is expressed as a percentage of Sales s , i.e., if you consider Sales s to be 100%, the rest of the lines would be a percentage of Sales s.
Show With Gross Profit? If the option Show With Gross Profit? Is set to Yes the Profit & Loss Statement is split to show Trading Profit, which considers only the Cost of Sales and Direct Expenses., Indirect Expenses are deducted from the Gross Profit to show the Nett Profit.
Note:
This
field
is
applicable
only
to
Horizontal
Form
of
Profit
and
Loss
.
Columnar Profit & Loss : Some Examples Select a column to display the Profit & Loss in a different currency.
Press New C olumn on the button bar or the keys ALT+C and change only the Currency and give the closing Exchange Rate.
The Profit & Loss figures are converted at this rate.
Select a column to display the Profit & Loss with a different stock valuation method.
Press New C olumn on the button bar or the keys ALT+C and change only the Stock Valuation Method to Last Purchase Cost.
The Profit and Loss screen will be displayed as shown
Show Quarterly Profit & Loss Press Auto-column on the button bar or the keys ALT+N . Select Quarterly from the list of periods. The Profit and Loss screen will be displayed as shown:
Income/Expense Stmt instead of P&L?
A ccount statements for Non-Trading Organisations For Non-Trading s (e.g. s of Charitable Organizations), the Trading and Profit & Loss Statement are inappropriate. In such cases, you may use Income & Expenditure by setting to Yes in F11:Features . The Income & Expenditure Statement displays as shown.
Income/Expense Stmt instead of P&L
Display Trial Balance
Trial Balance is a report of all balances for the company sorted by groups, i.e., it is displayed in a grouped form, comprising main groups and their closing balances. You can see that the debit and credit balances match. In Tally, the matching of the Trial Balance is a foregone conclusion since all voucher entries are in Debit - Credit format and must balance at the entry point. To view the Trial Balance Go to Gateway of Tally > Display>Trial Balance Note:
As
per
ing
principles,
the
Trial
Balance
does
not
list
Closing
Stock.
Select F1 : Detailed to break down the grouped information or simply drill down a Group for further detail.
The screen appears as shown
Select F5: Led-wise to list all ledgers and their closing balances.
The screen appears as shown
Select New C olumn to bring up the closing balances for another date.
The screen appears as shown
More: Reconciliation Statement
Reconciliation Statement
This report shows the flow of the s from Opening Balance to the effect of transactions on Closing Balance.
Select F12: Configure and set parameters as shown
The Trial Balance Reconciliation Statement is as shown
The Trial Balance can also be configured to show only Opening and Closing Balances.
Day Book
To view the Day Book Go to Gateway of Tally > Display>Daybook The Day Book lists all transactions made over a particular day and by default displays the last voucher entry date of a regular voucher. It could also be set up to list all the transactions made over a period. Press F2 : Period on the button bar or press the keys Alt+F2 . All the transactions include all financial vouchers, reversing and memorandum journals as well as inventory vouchers. Consider an example:
Day Book for current date
Day Book for a period
You can also filter the list so as to display the transactions of a particular voucher type using F4: Chg Vch button from the button bar. The screen appears as shown:
Books and s
The objective of having books and s in Tally is to pile up similar entries into a single entity so that they are meaningful, e.g., all cash entries in the Cash Book, all sales entries in the Sales Day Book (called Sales ).
The Tally transaction flow Apart from the subsidiary books, entries are also filed under each Voucher Type. Therefore, there will be as many s as there are voucher types. More: Journals, Day Books and s Sales (Sales Day Book) Invoice Profitability Columnar Sales s from Statistics Monthly Summary
Journals, Day Books and s
Journal, Sales , Purchase , Debit Note , Credit Note , Payment , Receipts , etc. are the different kinds of s. There are three ways to view various types of s: 1.
From the Display menu
2.
By changing the type of voucher from within a
3.
From the Statistics page
Consider the Sales which includes most of the options.
Sales (Sales Day Book)
Go to Gateway of Tally > Display > books > Sales The following screen displays.
By default, all s display Monthly Summary with transactions and closing balances. For Balance Sheet s, opening balance is displayed at the top of the screen. Select a month and press Enter to see the Sales Voucher . A list of all sales vouchers pertaining to the month you selected displays. You can use the options in the button bar to change the display according to your preferences. You can change the period of the report as well as the depth of information. Use F12: Configure to see the report with some or all of the following information, namely Narrations, Bill-wise details, Cost Centre details and Inventory details.
Click on F1 : Detailed to view the reports in detailed format.
Invoice Profitability
Display the Sales Voucher for a period by drilling down a month and change the period if required. Select F7: Show Profit or activate the option Show Gross profit estimates to Yes in F12: Configure
The report now displays each invoice with Transaction Value - Invoice value including taxes Gross Revenue – Actual sale value minus taxes Cost – Book cost of the product Gross Profit – Amount of profit or loss on the sale
Extract of Sales When you are in the Sales Voucher , select F6: Extract from the button bar. The following screen displays.
The Extract gives a break-down of the sales vouchers and groups them to provide totals for each group and ledger used in all sales vouchers for the period. The information is useful, when you want to know how much each group of customers bought, what is the tax component or what is the total value of each sales ledger.
Inventory-wise Extract of Sales
In the Sales Voucher select F6: Extract from the button bar
Go to F12: Configure .
Set Show Inventory-wise Extract to Yes to view the report of the stock items sold along with the details
on quantity and value.
The following screen displays.
Columnar Sales
Select the option F5: Columnar from the button bar, in the Sales Voucher screen. The following screen displays.
Set the options listed to Yes or No depending on how you want the Sales to display
Type of Column Select the type of column from the screen.
If you select Ledger or Group as Type of Column, you are provided with one more list for choosing the ledger/group. Your choice is displayed under Name of .
All Items (automatic columns) If this option is set, every ledger will use a column space
All Item (in one col.) If this option is set, all the ledger s are displayed in one column.
Group You can also select a group of ledger s to be displayed together in one column, e.g., Sales s. For other columns, you can use the additional options, namely Related s (automatic columns) or Related Items (in one col.).
Ledger Select a specific ledger e.g., VAT/Sales Tax. All other s can be put in one or more columns.
Related Items (automatic columns or in one column) Related items means all the ledger s used in a voucher. Hence, the report will be similar to All Items (automatic columns). This option is helpful when used in conjunction with a Group or a specific ledger in the first column.
Chg Vch Use this button to view a different from within an existing . E.g. If you are in Sales and want to view the Payment , press F4: Chg Vch and select Payment .
Payment
s from Statistics
To access the Voucher s from the Statistics page: Go to Gateway of Tally > Display >Statements of > Statistics The following screen displays.
Drill down a specific type of voucher to view the details.
Monthly Summary
When drilling down from a statement into any Group, Ledger, Stock item or Cost centre the screen displayed first is the Monthly summary. Monthly Summary can also be accessed from a voucher level screen with the help of the button Monthly . The monthly summary shows the opening balance for the year, and then lists each month's total transactions, inclusive of both debit (inwards for stocks) and credit (outwards for stocks) and finally each month's closing balance. Below the monthly summary, is a bar chart showing the movement of . Use F12: Configure to display the monthly summary according to your requirements. The options available on the button bar are very useful for configuring managerial reports. E.g. Use the New Column button to bring up the Monthly Summary of another ledger or object or the same object in another company. Press the button F5 : Quarterly , to view the summarized quarterly figures. Use the options in F12: Configure to view the details on percentages, averages and so on.
Ledger Voucher Monthly Summary The Ledger Voucher Monthly summary screen is displayed as shown.
Cost Category Monthly Summary The cost category monthly summary is displayed as shown. You can place the cursor on any particular month, say October and drill down for more details.
Stock Item Monthly Summary The screen will be displays as follows. If you want to view the details for any particular month you have to place the cursor on the month and drill down.
Group Summary
Go to Gateway of Tally > Display > Books > Group Summary> Group name for e.g. Duties and Taxes The following screen displays.
The Group Summary Statement shows the closing balances of the s falling under the selected group over a period. Using the buttons provided on the button bar, you can change the view to any of the following: Detailed, Individual Ledger listing for the selected group, monthly summary, columnar display for comparison and analysis. An example is given below:
Led-wise Display of Group Summary To view the Led-wise Display of Group Summary select F5: Led-wise from the button. This toggles with the button Grouped .
List of Vouchers
Vouchers or transactions of a similar nature or type entered over a period are collated and listed together to present meaningful information. There are different types of voucher lists, e.g., Group Vouchers, Ledger Vouchers, Stock Vouchers, Godown/Location Vouchers, etc... More: Group Vouchers Ledger Vouchers
Group Vouchers
To view the Group Vouchers Go to Gateway of Tally > Display > Books > Group Vouchers> Group Name e.g. Current Assets The following screen displays.
Group Vouchers is a list of all vouchers having at least one ledger entry belonging to the group selected. This statement is useful when you want to list all transactions for a particular group.
Ledger Vouchers
To view the Ledger Vouchers Go to Gateway of Tally > Display > Books > Ledger > Ledger e.g. Machinery The list of vouchers for the current month is displayed. You may also access Ledger Vouchers by drilling down from different statements, such as Group Summary and Monthly Summary.
Ratio Analysis
The Ratio Analysis Statement is a single sheet performance report for a selected period. It provides you with important values and key performance indicators. It is one report that top management needs to look at periodically to assess the company's financial health and where it is going in the short term. To view the Ratio Analysis screen Go to Gateway of Tally> Ratio Analysis The following screen displays.
The Ratio Analysis screen is divided into two parts:
Principal Groups
Principal Ratios
The Principal Groups are the key figures that give perspective to the ratios. Principal Ratios relate two pieces of financial data to obtain a comparison that is meaningful. More: Principal Groups and key figures Principal Ratios Payment Performance of Sundry Debtors
Principal Groups and Key Figures
Working Capital The Net Working Capital is calculated by subtracting Current Liabilities from Current Assets. Financial Analysts often consider the total Current Assets as the Working Capital. This serves as a measure of how far the firm is protected from liquidity problems.
Cash in Hand and Bank Balances This data presents another perspective on the liquidity position
Sundry Debtors (due till today) The total debtors and debtors that are due as on the date of the statement, are displayed
Sundry Creditors (due till today) The total creditors and creditors that are due as on the date of the statement are displayed.
Sales and Purchase s The Sales and Purchase s, which collate the trading activity for the period, are displayed.
Stock in Hand This field displays the stock in hand as on the date of the report and together with Cash and Bank Balances and Debtors, complete the Current Assets aspect of the Working Capital.
Nett Profit This is derived from the Profit & Loss and is the profit after direct and indirect expenses.
Wkg. Capital Turnover (Sales s/Working Capital) This is an activity or efficiency ratio that shows the number of times the working capital has been rolled over during a particular period. It depicts how effectively the firm is using its working capital.
Inventory Turnover (Sales s/Closing Stock) This is an activity or efficiency ratio that shows the number of times the stock has been rolled over during the period of the report. It depicts how effectively the firm is using its inventories.
Principal Ratios
You can compare Principal Ratios of your company over a period with industry averages as well as with ratios pertaining to other periods to assess current performance.
Current Ratio (Current Assets: Current Liabilities) Known as the liquidity or solvency ratio, this is the most frequently used for assessing the company’s capability of meeting its short-term obligations. More specifically, it elucidates a firm's ability to cover its current assets with current liabilities.
Quick Ratio (Current Assets-Stock in Hand: Current Liabilities) Known as Acid-Test Ratio it concentrates on the liquid part of the current assets, leaving out the closing stock. It used to measure a firm's ability to meet its current obligations. Stocks and inventories are the least liquid of all current assets and if current assets comprise a high proportion of inventories, a firm may be considered less solvent.
Debt-Equity Ratio (Loans (Liability): Capital + Nett Profit) This is a gearing ratio that shows the extent to which long-term debt is helpful in financing the firm and shows the proportion of borrowed funds to owners' equity. The lower the ratio, the greater the amount of funds invested by the owners. If the ratio is high it indicates that the borrowed funds are more than the own funds of the firm, which makes the firm less credit-worthy.
Gross Profit % This represents the trading profit exclusive of indirect expenses and tax deductions, expressed as a percentage of total sales. It measures the efficiency of a firm's operations and indicates how products are priced.
Nett Profit % This is the profit inclusive of all expenses (direct and indirect) except tax deductions, expressed as a percentage of total sales. It is a more specific measure of the efficiency of a firm's operations. Both Gross Profit % and Nett Profit % put together provide an insight into a firm's operations and the role played by direct and indirect expenses.
Operating Cost % (as percentage of Sales s) This is the total cost inclusive of direct and indirect expenses except for tax deductions, expressed as a percentage of sales. A high ratio shows that even a slight rise in costs would be risky and might necessitate increase in price.
Receivable. Turnover in Days (payment performance of Debtors) It is an efficiency ratio that measures the quality of a firm's receivables and determines how successfully the firm collects its debts. Receivable Turnover days is a figure that gives us the average number of days for which the receivables are outstanding. It must be compared with the average credit policy of the firm.
Computation of Receivable. Turnover Recv. Turnover in Days = (Closing Balance of debtors/Total Sales)*Number of Days
Return on Investment % (Nett Profit/Capital +Nett Profit) % Nett Profit is the profit after all expenses but before deduction of taxes. This is a profitability ratio that an investor is most interested in. The investor needs to know how much is earned on each dollar invested. If the investor finds other avenues that give better returns, he will move his money out of the firm.
Return on Wkg. Capital % (Nett Profit/Working Capital)% This is another profitability ratio that ignores sunk costs in Fixed Assets and assesses how profitably a firm uses its net current assets.
Payment Performance of Sundry Debtors
the invoice was paid, how long it was due and what was the delay in payment. At the bottom, the customer's average performance is indicated.
Cost Centre Reports
For conceptual information on Cost Centres and Cost Categories, please look up the relevant chapters under s Information. Cost Centre Reports are primarily performance reports that throw a different perspective on transactions. To access Cost Centre Reports Go to Gateway of Tally> Display > Statement of s> Cost Centres N o t e : Set Maintain Categories a n d Job
Cost Centres Costing for
More: Cost Category Summary Cost Centre Vouchers Cost Centre Break-up Ledger Break-up of a Cost Centre Group Break-up of a Cost Centre Job Work Analysis
to Yes more
in F11: Features. information.
Refer
Cost
Centres , Cost
Cost Category Summary
Go to Gateway of Tally > Display > Statements of s > Cost centers > Category Summary Cost Category Summary displays the information on all cost categories to which you have allocated the voucher transactions.
You can create any number of cost categories apart from the Primary one, which is the default. Each Cost Category has cost centres listed under it. The names in italics are cost centres that do not have any sub-cost centres. The names that are in normal fonts are cost centres that have sub-cost centres under them. The debit and credit transaction totals and the closing balance for each cost category are displayed together with their breakdown consisting of cost centre summaries.
Cost Centre Vouchers
From the Cost Category Summary, drill down into a cost centre for monthly breakup of the figures.
Select a month to display the Cost Centre Vouchers pertaining to that month.
In the Cost Centre Vouchers use F2: Period to expand the date range if required and F1 : Detailed option to drill down to access the original voucher.
To display more detailed cost centre vouchers, set the required options in F12: Configure .
The Cost Centre Vouchers screen is also accessible from all other Cost Centre Reports but the vouchers
displayed are only those that relate to the currently selected cost centre.
Cost Centre Break-up
Cost centre Break-up shows the ledger s that are used in vouchers, the cost centre they were allocated to, their total transaction values and the balance. If you consider only the revenue s, the Cost Centre breakup becomes the Profit or Loss statement of activities for the cost centre, and hence a powerful performance statement. To access the Cost Centre Break-up screen 1.
Go to Gateway of Tally > Display > Statements of s > Cost Centers > Cost Center Breakup
2.
Select a cost centre, e.g. Octroi & Freight Expense (which belongs to the Primary Cost Category).
3.
Click F1 : Detailed to see the ledgers.
The report will look as shown
Use the buttons on the button bar to view the report in the alphabetic order of ledger s. A columnar Cost-centre breakup enables comparison of two or more cost centres and assessment of their relative performance. Use New Column to bring up the data of another cost centre for comparison alongside. Drill down for further details.
Ledger Break-up of a Cost Centre
This provides you with another view of a cost centre report. It enables you to analyse the distribution of a ledger across different cost centres. If you want to know the Conveyance Expenses incurred by different cost centres you need to view the Ledger wise break up of cost centres. 1.
Go to Gateway of Tally > Display > Statement of s > Cost Centers > Ledger Break-up
2.
Select a ledger , say for e.g. conveyance
The following screen displays.
The total Conveyance Expenses allocated to different Cost Centres under Primary cost category are listed. If you have more than one category it will also be listed. Use the buttons on the button bar to view the report in alphabetic order. The columnar Cost-Break up of Ledger allows you to compare how different cost centres makes use of two or more ledgers (e.g. expense s). Use New C olumn to bring up another ledger , say, Sales . The report will give you how much each executive sold and how much he spent on running the motorcar. You will be able to judge their relative performance or even compare the data with that of another company.
Group Break-up of a Cost Centre
The Group break-up of cost centre gives you another view of a cost centre report by enabling you to analyse the distribution of a group (of ledger s) across different cost centres. If you want to know how Indirect Expenses were incurred by different cost centres, this is the report that you need to look at. 1.
Go to Gateway of Tally > Display > Statements of s > Cost Centers > Group Break -up
2.
Select a group , say for e.g. Indirect Expenses
The following screen displays.
The total Indirect Expenses allocated to different Cost Centres under the Primary cost category is given. If you have more than one category it will also be listed. Use the buttons on the button bar to view the report in alphabetic order of group s. The columnar Cost-Break up of group s allows you to compare how different cost centres make use of two or more group s (e.g. expense s). Use New Column to bring up another group of ledger , say, Sales . The report will give you how much each executive sold and how much was spent on running the motorcar. You will be able to judge their relative performance or even compare the data with that of another company.
Outstandings and Credit Control
Receivables and Payables Receivables and payables are the two key components of any company's working capital as well as its business activity. Receivables are part of current assets, whereas payables are of current liabilities. Both influence the short-term liquidity and financing of the company considerably. Effective control of these outstandings is necessary for the company to be financially sound. To view the Receivables and Payables screen Go to Gateway of Tally> Display > Statement of s > Outstandings The following screen displays.
More: Receivables (Bills Receivable) F12: Configure Bill-wise Outstandings report Payables (Bills Payable) Outstandings Report of a Single Ledger Age-wise Analysis of a Single Ledger Outstanding Report for a Group Age-wise Analysis for a Group Reminder Letters Reminder letters to a Group of ledgers
Receivables (Bills Receivable)
Reference Number This is the Bill reference number that was entered in the Bill-wise Details.
Party's Name The ledger name appears in this field.
Pending Amount This is the outstanding balance on a particular invoice. To see the breakup, press SHIFT + ENTER . If you want to see the breakup of all the bills, select the Condensed .
F1 : Detailed button. This toggles with the button F1 :
Due On This is the due date of the bill (with reference to the Effective date) specified during voucher entry.
Overdue by days This is the period in days from the due date to the end date of the report. In the above example, the end date is 2-Apr-2005.
Drill-down You can drill down any invoice for further details.
Buttons Print the report or e-mail it or use other buttons to configure, make a query or change the format of the report.
F12: Configure Bill-wise Outstandings report
The F12: Configuration screen for Bill-wise Outstanding Report appears as shown below.
Include Post-Dated Transactions? Post-dated transactions are those, whose voucher dates are after the end date of the period of display. If you set this option to Yes , you can have the post-dated transactions listed in the Outstandings report and learn their effect.
In the above example, note that there is an additional column for Post-Dated Amount .
Show Bills in Foreign Exchange? If this option is set Yes , the Bills Outstanding report will show only those bills raised in foreign currency. The bills raised in base currency will be excluded.
Show Over dues using Bill dates? Set this option to Yes if you want to use the invoice dates instead of due dates for calculating overdue days.
The Age of Bill in days column shows the age of the invoices in number of days.
Age-wise Analysis Select F6: Age wise from the button bar in the receivables screen. Select either the option Ageing by Bill Date or Ageing by Due Date for Methods of Ageing.
Set the age periods required for the report. You can drill down to query the individual invoices.
Age-wise analysis for a ledger or group of s is discussed separately.
Payables (Bills Payable)
To view the Bills Payable screen Go to Gateway of Tally > Display > Statements of s > Outstandings > Payables Note:
Payables
are
treated
exactly
the
same
way
as
R e c e i v a b l e s.
F4: Payable in the Receivables screen helps you switch to Bills Payable report.
Outstandings Report of a Single Ledger
If you want to know the outstanding status of the bills of a particular party , use the Ledger Outstandings Report. To view the Outstanding Ledger 1.
Go to Gateway of Tally > Display > Statements of s > Outstandings > Ledger
2.
Select a ledger from the list. The Ledger Outstandings report displays
Detailed functionality available in this report, including F12: Configure and Age-wise Analysis is the same as that available in Receivables . You can produce Reminder Letters from the ledger Outstandings report.
Use the C ontact button on the button bar to view the address and other details.
Age-wise Analysis of a Single Ledger
1.
Go to Gateway of Tally > Display > Statements of s > Outstandings > Ledger
2.
Select the ledger .
3.
Select F6: Age-wise and one of the two methods of Ageing.
Ageing by Bill Date
Ageing by Due Date 4.
Set the age periods required for the report.
The aged bills report is produced accordingly. Drill down for more details on the individual invoices.
Outstanding Report for a Group
1.
Go to Gateway of Tally > Display > Statements of s > Outstandings > Group
2.
Select a group from the list, e.g. Sundry Debtors. The report displays the outstandings for the selected group.
You can tab down further into each and configure the report using F12: Configure . You can view net amounts in this case to see the net balance outstanding for each ledger. For a group that contains sub-groups the button F5: Led-wise is useful. Note:
The
button
F5:
Led-wise
toggles
with
Group-wise.
Age-wise Analysis for a Group
1.
Go to Gateway of Tally > Display > Statements of s > Outstandings > Group
2.
Select a group, e.g. Sundry Debtors.
3.
Select F1 : Detailed from the button bar.
4.
Click Age-wise and select one of the two Methods of Ageing: Ageing by Bill Date or Ageing by Due Date . Set the age periods required for the report.
5.
The aged bills report is produced accordingly. You can drill down for further details on the individual invoices.
6.
Set the appropriate parameter in F12: Configure to view the Nett Balances.
6.
N o t e : You cannot print Reminder P r i n t i n g available in Gateway of
letters to a group from here. Use Tally .
Multi-
Reminder Letters
1.
Go to Gateway of Tally > Display > Statements of s > Outstandings > Ledger
2.
Select a ledger from the list.
3.
Click the buttons Print from the button bar.
The following screen displays
Print Reminder Letter Set this option to Yes . In the Company Ageing Alteration screen that appears set, accept or modify the ageing period as the case may be.
Show Bills in Foreign Exchange Here you can type Yes or No and accept. When you are in the Print screen, press F12: Configure to change the contents of the reminder letter.
If you want to print Reminder Letters to a group of ledgers, you must use the Multi- printing option available in Gateway of Tally .
Reminder letters to a Group of ledgers
Go to Gateway of Tally > Multi- Printing > Outstanding Statements > Ledger > Group of s Select the group for which reminder letters are required, e.g. Sundry Debtors. The following screen displays
This report is a Bill-wise details report that lists the outstanding bills for each ledger in the group.
Statutory Reports
To view the Statutory Reports: Go to Gateway of Tally > Display > Statutory Reports The following screen displays.
Note: enabled
The Statutory Reports menu will appear depending in F11:Features > Statutory and Taxation.
on
the
Statutory
features
Cash and Funds Flow
Cash management is essential for any business. Many companies, as they go into liquidation, continue to make profits because of insolvency. Businesses shut down because of lack of cash despite being profitable. Cash and Fund Flow Statements aid in cash management and are an important component of the management s. More: Cash Flow Funds Flow
Cash Flow
Cash Flow Statement is a chronological of the movement of cash in and out of the business and includes all cash transactions made with banks also. When used with the Balance Sheet and Profit & Loss , the Cash Flow Statement helps to assess the reasons for the differences between net income and net cash flow as well as the effect of cash/non-cash investing and financing transactions. To access the Cash Flow: 1.
Go to Gateway of Tally > Display > Cash/Funds Flow > Cash Flow
2.
A Monthly Cash Flow Summary that shows the Cash Movement – inflow and outflow for each month and the Nett Flow, displays.
3.
3.
Select a month and press Enter to drill down. Select the button F1 : Detailed from the button bar to see the cash flow for that month.
For Quarterly Cash Flow:
Change Period by pressing F2: Period and set the period, e.g., 1-4-05 to 1-12-05.
Select the option Auto Column from the button bar.
You can also select Quarterly (or Monthly or any other period) from the list
Columnar Cash Flow Statement
Funds Flow
While Cash Flow Statement is concerned only with cash, Funds Flow takes into , the movement of the entire working capital. It includes rise and fall in inventories, creditors and debtors apart from cash and bank. The statement reveals the Sources of Funds and how they were applied. To access the Funds Flow: 1.
Go to Gateway of Tally > Display > Cash/Funds Flow > Funds Flow
2.
A Monthly Funds Flow Summary with the movement of working capital for each month displays. It shows the Opening and Closing Balances of each month with a column for Funds Flow.
3.
Select a month and press Enter to drill down.
4.
3. 4.
Select F1 : Detailed to see the funds flow for the selected month.
5.
The bottom of the screen displays the movement in Working Capital.
You can drill down any line for further detail.
For Quarterly Funds Flow: 1.
Change the period by pressing F2: Period
2.
Set the period e.g., 1.1.04 to 1.5.04.
3.
Select the button Auto Column from the button bar.
4.
3. 4.
Else Select Quarterly (or Monthly or any other period) from the list
Reconciliation of Bank s
Reconciling the company's bank s with the banker's statement is a regular task of ing. In Tally, Reconciliation of Bank s facilitates the following:
Ability to ‘check back’ the correctness of reconciliation Tally uses Bank Date to mark against the voucher. For instance, if you issue a cheque on 8th April and your bank clears it on 19th April, you would set the Bank Date for the voucher as 19th April. This means that when you need to 'check back' later, whether the entry made by you is correct, you will only need to the bank statement of the 19th.
Recovering the reconciliation of any date This is of crucial importance in Auditing . The Bank Reconciliation is one of the pre-requisites of auditing and verification of the correctness of s at the year end. However, it is not a 'real-time' task, meaning auditors do not do it on the first day of the next year. For e.g., the reconciliation made on 31st March, should be 'viewable' even in August, by when almost all the cheques would have subsequently been marked Reconciled . Tally provides you with a facility of achieving this also. Bank s may have a different Starting Date for reconciliation purposes. When you create a bank , you are prompted to give an Effective Date for Reconciliation . Normally, this would be the Books Beginning from date itself. However, you could have imported data from a previous version of Tally or from any other system (where the reconciliation process was not available or was different). In that case, you may not want to reconcile the bank with your bank statements from the very beginning. Give the date from which you want the reconciliation facility to be active. Once you do this, previous entries would not appear for reconciliation, but would be taken as a reconciled Opening Balance. A quick experiment with Reconciliation will show you what it all means. Here is how you go about it: 1.
Bring up the monthly summary of any bankbook.
(You can choose a bank book from any of the following: Balance Sheet, Trial Balance, Display > Books > Cash/Bank Books).
2.
Bring the cursor to the first month (typically April), and press Enter . This brings up the vouchers for the month of April. Since this is a bank , you can see an additional button F5: Reconcile on the button bar to the right. Press F5 .
3.
The display goes to the Reconciliation mode, which can be edited. The primary component of the current screen is the column for Bankers Date .
4.
The Reconciliation found at the bottom of the screen shows:
Balance as per Company Books
Amounts not reflected in Bank
Balance as per Bank
The Balance as per Company Books reflects the balance as on the last date (in the example, it is 30th April). The Amounts not reflected in Bank are the debit and credit sums of all those vouchers, whose Bank Date is either BLANK , or LATER than 30-Apr (i.e. these vouchers have not yet been reflected in the bank statement). The Balance as per Bank is the net effect of the Book Balance offset by the amounts not reflected in the Bank – which must equal the balance in the bank statement N o t e : Some discrepancies may persist due to entries which you have not yet entered in your books. You print your reconciliation.
made would
in the bank statement, reconcile these manually,
and
As you mark the individual vouchers by setting the Bank Date , you will notice that the Reconciliation at the bottom of the screen keeps updating the changes. Once this process is complete, press Ctrl + A or Enter as many times as necessary to skip over the unmarked vouchers and accept the screen. The next time you opt for reconciliation, the screen displays only those vouchers that remain unreconciled. You can also display vouchers that are already marked as reconciled, in case you need to edit the marking, by using F12: Configure
Set Show Reconciled Vouchers also to Yes to see the reconciled vouchers. N o t e : It available
is not possible to reconcile physical transactions.
opening
balance
and
can
be
done
only
with
Set Allow back dated Reconciliation to Yes to enter bank dates which are lesser than the Voucher date. Press Alt+P or click on the Print button to print your reconciliation report.
Display Inventory Reports & Statements
Inventory in Tally operates in the same way as ing with regard to displaying, modifying and printing reports. Tally generates inventory reports based on the vouchers entered to date. You can use the customised reports to compare inventory data between different companies, periods of the financial year, and so on. Highlight the item and press Enter to step down to the next level of detail in a report. Repeat this process till you reach an individual voucher. Similarly, step back to higher levels by pressing Esc. The special features available for the currently displayed report are indicated on the button bar and can be selected with a single click of the mouse. This section highlights some special inventory screens and illustrates a basic level of customisation. More: Viewing Stock Summary Viewing stock items Making a Stock Query Analysis of Inventory Movements Godown Summary (Location Summary) Sales Bills Pending Purchase Bills Pending
Viewing Stock Summary
Stock Summary is a statement of stock-in-hand as on a particular date. It is updated with every transaction in real time and provides the current stock position. The statement can be drilled-down, as with all Tally reports, and configured to enable you to view different details, for instance, the total flow of stock can be viewed with a single report. Tally treats Stock Summary as one of the primary statements and makes it accessible directly from the Gateway of Tally. To view Stock Summary 1.
Go to Gateway of Tally > Stock Summary
2.
The default display is of Stock Group balances.
3.
Select Detailed to show another level of detail.
The detailed report will include sub-groups or Stock Items (in cases where there are no sub-groups), displays as shown:
In the above illustration the stock groups Hardware and Software contain stock items and have closing balances. The Stock Groups displays total quantities, as the unit of measure is the same for all the stock items added. A grand total is also available as there is a single unit of measure for all 'addable' items. If there were different units of measure, then the grand total would not be calculated and displayed. More: Stock Flow (reconciliation) Gross Profits – (Item and stock group profitability) Stock Valuation Methods Stock Group Summary Stock Category Summary
Stock Flow (reconciliation)
You can configure the Stock Summary Statement to display the flow of goods. 1.
Select F12: Configure while on the Stock Summary screen.
2.
Set the configuration as shown.
The Stock Summary displays the flow of stock, i.e. Opening Stock, Goods Inwards, Goods Outward and Closing Stock, as shown.
The report is quantitatively reconciled, i.e., Opening quantity + Inward Quantity – Outward Quantity = Closing Stock Quantity . However, this is incorrect for the values as the Outward Value displays Sale Values, not Cost. The Closing Stock Value is, however, based on Cost and the Cost Method adopted for each item. Value Reconciliation is possible if you are using Consumption figures instead of Sales Values..
Gross Profits – (Item and stock group profitability)
Stock Summary can also be expanded to show consumption and gross profits for each stock item. 1.
Select F7: Show Profits or F12: Configure while on the Stock Summary screen.
2.
Set Show Consumption and Gross Profits to Yes.
The Stock Summary report displays as shown.
The Outward Column shows Cost of Goods Outwards termed as Consumption and Gross Profit value and percentage is displayed. This statement is useful to analyse:
Profitability Analysis of Sales (Outwards) Value Reconciliation of Stock
Stock Valuation Methods
The Stock Summary report with stock valuation methods can be used to view the effects of different methods on the value of stock. Each stock item can be set up to have a different stock valuation method. In some instances, a particular method of valuation may be required, for example, to assess the replacement value or saleable value of stock. Tally displays stocks in any or all the valuation methods dynamically and simultaneously, without any complicated procedure. Suppose you want to use Last Purchase Cost method to assess the replacement value and the Last Sale Price method for realizable (saleable) value. In the Stock Summary screen, select the New Column button on the button bar or press Alt+C. The screen appears as shown below. Select Last Sale Price from the Stock Valuation Methods list.
The Stock Summary report with Last Sale Price column displays as shown:
More: To view Ageing Analysis
Stock Group Summary
This report is available when Integrate s and Inventory is set to Yes in the Company Features screen. It displays Opening and Closing Stock figures from the ledger master, rather than the inventory records. Hence, it is possible that Stock Summary and the Stock Group Summary report display different figures. Drill-down from Stock Group Summary to view the Stock Ledger where you can manually key in the closing balance for a given date. You can input closing stock figures for different dates. To view Stock Group Summary: 1.
Go to Gateway of Tally > Profit & Loss > Opening Stock (or Closing Stock)
2. Drill-down to the ledger to enter Closing Stock figures.
The date for the closing balance is the beginning from date and till date. If there is no date that follows the last, then that Closing Balance continues. A blank against a date signifies zero balance.
Stock Category Summary
To view Stock Category Summary: 1.
Go to Gateway of Tally > Display > Statements of Inventory > Categories
2.
Select a Category, for example, Spreadsheets.
The Stock Category Summary lists the Closing Balances of all items belonging to the selected category. Drill-down for Item Monthly Summary and Stock Voucher list. Use Show Profit for profitability analysis for the Items in the Category.
Viewing Stock Items
1.
Go to Gateway of Tally > Display > Inventory Books > Stock Item
You can also use the Stock Summary to view Stock Items. Place the cursor on the item and press Enter. 2. Select an item from the List of Items . 3. Select F12: Configure . Tab down the Configuration menu to Show with Graph? Type y and press Enter . Select Bar and No . The particulars display with a graph of Goods Inwards and Outwards (red for inwards, blue for outwards).
More: Stock Vouchers
Stock Vouchers
1.
Go to Gateway of Tally > Display > Inventory Books > Stock Items
2.
Select Item .
3.
Select and drill-down for any month.
The list of stock vouchers for the current month displays as shown
This list of vouchers for a stock item is the lowest level of collated data. If you drill-down any further, you can view the actual voucher. You can also access Stock Vouchers by drilling-down from statements such as Stock Summary.
Stock Query
Stock Query report provides you all the information about a particular item. To create Stock Query : 1.
Go to Gateway of Tally > Display > Statements of Inventory > Stock Query
2.
Select an Item from the List of Items. Tally uses the Stock Category to display Items of the same Category. This feature helps you to ascertain the availability and location of alternative products to offer your customer.
3. Select F4:Item to switch to another item.
Additional Information: 1.
Go to the Group Summary , select Software and press F12: Range to limit the display to Stock Groups having Closing Balance greater than 3000 .
2.
Explore the Locations report. Select On-site , click F1: Detailed , change the period: 1-5-05 to 31-7-05, and use Auto Column to bring up the month-by-month figures.
3.
Auto Column feature gives you the facility to check the stock status using different periods.
4.
Bring up the initial display of each report and use and back again.
Enter and Esc to drill-down through the levels of detail
Analysis of Inventory Movements
The Analysis of Inventory Movements is generated for ed transactions only, unlike Stock Summaries and other statements, where Goods Received but Bills not Received and Goods Dispatched but Bills not Raised are also considered. Thus Analysis statements, are used generally for a comparative study, and not considered authentic for s or Inventory records. Go to Gateway of Tally > Display > Inventory Books > Movement Analysis
Analyse stock movements by stock groups, categories, financial group or ledger. More: Movement Analysis (Stock Group Analysis) Item Movement Analysis Item Voucher Analysis Stock Category Analysis - Movement Analysis Ledger Analysis Transfer Analysis
Movement Analysis (Stock Group Analysis)
Movement Analysis of a selected stock group displays the Total Inward and Outward movement of all the items in a selected Stock Group . The quantities displayed are Actual Quantities of movement (which, in some cases, may be different from the Billed Qty in the transactions.) The 'Inward' detail displays the Effective Rate or Final Landed Cost of the materials, after considering all overhead costs (see 'Valuation of Purchases'). If the Effective Rate varies from the Basic Invoice Rate of the materials, it is highlighted. The Outward detail displays the Basic Invoice Rate and Value of goods sold/transferred out.
Item Movement Analysis
Gateway of Tally > Display-Inventory Books > Movement Analysis > Stock Item Analysis Item Movement Analysis is the next level of information (press Enter on the Stock Item or Display Inventory Books Stock Item Analysis ). This brings up the Party-wise/Transfer-wise detail of Movements. The Inward detail displays the Basic Invoice Rate and Effective Rate.
This report helps you compare Purchase Costs across different suppliers. For example, Supplier A may have a lower Basic Invoice Rate as compared to Supplier B , though the Effective Rate may be higher (perhaps due to differences in Taxes, Packing Costs, Freight Costs etc). Suppose a material is manufactured in-house as well as purchased, the difference in Purchase Costs and In-house Costs can be checked. Select multiple columns for different periods, to view the changes in the Effective Rate for purchases. Press Enter on the Party Name or Stock Journal Name to display the transaction-level details on Date of goods received/sold, Quantities, Basic Rates, Addl. Costs, and Effective Rate for each transaction..
The default screen displays the Addl.Costs (if any), in a single column. To view the spread of costs, press F12: Configure and select to view Show Addl. Costs . This brings up the bifurcation of all Additional Costs .
Item Voucher Analysis
This report gives the value details of all transactions for a selected stock item from a particular supplier or to a particular customer. It is obtained from Movement Analysis Report of a stock item. 1.
Go to Gateway of Tally > Display > Inventory Books > Movement Analysis
2.
Select Item from List.
3.
Select a Supplier (or Customer) from the Item Movement Analysis .
The report displays every purchase from Tally Solutions, Bangalore during the period specified with break-down of Basic Value and Additional Cost . To view full details of Additional Cost , press F12: Configure and set the option. The Item Voucher Analysis considers only billed transactions, not ones for which invoices have not been raised. Use F12: Configure for more details.
Stock Category Analysis - Movement Analysis
1.
Go to Gateway of Tally > Display > Inventory Books > Movement Analysis > Category Analysis
2.
Select a category , for example, Spreadsheets.
3.
Change period , if necessary.
The Stock Category Analysis statement displays the movement of Stock Items of a selected Stock Category. The Inward and Outward movement of these two items are summarised in the Summary. Drill-down to bring up the Item Movement Analysis for the selected item.
Ledger Analysis
Ledger Analysis is similar to Movement Analysis, except that you can view movements of the items for the selected Ledger (Party). Thus, you get an 'analysis' of all purchases made from a supplier, or all items sold to a customer. The next level of information brings up the transaction-level details.
Transfer Analysis
When using different Stock Journals for each transaction, Transfer Analysis gives the movement details for each type of Stock Journal. This is a very useful costing and waste analysis tool. In non-manufacturing set ups, which have Multiple Godowns, this report becomes a quick check to that all transfer entries have been entered correctly.
Godown / Location Summary
The Godown/Location Summary statement displays the Stock Summary for different Godowns/Locations . While the main Stock Summary shows the stock position for the entire company on a given date, the Godown/Location Summary is a statement of stock-in-hand at each location on a particular date. The Godown/Location Summary is updated with every transaction and it provides the current stock position for any Godown/Location at any time. This report can be drilled-down, as with all Tally reports, and configured to view different details. It is also possible to view the total flow of stock for each location in a single report. Experiment with the different buttons for this purpose. 1.
Go to Gateway of Tally > Display > Statements of Inventory > Godown/Location
2.
Select Primary to view the summary for all Godowns/Locations . Alternatively, select a specific Godown/Location to limit information to that Location/Godown.
3.
The default display is that of Godown/Location Group godowns/locations, quite like sub-groups of stock items.
4.
Select Detailed for second level of detail.
balances.
You
can
have
sub-groups
of
4.
Place the cursor on Software and press Shift+Enter to expand the group
More: Godown/Location Stock Flow/Reconciliation Godown/Location Vouchers Batch information in Summary Statements
Godown/Location Stock Flow/Reconciliation
The reconciled flow of goods at each location is available. Select F12:Configure while in the Godown/Location Summary Screen
The Godown Summary statement displays the flow of stock: Opening Stock, Goods Inwards, Goods Outward and Closing Stock, at each location.
The statement is quantitatively reconciled, not monetarily, i.e., Opening quantity + Inward Quantity – Outward Quantity = Closing Stock Quantity. However, this is not true of values because values do not add up in this manner. The Outwards value displays Sale Values, not Cost. The Closing Stock Value is, however, based on Cost and the Cost Method adopted for each item. Value reconciliation is possible using Consumption figures, instead of Outward Values. Press F:7 Show Profits to expand the Outwards Column for Consumption and Profit figures. Value Reconciliation is now possible using: Opening Value + Inward Value – Consumption Value = Closing Stock Value .
Columns Use Columns to view stock balances of the Godowns/Locations on different dates/periods or other options listed in the Auto Columns options. Even though you have selected a specific Godown/Location for display, you can still bring up information of the other godown(s)/location(s) in columns. Select New Column or Auto-Column for such a display.
The above report is obtained by selecting: New Column Various reports are available from the Stock Item Monthly Summary , including different periodicity and Average stocks. Drill-down an item in the Stock or Godown/Location Summary level to the Item Monthly Summary and use F12: Configure options. Refer F12: Configure for Material Consumption Summary Report in Job Costing
Godown/Location Vouchers
1. Go to Gateway of Tally > Display > Statements of Inventory > Godowns/ Locations 2. Select a Godown/Location . 3. Select Item.
Drill down through the entries for the Godown/Location Vouchers screen to appear. Godown/Location Vouchers is a list of all vouchers for a selected item that are related to the selected Godown/Location during the period of display. The relationship could be stock in/out of the particular location. This statement helps you to list all transactions for a particular Godown/Location .
Batch Information in Summary Statements
To view the stock of batches of an item: 1.
Go to Gateway of Tally > Stock Summary
2.
This could even be the Godown/Location Summary.
3.
Expand the Stock Group using Detailed or Shift+Enter till all the Items display.
4.
Use Shift+Enter to reveal the Batches and their stock position.
5.
Use F12: Configure to use Opening Balances, Goods Inwards and Goods Outwards.
Sales Bills Pending
Sales Bills Pending Report is generated when the option Tracking Numbers is set to Yes . It lists out all instances of incomplete sales, where goods may have been delivered but not invoiced. It also lists instances of invoices raised, but for which goods have not been delivered Go to Gateway of Tally > Display > Statements of Inventory > Sales Bills Pending The default report displays as shown.
Use Detailed to view the transactions. Use F12: Configure to view the Initial Quantity.
Note:
To
drill
down,
bring
the
cursor
on
the
voucher
detail
line
and
press
Enter .
Purchase Bills Pending
Purchase Bills Pending Report is created when the option Tracking Numbers is set to Yes. It lists all instances of incomplete purchases where goods may have been received, but not fully invoiced. It also lists instances of invoices received, but for which goods have not been received Go to Gateway of Tally > Display > Statements of Inventory > Purchase Bills Pending The default report displays as shown.
For variations in the report, refer Sales Bills Pending .
Aged Stock Analysis (Ageing Analysis)
A very important function of Working Capital management is monitoring stocks. Money locked up in stocks can adversely affect the liquidity of a company and every company strives or should strive to reduce stock levels to the optimum. Every business (except perhaps the liquor and antiques dealers) would prefer to dispose of older stocks as they might deteriorate with time, go out of fashion, or simply get forgotten. Tally's aged stock analysis or Stock ageing enables you to know the age of stocks in hand according to when they were received and the purchase value. More: How to view Ageing Analysis
How to View Ageing Analysis?
1.
Go to Gateway of Tally > Display > Inventory Books > Ageing Analysis
2.
Select the Group of Stock Items .
The Ageing Analysis report produces a default ageing period of <45 days, 45-90 days, 90-180 days and >180 days. You can change the setting by using F6 . The default report displays stock values based on Actual Purchase invoice . Use Hide Amount to view the report without values as has been done above. As Negative Stocks cannot be aged, they are shown in a separate column. More: Item Inward Details
Item Inward Details
Age Analysis is done for stock-in-hand based on when it was purchased. The Item Inwards details statement provides further information of aged stock such as date of purchase and supplier, and allows drill-down to the actual transaction voucher. Go to Gateway of Tally > Display > Inventory Books > Ageing Analysis Move the cursor to any of the age-wise columns (i.e., < 30 days, 30 to 60 Days, > 60 Days) for an press Enter.
item and
Scenario Management
Scenario management is a management tool that enables different displays of s and inventory related information, by selectively including certain types of vouchers without affecting the source data. It is useful in generating provisional reports, where entries are not actually made in the main books. It is also a useful forecasting tool i.e. you can forecast the expenses using provisional Vouchers and include them in your reports. The vouchers that are used in Scenario Management are: Optional Vouchers Memorandum Vouchers Reversing Journals This section shows you how to use the above-mentioned vouchers in Reports. You can create a number of scenarios each including and/or excluding one or more types of voucher entry. More: Create a Scenario Alter or Display Scenario Information How to use Scenarios List of s (Chart of s) Exception Reports
Creating a Scenario
Set Use Reversing Journals & Optional Vouchers in F11:Company Features to Yes. Go to Gateway of Tally > s Info. > Scenario > Create
1.
Give a suitable name to the scenario. In this case, it is Provisional.
2.
Set Include Actuals to Yes
3.
Set Exclude Forex Gains/Losses Calculations to Yes if you do not want the Unadjusted Forex Gain/Loss element to appear in the scenario
4.
Set Exclude Inventory Tracking Calculations to Yes if you do not want the Sales/Purchase Bills Pending
3.
4. element to appear in the scenario
5.
Include
From the list of vouchers, include the type of vouchers required. Notice that it picks up the Voucher Types created for this company. Provisional Vouchers and Regular vouchers that are marked Optional are permitted for selection. 6. Exclude Exclude from the list of vouchers already included in the type of vouchers that you do not want to affect this scenario. This option is used in Alter mode and hence is discussed under Alter/Display Scenario Information. 7. Accept to create this scenario.
Alter or Display Scenario Information
1. Go to Gateway of Tally > s Info > Scenario > Alter 2. Select the scenario to alter from the List of Scenarios The information given while creating the scenario displays and you can alter it. Exclude Use the Alter mode when you do not want a selected included voucher to affect the scenario, anymore. It is easier to put the selected voucher in the Exclude List, rather than to remove it from the Include List.
Using Scenarios
5. 6.
Accept the Voucher.
More: Display/Alter a Reversing Journal Using Scenarios in Statements and Reports
Display/Alter a Reversing Journal
View or alter the reversing journal through the Reversing Journals Book under Exceptional Reports. 1.
Go to Gateway of Tally > Display > Exception Reports > Reversing Journals
2.
Select a month to list all the reversing journals for that month. Drill-down to view/alter the entry.
Using Scenarios in Statements and Reports
You can use scenarios in statements (not s) that have the New Column button active. 1.
Display the Balance Sheet .
2.
Select New Column .
3.
In the column details, tab down to Types of Values to Show .
4.
Select the scenario named Provisional .
The Balance sheet displays as shown with two columns for the same date.
Note the Provision for Depreciation figures in both the columns. The actual column shows –18250 while the Provisional column shows –33250. This is on of the reversing journal entry in the Scenario. To view, go through the Exceptional Reports Display Menu. Use the same procedure to create another scenario for Sales Forecasts. 1.
Create a new Scenario and call it Sales Forecasts .
2.
Include Sales Vouchers Optional Only .
3.
Create 12 Sales Vouchers, one in each month. to mark them Optional .
4.
View the Sales s by drilling-down the Profit & Loss A/c .
5.
Bring up New Columns and limit each column date range to the following month.
The Sales forecast figures must display. N o t e : You could even use Memorandum v o u c h e r s . Memorandum Voucher s
is
Vouchers for this purpose, instead discussed in the next section.
of
the
Optional
List of s (Chart of s)
A chart of s is created from an s menu. To view an existing chart: Go to Gateway of Tally > Display > List of s
The List of Ledgers displays in alphabetical order of the main groups. Hence, Branch/Divisions is listed first, not the name Anil, which is under the group Capital. Note the indentation and change in font. The groups are in bold and begin on the extreme left; sub-groups are slightly indented towards the right and still in bold, while at the lowest level it is the ledger which is in italics. Drill-down a ledger name to alter its details or use Shift+Enter to view the details. Use the buttons to switch to their respective lists (these are all lists of different Masters):
List of Groups
List of Cost Categories
List of Cost Centres
List of Budgets
List of Locations
List of Stock Groups
List of Stock Items
List of Currencies
List of Units
List of Voucher Types
Exception Reports
Exception Reports track unusual transactions or balances. Go to Gateway of Tally > Display > Exception Reports The different kinds of Exception Reports are as shown.
More: Negative Stock Negative Ledgers Overdue Receivables Overdue Payables List of Memorandum Vouchers List of Reversing Journals List of Optional Vouchers Post-dated Vouchers TDS Not Deducted
Negative Stock
Go to Gateway of Tally > Display > Exception Reports > Negative Stock This report displays a list of all stock items that have a negative closing balance at the end of a specified period.
If a negative balance occurs it is adjusted by a purchase so that the balance is not negative at the end of the display period. You can change the period using the Period button or use the auto column button to view the negative stock items You can use the drill-down feature or view Stock Item display for further details.
Negative Ledgers
This is a list of ledger s that have obverse balances, i.e., balances that are opposite to the nature of the . For example, a creditor with a debit balance and an asset with a credit balance. Go to Gateway of Tally > Display > Exception Reports > Negative Ledgers
Bank of Paris is a Bank and is expected to have a debit balance. British Telecom is a Creditor/Supplier and should normally have a credit balance.
Overdue Receivables
T his is a list of all invoices that are overdue as on current date. Go to Gateway of Tally > Display > Exception Reports > Overdue Receivables
Ageing - use the Age-wise button. Overdue Payables – use the Payable button.
Overdue Payables
T his is a list of all purchase bills that are overdue as on current date Go to Gateway of Tally > Display > Exception Reports > Overdue Payables
List of Memorandum Vouchers
Go to Gateway of Tally > Display > Exception Reports > Memorandum Vouchers This is a list of Memorandum Vouchers entered during a period. Change the period as required.
List of Reversing Journals
Go to Gateway of Tally > Display > Exception Reports > Reversing Journals This is a list of Reversing Journals entered during a period. Change the period as required.
List of Optional Vouchers
Go to Gateway of Tally > Display > Exception Reports > Optional Vouchers This is a list of all types of vouchers marked as 'Optional' during a period.
Post-dated Vouchers
Go to Gateway of Tally > Display > Exception Reports > Post-dated Vouchers This is a list of all types of vouchers that are marked 'Post-dated' within a given period.
Printing Reports
Reports and documents generated through Tally's extensive display capabilities can also be printed. Printing is possible in two ways: 1.
Using the Print (Alt + P ) button and
2.
Multi- Printing
Using the Print (Alt + P) button You can choose to print directly from the screen currently displayed by selecting the button PRINT (top-most button on the right-hand side of the screen). This brings up the Print Configuration screen for the report and new button options on the right-hand side of the screen. You can change and alter the settings in the print configuration screen Printer – Click Alt + S (Select Printer) to change printer settings. This also displays the default paper size that you have set for the printer. No. of Copies – Click Alt + C (Copies) to specify the number of copies to be printed. Print Language – Set Enable Multilingual to Yes in F12: Configure and click Alt + L (Print Language) to print in the language of your choice. Method - Click Alt + F (Print Format) to select the print format. A pop-up list displaying the printing formats available in Tally. The formats provided are, Dot-Matrix Format, Neat Format and Quick (Draft) Format. Here you can select either the pre-printed or plain paper to print out your reports
Pre-Printed / Plain Paper: By default, the Printing Configuration screen is set to print on plain paper. The print-out displays as shown.
To print on a pre- printed invoice/ report, select Pre-printed (Alt+R ) and the Print Preview screen displays as shown.
Tally enables you to print the company details on the invoice/ report. You can toggle between the two options to
print using either method. Page Range - Click Alt + G (Page Nos) to select the starting page number and the page number range. Paper Type - The paper Type can be set after you select the printer. Paper Size - By default, the paper size in Tally is set at 8.50 X 10.98 or 216mm X To alter the paper size to your requirements, select Alt+S (Select Printer) . A list of printers displays.
More: Print Format Draft Mode Printing (Quick Format) Printing TDS Form16A Exporting eTDS Form Printing TDSForm27A
279mm .
Print Format
The Print Format button appears on the Print screen (after you press Alt+P or on clicking the Print button). Click the Print Format button and Tally displays a list of Print formats as shown.
Neat Mode and Quick/Draft print formats are compatible with most printer drivers installed on the Windows Operating System. Dot Matrix Format in Tally is a special print format that allows you to print Tally reports in text format using the speed of Dot Matrix printers. Most GUI-based software’s do not provide Dot Matrix printing capabilities. However, Tally being a Windows-based software has a print format compatible with dot matrix printers. This makes printing reports from Tally as quick as its real-time report generation. Select Dot Matrix Format. The screen displays as shown.
By default, Epson printer drivers are defined. Install Epson Printer drivers in Windows for any Dot Matrix printer and use this format to print reports quickly. N o t e: Any should be
Dot Matrix printer may be used, but ONLY Epson used for Dot Matrix Format printing in Tally.
printer
drivers
(LQ
and
FX
series)
Multi- Printing
This option enables the printing of the primary Books of s, like the Cash and Bank Books, Ledgers, Sales and Purchase s etc, without having to select the s one at a time and printing them . Go to Gateway of Tally > Multi Printing. Choose between the options – Books, Inventory Books, Day Book and Multi Voucher Printing . You can select the date and other selections before printing.
Drill-down to s Books, Outstanding Statements and Inventory Books and select the appropriate reports to print. Change the common printing options by selecting the appropriate buttons on the right side of the screen.
For details , click Printing Reports .
Printing All s Go to Gateway of Tally > Multi- Printing > Outstanding Statements > Ledger > All s
When Printing the Ledger Outstanding screen, if Show Details is set to Yes , and Start Fresh Page for each is set to No , the Person and the Tel. No. fields are displayed below each Ledger in the same page.
If Show Details is set to Yes , and Start Fresh Page for each is also set to Yes , each Ledger displays on a fresh page, with the address appearing below the Ledger Name. N o t e : The for them to
Person, be displayed.
Tel.
No.
and
the
address
should
be
entered
in
the
Ledger
Masters
Draft Mode Printing (Quick Format)
Almost every report (except Cheques) can be printed in Draft Mode. The default behaviour of Tally is to print in Neat Mode. To alter this, press Alt+F and all subsequent reports will be printed in Quick Format until Alt+F is pressed again at the Printing screen. (The button equivalent for this is Quick Format). Draft Mode imposes additional restrictions in printing, which you will quickly learn by experimentation. After selecting Draft Mode or Quick Format, click Alt+S to select the option Print to a File. Specify the name of the File to output the data and select the Printer whose dimensions are to be used.
Collaborative Tally
Collaborative Technology in Tally extends the ability of a company to manage information across different software applications, offices, business partners and managers-on-the-move. The integration of other technologies in Tally gives the the benefit of exchanging data with other systems. Collaboration enables the company to arrive at decisions quickly through faster exchange of data in a computer network and related environment. A higher profit is one of the advantages of using such technology in business.
Export of Data
Use Export option to export reports and statements from Tally. The exported reports can be viewed in a spreadsheet, published on the web or exported to another company using Tally.
Open a report or a statement and click the Export button or use ALT+E . The export screen displays Export? Yes or No .
Press Backspace or Esc or No to navigate through the fields and alter the parameters. Language
This option enables you to export your reports in English or any Indian language.
On selecting Default (All Languages) you can export your reports in any of the Indian languages. However, the display language has to be set to the respective Indian language. On Selecting Restricted (ASCII Only) you can export your reports in English. N o t e : If you have used company created in any with question marks.
the of
option Restricted (ASCII Only) to export reports of the Indian languages, then the exported values will
a appear
Format
Tally has four formats for export of data:
ASCII (Comma delimited)
Excel (Spreadsheet)
HTML (web-publishing)
XML (data interchange)
By default, the exported file will be saved in the Tally folder on your computer. To export to a different folder enter the path of the drive and folder in Output File Name . Another program can be used to import the content from the exported file or it can be used as is.
More:
Export Master Data
Export Formats
Tally has four formats for export of data.
ASCII (Comma delimited)
Excel (Spreadsheet)
HTML (web-publishing)
XML (data interchange)
ASCII (Comma delimited) In Tally all reports can be exported to ASCII by selecting ASCII (Comma delimited) format from the export Format screen. This feature enables the to export any report generated by Tally into plain text format with values separated by commas. This format is commonly used for email and several other programs.
Excel (Spreadsheet) In Tally all reports can be exported to Microsoft Excel spreadsheet by selecting Excel (Spreadsheet) option from the export Format screen. This feature enables the to export any report generated by Tally into Excel. Consequently, the can generate graphical representations of the data for better visual presentation. Note:
Export
to
Excel
is
compatible
with
Microsoft
Office
97
or
higher.
Export with Formatting/ Colour (Only in Excel format) Reports can be exported from Tally to Excel with or without all the formatting and background colour as it appears in Tally. These options can be defined on the Report Generation screen.
N o t e : If Excel with background Tips:
Export
(Spreadsheet) colour. to
Excel
works
Formatting is set to N o, the
faster
if
formatting
is
not
report
included
cannot
for
be
exported
export.
HTML (web-publishing) In Tally all reports can be exported to HTML format by selecting HTML (web-publishing) from the export Format screen. Reports in Hyper Text Markup Language (HTML) format retain their formatting and fonts. They can be read using an HTML-enabled mail program, or using browsers such as Microsoft Internet Explorer. Resolution (Only in HTML format) Resolution is based on the pixels used to format the report. A higher resolution gives a better quality of output. The Resolution option is available only in HTML format in Tally.
XML (data interchange) In Tally all reports can be exported to XML format by selecting XML (data interchange) from the export Format screen. Extensible Markup Language (XML) is an extension of HTML, but the data can be imported by other XMLaware systems. Using XML, Tally allows the to exchange information even with systems that do not run Tally. An XML file from Tally has an XML envelope and is formatted with XML tags, to enable import into other systems. The destination system requires re-formatting of XML Style Sheets (XSLT), based on the inherent style used in Tally before importing the data. When two systems are running different versions of Tally, XML data can be directly imported using the import menu option, without any re-formatting.
Export Master Data
Master Data from Tally can be exported to standard formats like ASCII, Excel, HTML and XML using the export feature. The exported data can be used by other programs.
1. To export Masters from Tally, go to Gateway of Tally > Display > List of s 2. Use Alt+E or click Export on the button bar. This displays the Report Generation screen. Press Backspace or Esc or No to change the default values.
Language Select the language in which you would like the data to be exported. Format
Select from the four formats available.
ASCII (Comma delimited)
Excel (Spreadsheet)
HTML (web-publishing)
XML (data interchange)
Output File Name Enter the name of the file in which the exported master will be saved. By default the file will be saved in the Tally folder in your computer. To export to a different folder, enter the path in Output File Name (Example: C:\differentfolder\filename). Type of Masters Select the Masters from the list.
Import of Data
Data can be imported to Tally from other s of Tally. Tally can also be programmed to import data from other systems to be used as an integrated system. For example, a Customer Management Program, with details such as status of an order and last established, can be imported to Tally. This imported data can be merged into a report containing outstanding balances. When data is changed in the other system, the change is also reflected in Tally. To import data, Go to Gateway of Tally > Import of Data
More: Masters Vouchers Synchronization
Import Formats
Only the Tally XML format is ed for import of Data in Tally.
Tally (XML) Format This option imports data in XML format. More on XML.
Import of Masters
Masters from another company can be imported to Tally and merged with the data of the current company. Note: * Load * Export
and the
activate Company before importing data from another company before
data. importing
it.
To import masters, 1.
Go to Gateway of Tally > Import Masters.
The Import of Data screen is displayed. 2.
Enter the full path of the file in the Import File Name field. Example: C:\tallyrel1.11\DayBook.xml .
3.
Select the appropriate option in the Treatment of entries already existing field from the Behaviour menu.
Combine Opening Balances – Select this to combine the opening balance of the imported masters with the opening balance of the current company.
Ignore Duplicates — Select this to ignore duplicate entries from the imported data. When imported entries are the exact replicas of entries in the current company, they are called duplicate entries.
Modify with new data — Select this to add new data from the imported master to the current company data.
4.
Enter to Accept .
5.
Open Tally.imp file located in the Tally folder in Notepad to view log of import activities.
5.
Import of Vouchers
This feature allows the import of vouchers from earlier versions of Tally and other s of Tally. Voucher data can be imported from other programs using XML. To import vouchers, 1.
Go to Gateway of Tally > Import Transaction > Vouchers.
Only the Tally XML format is ed for import of Vouchers in Tally.
2.
Import File Name – Enter the path of the drive and folder where the file to be imported exists.
Synchronization
Synchronization is the replication of data between two or more locations that use Tally. Data can be sent over the Internet, or in a private network system. Tally offers control over the frequency of replication. Data can be replicated after each transaction or updated at specific intervals. Synchronization takes place in a Client-Server environment and can be initiated only by the client. Data from the client is transferred to the server and from the server to the client. Replicating data is a single-click activity in Tally once Synchronization is set up between a server and its clients. More:
Tally Link Server
Direct Synchronization
Synchronization Using Tally Link Server
Tally Link Server is a service under Tally Internet Services that allows you to synchronize data without worrying about the Fixed IP. In a network environment, The Tally Server instance connects to the Tally Link Server, available on a public IP on a predefined port. The Tally Client instance connects to the Tally Link Server and communicates with the target Tally Server instance as long as the Tally server remains connected to the Tally Link Server The destination Tally Server instance is identified using its unique TallyLinkId. Thus, even if you have a dynamic IP on the Tally Server, you don’t need to change anything on the Client. Just log on to the Tally Link Server and stay connected. The figure below depicts the complete picture:
Set Up for Synchronization
On Client Computer 1.
Open Tally.ini file in the client computer and insert this line: clientserver=client
2. Execute Tally 3. F12: Configure> Connectivity> Sync Configuration.
TallySync Configuration
Ignore Server’s modified Voucher Type Masters? To modify the client’s Voucher Type Masters during synchronization set this field to Yes. TallyLink Configuration Use TallyLink? The field, Use TallyLink? , is set to No by default. If using the Tally Link Server, set this field to Yes. TallyLink ID Enter TallyLink ID to against your serial number. This Id is required for the identification on the TallyLink Server (TallyLink id can be a Tally Serial Number of the client machine or any name which will be ed against the serial number).
On Server Computer 1.
Open Tally.ini file on server computer and insert the following line: clientserver=server
1. Serverport = 20000 (any port between 1 to 64000, whichever is open. Note that the first 1000 to 1500 ports are standard ports, which must be avoided). 2.
Execute Tally .
3.
From Gateway of Tally> F12: Configure> Connectivity> Sync Configuration
TallySync Configuration Ignore Client's modified Voucher Type master? To modify the server’s Voucher Type Masters by the client after synchronization set this field to Yes . Enable Sync Logging (SockReq.log) To log all requests and responses in a file called sockreq.log set this field to Yes . This will help when debugging the sync process. Truncate previous log before Syncing This field appears only on setting Enable Sync Logging (Sockreq.log) to Yes . Setting Truncate previous log before Syncing to Yes will delete the previous logs before logging in to the current session. TallyLink Configuration Use TallyLink? Set to Yes to select Tally Link Server for syncing type TallyLink ID Enter TallyLink ID to against your serial number. Connect to TallyLink Server Set to Yes to establish a connection between the TallyLink Server and the remote Tally clients. (The Connect Button appears in the button bar. On opening the same screen next time use the Connect Button to connect to TallyLink Server) Connect on Startup Set to Yes to connect to the TallyLink server on startup
Accept the Tally Sync Configuration screen. Click on Connect button on the button bar or press ALT+N to connect to TallyLink server. If TallySync and TallyLink information are found correct, the following message displays in the calculator pane:
TallyLink ID
For both the server and client, who want to use the Sync feature through Tally Link Server, it is mandatory that they a TallyLink ID (Alias name) for their copy of Tally. TallyLink ID is a unique identifier used by Tally Link Server to identify all the connected Tally instances. To connect to the Tally Link Server for the first time, specify a TallyLink ID and send it to the server. The Link Server checks for the TallyLink Id in its database. If available, assigns the TallyLinkId to that particular Tally instance. This TallyLink ID is stored against the Tally Serial No. If the TallyLink ID is not available (the specified TallyLink ID has already been assigned to someone else.), a TallyLink ID already exists message displays. On all subsequent connections /requests, the TallyLink ID is verified against the Tally Serial No, authenticated and authorized.
Creating a Rule
Select the company whose vouchers are to be synchronized. Ensure that the company is kept open on both the client and the server computer. Create a new Client Rule on the client computer and specify the following: Company name on the server, Server details Synchronization details.
Gateway of Tally > Import of Data > Synchronization > Client Rules > Create
The details of the screen are mentioned below :
Name of Rule
Specifies the name for the client rule. Any name can be entered as long as such rule does not exist in the company.
Use TallyLinkServer Specifies if Tally Link Server is used for synchronizing. Type Yes to select Tally Link Server.
Server TallyLink Id Enter the Server TallyLink Id specified on the server computer.
Type of Rule This indicates the type of operation to be performed; the available options are Synchronize and Transaction. If Tally Link Server is selected, this option defaults to Synchronize and cannot be changed.
Company Name on Server Enter the name of company on the server computer with whom the sync is to be performed.
Synchronize Altered Transactions To send altered transactions to remote clients set this option to Yes.
Sync over slow connection If this option is set to Yes, Tally will send the vouchers in multiple small batches rather than in one big batch and will not time out if the connectivity is poor. This option must be set to Yes in most cases. If this option is set to No, the sync process takes a longer time as data are sent in multiple batches.
Company GUID on Server (Read-Only) Displays Company's Globally Unique ID
Current TID (Read-Only) Displays the creation ID of the last synchronized voucher of the remote company. This id is generated to identify new transactions created at the remote end.
Altered TID (Read-Only) Displays the altered ID of the last synchronized voucher of the remote company. This ID is generated to identify altered transactions at the remote end.
Is Active (Read-Only) Displays Yes if the Client Rule has been activated by the server.
Remote Alter State (Read-Only) Specifies whether Synchronize Altered Transactions is Yes or No on the server side for that particular client rule.
Creating a Server Rule
Go to Gateway of Tally > Import of Data > Synchronization > Synchronize. A request is sent to the server from the client computer to create a Server Rule corresponding to the Client Rule. A Server Rule is created implicitly whenever a Client Rule synchronizes with the server. Note:
You
cannot
create
a
Server
Rule
manually.
You can see the status of synchronization in the Calculator pane in Tally on the client machine. If you do not receive an error message in this pane, the Server Rule has been created successfully Note:
The
Server
Rule
is
in
encrypted
form.
Activating Server Rule Once the Server Rule is created it has to be activated on the server computer. Go to Gateway of Tally > Import of Data> Synchronization > Server Rules > Activate
You can now Sync from the client computer to transfer your vouchers.
Altering the Server Rule Go to Gateway of Tally > Import of Data > Synchronization > Server Rules > Alter
A List of Rules is displayed. Select the relevant rule. This will display the Server Rule Alteration screen.
The fields displayed in this screen will be in a read only mode except for Is Active and Synchronize Altered Transactions? .
Process of Synchronization
Ensure that the client computer and the server computer are connected to the Internet during the synchronization process. On the server computer : Start Tally > select the company (into which vouchers are to be synchronized from the client machine) > F12: Configuration > Sync configuration > Press the Connect Button. On the client computer: Start Tally > Select the company from which vouchers are to be synchronized > Gateway of Tally > Import of Transactions > Synchronization > Synchronize.
While synchronizing from the client computer the following message displays in the Calculator : Sync. Start at (time) and Sync End at (time). This ensures that the Client Rule has been synchronized successfully.
Activate server rule on the server computer : Ensure that the company is kept open in the server computer.
From Gateway of Tally > Import of Transactions > Synchronisation > Server Rules > Activate
This displays the name of the Client Company and link ID. Set Is Activate and Synchronize Altered Transactions to Yes .
Is Active? Displays the status of the client rule at the server end.
Synchronize Altered Transaction? Specifies if synchronization of altered transactions is to be done. On the client computer: Start Tally > Select the Company (from which vouchers are to be synchronized to the server machine) > Import of Transactions from Gateway of Tally > Synchronisation > Synchronize. On the client computer, a message displays on the Calculator : Sync. Start at (time) and Sync End at (time) .
This completes the synchronization process.
View Synchronized Vouchers
To view the synchronized vouchers, select Display > Day Book from computers.
Server Computer:
Gateway of Tally in both server and client
Client Computer:
All the vouchers from the client replicates to the server. Next time, on opting for Sync , the synchronized vouchers will not be posted. However, the new and the altered vouchers from both the client and server will get updated on the respective computers. Ensure that the vouchers are not deleted after synchronisation. In case of deletion, ensure that it is done on both the sides (i.e., server and client computers). On canceling the voucher, the change is updated accordingly at both the ends.
Direct Synchronization
Direct Sync is synchronization between a server and a client. Direct Synchronization can be over a LAN, WAN, the Internet or between two instances of Tally running on the same machine. It is usually done using a separate server The Tally Link Server is not used for Direct Synchronization. To enable this feature any of the nearest Tally Offices or send an email to [email protected] The server version of Tally must be installed on the server computer and client version on the client computer, before proceeding. Note:
Synchronization
can
be
initiated
only
by
the
client.
Direct Synchronization between Client and Server Direct Synchronization can be between two different entities/organizations or between the head-office and branches of an organization. Assume that ABC Company maintains your s. You can Transfer data from your company to ABC Company using Direct Sync, provided ABC Company has a server version of Tally installed and can connect over a network. Other clients of ABC Company can also connect and transfer their Tally data. Here, ABC Company is the server and other entities that are synchronizing their data, are clients. Direct Synchronization can also be implemented between the Head Office and Branches of an Organization. Thus, when synchronizing between the Head office and Branches, the Head office must have a server version of Tally installed and connect over a network to the Branches. The Branches must have client versions of Tally installed.
Enable Direct Synchronization
To check whether Direct Sync is Enabled? Go to Gateway of Tally> F12: Configure > Licensing > Add-ons If you have installed a client copy of Tally and have enabled Direct Sync, then you will see Direct Client displayed. If you have installed a server copy of Tally then both Direct Client and Direct Server are displayed.
Configuring Tally.ini file for Direct Sync
Open the Tally.ini file in notepad from the Tally installed folder.
For Client:
Enter Clientserver = client in the file and save. This specifies that Tally is to be run in client mode.
For Server:
Enter Clientserver = server in the file. This specifies that Tally is to be run in server mode.
Enter the T/IP Port number of the server and save.
Configuring Synchronization
On Client Computer
Open Tally and select a company.
Go to Gateway of Tally> F12: Configure > Connectivity> Sync Configuration to display the Tally Sync Configuration screen.
Set Yes in Ignore Server’s modified Voucher Type Masters? field if you do not want to replace the original transaction after synchronization. Set No if you want the transaction to be replaced by the modified transaction from the server.
By default, Use TallyLink? field is set to No .
On Server Computer
Open Tally on the server and select a company. Go to Gateway of Tally > F12: Configure > Connectivity> Sync Configuration to display the Tally Sync Configuration screen. Set Yes in Ignore Client’s modified Voucher Type Masters? field if you do not want to replace the original transaction after synchronization. Set No if you want the transaction to be replaced by the modified transaction By default, Use TallyLink? field is set to No .
Creating a Rule
Creating a Client Rule Go to Gateway of Tally> Import of Data > Synchronization > Client Rules > Create
Name of Rule - In this field, enter a name for the rule you are creating. You cannot enter an existing ClientRule name. Note:
By
default,
the
Use
TallyLinkServer
?
field
is
skipped
when
you
use
Direct
Sync
. Server URL - Enter the uniform resource locator (URL) of the server. This is the IP address/Name of the Tally server. Example: (192.168.1.206/ Localhost). Enter the T/IP port number of the server preceded by a colon after the URL. Note: Tally.ini
By file
default, the to change
synchronization port the port number
in
Tally
is
9000.
Change
the
parameters
in
Secure Server? - Enter Yes in this field if you are synchronizing to a secure server. Entering Yes here gives you the option to enter your name and . Name - Enter the name you use to connect to the server. - Enter the for the specified name. Use Compression? - Enter Yes in this field to compress the data that you send to the server. Use this option to reduce the size of data files which synchronize and transfer data. Type of Rule - Select Synchronize from the Rule Types menu.
Company Name on Server – Enter the name of the company on the server that you want to synchronize. Synchronize Altered Transactions? – Set this option to Yes to synchronize back dated/altered transactions with the server. Sync over slow connection? – If you have a slow speed Internet connection like a dial-up connection, set this option to Yes . The time taken to transfer data could be more but data transfer will be efficient.
The following fields are Read Only: Company GUID on Server – When you synchronize, Tally creates a Globally Unique Identifier (GUID) on the server. This GUID is displayed here. Current TID – This is the Current Transaction Identifier field and it displays the number of vouchers transferred. Altered TID – This is the Altered Transaction Identifier field and it displays the number of vouchers altered and transferred from the server to the client. Is Active – This field shows if synchronization is activated on the server. Remote Alter State – This field displays only if the Synchronize Altered Transactions field is set to Yes on the server for a particular Client Rule.
Creating a Server Rule Refer Creating a Server Rule for more details.
Synchronization Completed
Go to Gateway of Tally > Import Transactions > Synchronization > Synchronize from the Client machine to start the synchronization process.
The Calculator pane displays Sync. Start at and Sync. End at message.
View Synchronized Vouchers
You can view the synchronized vouchers from Gateway of Tally > Display > Daybook or Gateway of Tally >Display > Statements of s > Statistics Synchronization transfers vouchers along with the masters from the client computer to the server computer. Vouchers in the server computer will be replaced by modified vouchers from the client computer if the Ignore Client’s modified Voucher Type Masters? field is set to No on the server. Vouchers for the company in the server computer will be transferred back to the client computer in another instance of synchronization by the client.
Here, the vouchers in the client computer will be replaced by modified vouchers from the server if the Ignore Client’s modified Voucher Type Masters? field is set to No on the client machine.
Tally ODBC
Data can be accessed from any application using Open Database Connectivity (ODBC). Tally uses ODBC to connect to other programs and exchange data dynamically. Ensure that MS-Query is installed in the system in which you will be installing Tally. This enables as Tally is installed. The ODBC server automatically displays on the Calculator pane. More: Outward Connectivity Inward Connectivity
ODBC as soon
Outward Connectivity
Outward Connectivity is to connect directly to send data from one program to another, without any programming. It allows the to extract data from Tally and send it to other programs such as Microsoft Word or Excel. Outward Connectivity features:
Print labels for greeting cards from ledger addresses stored in Tally.
Create templates for report and forms such as audit reports and Schedule VI forms and plug in data from Tally.
Use popular programs in Tally’s open database, thereby giving you the flexibility to create your reports with up-to-date data from Tally.
More: Tally ODBC with Microsoft Word Tally ODBC with Microsoft Excel
Tally ODBC with Microsoft Word
Consider the following scenario. A company wants to send greeting cards to its customers. It can use the names and addresses of customers, stored in the Tally database to print labels. The steps to be followed are:
Start Tally and keep it open till the Mail Merge process is completed.
Ensure ODBC Server is displayed on Tally’s calculator pane.
Open MS Word.
Click on Tools > Mail Merge from the Menu bar.
From Main Document, click Create > Mailing Labels.
Click on Active Window.
In the Mail Merge Helper dialog box, click on Get Data > Create Data Source. Click on MS Query …from the Create Data Source dialog box.
Select TallyODBC from the Microsoft Query screen.
Query Wizard displays fields from Tally. Select Ledger and click the “>” button to select fields required in the query.
The screen appears as:
Use the Filter Data dialog box to limit the data to suit your requirement.
Sort the data in ascending or descending order in the Sort Order dialog box.
Click on Finish to complete the Query process.
Click on Set Up Main Document.
In Create Label dialog box, click on Insert Merge Field to insert the fields and click OK.
The screen appears as:
Click on Merge from Mail Merge Helper dialog box to create mailing labels in a new document.
The screen appears as:
Tally ODBC with Microsoft Excel
Tally ODBC extracts data from Tally and designs the reports in MS Excel. The steps to be followed are:
Start Tally and keep it open till the Mail Merge process is completed.
Ensure ODBC Server is displayed on Tally’s calculator pane.
Open MS Excel.
Click on Data > Get External Data > New Database Query from the Menu.
Select TallyODBC from the Choose Data Source dialog box.
The screen appears as:
Query Wizard displays fields from Tally. Select and click the “>” button to select fields required in your query.
The screen appears as:
Use the Filter Data dialog box to limit the data to suit your requirement.
Sort your data in ascending or descending order in the Sort Order dialog box.
Click on Finish to complete the Query process.
Click on OK from the Returning External Data to Microsoft Excel dialog box to display the selected columns on the Excel sheet.
The screen appears as:
Inward Connectivity
Inward connectivity integrates other systems with Tally to use data in them. Tally can be programmed for inward connectivity. This allows using data from other systems in Tally by creating an integrated system. For example, a customer management program containing details like status of an order and last made can be brought in Tally and merged in a report containing outstanding balances. Changes in the data in the program is immediately reflected in Tally. To connect to other programs and use external data in Tally, you can any of the nearest Tally Offices or send an email to [email protected]
E-capabilities
Exchange of data in a network is the order of the day in the world today. Import and export of data over a LAN or the Internet is a common feature in most organizations. E-Capablities is the ability of a software application/program to exchange data over a network. Tally has a broad range of E-Capabilites that allows you to E-mail data and publish reports and documents on the web.
E-Capabilities requirements: 1.
An Internet connection. It can be a dial-up, cable, ISDN, DSL or satellite connection.
2.
An E-mail to use the E-mail feature in Tally.
3.
A Uniform Resource Locator (URL) address to publish on the web, as well as the rights to files.
More: E-mail Web Publishing
E-mail (Electronic mail)
The E-mail is the most widely used facility on the Internet. It saves time and cost of postage. Use the email feature in Tally to:
E-mail any Tally report or document like invoices or purchase orders
Post reminder letters and statement of s
The following example illustrates the use of this feature in Tally:
E-mail a Reminder Letter To send a reminder letter to a customer by email: 1.
Go to Gateway of Tally > Display > Statements of s > Outstandings > Ledger
2.
Select the customer’s/company’s ledger from the List of Ledgers
3.
Click on Email from the button bar or press Alt+M
3.
4.
The fields on the Mailing Ledger Outstanding form are automatically completed if you have given the required information during creation of the master records. Select No or press Backspace to change/modify the entries. Select Yes to accept.
5.
The E-mail Server field is highlighted next. This is a mandatory field. The first time you use this feature in Tally, enter the name of your SMTP server, example: mail.btinternet.com. Subsequently, Tally will automatically display the SMTP server name. Refer to your Internet Service Provider (ISP) or network for further queries.
6.
The From field displays the name of your company entered in the Company Creation screen and stored in the Company Information Master records. You can also modify the default information. Press Enter.
7.
The From E-mail Address field displays the e-mail address entered in the Company Information Master data. Enter your email address, if you have not done so while creating a company, or if you want to change the id.
8.
Enter the name and in Authentication Name (Only if required) and field respectively if the mail server requires authentication.
9.
In the Format field a pop-up screen lists the three formats in which you can generate your email:
9.
ASCII (Comma delimited)
HTML (web-publishing)
XML (data interchange)
Select the type that suits your recipient. 10.
To E-mail Address field is a mandatory field.
It displays the recipient's email address as entered in the Mailing and Related details during ledger creation. Enter the address if you have not done so while creating the ledger or if you want to modify the information. 11.
Type the email address of another recipient to whom you want to send a carbon copy of the email in the CC (if any) field.
12.
The Subject field is filled by default and displays the subject of your mail. You can change it to a subject of your choice.
13.
Any text you enter in the Additional Text field precedes the report in the recipient’s mail program. You can use this field to type a message to the recipient.
14.
Additional Options provided in the form are:
Include Post-Dated transactions.
Transactions?- Set
this
option
to Yes to include post-dated
Show overdue using Bill Date?- Set this option to Yes to show bill date in report.
Range of Bills to show:- Select all bills or overdue bills to display.
Format:- Select condensed or detailed format for your reminder letter.
Show Qty Info in Detailed Format?- This option is selected for the detailed format mode and displays quantity.
Show bills of the following type:- Select the types of bills from all, credit or debit bills.
Note: 15.
Additional
Options
may
vary
depending
upon
the
type
of
report
you
want
to
email.
Print Preview: Use the Print Preview screen to view the document before emailing. This shows how the document appears in the recipient’s email.
Web Publishing
All reports and documents generated in Tally can be published on your website. Tally can create reports in HTML format and the same directly to your website. For example, use this feature to inform your customers about the new price-range and stocks available for sale on your website. Tally uses the highest standard of data encryption methods to ensure security of data.
ing Reports on the Website A website is a specific directory space allotted to you on that server. Protocols are set of rules and specifications on how data and files are transferred over a network. They cover all aspects of communication between computers including content, formatting and error control. To publish a report, statement or data generated in Tally, it to an Internet Server that has been configured to accept files in the specific protocols. Example: To publish your company’s balance sheet on your website: 1.
Go to Gateway of Tally > Balance Sheet .
2.
Click the button from the button bar or press Alt+O.
3.
The first time you , you will have to enter the required information on the screen displayed. The field to has two options:
3.
FTP Site
Web Page (HTTP/HTTPS)
FTP Site
This site accepts files transfers in File Transfer Protocol (FTP). FTP is a common choice for data or file transfer to a website. Select this option unless your site accepts HTTP or HTTPS s.
Web Page – HTTP/HTTPS
Hyper Text Transfer Protocol (HTTP) is the standard for transferring HTML files over the Internet. HTTP Servers are pre-programmed to accept HTTP connections. HTTPS sites are servers configured to accept secure connections. They conform to standard security protocols (example: SSL and SET) to ensure that your data and files are not tampered during an . Use this if your server is set up for HTTP/HTTPS or else select FTP. 4.
URL: Universal Resource Locator (URL) is the server address where you want to publish your report. For FTP, you will need to know the FTP server name and directory path. The FTP server name is the domain name of the Web server (example: ftp.server.com). The directory path is the folder on the server where the report is stored (example: /public_html). For a web page, an URL is typically in the form www.myweb.com/.
5.
Secure Server: This option displays when you select Web Page in to field. Use a secure connection when the data is sensitive and your server is configured for it. A secure site is one that has alphabet s following http (https) and the URL in the address bar of your browser displays https://www.______.com.
6.
Name (if any): Enter the -name you need to access the server for ing.
7.
(if any): Enter the
N o t e : Internet servers authenticate your identity before you can put data and files on the site. If you are unsure about your name, , or FTP location, your Internet Service Provider (ISP). 8.
Format: You can generate your reports in four formats. To know more about these formats, click on the links given below:
ASCII (Comma delimited)
HTML (web-publishing)
XML (data interchange)
Select the type that suits your requirement. 9.
Destination File: This option displays on selecting an FTP Site in to field. The default names are displayed. Modify if necessary.
Note: 10.
Additional
options
may
vary
depending
on
the
type
of
report
you
want
to
.
Print Preview: Use the Print Preview screen through the Print option to view the document before you .
Tax Deducted at Source (TDS)
Tax Deducted at Source (TDS) is one of the modes of collecting income tax. The buyer (Deductor) deducts the tax from the payment made to the seller (Deductee) and remits the tax to the Income Tax Department within the stipulated time. The buyers (Corporate and Non-Corporate) make payments (such as Salary, Rent, Interest on securities, Dividends, Insurance Commission, Professional Fees, Commission on Brokerage, Commission on Lottery Tickets, etc) to the sellers (Services) and deduct the requisite amount from such payments towards tax. The buyer files the TDS returns containing details of the seller and the bank, where the TDS amount is deposited to the Income Tax Department (ITD). The Income Tax Department has prescribed the formats for filing these returns electronically, which the buyer does in a CD/floppy. For additional details you can visit the Income Tax Website at http://www.incometaxindia.gov.in
Flowchart of TDS
A seller (Deductee) provides services to the buyer (Deductor). The buyer deducts the amount towards TDS prior to the services or the bills received. The buyer issues Form No.16A to the Deductee and deposits the deducted amount to the Authorised Bank (Treasury). The buyer files annual returns electronically to the Income Tax department.
Electronic TDS (e-TDS)
The Income Tax Department has made it mandatory for all Corporate companies like private limited and public limited to file their TDS returns in electronic media (i.e. e-TDS returns). However, the Non - Corporate like individuals, proprietary firms and partnership firms can furnish their returns in physical form to their respective Income Tax Offices. They can also furnish their returns in electronic form through TIN facilitation centers established by NSDL. Filing of e-TDS return to Non- Corporate deductors is optional.
Filing of e-TDS Returns
The Buyer (Deductor) has to furnish the TDS returns in electronic form and Form 27A in physical form along with the e-TDS return CD/floppy. Form 27A must be furnished separately for each return (Form 24, 26 or 27). NSDL has developed a utility called File Validation Utility (FVU) to whether the e-TDS return file prepared by the Buyer (deductors) conforms to the prescribed format.
Transaction Flow in Tax Deducted at Source
Example 1: Indirect Expenses (Fees for Professional or Technical Services (Section 194J) Manohar is a technical consultant for automobiles. He inspects used cars and prepares a report. Manohar (seller of the service) receives per car, Rs.500 for inspections. He inspects five cars in January 2005. So he has to receive Rs.2500 as service charges. Company 'A' pays him Rs.2250 towards service charges and pays Rs.250 to any Bank or IT counter towards TDS. The following diagram explains the transaction flow in TDS:
TDS in Tally
TDS (Tax Deducted at Source) in Tally provides an easy-to-use and flexible interface. It helps you to handle intricate cases and calculate the tax payable to the Income Tax Department. Tally calculates the tax of all parties/ suppliers where TDS deduction is mandatory. It calculates the TDS automatically and prints Form16A certificates, Forms 26Q, 26, 27 and 27A (Cover Note) for Quarterly/ Annual Returns as per statutory requirement. It allows the to view and print various TDS reports, Challans and TDS Outstanding statements.
Features of TDS in Tally The TDS functionality in Tally s the following features:
1. Simple and -friendly 2. Quick and easy to set up and use 3. ing for tax on partial/full payment of bills 4. Flexibility for auto and manual calculation of TDS 5. Complete tracking of each transaction from deduction to payment 6. Challan management and printing for prompt and accurate filing of tax 7. The Auto allocation feature prevents error-prone data entry and helps track the transactions faster. 8. Form 16A management: Can be printed for a transaction
Can be printed for a period
Can be printed yearly
9. Allows multi-party printing 10. Exporting of data in NSDL compliant TDS file format. 11. Electronic format (e-TDS return) with Form 26Q, Form 26 , Form 27 and Form 27A which will be validated by the utility, provided by the government. 12. Generates Form 16A, TDS Challan, TDS Computation and TDS Payable reports.
Company Creation
Company Creation means providing basic information about the company whose books of s you want to maintain in Tally. Gateway of Tally > Alt + F3 > Create Company
Statutory Compliance for Select the Country from the list of countries.
State Select the appropriate State from the list.
PIN Code Enter the Postal Index Number , which is numerical and of six digits
Enabling TDS in Tally
To enable TDS in Tally, Go to Gateway of Tally> F11: Features> Statutory & Taxation In the Company Operations Alteration screen, 1.
2.
Set Enable Tax Deducted at Source and Set/Alter TDS Details to Yes
Enter the TDS Deductor details in Company TDS Deductor Details screen
2.
A brief description on the fields that appear in the Company TDS Deductor Details screen is given below.
Tax Assessment Number Enter the Tax Assessment Number (TAN) in this field. The Tax Assessment Number (TAN) is a ten-digit alphanumeric number, issued by the Income Tax Department (ITD) to the deductors. One Tax Assessment Number is adequate for different types of deductions. TAN must be quoted properly on all Challans, Payment for TDS, Returns, All Certificates - Issue in Form No.16/16A, All Returns and in all documents and other correspondences with Income-tax Department.
Income Tax Circle/Ward (TDS) Enter the Income Tax Circle/Ward (TDS) issued by the Income Tax Department
Deductor Type According to the nature of the organisation, select the Deductor Type (Government or Others) from the list.
Name of person responsible Enter the name of the person authorised to file the TDS returns of your company.
Note: If Tally has the name.
a
security
feature
enabled
then
Designation Enter the designation of the authorised person filing the TDS returns.
this
field
is
automatically
filled
with
Statutory Info.
The Statutory Info. comprises Deductee Type and TDS Nature of Pymts reports. Go to Gateway of Tally > Display > Statutory Info.
The Statutory Info. displays the following options: 1.
TDS Nature of Pymt
2.
Deductee Type
TDS Nature of Pymt
To view TDS Nature of payment: Go to Gateway of Tally > Display > Statutory Info. > TDS Nature of Pymt 1.
Select any desired type from the list of various nature of payments to go to TDS Nature of Pymt Display
2.
The display window comprises of the fields, Name, Section and Payment Code. There is also a table, where you have details such as Deductee Type, Applicable from, Exemption Limit and Rate.
Deductee Type
To view Deductee Types Go to Gateway of Tally > Display > Statutory Info. > Deductee Types 1.
Select the Deductee Type from the List of Deductee Types
2.
The Deductee Type Display screen comprises Name of the Deductee Type, Residential Status and Deductee status. There is also a table for Deductee TDS Details with columns for Applicable from, Surcharge Exemption Limit, Surcharge, Additional Surcharge (Cess) and Additional Education (Cess).
Creating TDS Masters
You can create TDS Ledgers under any of these main group heads:
1. Duties and Taxes 2. Sundry Creditors 3. Sundry Debtors 4. All Current Assets (except Bank, Cash-in-hand and Stock-in-hand), Misc. Expenses (Assets), Loans and Advances (Assets) group or sub groups of these main groups 5. Unsecured Loans 6. Loans (Liability) (except Bank OD A/c, Bank OCC A/c ) 7. Secured Loans 8. Unsecured Loans 9. Branches/Division 10. Reserves & Surplus 11. Capital 12. Fixed Assets N o t e:For Sundry and For
ledgers created under Groups besides Duties & Taxes, Sundry Creditors and Debtors, to obtain the field Is TDS Applicable, set Maintain Bill-wise Details Non-Trading A/cs in F11: Features to Yes.
Creating a Tax Ledger
Create the Tax ledger under the group Duties and Taxes to calculate TDS at voucher entry levels. You can specify the Type of Duty/Tax only for Ledgers created under Duties and Taxes. To create a Tax Ledger for TDS on Rent, Go to Gateway of Tally> s Info.> Ledgers> Create
1.
Enter the Name of the ledger
2.
Select Duties & Taxes from the List of Groups in the Under field. On selecting Duties & Taxes, you will get a field Type of Duty/ Tax
3.
Select TDS from the Types of Duty/Tax list
4.
3. 4.
Select the appropriate TDS Nature of Payment from the List of TDS Nature of Payment
5.
If the total transaction limit exceeds the actual limit, set Ignore TDS Exemption Limit to Yes
6.
Accept to save the Ledger
Similarly, you can create different Tax Ledgers. N o t e: You will find different categories under Tax Nature of Payment from the List of TDS Nature of company.
Deduction. Select the relevant Payment that applies to your
TDS
Creating a Party Ledger
T o create a Party ledger grouped under Sundry Debtors or Sundry Creditors , Go to Gateway of Tally> s Info.> Ledgers> Create 1.
Enter the Name of the Ledger
2.
Select Sundry Debtors or Sundry Creditors from the List of Groups in the Under field
3.
If required, set Maintain balances bill-by-bill to Yes
4.
Set Is TDS Applicable to Yes
In the TDS Details screen:
Select the Deductee Type from the List of Deductee Types
Set Is Lower/No Deduction Applicable to No if not applicable
To ignore the exemption limit for surcharge and to calculate the surcharge on the amount specified, set Ignore Surcharge Exemption Limit to Yes
5.
Enter the Mailing Details and Tax Information
5.
6.
Accept to save the Ledger
Note: While creating ledgers under Sundry Creditors or Maintain Bill-wise Details is set to Yes. If the party is then PIN Code, State and the Sales Tax Number fields
Sundry Debtors, ensure a Non Resident Deductee are not applicable.
type,
Creating a Party where Lower/No Deduction is Applicable
To create a TDS Party where Lower/No Deduction is applicable, Go to Gateway of Tally> s Info.> Ledgers> Create 1.
Enter the Name of the Party
2.
Select the Group from the List of Groups at the Under field
3.
By default Maintain balances bill by bill is set to Yes
4.
Set Is TDS Applicable to Yes
In the TDS Details Screen, Select the Deductee Type from the List Of Deductee types Set Is Lower/No Deduction Applicable to Yes Select the Section number from the list. If 197 is selected, the cursor skips to the TDS Lower Rate field and you can enter the TDS Lower Rate in this field. If the section number 197A is selected, the cursor skips to Ignore Surcharge Exemption Limit? in the Ledger Creation screen and the TDS rate is taken as zero .
5.
Enter the Mailing Details and Tax Information
6.
Accept to save the ledger
Creating a Journal Voucher to book the TDS Expense
U sing the Journal, you can book expenses, deduct the TDS and pay the amount to the party for their s ervices. To book TDS expenses, Go to Gateway of Tally> ing Vouchers> Journal Vouchers 1.
Debit the ledger Rent grouped under Indirect Expenses from the List of Ledger s and enter the amount
2.
Select Smart Enterprises from the list and the amount to be credited appears in the Credit column
3.
In the Bill-wise Details for screen: 3.
Select New Ref as the Type of Ref
4.
Select the TDS ledger from the List of TDS Ledgers and the Amount appears automatically
5.
Enter a Narration if required and Accept to save the journal
Note : Tally.
Booking
the
TDS
Expense
can
be
done
using
Deduction of TDS using Journal voucher with TDS Deduction Button
the
Purchase
voucher
available
in
You can create a Journal using the TDS Deduction button, to record all the TDS deductions for parties who provide services. The List of Ledger s displays only those ledger s which are enabled for TDS and transaction ed where deduction of due. Go to Gateway of Tally> ing Vouchers> F7: Journal 1.
Click the TDS Deduction Button or press ALT+S . You will get a list of TDS Ledgers for the party selected
2.
Select the TDS Party Ledger from the list
3.
In the TDS Details for screen, select the TDS Ledger from the list (TDS on Rent). The system calculates the Net TDS to Deduct amount
4.
Select the TDS Applicable Bills from the list
5.
Accepting the TDS details sub form will post the Net TDS to Deduct amount in the Debit column of the Journal Voucher screen
6.
5.
6.
Press the Enter key to credit the Tax Ledger (TDS on Rent). You may enter the for identification and accept the screen to save the Journal Voucher
New Reference number
Creating a Journal Voucher to book the TDS Expense for a Lower/No Deduction party
To book TDS Expenses for a Lower/No Deduction Party , Go to Gateway of Tally> ing Vouchers> Journal Vouchers 1.
Debit the ledger Rent grouped under Indirect Expenses from the List of Ledger s and enter the amount
2.
Select ABB Enterprises from the list and the amount to be credited appears in the Credit column
In the Bill-wise Details for screen, 3.
3.
Select New Ref as the Type of Ref
4.
Select the TDS ledger from the List of TDS Ledgers and details in Is Lower/No Deduction , Section Number and Amount will appear automatically.
If you have created the Party and set Is Lower/No Deduction Applicable to Yes , you can still override the specified TDS rates and make changes to the percentage of Income Tax at the voucher entry level by setting Allow Alteration of TDS Rates and Values in F12: Configure to Yes .
5.
Enter a Narration if required and Accept to save the journal
5.
TDS deduction using the TDS Deduction button Go to Gateway of Tally> ing Vouchers> F7: Journal 1.
Click the TDS Deduction Button or press ALT+S . You will get a list of TDS Ledgers for the party selected
2.
Select the TDS Party Ledger from the list
3.
In the TDS Details for screen, select the TDS Ledger from the list (TDS on Rent). The system calculates the Net TDS to Deduct amount
4.
Select the TDS Applicable Bills from the list
4.
5.
Accepting the TDS details sub form will post the Net TDS to Deduct amount in the Debit column of the Journal Voucher screen
6.
Press Enter to credit the Tax Ledger (TDS on Rent). You may enter the New Reference number for identification and accept the screen to save the Journal Voucher
6.
7.
Accept the screen to save the Journal voucher
Payment Voucher
You can pay the TDS pending bills for the selected TDS ledger via the Payment voucher, either by using the Helper Button or by entering details manually.
TDS Challan Payment
Payment to the Party ( While Paying the Advance)
TDS
Creating a Payment Voucher using the TDS Helper button
3.
4.
Accept to save the voucher
5.
To print this voucher as a TDS Challan, click on the Print button or press ALT+P from the payment voucher. It will display the Voucher Printing dialog window. You can configure the payment voucher as depicted in the screen below. If you wish to view the challan in a preview mode, click on With Preview button or press ALT+I
6.
Set Print as TDS Challan to Yes . Accepting the Voucher Printing sub form will display the TDS Challan in Print Preview mode. Click Zoom or press Alt+Z to view the TDS Challan
7.
Click on Print to print the TDS Challan
Creating a Payment Voucher
5.
6.
Accept to save the Payment voucher
Advance to a Party
Assume ABC Company has decided to pay an advance of Rs.1 50 000 to a party (Apt ment) for their service on advertising for this year. The Total taxable amount on Rs.1 50 000 will be 1% as Tax, 10% as surcharge and 2% as Additional surcharge. After deducting the TDS from your Total Amount Paid/Payable, the Net TDS to deduct would be Rs.1, 683.00.
Creating a Payment Voucher (To Party )
To make a Payment to the Party, Go to Gateway of Tally > ing Vouchers > Payment 1.
Select the Bank from the list
2.
Select the Party from the list and enter the advance amount that you wish to pay to the party
3.
You will get the Bill wise Details sub form, select the type of reference as Advance and enter a name. Select the appropriate TDS ledger (TDS on ment) from the list. (If the TDS Ledger is selected as Not Applicable then such transactions are considered as Payments for which TDS will not be deducted)
4.
The amount entered in the debit amount is displayed in the Amount column
5.
4.
5.
After entering the Bill-wise Details , the TDS Details for the selected TDS ledger (TDS on ment) appears. This sub form displays the party , Type of Deductee , Amount, total taxable amount , income tax , Surcharge and Additional Surcharge . The total taxable amount is calculated till date in this sub form. Enter the name of the reference
6.
The TDS Details for the selected TDS ledger (TDS on ment) appears. This sub form displays the party , type of deductee , amount , total taxable amount , income tax , surcharge and additional surcharge . The total taxable amount is calculated till date in this sub form. Enter the name of the reference
7.
The Net TDS to Deduct on the Tax ledger is calculated according to percentages. Accept the TDS details sub form. The Taxable amount for TDS on ment appears as credit in the Payment voucher screen
7.
8.
Accept the Payment voucher screen to save the entry
Creating a TDS Challan
The TDS challan payment voucher can be entered using the TDS Helper button available in Tally. Go to Gateway of Tally > ing Vouchers > F5: Payment Voucher 1.
Click the TDS Deduction Button or press ALT+S
2.
In the TDS Filters screen, select the TDS Ledger , Deductee Status and enter the To Date
3.
Select the (Bank) from the list
4.
Accept the Payment voucher screen to save the entry
4.
TDS Challan Reconciliation
R econciliation of Challan Payments made to Bank for TDS s is done in the Ledger Voucher report. Go to Gateway of Tally > Display > s Book > Ledger > Select the TDS ledger from the list
The Ledger Vouchers Report provides a list of vouchers for the current month. You may view the Ledger Vouchers by drilling down. 1.
Click on the F5 : Challan Reconcile button or press ALT+F5 to view the Challan Reconciliation report
2.
Enter the Bank Challan Number , Challan Date , Cheque/DD Number , Bank Name and the Bank Branch Code OR use Set Challan Details (Alt +S) button from the Toolbar to reconcile challans from the TDS Challan Reconciliation screen for a selected period which has to be specified in the Ledgers Vouchers screen
3.
Enter the Bank Challan Number , Challan Date , Bank Name and BSR Code . Accept to Save and the details are entered are applicable to the selected vouchers
4.
Enter the Cheque/DD number and accept the Challan Reconciliation report to save the entry
TDS Reports
TDS Reports in Tally display the tax amount of the concerned party/supplier. Tally generates Form 16A and Form 27A and also provides the printing option to print these forms. You can export the e-TDS forms (Form 26/Form27/Form 26Q/Form 27Q) from Tally. The exported file will be saved in the defined path specified in the Output file name. You can get the e-TDS file validated through NSDL freely able utility, File Validation Utility (FVU) to whether the e-TDS return file prepared by the deductors conform to the prescribed format. Go to Gateway of Tally > Display > Statutory Reports > TDS Reports Click on the TDS Reports option to display the following
Print Form16A
Print Form 16A option provides the facility to preview and print Form 16A. Go to Gateway of Tally > Display > Statutory Reports > TDS Reports > Print Form 16A
1. On selecting the TDS Party Ledger from the List Of TDS Party Ledgers , Tally generates Form 16A report in preview mode 2. Use the buttons from the button bar to set printing options such as selecting the printer, number of copies, method, page range, paper type, paper size and print area
2.
3. Select TDS ledger from the list and enter the From , To and Challan Till date 4. Select the Type of Copy . Enter the Certificate No , Place and Date 5. Click on Yes to view Form 16A in print preview mode. Click on Zoom or press ALT+Z from the print preview screen to display the report as below
6.
6.
Click the Print button or press ALT+P to print Form 16A
ETDS Forms
ETDS Forms enable you to export the eTDS Forms for the specific period. Go to Gateway of Tally > Display > Statutory Reports > ETDS Forms
Format Tally exports the data in SDF format. NSDL’s File Validation Utility (FVU) accepts only .txt files. Set the output filename with .txt extension .
Output File Name Enter a name for the file with .txt extension to be exported. By default the file will be saved as Tally.txt in the Tally folder in your computer. To export to a different folder enter the path in Output File Name. For example,
C:\differentfolder\eTDS.txt).
Person Responsible Details The Person Responsible Details will capture the information provided at the time of Company Creation. But if you wish to modify, press the Backspace key to navigate to any field.
Form Name Select the required Form (Form 26/Form 27/Form 26Q/Form 27Q) from the Form type pop up.
Other Details From (blank for beginning) Enter the From date
To (blank for beginning) Enter the To date
Challan Till Date This field is provided to enter the date of the next quarter/next Year depending on the Quarterly (Form 26Q/Form 27Q) or Annual (Form 26/Form 27) returns. For example, if the Expense booking & TDS (deduction) vouchers are done in the first quarter (5.4.2007) and its payment is done on 7.07.2007, then the From date will be 1.4.2007 , To Date will be 30.6.2007 and Challan Till Date will be 7.07.2007 .
Type type has two options - Regular and Corrected Returns 1.
Regular : Select Regular type if you are filing returns for the first time.
2.
Corrected Returns : Select Corrected Returns type if you have made any corrections from the previous returns.
Is Change in Address of TAN since last Return? If you have changed your company address in company alteration screen since last return, set this option to Yes . Else set it to No . Click on Yes to Export the file (Form 26/Form27/Form 26Q/Form 27Q) from Tally. The exported file will be saved in the defined path specified in the Output file name. You can get the file validated through NSDL freely able utility File Validation Utility (FVU) to whether the e-TDS return file prepared by the deductors conform to the prescribed format. Note: Depending on From and To date, the return annually. For example, 01-04-2005 to 30-6-2005 is 31-3-2006, Yearly.
periodicity the First
is set quarter
as quarterly or and 01-04-2005
to
After preparation of the electronic return, entities have to the electronic return through the latest version of File Validation Utility (FVU) provided by NSDL which can be freely ed from the TIN-NSDL web-site.
To the file in File Validation Utility, you may refer to this link http://www.tinnsdl.com/onlineupproc.asp To view the exported file, open the folder where Tally is installed. The file is created in this folder by default.
Print Form 27A
Form 27A is a physical form with the summary of TDS return (Form 26/Form27/Form 26Q/Form 27Q), which contains control totals of Amount Paid and Income tax deducted at source in addition to other basic details along with CD/Floppy containing the e-TDS return data file. The control totals mentioned on Form 27A should match with the corresponding control totals in e-TDS return file. It should be submitted along with e-TDS returns. Clicking TDS Form 27A provides you with the facility to set the report titles and preview Form 27A . Go to Gateway of Tally > Display > Statutory Reports > TDS Reports > Print Form 27A Use the buttons provided on the Button Bar to set the printing option such as to select the printer, set the number of copies, method, page range, paper type, paper size and print area
Person Responsible Details
The Person Responsible Details will capture the information provided at the time of Company Creation. But if you wish to modify, press the Backspace key to navigate to any field.
Other Details 1.
Enter the From date
2.
Enter the To date
3.
Enter the Challan Date
4.
Select the Form type from the list at the field, Enclosed Form Type
5.
Enter the Previous Receipt No if applicable
6.
Enter the total number of annexure enclosed.
7.
Enter Other Information , if any.
8.
Enter the Place and Date
Click Yes to view Form 27A in print preview mode Click Zoom or press ALT+Z from the print preview screen to display the report as below:
Reconciliation Reports
The Reconciliation reports for TDS are as given below 1.
TDS Challan Reconciliation
2.
Form 16A Reconciliation
Form16A Reconciliation
This Report helps you to record the issue date of Form 16A Go to Gateway of Tally > Display > Books > Ledger 1.
Select the TDS party ledger from the list
2.
Click on F5: Form16A Reconcile button to reconcile Form 16A for the selected TDS party. Enter the Form 16A issue date and accept the screen
2.
Display Reports
To view TDS Statutory Information reports and MIS Reports, click on the links provided below 1.
Statutory Info
2.
MIS Reports
MIS Reports
The MIS Reports provide you with the TDS Outstandings. To view the TDS Outstandings, Go to Gateway of Tally > Display> Statement of s > TDS Outstandings
TDS Computation
To view the TDS Computation report, Go to Gateway of Tally > Display > Statements of s > TDS Outstandings >TDS Computations
1.
The Particulars column provides you with the Name of the Party and its TDS ledger names
2.
Amount Paid/Payable Till Date column displays the total amount of the Bills ed or payment made to the party
3.
The Tax column provides the amount of TDS computed as per the rate specified in the tax column, which is displayed below the TDS amount
4.
Surcharge is the total surcharge value computed as per the rate specified in this column, which is displayed below the Surcharge amount
5.
Addl. Surcharge (Cess) column displays the amount of Education Cess applicable as per the rate specified in this column, which is displayed below the Education Cess amount
6.
Addl. Education Cess column displays the amount of Additional Education Cess @ 1% as computed
7.
Total TDS column displays the total TDS amount including all additional taxes
8.
Less: TDS Deducted Till Date column provides the TDS amount deducted till date
9.
8. 9.
Net TDS to Deduct column displays the TDS amount yet to be deducted from the bills ed or payment made. If TDS is deducted using TDS journal and if the complete amount of TDS due is deducted. This column will not display any balance. Partial amount deducted will display the balance amount of TDS to be deducted in this column
Press F12 or click on the F12: Configure button.
In Show Party TDS PAN Number field enter Yes , to display the party’s PAN number in the report.
Click on the Print button or use ALT+P to print the TDS Computation report. This brings up the Printing TDS Computation configuration sub-form by which the can customise the appearance of the Ledger report. Accept the TDS Computation configuration sub-form to view the TDS Computations report in print preview mode.
If the TDS payment is made to the government then such payment will not be displayed in TDS Computation drill down report.
TDS Payables
TDS Payables report gives you information on the status of TDS payable (pending) amounts for a particular TDS Ledger . Go to Gateway of Tally > Display > Statements of s > TDS Outstanding > TDS Payables The TDS Payables report provides the Outstandings for a Tax ledger s.
Note: If Enter.
you
wish
to
know
more
details
on
the
voucher
drill
down
further
by
pressing
1.
Date : Date of creation as entered in the Payment/Journal/Purchase voucher
2.
Ref No : The payment Reference number
3.
TDS Ledger Name displays the TDS Ledgers created under Duties and Taxes
4.
Pending Amount : The pending amount that needs to paid by your company to the bank/party appears in this column
5.
Due on : The last date for the payment (Due date).
6.
Overdue by days : The number of days ed from the date of payment
Click on the Print button or use ALT+P to print the TDS Payable report. In the Printing TDS Outstanding screen, you can customise the Condensed or Detailed appearance of the TDS Payable by using the Backspace key to navigate to the fields. Accept the sub form to view the report in print preview mode.
TDS Ledger Outstandings
To find out the outstanding status of a particular tax ledger , Go to Gateway of Tally > Display > Statements of s > TDS Outstandings > Ledger Select the Tax ledger created under Duties and Taxes from the List of TDS Ledgers .
1.
The selected Tax L edger name appears at the top left corner of the screen
2.
The date of creation appears in the Date column as entered in the Payment/Journal/Purchase voucher
3.
The payment Reference number appears in the Ref No. column
4.
The Opening Amount appears in the Opening Amount column, if any
5.
The Pending Amount that needs to be paid by your company to the bank/party appears in the Pending Amount column
6.
The last date for the payment appears in the Due on column
7.
The number of days ed from the date of payment appears in the Overdue by days column
TDS Not Deducted
To view the TDS Not Deducted report, Go to Gateway of Tally > Exception Reports >TDS Not Deducted Press F12 or click on F12: Configure button
Set the field Show Party TDS PAN Number to Yes to display the PAN number in the report
This report will display only those transactions, for which TDS is not deducted or partially deducted. This is an exceptional report for non deduction or lesser deduction of TDS for the bills ed or payment made. Click the Print button or use ALT+P to print the TDS Not Deducted report.
Multi-Form16A Printing
Form 16A can be printed for a selected TDS ledger with details of all the parties/suppliers associated with the selected ledger. Go to Gateway of Tally > Multi ing Printing > Multi-Form 16A Printing
1.
Select TDS ledger from the list and enter the From and To date, Place and Date and accept the screen
1.
2.
Click the Print button or press ALT+P to print Multi-Form 16A
TCS Introduction
TCS is the Tax Collected at Source by the seller (collector) from the buyer/ lessee (collectee/ payee). The goods are as specified under section 206C of the Income Tax Act, 1961. If the purchase value of goods is X, the amount payable by the buyer is X+Y, where Y is the value of tax at source. The seller deposits Y (tax collected at source) at any designated branch of banks authorised to receive the payment. The seller, lessor or licensor, is responsible for the collection of tax from the buyer, lessee or licensee. The tax is collected for sale of goods, on transactions, receipt of amount from the buyer in cash or issue of cheque, draft or any other mode, whichever is earlier.
Classification of Seller for TCS
Under TCS, a seller is defined as any of the following:
Central Government
State Government
Any Local Authority
Any Statutory Corporation or Authority
Any Company
Any Partnership Firm
Any Co-operative Society
Any individual/HUF whose total sales or gross receipts exceed the prescribed monetary limits as specified under section 44AB during the previous year
Classification of Buyer for TCS
A buyer is classified as a person who obtains goods or the right to receive goods in any sale, auction, tender or any other mode. The following are not included:
Public Sector Companies
Central Government
State Government
Embassy of High Commission, Consulate and other Trade Representation of a Foreign State
Any Club, such as social clubs, sports clubs and the like
Goods and Transactions classified under TCS
Goods and transactions classified under TCS are listed below:
Alcoholic liquor for human consumption including Indian Made Foreign Liquor (IMFL)
Tendu leaves
Timber obtained under a forest lease
Timber obtained by any mode other than under a forest lease
Any other forest produce not being Timber or Tendu
Scrap (Scrap means waste and scrap from the manufacture or mechanical working of materials which is usable as such because of breakage, cutting up, wear and tear and other reasons)
Licensing or leasing of Parking Lot, Toll Plaza
Mining and quarrying
Note:
The
rate
of
surcharge
is
the
same
as
applicable
to
TDS
Certificate of TCS
The certificate of collection of tax at source has to be submitted in Form No-27D by persons collecting tax at source within a week from the last day of the month in which the tax was collected. If there is more than one certificate to be issued to a buyer for tax collected at source with respect to the period ending September 30 and March 31 in the financial year, then the person collecting the tax on request from the buyer can issue a consolidated certificate within one month from the end of such period. If an issued TCS certificate is lost, the person collecting tax at source may issue a duplicate certificate on plain paper, with necessary details as contained in Form-27D. The Assessing Officer (AO), before giving credit for the tax collected at source on the basis of the duplicate certificate, has to get the payment certified and obtain an Indemnity Bond from the assessee.
TCS Exemptions
TCS can be totally exempted or fixed at a lower rate under some circumstances.
Total Exemption: No TCS Collection A declaration by the buyer in Form Number 27C (in duplicate) has to be made for total exemption. The declaration is if the goods listed are to be used for the purpose of manufacturing or processing and not trading. A copy of the declaration has to be given to the person collecting tax. The person collecting this declaration form has to submit the copy to the authorities concerned on or before the seventh day of the following month.
Lower Rate of TCS The buyer (Collectee) can apply to the Assessing Officer (AO) for a lower rate, using Form No.13, subject to the condition that the AO is convinced that the total income of the buyer (Collectee) justifies the lower rate. The AO may issue a certificate, specifying the rate of collection.
Payment of TCS to the Government
The tax collected is to be paid to the Central Government within one week of the last day of the month in which the tax was collected. This payment is made in any branch of Reserve Bank of India (RBI), State Bank of India (SBI), or any other authorised bank. The payment is made accompanied by income tax challan 281. If the tax is collected on behalf of the Government, then the amount can be paid without the income tax challan.
Electronic TCS (e-TCS)
e-TCS is the filing of TCS returns using electronic media. It is mandatory for corporate and government collectors to furnish TCS returns in electronic form, from financial year 2004-2005. Collectors (other than government and corporates) may file TCS returns in electronic or physical form. NSDL collects the e-TCS returns from the Collectors on behalf of the Income Tax Department.
TCS returns on computer media for e-TCS TCS returns filed using computers should be in TCS specific form formats and must contain all the information, details and particulars specified in such forms. Computer media specifications are as follows (any of these):
CD ROM of capacity 650 MB or more
4mm 2GB/4GB (90M/120M) DAT Cartridge
3.5 Inches, 1.44 MB floppy diskette.
The returns must be accompanied by Form No.27B and verified.
Filing of TCS Returns
TCS returns are to be filed quarterly, in addition to annual returns.
The quarterly returns are to be filed in Form Number 27EQ on or before July 15, October 15 and January 15, respectively for the first three quarters of the financial year. For the last quarter, the returns are to be filed on or before April 30.
Annual returns are to be filed in Form Number 27E on or before June 30 of the following financial year.
TCS in Tally
Tally s TCS and is a simple and easy-to-use feature. The complexities of TCS are handled by Tally making it easier for you to maintain records and file TCS returns. Tally calculates TCS in transactions, where ever applicable. Tally also generates Print and File TCS forms and reports (Statutory and MIS).
Features of TCS in Tally TCS in Tally has the following features:
Simple and easy-to-use.
Maintain TCS records.
Lower/No Collection of TCS and Exemption Limit on Surcharge.
TCS Helper facility to pay TCS.
Print TCS Challan from Tally.
Generate TCS returns automatically from Tally and file.
E-TCS (electronic format) filing facility provided in Tally.
Generate Statutory Reports from Tally: Form 27D, E-TCS filing and Form 27B.
TCS Reconciliation Reports: TCS Challan Reconciliation and Form 27D Reconciliation
TCS Display Reports:
Statutory Masters: Collectee Types and TCS Nature of Goods MIS Reports: TCS Payables and TCS Ledger Outstandings
Enabling TCS in Tally
To enable TCS in Tally: 1.
Go to Gateway of Tally
2.
Press F11 or click F11: Features > Statutory & Taxation to display the Company Operations Alteration screen.
3.
Enter Yes in Enable TCS and Set/Alter TCS Details
4.
Enter the Company TCS Collector Details .
4.
5.
Enter the Tax Assessment Number . The Tax Assessment Number (TAN) is a 10-digit alphanumeric number, issued by the Income Tax Department (ITD) to the collectors.
6.
Enter the Income Tax Circle/Ward (TCS) . This is issued by the Income Tax Department
7.
Select the Collector Type from the List of Company Type .
8.
Enter the Name of person responsible for filing the TCS returns.
9.
Enter the Designation of the person responsible for filing of the TCS returns.
10.
Press Enter and Accept to save.
More: Enabling TDS in Tally
Statutory Info.
TCS Statutory Info. display goods under TCS and Collectee types and related details. Go to Gateway of Tally > Display > Statutory Info.
TCS Nature of Goods
Collectee Types
TCS Nature of Goods
To view TCS Nature of Goods 1.
Go to Gateway of Tally > Display > Statutory Info. > TCS Nature of Goods
2.
Select from the List of TCS Types to display the TCS Nature of Goods Display
Collectee Types
To view Collectee Types 1.
Go to Gateway of Tally > Display > Statutory Info. > Collectee Types
2.
Select from the List of Collectee Types to display the Collectee Type Display
C reating Party Ledgers for Sundry Debtors/ Sundry Creditors
To create Party Ledgers for Sundry Debtors/ Sundry Creditors 1.
Go to Gateway of Tally > s Info > Ledgers > Create
2.
In the Ledger Creation screen, enter the name of the buyer company in the Name field
3.
In the Under field, select Sundry Debtors/Sundry Creditors option from the List of Groups
4.
If required, set Maintain balances bill-by-bill? to Yes . Enter details in the Default Credit Period , if applicable. By default, the Inventory Values are affected? field is set to No
5.
Set Yes for Is TCS Applicable ?
6.
Select from the List of Collectee Types for Buyer/Lessee
7.
Set Yes in Is Lower/No Collection Applicable? if lower or no collection is applicable. Press Enter to display the Lower/No Collection Details screen. The existing Section Number is 206C by default. Enter the TCS Lower Rate (%) and press Enter
8.
Set Yes in Ignore Surcharge Exemption Limit? to ignore the exemption limit for surcharge and calculate
8. surcharge on the amount specified. If Ignore Surcharge Exemption Limit? is set to No , then surcharge is calculated only if the amount is above the exemption limit.
Note: Ignore Surcharge Exemption applicable to categories from the List 9.
Accept Yes to save
Limit? field is of Collectee
displayed in Party Master if Types in B u y e r / L e s s e e field.
C reating Sales Ledgers for TCS
To create ledgers under Sales s group 1.
Go to Gateway of Tally > s Info > Ledgers > Create
2.
Enter a name for the sales ledger in the Name field
3.
In the Under field, select Sales s from the List of Groups
4.
Set the Inventory Values are affected? to Yes if you are maintaining inventory
5.
Accept to save
5.
Creating TCS Ledger under Duties and Taxes
To create a TCS Ledger under Duties and Taxes for TCS on Sales 1.
Go to Gateway of Tally > s Info > Ledgers > Create
2.
In the Ledger Creation screen, enter the name of the TCS ledger in the Name field
3.
In the Under field, select the Duties & Taxes from List of Groups
4.
Select TCS from Types of Duty/Tax in the Type of Duty/Tax field
5.
Select from the List of TCS Types in the Nature of Goods/ Contract/ License/ Lease : field
6.
Set Inventory Values are affected? to No
7.
Accept to save
7.
Creating a Sales Voucher
To create Sales Voucher with TCS details 1.
Go to Gateway of Tally > ing Vouchers > F8: Sales
2.
Select As Invoice mode
3.
Enter the date and reference
4.
Select the Party to be credited from the List of Ledger s and enter Party’s A/c Name
5.
In the Party Details screen, check/ modify details
6.
Select Sales Ledger from the List of Ledger s
7.
Select the item from the List of Items in Name of Item
Note: 9.
To
create
an
Item,
refer
to
the
topic,
Stock
Items
Enter the Quantity and the Rate to get the amount in the Amount field
10.
Select the TCS ledger (Under Duties & Taxes ) for sales
11.
By default, the gross amount is displayed in TCS Details in TCS Computations screen . The gross amount can be changed if required.
12.
Enter new reference (New Ref ) and Due Date, or Credit Days (By default, 7th of the following month).
12.
12.
Select any other expense ledger, if applicable,from the List of Ledger s
13.
Enter narration, if required, and Accept to save
13.
Note: 1. When you create a Credit ( Agst Ref. ) from the List of 2. When you create a Credit applied in the selected bill.
Note TCS
against a Payable .
sales
bill
Note
against
sales
bill,
a
select
the
surcharge
respective
is
tax
considered
bill
as
Creating a Payment Voucher
You can create entries for payment of TCS in a normal payment voucher and manually pay TCS as shown here or you can create a TCS Payment voucher using the TCS Helper button from the button bar. This is an automatic feature which allows payment of TCS for all entries from a TCS ledger.
To create a TCS payment voucher manually 1.
Go to Gateway of Tally > ing Vouchers
2.
In the ing Voucher Creation screen select F5: Payment
3.
Enter the date
4.
Select and debit the TCS Ledger in Particulars from the List of Ledger s and enter the amount
5.
In the Tax Details screen, select from List of TCS Payable and enter the amount
6.
Select and credit the Bank authorised to receive TCS in Particulars from the List of Ledger s and enter the amount
7.
Enter Narration, if required,
8.
Print the TCS Challan , if required,
9.
Accept to save
9.
Creating a Payment Voucher using the TCS Helper button
Create a Payment voucher using the TCS Helper button from the button bar. This is an automatic feature which allows payment of TCS for all entries from a TCS ledger. You can use TCS Helper to pay TCS in one shot. Note: TCS Helper feature is available only P y m t / R c p t / C o n t r a ? from F12: Configure
if Use Single Entry mode for (Voucher Configuration) is set to Y e s .
To create a TCS payment voucher using the TCS Helper button 1.
Go to Gateway of Tally > ing Vouchers
2.
In the ing Voucher Creation screen select F5: Payment
3.
Press [Alt + R] or click the TCS Helper from the button bar to view the TCS Filters screen
4.
Select from the List of TCS Ledgers and enter
5.
Select Buyer/Lessee Status from Deductee/Collectee Status and enter. This lets you prepare separate challans as it is mandatory for different types of Collectees
6.
Enter the To Date to select the period for generation of TCS challan
7.
Enter the date
8.
Select the Bank ledger from the List of Ledger s in
9.
Select the TCS Ledger in Particulars from the List of Ledger s and enter the amount
10.
In the Tax Details screen, select from List of TCS Payable and enter the amount
11.
Enter Narration, if required,
12.
Print the TCS Challan , if required,
13.
Accept to save
12. 13.
Printing TCS Challan
You can print TCS Challans for a TCS payment voucher created manually or created using the TCS Helper button.
To Print a TCS Challan 1.
Press [Alt + P] or click on Print from the button bar in the Payment Voucher screen to view the Voucher Printing screen
2.
Press Backspace to navigate from Print Yes or No? and move the cursor to Print a TCS Challan?
3.
2. 3.
Set Yes for Print a TCS Challan?
4.
Set Yes for TCS Regular Assessment (Raised by I.T. Deptt.): if challans are for submission to the Income tax department
5.
Press Enter and Select Yes to Print
Note:
Use
the
Preview
Print Preview for TCS tax challan
[Alt
+
I]
option
to
preview
the
challan
to
be
printed.
TCS Reports
TCS reports in Tally are extensive. Statutory reports are integrated, making it convenient to print and file reports in government prescribed formats. Additionally, a wide of range reports such as reconciliation reports and display reports are available. These reports provide information at a glance and help in managing TCS issues with ease.
TCS Reports in Tally There are three types of TCS reports in Tally.
Statutory Reports
Reconciliation Reports
Display Reports
Statutory Reports
Statutory Reports are reports required in government prescribed formats for the purpose of filing returns. TCS statutory reports in Tally are dynamically generated. Print and file a report. E-Filing TCS returns is ed using the export feature. There are three types of TCS Statutory Reports.
Print Form 27D
E-TCS Forms
Print Form 27B
To view Statutory Reports 1.
Go to Gateway of Tally > Display > Statutory Reports > TCS Reports
2.
TCS Reports menu displays the following options.
2.
Print Form 27D
Form 27 D can be printed for a party by selecting a party ledger or multiple parties using Multi-form printing.
To print Form 27D 1.
Go to Gateway of Tally > Display > Statutory Reports > TCS Reports > Print Form 27D
2.
Select ledger from the List of TCS Party Ledgers
3.
In the Report Generation screen, press Backspace in the Print? Yes or No dialog box
4.
Select TCS ledger from the List of TCS Ledgers
5.
Enter the From and To date
6.
Enter the period for which the challan is required in Challan Date Till
7.
Enter the Type of Copy
8.
Enter the Certificate No
9.
Enter the Place and Date
10.
Select Yes to print
10.
Note:
Use
the
Preview
Form 27D is displayed as shown.
option
to
view
the
form.
Multi-Form 27D Printing Form 27D can be printed for a TCS ledger with TCS details for all the parties associated with the ledger. 1. 2.
1.
Go to Gateway of Tally > Multi- ing Printing
2.
Set period using Alt + F2
3.
Select on Multi-Form 27D Printing
4.
Press Backspace in Print? Yes or No from the Report Generation screen
5.
Select TCS Ledger
6.
Enter the From and To date, Place and Date of report generation
7.
Accept to Save
8.
Using PgUp and PgDn links to navigate in Print Preview screen
9.
Click Print or press ALT+P for printing multiple Form 27D
E-TCS Forms
To export TCS form for electronic filing 1.
Go to Gateway of Tally > Display > Statutory Reports > TCS Reports > ETCS Forms
2.
Select Restricted (ASCII only) from the language list.
3.
In the Report Generation screen, press Backspace in Export? Yes or No dialog box
4.
The cursor goes to the Output File Name . Enter a file name.
5.
Tally exports the data in SDF format. NSDL’s File Validation Utility (FVU) accepts only .txt files. Set the output filename with .txt extension.
6.
Enter Person Responsible Details
7.
Enter Yes or No for change in address since last return
8.
Enter the From and To date in Other Details
9.
Enter the period for which the challan is required in Challan Date Till
10.
Select the Form Name from Form Types
11.
Enter the Place and Date
12.
Select Type from Types menu
13.
Enter Yes or No for change in address of TAN
14.
Select Yes to export
15.
To view the file open the folder where Tally is installed. The file is created in this folder, by default
15.
Printing Form 27B
To print Form 27B 1.
Go to Gateway of Tally > Display > Statutory Reports > TCS Reports > Print Form 27B
2.
In the Report Generation screen, press Backspace in the Print? Yes or No dialog box
3.
Enter Person Responsible Details
4.
Enter the From and To date in Other Details
5.
Enter the period for which the challan is required in Challan Date Till
6.
Enter the Enclosed Form Type
7.
Enter the Previous Receipt No
8.
Enter the No. of Annexures enclosed
9.
Enter Other Information , if applicable
10.
Enter the Place and Date
11.
Select Yes to print
11.
Note:
Use
the
Form 27B is displayed as shown.
Preview
option
to
view
the
form.
TCS Reconciliation Reports
Reconciliation reports are for TCS challan reconciliation and Form 27D reconciliation. TCS Challan Reconciliation Form 27D Reconciliation
TCS Challan Reconciliation
Reconciliation of Challan Payments to the assigned Bank for TCS is done in the Ledger Voucher report. 1.
Go to Gateway of Tally > Display > s Book > Ledger
2.
Select TCS ledger from the List of Ledgers
3.
Ledger Vouchers report is displayed with a list of receipt/payment vouchers
4.
Click F5: Challan Reconcile or press Alt+F5 to display TCS Challan Reconciliation report
5.
Enter the Bank Challan Number , Challan Date , Cheque/DD Number , Bank Name and BSR Code
6.
Accept to save
6.
N o t e : Use Set Challan Details (Alt +S) button from the Toolbar to reconcile challans at once from the TCS Challan Reconciliation screen for a selected period (Set period in the Ledgers Vouchers screen). Enter the Bank Challan Number, Challan Date, Bank Name and BSR Code. Accept to Save and the details are applicable to the selected vouchers.
Form 27D Reconciliation
Reconciliation of Form 27D TCS for a party is done in the Ledger Voucher report. 1.
Go to Gateway of Tally > Display > s Book > Ledger
2.
Select the Party ledger from the List of Ledgers
3.
Ledger Vouchers report is displayed with a list of the Party’s receipt vouchers
4.
Click on F5: Challan Reconcile or press Ctrl+F5 to display Form 27D Reconciliation report
5.
Enter the date of issue of Form 27D in Form 27D Issue Date
6.
Accept to save
6.
N o t e : Use Set all Dates (Alt + S) button from the Toolbar in Form to set the dates at once for all vouchers displayed for a selected
27 D period.
Reconciliation
Display Reports
Display reports are to view TCS statutory information reports and MIS Reports. The types of display reports are as follows.
Statutory Masters
MIS Reports
MIS Reports
These reports provide information on TCS outstandings.
To view TCS Outstandings 1.
Go to Gateway of Tally > Display > Statements of s > TCS Outstandings
2.
Select from
TCS Payables
Ledger
TCS Payables
To view TCS Payables 1.
Go to Gateway of Tally > Display >Statements of s > TCS Outstandings > TCS Payables
2.
TCS Outstanding screen is displayed.
TCS Ledger Outstandings
To view TCS Ledger Outstandings 1.
Go to Gateway of Tally > Display > Statements of s > TCS Outstandings > Ledger
2.
Select from the List of TCS Ledgers to display the TCS Ledger Outstanding screen.
Introduction
VAT is a system of indirect taxation, which has been introduced in lieu of sales tax. It is the tax paid by the producers, manufacturers, retailers or any other dealer who add value to the goods and that is ultimately ed on to the consumer. VAT has been introduced in India to ensure a fair and uniform system of taxation. It is an efficient, transparent, revenue-neutral, globally acceptable and easy to ister taxation system. It benefits the common man (consumer), businessman and the Government. VAT enhances competitiveness by removing the cascading effect of taxes on goods and makes the levy of tax simple and self-regulatory, ensuring flexibility to generate large revenues. The cascading effect is brought about by the existing structure of taxation where inputs are taxed before a commodity is produced and the output is taxed after it is produced. This causes an unfair double-taxation. However, in VAT, a set-off is given for input tax (tax paid on purchases). This results in the overall tax burden being rationalized and a fall in prices of goods. VAT makes the tax structure simple, hassle-free and export-oriented. The integration of VAT with Tally will help you in the smooth functioning of your business and eliminate the complications that might otherwise arise in VAT.
Concept of VAT
The essence of VAT is in providing set-off for input tax and this is applied through the concept of input credit/rebate. This input credit in relation to any period means setting off the amount of input tax by a ed dealer against the amount of his output tax. Value Added Tax (VAT) is based on the value addition to the goods, and the related VAT liability of the dealer is calculated by deducting the input credit from the tax collected on sales during the payment period. This concept is explained with an example, in the Computation of VAT section. VAT works in two different ways: 1.
If VAT-ed business receives more output tax than the taxes paid as input, they will need to pay the difference to the Commissioner of Taxes (State).
2.
If the input tax paid is more than the output tax collected,
You can carry forward the Input credit and adjust it against the output tax in the subsequent months.
You can have the Input Credit refunded to you by the Government at the end of the current or following year.
You can receive refunds for Input Credit on exports within a period of three months.
General terminologies used in VAT
Term
Description
Input tax
This is a tax paid on purchases
Output tax
This is a tax charged on sales
The amount of Input tax that is permitted to be set off against Output tax. Input Credit
Composite Dealers
Dealers with annual gross turnover not exceeding a certain threshold (threshold decided by the respective State Governments) can opt for a composition scheme whereby they will pay tax as a small percentage of their gross turnover. However, retailers opting for this composition scheme will not be entitled to Input Credit. The State Governments fix the periods and the procedures for the payment of the lump sum.
Justification of VAT
VAT was adopted because the Sales Tax system is complex and induces non-compliance. It has been found to be a hindrance in the economic growth of Industry, State and the Country. This causes a huge loss of revenue to the government. VAT also helps in eliminating the dreaded cascading effect of Tax. For instance, in the existing structure, inputs are taxed before a commodity is produced and the output is taxed after it is produced. This causes an unfair double taxation with cascading effects. However, in VAT, as a set-off is given for input tax as well as tax paid on previous purchases, overall tax burden will be rationalized and prices in general will fall. VAT thus makes the tax system simple and transparent.
Advantages of VAT over Sales Tax
As VAT is a multi-point tax with set-off for tax paid on purchases, it prevents repeated taxation of the same product.
Simple and Transparent: In the Sales tax system the amount of tax levied on the goods at all stages is not known. However, in VAT, the amount of tax would be known at each and every stage of goods sale or purchase.
VAT has the flexibility to generate large and buoyant revenues, as it levies tax on value additions.
Zero rating of tax on exports is possible in case of VAT.
Fair and Equitable: VAT introduces uniform tax rates across the state so that unfair advantage cannot be taken while levying the tax.
Procedure of simplification: Procedures related to filing of returns, payment of tax, furnishing declaration and assessment are simplified under the VAT system so as to minimize any interface between the tax payer and the tax collector.
Ability to provide same revenue to the Government with lower rates of tax.
Tax does not become a cost of doing business.
VAT Rates
According to the White Paper, there are 550 categories of goods under the VAT system. They are classified into the following four groups, depending on the VAT rate:
VAT @ 4% The largest number of goods (270) comprising of basic necessity items such as drugs and medicines, agricultural and industrial inputs, capital goods and declared goods are under 4% VAT rate.
Exempted from VAT There are about 46 commodities under the exempted category. This includes a maximum of 10 commodities that each state would be allowed to select, from a broader approved list for VAT exemption. The exempted commodities include natural and unprocessed products in unorganized sector as well as items, which are legally barred from taxation.
VAT @ 1% This is for a specific category of goods like gold, silver, etc.
[email protected]% The remaining commodities are under the general VAT rate of 12.5%. N o t e : The few goods lottery tickets, petroleum determined. These items respective states.
that are outside VAT as a matter of policy would include liquor, products, as the prices of these items are not fully marketwill continue to be taxed under the sales tax act of the
Computation of VAT and Profit
The above diagram depicts computation of (10 %) VAT at each stage of business. Hence, it is not the manufacturers and retailers but only the consumer who has paid 10% VAT to the government. The profits for
manufacturers and retailers thus remain unaffected.
VAT in Tally
Features of VAT in Tally VAT is completely integrated with Tally. The VAT functionality in Tally s the following features, making it easier for computation:
Quick & easy setup
Fast & error-free voucher entry
Pre-defined list of sales & purchase classifications
Complete tracking of each transaction till annual returns
Printing of Tax invoice
VAT computation report
Better VAT-returns management
Monthly Return
Enabling VAT
Go to Gateway of Tally> s info. > F11: Features > Statutory & Taxation . Set Enable Value Added Tax (VAT) and Set/Alter VAT Details to Yes
On enabling Set/Alter VAT Details to Yes, Tally will prompt with VAT Details Screen.
VAT Details Select the State name. Set Type of Dealer? to Regular Enter the Regular VAT Applicable From date Accept the screen to save.
Note: State
All Classifications Model.
and
Statutory
forms
shown
here
are
based
on
the
Karnataka
Configuring Ledger for VAT Reporting
VAT Classification The VAT Classification is a list of VAT rates, which describes the nature of the Business Activity and the type of transaction. These are in-built in the system and will be updated if and when any statutory changes take place. Some of the VAT classifications are:
Input VAT @ 4%
Input VAT @ 1%
Input VAT @ 12.5%
Output VAT @ 1%
Output VAT @ 4%
Output VAT @ 12.5%
Purchases - Capital Goods
Purchases - Exempt
Purchases from uned dealers
Depending on the type of the business, type of transaction, and the statutory requirements of your State, you will need to select the appropriate classifications from the list during Ledger creations, voucher entries, etc. The Sales and Purchase transactions are segregated based upon the classification selected during voucher entry and shown in the VAT computation. In the VAT Computation you can view the classification-wise VAT and Nett Values.
Ledger Masters The VAT Classification will be displayed as a drop down list in the Ledger Masters. Tally gives the flexibility to the , to either have the classification selected in the Ledger Master tagged to all transactions, Or, select different classifications each time during voucher entries. This is explained in detail in the Vouchers and Transactions section. The Ledgers that are affected by VAT are:
Purchase Ledger
Sales Ledger
Duties and Taxes Ledger
Direct Expenses/Income
Creating a Purchase Ledger for VAT
The following additional fields pertaining to VAT can be seen in the Ledger entry screen. Go to Gateway of Tally > s Info > Ledger > Create/Alter
Used in VAT Return Set this to Yes if you wish to select VAT/Tax class for this Ledger. Note: Tally the Ledger time during
gives the flexibility to the to either have the classification selected in Master tagged to all transactions Or select different classifications each voucher entries. For more details refer Vouchers and Transactions.
The rest of the Ledger creation process is the same as in default Tally.
In the above example we have selected a VAT classification of 4%.
VAT classification - Purchase-Exempt Let us take an example of a VAT exempted transaction below.
Used in VAT Returns Set this to Yes and select Purchases - Exempt from VAT/Tax class for this Ledger.
Accept the screen to save.
Creating a Supplier ledger Create a ledger for the Supplier from whom you are buying the VAT exempted item:
Note: entered
The TIN or Sales in the Ledger.
Tax
number
of
the
creditor
whichever
applicable
needs
to
If VAT is not enabled for your company, the TIN/Sales Tax No. field will be replaced by Sales Tax No. To learn about the actual transaction, refer to Creating Purchase Voucher (As Invoice) for VAT section.
be
Creating a Sales Ledger for VAT
Like in the Purchase Ledger screen, select the required VAT/Tax classification in the Sales Ledger as well. Go to Gateway of Tally > s Info > Ledger > Create/Alter
Used in VAT Return Set this to Yes if you wish to select VAT/Tax class for this Ledger. Note: Tally the Ledger time during
gives the flexibility to the to either have the classification selected in Master tagged to all transactions Or select different classifications each voucher entries. For more details refer Vouchers and Transactions.
The rest of the Ledger creation process is the same as in default Tally.
In the above example we have selected a VAT class of 4%. The rest of the settings are the same as in default Tally.
Creating a VAT Ledger under Duties and Taxes
The ledger for Input VAT is shown below:
Type of Duty/Tax On the selection of group Duties and Taxes, the list of Tax Types CST, others and VAT, is displayed. Select VAT for VAT related transactions. N o t e : If you have V A T and T D S
enabled,
the
list
will
also
include
TDS.
VAT/Tax Class Like in the Purchase and Sales Ledger, this is a drop down list containing the VAT classifications. Select the appropriate classification or select Not Applicable if you wish to select the classifications at the Voucher level.
Percentage of calculation This field will display the VAT rate that you selected in the VAT/Tax class field.
Method of calculation This will display On VAT Rate if you have selected VAT under Type of Duty/Tax.
Output VAT
On selection of CST
Type of Duty/Tax On selection of CST for Type of Duty/Tax , you can select either Inter-State Purchases or Inter-State Sales for Tax Class . Once you select this, you need to manually enter the Percentage of Calculation.
Method of Calculation Once you enter the Percentage of calculation, select the Type of Duty from the drop down list.
Creating a VAT ledger under Direct Expenses/Income
Direct Expenses/Income The VAT/Tax Classification is selected in the same manner as for the Sales and Purchase Ledger screen.
The VAT related fields in the Direct Expense ledger is the same as for Purchase and Sales Ledgers.
The VAT related fields are same for Direct Income Ledger as well.
Vouchers and Transactions
The entire Data entry and Reporting architecture is based upon VAT Classifications selected during voucher entry. The Vouchers that are affected by VAT are as follows:
Purchase
Sales
Debit Note
Credit Note
Journals
Creating a Purchase Voucher (As Invoice) for VAT
Invoice can be classified into As Item Invoice and As s Invoice . The VAT functionality though, is the same for both. Given below are examples of transactions in Item Invoice with implementation of VAT.
As Item Invoice The selection and display of the VAT classifications in the vouchers differ according to the settings in the F12: Configuration screen.
F12: Configuration screen
Use Common Ledger A/c for Item Allocation - NO If you wish to use more than one ledger during a voucher transaction, you have to set this to No . This way, you need to select a ledger for every item during voucher entry. When you set this to No , you can see the VAT/Tax
Class at the header region of the screen if the Yes .
Allow Selection of VAT/Tax Class during entry field is set to
Allow Selection of VAT/Tax Class during entry?-YES Once you select Yes , you have the option to select the VAT classifications in the field VAT/Tax Class which is in header region of the Voucher screen. If it is set to No, the VAT/Tax Class will not be displayed in the voucher screen and the classifications will be taken from the Ledgers. Consider the following examples
Example 1: Purchase@4%
The following is the entry for the purchase of item1 when VAT classification is Purchase @ 4%. This classification is selected from a drop down list at the header region of the screen as shown below.
N o t e : In the VAT/Tax select this option if entry.
Class field, there is an option you need different classifications
called Not for each
Applicable . You can item during voucher
You will need to select the Duties and Taxes ledger after you are done with the entry of all items.
It will now calculate the VAT amount and add it to the Amount to give you the total. F12: Configuration screen
U se Common Ledger A/c for Item Allocation-YES When you wish to use the same Ledger for all items in a transaction, you can set this to Yes . Thus, you need not select a Ledger each time you enter an item during the voucher transaction. The following example to demonstrate the functioning of Assessable Value is shown by setting this field to Yes . Assessable Value : It is the value on which VAT is to be calculated. The value is arrived at after making proper deductions towards Trade discounts if any, and adjustments towards Excise/ED Cess payable. It is up to the to calculate this and enter it under the Assessable Value column. This manual entry gives flexibility to the to make the calculations as per the local statutory requirements. As this example does not include discount or Excise/ED Cess taxes, the Assessable Value will be Rs. 5000, which is retrieved from the Amount column. Let us assume we have:
A discount of Rs.200 on purchases
Excise tax of Rs.800 (16% of 5000)
ED Cess of Rs.16 (2% of 800)
1. Subtracting the discount amount: 5000 -200 = 4800 2. Adding the Excise tax amount : 4800+800= 5600 3. Adding the ED Cess amount : 5600+16= 5616 Therefore, our Assessable Value amount is Rs.5616. VAT is now calculated on this amount automatically on the selection of the tax ledger (Rs.224), as shown below.
The entries are to be ed similarly for Sales Voucher and Credit/Debit notes.
Example 2: Purchase-Exempt
This example is to demonstrate the working of Tally in the VAT exempted transactions and also to show the type and patterns of reports generated for such transactions. We are ing the following entry for the purchase of the VAT exempted item.
As it is exempt from VAT, this particular transaction does not affect the VAT amount in any way. Similarly for Inter-state Sales/Purchases . N o t e : In the Voucher mode the header region. Therefore, always.
there is no option for selection the VAT classification selected
of in
the the
VAT classification at Ledgers will apply
Creating a Sales Vouchers (As Invoice) for VAT
Functionality of Sales Voucher is similar to that explained in the Purchase Voucher. understand the calculation of VAT, let us take the following example:
Assessable Value: The calculation is similar to that explained in Purchase voucher.
Printing Configuration The Printing Configuration screen after the addition of new features will appear as follows:
However, in order to
Tax Invoice You will see the following new sections pertaining to VAT in the Invoice:
Title of Document This field prints the title entered in the Voucher Type Master .
E-mail The e-mail address of your Company (as specified in the Company Master) will also be printed in the Sales Invoice, just below the address.
VAT % This column can be enabled by setting Print VAT % to Yes in the Printing Configuration screen. The rate of VAT from the VAT classification selected during voucher entry is printed in this column.
VAT Analysis This field prints the VAT amount on the total Net Value. That is, Rate of VAT, Assessable Value and VAT Amount is printed at the bottom right of the screen.
V AT Amount (In words)
Prints the VAT amount in words.
Company's TIN/LST No. Prints the Company's TIN or LST number.
Company's CST No. Prints the CST number entered in the Company master.
Buyer's TIN/Sales Tax No. Prints the buyer's TIN or Sales Tax number, as the case may be.
Date & Time The field Print Date & Time in the Printing Configuration screen needs to be set to Yes in order to print the date. However, in case Excise details are enabled the Date & Time is printed regardless of the setting in the Printing Configuration screen.
Declaration The declaration entered in the Sales Voucher type Master will be printed. If it is not entered in the Sales Voucher type, Tally will print the following line by default: "We declare that this invoice shows the actual price of the goods described and that all particulars are true and correct". If you do not require this, you can set Print declaration to No in the Printing Configuration screen shown above.
Generated by By default the Generated by field will display This is a Computer Generated Invoice . However, you can change it if required. This is printed at the bottom of the Invoice.
Copies of the Invoice For five or more copies of the Invoice, each copy will be marked as follows: Original - Original Buyer's Copy Duplicate - Duplicate Seller's Copy Triplicate - Triplicate Transporter's Copy Quadraplicate - Extra copy Fifth and above - Extra Copy
Creating / Altering Sales Voucher Type Master for VAT
New Fields The following are the new fields added in the Sales Voucher Type Master. Go to Gateway of Tally > s Info > Voucher Types > Alter
Default Print Title You can set the title for the Tax Invoice in the Default Print Title field. This is helpful since you need not change the title in Print Configuration each time you use different voucher types. For example, you can set it as Tax Invoice for Local Sales and Bill of Sale for Retail Invoice.
Is Tax Invoice If Is Tax Invoice is set to Yes and the number of copies to be printed is more than one then the copy type is printed as follows: 1.Original – Buyer’s Copy 2. Duplicate – Seller’s Copy 3. Triplicate – Transporter’s Copy 4. Quadruplicate – Extra Copy 5. Extra Copy If Is Tax Invoice is set to No , and the number of copies to be printed is more than one, then the copy type is printed as follows: 1. Original 2. Duplicate 3. Triplicate 4. Quadruplicate – Extra Copy 5. Extra copy
Declaration Provision is made to enter the Statutory declaration if applicable. The same will be printed in the Tax Invoice.
Note: printed
If in
the declaration the Invoice.
field
is
left
blank,
Tally's
default
declaration
will
get
Voucher Class Given here is an example of how a Tax Invoice having items with multiple tax rates can be generated using Voucher Class. If you press Enter on Name of Class in the screen displayed above you will see the following screen: You can make the entries as required.
Override using Item default It is possible to enter a Tax Invoice having multiple items with different VAT Rates. Item default refers to the Sales Ledger that you may have set for a stock item. If you set Override using Item default to Yes and specify a Sales Ledger in the Class Table the sales Ledgers set in the item masters will still be considered.
Setting Sales Ledger in the Item Master Consider the Item Masters shown below:
Set Set/Modify Default Ledgers for Invoicing to Yes . The following screen displays.
If you do not see the field Set/Modify Default Ledgers in the Item Master, 1.
Go to Gateway of Tally > F12: Configuration > Accts/Inv Info
2.
Set Specify Default Ledger Allocation for Invoicing to Yes
1.
2.
Using the Sales Class in a Sales Invoice 1.
Go to Gateway of Tally > ing Vouchers
2.
Select F8: Sales Invoice
3.
Select the Voucher Class Sales Class and make the entries
When entering Sales Invoices with the Voucher class, note that you will not be able to edit Assessable Value Field. If you have an additional ledger say, Discount Ledger there is a facility to edit the Assessable Value manually in the sub screen that pops up when you press Enter on the Output VAT Ledgers. In the above example, the discount has been deducted from the assessable value.
Payment of VAT in Tally
The Journal and Payment Voucher entries for the payment of VAT can be demonstrated with the example shown below.
As shown in the screen above, the Output Tax is Rs.700.00 and Input Tax is Rs.424.64. The VAT payable is Rs.275.36.
Journal entry
Note:
The
Payment Voucher Entry
VAT
payable
Ledger
is
under
the
group
Duties
and
Taxes.
The VAT payable Rs.275.36 is transferred to the Cash or Bank .
Creating Debit Note / Credit Note for VAT
Purchase Returns - Debit Note This is a Purchase Returns entry and you have to use the Debit Note Voucher.
Sales Returns - Credit Note Let us take the example of a Sales Return. Here you have to use the Credit Note voucher.
Creating a Journal Voucher for VAT
If you need the Journal transactions for VAT Computation (for example, adjustment of Input credit, output tax, etc) you will need to make the following settings: Go to Gateway of Tally > s Info > Voucher type > Create/Alter The following screen is displayed
Name of Class You have to name the voucher class. In the above example, we have named it as VAT Adjustment Class. Once you press Enter , the following screen is displayed.
Use Class for VAT Adjustments Enable the option Use Class for VAT Adjustments to Yes , if you want the journal entries to be included in VAT Computation.
Journal Entries Let us consider a Purchase transaction and then a reverse entry for adjustment of Input credit. The following screen displays a typical Purchase Transaction.
Typical Purchase transaction
Reversal of Input Credit 1.
Go to Journal voucher screen by selecting the button F7: Journal from the button bar, which is on the right side of the screen or by pressing the F7 key.
2.
You will see the following screen where you need to select the Voucher class created before.
3.
Once you select this you can the typical reversal entry as displayed below.
3.
Once you have selected this, you can the typical reversal entry as shown below:
VAT Computation Report The VAT Computation report will be displayed as shown below.
N o t e : Rs.50 claimed.
of
the
Input
credit
is
reversed
and
only
the
balance
of
Rs.
50
can
be
Input Credit Adjustment for Capital Goods
Input Credit for capital goods is available over a maximum period of 36 monthly installments (States have the option to reduce the number of installments). The entry for the Purchase of Capital Goods is the same as in default Tally. Let us consider the following example for the adjustment of the Input credit. Purchase of Capital Goods for Rs. 5,00,000. The Input Credit is Rs. 20,000, which will be available over a period of 36 monthly installments. That is, (20,000/36) = 555.56 Hence, Rs. 555.56 can be claimed in the first installment as Input credit. The Journal entry for this is ed as shown below.
The Drill down report will be displayed as follows.
Further Drill down report will be displayed as follows:
Input Credit Adjustment for Opening Stock
Sales Tax paid on unsold stock at the end of financial year, i.e. prior to commencement of VAT, is eligible to receive input credit on submission of the required documents by the dealer. For this, a claim is to be made to the VAT/ sub-VAT officer within 30 days of implementation of the Act. Once the assessing officer verifies it, the credit may be adjusted or refunded in equal installments over six months.
Journal Entries In order to write off the Sales Tax incurred on closing stock in the next financial year, it is necessary to eliminate the tax charge from the stock value of the current year. Assuming the local purchases amount to Rs. 57 000 where Purchases @ 4% and Purchases @ 12.5% are Rs. 20 000 and Rs. 37 500 respectively, the transaction can be journalized as follows, selecting VAT Adjustment Class. (For more details on VAT adjustment class refer Journal )
Debit the Current Assets Tax Recoverable A/c and credit the purchase s. Following the grant of relief by the Assessing officer, you can a journal entry every month in the next financial (VAT) year, to adjust the sales tax paid in the previous year. To claim the installment credit at the end of each month, a journal entry upon selecting VAT Adjustment Class .
The amount of Rs. 57 500 is broken into six equal installments of Rs.9 583.33 and claimed at the end of each month.
Enabling MRP Feature
To enable the Maximum Retail Price (MRP) feature in Tally, 1. Go to Gateway of Tally > F12: Configure > Accts/Inv Info 2. Set the option Calculate VAT on MRP/Marginal to Yes
MRP in Stock Item Master Once MRP is enabled, two new fields, MRP and MRP Incl. of VAT will appear in the Stock Item Master Creation/Alteration. If MRP is inclusive of VAT, enter the MRP value in the MRP field and select Yes in the MRP Incl. of VAT field.
Single Stock Item Creation
Multiple Stock Item Creation
Creating Sales Invoice for VAT on MRP
Given below are few examples to show the calculation of VAT based on MRP (inclusive and non-inclusive of taxes).
VAT Rate 4% MRP Inclusive of Tax Consider the sale of Item 1 , which attracts 4% VAT:
Item Name Item 1
Item Vatable @ % 4.0
MRP Incl. of Tax Yes
VAT %
MRP
QTY
3.85
200
10
VAT On
VAT Amount
2000
76.92
Calculations: 1. As MRP is inclusive of Tax, the actual VAT% is calculated as (100*Rate of VAT)/ (100+Rate of VAT) 2. VAT amount = (VAT % * VAT On )/100. 3. VAT On = MRP * Qty
MRP not Inclusive of Tax Consider the sale of Item 2 , which also attracts 4% VAT:
Item Name Item 2
Item Vatable @ % 4.0
MRP Incl. of Tax No
VAT %
MRP
QTY
VAT On
VAT Amount
4
115
10
1150
46
As MRP is not inclusive of tax, VAT is calculated on MRP as (MRP * QTY)/100.
VAT Rate 12.5% MRP Inclusive of Tax Consider sale of Item 3 , which attracts 12.5% VAT:
Item Name Item 3
Item Vatable @ % 12.5.%
MRP Incl. of Tax Yes
VAT %
MRP
QTY
VAT On
VAT Amount
11.11
55
10
550
61.11
Calculations: 1. As MRP is inclusive of Tax, the actual VAT% is calculated as (100*Rate of VAT)/ (100+Rate of VAT) 2. VAT amount = (VAT % * VAT On )/100.
3. VAT On = MRP * Qty .
MRP not Inclusive of Tax Consider the sale of Item 4 , which also attracts 12.5% VAT.
Item Name Item 4
Item Vatable @ % 12.5
MRP Incl. of Tax No
VAT %
MRP
QTY
VAT On
VAT Amount
12.5
215
10
1075
268.75
As MRP is not inclusive of tax, VAT is calculated on MRP as (MRP * QTY )/100.
Sales Invoice Entry
Calculate VAT on MRP/Marginal Price for Actual and Billed Quantity If the option Calculate VAT on MRP/Marginal is activated in F12: Configure while creating Stock Item Masters, VAT is calculated automatically as follows:
Percentage of VAT (MRP x Actual Quantity)
If it is not enabled i.e. MRP=0, VAT is calculated automatically as follows: Percentage of VAT (MRP x Billed Quantity) This is in the case when Use Actual & Billed Qty is set to Yes in the F11: Features screen.
Creating Purchase Invoice for VAT on MRP
All calculations are the same as explained in the Sales Invoice .
Tax Invoice with MRP details
Printing Configuration A new field is included in the Printing Configuration screen called Print MRP/Marginal Column . Set to Yes in order to have the MRP printed on the Invoice.
The Tax Invoice for the transaction shown:
N o t e : The VAT amount
VAT Computation screen as in the default case.
will
show
the
original
Assessable
value
and
the
VAT Reports
As per VAT Act, every ed dealer is required to maintain proper Books of s and records for all sale, purchase and production. And also VAT -containing details of Input and Output tax.
VAT Reports in Tally VAT reports in Tally
Statutory Reports
Sales
Sales reports provides complete information on sales turnover achieved for a specific period. To view the Sales screen Go to Gateway of Tally > Display > Books > Sales Click on Columnar button or press the F5 key to re-define the columns and set the required parameters of reports, ledgers or groups to be shown individually or in a common column.
Set Show Partys' Tax Regn. No . to Yes. The Columnar Sales displays as below:
TIN/Sales Tax No. The TIN Or the Sales Tax No. (Central or Local) of the Party is displayed here. As there is only a need to enter either the TIN or the Sales Tax No.(Central or Local) at any point of the transaction, and not both, one single field serves the purpose for all transactions (with or without VAT) . Thus, the TIN or Sales Tax number, whichever applicable, is entered in the TIN/Sales Tax No. (Central or Local) field in the Party Ledger Master. This is picked up in the Tax Invoice and displayed as shown above in the Sales Columnar . If VAT is not enabled for your company, the TIN/Sales Tax No . column will be replaced by Sales Tax No .
Statutory Reports
Statutory Reports are reports required in government prescribed formats for the purpose of filing . VAT statutory reports in Tally generates and prints state specific monthly, quarterly or annual VAT Returns. There are two types of VAT Statutory Reports.
Vat Computation
VAT Forms
To view Statutory Reports 1.
Go to Gateway of Tally > Display > Statutory Reports > VAT Reports
1.
VAT Reports menu displays the following options
1.
Important: A stat.900 file containing updated statutory VAT Return forms and amendments made as and when by the respective states, is ed on the Tally website. The same can be ed for immediate access.
VAT Computation
VAT Computation report displays various types of Input VAT Tax and Output VAT tax ledgers employed and transacted during voucher entry. Tally provides a clear-cut presentation on how VAT is computed for a given period. It also provides a bird's eye view of all transaction related to VAT.
To view the VAT Computation report Go to Gateway of Tally > Display > Statutory Reports > VAT Reports > VAT Computation . VAT Calculations Let us consider the following that we made, for VAT Computation: 1. Purchased from Creditor-1, 100 quantities of item1 at the rate of Rs.50 each. The Input VAT@4% for this amount is Rs.200. 2. Purchased from Creditor, 100 quantities of item2 at the rate of Rs.50 each. However we applied a discount of Rs.200 here. Also, Excise tax of Rs.800 and Educational Cess of Rs.16 were levied on this. Therefore we applied the InputVAT@4% on the Assessable value of Rs.5616, which is Rs.224.64. Therefore total Input VAT = Rs.200 + Rs.224.64 = Rs.424.64 3. Sale of 50 quantities of [email protected] to Debtor-1 . OutputVAT@4% = Rs.600. 4. Sale of 100 quantities of item @ Rs.100 each. Output VAT@1%= 100 Therefore total Output VAT = Rs.600 + Rs.100 = Rs. 700 Therefore VAT Payable-> Output VAT - Input VAT = Rs.275.36 This is calculated automatically by Tally and the VAT Computation screen will be displayed as shown below.
The Reports for the two Purchases and one Sales transaction is shown below respectively:
For VAT exempted or zero rated transactions If you have transactions that are exempted from VAT but however want to have it displayed in the VAT Computation screen, you have to click on the F12: Configure button and set the Show all VAT classifications to Yes .
For example, in the case of Inter-State Sales, the Tax Amount column will show as NIL in the Computation screen.
Learn the effect of Purchase and Sales returns transactions in the VAT Computation and VAT Reports Screens
VAT Computation after Purchase/Sales returns
The following example is demonstrated assuming that you have gone through the VAT Computation section .
Purchase Returns - Debit Note Let us consider the following Purchase Returns entry:
Once this is done, the VAT Computation is displayed as shown below.
In the Purchases section, Rs. 500 is reduced from the Assessable Value and Rs. 20 is reduced from the Tax amount (while comparing with the VAT Computation before Purchase Returns). Therefore the VAT Payable is now Rs. 295.36 The VAT Computation Report will now show as follows:
Sales Returns - Credit Note Let us take the example of a Sales Return.
The VAT Computation screen will now show as follows:
The Assessable Value under Sales has reduced from Rs. 25,000 to Rs. 23,500 and the Tax Amount to Rs. 640.00. This will show in the Reports as follows:
has reduced
Therefore the VAT Computation and Reports are updated automatically as you the entries. Back to VAT Computation
VAT Forms
The VAT Forms Report is a statutory report. This report displays the VAT Return Form in the government prescribed format.
To view the VAT Forms 1. Go to Gateway of Tally > Display > Statutory Reports > VAT Reports >VAT Forms 2. Use the keys Alt + P key or click on Print option to print your report. This will display the VAT Return Form screen. Example: Under Karnataka VAT laws, Form No. 100 is the statutory form used for filing monthly returns by a ed dealer. Form No.100 contains different columns and indicate the turnover at different rates and the taxes applicable to them as per VAT definitions. Explanation on each column (i.e. Box)
Additional information: For explanation on each column in the VAT Form (i.e. Box), Refer to Statutory Help which is available at www.tallysolutions.com
Introduction
Value Added Tax (VAT) is an indirect tax on goods, introduced in lieu of sales tax, to ensure transparency and greater compliance. The basic premise of VAT is to tax the “true value” added to the goods, at each stage of the transaction chain. This ultimately reduces: 1. Tax paid to the government. 2. Cost/tax ed onto the consumer.
VAT is a multi-point tax as against sales tax, which is a single-point tax. VAT removes the cascading effect of tax on tax, by allowing a set off for input tax, i.e. tax paid at earlier stage on purchases. It is an efficient, globally acceptable and easy to ister taxation system.
VAT Composition In order to relieve some small businesses of the need to keep detailed records, the law has made provision for a simpler method of ing for VAT. The method of calculating, VAT payable is also made easier. Such a method is called a VAT Composition Returns. The VAT Composition Returns states that “Small dealers with an annual gross turnover not exceeding 5 to 50 lakhs and subject to respective state act and rules, who are otherwise liable to pay VAT, shall however have the option for a composition scheme with payment of tax at a small percentage of gross turnover. The dealers opting for this composition scheme will not be entitled to input tax credit.” This scheme is a special method of determining the tax liability for specified dealers whose turnover in the year before April 1, 2005 or in the current year exceeds Rs. 5 lakhs but does not exceed Rs.50 lakhs and subject to respective state act and rules.
Types of Dealers
There are two types of Dealers. ed Dealers Uned Dealers
ed Dealers A dealer whose gross annual turnover is above the VAT threshold limit is required to under VAT. This is mandatory. A new dealer will be allowed 30 days time from the date of liability to get ed. A VAT ed dealer will be eligible for input tax credit. All ed Dealers must follow the VAT law, irrespective of the size of the business. A ed Dealer may sell to both Consumers and Non- Consumers. A ed dealer can opt for compositions scheme.
Uned Dealers A dealer whose annual turnover is less than Rs.5 lakhs is an Uned Dealer and has been granted the status of a Consumer. So, the VAT paid by an Uned Dealer is treated as his cost and is charged no further VAT on his sale. It is assumed that such small dealers will not be supplying other industries or dealers. Therefore they are not included into the VAT chain. But if the small dealer is in the business of actually supplying to others besides consumers, then he can optionally choose to and gain the benefits of a ed Dealer. The ed dealer pays VAT on goods purchased from uned dealer.
Criteria for Registration under VAT Composition Returns
Dealers eligible to be ed under VAT Composition Returns The VAT Composition Returns is available to Dealers who: Resell goods in retail Run a Restaurant, Eating house, Club, Hotel (Other than Star Hotels), Refreshment rooms or Boarding Establishments Cater and serve food with non-alcoholic drinks Run Bakeries Dealers in second hand motor vehicles Engage in executing works contracts
The rate of tax payable under VAT Composition Returns for small dealers and other category of dealers is different. N o t e: Dealers who make Inter-state purchases are not eligible for the VAT Composition R e t u r n s scheme. This provision applies to VAT implied in most of the states.
Dealers not eligible to be ed under VAT Composition Returns The VAT Composition Returns is not available to: Manufacturers Importers Dealers who purchase any goods from a ed dealer on high seas basis Dealers who sell in retail Foreign Liquor and Country Liquor Dealers who sell in retail Drugs covered by Entry C-29 Dealers who sell in retail notified Motor Spirits
Procedure for Opting VAT Composition
1.
A Dealer, who is applying for a new VAT registration can opt to the Vat Composition Returns by indicating the same in the appropriate box of the Application form.
2.
A Dealer, who is already ed under VAT, can opt to the VAT Composition Returns scheme, by submitting the duly completed prescribed Form to the jurisdictional VAT officer.
Restrictions: If you have selected to pay Tax under the VAT Composition Returns scheme: You will not be allowed to claim any credits for input tax paid on your purchases You will not be entitled to issue any tax invoices You will not be allowed to charge and collect tax from your customers You have to retain tax invoices and retail invoices for all purchases
Filing VAT Composition Returns
The periodicity to file Composition Returns for small dealers and other category of dealers is different. Small traders in some states are required to file the returns on quarterly basis as prescribed under the Karnataka VAT Rules and in some other states like Maharashtra they are required to file the returns half yearly. For other category of composition dealer’s, returns are required to be filed monthly. However, some states have again linked this obligation of filing return based on their tax liability.
Advantages of VAT Composition Returns The Dealers ed under VAT Composition Returns need not issue Tax Invoice under the VAT Act. The Dealers under VAT Composition Returns are required to pay flat rate of tax on their turnover. Any dealer can opt for this scheme after doing the Cost Benefit Analysis under the VAT Composition Returns as well as the regular scheme of VAT if he is eligible for the scheme. VAT Composition Returns is very simple.
Disadvantages of VAT Composition Returns It is not possible to claim set off of any VAT paid on purchases Tax invoices cannot be issued to customers.
Enabling VAT Returns
Company Creation To create a company, provide basic information about the company whose books of s are to be maintained in Tally Go to Gateway of Tally > Alt + F3 > Create Company
State Select West Bengal from the List of States.
Enabling VAT Composition Returns
Go to Gateway of Tally> s info. > F11: Features > Statutory and Taxation. Set Enable Value Added Tax (VAT) and Set/Alter VAT Details to Yes
On enabling Set/Alter VAT Details to Yes, Tally will prompt with VAT Details Screen.
VAT Details
Select the State name.
Set Type of Dealer? to Composition and enter the Composition Scheme Applicable From date
Enter the applicable Tax Information detail in the Statutory and Taxation Screen
Accept to Save the changes
Note: State
All Classifications Model.
and
Statutory
forms
shown
here
are
based
on
the
West
Bengal
Creating a Customer ledger
To create a Party ledger , 1.
Go to Gateway of Tally > s Info > Ledger > Create
2.
Enter the Name of the party ledger you wish to create.
3.
Select the group under which you are creating the party ledger.
4.
Enable Maintain balance bill-by-bill? to Yes , enter details in the Default Credit Period if applicable. By default the Inventory Values are affected ? field is set to No .
5.
Enter the Mailing Details and Tax Information
6.
Accept to save .
6.
Creating a Supplier Ledger
Creating a Supplier ledger is similar to creating the Party/Customer Ledger but it should be created under Sundry Creditors.
Creating a Tax Ledger
To create a Tax Ledger Master, 1.
Go to Gateway of Tally > s Info > Ledger > Create
2.
Enter the Name of the Tax ledger you wish to create.
3.
Select the group Duties and Taxes from the list in the field Under.
4.
On the selection of group Duties and Taxes , you will get the option to select Type of Duty/Tax . Select Others from the list.
5.
Accept to save the changes.
5.
Creating a Sales Ledger
To create a Sales Ledger, 1.
Go to Gateway of Tally > s Info > Ledger > Create
2.
Enter the Name of the sales ledger you wish to create.
3.
Select the group under which you are creating the sales ledger .
4.
Set the option Used in VAT Returns to Yes , if you want to select VAT classifications for this Ledger.
5.
Once you set this to Yes , Tally prompts with VAT/Tax Class screen.
6.
Select the required classification from the drop down list under the field VAT/Tax Class . The drop down list consists of the Sales classifications pertaining to West Bengal state. If you do not wish to select a classification at the Ledger level , select Not Applicable .
Creating an Expense Ledger
To create an Expense ledger,
1. Go to Gateway of Tally > s Info > Ledger > Create 2. Enter the Name of the expense ledger you wish to create 3. Select the group under which you are creating the expense ledger 4. Accept to save the changes
Creating a TDS Ledger
To create an Expense ledger, 1.
Go to Gateway of Tally > s Info > Ledger > Create
2.
Enter the Name of the TDS ledger you wish to create
3.
Select the Group under which you are creating the TDS ledger
4.
Accept to save the changes
Create/Alter a Voucher Type
To create/Alter a Voucher Type, e.g. Journal 1.
Go to s Info. > Voucher Types > Create/Alter > Journal
2.
In the Voucher Type Alteration Screen, Type the Name of Class e.g. VAT Adjustment .
Set Use Class for VAT Adjustments to Yes and accept the screen.
Creating a Purchase Voucher
To create a Purchase Voucher, 1.
Go to Gateway of Tally > ing Vouchers > F9: Purchases
2.
Select As Invoice .
3.
Enter the Reference in the Ref field , if required.
4.
Select the Party’s A/c Name from the List of Ledger s.
5.
Select the required VAT/Tax Class from the drop down list.
6.
Select the Name of Item from the List of Items
7.
Enter the Quantity and Rate . The amount is automatically displayed in the Amount field.
8.
Enter Narration , if required.
9.
Accept to save the voucher.
Similarly you can create Purchases Vouchers for Purchases from URDs- Exempt goods (Composition) , Purchases from URDs- MRP Bases (Composition) , Purchases from URDs- Taxable goods (Composition) , Purchases- Taxable Goods (Composition) and Purchases- MRP Based (Composition) .
Creating a Sales Voucher
To create a Sales Voucher, 1.
Go to Gateway of Tally > ing Vouchers > F8: Sales
2.
Select As Invoice .
3.
Enter the Reference in the Ref field, if required.
4.
Select the Party’s A/c Name from the List of Ledger s.
5.
Select the required VAT/Tax Class from the drop down list.
6.
Select the Name of Item from the List of Items
7.
Enter the Quantity and Rate . The amount is automatically displayed in the Amount field.
8.
Enter Narration , if required.
9.
Accept to save the voucher
Similarly you can create Sales Vouchers for Sales-MRP Based (Composition) and Works ContractComposition Tax @ 0.25%.
Creating a Sales Return Voucher
To create a Sales Voucher, 1.
Go to Gateway of Tally > ing Vouchers > F8: Sales
2.
Select As Voucher .
3.
Enter the Reference in the Ref field , if required.
4.
Select the Party’s A/c Name from the List of Ledger s .
5.
Select Return of Taxable Goods in the Used for field
6.
Select the required VAT/Tax Class from the drop down list.
6.
6.
Select the Name of Item from the List of Items
7.
Enter the Quantity and Rate . The amount is automatically displayed in the Amount field.
8.
Enter Narration , if required.
9.
Accept to save the voucher.
Creating a Journal Voucher
To create a Journal entry using a Voucher Class , 1.
Go to Gateway of Tally > ing Vouchers > F7: Journal
2.
Select the class as VAT Adjustment from the list Class Table.
3.
Select the required flag from the VAT Composition Adjustments list under the field Used For.
Advance Tax Paid 1.
Select VAT Adjustment Class as the Voucher Class
2.
Select Advance Tax Paid in Used for field
2.
3.
Debit Composite Tax created under Duties and taxes (Type of duty – Others ) from the List of Ledger s
4.
Select the Ledger Advance Tax Paid created under Current Liabilities to be Credited
5.
The Amount is automatically entered
6.
Enter Narration if required
7.
Accept to save the voucher
Interest Payable 1.
Select the Voucher Type as VAT Adjustment Class from the Voucher Class list.
1.
2.
Select Interest Payable Under Section 33 in Used for field
3.
Debit Interest created under Indirect Expenses
4.
Select the Ledger Interest Payable created under Current Liabilities to be Credited.
5.
The Amount is automatically entered
6.
Enter Narration if required
7.
Accept to save the voucher.
TDS Adjustment 1. 2. 3.
Select VAT Adjustment Class as the Voucher Class
1. 2.
Select TDS Adjustment in Used for field
3.
Debit Total Tax Payable created under Duties and Taxes (Type of duty – Others ) from the List of Ledger s
4.
Select the Ledger Tax Deducted at Source created under Current Liabilities to be Credited
5.
The Amount is automatically entered
6.
Enter Narration if required
7.
Accept to save the voucher
Purchase Tax Adjustments 1. 2.
Select VAT Adjustment Class as the Voucher Class
1. 2.
Select Purchase Tax Adjustment in Used for field
3.
Debit Purchase Tax Expenses created under Direct Expenses
4.
Select the Ledger Purchases Tax Payable created under Duties and Taxes to be Credited
5.
The Amount is automatically entered
6.
Enter Narration if required
7.
Accept to save the voucher
VAT Returns Reports
To view the VAT Composition Reports, Go to Gateway of Tally > Display > Statutory Reports
VAT Returns Computation Reports
Go to Gateway of Tally > Display > Statutory Reports>VAT Composition Reports VAT Composition Reports menu displays the following options.
VAT Composition Computation The VAT Composition Computation screen displays as shown below.
Assessable Value The Assessable Value is the total value of the transactions made with the respective VAT/Tax Classification. Rate (%) The percentage rate of tax is displayed here. Tax Amount The rate of percentage value of the Assessable Value is the Tax Amount. VAT Composition Forms The VAT Composition Form for Delhi is displayed in the government prescribed format. Use Alt + P or click on Print option to print your report.
Show all VAT Classifications Enable the option Show all VAT Classifications? to Yes in F12: Configure
The computation screen displays as shown below.
VAT Composition Form
Go to Gateway of Tally > Display > Statutory Reports > VAT Composition Reports > VAT Composition Forms
VAT Composition Forms The VAT Composition Forms option will display the Report Generation screen as shown below.
The form displays as shown below.
RETURN FORM-15
The West Bengal Value Added Tax Rules 2005 Section A (General Information) Return Period The Return Period is the period specified while giving printing command.
Registration No The VAT TIN (Composition) as entered in F11: Features > F3: Statutory and Taxation> Tax Information screen is displayed here.
Name and Style of Business This Field appears as entered in the Company Creation screen is displayed here.
Address of the principal place of Business The Address of the Dealer as entered in the Company Creation screen is displayed here. Section B: (Statement of Sales)
1. Aggregate of Sales Price [Section 2(41)] The gross sales turnover (Total Sales less Works Contract) is displayed in this box.
2. Sales Price of goods tax on which has been paid on the maximum retail price at the time of purchase This Total sales transaction made using the VAT/Tax Class Sales MRP Based (Composition) less Sales Returns is displayed in this column.
3. Sales Return within six months from the date of sale The Sales Return Transaction made using the VAT Composition Adjustment Return of Taxable Goods is displayed in this column.
4. Turnover of Sales (01-02-03) [Section 2(55)] The Total of (Box 01 –02- 03) is displayed in this column.
5. Tax Payable under sub section (3) of section 16 @ 0.25 per centum on 04. The Sales Tax amount paid on Total Sales Turnover at 0.25% is printed in this Box. Section C:
(Works Contract)
6. Contractual transfer price (Total amount received or receivable during the period for execution of works contract. The Sales Transaction made using the VAT/Tax Class Works Contract –Composition Tax at 0.25% is displayed in this column
7. Number of Tax invoices raised This field is blank and entered manually.
8. Tax Payable under sub section (4) of section 18 @ 0.25 per centum on 06 The Sales Tax amount paid on Works Contract Composition Tax at 0.25% is printed in this Box. Section D: (Statement of Purchase)
9. Aggregate of Purchase Price [Section 2(35)] The Total Purchase turnover [Box 10 (a +b)] is displayed in this Box.
10. Break up of Purchase Price (a) Purchases made from ed dealers in West Bengal. (i) on goods on which tax has been paid on maximum retail price The Purchase Transaction made using the VAT/Tax Class Purchases- MRP Based (Composition) is displayed in this column. (ii) of taxable goods The Purchase Transaction made using the VAT/Tax Class Purchases-Taxable Goods (Composition) is displayed in this column. (iii) of other goods The Purchase Transaction made using the VAT/Tax Class Exempt Purchases is displayed in this column.
(b) Purchases made from ed dealers in West Bengal. (i) on goods on which tax has been paid on maximum retail price The Purchase Transaction made using the VAT/Tax Class Purchases From URDs- MRP Based (Composition) is displayed in this column (ii) of taxable goods The Purchase Transaction made using the VAT/Tax Class Purchases From URDs -Taxable Goods (Composition) is displayed in this column.
(iii) of other goods The Purchase Transaction made using the VAT/Tax Class Purchases From URDs -Exempt Goods (Composition) is displayed in this column.
Total (i) + (ii)+ (iii) Total of (i) + (ii)+ (iii) is printed in this Box.
Grand Total (a) + (b) Total of 10 (a) and 10 (b) is displayed in this Box.
11. Purchases tax payable on 10 (b) (ii) [ Refer to section 17] The entry made using Journal Voucher with the Vat Adjustment Class and Used for as Purchase Tax Adjustment is printed in this Box Below is the sample entry given: Flag: Purchase Tax Adjustment Dr. Purchase tax expenses A/c (under: Direct expenses) Cr. Purchases Tax Payable (under: Duties and Taxes A/c)
12. Output Tax [05+08+11] [Section 2(26)] The total of (Box 05+08+11) is displayed in this box.
13. Less Tax Deducted at Source (enclose Form 18) The entry made using Journal Voucher with the Vat Adjustment Class and Used for as TDS Adjustment is printed in this Box Below is the sample entry given: Flag: TDS Adjustment Dr. Total Tax Payable (under: Duties and Taxes) Cr. Tax Deducted at Source (Under: Current Assets)
14. Less Tax Paid (Other than 13) The entry made using Journal Voucher with the Vat Adjustment Class and Used for as Advance Tax Paid is printed in this Box
Below is the sample entry given: Flag: Advance Tax Paid Dr. Total Output Tax A/c (under: Duties and Taxes) Cr. Advance Tax Paid (under: Current Liabilities)
15. Add: Interest Payable under section 33 The entry made using Journal Voucher with the Vat Adjustment Class and Used for as Interest Payable is printed in this Box Below is the sample entry given: Flag: Interest Payable Dr. Interest (under: Indirect Expenses) Cr. Interest Payable (Under: Current Liabilities)
16. Amount due (12+15-13-14) The balancing figure is captured in this Box.
24. Payment Details This field is entered manually
Declaration This field is entered manually
Introduction
Service tax is an indirect tax levied on certain category of services provided by a person, firm, agency, etc. The Government of India has marked a set of services as taxable under the service tax structure. The seller provides a service and the responsibility of paying the service tax to the government rests with the seller.
Information on service tax
Currently, the rate of service tax on all the taxable services is 12%. Presently, service tax is applicable on 97 categories of services. A few of the listed services have an abatement facility. Service tax returns are to be filed to the Commissionerate of Service Tax for the fiscal half-year. Information on the registration, rules, list of services, rate of service tax, forms, etc can be found on the official website for service tax-http://www.servicetax.gov.in/
Service Tax Flow
When you buy and sell services? A person/firm providing a service that comes under the service tax category has to pay service tax. Service tax is to be shown separately in the invoice and is payable based on the payment realized and not on the total amount shown in the invoice. Similarly, when you buy a service that falls under service tax category, you avail service tax credit based on the payment made. So, you pay service tax on the services that you sell and get credit on the service tax payable when you buy a service.
Adjusting credit? While you pay service tax on sale of services that come under the service tax category, you can adjust service tax credit availed on purchase of services (Buyer). This deduction is called adjusting credit against service tax . The difference between the service tax that you have to pay for selling services and the service tax credit on purchases that can be adjusted is the payable service tax . Service tax (sales) that is adjustable against service tax credit (purchases) is also called availing input credit . Let us look at an example.
Adjusting 100% credit & 20% credit
If your input service (Purchase) can be directly related to the output service (Sales) then you can use 100% credit adjustment on the service tax payable. For example: If you are providing a consultancy service over the phone, then you can use the input credit from the telephone charges to adjust against 100% of the service tax payable on your consultancy service. If the input service is not solely used for the output service, then 20% credit adjustment is applicable. Input service tax credit can be adjusted to both output service tax and output cess (surcharge on tax). But input cess credit can be adjusted only towards output cess.
Assessable value Service tax is calculated on the assessable value. The assessable value is the service charge value minus abatement and expenses.
Abatement The government has given a deduction on the value to be considered for service tax on a few categories of services. For example, some categories of services include material value. A caterer has to procure materials to prepare food products and sell services. Service tax is charged on the total amount for the service and does not include the rate of the materials procured. Hence a deduction is provided. This deduction from the service charges to be considered for service tax is called abatement . Abatement is either a percentage of the service charges or a lump sum value. Example: a. Charge on Service
Rs.10, 000/-
b. If an abatement of 30% is applied, then abatement
Rs.3, 000/-
c. Here, the assessable value is (a-b)
Rs.7, 000/-
Therefore, service tax @ 12 % on Rs.7, 000/-
Rs.840/-
Expenses Expenses can be deducted from the total service charge to get the taxable amount. E.g. A technical consultant might travel to different locations with respect to work. The invoice is prepared as ‘consultancy’ and the travel expenses are included in the total service charges. If ed by records, you can deduct the travel expenses from the total service charge to derive the assessable value on which service tax is applicable.
Payment of Service Tax
How much do I pay? A seller provides a service to a buyer and bills the buyer for the service. The bill is inclusive of the service tax. The seller does not have to pay service tax on the total bill amount but only on the payment received. Example: Charge on service
Rs. 10, 000/-
Service tax @ 12%
Rs. 1, 200/-
Cess on Service Tax @ 2%
Rs. 24/-
Secondary Cess @ 1%
Rs. 12/-
Total bill
Rs. 11, 236/-
Here, the service-tax calculated turns out to be
Service Tax @ 12%
Rs. 1, 200/-
Cess on Service Tax @ 2%
Rs. 24/-
Secondary Cess @ 1%
Rs. 12/-
Total
Rs. 1, 236/-
Assuming, the buyer pays the seller Rs.5, 000/- as part payment, the service-tax payable for the payment received is calculated as given below. Charge paid on service
(10,000 x 5,000)/11,236
Rs. 4449.98
Service tax on Rs.5000/- is
(1,200 x 5,000)/11,236
Rs. 533.99
Cess on service tax is
(24 x 5,000)/11,236
Rs. 10.67
Secondary Cess on Service Tax is
(12 x 5,000)/11,236
Rs. 533
Hence, service tax is payable only on the value of payment received by the seller and not on the gross amount charged or billed (invoice value). Another case is when you receive an advance payment on services to be provided. Service tax is not applicable on advances paid until it is adjusted against the invoice.
Where do I pay? The service tax amount is to be paid in Form GAR – 7 Challan in a bank designated by the Commissionerate of Service Tax. For a particular area there is a Focal bank, with branch and code. This is the designated bank. Service tax payments will be accepted in all the branches of the bank, which are connected with the focal branch. The list of the banks and their branches accepting service tax payments is available with the Commissionerate of Service Tax. If your company is a corporate company, service tax is payable on a monthly basis by the 5th of the following month. For example, Service tax has to be paid by 5th January for the month of December. Non-corporate like individuals, proprietary firms, partnership firms and so on, have to pay service tax for the fiscal quarter. The payment is to be made by the 5th day of the month following the quarter. For example, service tax for the quarter ending 30th June is to be paid by 5th July. For the corporate and non-corporate bodies, service tax for the month of March is payable by 31st of March.
Filing returns Corporate and non–corporate organizations have to file service tax half-yearly with details in Form ST-3 and Input Credit Form (Form 5) to the Commissionerate of Service Tax. The filing of returns should be within 5 days from the last day of the fiscal half-year. For the fiscal half-year ending-date of 30th September, the last day for filing service-tax returns is 5th October. Copies of all GAR – 7 issued during the period must be attached.
Service Tax in Tally Features of Service Tax in Tally
Service tax integrated in Tally takes care of your service tax transactions. It eliminates error-prone information, incorrect remittance, penalties, interests, compliance issues, etc. Service Tax in Tally needs a one-time configuration for service tax features to be activated.
Tally tracks bill-wise (bill-by-bill) detail and automatically calculates service tax payable and input credit with the flexibility to make adjustments later.
Service tax is part of a regular transaction. Information on service tax is maintained and produced categorywise, which is mandatory in service tax returns.
Adjusts input credit towards service tax payable.
s for abatement and expenses.
Provision for exemption notification details.
Built-in assessable value feature on which service tax is calculated.
Transfer earlier pending service tax payable and available service tax input credit in to Tally
Reports are generated as per government suggested format. Print and file reports: G.A.R.-7 Challans, Input Credit Form, ST3 Report and ST3-A Report.
Management Information Services (MIS) reports: Service Tax Payable Report and Input Credit Form
Enabling Service Tax in Tally
To enable Service Tax , Go to Gateway of Tally > F11: Features > Statutory & Taxation Set Enable Service Tax to Yes
Set Set/Alter Service Tax Details to Yes to enter the Company Service Tax Details .
Company Service Tax Details The Company Service Tax Details screen is where you will enter the service tax details. The name of the company is displayed at the top followed by different fields.
Company Service Tax Details Service Tax Registration No . – Enter the registration number allotted to you by the Service Tax Department. Date of Registration – Enter the date of registration of Service Tax for your service. Assessee Code - Enter the code given to your company by the Service Tax Department . Type of Organization – In this field select the type of your organization from the List of Organisations menu.
Major Service Category Name - Here you will find options for different categories that come under the service tax net. You might be providing two or more services in a company. In such a situation, select the service category that is the mainstay or forms the major part of your business.
Select the relevant option from the List of Service Categories that applies to your company.
Credit Adjustment (%) – By default this field is set to 20. Enter the percentage of credit adjustment that you would like to avail.
Division Code - Enter the code of the division in which your company falls. Name - Enter name of the division under which your company falls.
Range Code - Enter the code of the range of your company. Name - Enter the name of the range under which your company falls.
Commissionerate Code - This is the code of the Commissionerate of Service Tax under which the address of your ed
premise is located. Name - This is the name of the Commissionerate of Service Tax under whose range the address of your ed premise falls.
Focal Bank Details Focal Bank Code -The Commissionerate of Service Tax allots a code to banks nominated for payment of service tax in a particular area. This code is available with the Commissionerate of Service Tax. Focal Bank Name - This is the name of the bank nominated by the Commissionerate of Service Tax to receive service tax payments in a particular area. This information is available with the Commissionerate of Service Tax . Focal Bank Address- Enter the address of the branch of the focal bank .
Display of Service Categories in Statutory Info.
Tally provides you with predefined set of Service Categories. You can view the values of each of the Service Category. Go to Gateway of Tally > Display > Statutory Info > Service Categories
Select the service category which you want to view. The Service Category screen has a Name field showing the category. This is followed by the fields Applicable to Country, Code, ing Code and Category fields. The Applicable From column displays the period for which the Cess Rate (%) and Secondary Cess Rate are applicable. Note:
Any
changes
to
the
values
will
be
Abatement (%), Service Tax Rate (%), and
updated
on
the
Tally
website.
Creating Sales Ledgers for Services
Go to Gateway of Tally > s Info > Ledgers > Create 1.
Enter the Name of the Sales ledger
2.
Select the Group Sales s in the field Under
3.
Set Inventory Values are affected to Yes
N o t e : Set the Inventory Values are affected field to Y e s , if service as item. For example: You sell consultancy charged by 4.
Set Is Service Tax Applicable to Yes
you the
are maintaining number of hours.
4.
6.
Select the Category Name from the List of Service Categories .
6.
7.
Accept the screen to Save .
N o t e : Create a Service Tax ledger for purchase services in two categories and service tax ledgers
each sell
service category. For example, if you services in three categories, create five
Creating Output Service Tax ledger
To create an Output Service Tax ledger: Go to Gateway of Tally > s Info > Ledgers > Create 1.
Enter the Name of the ledger
2.
Select Duties & Taxes in the field Under
3.
Select the Type of Duty from the List of Types of Duty/Tax
4.
Select the Category Name from the List of Service Categories
5.
Set Inventory Values are affected to No
5.
6.
Accept the screen to Save
Similarly, you can create ledgers for Input Service Tax
Creating a Customer Ledger
To create a Customer ledger: Go to Gateway of Tally > s Info > Ledgers > Create 1.
Enter the Name of the ledger
2.
Select the group from the List of Groups
3.
Set Maintain Balances Bill by Bill to Yes. Enter the Default Credit Period , if any
4.
Set Inventory Values are affected to No
5.
Set Is Service Tax Applicable to Yes
5.
6.
Select the Type of Classification in the Exemption Details screen
6.
N o t e : If Exempt classification is selected, then the Notification number has entered. The number will appear in the ST3 Half Yearly return of exempt 7.
Enter the Mailing Details
to be section
7.
8.
Accept the screen to save
Creating Party Ledgers for Service Tax
Creating Party Ledgers for Service Tax To create a Party Ledger for Service Tax, Go to Gateway of Tally > s Info > Ledgers > Create 1.
Enter the Name of ledger
2.
Select the Group from the List of Groups in the field Under
3.
Set Maintain Balances Bill by Bill to Yes. Enter the Default Credit Period , if any
4.
Set Inventory values are affected to No
5.
Set Is Service Tax Applicable to Yes
6.
Select the Type of Classification from the List of Classification
6.
7.
Accept the screen to save
7.
Creating Ledgers for Excise
To create a Ledger for Excise: Go to Gateway of Tally > s Info > Ledgers > Create 1.
Enter the Name of the ledger
2.
Select the Group Duties & Taxes from the List of Groups
3.
Select the Type of Duty/Tax from Types of Duty/Tax to Excise
4.
Select the appropriate Duty Head from the list
5.
Set Inventory Values are affected to No.
6.
Set the Percentage of Calculation to 16%
7.
Select the appropriate Method of Calculation from the list of Type of Duty
7.
7.
Accept the screen to save.
Similarly, you can create ledger for Education Cess – Excise and Secondary Education Cess, by selecting Duty Head as Cess on Duty and the Method of Calculation as Surcharge on Duty
Creating a Sales Voucher
To create a Sales voucher for Sale of Services , Go to Gateway of Tally > ing Vouchers > F8: Sales 1.
Select I : Acct. Invoice on the right hand side of the screen.
N o t e : A Sales 2.
Item
Invoice
can
also
be
ed
with
Inventory
allocations.
Enter the reference number in the Ref field if required.
N o t e : Set Use
Common
Ledger
A/c
for
Item
Allocation to No in the F12:
Configure
3.
Select the Party’s A/c Name from the List of Ledger s
4.
Select the Service ledger from the List of Ledger s
5.
Enter the Amount
6.
Select the Service Tax ledgers from the List of Ledger s for the Service Tax Details sub form to appear.
6.
7.
You can allocate the Expenses amount if any, in above screen, else leave the field blank and tab down to accept the above screen.
In the above example, Rs. 5000 is allocated to Expenses . 8.
Tab down through the Voucher entry screen for the Bill Wise Details sub form to appear.
8.
9. 10.
Select New Ref from Method of Adj. and accept the Bill-wise Details sub screen. Enter Narration if any in the Voucher entry screen.
10.
12.
Accept the screen to save .
Creating a Receipt Voucher
Creating Receipt Voucher Tally calculates the Service Tax liability on the payment received . If a part payment of Rs.50, 000 is received for the above Sales made, then Tally calculates the Service Tax liability for Rs. 50, 000 . To create a Receipt voucher, Go to Gateway of Tally > ing Vouchers > F6: Receipt 1.
Select the customer ledger from the List of Ledger s
2.
The Bill Wise Details sub form appears as shown
2.
3.
Select the Type of Ref from the list of Method of Adj .
4.
Select the Sales Voucher from the List of Pending Bills
5.
Enter the amount received and Accept the Bill-wise details sub screen
6.
Debit the Bank
7.
Enter Narration, if any
7.
8.
Accept the screen to Save .
Creating a Sales Voucher for Services Exempt from Service Tax
To create sales vouchers for Services exempted from Service Tax , Create a Customer ledger and select the Type of Classification as Exempt in the Exemption Notification Detail sub form.
Go to Gateway of Tally > ing Vouchers > F8: Sales ( as Invoice ) 1.
Enter the reference number in the Ref field if required.
2.
Select the Party’s A/c Name from the List of Ledger s .
3.
Select the Service Ledger from the List of Ledger s.
4.
3. 4.
Enter the Amount
5.
Select New Ref for Type of Ref in the Bill-wise Details sub form
6.
Select Service Tax ledger as Not Applicable
7.
Accept the Bill Wise Details sub screen to accept and save the voucher
7.
On receipt of the payment for the sale of the above service, the value is displayed in ST3 report.
Section 4(A) row 4 of the
Similarly, you can entries for an Export customer. The entry value will be displayed in Section 4(A) row 5 of the ST3 report.
Service Tax Payable Report
Go to Gateway of Tally > Display > Statutory Reports > Service Tax Reports > Service Tax Payables The screen display the details of the Service Tax Payable
Date - The date of the sales invoice is displayed. Ref No. - The reference number given to the sales invoice. Partys' Name – The name of the customer to whom the sale is made. Category Name – Name of the category of service is displayed.
Bill Value:
This column displays the total invoice amount . Assessable Value – The assessable value for the service. Service Tax - The total service tax calculated on the assessable value . Cess - The sum of Education Cess and Secondary Education Cess (Applicable from 1-4-2007 ) calculated on Service Tax.
Realised Value: This column displays the amount received on the invoice value. Assessable Value – The assessable value based on the realised value . Service Tax Payable - The amount of service tax payable based on the realised value. Cess Payable – The Total Cess (Education Cess and Secondary Education Cess) on the Service Tax Payable based on the realised value. Total Payable – The amount of Service Tax Payable inclusive of Educational Cess and Secondary Education Cess is displayed in this field. This value is calculated on receipt of payment. Use the Alt+P key or click on Print option to print your report.
Creating a Purchase Voucher
You can create a Purchase voucher to record the purchase of services. Go to Gateway of Tally > ing Vouchers > F9: Purchase ( as Invoice ) 1.
Enter the reference number in the Ref field if any
2.
Select the Party’s A/c Name from the List of Ledger s
3.
Select the Service Ledger (created under purchase group) from the List of Ledgers
4.
Enter the Amount
5.
Select the Input Service Tax ledger from the List of Ledger s
The Service Tax Details sub form appears as shown
6.
Accept the above screen for the Bill wise details sub form to appear
6.
7.
Select the Type of Ref from the list of Method of Adj.
8.
Select the Input Service Tax ledger from the List of Service Tax Ledgers and accept the Bill- wise Details sub form
9.
Enter Narration , if any in the Voucher entry screen
9.
10.
Accept the screen to save
Payment Voucher Let us now create a Payment voucher for the above purchase. Go to Gateway of Tally > ing Vouchers > F5: Payment 1.
Select the Party’s A/c Name from the List of Ledger s
The Bill-wise Details sub form for the Party ledger appears as shown
2.
Select the Type of Ref from the list of Method of Adj.
3.
Select the Purchase bill from the List of Pending Bills and accept the above screen
4.
Select the Bank to be credited in the Voucher Entry screen
5.
Enter Narration , if any
5.
6.
Accept the screen to save
Input Credit Form
The Input Credit Form report displays the details of Service Tax Input Credit available with the company as on a specified date. The same can be set off against Output service tax liability depending on the method of adjustment you have opted. If the rate of adjustment selected is 100%, then the entire available Input Service Tax can be set off, or if 20% is selected then to the extent of 20% of the Output Service Tax liability can be set off for the current period. The balance can be carried over for the next period. Go to Gateway of Tally > Display > Statutory Reports > Service Tax Reports > Input Credit Form The Input Credit Form appears as shown.
Date - Date of the purchase invoice Ref No - The reference number of the purchase invoice. Partys' Name/Service Tax No. - Name and Service Tax Registration number of the service provider.
Party Address – Address of the service provider Category Name - Name of the category of service purchased. Bill Value: This column displays Assessable value , Service Tax and Cess amount (Education Cess and Secondary Education Cess) as per the invoice Assessable Value – The net assessable value for the service purchased. Service Tax - Service tax payable as per the purchase invoice. Cess - Cess (Education Cess + Secondary Education Cess) on the service tax as per the purchase invoice Realised Value: This column displays the Assessable value, Service Tax and total Cess (Education Cess and Secondary Education Cess) calculated on the payment made against the invoice value. Assessable Value – The realised assessable value based on the payment made. Service Tax Credit - The realised amount of service tax credit based on the payment made. Cess Credit – Realised cess (Education Cess and Secondary Education Cess) on the Service Tax credit based on the payment made. Total Credit – Available Service Tax Credit inclusive of Educational Cess and Secondary Educational Cess . Use the Alt+P key or click on Print option to print your report.
Payment of Service Tax
To create a voucher for payment of Service Tax , Go to Gateway of Tally > s Info > F5: Payment 1.
Select the Output Service Tax ledger to be debited from the List of Ledger s
2.
On selecting the above, the Service Tax Bill Details sub form appears as shown
3.
Select the Type of Ref
4.
Select the Sales Bill from the List of Service Tax Bills and accept the Service Tax Bill Details sub form
3. 4.
N o t e : The Service
Tax
Payable
is
calculated
on
the
5.
Credit the Bank
6.
Set Payment Period to Yes and enter the From and To dates.
Note 7.
8.
:
The
period
Enter Narration, if any.
for
which
the
payment
is
made
is
payment
specified
received,
in
the
i.e.
above
50,
000 .
screen.
7.
8.
Accept the screen to save
Note 9.
: You can make separate payment
a
payment vouchers
for for
a
single multiple
Press Alt + P and set Print GAR-7 Challan to Yes
category in categories
one
payment
voucher.
You
can
9.
10.
Use the Print Preview Option (ALT+I) to view the challan on the screen. The challan will print in government prescribed format and can be used to remit service tax.
The print preview of GAR-7 Challan appears as shown
Full Name : The name of the company is printed in this field. Company Address: The address of the company is printed in this field. Telephone No. The telephone number of the company is printed in this field. Assessee Code No. The Assessee Code No. entered as in F11: Features is printed in this field. Commissionerate Name The Commissionerate Name as entered in F11: Features is printed in this field. Commissionerate Code, Division Code, Range Code The details entered in F11: Features are printed in this field ing Code of the Service and Amount Tendered in Rupees The ing Code of the service and amount charged is displayed in this field. The first row displays the code and the amount for Service Tax The second row displays the code and the amount for Cess The third row displays the code and the amount for Secondary Education Cess The fourth row displays the code and the amount for Interest The fifth row displays the code and the amount for Penalty The sixth row displays the code and the amount for Other Expenses Total The total of all the services provided is printed in this field. (In Words) Rupees The total amount is printed in words. Cash/ Cheque/Draft/Pay Order No. The Cash/ Cheque/Draft/Pay Order No. is entered manually in this field Dated The payment date is entered in this field. Drawn On The name of the bank is entered manually in this field. Signature of the Tenderer with date The Tax Payer signs in the above field.
Tax Payer’s Counterfoil This section prints the same details as mentioned above and would be issued to the Tax Payer.
Credit Adjustment using Excise Duty
You can adjust your Service Tax payment using Excise Credit . To create a Service Tax payment entry adjusting the Excise credit , Go to Gateway of Tally > ing Vouchers > Payment (F5 ) 1.
Select the Output Service Tax ledger from the List of Ledger s for the Service Tax Bill details to appear.
2.
Select Agst Ref in the Type of Ref column
3.
Select the bill from the List of Service Tax Bills
4.
2. 3. 4.
Enter the amount being paid
5.
Enter the rate of Credit Adjustment
6.
Credit the Excise Ledgers and specify the amount
7.
Credit difference amount to the Bank A/c
8.
Set the field Payment Period to Yes
9.
Specify the Service Tax Period
10.
Enter Narration if any
11.
Accept the Voucher to Save.
12.
11. 12.
Press Alt + P and set Print GAR-7 Challan to Yes
13.
Press Alt + I to view the preview as shown
The Excise Duty value of the above entry is displayed in Section 5(A) row 7 in ST3 report . The Education Cess and Secondary Education Cess for the above entry is displayed in Section 5(B) row 4 in the ST3 report .
Creating a Purchase Voucher using Excise Duty
The Excise Duty Input Credit can be availed on accrual and not on realization. You can create purchase entries using the Excise Duty ledgers. Go to Gateway of Tally > ing Vouchers > F9: Purchase in the Item Invoice Mode 1.
Enter the Supplier Invoice No. and Date
2.
Select the Party’s A/c Name from the List of Ledger s
3.
Select the Item from the List of Stock Items
4.
Enter the Quantity .
5.
Enter the Rate .
The ing Details sub form for the Stock Item appears as shown.
6.
Select the Purchase ledger from the List of Ledger s
7.
Select the VAT/Tax Class , if not assigned during ledger creation.
Note: Tally enabled.
provides
you
with
Excise
Classification even if the E x c i s e
8.
Accept the ing Details screen.
9.
Select the Excise ledgers from the List of Ledger s
feature
10.
Select the Input Vat ledger , created under Duties & Taxes from the List of Ledger s
11.
Select the VAT/Tax Class, if it is not assigned during ledger creation
12.
Tab down for the Bill Wise Details screen to appear
13.
is
not
11. 12. 13.
Select New Ref as Type of Ref .
14.
Select Service Tax ledger as Not Applicable
15.
Accept the above screen for the Voucher Entry screen to re appear.
16.
Enter Narration if any.
16.
17.
Accept the screen to Save.
Creating Vouchers for Arrears
To create vouchers for Arrears , Go to Gateway of Tally > ing Vouchers > Payment (F5) 1.
Select Arrears created under Indirect Expenses from the List of Ledgers .
2.
Select the payment type Arrears , from the List of Payment .
N o t e : You appropriate 3.
3.
can create options
Enter the Debit amount
vouchers
for
I n t e r e s t , O t h e r s and P e n a l t y
by
selecting
the
3.
3.
Enter the rate of credit adjustment .
Note : Payment
The option to Type only.
4.
Credit the Bank .
5.
Accept the voucher to save.
enter
the
rate
of
Credit
Adjustment
is
available
in
an
Arrears
5.
N o t e :- The Arrears of Service Tax and Education Cess Service Tax or Input Credit on E x c i s e , if available. The Journal Voucher. However, adjustment of Input Service Tax I n t e r e s t , P e n a l t y and M i s c e l l a n e o u s payments.
can be set off against I n p u t entry can be ed using is not allowed in case of
The value of the above entry is displayed in Section 2(B) row 1 of the ST3 report. Similarly, Payment entry for Penalty and Interest can be ed. A Payment entry for Penalty, for Rs. 1500 will be displayed in Section 2(B) row 4 of the ST3 report. A Payment entry for Interest, for Rs. 2000 will be displayed in Section 2(B) row 3 of the ST3 report
Transferring Earlier Service Tax Entries into Tally
You can transfer your pending Service Tax payable and available Service Tax Input Credit into Tally. Let us consider that the Input Service Tax has a debit opening balance of 618.00 and the Output Service Tax has a credit opening balance of 1236.00 for the previous year. To transfer the above Service Tax Payables and Input service tax to the current year, a new ledger should be created with Service Tax enabled , as mentioned below. Go to Gateway of Tally > s Info > Ledgers > Create 1.
Enter the Name of the service Tax Ledger
2.
Select the Group Duties & Taxes from the List of Groups in the field Under
3.
Select the Type of Duty as Service Tax from the Types of Duty/Tax
4.
Select the Category Name from the List of Service Categories .
5.
Set Inventory values are affected to No
5.
Similarly, you can create ledger for Output Service Tax .
Now, create the customer and party ledgers by setting Maintain Balances bill-by-bill to Yes and enter the opening balance. Assume that balance carried forward from previous year, for a supplier is Rs. 5,618 and for a customer is Rs. 11, 236 . The ledger creation screen appears as shown.
Let us now create a Journal Voucher to transfer Input service Tax . Go to Gateway of Tally > ing Vouchers > Journal (F7) 1.
Debit the Input Service Tax ledger created for the current year selecting from the List of Ledger s .
The Service Tax Bill Details for the Input Service Tax ledger appears as follows.
2.
Select the Type of Ref from Method of Adj .
3.
Enter the Amount .
Service Tax Opening Bill Details appears as follows
4.
Select the Party Ledger from the list of Service Party Ledgers. (The balance carried forward from the previous year can be entered in the field Opening Balance)
5.
Select the corresponding bill from the List of Pending Bills
6.
Enter the rate of Abatement if any
7.
Enter the Expense if any
8.
Enter the Assessable Value
9.
Enter the rate of Service Tax
10.
Enter the rate of Education Cess and Secondary Education Cess . Accept the Service Tax Opening Bill Details screen.
11.
Credit the Service Tax Input ledger created under Duties & Taxes for previous year.
11.
This journal will nullify the Input Service Tax Ledger of the previous year and transfer the pending service tax bill and the relevant tax information to the current Service Tax ledger. N o t e : The Input and Output Service Tax ledger for the previous year is created without the Service Tax feature enabled and setting the opening balances. The Service Tax liability and the Input Service Tax should be entered separately for each bill. 12.
Enter Narration if any.
13.
Accept the screen to Save the Voucher.
The Journal Entry for the Output Service Tax is created as follows: Go to Gateway of Tally > ing Vouchers > Journal (F7) 1. 2.
Debit the Output Service Tax ledger created for the previous year.
1. 2.
Enter the Amount in the field Debit.
3.
Credit the Output Service Tax ledger created for the current year
The Service Tax Bill Details for the Service Tax ledger appears as shown.
4.
Enter the Amount .
5.
Accept the above screen for the Service Tax Opening Bill Details to appear.
5.
6.
Select the Customer ledger from the list of Service Party Ledgers.
7.
Select the appropriate bill from the List of Pending Bills
8.
Enter the rate of Abatement if any.
9.
Enter the Expense if any.
10.
Enter the Assessable Value
11.
Enter the rate of Service Tax
12.
Enter the rate of Education Cess and Secondary Education Cess .
13.
Accept the above screen.
14.
Credit the Output Service Tax ledger created for the current year
15.
13. 14. 15.
Enter Narration if any.
16.
Accept to Save the Voucher.
ing of Advance Receipt from Customer Go to Gateway of Tally > ing Vouchers > Receipt (F6) 1.
Select the Bank to be debited
2.
Select the ledger to be credited from the List of Ledger s
3.
Select the customer ledger from the List of Ledger s.
4.
3. 4.
Enter the amount .
The Bill Wise Details screen appears:
5.
Select Advance as Type of Ref.
6.
Enter the Name , if required.
7.
Select the Service Tax ledger from the List of Service Tax Ledgers
8.
Accept the Bill Wise Details screen.
9.
Enter Narration if any.
9.
6.
Accept to Save the Voucher.
Creating a Memorandum Voucher
A Memorandum Voucher has to be created to capture the opening balance on the Service ledger. To create a Memo Voucher, Go to Gateway of Tally > ing Vouchers > Memorandum Voucher (Ctrl + F10) 1.
Select the Service ledger, e.g. Advertising Consultancy from the List of Ledger s
2.
Enter the Amount .
3.
Select the Service Ledger from the List of Ledger s .
4.
Accept the screen to save .
4.
N o t e : The above functionality.
entry
will
reflect
in
the
ST
3
report
and
does
not
affect
any
Service Tax Reports
Go to Gateway of Tally > Display > Statutory Reports > Service Tax Reports
More:
Service Tax Payables
Input Credit Form
ST3 Report
ST 3A Report
ST3 Report
The ST3 Report is a statutory report. This report displays the ST3 Form in the government prescribed format that is used to file Half – Yearly Service Tax returns to the Commissionerate of Service Tax . Go to Gateway of Tally > Display > Statutory Reports > Service Tax Reports > ST3 Report 1.
Use the Alt+P key or click on Print option to print your report.
This will display the Form ST-3 screen.
This is how the printed document will look:
For the period April – September October – March
The above boxes will be checked according to the ST-3 Period specified. 1.
Name and Address of the Assessee
The Name and Address of the company is displayed in this field. 2.
Registration Numbers of Premises for which return is being filed
The Service Tax Registration number is displayed in this field. 3.
Category of Taxable Services for which return is being filed
This field displays the list of Taxable Services provided by the company. 4.
Payment of Service Tax Category of Service
A. Payment details This section displays the Service Tax payment details for all the months in the specified period. It also provides you with a total of Service Tax for all the months. This section displays a monthly breakup of Service Tax payment details for the specified period. It also prints the
total of payment details for all the months. Amount received towards taxable service(s) provided - The total payment received from the customer, towards the taxable service provided is displayed in this field. Amount received in advance towards taxable service(s) to be provided - The advance received towards the Taxable Service is displayed in this field. Amount billed – Gross - The Total sales amount for the Service Category for the month is displayed in this field. Amount billed for exempted services other than export - The Total sales amount on an Exempted Service Category other than Export is displayed in this field. Amount billed for exported services, without payment of tax - The total sales amount on an Exported service category is displayed in this field. Amount billed for Services on which tax is to be paid - The total sales amount of the Taxable service is displayed in this field. Abatement Claimed – Value - The total amount claimed as abatement on the service provided is displayed in this field. Notification Number of Abatement - The notification number of abatement is displayed in this field. This number is provided by the Service Tax department. Notification number of Exemption - The notification number of the type of exemption selected in the ledger master is displayed in this field. (The type of exemption can be Export/Exempt) Provisional Assessment order no. - This field is to be entered manually. Service Tax payable - The total Service Tax payable for the service category is displayed in this field. Education Cess payable - The total amount of Education Cess and Secondary Education Cess payable for the service category is displayed in this field. Service Tax paid in cash - The service tax paid in cash is displayed in this field. Challan Number - The Challan number is entered manually in this field. Challan date - The Challan date is entered manually in this field. Service tax paid through Cenvat Credit - The Service Tax paid using the Service Tax Input Credit or Excise Input Credit is displayed in this field. Education Cess paid in cash - The total amount of Education Cess and Secondary Education Cess paid in cash is displayed in this field. Education Cess paid through Education Cess credit - The total amount of Education Cess and Secondary Education Cess paid through the Service Tax Input credit or Education Cess Input Credit is displayed in this field.
B. Details of Other payments
This section displays other payments made towards Service Tax. Column (1) Arrears of Service Tax - The arrears of Service Tax paid is displayed in this field. Education Cess - The sum of Education Cess and Secondary Education Cess paid is displayed in this field Interest - The Interest paid is displayed in this field. Penalty - The Penalty paid is displayed in this field. Miscellaneous - Any miscellaneous paid are displayed in this field. Excess amount paid and adjusted subsequently - This field is manually entered. Any extra amount paid that is adjusted with the payment is displayed in this field.
Column (2) 1.
Amount Cash - The payables specified in Column (1) are displayed in this field.
Column (3) 1.
Challan Number - The Challan number is manually entered in this field.
Column (4) 1.
Date - The date of the Challan is manually entered in this field.
Column (5) 1.
Amount – Credit - The Payment of arrear using the Input ST credit or Excise credit amount is displayed in this field.
Column (6) 1.
5.
Source Document No. - Payment of arrears using the Input cess is entered manually in this field.
Credit Details for Service Tax provider recipient
This section displays the monthly details of the Cenvat Credit ed on Service Tax . A. Cenvat Credit Details (1) Details of Credit Opening Balance - The debit opening Balance of the duty ledger is displayed in this field. The value is updated with the entries ed.
Credit Availed on Inputs - The Input credit availed on ing a default purchase entry with Excise duty (Excise ledger created under Duties & Taxes). Credit Availed on Capital Goods - The Input credit availed on selecting the VAT Classification in a default Purchase entry is displayed in this field and selecting the Excise classification as Purchase on Capital Goods. Credit availed on Input Service - The credit availed on Service Tax Purchases is displayed in this field. Credit received from Inputs service distributor - This table remains blank. Total credit availed - The total credit availed on the service is displayed in this field. Credit utilized towards payment of service tax - The amount used to adjust Service Tax credit is displayed in this field. Excise duty Input or Service Tax Input utilized for payment of Service Tax Closing Balance - The difference of the Total Credit Availed and the Credit utilized towards payment of Service Tax is displayed in this field.
B. Education Cess credit details This section displays the monthly break up of the credit availed on Education Cess. Opening Balance - The ledger debit opening balance of Education Cess is displayed in this field. Credit of Education Cess availed on goods - The total credit availed on Education Cess and secondary Education Cess on goods with capital goods and without capital goods is displayed in this field.. Credit of Education Cess availed on services - The total credit availed using Education Cess and secondary Education Cess on a realised Service Tax purchase is displayed in this field. Credit of Education Cess utilized for payment of Service Tax - The total credit used to adjust the Service Tax payment is displayed in this field. The total Service Tax Cess or Education Cess and Secondary Education Cess is displayed in this field. Closing Balance - The difference of the Total Credit Availed and the Credit utilised towards payment of Service Tax is displayed in this field.
6.
Credit Details for Input service distributor
(A) Details of Cenvat credit received and distributed (B) Details of Education Cess received and distributed (C) The taxable services on which input service credit has been distributed during the half year period This field remains blank as is not currently ed. 7.
Details of amount payable but not paid as on the last day of the period for which the return is filed. - The details of the Service Tax due are manually entered in this field.
8.
Self Assessment Memorandum - The name and place of the company and the signature of the concerned
7.
8. authority has to be filled manually.
Acknowledgement The details are to be filled by the Service Tax department .
ST 3A Report
The ST 3A report is similar to ST 3 report and is a provisional Assessment report only.
Introduction
Central Sales Tax (CST) is a tax on sales of goods levied by the Central Government of India. CST is applicable only in the case of inter-state sales and not on sales made within the state or import/export of sales. Inter-state sale is when a sale or purchase constitutes movement of goods from one state to another. Accordingly, consignments to agents or transfers of goods to branch or other offices is not a sale as per the CST Act CST is payable in the state where the goods are sold and movement commences. The tax collected is retained by the state in which the tax is collected. CST is istered by Sales Tax authorities of each state. Thus, the State Government Sales Tax officer who assesses and collects local (state) sales tax also assesses and collects CST.
Inter-state Sale
An inter-state sale takes place when a sale or purchase: Leads to movement of goods from one State to another State. Is achieved by the transfer of documents of title while the goods are being moved from one State to another State.
Example 1: “A” in Andhra Pradesh sells and delivers goods to “B” in Karnataka. Example 2: “A” in Maharashtra delivers goods to “B” in Gujarat. “B” sells it to “C” in Gujrat by transferring the document of title during the goods movement from Maharashtra to Gujrat. N o t e : Goods state is not
that are sold within considered inter-state
a state, sales.
but
while
transporting
travel
through
another
Subsequent Sales
Subsequent sale is a Sale of goods after the first time it has been sold through transfer of documents of title. Under the CST Act, sales tax is levied at a single point only (first sale) and no sales tax is payable on subsequent sales.
CST Transaction Forms
Dealers have to issue certain declarations in prescribed forms to buyers/sellers. The type of forms are C, D, E1, E2, F, H and I. Forms C, E1, E2, F and H are printed and supplied by Sales Tax authorities. Dealers have to issue declarations in these forms printed and supplied by the Sales Tax authorities. Form D is to be issued by government organization departments making purchases. These forms are to be prepared in triplicate.
Form C The sales tax on inter-state sale is 4% or the applicable sales tax rate for sale within the State whichever is lower if the sale is to a dealer ed under CST and the goods are covered in the registration certificate of the purchasing dealer. The purchasing dealer is eligible to get these goods at concessional rate if a declaration in C form is submitted to the selling dealer.
Form D Sale to government is taxable @ 4% or applicable sales tax rate for sale within the State whichever is lower. This concession on CST is applicable if Form D is issued by the government department which purchases the goods.
Form E1 This form is issued by the dealer who makes the first inter-state sale during movement of goods from one State to another. This enables the purchaser to claim exemption from CST on the second inter-state sale during the movement of goods by transfer of documents of title.
Form E2 This form is issued by the second or the subsequent seller when the goods move from one state to another in a series of inter-state sales by transfer of documents of title. This form enables the purchaser to claim exemption form CST on subsequent sale of goods.
Form F This form is issued when goods are despatched to another state as a consignment or to the branch of a dealer in another State. The CST is not payable if there is only inter-state stock transfer and there is no sale. To claim interstate movement of goods as “not a sale”, the dealer has to produce a declaration in Form ‘F’ received from Consignment Agent or Branch Office in another State. One Form F covering receipts during one calendar month has to be issued.
Form H This form is issued by an exporter for purchase of goods. The purchase of goods is for an export order or in pursuance of an export order. These goods are then sold in export and the form enables seller of the goods to the exporter to claim deduction on the goods sold for export.
Form I This form is issued by a dealer located in a Special Economic Zone (SEZ). No CST is levied when sales is made to a dealer located in SEZ.
Rate of CST
In an inter-state sale to a ed dealer against form C the rate of CST is 4% or local sales tax rate whichever is lower. If under the local sales tax law, sale or purchase is exempt from CST the CST is Nil. In an inter-state sale to government against form D the rate of CST is 4% or local sales tax rate whichever is lower. Rate of CST in case of inter-state sale of declared goods without form C or D is twice the rate of tax applicable to the local sale or purchase of such goods in that state. Rate of CST in case of other goods ( i.e. non-declared goods) is 10% or the applicable local sales tax of that state, which ever is higher.
Filing of CST Returns
CST amount shall be paid and returns to be filed on a monthly/Quarterly basis and as the case may be. Due date for submitting the return is on or before 15th of the succeeding month or due date for submitting the local sales tax or VAT return of a particular state whichever is later. CST Returns shall be submitted to local Commercial Tax Officer.
CST Features in Tally
State specific CST Returns Tracking of forms: C forms - (Issuable/Issued/Receivable/Received) E1, E2 Forms – Issued against sale of goods in transit by the buyer F forms - For Consignment sales and Branch Transfer H Forms – for sale in course of exports D Forms - For sale to Govt. Organisations I Forms - For sale to SEZ customers Reminder Letters/Covering letters to customers Auto-Fill option.
Enabling CST in Tally
To enable CST feature in Tally : Go to Gateway of Tally> F11: Features > Statutory & Taxation In the Company Operations Alteration screen set Enable Value Added Tax and Set/Alter VAT details to Yes and save.
Note:
CST
feature
is
enabled
only
if
Enable
Value
Added
Tax is set to Y e s .
Configuring Invoice for CST
To activate the E1 and E2 form in transactions: Go to Gateway of Tally > F12: Configuration > Invoice/Orders Entry . In the Invoice Configuration screen set Activate ‘E1’ or ‘E2’ Transaction? to Yes. Accept to save.
Creating CST Party Ledgers
Creating Party Ledgers for Sundry Creditors To create party ledgers for Sundry Creditors: Go to Gateway of Tally > s Info > Ledgers > Create In the Ledger Creation screen enter the name of the company supplying goods to you in the Name field. In the Under field, select Sundry Creditors option from the List of Groups . If required set Maintain balances bill-by-bill? to Yes . Enter details in the Default Credit Period if applicable. By default the Inventory Values are affected? field is set to No . Enter in the Tin/Sales Tax No. field. Accept Yes to save.
Creating Party Ledgers for Sundry Debtors To create party ledgers for Sundry Debtors: Go to Gateway of Tally > s Info > Ledgers > Create . In the Ledger Creation screen enter the name of the company receiving goods from you in the Name field. In the Under field, select Sundry Debtors option from the List of Groups . If required set Maintain balances bill-by-bill? to Yes . Enter details in the Default Credit Period if applicable. By default the Inventory Values are affected? field is set to No . Enter in the Tin/Sales Tax No. field.
Accept Yes to save.
Creating Sales and Purchases Ledger
Creating Sales Ledgers To create ledgers under Sales s group: Go to Gateway of Tally > s Info > Ledgers > Create . Enter a name for the sales ledger in the Name field. In the Under field select Sales s from the List of Groups . Set Yes in Used in VAT Returns? . Select Not Applicable from VAT/Tax Class list . Set the Inventory Values are affected? to Yes if you are maintaining inventory. Accept Yes to Save.
Creating Purchase Ledgers To create purchase ledgers under Purchase s group: Go to Gateway of Tally > s Info > Ledgers > Create . Enter a name for the purchase ledger in the Name field In the Under field select Purchase s from the List of Groups Set Yes in Used in VAT Returns? Select Not Applicable from VAT/Tax Class list Set the Inventory Values are affected? to Yes if you are maintaining inventory Accept Yes to Save
Creating CST Ledger for Sales
To create a CST Ledger under Duties and Taxes for CST on Sales: Go to Gateway of Tally > s Info > Ledgers > Create . In the Ledger Creation screen enter the name of the CST ledger in the Name field. In the Under field select the Duties & Taxes from List of Groups . Select CST from Types of Duty/Tax menu in the Type of Duty/Tax field. Select Not Applicable from VAT/Tax Class menu in the VAT/Tax Class field. Enter the CST percentage applicable in Percentage of Calculation? Select the Method of Calculation from Type of Duty menu. Accept Yes to Save.
Creating CST Paid on Purchases Ledger
To create CST paid on purchases ledger under Purchase s group. This ledger is created under Purchase s to include/appropriate CST value to purchase. Go to Gateway of Tally > s Info > Ledgers > Create Enter a name for the Purchase ledger in the Name field Select Purchase s from the List of Groups menu in the Under field Press Ctrl + Enter to go to the Group Alteration screen Set Yes in Used for Calculation (eg. Taxes, Discounts)? Accept Yes to Save
In the Ledger Creation screen, Enter the name of the ledger and select the expense group from the list. Set the Inventory Values are affected? to Yes if you are maintaining inventory. In Percentage of Calculation? enter the CST percentage applicable. Select the Method of Calculation from Type of Duty menu. Set Used in VAT Returns? to Yes. Select Not Applicable from VAT/Tax Class list. Accept Yes to Save.
Creating a Purchase Voucher
Go to Gateway of Tally > ing Vouchers > F9: Purchase Select As Invoice .
Note:
Purchase
Voucher
can
also
be
entered
in
As
Voucher mode.
Enter the date and reference. Select the Party to be credited from the List of Ledger s in Party’s A/c name. In the Party Details screen, check/modify details. Select the Purchase Ledger from the List of Ledger s . Select Inter-State Purchases from VAT/Tax Class . Select an item from the List of Items .
Note:
To
create
an
Item,
refer
to
topic
Stock
Items .
Enter the Quantity and the Rate to get the amount in the Amount field. Select the CST paid on purchases ledger under purchase s. Select the form to issue from Form Types . Enter the form number and date in Form No and Date respectively. Leave it blank if not yet issued. Select the form to receive from E Form Types . Enter the form number and date in Form No and Date respectively. Leave it blank if not yet received.
N o t e : E Form Types are displayed only if: 1. Activate ‘E1’ or ‘E2’ Transaction? is set to Y e s from F12: 2. C F o r m is selected from Form Types. Enter narration if required and accept Yes to save.
Configure .
Creating a Sales Voucher
Go to Gateway of Tally > ing Vouchers > F8: Sales . Select As Invoice .
Enter the date and reference. Select the Party to be credited from the List of Ledger s and enter Party’s A/c name. In the Party Details screen, check/ modify details. Select the Sales Ledger from the List of Ledger s . Select Inter-State Sales from VAT/Tax Class . Select an item from the List of Items .
Note:
To
create
an
Item,
refer
to
the
topic,
Stock
Items .
Enter the Quantity and the Rate to get the amount in the Amount field. Select the CST Tax ledger (under Duties & Taxes) for sales. Select the form to receive from Form Types . Enter the form number and date in Form No. and Date , respectively. Leave it blank if not yet received. Select the form to issue from E Form Types . Enter the form number and date in Form No. and Date , respectively. Leave it blank if not yet issued.
N o t e : E Form Types are displayed only if: 1. Activate ‘E1’ or ‘E2’ Transaction? is set to Y e s from F12: 2. C F o r m is selected from Form Types. Enter narration if required and Accept to save.
Configure .
Note: D Form F Form H Form I Form
C
Form is for ed customers. is for Government Organisations. is for Branch transfers. is for deemed exports. is for SEZ Customers.
Creating Debit and Credit Notes
You can create Debit and Credit Notes for changes in Quantity, Rate, Return of Goods, and so on. Debit/Credit note is enabled in F11:Features in the Gateway of Tally. To Create a Debit/Credit Note: Go to Gateway of Tally > ing Vouchers . In the ing Voucher Creation screen, select F9:Debit Note/ F8: Credit Note to create a debit/ credit note. Select As Invoice .
Note:
Debit/
Credit
Note
can
also
be
entered
in
As
Voucher mode.
Enter the date and reference. Select the Party to be credited from the List of Ledger s and enter Party’s A/c name . In the Party Details screen, check/ modify details. Select the Sales/ Purchase Ledger from the List of Ledger s . Select Inter-State Sales/Inter-State Purchases from VAT/Tax Class . Select an item from the List of Items .
Note:
To
create
an
Item,
refer
to
the
topic,
Stock
Items .
Enter the Quantity and the Rate to get the amount in the Amount field. Select the CST tax ledger under Duties & Taxes for credit note, and CST paid on purchases ledger under Purchase s for debit note. Select the form to receive from Form Types . Enter the form number and date in Form No. and Date , respectively. Leave it blank if not yet received. Select the form to issue from E Form Types . Enter the form number and date in Form No. and Date , respectively. Leave it blank if not yet issued.
N o t e : E Form Types are displayed only if: 1. Activate ‘E1’ or ‘E2’ Transaction? is set to Y e s from F12: 2. C F o r m is selected from Form Types.
Configure .
Enter narration if required and Accept to save.
CST Reports
CST Reports display forms to be received and issued. It allows you track pending forms and reconcile forms. To view CST Reports: Go to Gateway of Tally > Display > Statutory Reports > CST Reports
Forms Receivable Forms Issuable
Forms Receivable
This displays the CST forms receivable for the statutory reports from the CST Party Ledgers. Go to Gateway of Tally > Display > Statutory Reports > CST Reports > Form Receivable Select from CST Party Ledgers/Groups Forms to be received for the selected ledger are displayed in the Forms Receivable screen Enter in the Form Number and Date for forms received Accept to save
Forms Issuable
This displays the CST forms issuable for the statutory reports from the CST Party Ledgers. Go to Gateway of Tally > Display > Statutory Reports > CST Reports > Form Issuable. Select from CST Party Ledgers/Groups. Forms to be issued for the selected ledger are displayed in the Forms Issuable screen. Enter in the Form Number and Date for forms received. Accept to save.
Auto Fill option for CST
The Auto Fill option for CST is available in the Form Issuable/ Form Receivable screen. Use this option to filter the type of forms and to fill up the form number for a group of vouchers. Go to Gateway of Tally > Display > Statutory Reports > CST Reports > Form Receivable/ Form Issuable . Press F5: Auto Fill – CST . In the Set Form Numbers screen. Select the form from Form Types .
Enter the Form Number and Form Date for the group of vouchers. Accept to save.
In the Forms Receivable/ Forms Issuable screen, Accept to save.
Appropriation in Vouchers
Form numbers and date entered in Forms Receivable/ Forms Issuable are recorded and displayed in the Vouchers. To view this: Go to Gateway of Tally > Display > Daybook . Press Alt + F2 to change the period. Select the voucher and enter to go to the ing Voucher Alteration screen. The entries are displayed in Form No: and Date: fields.
Viewing All Vouchers
Go to Gateway of Tally > Display > Statutory Reports > CST Reports > Form Receivable/ Form Issuable . Select the party’s ledger from List of Ledgers . Press Alt + F2 to change the period. In the Forms Receivable/ Forms Issuable , screen press F12: Configure . In the CST Configure screen, set Show All Vouchers? to Yes . Show Vouchers of: displays Form Types . Select the type. To view all types, select Not Applicable .
Reminder and Covering Letters
You can send reminder letters to parties who have to issue forms. You can also send covering letters to parties, confirming receipt of forms.
Configuring Reminder and Covering letters To configure reminder and covering letters: Go to Gateway of Tally > F12:Configure > Printing . Reminder Letter – CST Form. Covering Letter – CST Form. Enter default details in the CST Reminder Print Config screen, for reminder letters, and in the CST Covering Print Config screen, for covering letters.
Reminder Letters Go to Gateway of Tally > Display > Statutory Reports > CST Reports > Form Receivable . Select the party’s ledger from List of Ledgers . In the Forms Receivable screen, press Print (Alt + P) . In the Report Generation screen, set Print Reminder Letter? to Yes .
Print Preview
Covering Letters Go to Gateway of Tally > Display > Statutory Reports > CST Reports > Form Issuable . Select the party’s ledger from List of Ledgers . In the Forms Issuable screen, press Print (Alt + P) . In the Report Generation screen, set Print Covering Letter? to Yes .
Print Preview
Introduction
Fringe Benefit Tax was introduced as part of Finance Act, 2005 as an additional income-tax and came into force from April 1, 2005. The term Fringe Benefits means ‘any consideration for employment provided by way of any privilege, service, facility or amenity provided by the employer to the employees’. Fringe Benefit Tax is to be levied on the employer in respect of fringe benefits provided/deemed to be provided by the employer to his employees during any financial year commencing on or after 1.4.2005 Fringe Benefit Tax is payable at the rate of 30% of the value of fringe benefits computed in the manner prescribed under the Section 115WC.
Salient Features of FBT
Some of the features of FBT are listed as follows: 1.
Fringe Benefit Tax payable by an employer is in respect of perquisites or fringe benefits provided or deemed to have been provided by the employer to his employees in addition to the cash salary or wages paid during the year.
2.
Fringe Benefit Tax is levied in addition to the Income-Tax charged.
3.
Fringe Benefit Tax is payable at the specified rate on the value of fringe benefits provided to the employees. The value of fringe benefits is calculated in accordance with the provisions of Section 115WC of the Income-Tax Act, 1961.
4.
An employer has to pay Fringe Benefit Tax even if no Income-Tax is payable on the total income.
5.
Like any other direct tax, Fringe Benefit Tax is not an allowable expenditure for the purpose of computation of taxable income.
Important points relating to Fringe Benefit Tax
Some of the important points to be observed in FBT: 1.
Rate is calculated on Net Expenses.
2.
Expenses are not to be segregated between ‘Paid to Employees’ and ‘Paid to Outsiders’.
3.
Depreciation is calculated on the basis of Income Tax.
4.
FBT is applicable on Service Tax paid on any of the expenditure chargeable to FBT.
5.
Payment of FBT in case employers have employees based both in and outside India.
6.
Medical reimbursement upto Rs. 15,000 per employee is charged to FBT.
7.
Applicability of FBT in case an employer is engaged in two or more business activities.
8.
Different rates of tax on the Fringe Benefits provided by different industries.
9.
FBT is not payable on Advance paid.
10.
Tax Rate is 30% + Surcharge @10% + Education Cess @ 2% .
11.
One Ledger may have expenditure relating to different groups under FBT.
Characteristics of FBT
Some of the characteristics of FBT are: It is a tax on expenditure, not income. It is a tax on employer, not employees. It is a surrogate tax on employers. It cannot be recovered from the employees. It is to tax benefits that are usually enjoyed collectively by the employees and cannot be attributed to individual employees. A combination of presumptive and non-presumptive approaches has been adopted.
Classification of Employer for FBT
Under FBT, an Employer is defined as any of the following: Company Firm Association of Persons or a Body of Individuals (except Fund or Trust or institution eligible for exemption under section 10(23C) or ed under section 12AA) Local Authority Every Artificial judicial person, not falling within any of the above
Note:
Under
FBT,
they
are
considered
as
Employer
even
if
the
Taxable
Income
is
NIL.
Classification of Not Employer for FBT
The following are not included as Employer under FBT: An Individual (i.e., Proprietorship concern) Hindu Undivided Family Association of Persons or a Body of Individuals exempt under section 10(23C) or ed under section 12AA Central Government State Government
Direct Fringe Benefit
Direct Fringe Benefit as classified under section 115(WB) (1) means: Any privilege, service, facility or amenity, which is directly or indirectly provided by an employer to his employees (including former employee or employees). Any free or concessional tickets provided by the employer for private journeys to employees or their family . Any contribution by the employer towards an approved superannuation fund for employees. Any reimbursement, which is directly or indirectly made by the employer to employees for any purpose.
Deemed Fringe Benefit
The Fringe Benefits are deemed to have been provided if the employer incurs any expenditure or makes any payment in the course of business or profession. This includes any activity whether or not such activity is carried on with the object of deriving income, profits or gains. Any expenditure incurred or payment made for the following constitutes deemed fringe benefit. Entertainment Hospitality Conference Sales promotion including publicity Employee welfare Conveyance, tours and travel Hotel, boarding, lodging Repair, running and maintenance of cars Repair, running and maintenance of aircraft Use of telephone Maintenance of any accommodation in the nature of guest house Festival celebrations Health Club Any other club Gifts Scholarship to employees’ children Consumption of fuel other than industrial fuel
Payment of FBT to the government
In accordance with the provisions, the FBT should be paid in advance during any financial year and the regular assessment of fringe benefits is to be made in a later assessment year.
Advance Fringe Benefit Tax Every assessee who is liable to pay advance tax has to pay tax on the current fringe benefits calculated in the manner laid down. The amount of advance tax payable in the financial year is 30% of the value of the fringe benefits paid or payable in each quarter. This is payable on or before the 15th day of the month following each quarter except for the quarter ending 31st of March. For the quarter ending on the 31st of March of the financial year, the amount of advance tax (on an estimated value) is to be paid on or before the 15th of March for the financial year. If tax is not paid or the tax paid is less than the prescribed rate, the assessee is liable to pay simple interest at the rate of 1% on the amount by which the advance tax paid falls short.
Filing of FBT return
An employer who has paid or made provision for payment of fringe benefits to his employees during the previous year is required to furnish a return of fringe benefits in the prescribed form and manner to the Assessing Officer before the due date. For a company as an employer the due date is the 31st of October of the assessment year. For a person who is an employer but not a company and whose s are required to be audited, the due date is the 31st of October of the assessment year. For any other employer, the due date for filing the return of fringe benefits is the 31st of July of the assessment year. After the due date, the Assessing Officer may issue a notice to the assessee requiring him to furnish a return in the prescribed form and manner within a period of thirty days. Failure to furnish a return of fringe benefits or delayed filing of such return will result in the levy of interest at the rate of 1% for each month of delay or till the assessment is made on the amount of tax on the value of fringe benefits.
FBT in Tally
FBT in Tally provides an easy-to-use and flexible interface. It allows the to view and print FBT Reports and Challans. N o t e: FBT can companies.
be
processed
for
both
s
Only
and
s
With
Inventory
Features of FBT in Tally The FBT functionality in Tally s the following features: Simple and -friendly. Quick and easy to set up and use. Challan management and printing for prompt and accurate filing of tax. One-time easy configuration to enable FBT. You have to enter transactions; FBT is automatically calculated and generated in Reports. The FBT Report has FBT Computation Report which displays detailed FBT calculations for each category under FBT. The report also displays FBT (-defined Ledger), Education Cess and Surcharge tax payable. Allows you to generate, print and file ITNS 283 Challan from Tally. All categories and assessee types of FBT are incorporated in Tally. Any changes made are updated automatically and manual changes are not required. FBT Assessee Type and FBT Category are displayed in the Statutory Masters with the details. Values in transactions are taken from here. Changes in details are updated automatically.
Enabling FBT in Tally
Configuration of FBT Set the option Use ing terminology of as India/SAARC in the F12: Configuration screen.
Enable FBT in F11: Features You can enable Fringe Benefit Tax (FBT) by using the F11: Features screen. 1.
Go to Gateway of Tally > F11: Features > Statutory & Taxation
2.
Set the option Enable Fringe Benefit Tax (FBT) to Yes
2.
3.
Set Set/Alter FBT Details to Yes . The Company FBT Assesse Details sub form appears as shown.
3.
Income-Tax/PAN Number If the Income Tax/PAN Number is not entered in the Company Master , the same can be entered in F11: Features under Company FBT Assessee Details . If the Income Tax/PAN Number is entered in the Company Master, it cannot be edited in F11: Features under Company FBT Assessee details .
Assessee Type Set the Assessee Type to which your company belongs to. This information is used to calculate the Income Tax, Surcharge and Education Cess while computing FBT. Note: * The option Is Surcharge Applicable ? is applicable only if your Assessee Type is Association of Persons/Body of Individuals. On setting this field to Yes in the Company FBT Assessee Details, the surcharge is calculated in FBT Computation Report. * For the Assessee Type Local Authority, the option Is Surcharge Applicable? is not
applicable. * For all the other Assessee allowed to edit the same.
Types, this
Assessee Category Select the appropriate Assessee Category from the list.
option
is
set
to
Yes
by
default
and
you
are
not
Display of FBT Assessee Types and Categories in Statutory Info.
Tally provides you with predefined set of FBT Categories and Assessee Details.
FBT Assessee Type To view the FBT Assessee Type details, Go to Gateway of Tally > Display > Statutory Info > FBT Assessee Type
Select the Assessee Type from the List of Assess Types. The screen has a Name field displaying the Assessee Type. The FBT Assessee Details displays the Rate of FBT, Surcharge, Additional Surcharge (Cess), Additional Education (Cess) and the dates they are applicable from.
FBT Categories To view the FBT Category details, Go to Gateway of Tally > Display > Statutory Info > FBT Category
Select the FBT category from the List of FBT Categories. The screen displays the FBT Category and the corresponding Section code. The FBT Category section displays the Eligible Percentage for all the Assessee Categories and the dates they are applicable from. Note:
Any
changes
to
the
values
will
be
updated
on
the
Tally
website.
FBT masters
You have to specify the FBT Ledger Names under any of these main group heads – Duties and Taxes, Sundry Creditors, Sundry Debtors, Indirect Expenses or sub groups of these main group heads. Create the following ledgers under specified groups: Tax Ledger under Duties and Taxes Party Ledger under Sundry Creditors Expense Ledger under Indirect Expenses
Creating Tax Ledger
The tax ledgers created under the group Duties and Taxes are used for calculation of tax. Tax Ledger is used in FBT payment. To create a Tax Ledger, Go to Gateway of Tally > s Info. > Ledgers > Create Enter the Name of the tax ledger Select the group Duties & Taxes from the List of Groups Select FBT from the list of Types of Duty/Tax
Creating a Party Ledger
Create ledgers for Party/Suppliers under the group Sundry Debtors/Sundry Creditors. To create an FBT Party Ledger , Go to Gateway of Tally > s Info. > Ledgers > Create In the Ledger Creation screen, enter the name of the party in the Name field In the Under field, select Sundry Creditors/Sundry Debtors If required, set Maintain balances bill-by-bill? to Yes . Enter details in the Default Credit Period , if applicable. By default, the Inventory Values are affected? field is set to No. Accept and Save.
Creating an Expense Ledger
All the expense ledgers are to be created under the group Indirect Expenses . The group Indirect Expenses is used for booking expenses. To create an FBT Expense ledger, Go to Gateway of Tally > s Info. > Ledgers > Create Enter the Name of the expense ledger Select the group Indirect Expenses from the List of Groups
When Is FBT Applicable ? is set to Yes , the field Default FBT Category? will be displayed. You have to select the appropriate FBT Category from the List of FBT Categories .
Accept Yes to save the ledger
Creating/Altering FBT Voucher Type
To create or alter a FBT Voucher type such as Journal 1.
Go to s Info. > Voucher Types > Create/Alter > Journal
2.
In the Voucher Type Alteration screen, Type the Name of Class . For example, Fringe Benefit Recovery.
The following screen displays.
Set Use Class for FBT Recovery to Yes and Accept the screen.
Creating FBT Vouchers
Creating FBT Journal Voucher: FBT Journal Voucher can be created in two ways: 1.
FBT Journal Voucher without a Class
2.
FBT Journal Voucher using a Class
Creating FBT Journal without a class
1.
Go to Gateway of Tally > ing Vouchers > F7: Journal
2.
Select Entertainment from the list and enter the amount in the debit column
3.
Select the Party (Supplier) from the list. Amount appears automatically in the Credit column
N o t e : FBT s selection of a ledger with multiple selection of FBT Category during entry to Y e s in F12:
categories. To do this, Configure screen.
set
Allow
Creating FBT Journal with a class
To create a Journal Voucher using a Voucher Class , 1.
Go to Gateway of Tally > ing Vouchers
2.
Select F7: Journal button from the button bar or press the F7 key. Select the class as Fringe Benefit Recovery from the list Class Table.
3.
The FBT Journal voucher screen displays as shown. This provides the recovery details from an employee and the same appears in the FBT Computation report.
Debit the Supplier Credit the Expenses incurred
4.
Enter the narration , if required
5.
Accept the voucher to save
Creating a Payment voucher to book expenses for FBT
To create a FBT Payment voucher, 1.
Go to Gateway of Tally > ing Vouchers
2.
Select F5: Payment from the ing Voucher Creation screen
3.
Enter the Date
4.
Select FBT Ledger in Particulars from the List of Ledger s . The FBT Category sub screen displays. Select the appropriate category from the list of FBT Categories and enter the amount.
N o t e : The FBT Category e n t r y is enabled in F12:
is
displayed if Allow Configuration .
selection
of
FBT
Category
5. Credit Bank or Cash through which the payment is to be made against the FBT Ledger.
6. Enter Narration , if required 7. Accept to save
during
Creating a Payment voucher without FBT helper button
1.
Go to Gateway of Tally > ing Vouchers
2.
Select F5: Payment in the ing Voucher Creation screen
3.
Select the Bank/Cash from the list
4.
Select the FBT Ledger from the list and enter the amount
5.
On selecting the FBT Ledger , the field FBT Details displays above the Narration field. Set FBT Details to Yes
6. On setting FBT Details to Yes , the following screen displays
7. Enter the FBT Filter details and Accept to save the payment voucher screen
Creating a Payment voucher with the FBT helper button
Payment of FBT can be made using FBT Helper button. Payment will be calculated only on the vouchers which are between the From Date and To Date. N o t e : FBT Helper feature is P y m t / R c p t / C o n t r a ? in F12:
available only if Use Single Entry mode for Configure (Voucher Configuration) is set to Y e s .
1.
Go to Gateway of Tally > ing Vouchers
2.
Select F5: Payment in the ing Voucher Creation screen
3.
Press Alt + F or click FBT Helper from the button bar to view the FBT Filters sub screen
4.
Select the Type of Payment from the list. The selection will be reflected in the Challan
For example, if Advance Tax (100) is selected in the payment filter, Advance Tax is automatically marked (x) in the FBT Challan.
5. Select the ledger from the List of FBT Ledgers
6.
Enter the From Date and To Date to select the period for computing payment and for the generation of FBT Challan
7.
Select the Bank ledger from the List of Ledger s, which is to be credited in the Payment Voucher
8.
Enter Narration , if required
9.
Click Print button or press Alt+ P to print FBT Challan , if required
10.
Accept to save
9. 10.
Printing FBT Challan
You can Print the FBT Challan for a FBT Payment voucher created manually or using the FBT helper button. To print a FBT Challan , 1.
Press Alt + P or click Print from the button bar in the Payment Voucher screen to view the Voucher Printing screen
2.
Press Backspace to navigate from Print Yes or No ? and move the cursor to Print as FBT Challan ?
3.
Set Print as FBT Challan to Yes
4.
Accept the sub screen to save
3. 4.
Note: * If the option Print as FBT Challan is set to Y e s then Default Payment C h e q u e will not be printed. * Ensure you click With Preview button or press Alt+ I to view the FBT Print Preview mode
Print Preview of FBT Challan
Challan Challan in
and
Creating a Purchase voucher
To create a Purchase Voucher, Go to Gateway of Tally > ing Vouchers Select F9: Purchase from the button bar or press F9 Select As Voucher/As Invoice Enter the Date and Reference Credit the party ledge r from the List of Ledger s Select the expenses from the List of Ledger s and debit the same. The FBT Category sub screen displays. Select the appropriate category from the list of FBT Categories and enter the amount Enter Narration, if required Accept to save
N o t e : Set the Configure .
option
Allow
Expenses/Fixed
Assets
in
Purch.
Vouchers to Y e s In F 1 2 :
Creating a Debit Note
A Debit Note for FBT can be entered in Voucher or Invoice mode. N o t e : Set
the
option
Use
Debit/Credit
Notes to Y e s in F11:
To create a Debit Note, Go to Gateway of Tally > ing Vouchers Select F9: Debit Note from the button bar or press Ctrl + F9 Select As Voucher/As Invoice Enter the Date and Reference Debit Cash from the List of Ledger s Select the Party from the List of Ledger s and credit the same Enter Narration , if required Accept to save
Features .
FBT Computation
FBT Computation lists only those categories for which ledgers are created and transacted. To view the FBT Computation screen, Go to Gateway of Tally > Display > Statutory Reports > FBT Reports > FBT Computation
FBT Payment Details Set the option Show FBT payment Details to Yes in F12: Configure for the payment details to be displayed in the FBT Computation screen.
The screen displays as shown
Less: Advance Tax Paid The value in this field is taken from all the Payment vouchers with the FBT Ledger and Type of payment marked as Advance Tax (100) with the appropriate period.
Less: Self Assessment Tax Paid The value in this field is taken from all the Payment vouchers with the FBT Ledger, Type of payment marked as Self Assessment Tax (300) with the appropriate period.
Less: Tax paid on Regular Assessment The value in this field is taken from all the Payment vouchers with the FBT Ledger and Type of payment marked as Tax On Regular Assessment (400) with the appropriate period.
Section Code Set the option Show Section Code to Yes in F12: Configure if the Section code i s to be displayed in the FBT
Computation screen.
The screen displays as shown.
Expenditure Amount This field displays the amount that is spent on the FBT marked Indirect Expenses like Entertainment, Conveyance, and so on.
Amount Recovered The amounts that are recovered from the employees towards the expenses incurred are displayed here.
Nett Amount The difference between the amount incurred on the Indirect Expenses and the amount recovered from the Employee is the Nett Amount.
Percentage as per Sec 115WC The percentage of Rate of Tax of FBT Category (Enabled in F11: Features ) for the respective FBT category is displayed in this field. For more details, refer FBT Ledger Category
Value of Fringe Benefit The Percentage obtained as per sec 115WC on Nett Amount for the respective category is the value of Fringe Benefit.
FBT Ledger Category
From the FBT Computation screen press Enter on any particular FBT Category to drill down to a report that displays all the ledgers marked with respective FBT Category. Consider the FBT Category Entertainment – under the Section 115WB (2) (A)
Name of the Ledger Name of the ledger marked with above mentioned FBT Category is displayed here.
Expenditure Amount The amount spent towards Entertainment - 115WB (2) (A) and ed for a particular ledger is displayed here.
Amount Recovered The amount that has been recovered from the employees towards the expenses incurred is displayed here.
Nett Expenditure The difference between the amount spent on Entertainment and the amount recovered from the Employee is the Nett Amount.
Percentage as per Sec 115WC The percentage of the Rate of Tax of Company Assessee Category (enabled in F11: Features) for the respective FBT category is displayed in this field.
Value of Fringe Benefit The percentage obtained as per sec 115WC on Nett Amount for the respective category is the value of Fringe Benefit.
FBT Tax is calculated on the value of fringe benefits. Rate of tax is extracted from FBT Assessee Type master for the selected Assessee Type in F11: Features. For example, if Assessee Type is Association of Persons/Body of Individuals then, Income Tax Rate is 30%, Surcharge is 10 % and Education Cess is 2%. Note:
The
percentage
will
vary
for
different
Assessee
Types.
Surcharge Surcharge is calculated on Fringe Benefit Tax Amount and is extracted in the same way as Rate of Tax .
Education Cess Education Cess is calculated on the sum of value of Income Tax and Surcharge. Additional Surcharge Rate/Cess Rate is also extracted in the same way as Rate of Tax.
Total Tax This is the total of the Income Tax, Surcharge and Education Cess percentage values. Note: * From FBT Ledgers * From FBT Ledger Alteration screen.
of Category, you can drill Vouchers, you can further
down to FBT drill down to
Ledger Vouchers. ing Voucher
Introduction
A manufacturer of excisable goods can avail MODVAT (now CENVAT) credit of duty paid on the goods purchased from any dealer w.e.f. 04.07.94. The dealer intending to issue modvatable (now Cenvatable) invoices should get themselves ed with the jurisdictional Range Superintendent by following the procedure prescribed in Rule 9 of Central Excise (No.2) Rules, 2001. All the godowns /Store-rooms should be ed separately. A Central Excise ed dealer should ensure that the prescribed is maintained for the godown/ Storeroom. All the consignments received/ issued from the godown have to be entered in the (further details in Central Excise Rules and Manual). The Dealer shall issue the invoices in quadruplicate. The copies of the invoices issued by a first stage dealer and a second stage dealer shall be marked at the top as "FIRST STAGE DEALER" and "SECOND STAGE DEALER" respectively. The invoice issued by a first stage or second stage dealer in the case of imported goods and by a second stage dealer in the case of other goods, shall be duly authenticated by the officer. The Dealer shall issue one invoice for every consignment dispatched in one batch and at a given time. If a consignment is split into two or more batches, then each consignment is dispatched separately with separate invoices.
Who is a Trader/Dealer? A Trader/Dealer is someone who purchases and sells goods and maintains an inventory of goods. A ed Excise dealer is a dealer of Excisable goods who is ed under Central Excise rules, 1944 and on the strength of whose invoice Cenvat credit can be taken.
Who will be covered under Dealer Excise? The following dealers are covered under Excise for Dealer.
First Stage Dealer A First Stage Dealer is one who purchases goods directly from any of the following:
The manufacturer under the cover of any invoice issued in of the provision of Central Excise Rules, 2002 or from the depot of the said manufacturer.
Goods purchased from the premises of the consignment agent of the said manufacturer.
Goods purchased from any other premises from where the goods are sold by or on behalf of the said manufacturer.
Goods purchased from an importer or from the depot of an importer.
Goods Purchased from the premises of the consignment agent of the importer.
Second Stage Dealer
A ed dealer who purchases goods from the First Stage Dealer is called a Second Stage Dealer.
Flowchart on Excise Dealer
The categorization of a dealer as first stage or second stage is not predefined. It is decided during the purchase. Therefore, a dealer may be a first stage dealer or a second stage dealer depending on the type of purchase. Assume you are a First Stage Dealer and you buy the goods from the importer or Manufacturer.
The Invoice issued on sale of goods to the Manufacturer or Second Stage Dealer has to indicate the amount of Excise Duty ed on or proportionate value to the excise of the goods being sold.
Example 2 Let us assume that you are a Second Stage Dealer and you purchase goods from a First Stage Dealer.
Type of Duties and Method of Calculation
The Duties for Excise can be calculated on Assessable value and on Duty Value. According to the Excise laws, find below the list of Excise duties with the method of calculation. Type of Duty
Method of Calculation
Formula for Calculation
Basic Excise Duty
On Assessable Value
Assessable Value
Special Excise Duty
On Assessable Value
Assessable Value
Additional Duty of Excise (Goods of Special
On Assessable Value
Assessable Value
On Duty Value
BED + SED
On Duty Value
BED + SED
National Calamity Contingent Duty (NCCD)
On Duty Value
BED + SED + AED(GSI)
Countervailing Duty (CVD) On Import)
On Assessable Value
Assessable Value OR Assessable Value + BED
Education Cess
On Duty Value
BED + SED + AED(GSI)+ AED(TTA) +AED(TTW) + NCCD + ADE + SAD
Secondary Education Cess (SED)
On Duty Value
BED + SED + AED(GSI) + AED(TTA) + AED(TTW) + NCCD + ADE + SAD
Education Cess on CVD
On Duty Value
CVD Value
Importance) AED (GSI) Additional Duty of Excise (Textile and Textile Articles) AED (TTA) Additional Duty of Excise (Tea and Tea Waste) AED (TTW)
Special Additional Excise Duty (SAD)
On Duty Value
BED + SED + AED(GSI) + AED(TTA) + AED(TTW) + NCCD + ADE
Additional Duty of Excise (ADE)
On Duty Value
BED + SED
Filing Excise Returns
Every ed dealer is required to maintain a Daily Stock of records of receipts of duty-paid goods and issue thereof, and submit quarterly return in the Form - 2.
Excise for Dealers in Tally
The Excise for dealers feature in Tally s the following, making it easy for computation:
Easy to use
Fast and error free voucher entry
Complete tracking of Excise duty on each transaction
Printing of Excise invoice with the Supplier & Manufacturer details as configurable option
Reports are generated as per Central Excise Statutory requirements
Generation of Quarterly Return in Form-2
Generation of Sales and Purchase Extract
Enabling Excise in Tally
You can enable Dealer - Excise in Tally, in the F11: Features screen. Go to Gateway of Tally > F11: Features > Statutory & Taxation The Company Operations Alteration screen appears as mentioned below 1.
Set Enable Dealer – Excise to Yes .
2.
Set Set/Alter Dealer – Excise Details to Yes .
3.
The Company Excise Details sub-form appears as shown below.
3.
ECC/PAN Based Regn/Code No.: The 15-Digit PAN based registration number is an alphanumeric number mentioned in the Registration Certificate. The first part would be the 10-character (alphanumeric) Permanent Number [PAN] issued by the Income Tax Authorities to whom the registration number is allotted (includes a legal person). The second part comprises a fixed 2-character alpha-code indicating the category of the Registrant. The third part is a 3-character numeric code. Commissionerate: The Commissionerate of central Excise is the division under which your ed premise is located.
Range
Code: Enter the code of the range under which your company is ed. Name: Enter the name of the range under which your company is ed. Address: Enter the address of the Range under which your company is ed.
Division
Code: Enter the code of the division under which your company is ed. Name: Enter the name of the division under which your company is ed. Address: Enter the address of the division under which your company is ed.
Creating a Supplier Ledger
Go to Gateway of Tally > s Info > Ledgers > Create The ledger creation screen appears as shown below. 1.
Enter the name of the Supplier in the Name field.
2.
Select the group Sundry Creditors in the Under field.
3.
Set Maintain Balances Bill by Bill to Yes and enter the Default Credit Period
4.
Inventory Values are affected is set to No
5.
In the Mailing Details section enter the supplier details, Income Tax and the Sales Tax numbers .
5.
6.
Set Excise Details to Yes to display the Excise Details sub form.
6.
7.
Enter the Excise Registration Number of the supplier.
8.
Enter the Range under which the supplier’s company is ed.
9.
Enter the Division under which the supplier’s company is ed.
10.
Enter the division under which the premise of the Supplier’s company is ed.
11.
Select the Default Nature of Purchase from the Nature of Purchase list. The table lists the Type of Purchase , which can be changed during transactions.
N o t e : The and Sundry
Excise Details sub-screen Debtors only.
Creating Customer Ledger
appears
for
ledgers
created
under
Sundry
Creditors
Creating Customer ledger is similar to that of creating the Supplier Ledger but it should be created under Sundry Debtors.
Creating a Stock Item
Go to Gateway of Tally > Inventory Info > Stock item > Create The Stock Item Creation screen appears as shown below.
1. Enter the name of the Stock Item in the Name field. 2. In the Under field, select the group under which the Stock Item is created from the List of Groups list. 3. Select the unit for the Stock Item from the Units list. 4. Set Excise Details to Yes to display the Duty Details sub form as shown below.
4.
5. Enter the Tariff Classification number.
Note: The Tariff Classification field is Note and Debit Note will list the Stock 6.
Select the Type of Duty from the List of Duties
7.
Specify the Rate of Duty
8.
Select the Method of Calculation
9.
After entering the details accept Yes to save
mandatory. Items with
The Tariff
Refer to Types of Duties and Method of Calculation for details on all the duties.
Excise Purchase/Sales/Credit Classification only.
Creating Ledgers for Excise Duty
The Ledgers for Excise Duty are used to the Excise Duty . Go to Gateway of Tally > s Info > Ledgers > Create 1.
Select Duties & Taxes from the List of Groups
2.
Select Excise for Type of Duty/Tax
3.
Select the appropriate Duty Head from the list
4.
Set Inventory values are affected to Yes
5.
3. 4. 5.
Enter the Percentage of Calculation
6.
Select the Method of Calculation from the Type of Duty list
Similarly, you can create Ledger Masters for different Rates of Excise Duties .
Methods of Excise ing The can use any of the following two methods to Excise Duty in Tally 1. On the Total Cost Basic Rate
Assessable Value + Taxes = Cost of the Item The sum of the Total Assessable Value and the Excise Duty will form a part of the Cost of the Item
Eg. Stock Item A costs
Rs. 50/ unit
100 nos of Stock Item A
Total Cost Rs. 5000(@ Rs. 50/unit)
Excise Duty@16%
Rs. 800/-
Education Cess@2%
Rs. 16/-
Secondary Education Cess @ 1%
Rs. 8/-
The Total Amount
Rs. 5824/-
The Total Purchase Cost/unit
Rs. 5824/100= 58.24
Note:
The
Excise
Duty
paid
by
the
dealer
becomes
the
cost
for
the
dealer.
2. Appropriation by Quantity or Value
Eg.
Stock Item A cost 100 nos of Stock Item A
Rs. 50/unit Total Cost Rs. 5000
Excise Duty@16%
Rs. 800/-
Education Cess@2%
Rs. 16/-
Secondary Education Cess @ 1%
Rs. 8/-
The basic Rate of the Stock Item is retained and the details of the Excise Duty are shown using the duty ledgers created under the purchase . The appropriation is done by Tally and the duty against is added to the cost of the material.
Creating Ledgers for VAT
VAT ledgers are created to allocate Input and Output VAT on purchase and sales transactions. Go to Gateway of Tally > s Info > Ledgers > Create 1.
Select Duties & Taxes from the List of Groups
2.
Select VAT for Type of Duty/Tax
3.
Select the Default VAT/ Tax Class from the List of VAT/Tax Class
4. 5.
3.
4.
By default Inventory values are affected field is set to Yes
5.
Set Percentage of Calculation, if required
6.
Method of Calculation is set to On VAT Rate by default.
N o t e: If the V A T / T a x Class is not selected during v o u c h e r entry.
selected
at
the
ledger
level,
the
same
can
be
Creating Voucher Type
The Excise Voucher Type for Purchase , Sales , Credit Note and Debit Note has to be created before creating the invoices.
Creating Purchase Voucher Type Go to Gateway of Tally > s Info > Voucher Type > Create
Name: Enter the name of the Voucher type. Type of Voucher: Select the type of voucher as purchase from the list of Voucher types . Abbreviation: You may abbreviate the Vouchers type as per your requirement. Method of Voucher Numbering: Select Automatic for the method of Voucher numbering.
Use Advanced Configuration: Set it to Yes to specify the numbering method, if required. Refer Creation of Voucher Types for details on other fields. Use for Dealer Excise: Set this field to Yes to enter Excise Purchase to capture Assessable Value and Excise Duty breakup. Accept the screen to save after entering all the details. N o t e : The Use for Dealer Excise option will appear Sales/Credit Note only and if the Dealer Excise is Statutory & Taxation .
in Purchase/Debit Note and enabled in the F11 Feature F3
–
Creating Sales Voucher Type Creating Sales Voucher Type is similar to that of Creating a Purchase Voucher Type but it should be created under the Sales Type of Voucher.
Creating a Debit Note Voucher Type A Debit note Voucher type has to be created if a Debit Note has to be ed. The Voucher Type should be created under Debit Note type of Voucher.
Creating a Credit Note Voucher Type A Credit note Voucher type has to be created if a Credit Note has to be ed. The Voucher Type should be created under Credit Note type of Voucher.
Creating an Excise Opening Stock
Tally allows you to maintain a record of Excise Opening Stock Balance of the Excise Stock Items N o t e : Excise Opening Stock option create an Excise Purchase voucher
under the Inventory Info menu will appear only if you type with Use for Dealer Excise o p t i o n set to Y e s .
To create an Excise Opening Stock : Go to Gateway of Tally > Inventory Info > Excise Opening Stock
Creating an Excise Opening Stock You can track the Excise Opening Stock by entering the Stock Item Purchase details in the Excise Opening Stock . Let’s consider an Example: A buys 100 nos of Stock Item A from King & Sons and 50 nos of Stock Item A from MICO Manufacturing Limited . The Opening Stock carried forward for the current year will be 35 nos of Stock A ( 25 nos . from king & Sons and 10 nos from MICO Manufacturing Limited ). To record this Excise Opening Stock balance, you need to follow the below procedure: Go to Gateway of Tally > Inventory Info > Excise Opening Stock 1. 2. 3.
Enter the purchase Invoice Number of the Stock Item in the field Supplier Invoice No.
1. 2.
Select the Party’s A/c Name from the List of Ledger s
3.
Enter the Party details in the Party Details sub form
4.
Accept the above screen and select the Nature of Purchase from the list
4.
5.
Select the Purchase Ledger from the List of Ledger s
6.
Select the Stock Item from the List of Excise Stock Items for the Item Allocations screen to appear
7.
Enter the Purchase Quantity in the field Quantity , i.e. quantity purchased from the supplier
8.
Enter the purchase Rate
8.
9.
Accept the above screen and the Excise Details screen to appear
9.
10.
Enter the Supplier Invoice Number and Supplier Invoice Date
11.
Enter the PLA RG 23 Sl. No. if any
12.
Enter the Quantity on hand in the field Excise Opening Stock and accept the Excise Dealer sub form
N o t e : For accepted.
accurate
Duty
calculations
,
all
the
fields
in
the
above
screen
have
to
be
13.
Accept the above screen
Similarly, the Excise Details sub form for the Stock Item purchased from MICO Manufacturing Limited appears as shown
The Excise Opening Stock appears as shown
N o t e : The Excise Opening Stock affect your Book of s. They Book .
voucher is an o p t i o n a l voucher, can be viewed under Exception
which will not Reports and D a y
Creating an Excise Purchase Invoice
The Voucher Types created should be used for all the purchase and sales entries of Excise transactions. The Excise feature s Multi Currency and Voucher Class. Go to Gateway of Tally > ing Vouchers > Select F9: Purchase
1. Select the Excise Purchase as the Voucher Type from the list of Voucher types in the Invoice mode. 2. Select Item Invoice on the right side of the screen 3. Enter the Supplier Invoice No. and Date 4. Select the appropriate Party’s A/c Name from the list displayed The Party Details sub-form will appear as shown
5. Supplier’s Details This section will include the Consignee and supplier details like the details, Sales Tax number and the Excise registration details. The details will appear automatically if they are provided during the Supplier Ledger Creation. N o t e : The Consignee Consignee Names in
and F12:
the Supplier Configuration
details appear is enabled
if
Allow
separate
Buyer
and
6. Manufacturer/Importer Details If your supplier is not a Manufacturer , enter the name , address , Excise registration details Invoice number and date of Invoice , of the Supplier Manufacturer /Importer. If you are not a Self Importer, you can enter the respective company details. After entering the above details, the ing Voucher Creation screen re appears.
7.
7. Select the Nature of Purchase from the list of Nature of Purchase . This field defines the Supplier’s role in selling the product to us. Agent of Manufacturer is selected when the supplier is an agent of the manufacturer and the goods is directly sold from the manufacturer to the buyer. The buyer is a First Stage Dealer. In this case the excise invoice may be issued by the manufacturer or the agent. First Stage Dealer is selected when the goods are directly purchased from the First Stage Dealer. In this case the excise invoice is issued by the First Stage Dealer. Importer is selected when the goods are directly self imported. In this case the invoice is issued by the exporter. Manufacturer is selected when the goods are directly purchased from the manufacturer. In this case the excise invoice is issued by the manufacturer. Purchase from Importer is selected when the goods are purchased from the importer. In this case the invoice is issued by the importer. Second Stage Dealer is selected when the goods are purchased from the Second Stage Dealer. In this case the invoice is issued by the Second Stage Dealer.
N o t e : By default the Nature of Purchase above field which can be changed.
selected
in
the
Party
Ledger
appears
in
the
8. Select the Purchase Ledger. 9. Select the VAT/Tax Class from the list. 10. Select the Stock Item from the List of Stock Items table to display the Excise Details (Excise Allocations) Screen. N o t e : The List enabled
of
Stock
Items
displayed
will
list
the
Stock
Items
11. Select the Name of the Item and the Item Excise Allocations Screen appears.
12. Enter the Order Number , if any 13. 14.
with
Excise
feature
12. 13. Enter the Quantity and Rate 14. Accept the Item Allocation Screen for the Excise Details sub-screen for the stock item will appear.
16. The Supplier Invoice No. is automatically captured from the Ref field in the Voucher entry screen. However, it is an editable field. N o t e : The Supplier Invoice No. is mandatory and can be alphanumeric. If the Ref No. is not entered in the Voucher creation screen, then the Supplier Invoice No. field by Default will appear as Not Applicable and the cursor remains in the field until a valid number is entered. The Supplier Invoice Date is mandatory. The date has to be same or lesser than the Voucher date.
17. The Supplier Invoice Date and the Assessable Value is automatically captured. However, the above fields can be edited. Ensure that the Supplier Invoice Date is same as the Excise Purchase Invoice date. Any additional cost apart from basic value falling under the purview of Excise can also be included in the Assessable Value field.
18.
18. Enter the PLA RG Number , if any 19. The Type of Duty and the Rate of Duty defaults, as specified in the Item Masters Creation screen Note:
The
entries
for
the
Excise
Duty
have
to
be
ed
in
20. Accept the Excise Details sub screen for the Voucher Entry screen to reappear.
21. Select the required Excise Duty Ledgers 22. Accept the Invoice to Save
Invoice
mode
only.
Creating a Non Excise Purchase Invoice for Excise Stock Item
Go to Gateway of Tally > ing Vouchers > Select F9: Purchase 1. Select the Purchase Voucher from the List of Voucher Types . 2. Enter a Reference Number in the Ref field if required. 3. Select the appropriate Party’s Name from the list displayed. 4. Enter the details in the Party Details sub form. 5. Select the Purchase Ledger for the Ledger Allocation. 6. Select the Excisable Stock Item from the List of Items table.
Note :
The
list
of
items
will
consist
of
E x c i s a b l e and Non
8. The Item Allocation screen appears as shown below.
Excisable
stock
items
8.
9. Specify the Quantity and the Rate of the Stock Item and accept the Item Allocation screen for the Purchase Creation screen to reappear. 10. Enter Narration if required.
10.
12. Accept the voucher to Save .
In the above scenario, credit cannot be ed on the stock item.
Creating an Excise Sales Invoice
To create a Sales Invoice, Go to Gateway of Tally > ing Vouchers > F8: Sales 1.
Select Excise Sales Voucher type from the list of Voucher Types .
2.
Enter the Sales Invoice Number in the No. Field if the Voucher type is set to Manual.
3.
Select the Party’s Ac Name from the list displayed.
4.
The Party Details sub-form appears as below.
Note: The creation.
Buyer's
Details
will
appear
automatically
if
specified
during
the
ledger
5.
Enter the details in corresponding fields and accept the screen to save.
6.
Select the Sales ledger for allocation on returning to the Voucher Entry Screen.
7.
Select the Stock Item from the list of Items.
8.
On selecting the item, the Supplier Details sub-screen for the item appears as shown below.
9.
Select the appropriate purchase from the List of Purchases table. This table lists all the purchases made for the Stock Item .
10.
Upon selecting a Purchase, the cursor skips to Quantity Utilized field. The value in this filed can be altered.
10.
If the Purchased quantity is 100 and the Utilised quantity is 25, it can be specified in the above field. N o t e : If a message 11.
the
utilized
quantity
is
more
the
purchased
quantity,
Tally
warns
you
with
On selecting the second entry, Tally filters the List of Purchases to display the purchases made from the Supplier and the nature of purchase specified in the first entry.
N o t e : The Supplier Details sub-form and one type of purchase only. 12.
than
can
hold
the
details
belonging
to
a
Single
Supplier
After selecting the Supplier Details, the Item Allocation screen for the Stock Item appears. The details are automatically captured from the supplier details sub form. However, the fields can be altered.
12.
13.
Accept the Invoice to save the entry.
14.
Use Alt+P from the Sales Invoice Screen to display the print preview of the Sales Excise Invoice (ISSUE OF INVOICE UNDER RULE 11 OF CENTRAL EXCISE RULES 2002). Set the print configuration for the Sales Excise Invoice by selecting the appropriate buttons
15.
Press Alt+I and accept Yes to print preview the Sales Excise Invoice screen. The preview of Excise Sales Invoice appears as shown below:
The Excise Sales Invoice includes the Sales details of the Stock item sold, like the Quantity , Rate and Amount . The Excise Duty ed on credit information will contain Assessable Value, Rate of Basic Excise Duty, Rate of Cess and Cess amount is printed in this section. To print the Purchase details and Excise duty breakup in the Excise Sales Invoice , click on F12: Configure .
Set Print Trader Supplier info to Yes . Setting this option to Yes , the Excise details of the Stock item are printed in the Invoice with supplier and Manufacturer’s Excise details and Invoice No . and Date of Purchase . The preview of the Excise Sales Invoice appears as shown below. The Invoice can be printed in only.
Neat Format
The Excise Sales Invoice will include the Supplier and the Manufacturer’s details and the Customer details. This invoice provides you with the Purchase and Sales details of the Excise Stock Items , along with the Excise Duty paid on the Products. In the above screen, it is assumed that the Excise Stock Items are purchased from a First Stage Dealer . Hence, the Sales Excise Invoice is titled as Second Stage Dealer , which indicates the stage of this Transaction. The title of Excise Invoice printing will be as follows: If the Stock Items are purchased from a Manufacturer/Importer , then the sales invoice for that item will print as First Stage Dealer . If the Stock Items are purchased from a First Stage Dealer , then the sales invoice for that item will print as Second Stage Dealer . If the Stock Items are purchased from a Second Stage Dealer , then the Sales Invoice for that item will print as Second Stage and Subsequent Dealer . The Sales Excise Invoice prints the VAT/CST/ST registration details, captured from Company Creation Screen. Range/Code, Division / Code, Commissionerate The details specified in the Excise Details sub form of the Statutory & Taxation of F11: Features is printed in the corresponding fields. Buyer/Consignee details The Buyer/Consignee details specified in the Party Details sub form is printed in this field. The details will also include the corresponding Excise and Tax registration details.
Sales Section This section will print the Excise Stock Items sold. It displays the Quantity , Rate and the total Amount of the Stock Items sold. Excise Duty ed on credit information will contain Description of goods , Assessable Value , Rate of Basic Excise Duty , Rate of Cess and Cess amount is printed in this section. If the quantity of Stock Items sold is less than the purchased quantity, then the proportionate Assessable Value of item is captured along with the Rate of Duty of Item and Education Cess from the Purchase Invoice. The Amount of Excise Duty and Amount of Cess is printed in words. N o t e : Similarly, are printed.
VAT Declaration
if
there
is
more
than
one
type
of
duty,
then
the
breakup
of
the
duties
The VAT Declaration is printed if the VAT ledgers are allocated in the sales entry.
Purchase Section This section prints the purchase details of the Stock Items . The Supplier details like the Name and Address along with the Excise Registration details, of the Manufacturer/Importer , First Stage or the Second Stage Dealer is printed in this field. It also prints the Purchase Invoice number and the Date of the Purchase invoice issued by the Supplier and the Manufacturer. The Invoice will also print the PLA RG Serial numbers. The Excise Duty Section will list the Description of Goods , Tariff Classification number of the Stock Item and the Quantity of the Stock Item purchased. The Rate of Basic Excise Duty , Assessable Value , Duty per Unit , Total Duty Amount and Ed Cess amount is captured from the corresponding Purchase Entry. Note : Excise Sales Invoice as per Rule 11 should be a single page document. Therefore, it is recommended to use a maximum of Six Stock items and one ledger an A4 size paper and seven stock items and one ledger on Legal size paper. The preview of a Sales Invoice for an Import transaction appears as shown.
on
N o t e : The Excise Transaction .
Sales
Invoice prints an I m p o r t D e c l a r a t i o n for an I m p o r t
Creating a Sales Invoice without ing Excise Duty
Tally allows you to sell an Excise Stock Item using an Excise Sales Invoice or Standard Commercial invoice where duty is not ed on to the buyer. For Example : Assume that you have 20 nos of Excisable Stock Item You can sell both 10 nos of Excisable Stock Item and 5 nos of Non Excisable Stock Item in a single sales invoice. The above example can be entered in a single Sales Invoice screen as displayed below: 1.
Go to Gateway of Tally > ing Vouchers > F8: Sales
2.
Select Sales Invoice from the Voucher Types
3.
Enter the reference number in the Ref field
4.
Select the Party’s A/c name from the List of Ledger s
4.
5.
Select the Sales ledger for ledger allocation.
6.
Select the Stock Item from the List of Stock Items table to display the Supplier Details sub form .
6.
7.
The Purchase entries ed for the Stock Items using an Excise Purchase Voucher Type is displayed in the List of Purchases table.
8.
Select the Purchase entry from the list.
N o t e : If you do not wish the item, you may select Not item allocation screen . 9. 10.
to
select the purchase transaction with Excise duty value for Applicable , and then specify the Item quantity in the
On selecting the entry, specify the quantity to be sold in the Quantity Utilized field. You can select the purchase entries belonging to different Party’s in the same sub form.
10.
11.
Accept the above screen for the Item Allocations screen to appear.
12.
If the above Stock Item is not Excisable , then specify the same in Quantity field of the Item Allocation screen.
12.
Note: 13.
In
the
above
screen,
Accept the screen to Save .
10
items
are
E x c i s a b l e and 5 items are Non
Excisable .
13.
Creating an Excise Debit Note
Go to Gateway of Tally > ing Vouchers > Debit Note (Ctrl + F9) 1.
Select the Debit note created for Excise from list of Voucher Types.
2.
Enter the Ref number in the Ref field.
3.
Select Party’s A/c Name from the list of ledger s
4.
Specify the required details in Party details sub form.
5.
Select the Purchase ledger for allocation
6.
Select the Item from the list of Excise Stock Items
7.
The Excise Details sub form for the Stock Item appears.
7.
8.
Select the Purchase Invoice from the List of purchases .
9.
The cursor then skips to Quantity Return field. Specify the quantity to be returned to the supplier.
10.
Accept the above screen for the Item Allocation screen to appear.
11.
Accept the Debit Note to save the entry.
11.
Creating an Excise Credit Note
Go to Gateway of Tally > ing Vouchers > Credit Note (Ctrl + F8 ) 1.
Select the Credit Note created for Excise from the List of Voucher Types
2.
Enter the Ref number in the Ref. field.
3.
Select the Party’s A/c Name
4.
Enter the corresponding details in the Party Details .
5.
Select the Sales ledger to be allocated.
6.
Select the Name of the stock item from the list of Excise Stock Items
7.
The Supplier Details sub form for the Stock Item is displayed
7.
8.
Enter the Sales Invoice Number issued to the customer.
9.
The Sales Invoice Date is automatically captured.
10.
The corresponding Purchase Invoices are listed and select the purchase invoice from the list of Purchases.
11.
Enter the Quantity returned.
12.
The Credit Note screen reappears, the rate and the amount is automatically captured.
13.
Accept the screen to save.
13.
Creating a Non Excise Credit Note
Go to Gateway of Tally > ing Vouchers > Credit Note or Ctrl + F8 1.
Select default Credit Note from the List of Voucher Types .
2.
If an Excise Credit Note is selected, then Tally prompts you with the following message.
Therefore, only a default Credit Note has to be ed against a default Sales Invoice . 3.
Enter the reference number in the Ref field if required.
4.
Select Party’s A/c Name
5.
3. 4. 5.
Enter the corresponding details in the Party Details sub form
6.
Select the Sales ledger to be allocated.
7.
Select the Stock Item from the List of Stock Items to display the Supplier Details sub form.
8.
The Supplier Details sub form will list the purchases for Excise Stock Items only, and hence will not list the Purchases. The Non Excisable Stock Item can be allocated in the Item Allocation screen
9.
If the Excisable Stock Items are returned, then the quantity has to be entered in the above screen by selecting the appropriate Purchase from the table.
10.
If the Non Excisable Stock Items are returned, then select Not Applicable in the above screen.
11.
The Item Allocation screen appears as shown below.
11.
13.
Enter the returned Quantity .
14.
On accepting the Item Allocation screen, the Credit Note screen reappears.
14.
Excise Reports
To view Excise Reports Go to Gateway of Tally > Display > Statutory Reports > Dealer Excise Reports
The Dealer Excise Reports menu consists of
Excise Stock Excise Purchase Bill Form RG 23D
Form 2
Sales And Purchase Extract
Excise Stock
Every ed Dealer has to maintain Stock recording the daily receipt and issue of Excisable goods ready for inspection by the officers of the department. The Excise Stock in Tally gives the purchase and sales information. It has two sections, which are, the Receipt section for Purchases and Issues section for the Sales/Debit Note/Credit Note details. Go to Gateway of Tally > Display > Statutory Report > Dealer Excise Reports> Excise Stock Select the Stock Item from the list of items to view the report.
The above screen lists the Purchase details.
Receipt
Invoice No. /Date: The number given to the Invoice . Name and Address of the Supplier: The field displays the Name and the Address of the Supplier . Nature of Purchase: Lists the Nature of Purchase as specified during the Invoice Entry. Quantity: Quantity purchased. Rate: The Rate at which the item is purchased. Assessable value: The Total Assessable Value of the product. Duty per Unit: The Total Duty amount divided by quantity is printed in this field. Total Duty: The Total Duty for the Stock Item is displayed in this field. This field captures the total Duties paid. Cess per Unit: Excise Cess per item is displayed. Total Cess: Total Cess on the total Quantity of the Stock Item.
Issue The Issue/Debit Note/Credit Note details in the Excise Stock are specified in the screen below.
The F6: Date button lists all the Purchase and Sales transactions for a specified period. Toggle to F6: Purchase Date button to list the Excise Sales/ Excise Credit Note/ Excise Debit Note transactions, for the purchase bills as specified in the Purchase date range. Duty Details Duty ed On/Duty not ed on : This row displays the details of the Stock Items on which the duty is ed or not ed. Balance Duty : The Balance available Duty Amount to be ed on is displayed in this field. Issued Quantity : The Total Quantity of Items Sold/Returned is displayed in this field. Total Duty : This Field displays the Total Duty utilized in whole or proportionate to the Quantity Issued/Returned . The return inward quantity is displayed in negative. Total Cess : The Total Cess Amount utilized is displayed in this field. Use Alt +F1: Detailed to get a detailed Report. The detailed Excise Stock appears as shown below.
Vch Type/Invoice No./Date/: The Document type, Invoice number and date as specified in the Sales/Credit Note/Debit Note Invoice is displayed in this field. An additional column appears. Vch Type/Invoice No./Date: The Document type , Invoice Number and Date as specified in the Sales/Credit Note/Debit Note Invoice are displayed in this field and the Duty Details column displays the Name and Address of the Party . This Column also details the Duty ed On, Duty not ed On and the Balance Duty. Use the Alt + P key or click on the Print option to print your Report. The printed document will appear as shown below.
The preview of the Excise Stock on pressing Alt + F1 is as shown below.
Note:
The
Excise
Stock
can
be
printed
in
Neat
Mode
format
only.
Excise Purchase Bill
The Excise Purchase Bill provides the bill wise details of all the purchase and corresponding sales invoices for each of the purchase invoices.
The consists of two sections Receipt and issue.
Receipt This section details the Purchase details. Invoice No. / Date: This column displays Purchase Invoice number and Date . Particulars : This column displays the Stock Item purchased and its Tariff Number . Name and Address of the Supplier : This column displays the Name and the Address of the Supplier .
Nature of Purchase : This column lists the Nature of Purchase as specified during the Invoice Entry. Quantity : This column displays the Quantity purchased. Rate : The Rate at which the item is purchased appears in this column. Assessable Value : The Total Assessable Value of the item appears in this column. Total Duty : The Total Duty for the Stock item is displayed in this column. Total Cess : The Total Cess Amount calculated on the purchased quantity is displayed in this column.
Issue This section displays the Sales/Credit Note/Debit Note details.
Duty Details Duty ed On / Duty Not ed On: This column displays the Duty details on the quantity sold.
Balance Duty : The Balance Unutilized Duty Amount is displayed in this column. Issued Quantity : The Total Quantity of Items Sold/Returned is displayed in this column. Total Duty : This column displays the Total Duty Utilized in whole or proportionate to the quantity Issued/Returned . Total Cess : The Total Cess Amount utilized on the Stock items Issued/Returned On using Alt + F1: Detailed , an additional column displays the Voucher details column.
Vch Type/ Invoice No. / Date : This column displays the details of the Voucher entries ed. Name and Address of the Party : On selecting Alt +F1 the Duty Details column displays the Name and address of the Party . F2: Period displays all the Purchase entries corresponding to the date specified. The preview of the Excise Purchase Bill appears as follows
The preview of the Excise Purchase Bill on pressing Alt + F1 is as shown below.
Form RG 23D
Form RG 23D details the Excise purchases and the corresponding Sales transactions . The preview of Form RG 23D prints as shown.
Invoice No. /Date : The Purchase Invoice number and the date are displayed in this field. PLA RG23 Sl. No. : The PLA RG23 serial number for the Purchase Invoice is printed in this field Name and Address of Manufacturer/ Importer including Central Excise Regn No/ Range/ Division/ Commissionerate The Manufacturer/ Importer details entered in the Party details sub form of the Purchase voucher is printed in this field. Quantity : The quantity of items purchased is printed in this field. Rate : The rate of the Stock Item purchased is printed in this field. Assessable Value : The Assessable Value of the Stock Items is printed in this field. Duty per Unit : The Excise Duty paid per unit is printed in this field. Excise Duty : The Excise Duty calculated on the Assessable Value is printed in this field. Edn Cess per Unit : The Education Cess paid per unit is printed in this field. Education Cess : The total Education Cess paid is printed in this field. Sec Edn Cess per Unit : The total amount of Secondary Education Cess paid per unit is printed in this field. Secondary Education Cess : The total amount of Secondary Education Cess paid is printed in this field. Total Duty : The Total Duty paid is printed in this field. Duty ed on This row lists the Excise duty ed on to the corresponding Excise Sales
Form - 2
Every ed dealer is required to submit a return as per Excise Rules 2002 every quarter in Form - 2 Go to Gateway of Tally > Display > Statutory Reports > Dealer Excise Reports > Form – 2 In the Form - 2 printing screen, Press Backspace and specify the From date and To date
Form - 2 displays the details of the Stock item with the maximum duty value. To configure Form – 2 to show details of all stock items, from the above printing configuration screen press F12: configure and set Show All Items to Yes
Form - 2 is divided into two sections. The Issue/ Sales section and the Receipt / Purchase section. The preview of Form - 2 , Issue/ Sales section appears as shown.
Press Pg Down to view the Receipts/ Purchase section,
Note: of the
For invoices Stock item
with with
more than one Stock item entries, Form the maximum duty component value.
-
2
captures
the
1. Name of the First Stage/Second Stage Dealer: The name of your company is printed in this field. 2.
3.
details
1. 2. Excise Registration Number: The Excise Registration Number of your company, specified in the F11: Features screen is printed. 3. Address: The address of your company specified in the Company Creation screen is printed in this field. 4. Particulars of Invoice issued by First Stage / Second Stage Dealer This section will list the Sales Invoices. Invoice Number with Date : The Date and the Invoice Number is printed in this field. Description of the Goods : This column list the Stock Items sold Central Excise Tariff Heading : The Tariff Number of the Stock Items are printed in this column. Quantity : The total number of Stock items sold is printed in this column. Amount of Duty : The total amount of Excise Duty ed on for the Stock Item is printed in this column. Amount of Ed Cess : The total amount of Education Cess ed on for the Stock Items is printed in this column. Amount of Sec Ed Cess : The total amount of Sec Education Cess ed on for the Stock Items is printed in this column.
5. Particulars of the Documents based on which the credit is ed on Invoice / Bill of Entry Number with Date : The Purchase Invoice number and date is printed in this field. Name and Address of the First Stage /Second Stage Dealer : This column displays the First Stage /Second Stage Dealer details specified in the Purchase Entries. Name and Address of the Manufacturer / Importer : This column displays the Manufacturer / Importer details specified in the Purchase Entries. Description of the Goods : The description of the goods is printed in this column. Central Excise Tariff Heading : The Tariff the number of the Stock Items are printed in this column Quantity : The quantity of goods purchased is printed in this column. Amount of Duty : The total duty paid on the Stock Items is calculated in this column. Amount of Ed Cess : The total amount of Education Cess paid on for the Stock Items is printed in this column. Amount of Sec Ed Cess : The total amount of Sec Education Cess ed on for the Stock Items is printed in this column.
Sales and Purchase Extract
Excise Sales and Purchase Extract report displays the details of purchase and sales transactions of all excisable goods (Excise Invoice as well as Commercial Invoice). Go to Gateway of Tally > Display > Statutory Reports > Dealer Excise Reports > Sales and Purchase Extract In the Sales and Purchase Extract printing screen, Press Backspace and specify the From date and To date
The preview of Sales and Purchase Extract appears as shown.
Press Pg Down
1. Name of the First Stage/Second Stage Dealer: The name of your company specified in the Company Creation screen is printed in this field.
2. Excise Registration Number: The Excise Registration Number of your company, specified in the F11: Features screen is printed.
3. Address: The address of your company specified in the Company Creation screen is printed in this field.
4. Particulars of Invoice issued by First Stage / Second Stage Dealer This section will list the Sales Invoices. Invoice Number with Date : The Date and the Invoice Number is printed in this field. Description of the Goods : This column list the Stock Items sold Central Excise Tariff Heading : The Tariff Number of the Stock Items is printed in this column. Quantity : The total number of Stock items sold is printed in this column. Amount of Duty : The total amount of Excise Duty ed on for the Stock Item is printed in this column. Amount of Ed Cess : The total amount of Education Cess ed on for the Stock Items is printed in this column. Amount of Sec Ed Cess : The total amount of Sec Education Cess ed on for the Stock Items is printed in this column.
5. Particulars of the Documents based on which the credit is ed on Invoice / Bill of Entry Number with Date : The Purchase Invoice number and date is printed in this field. Name and Address of the First Stage /Second Stage Dealer : This column displays the First Stage /Second Stage Dealer details specified in the Purchase Entries.
Name and Address of the Manufacturer / Importer : This column displays the Manufacturer / Importer details specified in the Purchase Entries. Description of the Goods : The description of the goods is printed in this column. Central Excise Tariff Heading : The Tariff the number of the Stock Items are printed in this column Quantity : The quantity of goods purchased is printed in this column. Amount of Duty : The total duty paid on the Stock Items is calculated in this column. Amount of Ed Cess : The total amount of Education Cess paid on for the Stock Items is printed in this column. Amount of Sec Ed Cess : The total amount of Sec Education Cess ed on for the Stock Items is printed in this column.
Introduction
GST stands for Goods and Service Tax. A person is required to for GST when his annual taxable supplies exceed or are expected to exceed S$1 million. However, a person may apply for voluntary registration even if his taxable supplies do not exceed S$1 million. Once he has ed voluntarily, he is required to remain ed for at least 2 years. Inland Revenue Authority of Singapore: The IRAS holds the responsibility of collecting GST. A Comptroller is appointed for the istration of the GST Act.
GST Classes
Supply The GST Act defines supply as including "all forms of supply done for a consideration". A supply includes a sale of goods or rendering of service. It can be either taxable (standard-rated or zero-rated), exempt or outside the scope of GST.
Taxable supply A taxable supply is a standard-rated or zero-rated supply. GST incurred by a GST ed person on his business purchases is recoverable from the Comptroller as input tax credit if the purchase is for the making of taxable supplies.
Types of GST Classes Standard-Rated supply Standard-rated supply is the supply of goods or services made in Singapore. GST is chargeable at the rate of 5% on the value of the supply.
Zero-Rated supply Zero-rated supply is the export of goods or the rendering of international services. GST is chargeable at the rate of 0% on the value of supply.
Exempt supply Exempt supply can be the sale/ lease of a residential property or certain financial activities as stated under the Fourth Schedule of the GST Act. GST is not chargeable on Exempt supply. Generally, any GST incurred in making Exempt supplies cannot be claimed as input tax.
Combined This is a special feature offered by Tally to different Types of GST Classes in one single entry. For instance, you can first a Purchase/ Sales entry by selecting the GST Type as Combined and then assign more than one GST Type in the voucher. Refer to the topic ' Entries Using Combined GST Type'.
Out-Of-Scope supply When you have make a supply of goods which are delivered from a place outside Singapore to another place outside Singapore without ing through Singapore, such supplies are treated as out of scope supplies for GST purposes. Accordingly, you are not required to charge GST on the supplies.
Imports Imports are goods removed from a place outside Singapore and brought into Singapore. GST is chargeable on the importation of goods into Singapore. It is collected by the Singapore Customs at the point of importation, regardless of whether the person is GST ed or not. However, GST will not be payable when a person is granted relief under the GST (Imports Relief) Order or is an approved traders under the Major Exporter Scheme, or the Third Party Logistics (3PL) Company Scheme.
GST Flow
GST is charged on the value of the supply of goods and services whenever the time of supply is triggered. The value of the supply can be for a consideration in either money or open market value of the supply. If the value is for a consideration in money, the value of supply is determined as follows: Value of supply + GST = Consideration If the supply is not for a consideration in money or is for a consideration not wholly consisting of money, then the value of the supply will be its Open Market Value (OMV).
Open Market Value OMV is the price (exclusive of GST) that the goods or services would fetch at the time when they are supplied between two unrelated persons.
GST Glossary Taxable Person: A Taxable Person is a person who is ed or required to for GST. A The term includes an individual, a partnership, a company, a club, an association, a society, a management corporation or a non profit organisation. Input Tax: Input Tax is the GST paid on your business purchases. You can claim Input Tax Credit from IRAS. Output Tax: Output Tax is the GST collected or absorbed by a GST ed person on the sale of goods or provision of services. It is the GST payable to IRAS.
Filing GST Returns
Form GST F5 is the return that a GST ed person has to submit at regular intervals. A GST ed person s for the output tax collected and claims the input tax incurred in this return. Form GST F5 is issued to a GST ed person on a quarterly basis i.e. once in 3 months . A GST ed person receives the Form GST F5 in the last month of each quarter. If he opts for a monthly ing period, then Form GST F5 is sent to him on a monthly basis. Form GST F5 must be completed and submitted to the Comptroller not later than 1 month after the end of the prescribed ing period. For example, if Form GST F5 is issued to you for the prescribed ing period from 1 January 2006 to 31 March 2006 , you need to furnish the duly completed and signed return to the Comptroller by 30 April 2006 .
Prescribed ing Periods Cycle A
Cycle B
Cycle C
01 January to 31 March
01 February to 30 April
01 March to 31 May
01 April to 30 June
01 May to 31 July
01 June to 31 August
01 July to 30 September
01 August to 31 October
01 September to 30 November
01 October to 31 December
01 November to 31 January
01 December to 28/29 February
Other GST Transaction Forms Form GST F7 Form GST F7 is a return that a GST ed person can use to rectify any error made in Form GST F5 .
Form GST F8 This is the final GST return that you need to file before you are de-ed from GST.
Payment of GST Payment refers to the amount of tax payable by a GST ed person. It must be made within 1 month after the end of the ing period. However, if you are under the GIRO scheme, an electronic direct debit mechanism, your tax payable will be deducted from your bank on the 15th day of the month after the due date for submission of Form GST F5 . For example, if you have filed Form GST F5 for the prescribed ing period from 1 January 2006 to 31 March 2006 before 1 May 2006 , your tax payable will be deducted from your bank on 15 May 2006 .
Enabling GST in Tally
Creating a Company Go to Gateway of Tally > Alt+F3 > Create Company
Enter the details of the Company Select the country from the List of Countries , in the field Statutory Compliance for
Enabling GST in F11: Features
Go to Gateway of Tally > Select F11: Features > Statutory & Taxation
Set Prepare & Follow Singapore Style GST Returns to Yes Enter the GST Registration Number and the Company Registration Number
Creating a Party Ledger
1.
Go to Gateway of Tally > s Info > Ledgers > Create
2.
In the Ledger Creation screen enter the name of the GST ledger in the Name field
3.
In the Under field, select Sundry Creditors from the List of Group s
4.
Set Maintain Balances Bill by Bill to Yes
5.
The option, Inventory Values are affected is set to No by default. Set this to Yes if applicable
6.
5. 6.
Accept the screen to s ave
Customer ledgers can be created in a similar manner.
Creating a Tax Ledger
1.
Go to Gateway of Tally > s Info > Ledgers > Create
2.
In the Ledger Creation screen enter the name of the GST ledger in the Name field
3.
In the Under field, select Duties & Taxes from List of Groups
4.
Set Inventory Values are affected to No
5.
Set the Percentage of Calculation to 5%
6. 7.
5. 6.
Select the Method of Calculation from the Type of Duty menu
7.
Select GST Deductible – Input Tax from the GST Type menu in the GST Type field.
8.
Accept the screen to s ave .
You can similarly create a ledger for GST Output , by selecting GST Type as GST Payable – Output Tax .
Creating a Purchase Ledger
To create ledgers under the Purchase s group 1.
Go to Gateway of Tally > s Info > Ledgers > Create
2.
Enter a name for the Purchase ledger in the Name field
3.
In the Under field select Purchase s from the List of Groups
4.
Set Inventory Values are affected? to Yes if you maintain inventory
5.
Set the field GST Applicable? to Yes under Statutory Information
6.
6.
Accept the screen to Save
Sales ledgers can be similarly created.
Creating an Expense Ledger
To create ledgers under the Expenses s group 1.
Go to Gateway of Tally > s Info > Ledgers > Create
2.
Enter a name for the Expenses ledger in the Name field
3.
In the Under field select Indirect Expenses from the List of Groups
4.
Set Inventory Values are affected? to Yes if applicable
5.
Set GST Applicable? to Yes under Statutory Information
6.
6.
Accept the screen to save.
You can, similarly create ledgers for Sales s, Expenses s, Fixed Assets, Liabilities and Income s under the respective groups.
Creating a Stock Item
1.
Go to Gateway of Tally > s Info > Ledgers > Create
2.
Enter a name for the Stock Item in the Name field
3.
In the Under field select Primary from the List of Groups
4.
Select the Units
5.
Enter the Rate of GST
6.
Accept the screen to save
Creating a Payment Voucher
1. Go to Gateway of Tally > ing Vouchers > Select Payment (F5) 2. Select Cash for the to be debited 3. Select the required GST Type , for example, Standard Rated 4. Select the ledger Stationery Expenses from the List of Ledger s 5. Select the ledger GST Input from the List of Ledger s
6. 7.
6. Enter the Narration 7. Accept the voucher to s ave .
You can similarly create payment entries for different GST Types. However, GST is chargeable on Standard Rated only. Refer GST Classes . N o t e :The above entry can be created, then the ledger allocated A p p l i c a b l e ledger only.
created for a
using Classes. If a Voucher Type Class
Voucher Type should be a
Class GST
is
Creating a Purchase Voucher
1. Go to Gateway of Tally > ing Vouchers > Purchase (F9) 2. Enter the reference for the voucher in the Ref field 3. Select the Party’s A/c Name from the List of Ledger s 4. Select the Purchase Ledger 5. Select the GST Type (Standard Rated ) from the List of GST Type 6. Select the Name of the Stock Item from the List of Items 7. Enter the appropriate Quantity and Rate and the amount is displayed in the Amount field 8. Select the GST Input ledger from the List of Ledger s
8.
When the payment is made, the GST Type should be set to Not Applicable , as the Purchase Voucher is booked to include the GST Input. The Payment entry should be ed as follows.
Creating a Sales Voucher
1. Go to Gateway of Tally > ing Vouchers > Select Sales Voucher (F8)
2. Enter the reference in the Ref field 3. Select the Party’s A/c Name from the List of Ledgers 4. Select the Sales A/c Ledger 5. Select the GST Type from the List of GST Types 6. 7.
5. 6. Select the Stock Item from the List of Stock Items 7. Select the ledger GST Output from the List of Ledgers 8. Enter the N arration if required 9. Accept the Voucher to s ave
On receipt of payment, a payment entry has to be ed without allocating the Tax ledger and GST Type.
Creating an Exempt Purchase Voucher
A GST Exempt Purchase Voucher can be created by selecting the GST type as Exempt . To create an Exempt Purchase Voucher , 1. Go to Gateway of Tally > ing Vouchers > Select Purchase Voucher (F9) 2. Enter the Reference for the voucher in the Ref field 3. Select the Party’s A/c Name from the List of Ledger s 4. Select the Purchase ledger 5. Select the GST Type (Exempt ) from the List of GST Type 6. Select the Name of the Stock Item from the List of Items 7. Enter the appropriate Quantity and Rate and the amount displayed in the Amount field. 8. Enter Narration, if any 9. Accept the voucher to s ave
9.
N o t e : If you select a GST Ledger GST Not Allowed .
in
the
above
entry,
Tally
displays
the
error
message
Creating a Sales Voucher Using Combined GST Type
Tally provides you with a new GST Type called Combined , which allows you to allocate Stock Items to different GST Types in one single entry. 1.
Go to Gateway of Tally > ing Vouchers > Select (F8) Sales > Select Voucher mode
2.
Enter the reference number in the Ref field.
3.
Select Combined as the GST Type from the list
Note : A/c for
In an Invoice mode, Item Allocation in
the option C o m b i n e d appears only F12: Configure is set to N o .
if
Use
Common
4.
Debit the Party ledger from the List of Ledgers
5.
Enter the amount in the Amount field
6.
Credit the Sales ledger
7.
Select the Name of the Item from the List of Stock Items in the Inventory Allocation screen
8.
Enter the Quantity to be sold
9.
Enter the Rate for the Voucher Entry screen to reappear
Ledger
9.
10.
Select the GST Type (Example: Exempt ) from the List of GST Types .
11.
Credit the Sales ledger from the List of Ledger s to allocate the remaining value
12.
Specify the Stock Item , Quantity and R ate in the Item Allocation screen
13.
Select the GST Type (e.g. Standard Rated) from the list
14.
Credit the GST Output ledger to allocate the tax amount
15.
The Bill Wise Details sub screen displays as shown below.
15.
16.
Select Agst Ref as Type of Ref
17.
Select Pending Bill from the List of Pending Bills
18.
Accept the above screen for the Voucher Entry screen to reappear
19.
Enter the Narration if any
19.
20.
Accept the screen to save
Purchase vouchers using different GST Types can be created in a similar manner.
Reports
To view the GST Reports, Go to Gateway of Tally > Display > Statutory Reports
GST Reports consist of GST Analysis GST Return – F5
GST Analysis
The GST Analysis report gives details on the Total of all Purchase and Sales transactions, ed using different GST Types .
Supplies/Incomes (Output Tax) This section displays the total sales amount on each GST Type .
Combined The total sales amount calculated on different GST Types using a Combined class displays in this column.
Standard Rated
The total sales amount on all the transactions ed using the Standard Rated GST Type, is calculated and displayed is this column.
Zero Rated The total sales amount on all the transactions, ed using the Zero Rated GST Type, is calculated and displayed is this column.
Exempt The total sales amount on all the transactions, ed using the Exempt GST Type, is calculated and displayed is this column.
Out-of-Scope The total sales amount on all the transactions ed using the Out-of-Scope GST Type is calculated and displayed is this column.
Purchases/Expenses (Input Tax) This section displays the total purchase amount on each of the GST Types mentioned above.
Import Under MES The total purchase amount on all the transactions, ed using Imports under MES GST Type is calculated and displayed is this column.
Gross Amount This column displays the total sales/purchase amount in each of the GST Types .
GST Amount This column displays the total GST amount on each of the GST Types .
GST% This column displays the Percentage of GST . The GST Analysis report also calculates and displays the Net GST to be claimed from IRAS . Use Alt + F1 to view a detailed GST Analysis .
GST Return F5
GST Return F5 is a statutory report which has to be filed every quarter.
Box 1 displays the total value of Standard Rated sales. Box 2 displays the total value of Zero Rated sales. Box 3 displays the total value of Exempt sales. Box 4 displays the sum of Box 1, 2 and 3 . Box 5 displays the total value of Taxable Purchases . Box 6 displays the Output Tax due on the sales. Box 7 displays the Input Tax and the Refund Claimed Box 8 displays the Net GST to be paid to IRAS (if Output Tax is greater than Input Tax ) or to be claimed from IRAS (if Input Tax is greater than Output Tax ). Box 9 displays the total value of the goods imported under the scheme.
Introduction
Sales Tax in Malaysia is a single stage tax imposed in proportion to the value of certain imported and locally manufactured goods. Under the Sales Tax Act 1972, Sales Tax is istered by the Royal Customs and Excise Department of Malaysia. The Financial Year is 1st January to 31st December. Manufacturers need to be licensed under the Sales Tax Act 1972, a Federal Act, and are obligated to levy charge and collect the tax from their customers. Sales tax, for imported goods, is collected from the importer, at the time of release of goods from customs. The Sales Tax levy is applicable to the entire Federation of Malaysia, except Labuan, Langkawi, Tioman, Free Zones and Licensed Manufacturing Warehouses.
Information on Sales Tax
Taxable Goods Under the Sales Tax Act , 1972, except those goods which are specifically exempted by order of the Minister of Finance, all goods manufactured domestically or imported into Malaysia are taxable. The term ‘manufacture of goods other than petroleum’ means the conversion of organic or inorganic materials, by manual or mechanical means, into new products by changing their size, shape or nature. It includes the assembly of parts into machinery or other products, but does not include the installation of machinery or equipment for the purpose of construction. In relation to petroleum, the term ‘manufacture’ means refining or compounding, and includes the addition of foreign substances.
Goods Exempted from Sales Tax Live animals, fish, seafood and certain essential food items including Meat, milk, eggs, vegetables, fruits, bread and so on. Medical and educational equipment including sports equipment, Books, and so on. Photographic equipment and films Motorcycles below 201 c.c. capacity, bicycles for adult use including Parts and Accessories Machinery for textile industry, food industry, paper and printing industry, construction industry, metal industry, and so on Primary commodities including cocoa, rubber and their related Products Naturally occurring minerals, chemicals, etc. Helicopters, aircraft, ships and other vessels Mobile libraries and clinics; computers Books, newspapers and other reading material Building equipment
Exemption from licensing If the total sales value of taxable goods manufactured did not exceed RM100,000 in the preceding year and is not expected to exceed RM100,000 during the next 12 months, the manufacturer may apply for a certificate of exemption from licensing. This certificate is renewable on a yearly basis. However, the manufacturer may choose to apply for licensing in order to enjoy tax-free inputs.
Tax-free Inputs (Raw materials) Raw materials and components (inputs) can be imported or acquired, free of sales tax, by a licensed manufacturer, for use in the manufacturing process in order to maintain the single-stage tax concept.
Flow of Sales Tax
Ring System The Sales Tax Act entitles only the licensed manufacturer and tax exemption license holders to manufacture and sell produce. However, it does not single out the non licensed manufacturers for discrimination. The ring system explained below demonstrates how this is avoided: A Licensed manufacturer can acquire taxable goods, from another manufacturer, free of sales tax A Licensed manufacturer can import taxable goods free of sales tax A Licensed manufacturer can transfer taxable goods to another licensee for completion of manufacture and then acquire them back, free of sales tax. This is basically to solve problems of sub-contracting and farming out A Licensed manufacturer can acquire taxable goods which are deposited or kept in a customs warehouse or a warehouse licensed under Section 65 of the Customs Act free of sales tax A non-licensed manufacturer can import taxable goods on behalf of a licensed manufacturer free of sales tax A non-licensed manufacturer can acquire taxable goods from a licensed manufacturer on behalf of a licensed manufacturer free of Sales Tax
Rate of Tax
Goods
Rate of Tax
Fruits, certain foodstuff, timber and building materials
5%
For all unspecified goods
10%
Cigarettes and tobacco
15%
Liquor drinks
25%
and
alcoholic
Petroleum Products
Rates specified from time to time.
Filing Sales Tax
Except Petroleum Products, the tax period for all goods is 2 calendar months. The tax must be paid to the customs authorities within 28 days of the expiry of the taxable period. The Taxable periods and their due dates are as follows
Tax Period
Due Date
January – February
28th March
March – April
28th May
May – June
28th July
July - August
28th September
September – October
28th November
November – December
28th January of next Financial Year
The taxable period for petroleum products manufactured in Malaysia is one calendar month and tax charged must be paid to the sales tax office within 10 days of the expiry of the taxable period. For petroleum products stored in licensed warehouses, the sales tax is due only when they are released from the licensed warehouse. The sales tax is payable within 10 days of the end of the month in which the sales tax arises.
Penalties The failure to pay the sales tax within the stipulated time attracts penalties as follows.
Period delayed
Penalty
Unpaid after days / 10 days
10%
28
Unpaid for each subsequent period of 30 days
Drawback
10% to a maximum of 50%
Under Section 29 of the Sales Tax Act 1972, all duty-paid goods used as materials for the manufacture of other goods which are subsequently exported, are eligible for drawback of the sales tax in full.
Refund of sales tax on Bad Debts With effect from 1 January 2003, a licensed manufacturer or importer is eligible for a refund of sales tax in relation to debts deemed as bad debts. Bad Debts include debts which cannot be collected after 12 months from the date of payment of tax.
Credit notes In the returns furnished in accordance with Section 19, a licensed manufacturer may deduct the amount of sales tax paid in respect of taxable goods returned by a purchaser, or discounts subsequently given to the purchaser, from the amount of sales tax ed for in the return. The credit note issued by a licensed manufacturer to a purchaser must contain the requisite particulars.
Sales Tax in Tally
Tally offers complete and accurate tracking of sales tax entries. It calculates the sales tax paid on each transaction. It also offers you the flexibility to track part payments received and adjust them with the expenses incurred. The information collated using Tally can be printed in the Government prescribed format.
Enabling Sales Tax in Tally
Company Creation To create a company, Go to Gateway of Tally > Alt + F3 > Create Company
Select Malaysia from the List of Countries in Statutory compliance for field
Enabling Sales Tax in F11: Features To enable Sales Tax in Tally , go to Gateway of Tally > F11: Features >Statutory and Taxation .
Set Enable Sales Tax to Yes . Enter the Sales Tax Registration number. Enter Sales Tax File Numbe r given by the Malaysian Customs and Excise Department
Creating a Party Ledger
To create a Party ledger, go to Gateway of Tally > s Info > Ledgers > Create . 1.
In the Ledger Creation screen enter the name of the company supplying goods to you in the Name field
2.
Select Sundry Creditors in the Under field from the List of Groups
3.
Set Maintain balances bill-by-bill? to Yes . Enter details in the Default Credit Period if set to Yes
4.
Enter the Details of the customer
5.
Enter the Tax Information
6.
4. 5. 6.
Accept Yes to save
Creating a Sales Ledger
To create a Sales ledger, Go to Gateway of Tally > s Info > Ledgers > Create 1.
In the Ledger Creation screen enter the name in the Name Field
2.
In the Under field, select Sales s from the List of Groups
3.
Set Inventory Values are affected? field is set to Yes, if applicable
4.
Set Used in Sales Tax to Yes
4.
5.
Select the Sales Tax Class from the list
N o t e : The Sales Tax Class can also Not Applicable in the ledger creation 6.
Accept the screen to save
Similarly, you can create for Purchase ledgers
be selected screen.
during
voucher
entry,
by
selecting
Creating a Stock Item
To create a Stock Item, Go to Gateway of Tally > Inventory Info > Stock Items > Create 1.
Enter the name in the Name Field
2.
In the Under field, select the group from the List of Groups
3.
Select the Units
4.
Enter the Tariff Code No.
5.
Enter the Rate of Sales Tax
Note: 4.
It
is
mandatory
Accept the screen to save
to
specify
the
Rate
of
Sales
Tax
in
the
above
screen
4.
Creating a Voucher Type to Adjust Sales Tax
A Voucher Class has to be created to claim Sales Tax . The use of class is discussed further. Go to Gateway of Tally > s Info > Voucher Types > Alter > Journal 1.
Set the options to Yes/No as per requirement
2.
Enter the Name of the Class
3.
Set Use Class for Sales Tax Adjustments to Yes
4.
Accept the screen to save
Creating a Purchase Voucher
To create a Purchase Voucher , Go to Gateway of Tally > ing Vouchers > F9: Purchase in the Item Invoice Mode 1.
Enter the reference number in the Ref field if any
2.
Select the Party’s A/c Name from the List of Ledger s
3.
Select the Item from the List of Stock Items
4.
Enter the Quantity .
5.
Enter the Rate .
The ing Details sub screen displays as shown.
6.
Select the Purchase A/c from the List of Ledger s
7.
Select the Sales Tax Class from the list for the Purchase Voucher.
8.
Accept the above screen to save
9.
Select the Sales Tax ledger created under Duties & Taxes for the VAT Class Details sub screen to display
9.
10.
Select the Sales Tax Class from the list.
11.
Accept the Voucher Entry screen to save .
11.
Creating a Sales Voucher
Create a Sales Voucher for a taxable stock item according to the following procedure. (The Sales Tax ledger selected in the Sales voucher should be in accordance to the rate specified in the Stock Item master.) Go to Gateway of Tally > ing Vouchers > F8: Sales 1.
Enter the reference number in the Ref field if required
N o t e : Set Use Common to allocate sales A/c for
Ledger A/c each Stock
for Item Item.
Allocation
2.
Select the Party’s A/c Name from the List of Ledger s
3.
Select the Item from the List of Stock Items
4.
Enter the Quantity
5.
Enter the Rate
The ing Details sub screen displays as shown.
t o No i n the F 1 2 : C o n f i g u r e ,
6.
Select the Sales A/c from the List of Ledger s
7.
Select the Sales Tax Class from the List for the Sales Voucher
8.
Accept the screen to save
9.
Select the Sales Tax ledger created under Duties & Taxes for the VAT Class Details sub screen to display
9.
10.
Select the Sales Tax Class from the list
11.
Accept the Voucher Entry screen to save
11.
Creating a Credit Note
When a customer returns stock items, the entry using a Credit Note . 1.
Go to Gateway of Tally > ing Vouchers > Credit Note (Ctrl + F8)
2.
Enter the Reference Number if required
3.
Debit the Customer ledger
4.
Enter the amount
The Bill Wise details screen displays as shown.
5.
5.
Select the Type of Reference from the List of Method of Adj
6.
Select the bill from the List of Purchase Bills
7.
Enter the Amount
8.
Debit the Sales A/c
9.
Select the Sales Tax Class from the List of Sales Tax Class
The Inventory Allocation screen displays as shown.
10.
Select the Stock Item returned from the List of Stock Items
11.
Enter the Quantity returned
12.
Enter the Rate
13.
Accept to display the Voucher Entry screen to appear
14.
Enter the Narration if any
15.
Accept the screen to save
15.
Creating a Sales Voucher Exempted from Sales Tax
The sale of goods to an export customer or licensed manufacturer is tax free . To create a sales voucher for an Export Customer or a Licensed Manufacturer , Go to Gateway of Tally > ing Vouchers > F8: Sales 1.
Enter the reference number in the Ref field if required
N o t e : Set Use
Common
Ledger
A/c
for
Item
Allocation to N o in the F12:
2.
Select the Party’s A/c Name from the List of Ledger s
3.
Select the Item from the List of Stock Items
4.
Enter the Quantity
5.
Enter the Rate
The ing Details sub screen displays as shown.
Configure
6.
Select the Sales A/c from the List of Ledger s
7.
Select the Sales Tax Class as Export Sales from the List for the Sales Voucher
8.
Accept the screen to save
8.
Creating a Journal Voucher
If a Taxable Stock Item is used, for own use or disposed, or not sold, then the same can be shown by ing the following entry. Go to Gateway of Tally > ing Vouchers > Select Journal Voucher: F7 1.
Select the Voucher Type from the Voucher Class List
2.
In the Journal Voucher screen, debit the Expenses ledger created under Indirect Expenses
3.
Enter the Amount
4.
Credit the Purchases
5.
Select the Stock Item from the List of Items in the Inventory Allocations screen
6.
Enter the Quantity
6.
7.
Accept the screen for the VAT Class Details to display
7.
N o t e : If then select 8.
10.
be
categorised
under
any
of
the
above
Sales
Tax
classes,
Select the Sales Tax Class from the list
N o t e : The 9.
the purchase cannot Not Applicable
Rate
of
Enter Narration if any Accept the screen to save
Sales
Tax
class
should
be
the
same
as
specified
in
the
Stock
Item.
10.
Creating a Journal Entry to Adjust Rebate in Sales Tax Using ST 10
A Licensed Manufacturer is entitled to purchase goods, tax free. If a Licensed Manufacturer has paid tax on purchase of raw materials, then he can claim rebate against the sales tax paid on purchases. This type of rebate can be adjusted against the sales tax liability of the licensed manufacturer. A Licensed Manufacturer can claim a rebate of 4% on Sales Tax paid @ 5% and a rebate of 8% on Sales Tax paid @ 10%. 1.
Go to Gateway of Tally > ing Vouchers > Select Journal Voucher: F7
2.
Select the Voucher Type from the Voucher Class List
3.
In the Journal Voucher screen, debit the Sales Tax ledger
4.
Enter the Amount
5.
Select the Sales Tax Class from the List of Sales Tax class
5.
6.
Enter the Assessable Value of the Purchase
7.
Credit the Purchases in the Journal Entry screen
7.
8.
Select the Stock Item from the List of Items in the Inventory Allocations screen.
9.
Enter the Quantity
10.
Enter the Amount
11.
Select the Sales Tax Class for the Purchase ledger
11.
12.
Enter the Narration if any
13.
Accept the screen to save
13.
Reports
Tally provides you with the Sales Tax forms in the Government prescribed format. Go to Gateway of Tally > Display > Statutory Reports > Sales Tax Reports
The Sales Tax Reports menu consists of two forms
Form ST 3 Form ST 10
Form – ST 3
The Form ST 3 comprises the details of all the sales transactions. The form has to be filed at the Malaysian Excise and Customs Department every two months. Go to Gateway of Tally > Display > Statutory Reports > Service Tax Reports > Form – ST 3 Press Alt + P to print the form.
The preview displays as shown
Scroll through the form using the Page Down key in your keyboard.
Note format
:
The information issued by the
given in the Government.
above
forms
has
to
be
used
Box 1 The Name and Address of the Company is printed in this field Box 2 This field remains blank. Box 3 The Sales Tax License number, as entered in F11: Features, is printed in this field. Box 4 The Sales Tax File Nr, as entered in F11: Features, is printed in this field. Box 5,6,7 and 8
to
fill
the
pre
printed
The above boxes are filled by the Malaysian Customs and Excise Department . Box 9 The Taxable period for the Return is printed in this field. Box 10 The Total value of goods Exported is printed in this field. Box 11 The total value of the goods exempted from Sales Tax is printed in this field. Box 12 The total value of goods sold to a Licensed Manufacturer is printed in this field. Box 13 The Serial Numbers of the Stock Items are printed in this field Box 14 The List of Sales Tax enabled Stock Items is printed in this field Box 15 The Tariff Code entered in the Stock Item Master is printed in this field. Box 16 The total value of Sales Tax enabled goods sold is printed in this field. Box 17 The total value of goods that are not sold, but used for Own Use, or Disposed Off other than sale is printed in this field. Box 18 The sum of Box 16 and Box 17 is printed in this field. Box 19 The Rate at which the Sales Tax is charged is printed in this field. Box 20 The total amount of Sales Tax charged on the goods is printed in this field. Box 21 The total amount of Tax deducted via ST 10 is printed in this field. Box 22 The total amount of Tax deducted using Credit Notes is printed in this field. Box 23 This box remains blank because Penalty cannot be estimated during the generation of the returns.
Box 24 This box remains blank because Penalty cannot be estimated during the generation of the returns. Box 25 This box displays the total Tax Payable. Box 26 The Name of the Declarant entered in the print configuration screen, is printed in this field. Box 27 The Identity Card No. or the port No. entered in the print configuration screen, is printed in this field. Box 28 The Designation of the person filing the return, entered in the print configuration screen, is printed in this field. Box 29 The Declarant is required to sign in this column. Box 30, 31, 32, 33, 34 The above boxes are filled by the Malaysian Customs and Excise Department .
Form ST – 10
The Form – ST10 lists the purchase details. It has to be filed at the Malaysian Excise and Customs Department every two months. Go to Gateway of Tally > Display > Day Book > Statutory Reports > Sales Tax Reports > Form ST – 10
Box 1 The Name and Address of the company is printed this field. Box 2 This field remains blank. Box 3 The Sales Tax License number as entered in F11: Features is printed in this field. Box 4 The Sales Tax File Nr as entered in F11: Features is printed in this field. Box 5,6,7 and 8 The above boxes are filled by the Malaysian Customs and Excise Department . Box 9 The period for which the ST3 is generated is printed in this field. Box 10 The Serial number is printed in this field. Box 11 The Supplier’s Name is printed in this field. Box 12 The Stock Items purchased are printed in this field. Box 13 The Tariff Code of the Stock Items entered in the Stock Item Master is printed in this field. Box 14 The Rate of Sales Tax paid on each of the Stock Items is printed in this field. Box 15
The Invoice numbers of the purchase entries ed is printed in this field. Box 16 The Invoice Dates are displayed in this field. Box 17 The purchase prices of the Stock Items are printed in this field. Box 18 The rate of rebate on Sales Tax is printed in this field. Box 19 The total value of Sales Tax deduction for each sale is printed in this field. Box 20 The total value of the deduction in Sales Tax is printed in this field. Box 21 The Name of the Declarant, as entered in the print configuration screen, is displayed in this field. Box 22 The Identity Card No. or the port No., as entered in the print configuration screen, is printed in this field. Box 23 The Designation of the person filing the return, entered in the print configuration screen, is printed in this field. Box 24 The Declarant is required to sign in this column. Box 25 The above box is filled by the Malaysian Customs and Excise Department.
Introduction
Service Tax is a form of indirect tax imposed on taxable services as prescribed under the second schedule of the service tax regulations of 1975. Service Tax is imposed on a Taxable service provided by a Taxable person. The Government of Malaysia has defined a set of services which are Taxable. The collection of the tax is istered by the Royal Customs and Excise Department of Malaysia .
Information on Service Tax
Rate of Tax The Rate of Service Tax on all the services under the Service Tax acts is 5%.
Taxable Person/Licensing Any Taxable person, who carries on business of providing taxable service and on crossing the threshold limit if any, must apply for a license. The term “person” includes an individual, a firm, a society, an association, a company and every other juridical person. No fee is payable for the issuance of a license. A complete list of Taxable Services is as follows:
Department Code 601
Supplying MMT inside Hotel
602
Supplying MMT outside Hotel
603
Supplying room to stay / sleep
604
Corkage, towel charge & cover charge services
605
Supplying room for Meeting / Cultural performances / Fashion Shows
606
Health Service
607
Massage Service
608
Supplying Escort to Social and Couple Dance
609
Sport and Recreation/Picnic Service
610
Preparation of Insurance Policy
611
Telecommunication Service
612
Credit Card Service
613
Customs clearance of Goods/Commodity Services
614
Supplying automobile parking space
615
Speed Courier/Shipment Service
616
Transport Service
617
Security / Guard Service
618
Professional Services
619
ing Services
620
Juridical / Legislative Services
621
Engineering Professional Services
622
Architectural Services
623
Surveyor / Assessor / Valuator / Real Estate Agent Service
624
Consulting Services
625
Veterinary Services
626
Automobile lease/rental Services
627
istrative services
628
Advertising Services
629
Golf game services
630
Corporate Protection and Security
631 - 644
Reserved
645
Tax on service apart from those stated above
646
Outdoor gathering / event services
Assessable value
Service Tax is calculated on Assessable Value. The Assessable Value is the difference of the Total Service charge and Expenses.
Expenses Expenses include those which incur while providing services i.e. postage, conveyance etc.
Payment of Service Tax
Service Tax is due when payment is received for taxable services rendered. If payment is not received within 12 calendar months from the date of issuance of invoice, the tax is due on the day immediately after the expiry of the 12-month period. Example: The service provider has issued an invoice on 1-1-2005 for Rm. 1050.00 and this includes Rm.50/- as service tax. If he doesn’t receive the payment by 2-1-2006 then he has to pay tax of Rm.50.00 to the department. In Malaysia the Financial Year covers from 1st January to 31st December.
How Much do I pay? Service Tax is paid on the Assessable Value at 5%. Consider the following example. ABC Company is a Consultancy firm and charges 1200 as consultation fees. The breakup of the Total Service Charge is as follows. Consultation Charges Tax @ 5% Disbursement -
1000.00 50.00 150.00
If the client pays RM. 600 as partial payment, then the amount can be allocated using any of the following methods.
Adjusting the Disbursement Amount First:
Total Billed Amount Total Amount Received
1200 600
Adjusting the Disbursement Amount Amount received
600
Total disbursement
150
Balance
450
The Balance amount can be adjusted as follows. Towards Consultation charges (450*1000)/1050
428.57
Towards Tax (450*50)/1050
21.43
Total The Service Tax Report appears as follows.
450.00
Date
Total Amount Billed
01-Jan06
Taxable Fees Collected
1200
Tax Collected
428.57
Taxable Fees Outstanding > 1 year
Tax Outstanding > 1 year
21.43
Total Tax Payable
21.43
If payment is not received within 12 calendar months of the date of issuance of invoice, the tax is due on the day immediately after the expiry of the 12-month period. This amount appears in the column Tax Outstanding > 1 year.
Adjusting the Disbursement Amount Last: Total Billed Amount
1200
Total Amount Received
600
Adjusting the Disbursement Amount Amount received
600
Total disbursement Balance
600
The Balance amount can be adjusted as follows. Towards Consultation charges (600*1000)/1050
571.43
Towards Tax (600*50)/1050
28.57
Total
600.00
The Service Tax Report appears as follows. Date
01,Jan06
Total Amount Billed 1200
Taxable Fees Collected
Tax Collected
571.43
28.57
Taxable Fees Outstanding > 1 year
Total Amount Received
1200 600
Adjusting the Disbursement Amount Amount Received The amount can be adjusted as follows.
Total Tax Payable 71.73
Allocating the charges proportionately Total Billed Amount
Tax Outstanding > 1 year
600
Towards Consultation Charges (600*1000)/1200 Towards Tax (600*50)/1200
500.00 25.00
Towards Disbursement Amount (600*150/1200 Total
75.00 600.00
The Service Tax Report appears as follows Date
01Jan06
Total Amount Billed
1200
Taxable fees Collected
Tax Collected
500.00
25.00
Taxable fees Outstanding > 1 year
Tax Outstanding > 1 year
Total Tax Payable
25.00
Invoice Invoice for Taxable Service must fulfil the following criteria: 1.
All invoices and receipts shall be printed and serially numbered.
2.
The total of all sales made and all service tax collected in each day shall be transferred at the end of such day to a record of sales, which shall be submitted together with the monthly returns.
3.
No alteration shall be made on the invoices or receipts and copies thereof. If a mistake has been made, the invoice or receipt and copy thereof shall be treated as cancelled and clearly marked "CANCELLED". The cancelled invoice or receipt together with all copies thereof shall be submitted to the Director General for inspection.
4.
If any invoice or receipt which has been issued is missing, the Director General shall estimate the service tax to be paid.
Maintenance of Records All invoices, receipts, books of and other records as required by the Act shall be kept within the principal place of business, or in any other place approved by the Director General. The person claiming the refund must keep all records and documents pertaining to the claim for a period of six years from the date of claim for inspection by the proper officer at any time.
When do I pay Service Tax? When a payment is received from a customer, Service Tax must be paid to the Customs Department within 28 days of the end of a Taxable Period (a Taxable Period covers two months). If the licensee does not receive the payment even after the invoice has been issued, the Service Tax has to be paid within 28 days of the 12 monthperiod from the date of issuance of the invoice.
Method of Payment
The Service Tax due and payable, in respect of any return required to be filed under the Act, can be paid by any of the following methods. 1.
Cash
2.
Postal Order or Money Order
3.
Cheque or Bank Draft
The cheque or bank draft has to be addressed to the ‘State Customs Director’ where the Tax is paid.
Service Tax
Tally provides you with a complete tracking of sales transactions for Malaysia Compliant Service Tax. Its fast and error-free voucher entry enables the easy calculation of Service Tax to be paid on each transaction. Tally offers you the flexibility to track part payments received and adjust them with the expenses incurred. Tally also tracks Service Tax which is unpaid for more than a year and generates reports in the Government prescribed format.
Enabling Service Tax
Company Creation Go to Gateway of Tally > Alt + F3 > Create Company
Enter Company details such as Mailing details. Select the Country from the List of Countries under the field, Statutory Compliance for .
Enabling Service Tax in F11 Features Go to Gateway of Tally > Select F11: Features > Statutory & Taxation
1.
Set Enable Service Tax to Yes
2.
Set Set/Alter Service Tax Details to Yes to display the Company Service Tax Details screen.
2.
3.
Enter the Service Tax Registration Number allotted by the Service Tax department
4.
Enter the Date of Registration
5.
Enter the File No. (The File No. is the Ledger Folio number)
6.
Select the Method of adjustment of Expenses from the List of Adjustment Methods
First Receipt : The expenses are first adjusted from the amount received and then the rest of the amount is adjusted against Service fee and Tax . Last Receipt : The expenses are adjusted from the last receipt of the bill amount Proportionate : The payment received from the customer is proportionately adjusted against fee, tax and disbursement 7.
Accept the screen to save
7.
Creating a Customer Ledger
To create a Customer ledger, 1.
Go to Gateway of Tally > s Info > Ledgers > Create
2.
In the Ledger Creation screen enter the name of the company that has supplied goods to you in the field
3.
Select Sundry Debtors in the Under field from the List of Groups
4.
Set Maintain balances bill-by-bill? to Yes . Enter details in the Default Credit Period if applicable
5.
Name
4. 5.
Set Is Service Tax Applicable to Yes for the Exemption Details screen to display
6.
Set Type of Classification as Exempt if tax is not payable. Set the above field to Not Applicable if tax is payable
7.
Enter the Mailing details and Tax information
7.
6.
6. Accept the screen to save
Similarly, you can create Supplier ledgers.
Creating a Tax Ledger
To create Service Tax ledger, 1.
Go to Gateway of Tally > s Info > Ledgers > Create
2.
Enter the Name of the Ledger
3.
Select the Group Duties & Taxes in the Under field
4.
Select the Type of Duty from the list of Types of Duty/Tax
5.
On selecting Service Tax as Type of Duty , an additional table to select the Category Name appears
6.
6.
Select the Category Name from the List of Service Categories
7.
Set Maintain Balances bill by Bill to Yes if applicable
8.
Set Inventory Values are affected to No, which can be set to Yes if applicable
9.
Accept the screen to save
Creating Sales Ledgers for Services
To create Sales ledgers for Services, 1.
Go to Gateway of Tally > s Info > Ledgers > Create
2.
Enter the Name of the ledger. . For example, ancy
3.
Select the Group Sales/Direct Income from the List of Groups
4.
Set Inventory Values are affected to Yes, if applicable
5.
Set Is Service Tax Applicable to Yes for the ledger. A list of all types of services category displays as shown:
6.
5.
6.
Select ing Services (619) from the List of Service Categories
7.
Accept the screen to save
Similarly, you can create ledgers for various services.
Creating Ledgers for Indirect Expenses
An Expenses ledger has to be created to claim the expenses. 1.
Go to Gateway of Tally > s Info > Ledgers > Create
2.
Enter the Name of the ledger
3.
Select the Group Indirect Expenses from the List of Groups
4.
Set Maintain Balances Bill By Bill to Yes/No if applicable
5.
Set Is Service Tax Applicable to Yes for the ledger
6.
Select ing Services (619) from the List of Service Categories
6.
8.
Accept the screen to save
Creating a Sales Voucher
Create the entry to show the sale of the service using the following steps. 1.
Go to Gateway of Tally > ing Vouchers > Sales (F8)
2.
Enter the reference number in the Ref field
3.
Select Party’s A/c Name from the List of Ledger s
4.
Enter the party details in the Party Details sub form
5.
Select the Service Ledger from the List of Ledger s
6.
Enter the amount in the Amount field
7.
Select the Service Tax ledger from the List of Ledger s
On selecting the Tax ledger, the Service Tax Details sub form displays.
8.
Accept the above screen for the Bill wise Details sub form to display
9.
Select New Ref as the Method of Adjustment
9.
10.
Accept the above screen for the Voucher Creation screen to reappear
10.
11.
Accept the screen to save the voucher
The above entry displays as shown.
Creating a Sales Voucher to Allocate Expenses
Tally provides you with two methods to allocate expenses incurred on the sale of services.
Method 1 The expenses can be included in the Service Charges . Example: The service charge is RM. 1000 and the expense incurred is RM. 150 , therefore the service charge would be RM. 1150 . The voucher for the above entry is created, using the following steps. 1.
Go to Gateway of Tally > ing Vouchers > Sales (F8)
2.
Enter the reference number in the Ref field
3.
Select Party’s A/c Name from the List of Ledger s
4.
Enter the party details in the Party Details sub form
5.
Select the Service Ledger from the List of Ledger s
6.
Enter the amount in the Amount field
7.
Select the Service Tax ledger from the List of Ledger s
On selecting the Tax ledger, the Service Details sub form displays.
8.
Accept the above screen for the Voucher Entry screen to reappear
9.
Select the Expenses ledger created under Indirect Expenses to allocate the expenses
10.
Enter the amount
11.
Tab down for the Bill Wise Details sub form to display
11.
12.
Select New Ref as the Method of Adj
13.
Tab through the fields for the Voucher Entry screen to display
14.
Enter the Narration if any
14.
15.
Accept the Voucher to save
The above entry displays as shown.
Method 2 Expenses can be allocated using an Expense ledger, created under Indirect Expenses . The voucher can be created using the following steps. 1.
Go to Gateway of Tally > ing Vouchers > Sales (F8)
2.
Enter the reference number in the Ref field
3.
Select Party’s A/c Name from the List of Ledger s
4.
Enter the party details in the Party Details sub form
5.
Select the Service Ledger from the List of Ledger s
6.
Enter the amount in the Amount field
7.
Select the Expenses ledger created under Indirect Expenses
8.
Specify the Expenses amount in the Expenses field
9.
Select the Service Tax ledger from the List of Ledger s
On selecting the Tax ledger, the Service Details sub form displays
10.
Enter the amount in the Expense field
11.
Accept the above screen for the Voucher Entry screen to reappear
12.
Tab down for the Bill Wise Details sub form to display
12.
13.
Select New Ref as the Method of Adj
14.
Tab through the fields for the Voucher Entry screen to display
15.
Enter the Narration if any
15.
16.
Accept the voucher to save
The entry displays as shown.
Creating Sales Vouchers Exempted from Service Tax
For services exempted from tax, the classification should be selected in the ledger master. 1.
Create the Customer ledger to set the Exemption Detail to Exempt
2.
Go to Gateway of Tally > ing Vouchers > Sales (F8)
3.
Enter the reference number in the Ref field
4.
Select Party’s A/c Name from the List of Ledger s
5.
Enter the party details in the Party Details sub form
6.
4. 5. 6.
Select the Service edger from the List of Ledger s
7.
Enter the amount in the Amount field
Tab down for the Bill Wise Details sub form to display
8.
Select New Ref for the Type of Ref
9.
Accept the above screen for Voucher Entry screen to display
10.
Enter the Narration if any
11.
Accept the voucher to save
11.
Note
:
The
above
entry
is
applicable
for
ST
3
report
only.
Creating a Receipt Voucher
On receipt of payment from a customer, a Receipt voucher has to be entered. 1.
Go to Gateway of Tally > ing Voucher > Select Receipt (F6)
2.
Select the Customer ledger from the List of Ledger s for the Bill Wise Details sub form to display
3.
Select Agst Ref as the Type of Ref
4.
Select the Bill against which the payment is received from the List of Pending Bills
5. 6.
5.
Accept the above screen for the Voucher entry screen to display
6.
Debit the Cash/Bank with the amount received
7.
Enter the Narration, if any
8.
Accept the voucher to s ave
Creating a Receipt Voucher to Adjust the Expenses
Expenses can be adjusted in the receipt entry by selecting the appropriate Method of Adjustment in F11: Features > Statutory & Taxation
For example, a customer makes a partial payment of RM. 600 for the Sales entry of RM. 1200 .
On First Receipt A receipt entry can be created selecting Method of Adjustment of Expenses as On First Receipt . The value in the Service Tax displays as shown.
The Total Tax adjusted is calculated is as follows. Total Billed Amount
1200
Total amount received
600
Adjusting the Disbursement Amount Amount received
600
Total disbursement
150
Balance
450
The Balance amount can be adjusted as follows. Towards the Consultation charges (450*1000)/1050 = 428.57 rounded off to
428.60
Towards the Tax (450*50)/1050
21.43
Total
450.03
On Last Receipt On creating a receipt entry selecting Method of Adjustment of Expenses as On Last Receipt , the value in the Service Tax displays as shown.
The Total Tax adjusted is calculated is as follows. Total Billed Amount Total Amount Received
1200 600
Adjusting the Disbursement Amount Amount received
600
Total disbursement Balance The Balance amount can be adjusted as follows.
600
Towards Consultation charges (600*1000)/1050 = 571.43 rounded off to
571.40
Towards Tax (600*50)/1050
28.57
Total
599.97
Proportionate On creating a receipt entry selecting Method of Adjustment of Expenses as Proportionate , the value in Service Tax displays as shown.
The Total Tax Payable is calculated is as follows. Total Billed Amount Total Amount Received
1200.00 600.00
Adjusting the Disbursement Amount Amount Received The amount can be adjusted as follows.
600.00
Towards Consultation charges (600*1000)/1200
500.00
Towards Tax (600*50)/1200
25.00
Towards Disbursement amount (600*150/1200 Total
75.00 600.00
Creating a Payment Voucher
To pay the Service Tax , 1.
Go to Gateway of Tally > ing Vouchers > Payment (F5)
2.
Debit the Tax ledger from the List of Ledger s
3.
Select Agst Ref from the Method of Adj in the Service Tax Bill Details
4.
Select the Service Tax Bill against which the payment is made from the List of Service Tax Bills
5.
The amount can be altered
6.
5. 6.
Credit the Bank
7.
Enter the Narration, if any
8.
Accept the voucher to s ave
Reports
To view the Service Tax Reports, Go to Gateway of Tally > Display > Statutory Reports > Service Tax Reports
The Service Tax Reports consist of the following.
Service Tax Service Tax Return
Service Tax
The Service Tax details the total sales of taxable goods and the tax received. It also provides details on unpaid tax. Go to Gateway of Tally > Display > Statutory Reports > Service Tax Reports > Service Tax
Date : This column lists the dates in the period specified in the F2: Period . Total Daily Sales Based on Invoices : This column displays the total sales made on the specific dates.
Paid Qty/Invoice Value of Goods/Services Taxable : This column displays the total payment received for the sale of service. Total of Tax received : This column displays the value of the Service Tax received on the sales made for a
specific date.
Invoice Unpaid Bill/Invoice Value of Goods/Services Taxable : This column displays the value of the goods or services on which tax has not been paid for more than a year. Total of Tax to be paid : This column displays the total tax due on the sales of taxable service for which the payment has not been received for more than one year. Total tax to be paid : This column displays the total amount of tax to be paid (i.e. column 4 + column 6) On viewing the Service Tax after changing the year to 2007 , the screen displays as shown
Press Alt + P to view the preview of the Service Tax
The preview of Service Tax displays as shown.
Name & Address Licensee : The name and mailing details of the company display in this field.
License No : The Service Tax Registration number is displays in this field.
Tax Period Month : The month for which the Service Tax is viewed is displays in this field. Year : The year for which the Service Tax is viewed is displays in this field.
Service Tax Return
The Service Tax Return is a statutory report which has to be filed bimonthly. This report displays Tax details such as the Rate of Tax, Total Tax Payable and so on. Go to Gateway of Tally > Display > Statutory Reports > Service Tax Reports
The preview of the Service Tax Return displays as shown. The details are displayed in Bahasa Melayu ` and English
Name and Address of Principal Place of Business : This box displays the name and address of the company . Address of Branches if different from above : This box remains blank. Service Tax License No. : The Service Tax Registration Number , as specified in F11: Features , displays in this field. File No. : The File Number, as specified in F11: Features , displays in this field. Box 5, 6, 7 and 8 : These boxes have to be filled by the Service Tax Department . Return for Taxable Period : The period for which the Service Tax Return is filed is specified in this field. Type of Service Provided : This box displays the Type Of Service provided to the customer . Department’s Revenue Code : This box displays the revenue code to the corresponding service. Quantity : If the service provided is in the form of an item, then this box displays the quantity of the item sold. This column currently remains blank. Value : This box displays the total value of taxable service provided. Less Value of Service Exempted : This box displays the total value of the exempted sales entries. Total Taxable Value : This box displays the total taxable value on all the sales ( i.e. 16 = 14-15)
Service Tax Rate : The rate of the Service Tax is displays in this box. Amount : The total amount of Service Tax displays in this box.
Penalty Rate : This column currently remains blank. Amount : This column currently remains blank. Less Deduction Allowed : This column currently remains blank. Total Amount Payable : This column displays the sum of total tax and the penalty. Name of the Declarant : The name of the person filing the returns displays in this box. Identity Card/port No. : The Identity Card Number or the port Number is entered in this field. Designation : The designation of the person filing the returns displays in this box. Box 27, 28, 29, 30 and 31 : These boxes have to be filled in by the Service Tax Department .
Introduction
Value Added Tax is a tax levied on the sale of tangible goods, which according to their nature and legal status, may be movable, immovable, or intangible assets. The Government appoints VAT collectors, who collect the VAT due from goods purchased or services received and forward the payments to the State Treasury. VAT collectors include Production Sharing Contractors (PSCs), Government Treasurer Companies, or Government institutions appointed by the Minister of Finance.
Information on VAT
Tax Payer A Taxable Person or a Tax Payer for Value Added Tax purposes is an individual or an entity, supplying taxable goods and/ or rendering taxable services.
Entity Entity is a group of people and/or capital which forms a unity that either conducts business or does not. It includes: Corporation Limited partnership State – local owned enterprise in whatever name and form Co operative, pension fund, partnership, association foundation, public organisation, social and political organisation, or any similar organisation, institution, permanent establishment and any other form of entity.
Taxable Goods Value Added Tax shall be imposed on: 1.
Supply of Taxable Goods carried out in the customs area by a Firm
2.
Import of Taxable Goods
3.
Taxable Services rendered in a customs area by a Firm
4.
Utilisation of intangible Taxable Goods obtained from outside the customs area within a Customs Area
5.
Utilisation of Taxable Services obtained from outside the customs area within a customs area
6.
Export of Taxable Goods by a taxable person for VAT purposes.
Rate of VAT VAT is imposed on most goods and services at a rate of 10%. Government regulations can adjust the rate to as low as 5% and as high as 15%.
Terminology Used in VAT
Taxpayer Identification Number Every tax payer should at the office of Directorate of General of Taxes to obtain a Taxpayer Identification Number, which will be unique to him/ her.
Taxable Period Taxable period is equal to one calendar month or any other period that does not exceed three calendar months as stipulated in a decree by the Minister of Finance.
Taxable Year Taxable Year is a calendar year unless the taxpayer adopts an ing year, which is different from the calendar year.
Filing VAT Returns
Every Tax Payer is obliged to complete his Tax Return, using the Indonesian Language in the Latin alphabet with Arabic numerals and Rupiah currency, and and confirm it by g and filing it at the district tax office. A Tax Payer who has obtained permission from the Minister of Finance to use a foreign language and non-Rupiah currency in the Tax Return, shall file his Tax Return in the Indonesian Language or Foreign Language, using currency other than the Rupiah, as regulated in a decree by the Minister of Finance. A Tax Payer shall obtain a Tax Return form at the locations specified by the Director General of Taxes. On request, the Director General of Taxes may extend the period for filing an Annual Tax Return for no longer than six months. The request shall be in writing, accompanied by a statement estimating the amount of tax payable for a taxable year and proof of settlement of the tax payable. If the Tax Return is not filed within the due date, or is filed after the due date, a Letter of Reprimand shall be issued. The form and content of the Tax Return and the required information, along with the documents, shall be stipulated in a decree by the Minister of Finance. A Tax Return shall be considered ‘Not Filed’ if it is not signed, or does not contain the required information and documents.
Tax Return A Tax Return is a document used by a tax payer to report the calculation and/or payment of taxes.
Annual Tax Return Annual Tax Return is a tax return for a particular taxable year or a fraction of the taxable year.
Due Dates for Filing Tax Returns Periodic Tax Return Periodic Tax Return is filed twenty days after the end of a taxable period. If the tax is not paid within the due date, then an istrative Penalty of Rp. 50,000.00 is charged for an individual tax payer.
Annual Tax Return Annual Tax Return is filed three months after the end of taxable year. If it is not paid within the due date, then a penalty of Rp. 100,000.00 is charged. N o t e: The decree of
istrative the Minister
Where and When do I pay? Tax shall be payable at the time of: 1. 2.
penalty applies of Finance.
to
certain
tax
payers
who
are
stipulated
by
a
1.
Supply of Taxable Goods
2.
Import of Taxable Goods
3.
Rendering of Taxable Services
4.
Utilisation of intangible Taxable Goods obtained from outside the Customs Area
5.
Export of Taxable Goods
If payment is received: 1.
Before supply of Taxable Goods or rendering of Taxable Services
2.
Before the utilisation of intangible Taxable Goods
The tax shall be paid at the time of payment. N o t e: If there is payment then the tax payable
any change of rules or if there is any difficulty in deciding the time of Director General of Taxes may determine a certain time as ‘time of
Issue of Invoice A Taxable Person for VAT purposes shall be obliged to issue a Tax Invoice for each supply of Taxable Goods or Services. A Taxable Person for VAT purposes may issue a single Tax Invoice, consisting of all supplies, to the same buyer of Taxable Goods or recipient of Taxable Services during one calendar month. If the payment is received before the supply of Taxable Goods or the rendering of Taxable Services, then the Tax Invoice shall be issued at the time of payment. The time of issuance, format, size, availability and procedures for submission and correction of a Tax Invoice shall be determined by the Director General of Taxes. A Tax Invoice shall include information concerning the supply of Taxable Goods or the rendering of Taxable Services along with. 1.
The name, address and Taxpayer Identification Number of the Taxable Person supplying the taxable Goods or rendering the Taxable Services
2.
The name, address, and Taxpayer Identification Number of the buyer of the taxable of the Taxable Services
3.
The type of Goods or Services, total Sales Price or Consideration, and amount of
Value Added Tax withheld Sales Tax on Luxury Goods withheld code, serial number and date of issuance of the Tax Invoice and
name, position, and signature of person authorised to sign the Tax Invoice.
Interest If the payment or remittance of tax payable is made after the due date, a penalty of 2% is charged. The interest is calculated monthly, from the due date of payment up to the date of payment, where a fraction of the month is treated as one full month.
Refund of Tax Overpayment The Director General of Taxes must issue a notice of tax assessment within twelve months of the acceptance of a request for refund of tax overpayment.
VAT in Tally
VAT for Indonesia in Tally is simple and easy to use with in-built classifications for easy voucher entry. It tracks all VAT enabled transactions and computes them automatically. Transactions can be recorded in foreign currency. Tally allows the generation of simple and standard invoices as well VAT Return forms in Government prescribed formats.
Enabling VAT in Tally
Creating a Company 1.
Go to Gateway of Tally > Alt+F3 > Create Company
2.
Enter the details of the Company.
3.
Select the country from the List of Countries, in the field Statutory Compliance for .
Enabling VAT in F11: Features 1.
1.
Go to Gateway of Tally> s info. > F11: Features > Statutory & Taxation.
2.
Set Enable VAT to Yes .
Under Tax Information, enter the following fields: VAT Regn. No. : Enter the 15 digit VAT Registration Number issued by the tax office VAT Regn. Date : Enter the VAT Registration Date Tax Invoice Code : Enter the alpha-numeric tax invoice code Accept the screen to save .
Creating a Sales Ledger
To create a Sales ledger for VAT 1.
Go to Gateway of Tally > s Info > Ledger > Create/Alter
2.
Enter the Name of the ledger
3.
Select the group Sales s from the List of Groups
4.
Set Inventory values are affected? to Yes
5.
Set Used In VAT Returns? to Yes and Select the VAT/Tax Class as shown in the screen below.
6.
6.
Accept the screen to save .
N o t e : You can select the VAT/TAX Applicable in the above field.
Class
during
voucher
entry,
by
selecting
Not
Similarly, you can create a sales ledger with VAT/TAX Class – Sales @ 10% to Uned Dealers .
Creating a Party Ledger
To create a ledger for the Supplier , 1.
Go to Gateway of Tally > s Info > Ledgers > Create
2.
Enter the name of the ledger in the Name field
3.
In the Under field, select Sundry Creditors from List of Groups
4.
Set Maintain Balances Bill by Bill to Yes/No
5.
By default Inventory Values are affected is set to No , which can be set to Yes , if applicable
6.
Enter the Mailing Details for the ledger
7.
Enter the 15 digit VAT Regn. No .
7.
8.
Accept the screen to s ave .
Creating a Purchase Ledger
To create a Purchase ledger for VAT, 1.
Go to Gateway of Tally > s Info > Ledger > Create/Alter
2.
Enter the name of the ledger in the Name field
3.
In the Under field, select the Purchase s from the List of Groups
4.
By default Inventory Values are affected is set to No , which can be set to Yes , if applicable
5.
Set Used In VAT Returns? to Yes and Select the VAT/Tax Class as shown in the screen below
6.
6.
Accept the above screen to save
Creating a VAT Ledger
Ledgers for VAT has to be created following the procedure mentioned below. 1.
Go to Gateway of Tally > s Info > Ledgers > Create
2.
Enter the name of the ledger in the Name field
3.
In the Under field, select Duties & Taxes from List of Groups
4.
Select VAT in the field Type of Duty/Tax
5.
In the VAT/TAX Class field, select the appropriate classification
Note: You Applicable
can select the in the above
VAT/TAX field
Class
during
the
Voucher
entry
by
selecting
Not
6.
By default Inventory Values are affected is set to No , which can be set to Yes , if applicable
7.
Set Percentage of Calculation to the VAT rate that you selected in the VAT/Tax class field or set it to 0%
8.
Select the Method of Calculation – On VAT Rate from Type of Duty menu
8.
9.
Accept to save .
Creating a Sales Voucher Type
A Sales Voucher Type has to be created/Altered to issue a Standard VAT Invoice 1.
Go to Gateway of Tally > s Info > Voucher Types > Alter/Create
2.
Enter the Name of the Voucher Type
3.
Select the Type of Voucher as Sales from the List of Voucher Type
4.
Abbreviate the Voucher Type as per your requirement in the Abbr. field
5.
Select Automatic for the method of Voucher numbering
6.
Set Use Advance Configuration to Yes, to specify the numbering method, if required
7.
Set the remaining fields according to your requirements. For more information, refer to Voucher Types
8.
Set Is Tax Invoice? to Yes to issue a Standard Invoice
N o t e : If Set format.
is
Tax
Invoice is set to N o
,
then
the
Invoice
is
printed
in
Simple
Invoice
9.
Enter all the details and accept the screen to save
Creating a Purchase Voucher
To create a Purchase Voucher, 1.
Go to Gateway of Tally > ing Vouchers > Select Purchase Voucher (F9)
2.
Enter the Reference in the Ref field if required
3.
Enter the Date of Purchase in the Date field
4.
Select the Party’s A/c Name from the List of Ledgers
5.
Select the Purchase A/c Ledger
6.
Select the VAT/Tax Class from the List of VAT/TAX Class , if it is not specified in the ledger creation
Note select
: Set Allow selection of VAT/Tax VAT/Tax Class during Voucher
Class during entry to Yes in F12: Entry
7.
Select the Stock Item from the List of Items
8.
Select the VAT ledger from the List of Ledger s
9.
Enter Narration if required
Configure , to
9.
10.
Accept the voucher to save
Creating a Debit Note
You can use the Debit Note Voucher to record a Purchase Return entry. 1.
Go to Gateway of Tally > ing Vouchers > Ctrl + F9
2.
Enter the Reference in the Ref field
3.
Select Party’s A/c Name from the List of Ledger s
4.
Enter the required details in Party Details sub form
5.
Select the Purchase ledger for allocation
6.
Select the VAT/Tax Class from the List
7.
Select the Stock Item from the List of Items
8.
Enter the Quantity and Rate
9.
Select the VAT ledger from the List of Ledger s
10.
Enter N arration if required
10.
10.
Accept the voucher to s ave
Creating a Simple Sales Invoice
To create a Simple Sales Invoice that includes VAT, 1.
Go to Gateway of Tally > ing Vouchers > Select Sales Voucher (F8)
2.
Enter the Reference in the Ref field if required
3.
Enter the Tax Invoice No.
4.
Select the Party’s A/c Name from the List of Ledgers
5.
Select the Sales A/c Ledger
6.
Select the VAT/Tax Class from the List of VAT/TAX Class , if the class is not selected during the ledger creation.
N o t e : Set Allow to select VAT/Tax
selection Class
of VAT/Tax Class during Voucher Entry
7.
Select the Stock Item from the List of Items
8.
Select the ledger VAT from the List of Ledger s
9.
Enter N arration if required
during
entry to Y e s in F12:
Configure ,
9.
10.
Accept the voucher to s ave .
N o t e : In the VAT/Tax Class field, there is an option called Not Applicable . Select this option if you need different classifications for each item during voucher entry. Similarly, you can create entries for Sale to Uned Dealers .
Creating Standard Sales Invoice
To issue a sales invoice using a currency other than the Rupiah , follow the procedure given below. To create a sales entry, a foreign currency has to be created, e.g. RM. Refer to Currencies for more information. 1.
Go to Gateway of Tally > ing Vouchers > Select Sales Voucher (F8)
2.
Select the Voucher type – Sales Standard
3.
Enter the Reference in the Ref field if required
4.
Enter the Tax Invoice No .
5.
Select the Party’s A/c Name from the List of Ledgers
6.
Select the Sales A/c Ledger
7.
Select the VAT/Tax Class from the List of VAT/TAX Class
8.
Select the Stock Item from the List of Items
9.
Enter the quantity
10.
As it is a Forex transaction, enter the foreign currency. In this case, enter RM and then rate
11.
The Forex Rate of Exchange screen is displayed as shown.
11.
12.
Enter the Rate of Exchange
13.
If the item is sold at a discount price then, select the ledger Discount created under Indirect Expenses
14.
If the Discount ledger is selected, then prefix the rate of discount with a Negative (-) symbol.
15.
Select the ledger VAT from the List of Ledger s and enter the rate .
16.
Enter Narration if required
16.
17.
Accept the screen to save
To Print a Standard Sales Invoice Press Alt + P (Print) to display the Voucher Printing screen,
Enter the details like the Name , Status/Designation/Place and Date . Press F12: Configure to display the Invoice Printing Configuration Screen, Set Print in Statutory Format to Yes
The preview of the invoice displays as shown:
The following details are displayed in the Standard Tax Invoice The Invoice No. : It displays the number assigned in the sales voucher Code and No. of Tax Invoice : The Tax Invoice Code as entered in F11: Features and the seven digit number entered in the Invoice is printed in this field.
Seller Details Name : The company name as entered in the company creation screen is printed here Address : The company address as entered in the company creation screen is printed here VAT Regn. No. : The VAT Regn. No. as entered in F11: Features is printed in this field The Date of Issue of Taxable Invoice : The VAT Regn. Date as entered in F11: Features is printed in this field
Buyer Details Name : The name of the buyer is printed in this field Buyers Address : The buyer's address is printed in this field VAT Regn. No. : The buyers VAT Regn. No. as entered in the ledger is printed here Type of Goods/ Services : The nature of goods or service being sold is entered here Selling Price in Foreign Currency and In Indonesian Rupiah : The value of the goods being sold is printed in both the sellers as well as the buyers currency (Since the above is a foreign currency transaction) Total Sale/Compensation/Advances : The value of the sale is printed in this field Total Discount : Any discount offered is printed in this field Amount of Down Payments : This field remains blank Total Subject to VAT : The total value of goods sold that are VAT liable is printed in this field VAT Amount : 10% X Total Subject to VAT Place & Date : The date and place of the Invoice is printed in this field Authorised Signatory : The Designation of the person filing the return entered in the Print Configuration screen is printed in this field. Exchange Rate : The Rate at which the currency was exchanged
Creating a Credit Note
A Credit Note voucher can be used to record a Sales Return entry. To create a Sales Return entry, 1.
Go to Gateway of Tally > ing Vouchers > Ctrl + F8
2.
Enter the Reference number in the Ref field if required
3.
Select Party’s A/c Name from the List of Ledger s
4.
Enter the required details in Party Details sub form
5.
Select the Sales ledger for allocation
6.
Select the VAT/Tax Class from the List of Ledger s
7.
Select the Item from the List of Items
8.
Select the ledger VAT from the List of Ledger s
9.
Enter N arration if required
9.
10.
Accept the voucher to s ave .
VAT Reports
To view VAT Reports, Go to Gateway of Tally > Display > Statutory Reports > VAT Reports
The VAT Reports menu displays the following options VAT Computation VAT Forms
VAT Computation
VAT Computation report displays the summary of Input and Output VAT Classifications, Assessable Value and subsequent Tax calculated on the Assessable Value. It also calculates the opening Input VAT carried forward if any, and the balance paid/payable. To view the VAT Computation report Go to Gateway of Tally > Display > Statutory Reports > VAT Reports > VAT Computation .
The VAT Computation Report displays the Total Output and Input Tax payable and the Total Input Credit available. Drill down to each tax classification to view the Sales/ Purchase reports as shown.
VAT Forms
The VAT return forms can be viewed using the VAT Forms menu. Go to Gateway of Tally > Display > Statutory Reports > VAT Reports > VAT Forms > VAT Return Forms
FORM – 1195 A1 FORM – 1195 B1
FORM 1195 A1
Form – 1195 A1 displays the Sales entries as shown.
Tax Year Period : The month of submission is displayed in this field The Name of the Company : The Name of the Company is displayed in this field. VAT Regn. No. : The VAT Regn. No. as entered in F11: Features > F3: Statutory and Taxation is displayed here. N.P.P.K.P No. : The VAT Registration number is displayed in this field VAT Regn. Date : The VAT Regn. Date as entered in F11: Features is displayed in this field Column 1 : The Serial Number is displayed in this column. Column 2: The Supplier's Name is displayed in this column. Column 3 : The Supplier's Tax ID is displayed in this column Column 4 : The Supplier's Tax Invoice No. is displayed in this column Column 5 : Date of Invoice is displayed in this column Column 6 : The Tax Value in Rupiah is displayed in this column Column 7 : This field remains blank Row I : The Total Tax Value for a non tax ed customer is printed in this field Row II : This field remains blank Row III : This field remains blank
Recapitulation 1. 2.
Simple Tax Invoice : The total tax on Simple Tax Invoices is displayed in this field.
1. 2.
Tax Invoice to Value Added Tax Payee : This field remains blank
3.
Standard Tax Invoice to Third Party who is not a Value Added Tax Collector : The total tax value paid to the ed dealer is printed in this field
4.
Total Value Added Tax : The sum of box 1 and box 3 is displayed in this field.
5.
Reduced by VAT/Sales Tax on Luxury Goods : The tax value calculated on the return of the sold goods (credit notes) is printed in this field.
6.
Total : The difference between Box 4 and Box 6 is displayed in this field
FORM 1195 B1
Form 1195 B1 displays the purchase transactions:
Date of Statement month and year : The Period specified in the print configuration is displayed in this field Date of revised statement : This field has to be filled manually The Name of the Company : The Name of the Company is printed in this field VAT Regn. No. : The VAT Registration number as entered in F11: Features > Statutory & Taxation is displayed in this field N.P.P.K.P No . –The VAT Registration is displayed in this field VAT Regn. Date – The VAT Registration Date as entered in F11: Features > Statutory & Taxation is displayed in this field Column 1 : The Serial Number for the details in the form is printed in this field Column 2 : The Supplier's Name is displayed in this column. Column 3 : The Supplier's Tax ID is displayed in this column Column 4 : The Supplier's Tax Invoice No. is displayed in this column Column 5 : The Date of the supplier Invoice is displayed in this column Column 6 : The Tax Value in Rupiah is displayed in this column Column 7 : This field remains blank Row I : This field remains blank Row II : This field remains blank Total Tax Value : The Total Tax Value is printed in this field Row III : This field remains blank
Recapitulation Import Tax duty which is in the same tax period : This field remains blank VAT-In for the same Tax period : Total Tax paid for the specified period is printed in this field. Import Tax Duty which is not in the same Tax period : This field remains blank VAT-In for not the same Tax Period : The Input VAT paid on the purchases which do not belong to the same period is printed in this field. Total Input Tax : The total of the fields 2 and 4 is printed in this field. Reduced with VAT for Procurement Return Goods : The amount on Input Vat reversed due to return of goods is printed in this field. Others : This field remains blank Total Input Tax which has been credited : The difference of rows 5 and 6 (5-6) is printed in this field N o t e : An M T S code the date entered in
appears in Column 7 of the Purchase Voucher
the
form,
when
the
bill
date
is
greater
than
UK VAT Analysis
Tally produces the VAT Analysis Report in the British VAT Return Form 100 format with Boxes 1 to 9. It is automatically produced for a quarter ending the last date of voucher entry and is picked from the sales and purchase voucher entries..
Set-up required to produce the return The set-up is more in detail if you deal with the European Union.
Where Boxes 2, 8 and 9 are not applicable Businesses not trading in Goods or related services with the EC – Domestic trade only or Exports to other countries or supply of services, like consultancy, to EC. In short, where Boxes 2, 8 and 9 are not applicable. In the Company Creation screen, 1.
Select the UK from the List of Countries in the field Statutory Compliance for.
2.
Activate the option Prepare and Follow British Style VAT Returns to Yes in F11: Features > Statutory & Taxation. Select Not Applicable for the option Group Name Under which EC Debtors are classified . Select Not Applicable for the option Group Name Under which EEC Creditors are classified.
Note: 2.
Use
Voucher
Classes
for
sales
to
automate
sales
invoice
entry
if
required.
Ensure that all VAT entries are made through Purchases, Sales, Debit Note and Credit Note vouchers only. VAT entries made in other voucher types like Payment, will not be included in the VAT Return.
N o t e : The set up determines the figures that go into the VAT Analysis Report. Hence, check the figures and the entries carefully before copying them into your VAT Return. Adjustment items like Fuel scale charges are typically entered through a journal and would not be reflected in the Report. For this, you might have to adjust the Report figures. More: VAT Analysis Report Businesses trading in goods with the EEC and not services Print VAT Analysis Return and Reports
Business Trading in Goods with the EEC and Not Services
Where Boxes 2, 8 and 9 are applicable If you deal with the EEC, it is advisable to group your EC Customers separately under a sub group of Sundry Creditors. You have to be careful while grouping only VAT ed companies in these groups as they would affect Box 8 and 9 as well as the EC Sales List. Note: Uned like UK companies 1.
2.
companies
or
individuals
should
be
grouped
Go to Gateway of Tally > F11: Features > F2: Inventory Features > Style VAT Returns to Yes. The following screen displays.
separately
and
treated
Set Prepare & Follow British
2.
Select any Group Name for the option Group Name Under which ‘EEC Debtors’ are classified . E.g. EC Customers.
3.
Select any Group Name for the option Group Name Under which ‘EEC Creditors’ are classified. E.g. EC Suppliers..
4.
Alter the group Sales s to enable Used for Calculation . Set it to Yes .
6.
Now create or alter the ledger used for recording sales of Goods (not services) to EC Countries. Activate Percentage of calculation and set it to the standard rate of VAT , E.g. 17.5. Set the method of calculation to any one method, say On Total Sales .
7.
If you have sales for items with different VAT rates, create separate sales s for them and give percentages accordingly.
8.
Follow the same steps for EC Purchases s as well.
9.
Use Voucher Classes for sales to automate sales invoice entry if required.
10.
Ensure that all VAT entries are made through Purchases, Sales, Debit Note and Credit Note vouchers only.
Note:
VAT
entries
made
in
other
voucher
types
like
Payment,
will
not
be
included
in
the
10.
VAT
Return
Business providing services to the EC in addition to Goods as well as exporting to other countries If you deal with the EC, it is advisable to group your EC Customers separately under a sub-group under Sundry Debtors. Likewise, group EC Suppliers under a separate sub-group of Sundry Creditors 1.
Activate British Style VAT Returns in F11:Company Features.
2.
Select any Group Name for the option Group Name Under which EEC Debtors are classified . E.g. EC Customers..
3.
Select any Group Name for the option Group Name Under which EEC Creditors are classified . E.g. EC Suppliers.
4.
Alter the group Sales s to enable Used for Calculation and set it to Yes . For Goods follow the instructions in 2 above.
For sale of services to EC Countries, do not give any percentage. Leave the field blank. For export sales, do not give any percentage.
5.
Follow the same steps for EC Purchases s.
6.
Use Voucher Classes for sales to automate sales invoice entry if required.
7.
Ensure that all VAT entries are made through Purchase, Sales, and Debit Note and Credit Note vouchers only. VAT entries made in other voucher types like Payment, will not be included in the VAT Return.
N o t e : The set up determines the check the figures and the entries
figures that go carefully before
into the VAT Analysis Report. copying them into your VAT
Hence, Return.
VAT Analysis Report
To view the VAT Analysis Report Go to Gateway of Tally > Display > VAT Analysis The following screen displays.
Box 1 Gives VAT due calculated from the sales vouchers. Double click on the row or press Enter and the following screen displays.
The sales entries are displayed in columns showing break-up of net value of sales on which VAT is applicable or not. The VAT charged on each invoice is shown in a column. VAT calculated but not applied is shown for EC Sales information for items on which VAT is charged only in the UK. This is directly relevant for Box 2 purposes. The amount shaded green is brought to the VAT box.
Box 2 The Box is not relevant if there are no inputs from EEC. The EC VAT calculated but not applied is brought in. It is also included in Box 4, which is the total VAT Charged and EC VAT Calculated (not applied). Double click on the row or press Enter and the following screen displays.
Box 3 This prints the total of the sum of Box 1 and Box 2 .
Box 4 It is the VAT dues calculated from Purchase Voucher entries. It includes the Box 2 figure. Double click on the row or press Enter to view input details. The following screen displays.
The purchase entries are displayed in columns showing break-up of net value of purchases on which VAT is applicable or not. The VAT charged on each invoice is shown in a column. VAT calculated but not applied is shown for EC purchases information for items on which VAT is charged in the UK. The amount shaded green is brought to the VAT box.
Box 5 Net VAT due to be paid or refunded which will be the difference between the Box 3 & Box 4 .
Box 6 Total Net Value of sales and other outputs as obtained from the sales voucher entries. Double click on the row or press Enter to view Output Details. The following screen displays.
Box 7 Total Net Value of purchases and other inputs as obtained from the purchase voucher entries. Double click on the row or press Enter to view Output Details. The following screen displays.
Box 8 This shows the sale of goods to EEC customers. The figure depends upon correct classification of EEC customers and activation of percentage of calculation in sales ledger s. It is the total of the amounts in the Nett Value (VAT Applicable) column in the Output Details for EC Member Countries. Note: Those items that although have a VAT Rate specified, but whose sale allocation do not have a percentage of calculation will not be included. Hence, it is important to allocate EC Sales to a separate Sales for which percentage of Calculation has not been set to 0. On the other hand, services supplied to EC Customers are not to be considered and hence should be allocated to a sales for which the percentage of calculation is 0. The following screen displays Output Details for EC Member Countries.
Box 9 This reflects the purchase of goods from EC Suppliers. Note:
The
same
note
of
caution
as
for
Box
8
applies
to
Box
9
as
well.
Print VAT Analysis Return and Reports
Display the VAT Return Screen and click on the Print Button or use the keys Alt+P. The Print option cycles through all reports including EC reports. Let us consider an Example: Create the following groups: 1.
EC Customers under Sundry Debtors
2.
EC Suppliers under Sundry Creditors
3.
EC Customers for goods and services
4.
Export Customers
N o t e : Alter the Groups Sales s and for the Field Used for Calculation to Yes..
Purchase
s
to
change
Create the following Ledger s (alter if they already exist). Under the Group Sales s EC Sales – Goods Set the option Inventory Values are affected? to Yes Enter the required percentage in the Percentage of Calculation field. Here it is 17.5%. Select On Total Sales from the Type of Duty list under the Method of Calculation field.
EC Sales – Services Set the option Inventory Values are affected? to Yes Enter the required percentage in the Percentage of Calculation field. Here it is 0%.
UK Sales Set the option Inventory Values are affected? to Yes Enter the required percentage in the Percentage of Calculation field. Here it is 17.5% Select On Total Sales from the Type of Duty list under the Method of Calculation field.
the
setting
Export Sales Set the option Inventory Values are affected? to Yes Enter the required percentage in the Percentage of Calculation field. Here it is 0%.
Under the Group Purchase s EC Purchases Set the option Inventory Values are affected? to Yes Enter the required percentage in the Percentage of Calculation field. Here it is 17.5%. Select On Total Sales from the Type of Duty list under the Method of Calculation field.
VAT s under the group Duties and Taxes 1.
Output VAT
Enter the required percentage in the percentage of calculation. Here it is 17.5% Select Based on Item Rate from the Type of Duty list under the Method of calculation field.
2.
Output VAT – 0%
Enter the required percentage in the percentage of calculation. Here it is 0% Select Based on Item Rate from the Type of Duty list under the Method of calculation field.
3.
VAT Exempt
Select VAT from the Types of Duty/Tax list under the field Type of Duty/Tax. Select the required VAT/Tax Class under the field VAT/Tax Class.
4.
Input VAT.
Enter the required percentage in the percentage of calculation. Select Based on Item Rate from the Type of Duty list under the Method of calculation field.
Classes (to automate invoice entry) Alter the Sales Voucher Type and create the following classes. Refer Voucher Classes for more details. VAT Sales In the Voucher Type Alteration screen, give a suitable name under the field Name of Class. Then the Voucher Type Class screen is displayed. Select UK Sales as the Ledger Name from the List of Ledger s under the Default ing Allocations for each Item in Invoice . Type 100% under the Percentage field. Select Output VAT @ 17.5% as the Ledger Name and Value Basis as 17.5% under the Additional ing Entries
EC Sales (Goods) Select EC Sales (Goods) as the Ledger Name from the List of Ledger s under the Default ing Allocations for each Item in Invoice Select Output VAT @ 0% as the Ledger Name under the Additional ing Entries
EC Sales (Services) Select EC Sales (Services) as the Ledger Name from the List of Ledger s under the Default ing Allocations for each Item in Invoice Select VAT Exempt as the Ledger Name under the Additional ing Entries
Export Select Export Sales as the Ledger Name from the List of Ledger s under the Default ing Allocations for each Item in Invoice . Select VAT Exempt as the Ledger Name under the Additional ing Entries .
Introduction
Value Added Tax is a form of sales tax. It is a tax on consumption, levied on the sale of goods and services and on the import of goods into the Philippines. It is an indirect tax, which can be ed on to the buyer. Every person or entity that sells/ leases goods, properties and services subject to VAT is required to file VAT Returns, if the aggregate amount of actual gross sales/ receipts exceeds Seven Hundred Fifty Thousand Pesos (PHP 750,000.00), for any twelve-month period. In short, the following persons are liable to file VAT returns:
A person required to as VAT taxpayer, but who failed to
A person who imports goods
Professional practitioners such as
Certified Public ants
Insurance Agents (Life & Non-Life)
Professional Practitioners who are required to the government examination
Others
Type of Rates
The standard VAT rate is 12 percent. Certain goods and services are exempted from VAT (i.e., exempt without credit for input VAT), including medical, dental, and hospital services; educational services provided by private and government educational institutions; and educational services rendered by duly accredited private educational institutions.
Tax Rates 1.
For output tax - 0% or 12%
2.
For input tax
Normal - 0% or 12% Transitional input tax rate - 8% or 10% Presumptive input tax rate - 1-1/2%
Creditable VAT withheld by the Government and the licensee or lessee (3%, 6%, 8.5% and 10%).
Types of Purchases
Purchase of Capital Goods (Not exceeding P1 Million )
Purchase of Capital Goods (Exceeding P1 Million)
Domestic Purchases of Goods Other than Capital Goods
Importation of Goods Other than Capital Goods
Domestic Purchase of Services
Services Rendered by Non-Residents
Purchases Not Qualified for Input Tax
Others
Types of Sales
The term "sale or exchange of services" implies the performance of all kinds of services in the Philippines for others for a fee, remuneration or consideration.
Zero-Rated Sale It is a sale, barter or exchange of goods, properties or services that are subject to 0% VAT.
VAT Exempt Sales It is a sale or lease of goods, properties and services that are not subject to output tax. The buyer cannot avail tax credit or input tax on such exempt sale.
Sales Subject to VAT Normal sales by a VAT ed dealer to another VAT ed dealer or retailer.
Sales to Government Sales made to the government.
Types of Returns Monthly VAT Declaration Tax Form BIR Form 2550 M
Documents Required for filing returns 1.
Duly issued Certificate of Creditable VAT Withheld at Source (BIR Form 2307), if applicable
2.
Duly approved Tax Debit Memo, if applicable
3.
Duly approved Tax Compliance Certificate, if applicable
4.
Previously filed return and proof of payment, for amended return
5.
Summary List of Sales (if quarterly total Sales/Receipts (net of VAT) exceeds PHP 2,500,000) with the following information:
BIR-ed name of the buyer who is engaged in business/exercise of profession Taxpayer Identification Number (TIN) of the buyer (Only for sales that are subject to VAT) Exempt Sales Zero-Rated Sales Sales subject to VAT (exclusive of VAT)
Output Tax (VAT on Sales)
6.
Summary List of Purchases (if quarterly total purchases (net of VAT) exceeds PHP 1,000,000) with the following information:
BIR-ed name of the seller/ supplier/ service provider Address of seller/ supplier/ service provider Taxpayer Identification Number (TIN) of seller/ supplier/ service provider Exempt purchases Zero-Rated purchases Purchases subject to VAT (exclusive of VAT) - on services Purchases subject to VAT (exclusive of VAT) - on capital goods Purchases subject to VAT (exclusive of VAT) - on goods other than capital goods Creditable Input Tax Non-creditable Input Tax
N o t e : Creditable and non-creditable basis, but on per month basis. 7.
input
taxes
are
to
be
The Quarterly Summary List of Importation with the following information:
Import Entry Declaration Assessment/ Release Date Date of Importation Name of the Seller Country of Origin Dutiable Value All Charges Before Release from Customs Custody Landed Cost Exempt
computed
not
on
per
supplier
Taxable (Subject to VAT) VAT Paid Official Receipt (OR) Number of the Official Receipt evidencing payment of tax Date of VAT payment
Quarterly VAT Declaration Tax Form BIR Form 2550 Q Documents Required for Filing Returns
1. Duly issued Certificate of Creditable VAT Withheld at Source (BIR Form 2307), if applicable 2. Duly approved Tax Debit Memo, if applicable 3. Duly approved Tax Compliance Certificate, if applicable 4. Previously filed return and proof of payment, for amended return 5. Summary List of Sales (if quarterly total Sales/Receipts (net of VAT) exceeds PHP 2,500,000) with the following information: BIR-ed name of the buyer who is engaged in business/exercise of profession
Taxpayer Identification Number (TIN) of the buyer (Only for sales that are subject to VAT)
Exempt Sales
Zero-Rated Sales
Sales subject to VAT (exclusive of VAT)
Output Tax (VAT on Sales)
6. Summary List of Purchases (if quarterly total purchases (net of VAT) exceeds PHP 1,000,000) with the following information:
BIR-ed name of the seller/ supplier/ service provider
Address of seller/ supplier/ service provider
Taxpayer Identification Number (TIN) of seller/ supplier/ service provider
Exempt purchases
Zero-Rated purchases
Purchases subject to VAT (exclusive of VAT) - on services
Purchases subject to VAT (exclusive of VAT) - on capital goods
Purchases subject to VAT (exclusive of VAT) - on goods other than capital goods
Creditable Input Tax
Non-creditable Input Tax
Note: basis,
Creditable and non-creditable but on per month basis.
input
taxes
are
to
be
computed
7. The Quarterly Summary List of Importation with the following information:
Import Entry Declaration
Assessment/ Release Date
Date of Importation
Name of the Seller
Country of Origin
Dutiable Value
All Charges Before Release from Customs Custody
Landed Cost
Exempt
Taxable (Subject to VAT)
VAT Paid
Official Receipt (OR) Number of the Official Receipt evidencing payment of tax
not
on
per
supplier
Date of VAT payment
Filing of Returns
For Monthly VAT Declarations Manual Filing Returns must be filed not later than the twentieth (20th) day, of the following month.
For Quarterly VAT Declarations Returns must be filed within twenty-five (25) days, following the close of the taxable quarter of the taxpayer, for manual filing.
How Do I File My Returns? When a payment has to be made:
You are required to and present the duly accomplished BIR Form 2550 M/Q with the required attachments and your payment at the nearest Authorised Agents Bank (AAB) of the Revenue District Office.
Where there are no AABs, you are required to and present the duly accomplished BIR Form 2550 M/Q, together with the required attachments and your payment to the Revenue Collection Officer or duly Authorised City or Municipal Treasurer, located within the Revenue District Office.
You will receive a copy of the duly stamped and validated form from the teller of the AABs/ Revenue Collection Officer/ duly Authorised City or Municipal Treasurer.
When there is no payment:
You are required to and present the duly accomplished BIR Form 2550 M/Q with the required attachments at the Revenue District Office.
You will receive your copy of the duly stamped and validated form from the RDO representative.
Note: For taxpayers filed for the
1. with offices in multiple locations, only one consolidated return shall be principal place of business/ head office and all the branches. 2. The Quarterly List of Sales and Purchases shall be submitted in magnetic form, using a 3.5-inch floppy diskette, following the format provided under Section4. 110-4 (sub-section G) of RR 8-2002
Penalties
There shall be imposed and collected as part of the tax: A surcharge of twenty-five percent (25%), fifty percent (50%), interest at the rate of twenty percent (20%) per annum, compromise penalty or such higher rate as may be prescribed by rules and regulations, on any unpaid amount of tax, from the date prescribed for the payment until the amount is fully paid.
Creating a Company
To create a company, provide basic information about the company whose books of s are to be maintained in Tally Go to Gateway of Tally > Alt + F3 > Create Company
Statutory Compliance for: Select Philippines from the List of Countries
Enabling VAT Returns Go to Gateway of Tally> s Info. > F11: Features > Statutory and Taxation
Set Enable Value Added Tax (VAT) to Yes
Select Type of Dealer as Regular
Enter the VAT Registration number
Enter VAT Applicable from date
Enter the Line of Business
Enter RDO Code given by the Philippines Customs and Excise Department
Accept to save the changes
Creating a Customer Ledger
To create a Customer ledger,
1. Go to Gateway of Tally > s Info > Ledger > Create 2. Enter the Name of the customer ledger you wish to create 3. Select the group Under which you are creating the customer ledger 4. Enable Maintain balance bill-by-bill? to Yes and enter details in the Default Credit Period if applicable 5. By default the Inventory Values are affected? field is set to No 6. Accept to save
Creating a Supplier Ledger
Create a Supplier Ledger under Sundry Creditors as shown.
Creating an Input VAT Ledger
To create a Input VAT Ledger 1.
Go to Gateway of Tally > s Info > Ledger > Create
2.
Enter the Name of the Tax ledger you wish to create
3.
Select the group Duties and Taxes from the field Under
4.
On the selection of group Duties and Taxes , you will get the option to select Type of Duty/Tax . Select VAT from the list
5.
5.
If you do not wish to select VAT classification at the Ledger level, select Not Applicable as the VAT/Tax Class can be selected while creating a voucher.
6.
By default the Inventory values are affected field is set to No
7.
Set the Percentage of Calculation as 12% and Method of Calculation as On VAT Rate .
Note: If selected
the VAT/Tax Class is not during voucher entry.
selected
at
the
ledger
level,
the
same
can
be
Creating an Output VAT Ledger
Creating Output VAT is similar to that of creating Input VAT.
Creating a Sales Ledger
To create a Sales Ledger,
1. Go to Gateway of Tally > s Info > Ledger > Create 2. Enter the Name of the sales ledger you wish to create 3. Select the group under which you are creating the sales ledger 4. Set the option Used in VAT Returns to Yes , if you want to select VAT classifications for this Ledger
5. Once you set this to Yes , Tally prompts with VAT/Tax Class screen 6.
5. 6. Select the required classification from the drop down list under the field VAT/Tax Class . The drop down list consists of the Sales classifications pertaining to Philippines . If you do not wish to select a classification at the Ledger level, select Not Applicable 7. Select the Type of Industry from the list Type of Industries Note: Types of Industry the is selecting the will appear.
is applicable taxable sales
only in the as VAT/Tax
case Class
of taxable sales. Therefore, then this Type of Industry
if list
Creating a Purchase Ledger
Creating a Purchase ledger is similar to creating the Sales Ledger, but it should be created under Purchase s.
Creating a Journal Voucher Type
To create/Alter a Voucher Type, e.g. Journal
Go to s Info. > Voucher Types > Create/Alter > Journal
Enter VAT Adjustment Class in the Name of Class field.
Set Use Class for VAT Adjustments to Yes and accept the screen
Creating Sales Voucher
To create a Sales Voucher ,
1. Go to Gateway of Tally > ing Vouchers > F8: Sales 2. Select As Invoice 3. Enter the Reference in the Ref field , if required 4. Select the Party’s A/c Name from the List of Ledger s 5. Select the Sales Ledger applicable to the type of sales from the List of Ledger s . Select the VAT/Tax Class from the drop down list
6. 7.
6. Select the Name of Item from the List of Items 7. Enter the Quantity and Rate . The amount is automatically displayed in the Amount field 8. Select the Output VAT from the List of Ledger s . The percentage of the Output VAT rate is automatically calculated on the Assessable Value 9. Enter Narration , if required 10. Accept to save the voucher Similarly, you can create Sales Vouchers for the remaining sales classes.
Creating a Sales Exempt Voucher
Go to Gateway of Tally > ing Vouchers > F8: Sales
1. Select As Invoice 2. Enter the Reference in the Ref field, if required 3. Select the Party’s A/c Name from the List of Ledger s 4. Select the required VAT/Tax Class from the drop down list
5. Select the Name of Item from the List of Items 6. 7.
5. 6. Enter the Quantity and Rate . The amount is automatically displayed in the Amount field 7. Enter Narration , if required 8. Accept to save the voucher Similarly, you can create Sales Vouchers for the remaining sales classes
Creating a Sale of Service Voucher
1. Go to Gateway of Tally > ing Vouchers > F8: Sales 2. Select As Invoice 3. Enter the Reference in the Ref field, if required 4. Select the Party’s A/c Name from the List of Ledger s 5. Select the Sales Ledger from the List of Ledger s 6. Select the required VAT/Tax Class from the drop down list. If the Vat class is not selected in the ledger creation
7. 8.
7. Select the Name of Item from the List of Items 8. Enter the Quantity and Rate. The amount is automatically displayed in the Amount field. 9. Select the Output VAT from the List of Ledger s. The percentage of the Output VAT rate is automatically calculated on the Assessable Value 10. Enter Narration, if required 11. Accept to save the voucher Similarly, you can create Sales Vouchers for the remaining sales classes.
Creating a Purchase Voucher
To create a Purchases Voucher,
1. Go to Gateway of Tally > ing Vouchers > F9: Purchase 2. Select As Invoice 3. Enter the Reference in the Ref field, if required 4. Select the Party’s A/c Name from the List of Ledger s 5. Select the Purchase Ledger 6. Select the required VAT/Tax Class from the drop down list
7.
7. Select the Name of Item from the List of Items 8. Enter the Quantity and Rate . The amount is automatically displayed in the Amount field 9. Select the Input VAT . The Input VAT percentage is automatically calculated on the Assessable Value 10. Enter Narration , if required 11. Accept to save the voucher
Creating Purchase service voucher
To create a Purchase Voucher,
1. Go to Gateway of Tally > ing Vouchers > F9: Purchase 2. Enter the Reference in the Ref field, if required
3. Select Vendor-Services from the List of Ledger to be credited 4. Enter the amount to be credited 5. Select Purchase-Services and Input VAT@12%-Services from the List of Ledger to be Debited 6. 7.
4. 5.
6. Enter the amount 7. Enter Narration , if required 8. Accept to save the voucher
Creating a Journal Voucher
To create a Journal using a Voucher Class,
1.
Go to Gateway of Tally > ing Vouchers > F7: Journal
2.
Select the class as VAT Adjustment Class from the Voucher Class List
3. Select the flag from the VAT Adjustments list under the field Used For
4.
Select Advance Tax Paid in Used for field
4.
5.
Select the Ledger Net VAT Payable created under Duties and Taxes from the List of Ledger s to be debited
6.
Select the Ledger, Advance Tax Paid from the List of Ledger s to be credited
7.
The Amount is automatically entered
8.
Enter Narration, if required
9.
Accept to save the changes
Creating a Journal for Compromise for Philippines 1.
Go to Gateway of Tally> ing Voucher > F7: Journal
2.
Select VAT Adjustment Class as the Voucher Class
3.
1. 2. 3.
Select Compromise in Used for field
3.
Select the Ledger Compromise created under Indirect Expenses from the List of Ledger s to be debited
4.
Enter the amount to be debited
5.
Select the Ledger Compromise Payable from the List of Ledger s to be credited
6.
The Amount is automatically entered
7.
Enter Narration, if required
8.
Accept to save the voucher
8.
Creating a Journal for Attributable Input Tax Towards Exempted Sales Go to Gateway of Tally> ing Voucher > F7: Journal 1.
Select VAT Adjustment Class as the Voucher Class
2.
Select Attributable Input Tax Towards Exempted Sales in Used for field
3.
Select the Ledger Expenses created under Indirect Expenses from the List of Ledger s to be debited
4.
Enter the amount to be debited from the List of Ledger to be credited
5.
Select the Ledger Input VAT-Normal Purchase @ 12% from the List of Ledger s to be credited
6.
The Amount is automatically
7.
5. 6. 7.
Enter Narration, if required
8.
Accept to save the voucher
Creating a Journal for Deferred Input Tax on Capital goods Greater than P1M Go to Gateway of Tally> ing Voucher > F7: Journal 1.
Select VAT Adjustment Class as the Voucher Class
2.
Select Deferred Input Tax on Capital goods Greater than P1M in the Used for field
3.
Select the Ledger Deferred Input VAT on Capital goods A/c created under Current Assets from the List of Ledger s to be debited
4. 5.
3.
4.
Enter the amount to be debited
5.
Select the Ledger Input VAT on Capital Goods 12%-More than 1 M from the List of Ledger s to be credited
6.
The Amount is automatically entered
7.
Enter Narration, if required
8.
Accept to save the voucher
Creating a Journal for Input Tax Reversal - Others Go to Gateway of Tally> ing Voucher > F7: Journal 1.
Select VAT Adjustment Class as the Voucher Class
2.
Select Input Tax Reversal Others in Used for field
2.
3.
Select the Ledger Expenses created under Indirect Expenses from the List of Ledger s to be debited
4.
Enter the amount to be debited
5.
Select the Ledger Input VAT @ 12%-Normal Purchase from the List of Ledger s to be credited
6.
The Amount is automatically entered
7.
Enter Narration, if required
8.
Accept to save the voucher
Creating a Advance Tax Payments Made
1.
Go to Gateway of Tally> ing Voucher > F7: Journal 1.
Select VAT Adjustment Class as the Voucher Class
2.
Select Advance Tax payment Made in Used for field
3.
Select the Ledger Net Vat payable from the List of Ledger s to be debited
4.
Enter the amount to be debited
5.
Select the Ledger Advance Tax paid from the List of Ledger s to be credited
6.
The Amount is automatically entered
7.
Enter Narration, if required
8.
7. 8.
Accept to save the voucher
Creating a Journal for Not Attributable Input Tax Towards Exempted Sales Go to Gateway of Tally> ing Voucher > F7: Journal 1.
Select VAT Adjustment Class as the Voucher Class
2.
Select Not Attributable Input Tax Towards Exempted Sales in Used for field
3.
Select the Ledger Expense from the List of Ledger s to be debited
4.
Enter the amount to be debited
5.
Select the Ledger Input Vat @12% on Normal Purchase from the List of Ledger s to be credited
6.
5.
6.
The Amount is automatically entered
7.
Enter Narration, if required
8.
Accept to save the voucher
Creating a Interest Payable Go to Gateway of Tally> ing Voucher > F7: Journal 1.
Select VAT Adjustment Class as the Voucher Class
2.
Select Interest Payable in Used for field
3.
Select the Ledger Interest from the List of Ledger s to be debited.
4.
3. 4.
Enter the amount to be debited.
5.
Select the Ledger Interest Payable from the List of Ledger s to be credited
6.
The Amount is automatically entered
7.
Enter Narration, if required
8.
Accept to save the voucher
Creating a Journal for Not attributable Input Tax Towards Sales to Government Go to Gateway of Tally> ing Voucher > F7: Journal 1.
Select VAT Adjustment Class as the Voucher Class
2.
Select Not Attributable Input Tax Towards Sale to Govt in Used for field
2.
3.
Select the Ledger Expenses from the List of Ledger s to be debited
4.
Enter the amount to be debited
5.
Select the Ledger Input Vat @12% on Normal Purchase from the List of Ledger s to be credited
6.
The Amount is automatically entered
7.
Enter Narration if required
8.
Accept to save the voucher
Creating a Journal for Transitional Input Tax Go to Gateway of Tally> ing Voucher > F7: Journal 1.
1.
Select VAT Adjustment Class as the Voucher Class
2.
Select Transitional Input Tax in Used for field
3.
Select the Ledger Input VAT from the List of Ledger s to be debited.
4.
Enter the amount to be debited.
5.
Select the Ledger Tax Paid on Opening Stock from the List of Ledger s to be credited
6.
The Amount is automatically entered
7.
Enter Narration, if required
8.
Accept to save the voucher
8.
Creating a Journal for Withheld Tax Credit Availed- Government Go to Gateway of Tally> ing Voucher > F7: Journal 1.
Select VAT Adjustment Class as the Voucher Class
2.
Select Withheld Tax Credit Availed-Govt in Used for field
3.
Select the Ledger Output VAT@12% from the List of Ledger s to be debited.
4.
Enter the amount to be debited
5.
Select the Ledger Tax Withheld from the List of Ledger s to be credited
6.
The Amount is automatically entered
7.
5. 6. 7.
Enter Narration, if required
8.
Accept to save the voucher
Creating a Journal for Standard Input Tax to sale to Government Go to Gateway of Tally> ing Voucher > F7: Journal 1.
Select VAT Adjustment Class as the Voucher Class
2.
Select Standard Input Tax to Sale to Govt in Used for field
3.
Select the Ledger Input VAT from the List of Ledger s to be debited
4.
Enter the amount to be debited
5.
3. 4. 5.
Select the Ledger Expenses from the List of Ledger s to be credited
6.
The Amount is automatically entered
7.
Enter Narration, if required
8.
Accept to save the voucher
Creating a Journal for Surcharge Payable Go to Gateway of Tally> ing Voucher > F7: Journal 1.
Select VAT Adjustment Class as the Voucher Class
2.
Select Surcharge Payable in Used for field
3.
2.
3.
Select the Ledger, Surcharge , from the List of Ledger s to be debited
4.
Enter the amount to be debited
5.
Select the Ledger Surcharge Payable from the List of Ledger s to be credited.
6.
The Amount is automatically entered.
7.
Enter Narration, if required
8.
Accept to save the voucher
Creating a Journal for VAT Refund/TCC Claimed Go to Gateway of Tally> ing Voucher > F7: Journal 1. 2.
1.
Select VAT Adjustment Class as the Voucher Class
2.
Select VAT Refund/TCC Claimed in Used for field
3.
Select the Ledger, Refund Claim , from the List of Ledger s to be debited
4.
Enter the amount to be debited
5.
Select the Ledger, Input VAT , from the List of Ledger s to be credited
6.
The Amount is automatically entered
7.
Enter Narration, if required
8.
Accept to save the voucher
8.
VAT Reports
To view VAT Reports, Go to Gateway of Tally > Display > Statutory Reports > VAT Reports
The VAT Reports menu displays the following options VAT Computation VAT Forms
VAT Computation
The VAT Computation screen displays as shown.
Assessable Value The Assessable Value is the total value of the transactions made with the respective VAT/Tax Classification.
Tax Amount The rate of percentage calculated on the Assessable Value is the Tax Amount.
Show all VAT Classifications
Enable the option Show all VAT Classifications? to Yes in F12: Configure
The VAT Computation screen displays as shown.
VAT Return
Go to Go to Gateway of Tally > Display > Statutory Reports > VAT Reports > VAT Forms > VAT Return Forms
The VAT Return for Philippines is displayed in the government prescribed format. Use Alt + P or click on Print option to print the report.
The VAT Return form displays as shown
Monthly Value added Tax – Declaration Fill in all applicable space. Mark all appropriate boxes with an ‘X’ 1. For the Month of DD/MM/YY The date entered in the Report Generation screen is captured in this column. 2. Amended Return This field is to be filled manually. 3. Number of sheet attached This field is to be filled manually. Part I 4. TIN The VAT TIN (Regular) as entered in F11: Features > F3: Statutory and Taxation is displayed here. 5. RDO Code The RDO Code as entered in F11: Features > F3: Statutory and Taxation is displayed here. 6. Line of Business The Line of Business as entered in F11: Features > F3: Statutory and Taxation is displayed here. 7. Taxpayer’s Name (for Individual) Last Name, Middle Name/ (for Non-Individual) ed Name Taxpayer’s Name as entered in the Company Creation screen is printed in this column. 8. Telephone no The Telephone number as entered in the Company Creation screen is captured in this column. 9. ed address The ed Address as entered in the Company Creation screen is captured in this column. 10. Zip code The Zip Code as entered in the Company Creation screen is captured in this column. 11. Are you availing of tax relief under Special Law or International Tax Treaty? To be filled manually after printing. Part II 12. Vatable Sales/Receipt- Private (Sch.1) The Total of all the Sales transactions made using the VAT/Tax Classifications, Sales of Service@12% and Sales of Goods @12% Assessable Value is captured in the Sales/Receipts for the month (exclusive of VAT) column and the corresponding Tax amount is captured in the Output Tax due for the month column. 13. Sales to Government
The Total of all the Sales transactions made using the VAT/Tax Classifications Sales of Service to Govt@12% and Sales of Goods to Govt @12% Assessable Value is captured in the Sales/Receipts for the month (exclusive of VAT) column and the corresponding Tax amount is captured in the Out put Tax due for the month column. 14. Zero Rated Sales/Receipts The Total of all the Sales transactions made using the VAT/Tax Classification Sales-Zero Rated Assessable Value is captured in the Sales/Receipts for the month (exclusive of VAT) column. 15. Exempt Sales/Receipts The Total of all the Sales transactions made using the VAT/Tax Classification Sales Exempt Assessable Value is captured in Sales/Receipts for the month (exclusive of VAT) column. 16. Total Sales/Receipts and Output Tax Due The Total of Boxes (12A+13A+14+15) is captured in column 16A and the Total of (12B+13B) is captured in 16B. 17 A. Input Tax Carried Over from Previous Period / Excess over 70% of Output VAT Input Tax Carried Over from Previous Period / Excess over 70% of Output VAT is captured in this column. 17 B. Input Tax Deferred on Capital Goods Exceeding P1Million from Previous Period The entry made using Journal Voucher with the Vat Adjustment Class and Used for as Input Tax Deferred on Capital Goods is printed this column. The sample entry is given below. Dr. Input Tax Deferred on Capital Goods Cr. Input Vat on capital goods@12% 17 C. Transitional Input Tax The entry made using the Journal Voucher with the Vat Adjustment Class and Used for as Transactional Input Tax is printed this column. The sample entry is given below. Dr. Input VAT Cr. Tax paid on opening stock 17 D. Presumptive Input Tax The entry made using the Journal Voucher with the Vat Adjustment Class and Used for as Presumptive Input Tax is printed this column. The sample entry is given below. Dr. Input VAT Cr. Other Income 17 E. Others This field remains blank. 17 F Total (Sum of Item 17A, 17B, 17C, 17D & 17 E) The Sum of Item 17A, 17B, 17C, 17D & 17E is captured in this column. 18 A/B. Purchase of Capital Goods not exceeding P1Million (see sch.2) The Total of all the Purchase transactions made using the VAT/Tax Classification, Purchase of capital goods, not
exceeding P1M Assessable Value is captured in Purchases column and the corresponding Tax amount is captured in 18 B column. 18 C/D. Purchase of Capital Goods exceeding P1Million (see sch.2) The Total of all the Purchase transactions made using the VAT/Tax Classification, Purchase of capital goods exceedingP1MAssessable Value is captured in Purchases and the corresponding Tax amount is captured in 18D column. 18 E/F. Domestic Purchase of Goods other than capital goods The Total of all the Purchase transactions made using the VAT/Tax Classification, Purchase of goods@12% Assessable Value, is captured in Purchases column and the corresponding Tax amount is captured in 18 F column. 18 G/H. Importation of Goods other than capital goods The Total of all the Purchase Transactions made using the VAT/Tax Classification, Purchase-Import@12% Assessable Value, is captured in Purchases and the corresponding Tax amount is captured in 18 H column. 18 I/J. Domestic Purchase of Service Goods other than capital goods The Total of all the Purchase Transactions made using the VAT/Tax Classification, Purchase-Service@12% Assessable Value, is captured in Purchases and the corresponding Tax amount is captured in 18 J column. 18 K/L. Service rendered by Non-residents The Total of all the Purchase transactions made using the VAT/Tax Classification, Purchase of Service rendered by Non- Residents@12% Assessable Value, is captured in Purchases column and the corresponding Tax amount is captured in 18 L column. 18 M. Purchases Not Qualified for Input Tax The Total of all the Purchase transactions made using the VAT/Tax Classification, Purchase not Qualified for Input Tax Assessable Value, is captured in the Purchases column. 18 N/O. Others This field remains blank. 19. Total Available Input tax (Sum of item 17F, 18B, 18D, 18F, 18H, 18J, 18L & 18O) The Total Available Input tax (Sum of item 17F, 18B, 18D, 18F, 18H, 18J, 18L & 18O) is captured in this column. 20 A. Input Tax on Purchases of Capital Goods exceeding P1Million deferred for the succeeding period (Sch.3) The entry made using the Journal Voucher with the VAT Adjustment Class and Used for as Deferred Input Tax on Capital Goods greater than P1M is printed this column. The sample entry is given below. Dr. Deferred input on capital goods Cr. Input Vat on capital goods@ 12% 20 B. Input Tax on Sale to Govt. closed to expense (Sch.4) The Schedule 4 Value is captured in this column. 20 C. Input Tax allocated to exempt sale (Sch.5) The Schedule 5 Value is captured in this column. 20 D. Vat Refund/TCC Claimed
The entry made using Journal Voucher with the Vat Adjustment Class and Used for as Vat Refund/TCC Claimed is printed this column. The sample entry is given below. Dr. Refund Claim Cr. Input Vat 20 E. Input Tax in excess of 70% cap to be carried to next period (Sch.6) The Schedule 6 Value is captured in this column. 20 F. Others The entry made using Journal Voucher with the Vat Adjustment Class and Used for as Input Tax reversal- others is printed this column. The sample entry is given below. Dr. Expense A/c Cr. Input Vat @12% 21. Total Allowable Input Tax (Item19 less Item 20G) The Difference of Box 19 and 20 G is captured in this column. 22. Net VAT Payable (Item 16B less Item 21) The Difference of Box 16Band 21 is captured in this column. 23 A.
Creditable Value-Added Tax Withheld (Sch. 7)
The Schedule 7 Value is captured in this column. 23 B. Advance Payments (Sch.8) The Schedule 8 Value is captured in this column. 23 C. VAT withheld on Sales to Government (Sch.9) The Schedule 9 Value is captured in this column. 23 D. VAT paid in return previously filed, if this is an amended return This field remains blank. 23 E. Others This field remains blank. 23 F. Total Tax Credit/Payment The Total of 23A+23B+23C+23D+23E is captured in this column. 24. Tax Still Payable/(Overpayment) (Item 22 less Item 23F) The Difference of Box 22 and 23F is captured in this column. 25A. Surcharge The entry made using Journal Voucher with the VAT Adjustment Class and Used for as Surcharge Payable is
printed this column. The sample entry is given below. Dr. Surcharge A/c Cr. Surcharge Payable A/c 25B. Interest The entry made using Journal Voucher with the VAT Adjustment Class and Used for as Interest Payable is printed this column. The sample entry is given below. Dr. Interest A/c Cr. Interest Payable A/c 25C. Compromise The entry made using Journal Voucher with the VAT Adjustment Class and Used for as Surcharge Payable is printed this column. The sample entry is given below. Dr. Compromise A/c Cr. Compromise Payable A/c 26 Total Amount The Difference of Box 24 and 25D is captured in this column. The Fields 27, 28, 29, 30, 31 and 32 are entered manually.
Schedule Schedule 1:
Schedule of Sales/Receipts and Output Tax (Attach additional sheet, if necessary) The Total of all the Sales transactions made using the VAT/Tax Classification as normal sales and selecting the Type of Industry is captured in the ATC column, Assessable Value is captured in Sales/Receipts for the period column and corresponding Tax amount is captured in Out put Tax due for the period column
Schedule 2:
Purchases/Importation of Capital Goods (Aggregate Amount Not Exceeding P1 Million) (Attach additional sheet, if necessary) The Total of all the Purchase transactions made using the VAT/Tax Classification, Purchase capital goods not exceeding 1 Million Assessable Value is captured in Amount column and the corresponding Tax amount is captured in Input Tax due for the month column. Schedule 3:
Purchases/Importation of Capital Goods (Aggregate Amount Exceeds P1 Million) (Attach additional sheet, if necessary) The Total of all the Purchase Transactions made using the VAT/Tax Classification, Purchase capital goods exceeding 1 Million- Assessable Value is captured in the Amount column and the corresponding Tax amount is captured in the Input Tax due for the month column.
Schedule 4:
Input Tax Attributable to Sale to Government The entry made using the Journal Voucher with the Vat Adjustment Class and Used for as Attributable Input tax
towards to Govt is printed in this column. The sample entry is given below. Dr. Expense A/c Cr. Input Vat normal purchase The entry made using the Journal Voucher with the Vat Adjustment Class and Used for as Not Attributable Input tax towards to Govt is printed in this column. The sample entry is given below. Dr. Expense A/c Cr. Input Vat normal purchase The entry made using the Journal Voucher with the Vat Adjustment Class and Used for as Standard Input Tax to sale to govt is printed in this column. The sample entry is given below. Dr. Input A/c Cr. Expense a/c
Schedule 5:
Input Tax Attributable to Exempt Sales i. The entry made using the Journal Voucher with the Vat Adjustment Class and Used for as Attributable Input tax towards Exempted Sale is printed in this column. The sample entry is given below. Dr. Expense A/c Cr. Input Vat normal purchase ii. The entry made using the Journal Voucher with the Vat Adjustment Class and Used for as Not Attributable Input tax towards Exempted sale is printed this column. The sample entry is given below. Dr. Expense A/c Cr. Input Vat normal purchase
Schedule 6: Input Tax in Excess of 70% Cap
The entry made using the Journal Voucher with the Vat Adjustment Class and Used for as Input Tax adjustment is printed in this column. The sample entry is given below. This field remains blank. Dr. Input Tax adjustment A/c Cr. Input Vat
Schedule 7: Tax Withheld Claimed as Tax Credit (Attach additional sheets, if necessary)
The entry made using the Journal Voucher with Vat Adjustment Class and Used for as Withholding Tax-Other Agency is printed in this column. The sample entry is given below: Dr. Withholding Tax other agency A/c Cr. Sundry Drs
Schedule 8: Schedule of Advance Payment (Attach additional sheets, if necessary)
The entry made using the Journal Voucher with Vat Adjustment Class and Used for as Advance Tax Payment Made is printed this column. The sample entry is given below. Dr. Net Vat payable A/c Cr. Advance Tax Paid
Schedule 9: VAT Withheld on Sales to Government (Attach additional sheets, if necessary)
The entry made using the Journal Voucher with the Vat Adjustment Class and Used for as Withheld Tax Credit availed -Govt is printed in this column. The sample entry is given below. Dr. Output Vat A/c Cr. Tax withheld A/c
Introduction
Point of Sales is considered a one-step billing process. This means that entering the order and generating the invoice and receipt of amount are considered to be part of the same step. This is normally used in an environment where the customer is making the purchase in person and the invoicing process is part of the checkout process.
POS Invoicing in Tally
The POS (Point-of-Sales) Invoice feature allows you to create invoices at a point of sales and to collect payment from your customers. POS Invoice allows you to create invoices in seconds and also print and mail the invoices.
Features of POS Invoicing in Tally The POS Invoicing functionality in Tally is :
Simple and very friendly.
Quick and easy to set up and use.
Facilitates faster data entry and calculations.
High speed printing of Invoices.
POS Voucher Type without a Class
To create a POS Invoice Voucher Type without Voucher Class Go to Gateway of Tally > s Info > Voucher Type > Create
Name: Enter the name of the new Voucher type (for e.g.: POS Invoice). Type of Voucher: The type of voucher Sales from the predefined voucher types. Select the type of Voucher as Sales from the list of Voucher Types. Abbreviation: By default Sales text will appear in the abbreviation field. abbreviation as per your requirement
However, you can enter the
Used for POS Invoicing?: On selecting the Sales voucher type from the list, “Used for POS Invoicing?” field appears. Set this field to YES if you wish to a POS Invoice.
Print Message 1 and Print Message 2: These fields can be filled with appropriate messages and they are provided just for the Convenience. The same will be printed at the bottom of the POS invoice in the Tax Invoice. Note: 1 . Once Use entitled to set
POS for Invoicing field is set to Y e s in voucher type, this field to N O if you have ed a POS Invoice.
you
will
not
be
2 . For Information on Default Print Title, Method of Voucher Numbering, Starting Number, Width on Numeric Part, Use Common Narration, Print after saving Voucher, Name of Class, Restart Numbering and Prefix Details click here.
POS Voucher Type with a Class
To create a POS Invoice Voucher Type with Voucher Class: Create a new Voucher type POS Invoice with a Voucher Class. Complete the form for creating a new Voucher Type as given. Press Enter at the Name of Class field in the Voucher type creation screen to see the following screen with the entries made.
If the different modes of payment for invoices are Gift vouchers, Credit/Debit Card Payment, payment through Cheque/DD and Cash, then the following four new default ledger s have to be created: 1.
Gift Vouchers under group Sundry Debtors
2.
Ledger Bank or Bank OD/OCC (for card payments)
3.
1. 2. 3.
Payment through C heque/DD , under the group Ledger Bank s or Bank OD/OCC
4.
Cash under group ledger Cash
The other entries for each item in Invoice are similar to default Sales Voucher class creation.
Creating a POS Invoice
To enter a simple transaction using a POS Invoice . Go to Gateway of Tally > ing Vouchers > Select F8 1.
Select the POS Invoice as the Voucher type from the list of Voucher types.
2.
Select the Godown , Sales Ledger and VAT/Tax Class if applicable.
3.
Select the Item using the Bar code reader to scan the bar code or select the Item from the list.
4.
Enter the Batch-wise details and Actual and Billed Quantity (If these features are activated in F11: Features).
5.
The Rates of the Item is picked up from Set Standard Rates screen (Stock Item Creation screen) or from the Price List screen.
6.
Select VAT/Tax from the list.
7.
By default for the first time, the POS Invoice screen will appear in appear as below with the Cash and Cash tendered field:
Single Mode Payment. The screen will
7.
8.
The Multi Mode Pymt button helps you to make the payment through other mode like Gift voucher, credit card or by cheque. Click on the Multi Mode Pymt button, the POS Invoice will appear as:
8.
9.
10.
Select Gift voucher from the list and enter the amount OR Select Credit/Debit Card Payment and enter the amount and the card number OR Select the Cheque and enter the amount , Bank Name and Cheque Number OR Select Cash ledger from the list and enter the amount to be paid. Enter the Cash Tendered and Balance will be calculated automatically. Accept the POS Sales Invoice screen.
Consider the above example shown in the above screen, where Multi-mode Payment options like Gift Vouchers, Credit/Debit card payment, Cheque and Cash were allowed. Here, the Customer has made a payment of Rs.1000 using a Gift Voucher and Rs.1000 is paid by Credit Card and Rs.500 by Cheque and the remaining balance amount Rs.587.50 is paid in Cash. The Debit/Credit Card Number, Cheque payment and the actual money tendered in cash are recorded. Since the Customer tenders Rs.1000 in cash, the system calculates the balance amount as Rs.412.50, which is returned to the customer. The calculation is as below:
Total amount to be paid : Rs.3087.50 Amount paid by Gift Vouchers : 1000 Amount paid by Credit/Debit Card : 1000 Amount paid by Cheque : 500 Amount paid by Cash : 587.50
Cash to be owed by the customer is Rs.3087.50, the system calculates the Amount Received – Actual Billed Amount less amount received through other mode apart from cash = Balance Amount (viz. 3087.50-[1000-1000-500-587.50]=1000 = Rs.412.50 ) N o t e : If Maintain select only one
Multiple Godown feature is set to Y e s in F11: Godown while ing a POS Invoice.
Features , you can
Illustrating POS invoicing for billing Pharmaceutical products To create a POS Invoice follow the procedure given: 1.
Set Use Security Control to Yes in Company Creation/Alteration screen and create the name using the security feature in Tally. The who logs in to Tally with the name of the and can print the POS Invoice with the name.
2.
Set Maintain Batch-wise Details and Set Expiry Dates for Batches to Yes in the F11: Features screen.
3.
Set Use different Actual & Billed Quantities to Yes in F11: Features screen to specify the free items.
4.
Set Separate Discount column on Invoices to Yes to specify the discount on any items while making a POS sales invoice.
5.
Create Stock Items. Place the cursor in the alias field and use the Bar Code Reader to scan and read the bar code of the Item. This code will automatically get displayed in the alias field. Select the Unit of measure and Set Maintain in Batches to Yes. On setting this option you will get Track Date of Mfg and Use expiry dates set these two fields to Yes.
6.
Set Standard Rates to Yes and enter the standard selling price of the Item (Press F12: Configure button in the Stock Item creation screen and Set Allow Std. Rates for Stock Items to Yes). If you have specified the rates in the price level then you can skip this field.
7.
Create a Voucher Typ e (e.g. POS Invoice) under Sales voucher type.
8.
Press F8: Sales in the Voucher Entry screen and select the POS Invoice from the list of Voucher Types.
9.
Select the Godown, Sales Ledger and VAT/Tax Class (if applicable) from the list.
10.
Select the Item from the list or use the scanner to read the bar code of the item. On selecting the Item from the list or by scanning, you will be prompted to enter the Batch Name in the New Number screen. Enter the Batch Name of the Item.
10.
11.
Tally prompts you to enter the Manufacturing Date and the Expiry Date as below:
11.
12.
The rate of the Item entered in the Set Standard Rates (in Stock Item creation screen) or in Price List screen will get reflected in the rate and amount column.
12.
Note: To enter details of items offered free with purchases, set Use different Actual and Billed Qty and Allow 0 valued entries in vouchers to Y e s in F 1 1 : Features . For Example: If you buy 2 shirts and get 1 shirt free with it, while entering POS Invoice, enter 3 shirts in the A c t u a l Column and 2 shirts in the B i l l e d Column. While printing the Invoice, the difference in the actual and billed quantity will be shown as F r e e in the R a t e Column. 13.
Select VAT/Tax from the list.
14.
Select Gift voucher from the list OR Select Credit/Debit Card Payment and the card number and enter the amount OR Select the Cheque and enter the amount, Bank Name and Cheque Number .
15.
Select the Cash and enter the cash paid by the customer at the counter. The balance amount , which has to be paid to the customer, will be calculated automatically.
16.
Accept the POS Sales Invoice screen to save the transaction.
16.
Extra Features available from a POS Invoice screen are : Single Mode/ Multi Mode Pymt: You can toggle between single and multi mode payments by clicking on the Single Mode Pymt button. In Multi Mode the customer can choose to make his payment by Credit/Debit cards, Gift Vouchers, Cheque or Cash and have all details available on his invoice. In Single Mode only the Cash transaction fields will be printed on the invoice. Note: * If Use Multiple Price level for Invoicing is enabled for the Item then the rates of the Item is picked up from the price levels. Else, you can set the price of the Item in the Stock Item creation screen using the Set Standard Rates to Yes. Enter the standard selling price of the Item (Press F12: C o n f i g u r e button in the Stock Item creation screen and set Allow Std. Rates for Stock Items to Y e s ). * If you have set the rate for an Item both in Price Levels and in Set Standard Rates (in Stock Item Creation screen), the rate is picked up from the Price List and not from the Set Standard Rates in Stock Item creation screen.
Printing a POS Invoice On accepting the POS Sales Invoice screen, press ALT+P or click on Print button, Tally prompts you to print. Press ALT+S or click on the Select Printer button and select the printer from the list. Currently, Tally STAR TSP 600 Compatible, Epson TM T88iii Compatible and Epson TM U220 Compatible printers.
Press ALT+F or click on the Print Format to select the print mode. You can either select the Neat Mode or Quick /Draft . In Neat Mode format you will be able to preview the POS Invoice where as in Quick/Draft mode you cannot preview the POS Invoice.
Press F12 or click on F12: Configure button and set the required options:
Set Print Item Name in One Line to Yes to print the Item details in a single line. If print format is set to Neat Mode then Tally will compress the name of the Item and prints in one single line. However, if the print format is set to Quick Draft Mode then Tally truncates the text and prints in multiple lines.
Set Print Serial No. to Yes to print the serial number.
Set Print Rate Column to Yes to print the rate column.
Print Batch Details is set to No by default, set this option to Yes , if you wish to print the Manufacturing Date and Expiry Date
Set Print Card/Cheque No. to Yes to print the Card/Cheque number.
Print whole Card Number is set to No by default, which will print only last 4 digit of card number. Set this option to Yes to print the 16 digit card number on the POS Invoice.
Set Print VAT Analysis of Item to Yes to print the VAT Analysis on POS Invoice.
Set Print Narration to Yes to print the Narration on POS Invoice.
Accept the Print screen to view the POS Invoice in preview mode (Only for Neat Mode format).
The Invoice displays the company name and address, TIN, CST, Bill number, time, date, name, serial number, description, quantity, rate, amount, Batch number, Expiry date, Manufacturing date, Free Item (if any), discount (if any) Vat analysis, payment mode details, balance to be paid to the customer and the print message.
POS
POS provides the list of Invoices. These Vouchers are collated and listed together for a period to give meaningful information. Each POS Invoice is further drilled down to obtain the lowest level of information. To view the list of POS Invoice Statement: Go to Gateway of Tally > Display > s Books > POS
N o t e : POS activated in
Voucher
option will appear, only Type and at least one
if the option Use entry is made
for
POS
Invoicing is
Press ALT+F1 or click on F1: Detailed button to view the POS Invoice in detailed format with all the tax details.
Press F12 key or click on F12: Configure button.
Set Show Inventory Details also to Yes and view List of All POS Vouchers with Inventory details. F4: Chg Vch: This button allows you to view different voucher type within the POS screen. Example:
Change to Payment from POS by clicking on the F4: Chg Vch button or by pressing the F4 key. F5: Columnar: This button allows you to select different columns for the report. For additional information refer to Columnar Sales . F6: Extract: Provides you with a break down of the POS Invoice vouchers and groups them to provide totals for each group and ledger used in all POS Invoice for that period. Click on the Print button or press ALT+P to view the POS in print preview mode. Press ALT+Z to zoom the print preview screen.
N o t e : Click on P g D n to view the next page. The total carried over and brought forward to the next page.
balance
of
the
first
page
is
Introduction
The Job Costing feature allows you to track cost and revenue information down to the smallest detail. Costs associated with the planning, implementation and completion of a project or job are known as Job costs. It includes expenses related to labour, material purchases, subcontractor costs, as well as other costs and inventory consumed on projects. You track the costs/ expenses by asg them to specific incomes received on of jobs/ projects.
Use of Job Costing
Job Costing is used: To determine the true cost for each job broken down by locations To determine the revenue and expenditure and therefore the profit associated with each job To track overhead costs by allocating them for each job To identify loss on projects at an early stage
Enabling Job Costing in Tally
Use the Job Costing feature in Tally to track all income and expenses for a project. Each project or job is created as a Cost Centre. The Cost Centres and Inventory Options (Maintain Multiple Godowns) are integrated in Tally to enable Job Costing if the company maintains s with Inventory. For companies that maintain s Only, the Job Costing feature cannot be enabled. To enable Job Costing Go to Gateway of Tally > F11: Features > ing Features In the Company Operations Alteration screen set Maintain Cost Centres and Use Cost Centre for Job Costing to Yes . If you have more than one active Project/Job (Cost Centre) set Maintain Multiple Godowns to Yes in F11: Features > Inventory Features Accept to save.
Tip: For Companies that maintain s Only, Costing is disabled in F11: Features screen.
the
option
Use
Cost
Centre
for
Job
N o t e : To Job Costing principles/Cost Centres , Tally needs to ensure that each transaction recorded is ed for internally with respect to all the Cost Centres. This additional real-time processing task can potentially reduce the operating efficiency of Tally thereby resulting in reduction of speed. This could be significant, especially on computers unable to handle the additional computing load adequately. s are therefore advised to create Cost Centers and Job Costing s within reasonable limits to get the optimum business benefit from the module and yet retain the unmatched speed of the software. For more information on this topic, please your nearest Tally office.
Creating Ledgers for Job Costing
Creating Ledgers for Job Costing is similar to that of other Ledgers. Refer Ledgers for additional information.
Creating Job Costing Party Ledgers Create party s for our Customers under Sundry Debtors. For e.g. you can create a Ledger for a Bangalore customer and one for a Chennai customer. Similarly create your Suppliers under Sundry Creditors.
Creating Sales and Purchases Ledgers Create Sales Ledgers under Sales s and Purchase Ledgers under Purchase s. Ensure that the field Cost Centres are applicable? is Yes for the Ledgers you want to include in Job Costing.
Creating Income and Expenses Ledgers Create Income Ledgers such as Project Inspection Charges etc. under Direct Income. Expense ledgers such as Transportation Charges, Project Site Rent, and so on can be created under Direct Expenses. Staff Welfare, Telephone Charges etc. can be created under Indirect Expenses as required by your project. Ensure that the field Cost Centres are applicable? is Yes for all the Ledger s you want to include in Job Costing.
Creating Cost Centres for Job Costing
You can create different Cost Centres for different projects, with each Cost Centre being treated as a Job. For e.g. you can create a Cost Centre Project-Bangalore for the on-going projects in Bangalore and Project-Chennai for the on-going projects in Chennai. Refer to Cost Centre for additional information. To activate Job Costing Go to Gateway of Tally > s Info > Cost Centres > Create Enter the name of the Cost Centre in the Name field In the Under field select Primary from the List of Options Set the option Use for Job Costing to Yes. This cost centre will then be available in the dropdown for the Job Work Analysis report Accept to save
Note: under
Use for Job Costing field is set to Y e s by default a Cost Centre for which Job Costing is activated.
for
the
Cost
Centres
created
Creating Godowns/Locations for Job Costing
Creating Godowns is very important in Job Costing. Each project is associated with a Godown. This link is provided while creating the Godown. Any material consumption from this Godown is taken into as the material consumed for that project and will reflect in the reports. Go to Gateway of Tally> Inventory Info > Godowns > Create In the Godown Creation screen, Allow Storage of Materials is automatically set to Yes . An additional field Set Job/Project Name for Job Costing is displayed. Press the spacebar in the field and the list of Cost Centres for which Use for Job Costing was set to yes is displayed in the List of Cost Centres sub-screen. Select the Cost Centre to which the Godown is associated. Accept Yes to Save. Refer Create a Location for more details on Creating Godown.
Tip: The additional field Default Job Name is displayed only if Maintain and Use Cost Centre for Job Costing are set to Y e s in F11: Features. s u p p o r t s multiple levels of Godown.
Cost Centres Job Costing
Creating Voucher Classes for Stock Journals
Stock Journal classes allow you to handle transfers from one location (Godown) to another, for companies having Multi-Location Inventory and at least two locations/Godowns created. It also allows you to track transfer of materials for consumption. Refer to Voucher Classes for Stock Journals for additional information.
Creating Stock Journal Class Go to Gateway of Tally > s Info. > Voucher Type > Create / Alter Select the Stock Journal Voucher from the List of Voucher Types. Enter all the fields as per your requirement. Refer Create a Voucher Type for more details. To create a Stock Journal Voucher Class, enter a name in the Name of Class field. The Class Consumption: screen is displayed. To create a class for inter-godown transfer set the option Use Class for Inter-Godown Transfer to Yes. To create a class for consumption set the option Use Class for Inter-Godown Transfer to No. An additional option Use Class for Job Costing Consumption is displayed. Set this option to Yes.
N o t e : If you maintain only one P r o j e c t / J o b with a single Godown, while Stock Journal Voucher Type and creating a class, the option Use Class Godown Transfers is not displayed. Only the option Use Class for Job Consumption is displayed.
altering the for InterCosting
Creating Purchase Vouchers
You can enter a purchase voucher in As Voucher mode as the Cost Allocation sub-screen does not appear in the As Invoice mode. Create a Cost Centre class before ing the entries. In the purchase entry it is not necessary to allocate to Job Costing for Job Cost reporting. Go to Gateway of Tally > ing Vouchers In the Voucher Creation screen select F9: Purchase Select As Invoice Enter the date and reference Select the Party to be credited from the List of Ledger s in Party’s A/c name Select the required Purchase Ledger from the List of Ledger s Select an item from the Stock Items List of Items .
On selecting the Item, an Item Allocations sub screen for the selected Item appears:
Select the Godown under the Godown field and specify the quantity to be allocated under the Quantity field. Enter the Quantity and Rate , and the amount is automatically displayed in the Amount field. Select the next Godown and follow the similar procedure for Item allocation . Select the Items to be purchased. Enter Narration if required and accept to save
Creating Sales Vouchers
Sales Vouchers can be created in Voucher or Invoice Mode To create Sales Invoice: Go to Gateway of Tally > ing Vouchers In the Voucher Creation screen select F8: Sales Select As Invoice Select Acct Invoice Enter the date and reference Select the appropriate Customer in the Party’s A/c Name Enter the Despatch , Order and Buyer’s details in the sub-form that appears Select the Sales ledger from the List of Ledger s Select the corresponding Ledger below the Particulars field Enter the amount in the Amount field In the Cost Allocations sub screen, select the Cost Centre from the List of Cost Centres under the field Name of Cost Centre and enter the amount to be allocated to that Cost Centre. Enter narration if required and accept to save
Similarly, you can create Sales Vouchers for Project Inspection Charges, Miscellaneous Receipts etc.
Creating Payment Vouchers
To create Payment Vouchers: Go to Gateway of Tally > ing Vouchers In the Voucher Creation screen select F5: Payment Enter the date and reference Select the Bank from where payment has to be made Select the Ledger e.g. General Maintenance created under Indirect Expenses and enter the amount to be debited The Cost Allocations sub-screen appears. If the payment has to be allocated to more than one Cost Centre, select the Cost Centres and allocate the corresponding amount In the Voucher Creation screen, enter narration if required and accept to save
Similarly you can create Payment Vouchers for Labour Charges Paid, Printing and Stationary, Staff Welfare, Telephone Charges, Transportation Charges or any other expenses that form a part of project cost.
Creating Journal Vouchers
Creating Journal Vouchers is similar to that of other vouchers. While creating Journal Vouchers, you can allocate the amount to more than one Cost Centre in the Cost Allocations sub-screen that appears. An example of a Journal Voucher entry is shown below:
Similarly, you can create Journal Vouchers for Labour Charges Paid, Salaries, Project Site, Rent, etc.
Creating Stock Journal Voucher (Consumption Transfer)
Create a Stock Journal voucher by selecting the Voucher Class Consumption to create a Stock Journal voucher for Consumption Transfer.
Creating Stock Journal Voucher (Inter - Godown Transfer)
To create a Stock Journal for Inter - Godown Transfer: Go to Gateway of Tally > Inventory Vouchers In the Inventory Voucher Creation screen, select F7: Stk Jrnl and select the Voucher Class Transfer to create a Stock Journal voucher for Inter-Godown Transfer. Enter the date of the Voucher Select the name of the Destination Godown in the Destination Godown field. Select the Item to be transferred under the Name of the Item field. To create an Item, refer to the topic Stock Items Select the Godown where the Stock Item is currently located under the Godown field Enter the amount to be transferred under the Quantity field. The Rate and Amount field gets displayed automatically if the rate is specified while creating the Stock Item; else enter the rate to get the amount in the Amount field Similarly enter all the items to be transferred. Enter narration if required and accept Yes to save
Two Levels of Reports
Two levels of reports are displayed in Job Costing. 1.
Job Work Analysis
2.
Material Consumption Summary
The Job Work Analysis report s details of Multiple Companies, Multiple Jobs, Multiple Currencies in a single report. The Materials Consumption Summary report gives details of the materials consumed for that project from the particular Project Location.
Job Work Analysis Report
To view Job Work Analysis report: Go to Gateway of Tally > Display > Statements of s > Job Work Analysis The jobs for which Use for Job Costing was set to Yes in the Cost Centre Creation/Alteration screen is displayed in the List of Job/Project sub-screen that appears. Select the Cost Centre for which you need a Job Costing report from the list. The Job Work Analysis screen appears as shown below:
The Job Work Analysis report s details of Multiple Jobs in a single report. All these details are viewed as different columns with the help of New Column button. The button Auto Column is also available in the report to view the period for a particular period that can be selected from the list. Refer Modify Reports for adding, deleting and altering columns.
Thus the Job Work Analysis report gives a breakup of Revenue , Cost (Expenses) with respect to material consumption, Direct Expenses , Indirect Expenses and Nett Profit . N o t e : C o n s u m p t i o n is the Outwards Inventory entries of Items made in the Stock Journal Voucher with Consumption Class enabled and the Outwards Inventory entries of Items made with the Manufacturing Journal for a particular Project Location. All other Outwards Inventory entries are considered as Other Transfers .
C omparing Job Work Analysis of Multiple Jobs You can compare the job costs of two or more jobs by adding another job as a New Column . To add another job as a new column select the button New Column on the right hand side of Job Work Analysis screen. The following screen appears.
To compare two jobs of the same company, select the same company in the Name of Company field To compare two jobs of different companies, load the companies and select a different company in the Name of Company field
Enter the period for which you like the report to be displayed in the From and To fields Select the Job from the List of Job/Project in the Name of Cost Centre field
A new column is added to the report for the selected new job Similarly you can compare the Job Costing of multiple companies To view the total costs of multiple jobs as a new column, from the Job Work Analysis screen for multiple jobs, select F12: Configure and set Show Total Column to Yes . A new column Total is added to the existing report format and the total cost of all the jobs selected gets displayed.
There are other F12: Configure options available, which you can activate as per your requirements.
The following screen shot shows the report with Show Percentages activated
Drill down the groups under Revenue (Income) to view a break up of Job/Project. Further drilling down displays the Job/Project Monthly summary and Job/Work vouchers. Refer to Cost Centre Breakup report section for more information.
Material Consumption Summary Report
To view the Material Consumption Summary report, scroll down to the line Consumption in Job Work Analysis Report and press Enter . The Report Material Consumption Summary is displayed.
When multiple levels of Godowns are used, the values are displayed accordingly for each Godown Group and when you drill down further the values are displayed for individual Godown.
Drill down from the above report, to get a Godown summary report. This report displays Stock Items and also Stock Groups if any.
The Stock Groups when drilled down further displays the Godown summary of that Stock Group
Additional details are displayed based on the options selected in F12: Configure .
Configure as per your requirements to get the additional fields in the report as shown below.
Introduction
Tally Payroll is integrated with ing to give the the benefits of simplified Payroll processing and ing. Tally Payroll enables s to set up and implement salary structures, ranging from simple to complex, as per the organization’s requirements. You can also align and automate payroll processes and directly integrate them with main stream ing applications. Payroll data can be viewed as part of the existing and configurable cost centre reports for business analysis. Tally Payroll also s configurable formats for payslip printing; flexible salary/wage, attendance, leave and overtime s; gratuity and expat reports.
Features of Tally Payroll In keeping with Tally’s tradition of simplicity, strength and flexibility, Tally Payroll offers the following features to meet the diversified requirements of small to large business enterprises. It allows seamless integration with Tally s. There are no disconnects between Payroll and s. It offers Employee Groups - unlimited classification and sub-classification of employees. It offers Pay Structures – ease of conformity, faster entry and flexibility of non-dependence. It offers Pay Components - -definable earnings, deductions and others. It offers a unique Auto-Manual payroll processing facility. It is independent of processing period restrictions. It offers Employee Groups, Pay structures and Pay components. It offers a unique Auto-Manual payroll processing facility. It allows Arrears Calculation. It computes salary based on Attendance, Time, Unit of Production or any other criteria. Tally Payroll helps in tracking of Loans and Advances. It provides calculation of Gratuity. It allows you to drill down from any summary report to detailed levels, and till the originating transaction, for a particular Pay component value. It provides configurable report formats. You can also process Payroll using the Multilingual feature in Tally.
Enabling Payroll in Tally
To enable Payroll in Tally Go to Gateway of Tally > F11: Features> ing Features
Set Maintain Payroll to Yes You can set More than ONE Payroll / Cost Category to Yes if you wish to process payroll for multi group of Employees.
Four Easy Steps To Generate a Payslip
Four Easy Steps To Generate a Payslip
The new enhanced Payroll in Tally requires minimal effort for accurate processing. Setting up Pay Heads, Employee Group, Employees, Salary Details and Attendance/Production Type is now a simple process with Tally’s Four easy steps to generate a payslip.
Step 1 Create Pay Heads The components of structured salary are created under Pay Head Create the salary structure components in pay head. The Pay head creation in tally is very friendly. Tally allows creating any complex type of pay head.
Step 2 Create Employee Masters Create an Employee master. Enter the requisite Employee Details & Employee group by grouping employees under the function they perform; their department or designation.
Step 3 Create Salary Details Create the applicable Salary Details for both Employee Groups as well as Individual Employees with earnings, deductions and basis of computation.
Step 4 Process Payroll and Generate the Payslip a Payroll voucher to enter all Earnings and Deductions in payroll transactions that are paid along with the Salary Payslip for all employees Generate the Payslip that provides employee as well as attendance details, itemises each component of the employee’s earnings and deductions, and displays the net amount paid to him for a given pay period. It also provides information to the employee as to how the net amount was arrived at.
Payroll Configuration
The Payroll Configuration can be enabled as shown below: Gateway of Tally > F12: Configure > Payroll Configuration
In the above screen: The option Show NI Number (for International companies only) and Show Statutory Details (for India/SAARC companies only) can be set to Yes to enter the NI details/ PF, ESI and PF PAN details in the Employee details form and print the same information in the Employee Payslip. The options, Show port & Visa Details and Show Contract Details, should be set to Yes as shown, to display the port, Visa and Contract Details in the Expat Reports. If these options are set to No, then the Expat Reports menu will not be displayed under Payroll Reports. Some of the Information related to Employee port such as port Number, port Expiry date, Visa Number, Visa Expiry date, Contract Start and Expiry dates will not be displayed at the creation of the Employee.
Payroll Info.
The Payroll Info. allows you to set up the employee defaults and standard payroll information with common payroll fields used for calculating earning and deductions. Go to Gateway of Tally > Payroll Info.
Payroll Info: Pay Heads Employee Groups Employee Salary Details Units (Work) Attendance/Production Types Voucher Types
Pay Heads
The salary components constituting Pay Structures are called Pay Heads. A Pay Head may be an earning, which is paid to an employee, or a deduction, which is recovered from his/her salary. The value of these Pay Heads could be either fixed or variable, for each Payroll period.
Pay Head Type A Pay Head is categorized as Allowances, Deductions or Reimbursements In Tally Payroll, Pay Head types are provided in a natural language for ease of use, as follows: 1.
Earning for Employees
2.
Deduction from Employees
3.
Employees Statutory deductions
4.
Employer’s Statutory Contribution
5.
Gratuity
6.
Loans and Advances
7.
Reimbursement to Employees
While creating the salary payable ledger you can use Not Applicable type which will be used to post appropriate ing entries.
Calculation Types The Calculation of the Pay Head is based on its Calculation Type. Tally payroll allows following calculation methods Note: using mode
The formula Payroll Auto of Payroll
defined in Calculation Type will be used for computation only while Fill functionality in the Payroll Voucher, and not in Manual entry voucher.
The following computational models are ed in Calculation Types.
As Flat Rate As Flat Rate is a Calculation where the value of the Pay head is a fixed amount for a period. Pro-rata will not happen in this type of the component. (Pay Head) Examples of Flat Rate Calculation Type: Conveyance Allowance of Rs. 800.00 per month is exempt from tax and followed by many organisation. Fixed Loan Installment deduction amount.
On Attendance On Attendance type of calculation is based on the attendance data where the component will get pro-rated. In Tally the attendance can be of Payable days (Present) or loss of pay (Absent) type.
On Production On Production calculation type is used to calculate the Production incentive type of Pay head. The production data can be entered in Attendance voucher against a Production type.
As Computed Value As Computed Value is used if the Pay Head value is based on a dependent component. You will be able to define the dependent component by specifying the formula or using the current sub-total or current earning or deduction total. You can also define the slab either by percentage to value or the combination in a slab. Example: HRA as 40% of Basic Salary
As defined Value As defined Value allows you to manually enter the value at the time of processing the salary. This calculation type is useful for Pay Heads that have variable values and are not related to any attendance/production data
Creating an Earning Pay Head
To create an Earning Pay Head, Basic Salary , under Indirect Expenses : Go to Gateway of Tally> Payroll Info. > Pay Heads> Create
1.
Enter the Name of the Earning Pay Head.
2.
Select Earnings for Employees as the Pay Head Type from the List of Pay Head Types .
3.
Select the respective Pay Head Group Earnings from the list for the field Unde r.
4.
Select Yes from the list if you want the Pay head to affect the net salary.
5.
4. 5.
The Pay Head name entered in the Name field will appear in this field. You can change the same, if required. The name entered in this field will appear on the payslip.
6.
Select Flat Rate from the List of Calculation Types .
7.
Select the Calculation Period Type from the list.
8.
Based on the Calculation Period Type , you can select and enter the details for Per Day Calculation Basis .
9.
Select the Rounding Method from the list if applicable.
10.
Accept to save the Pay Head.
Similarly, you can create Earning Pay Heads for HRA, Conveyance and so on..
Creating a Deduction Pay Head
To create a Deduction Pay Head, Professional Tax under Employees’ Statutory Deductions: Go to Gateway of Tally> Payroll Info.> Pay Heads> Create
1.
Enter the Name of the Deduction Pay Head.
2.
Select the Pay Head Type from the List of Pay Head Types .
3.
Select the Group from the List of Groups .
4.
Select Yes from the list if you want the Pay Head to affect the net salary.
5.
4. 5.
The Pay Head name entered in the Name field will appear in this field. You can change the same, if required. The name entered in this field will appear on the payslip.
6.
Select the Calculation Type from the List of Calculation.
7.
On selecting the calculation type to ' As Computed Value , a new field Calculation Period appears which will be set to Months automatically
8.
Select On Current Earnings Total from the list to be Computed On.
9.
Specify the Slab Rate .
10.
Select the Rounding Method from the list if applicable.
11.
Accept to save the Pay Head.
Similarly, you can create a Deduction Pay Head for Provident Fund and so on. N o t e : If you are using any Pay Head component having Calculation Type V a l u e and Compute : On Current Earnings Total, while defining Salary sequence of the component has to be selected accordingly.
As Computed Detail, the
Creating Salary Payable Ledger
A Salary Payable under the group Current Liabilities is used to credit the total of Net Payable salary of all employees. When salary is disbursed, this is debited and Cash or Bank is credited. To create Salary Payable Pay Head under the group Indirect Expenses : Go to Gateway of Tally> Payroll Info.> Pay Heads> Create
1.
Enter the Name of the Pay Head
2.
Select Not Applicable from the List of Pay Head Types
3.
Select Current Liabilities from the list
4.
3. 4.
Accept to save the Pay Head
Creating Gratuity Pay Head
To create a Pay Head Gratuity under Current Liabilities : Go to Gateway of Tally> Payroll Info.> Pay Head> Create
1.
Enter the Name of the Pay Head
2.
Select Gratuity from the List of Pay Head Types
3.
Enter the Slab Rate Details for Gratuity Calculation in the sub-screen
3.
4.
Select Current Liabilities from the list
5.
Accept to save the Pay Head
N o t e : To use the Earning Pay Head for G r a t u i t y calculation, set Use for Gratuity ? field to Y e s in the ledger creation screen (for Pay Heads such as Basic Salary, HRA, and so on, created under Indirect Expenses).
Employee Group
Tally allows you to set up default (common) information for employees. An Employee Group allows you to group employees in a logical manner. The Salary structure can be defined at the Employee Group level. Referring to this Group as a template and changing accordingly will ease building all your employee records on it. For example, by department or function such as Production, Sales, istration and so on, or by designation such as Managers, Supervisors, Workers and so on.
Creating an Employee Group
To create Sales as an Employee Group , Go to Gateway of Tally> Payroll Info.> Employee Groups> Create (Single Group)
Enter the Name of the Employee group. Select the group from the List of Employee Groups . Accept to save the Employee Group.
Creating Multiple Employee Groups You can create multiple Employee Groups in this mode. Go to Gateway of Tally> Payroll Info.> Employees> Create (under Multiple Groups) The Multi Employee Group Creation screen displays.
Employee
The Employee Creation screen allows you to enter basic setup information that applies to the employees. Enter General Information, Payment Details and port & Visa Details.
Creating an Employee
Creating Single Employee To create an Employee under the Employee group, Sales: Go to Gateway of Tally> Payroll Info. > Employees> Create (Single Employees)
Enter the Name of the Employee , Select the Employee Group in the field Under , Enter the Date of ing , the Employee General Information , Payment Details , port & Visa Details and Accept to save.
Creating Multiple Employees You can create multiple Employees in this mode. Go to Gateway of Tally> Payroll Info.> Employees> Create (under Multiple Employee)
The Multi Employee Creation screen displays.
Salary Details
Salary Details is used to define a Pay Structure to an Employee or to an Employee Group to speed up the entry of Individual Employee’s Pay Structure. Select the basic Pay Heads that applies most for your employees and create as an Employee Group. However, it is not compulsory for all employees to have the same compensation structures as of the Employee Group. If required, a Pay Head element or its value may be added, deleted or altered at Individual Employee level. N o t e: If
the
slab
rate
is
not
defined
in
the
PayHead
then
you
will
get
the
full
value
Creating Salary Details for an Employee Group
To create Salary Details for an Employee Group , for example, Sales: Go to Gateway of Tally> Payroll Info.> Salary Details> Create> Select Sales from the List of Employees/Group
1.
Enter the Effective From date.
2.
Select the Pay Heads from the List of Pay Heads.
3.
The Pay Head Type , Calculation Type and Calculated On fields display the details provided at the Pay Head creation level.
4. 5.
3.
4.
Enter the Defined values , if applicable.
5.
Accept to save
N o t e : If you are using any Pay Head component having Calculation Type : As Computed Value and Compute : On Current Earnings Total then while defining Detail, the sequence of the component has to be selected accordingly.
Salary
Salary Details Configuration Go to Gateway of Tally> Payroll Info.> Salary Details> Alter > Select Employee/ Employee Group from the List of Employees/Group > F12: Configure
Allow to Override Slab Percentage Set Allow to Override Slab Percentage to No to prevent changes made to Slab Percentages. If you set it to Yes , you can override the percentages already defined. E.g. If you have defined Slab Rate for HRA as 40% in the Pay Head level, and if you wish to change the Slab Rate percentage in the Salary details screen. Set Allow to Override Slab Percentage to Yes in Salary details configuration screen and Tally will allow you to Overridde the percentage e.g. to 50% and so on... (Metro Cities & Non Metro Cities).
Show Payhead Type Set Show Payhead Type to Yes to display if the Pay Head is an Earning or Deduction in the Salary Details screen.
Show Calculation Type Set Show Calculation Type to Yes to display the method of calculation adopted (As Computed Value, As Defined Value, Flat Rate, On Attendance or On Production) .
Show Computed On Set Show Computed On to Yes to display the Computation Information (On Current Deductions Total, On Current Earnings Total, On Current Sub Total, On Specified Formula)
Creating Salary Details for an Employee
To create Salary Details for an Employee: Go to Gateway of Tally> Payroll Info.> Salary Details> Create> Select the Employee from the List of Employees/Group
1.
Enter the Effective From date.
2.
In the Pay Head field, the Start Type list displays two options namely, Copy From Parent Value and Start Afresh .
2.
3.
If you select Copy From Parent Value , the Salary Details defined for the Employee Group to which the Employee belongs will appear in the screen.
N o t e : If from parent 4.
the PayHead details are available in the parent value, else you will get only Start Afresh.
group
then
you
will
get
Copy
If you select Start Afresh , you have to select the Pay Heads from the List of Pay Heads and enter the Defined rates if required.
Units (Work)
A Unit in Tally Payroll is similar to the Unit of Measure in Tally’s Inventory module. In Payroll, Units are used to facilitate calculation of a Pay Head value based on Production, which in turn would be linked to Units such as Time, Work or Quantity. Go to Gateway of Tally > Payroll Info. > Unit (Work)
Creating Units (Work)
In the Units Creation screen, select the Type of unit from the list. Select the Symbol from the list. A Simple Unit in Tally is a single independent unit and has no relationship with other units, while a Compound Unit refers to two Simple Units having an arithmetical relationship and is not a distinct unit. In the case of Overtime, whose value is computed based on Overtime Hours put in by an employee, you would need to define Hr – Hours and Min – Minutes as Simple Units and Hr of 60 Min as a Compound Unit and set this unit in Overtime Pay Head.
Refer to Units of Measure for details description of Unit of Measure.
Attendance/Production Type
The Attendance / Production type is used to record the attendance and production data. Based on the component (Pay head) structure, you can define multiple attendance / production types. Examples for attendance / production types are No. of days present or conversely, No. of days Absent and production based such as Hours worked, Number of Pieces produced. Attendance/Production Type is associated with the Pay Head in employee’s Pay structure. The variable data is entered in the Attendance voucher for the payroll period. Attendance/Production Types may also be defined in hierarchical groups whereby Types having a common Unit are combined under logical groups. The Attendance/Production Type may be Attendance/leave with pay, Leave without Pay (if salary is to be paid based on number of days attended) Paid Leave, Unpaid Leave, Absent and Production type which can be based on Piece Production, Overtime Hours, and so on.
Creating an Attendance/Production Type
Creating an Attendance/Production Type for Attendance/Leave With Pay Go to Gateway of Tally > Payroll Info. > Attendance/Production Types > Create
1.
Enter the Name of the Attendance Type
2.
Select Primary from the list for the field Under.
3.
Select Attendance/Leave with Pay as the Attendance Type.
4.
The Period Type appears automatically.
5.
Accept to save the Attendance Type.
Similarly, you can create an unpaid Leave grouped under Leave without Pay.
Creating an Attendance/Production Type for Production Go to Gateway of Tally > Payroll Info. > Attendance/Production Types > Create
1.
Enter the Name of the Attendance Type
2.
Select Primary from the list for the field Under.
3.
Select Production as the Attendance Type.
4.
The Unit field will appear, select the appropriate type of unit from the list.
5.
Accept to save the Attendance Type.
Similarly, you can create Box Production Attendance Type
Voucher Types in Tally Payroll
Tally Payroll provides you with Payroll, Attendance and Payment Voucher Types. You may define a template called Voucher Class in order to automate and control usage of ledger s and computed values to be posted. It is a powerful and configurable option that enables you to define the rules of voucher entry for a particular voucher type. It also helps in speeding up the process and minimises data entry for posting a voucher. However, creating a Voucher Class is not mandatory. For more information, refer to Creating a Voucher Class for Payroll
Payroll Vouchers
In addition to the existing voucher types in ing and Inventory module, two new Voucher Types Attendance and Payroll are enabled when Payroll Feature is activated in F11: Features. Go to Gateway of Tally > Payroll Vouchers Attendance voucher is used to record employees’ Attendance / production data for the Attendance/Production Types created in Payroll Masters. Such data may be entered as a single Attendance voucher per payroll period or multiple vouchers as and when required within a payroll period. While generating the Payroll voucher, Tally automatically picks up required data, based on the period selected and computes the corresponding value of Pay Heads, which are linked to such attendance/production types. Payroll voucher is a document to manually enter one-time/ad-hoc payroll transactions for individual employees; as well as Payroll processing activity for all or selected employees, using Auto Fill functionality. Payroll Buttons If Maintain Payroll option is set to Yes in F11: Features, the Payroll Buttons will appear along with s and Inventory buttons in Voucher Creation screen on the button bar.
Attendance Vouchers
Attendance voucher allows you to enter Attendance , Overtime , Leave or Production details. You can enter separate vouchers for each day or a single voucher for a given pay period, say a month, with aggregated values. You can also enter data for one or more or all employees. Similarly, one or more attendance types together in a single voucher.
Attendance Voucher Entry – Manual Entry Go to Gateway of Tally > Payroll Vouchers > F5: Attendance
1.
Click F2: Date to change the date
2.
Select the Employee from the List of Employees
3.
1. 2. 3.
Select the Attendance/Production Type from the List
4.
Enter the Value
5.
Select End of List from the List of Employees.
6.
Accept to save the voucher
Attendance Voucher Entry - Auto Fill In the attendance voucher, you can use the A : Payroll Auto Fill button to speed up data entry process. Auto Fill enables the to fill all employees of a selected Cost Category (if more than ONE Cost Category is enabled) and/or a selected employee group and enter value data for selected type of Attendance/Production Type for these employees. Go to Gateway of Tally > Payroll Vouchers > F5: Attendance 1.
Click F2: Date to enter the date.
2.
Click A : Attd Auto Fill .
3.
In the Attendance Auto Fill screen, select the Cost Category if applicable.
4.
Select the Employee/Group from the List of Group/Employees .
5.
Select the Attendance/Production Type from the list.
6.
Enter the Value against the Employee name .
5. 6.
7.
Accept to save the Attendance voucher .
N o t e : Days with Loss of Pay (LOP) are treated as a D e d u c t i b l e with respect to an Earning Pay Head type and as a P a y a b l e with respect to a deduction component. F o r E x a m p l e : An L O P is deducted from B a s i c salary which is an Earning Pay Head. However, with respect to a Deduction Component such as canteen expenses, it is treated as a payable.
Usage of Voucher Class in Tally Payroll
In some of the Tally vouchers, you may define a template called Voucher Class in order to automate and control usage of ledger s and computed values to be posted. It is a powerful and configurable option that enables you to define the rules of voucher entry for a particular voucher type. It also helps in speeding up the process and minimises data entry for posting a voucher. In a voucher class , you may exclude selection of inapplicable groups and/or specify applicable groups. For example: In a Payroll voucher, you may exclude posting to ledger pertaining to groups such as Fixed Assets, Sundry Debtors/Creditors, Sale/Purchase etc., or Include groups like Indirect Expenses, Loans & Advances (Liabilities) and so on. Voucher Class in Tally Payroll helps the to rapidly process their Payroll data.
Voucher Class – Manual Salary Create a voucher class to use for manual payroll entry. Go to Gateway of Tally > Payroll Info. > Voucher Type > Alter > Payroll
Enter Manual Salary in the Name of the Class and press Enter Key. Tally will display a sub-form for Class definition. Enter Yes, in Use Employee-wise Pay Head Allocation ? Typically, in a manual salary no particular groups are included or excluded and net payable amount of manual payroll entries will be posted to the Salary payable ledger. Therefore, Select End of List in Exclude and Select the Group in Include and select Salary Payable (Ledger created under Current Liabilities) Values for Voucher Class: Manual Entry.
Accept Class definition screen and also the Voucher Alteration screen.
Payroll Voucher
Payroll voucher is used to record Employees’ Payroll related transactions. This voucher may be used in two ways – Manual Entry and Automated Entry .
Payroll Voucher entry - Manual Salary To create a Payroll voucher manually, Go to Gateway of Tally > Payroll Vouchers > Payroll Voucher
1.
Change the Voucher date .
2.
Select Salary Payable from the List of Ledger s .
3.
1. 2. 3.
Select the Employee from the List of Employees in the field Particular
4.
Select the Pay Heads and enter the appropriate values
5.
Select End of List and Accept the voucher.
Payroll Voucher – Auto Fill To create a Payroll Voucher using the button A : Payroll Auto Fill , Go to Gateway of Tally > Payroll Vouchers > Payroll voucher 1.
Select the Ledger (Cash/Bank/Salary Payable) from the list
2.
Click A: Payroll Auto Fill
Note:
You
can
calculate
the
Payroll
Voucher
for
a
week
3.
Enter the From and To date in the Employee Filter screen
4.
Select the Employee/Group from the List of Group/Employees
5.
Enter the defined values if required
or
fortnight.
5.
6.
Accept to save the voucher
N o t e : A single payroll voucher can be used to efficiently. For a company with more than 100 voucher for every 100 employees.
entries for upto 100 employees employees, create a multiple payroll
Payroll Reports
To view Payroll Reports Go to Gateway of Tally > Display > Payroll Reports
The Payroll Reports menu displays: Statements of Payroll Attendance Sheet Attendance Gratuity Report Expat Reports
Statements of Payroll
Go to Gateway of Tally > Display > Payroll Reports > Statements of Payroll
The Payroll Reports menu displays: Payslip Pay Sheet Payroll Statement Payment Advice Payroll Employee Ledger Breakup Ledger Employee Breakup
Payslip
A Payslip is a document issued to an employee that itemises each component of earnings and deductions, and the net amount paid to an employee for a given pay period. It provides visibility to an employee of how the net amount has been arrived at. In Tally Payroll, the Payslip option of Display, Payroll reports menu provides s the facility to View the Payslip, Configure content and appearance based on the requirement and then Print the Payslip. Go to Gateway of Tally > Display > Payroll Reports > Statement of Reports > Payslip
Configuration options in Payslip Click on F12: Configure button in the Payslip to display a configuration sub-form, using which the can customise the display/printing content and appearance of the Payslip.
The default settings for the configuration options are shown above. These options are self-explanatory. The options, which are set to Yes, will become visible in the Payslip. Select No to exclude the information, which is not required to be on the Payslip. Configuration options in : Pay Slip Show Vertical Payslip - Set this option to Yes to align Deduction Part below the Earning. Set it to them side-by-side.
No to align
Show Employee Details - Set this option to Yes to display Employee Details as entered in the employee master. Show port Details - Set this option to Yes to display the port Details. Show Visa Expiry Date - Set this option to Yes to display the Visa Expiry Date. Show Attendance/Production Details - Set this option to Yes to display Attendance/Production data. Show Attendance/Production Groups - Set this Attendance/production data as defined while Types creation.
option
to
Yes
to
display
grouping
of
the
Display Attendance/Production Type in Tail Units? - For compound units used in Attendance/Production Type, set this flag to Yes to display value of the Attendance/Production Data in Tail unit and set the same to No to display data in Main unit. Show Year To Date values - Set this option to Yes to display cumulative value of attendance/production data or Earning and Deduction data for the current Financial Year. Remove Zero Entries - Set this option to Yes to remove Earning/Deduction data with Zero value from the Pay Slip For Attendance/Production Also - Set this option to Yes to remove Attendance data with 0 values from the
Pay Slip. Appearance of Name - You can select the appropriate appearance of name from the Name Style list.
Detailed/Condensed Button Click on Detailed button or press ALT+F1 to view source details of individual Attendance and Pay Head values. This view displays the Attendance or Payroll vouchers from which the data is picked in the current Payslip. Voucher Number, Date and the Value of the attendance or earning or deduction value is displayed. This is useful when multiple attendance/payroll vouchers are entered during the same payroll period. The can drill down to the corresponding voucher directly from the Payslip screen. Click the Condensed button or press ALT+F1 again to return to the normal mode.
Period Button By default, when you bring up the Payslip view, the Period of Payslip - Attendance and Payroll Vouchers data is set to current month, and in most cases you don’t have to change it. However, if required, you can change the period of data and include multiple-period payroll information to view/print a consolidated Payslip. As in all other Tally reports, there is a great flexibility in of Period of Payroll processing as well as in the printing of Payslip.
Employee Button Using Employee Button (F4 Key) , you can view another employee’s Payslip from the existing Payslip display screen.
Printing Single Payslip Click on Print button or Press ALT+P from the Payslip display screen to print currently displayed Payslip. Tally will print the Payslip in the format that is configured for display.
Pay Sheet
Pay Sheet is a matrix report with category, group and employees cascading in rows, and Pay Heads appears as columns. The default report contains all earnings and deduction details for a given month or period with a number of options to configure appearance of rows and columns. Format of the pay sheet report may be configured to serve as a Salary/Wage as required by the organisation. The selection of data may be filtered for given category or group of employees. Go to Gateway of Tally > Display > Payroll Reports > Statement of Reports > Pay Sheet
Configuration options in Pay Sheet report F12: Configure button in the Pay Sheet brings up a configuration sub-form by which the can customise the
display/printing content and appearance of the Pay Sheet report.
Show ‘Net Pay’ Column - Set this option to Yes to display the Net Payable Column. Show Column Subtotals - Set this option to Yes to display the sub-totals of Earnings/Deduction columns. Remove Zero Entries - Set this option to Yes to remove Earning/ Deduction data with Zero value Show Payslip Names for Ledgers - Set this option to Yes to display the Name to Appear in Payslip, defined in Ledger, as the column headings. Setting this to No will display Ledger name. Include Employee Groups & Categories - Set this option to Yes to display rows showing Category and Groups. Set this to No to list only employee information. Show Category/Group Total - Set this option to Yes to display Category and Group wise Totals. Show Grand Total - Set this option to Yes to display Grand total at the bottom of the report. Format - You can choose either Detailed or Condensed . Show Employee Number - Set this option to Yes to display employee number along with the Name. Expand all levels in Detailed format? - Set this option to Yes to expand all levels and display Employee details. Set the same to No , to display summary report for Category/Group. Appearance of Name - You can Select the appropriate appearance of name from the Name Style list. Sorting Method - You can select the appropriate sorting method from the list.
Button functionalities in Pay Sheet report Detailed/Condensed Button
Use this toggle button (F1) to quickly change the report view from detailed to summary and vice versa.
Period button Using Period (F2) button, you can change the period for which the report is viewed. Using this functionality, you can display the report for any period such as Day, Week, Fortnight, Month, Quarter, Half-Year or entire Year.
Employee Filter Button Similar to Payroll and Payment vouchers, using Employee Filter button or clicking on F7 : Employee Filters button, the can quickly select employees/groups to be displayed in the pay sheet report.
F4: Change Currency: Click on F4: Change Currency button or press F4 key to change the currency.
New Column Use this button (ALT+C) , to add a column for any other Pay Head not part of the default Pay Slip format. Such new column is added on the right-hand side of the existing columns.
Alter Column Use this button (ALT+A) , to replace an existing column in the report with a new Pay Head column. The cursor should be positioned in the column to be replaced.
Delete Column Use this button (ALT+D) , to delete an existing column in the report. The cursor should be positioned on the column to be deleted. Use above column buttons to customise the appearance of various Pay Heads as columns as per requirement.
Printing Pay Sheet Report Printing of Pay sheet is done in a similar way as any other report in Tally, by Pressing ALT+P from the report display screen. While printing the Pay Sheet report, choose an option to Increase the Line Height (for each employee line) for the purpose of obtaining signature of employee or fixing a stamp, and use the printed report for manual salary disbursement or any other similar purpose.
Payroll Statement
While Pay Sheet report gives you a readily available set of earning/deduction columns and format, Payroll Statement Report allows you to generate the report for a specific Pay Head/Ledger. Go to Gateway of Tally > Display > Payroll Reports > Statement of Reports > Payroll Statement
N o t e : The button report. Refer Pay
functionalities Sheet report
in Payroll for more
Configuration options in Payroll Statement report
Statement report is similar to Pay information on button functionalities.
Sheet
F12 : Configure button in the Payroll Statement brings up a configuration sub-form using which the can customise the display/printing content and appearance of the Payroll statement report.
Remove Zero Entries : Set this option to Yes to remove Earning/Deduction data with Zero value. Show Payslip Names for Ledgers - Set this option to Yes to pick the name entered in the Name to Appear in Payslip field in Ledger master screen. Set this option to No to pick the name entered in the Name field of the Ledger master screen. Include Employee Groups & Categories - Set this option to Yes will display rows showing Category and Groups. Setting this to No will list only employee information. Show Category/Group Total - Set this option to Yes to display Category and Group wise Totals. Show Grand Total - Set this option to Yes will display Grand total at the bottom of the report. Format - Detailed or Condensed Show Employee PF Number: Set this option to Yes to display employee PF number. Show Employee IT PAN: Set this option to Yes to display employee IT PAN number. Show Employee Bank Details: Set this option to Yes to display employee bank details. Show Employee Number: Set this option to Yes to display employee number along side the Name. Show Employee ESI Number: Set this option to Yes to display employee ESI number. Show Employee port Details : Set this option to Yes to display employee port details. Show Employee Visa Expiry Date: Set this option to Yes to display employee Visa Expiry date. Expand all levels in Detailed Format: Set this option to Yes to expand all levels and display Employee details. Set this option to No to display summary report for Category/Group. Appearance of Name - Select the appropriate appearance of name from the Name Style list.
Sorting Method - Select the appropriate sorting method from the list.
Payment Advice
The payment Advice report is used to generate Payment Advice / Bank Transfer letters for a specific bank based on the Salary Payment vouchers posted to the . For more details refer to Payment Advice for Bank Transfer , in the advanced usage section. Go to Gateway of Tally > Display > Payroll Reports > Statement of Reports > Payment Advice
Click Yes to display the screen as shown
This is a default payment advice format. If you require changes specific to your bank’s requirement, Tally Business Solutions Development Services.
Payroll
Payroll is a month-wise transaction summary report displaying vouchers month-wise, akin to Display Statistics in the ing module. Though the primarily displays Payroll vouchers, you can customise to add any other voucher type by adding a new column. Go to Gateway of Tally > Display > Payroll Reports > Statement of Reports > Payroll
Press F12: Configure button and set the Appearance of Names and the Periodicity to use as shown
You can drill down to a List of Payroll Voucher reports for a month and then to a specific voucher, if required.
Employee Pay Head Breakup
This report is similar to a Payroll Statement for a selected Pay Head / Ledger, with a difference that, in this report, opening balance, credit/debit transaction and closing balance for the selected period would be displayed as columns. Refer to Track Loans and Advance balances for an example of usage of this report. Go to Gateway of Tally > Display > Payroll Reports > Statement of Payroll > Employee Pay Head Breakup
Note: Refer to Reconciliation F12:Configuration screen.
Statement
section
for
additional
You can drill down to Employee Summary report, from the Employee Ledger Breakup report.
information
on
From Employee Ledger Breakup report you can drill down to a Monthly Employee Summary report.
From Employee You can further drill down to Employee Voucher s screen.
Ledger Employee Breakup
This report displays a group wise summary of the transactions and Closing balance for selected employee. Drill down to specific ledger of the group, the month wise summary and up to voucher, is available in this report. Go to Gateway of Tally > Display > Payroll Reports > Statement of Reports > Ledger Employee Breakup
Select the Employee from the list to view the ledger breakup of a particular employee.
Note: Refer to Reconciliation F12:Configuration screen.
Statement
section
You can drill down to Breakup of Employee report, from this report.
for
additional
information
on
Drill down further to view the Ledger Monthly Summary report and the Employee Voucher report.
Attendance Sheet
The Attendance Sheet report is similar to Pay Sheet report, and displays a pre-formatted report with columns, related to your attendance/production data. Go to Gateway of Tally > Display > Payroll Reports > Attendance Sheet
Configuration options in Attendance Sheet report Configuration button, F12 in the Attendance Sheet, brings up a configuration sub-form by which the can customise the display/printing content and appearance of the Attendance Sheet report.
Include Group Attendance/Production Types Attendance/Production Types in Attendance Sheet report. Display Attendance/Production Types Attendance/Production Types in Tail Units.
in
Tail
Set
Units?-
Refer Pay Sheet Section for more information on other fields.
this
Set
option
this
to
option
Yes
to
to
Yes
Include
to
Group
display
the
Attendance
This report is similar to Payroll and displays the summary report of the Attendance vouchers. The configuration and button functionality are the same as in other Payroll reports. Go to Gateway of Tally > Display > Payroll Reports > Attendance
Press F12: Configure button and set the Appearance of Names and the Periodicity to use as shown:
Gratuity Report
Gratuity is a statutory benefit to the employees who have rendered continuous service for at least five years. The gratuity benefit is payable on cessation of employment either by resignation, death, retirement or termination. The last drawn basic salary is taken as the basis for the calculation. For Example : In India, As per statute, he/ she is eligible for 15 days pay for each completed year of service though the employer can also structure a gratuity benefit that is higher Gratuity payment is a statutory liability for an organization and tends to increase as the salaries and tenure of employment increase annually. The Gratuity Summary report provides comprehensive information about the Employee’s Gratuity Eligible Salary and the Total Gratuity amount that is liable to be given to the employees. Go to Gateway of Tally > Display > Payroll Reports > Gratuity Report
It displays a summary of all the Employee names along with their Date of Birth, Date of ing the Organisation, as well as the Gratuity Eligible Salary and the Total Gratuity liability as on date. You can drill down in the screen shown to view the Gratuity details.
Button Functions in Gratuity Report: F4: Change Currency: Click F4: Change Currency button or press F4 key to change the currency.
F5: Employee Wise Click F5: Employee Wise or press F5 to view the Employee wise Gratuity Report F7 : Employee Filters Click F7: Employee Filters or press Ctrl+F7 to filter the cost category wise and Employee/Group wise details in Gratuity Report
After you enter the Employee filter details the screen appears as below
Click F12: Configure button from Gratuity Report screen to display four options namely Show Employee Number, Show Date of Birth, Show new ees only and Show Deactivated Employees.
The option Show Employee Number? is set to No by default. You can set this option to Yes so that the Report displays the Employee number. The option Show Date of Birth? is set to Yes by default. The Last two options Show new ees only and Show Deactivated Employees are set to No by default. If the option Show new ees only is set to Yes , then Gratuity Summary of all the new employees will be displayed i.e. the details of the employees whose date of ing lies between the From Date and To Date of the Report is displayed. Similarly, if the Option Show Deactivated Employees is set to Yes , the details of the Employees who have
been deactivated are displayed. Note: * When the option Show new ees only? is set to Y e s , the will not be able to move to the next option and the report will be displayed immediately with the corresponding details. If the option Show new ees only? is set to N o, the option Show Discontinued Employees? can be set. When the details of D i s c o n t i n u e d E m p l o y e e s are displayed, you will get additional information in the form with Date of L e a v i n g along with the existing details. * When
both
the
options
are
set
to
N o, the
details
of
all
the
employees
are
displayed.
Expat Reports
The Expat reports provide comprehensive information about foreign nationals who are employed (as both regular as well as contract employees) on short/long work assignments in your company. It displays all the relevant information such as port/Visa/Contract Expiry dates along with the date of ing with respective port/Visa numbers and so on... both at an individual employee level as well as at the group level. Go to Gateway of Tally > Display > Payroll Reports > Expat Reports
The Expat Repor ts are further divided into three sub reports. They are: 1. port Expiry 2. Visa Expiry 3. Contract Expiry Each of the above mentioned reports have been discussed in detail further.
port Expiry: This report provides all the relevant information about the port of an Employee such as port number, Country of Issue, port Expiry date and other details such as the Employee’s date of ing the organisation and the information of the employee in the form of Email address. To view the port Expiry report Go to Gateway of Tally > Display > Payroll Reports > Expat Reports > port Expiry
Individual Employee/Group Employee port expiry details can be obtained by clicking/selecting Ctrl + F7 or F7 : Employee Filters on the button bar. On selecting this, a list displays prompting you to select either an employee or their groups. You can drill down for further details.
F12: Configure Click F12: Configure button or press F12 key to set the configuration as shown
N o t e : F12: and Contract
Configure screen in Expat Reports i.e. Expiry is the same as shown above.
for
port
Expiry,
Visa
Expiry
Show All Employees: Set this field to Yes to view all the employee port details. Show Expiry in days: Set this field to Yes to enter the expiry days. Expiry in next n days: To get the port expiry details for the next n days, enter the number of days in this field. ‘0’ will denote the current date (last voucher entry date). Show Employee Number: Set this field to Yes to display the Employee Number in the report. Appearance of Name: Select the name style from the list. Sorting Method: Select the Sorting Method from the list. You can sort the employee details based on the Employee Number, port Expiry date in ascending or descending order. Show Employee Email Id: Set this to Yes to view the email id. Show Deactivated Employees: Set this to Yes to view all the employees along with the deactivated employees. Note: * On setting Show All Employees to Y e s, Tally displays all the employee details, which includes both the expired and not expired port details. * On setting Show All Employees and Show Expiry in days to N o, Tally filters only those employee ports, which are to be expired. * On setting Show All Employees to N o and if Show Expiry in days is set to Y e s , then you will get the Expiry in next n days field, on entering the number of n days, Tally will filter the port which will be expired within the stipulated period (number of n days). On entering all the above details in F12: Configure screen, the port Expiry report will appear as shown
Visa Expiry: This Report is similar to port Expiry Report and provides all the relevant information related to Employee such as Visa Number, Visa Expiry Date and other details such as Employee’s date of ing the Organisation and his/her details. To view the Visa Expiry report Go to Gateway of Tally > Display > Payroll Reports > Expat Reports > Visa Expiry
Select F2: Period to view the Visa expiry details of all the employees. Individual Employee/Group Employee Visa expiry details can be obtained by clicking/selecting Ctrl + F7 or F7 : Employee Filters on the button bar. On selecting this, a list displays prompting you to select either an employee or their groups. You can drill down for further details.
Contract Expiry: This report primarily provides useful information about the Contracted Employees. All the relevant information about the Contract Employee such as the Work Permit Number, Contract Start and Expiry Date along with some additional details such as Employee’s date of ing the Organisation and Email address are captured and displayed.
Select F2: period button to view all details of the report. Click/Select Ctrl + F7 or F7 : Employee Filters to view the details of an individual employee or group. You can also alternatively view the Employee Contract Expiry details individually, by clicking F5: Employee wise on the button bar.
Payroll with Provident Fund
Payroll in Tally s the computation of Provident Fund, its deductions and ing. You can process the PF in any one of the following ways: 1.
PF process using a single payroll voucher
2.
PF process using separate payroll vouchers
3.
PF process using voucher class
Creating a Ledger for PF Payable Go to Gateway of Tally > s Info. > Ledgers > Create 1.
Enter the name (Eg: Employer PF Payable ) in the Name field
2.
Select Current Liabilities in the Under field
Creating a Pay Head for Employee's Contribution to PF To create a Pay Head, Employee’s PF @ 12% Go to Gateway of Tally > Payroll Info > PayHeads > Create
1.
Enter the Name of the Pay Head
2.
Select Employee’s Statutory Deductions as the Pay Head Type from the List of Pay Head Types
3.
Select Current Liabilities for the field Under
4.
Select Yes if you want the Pay head to affect the net salary.
5.
Specify the Pay Head Name to appear on the Payslip
6.
On selecting the calculation type to 'As Computed Value' , a new field Calculation Period appears which will be set to Months automatically
7.
Select Normal Rounding for Rounding Methods
8.
Set the Rounding Limit to 1
9. 10.
8. 9.
Select On Specified Formula for Computation
10.
Select the appropriate Pay Head for Specified Formula
11.
Enter the Slab Details in the table, as applicable
12.
Accept to save the Pay Head
Creating Pay Heads for Employer’s Contribution to PF The employer’s contribution to PF is divided into Employers PF @ 8.33% and Employers PF @ 3.67% for which separate Pay Heads are created.
Employer’s PF @ 8.33% To create a Pay Head , Employer’s PF @ 8.33% Go to Gateway of Tally > Payroll Info > PayHeads > Create 1.
Enter the Name of the Pay Head
2.
Select Employer’s Statutory Contributions as the Pay Head Type from the List of Pay Head Types
3.
Select Employer’s PF Contributions for the field Under
4.
Select No,
5.
Select As Computed Value from the List of Calculation Types
6.
Select Normal Rounding for Rounding Methods
7.
Set the Rounding Limit to 1
8.
Select On Specified Formula for Computation
9.
Select Basic for the Specified Formula
if you do not wish the payhead to affect in the net salary.
10.
Select the appropriate Pay Head for Specified Formula
11.
Enter the Slab Details in the table, as applicable
12.
Accept to save the Pay Head
12.
Employer’s PF @ 3.67% To create a Pay Head, Employer’s PF @ 3.67% Go to Gateway of Tally > Payroll Info > PayHeads > Create 1.
Enter the Name of the Pay Head
2.
Select Employer’s Statutory Contributions as the Pay Head Type from the List of Pay Head Types
3.
Select Employer’s PF Contributions for the field Under
4.
Select No,
5.
Select As Computed Value from the List of Calculation Types
6.
Select Normal Rounding for Rounding Methods
7. 8.
if you do not wish the payhead to affect in the net salary.
6. 7.
Set the Rounding Limit to 1
8.
Select On Specified Formula for Computation
9.
In the Compute: On Specified Formula sub screen, Select Employee’s PF @ 12% . In the next line, under the Function field, select Subtract Pay Head from the list Additional Computations for and select Employer’s PF Contr. @ 8.33%
10.
Enter the Slab Details in the table, as applicable
11.
Accept to save the Pay Head
N o t e : Employer’s Contribution after subtracting Employer’s PF
to PF @ Contr. @
3.67% 8.33%
is calculated on from Employee’s
the PF
amount arrived @ 12%
at
Additional Information Creating Ledgers for istrative Charges – PF, Deposit Linked Insurance (DLI) and Employee’s Deposit Linked Insurance(EDLI) istrative Charges for PF @ 1.1% , DLI @ 0.5% and EDLI @ 0.01% are paid by the employer from time to time for every employee employed by him. Since the above charges are paid by the employer, they do not appear as part of the CTC. They are created as ledgers and a liability entry should be ed for all of them.
PF Process using a single payroll voucher
In this case, you can book the PF employer contribution payable (Expense) and PF employer contribution payable (Deduction) in a single payroll voucher.
Creating an Employer Contribution Voucher Go to Gateway of Tally > Payroll Vouchers > Payroll Voucher 1.
Press ALT+A (Payroll Auto Fill) and select 1-4-2006 for From and 30-4-2006 for To , the Primary Cost Category in Cost Category and Sales in Employee Group respectively.
1.
Payroll Voucher is processed with Employees and Employer Contribution with employer contribution deduction (current liability) details.
Payments of PF In order to the Employees and Employer Contribution details of an employee, enter the Payment voucher as shown below. Go to Gateway of Tally > ing Voucher > F5: Payment 1. 2. 3.
Change voucher date to 30-April -2006 using F2: Date button.
1. 2.
Click on Payroll Auto-Fill or Press CTRL+F7 to bring up Employee Filters pop-up.
3.
Select appropriate employee group or employee (E.g. All Items ) and Salary Payable in the Payroll Ledger.
4.
Tally will fill the Payment voucher with employee wise salary unpaid/outstanding in the Salary Payable . The actual amount paid/payable to each employee may be modified if required.
5.
Accept and save the voucher.
Payment of PF Employer’s Payable
Go to Gateway of Tally > ing Voucher > F5: Payment 1.
Change voucher date to 30-April-2006 using F2: Date button.
2.
Select the Bank from the list
3.
Select the appropriate PF Employer’s Payable payhead from the list, Tally displays the Employee Allocation for: sub-form to allocate the PF Employer’s payables.
4.
Select the Employee from the list and enter the PF Employer’s Payable amount.
5.
Accept and save the voucher.
To View the Monthly PF Employer’s Payable Statement
After the Employer contribution voucher has been posted, Go to Gateway of Tally > Display > Payroll Reports > Statement of Payroll > Payroll Statement 1.
Select Ledger for PF Employer’s Payable @ 3.67%
2.
Press F2 and Select the period for the Payroll Statement
N o t e : You can click on Employer Contribution
New Column button or Press A L T + C ledgers in the required order.
and
select
To view the Employee Breakup of PayHead Go to Display > Payroll Reports > Statements of Payroll > Employee Pay Head Breakup 1. 2.
Select PF Employer’s Payable @ 8.33%
all
appropriate
1. 2.
Select Sales in the Primary Cost Category
The following screen displays
Similarly, you can view the Employee breakup of Payhead for PF Employer’s Payable @ 3.67%
PF process using separate payroll vouchers
You can book the PF employer contribution payable ( Expenses) along with the salary process and subsequently book the current liability for PF contribution separately.
Creating a Payroll Voucher Go to Gateway of Tally > Payroll Vouchers > Payroll Voucher 1.
Press CTRL+F4 and select voucher class Salary Process .
2.
Press ALT+A (Payroll Auto Fill) and select 1-5-2006 for From and 31-5-2006 for To , the Primary Cost Category in Cost Category and Sales in Employee Group/Employee respectively.
3.
3.
Enter the narration , if required
4.
Accept the screen.
Creating a PF Process Voucher Go to Gateway of Tally > Payroll Vouchers > Payroll Voucher 1.
Press CTRL+F4 and select voucher class PF Process
2.
Press ALT+A (Payroll Auto Fill) and select 1-5-2006 for From , 31-5-2006 for To , select the Employee from the list.
3.
Enter the narration , if required
4.
3. 4.
Accept the screen.
Payments to Employee In order to the salary payment to employee, enter the Payment voucher as shown below. Go to Gateway of Tally > ing Voucher > F5: Payment 1.
Change voucher date to 31-May -2006 using F2 : Date button.
2.
Click on Payroll Auto-Fill or Press CTRL+F7 to bring up Employee Filters pop-up
3.
Select the Bank from the list.
4.
Select Salary Payable from the list.
5.
Select appropriate employee group or employee (E.g. All Items)
6.
Tally will fill the Payment voucher with employee wise salary unpaid/outstanding in the Salary Payable . The actual amount paid/payable to each employee may be modified if required.
6.
7.
Accept and save the voucher.
Payment of PF Employer’s payable . Go to Gateway of Tally > ing Voucher > F5: Payment 1.
Change voucher date to 31-May-2006 using F2: Date button
2.
Select the Bank from the list
3.
Select the appropriate PF Employer’s [email protected]% payhead from the list, Tally displays the Employee Allocation for: sub-form to allocate the PF Employer’s payables
4.
Select the Employee from the list and enter the PF Employer’s Payable amount.
5.
Select the appropriate PF Employer’s [email protected]% payhead from the list, Tally displays the Employee
6.
4. 5. Allocation for: sub-form to allocate the PF Employer’s payables 6.
Select the Employee from the list and enter the PF Employer’s Payable amount
7.
Accept and save the voucher.
To View the Monthly PF Contribution Statement After the Employer contribution voucher has been posted, Go to Gateway of Tally > Display > Payroll Reports > Statement of Payroll > Payroll Statement 1.
Select Ledger for PF Employer’s Payable @ 3.67%
2.
Press F2 and select the period for the Payroll Statement
1. 2.
N o t e : You can click on New Column button or Press A L T + C Employer Contribution ledgers in the required order.
and
select
all
To view the Employee Breakup of PayHead Go to Display > Payroll Reports > Statements of Payroll > Employee Pay Head Breakup 1.
Select PF Employer’s Payable @ 8.33%
2.
Select Sales in the Primary Cost Category
The following screen displays
Similarly, you can view the Employee breakup of Payhead for PF Employer’s Payable @ 3.67%
appropriate
PF process using voucher class
Tally Payroll provides you with Payroll, Attendance and Payment Voucher Types you may define a template called Voucher Class in order to automate and control usage of ledger s and computed values to be posted. It is a powerful and configurable option that enables you to define the rules of voucher entry for a particular voucher type. It also helps in speeding up the process and minimises data entry for posting a voucher. You can book the PF contribution using the Voucher Class Go to Gateway of Tally > Payroll Info. > Voucher Types > Alter
In a Voucher Class , you may exclude selection of inapplicable groups and/or specify applicable groups. For example: In a Payroll voucher, you may exclude posting to ledger pertaining to groups such as Fixed Assets, Sundry Debtors/Creditors, Sale/Purchase etc., or Include groups like Indirect Expenses, Loans & Advances (Liabilities) and so on. Voucher Class in Tally Payroll helps the to rapidly process their Payroll data. Values for Payroll Class: Employer’s Process 1.
Select End of List for Exclude these Groups
2.
Select Employer’s PF Contributions for Include these Groups
3.
Select the Ledger Employer’s Payable for Ledger to use
4.
Accept and Save changes
4.
Creating an Employer Contribution Voucher Go to Gateway of Tally > Payroll Vouchers > Payroll Voucher 1.
Press CTRL+F4 and select voucher class Employer’s Process .
2.
Press ALT+A (Payroll Auto Fill) and select 1-4-2006 for From and 30-4-2006 for To , the Primary Cost Category in Cost Category and Sales in Employee Group respectively.
2.
Payroll Voucher is processed with Employer Contribution details .
To View the Monthly PF Contribution Statement After the Employer contribution voucher has been posted, Go to Gateway of Tally > Display > Payroll Reports > Statement of Payroll > Payroll Statement 1.
Select Ledger for Employer’s PF Contr. @ 3.67% .
2.
Press F2 and Select the period for the Payroll Statement
2.
N o t e : You can click on New Employer Contribution ledgers
Column in the
button or required
Press A L T + C order.
and
select
To view the Employee Breakup of PayHead Go to Display > Payroll Reports > Statements of Payroll > Employee Pay Head Breakup 1.
Select Employer’s contri. @ 8.33%
2.
Select Sales in the Primary Cost Category
The following screen displays
all
appropriate
Similarly, you can view the Employee breakup of Payhead for Employer’s Contri. @ 3.67%
Payroll with ESI
Tally Payroll s the computation, deduction and ing of ESI for filing monthly and annual returns.
Creating ing Group, Ledgers and Pay Heads Creating a Pay Head for Employer’s ESI @ 4.75% Go to Gateway of Tally > Payroll Info > PayHeads > Create 1.
Enter the Name of the Pay Head
2.
Select Employer’s Statutory Contributions as the Pay Head Type from the List of Pay Head Types
3.
Select Employer’s ESI @ 4.75% for the field Under
4.
Select Yes if you want the Pay head to affect the net salary
5.
Specify the Pay Head Name to appear on the Payslip
6.
Select As Computed Value from the List of Calculation Types
7.
Select Normal Rounding for Rounding Methods
8.
Set the Rounding Limit to 0.05
9.
Select On Current Earnings Total for Computation
10.
Enter the Slab Details in the table, as applicable
11.
Accept to save the Pay Head
11.
Creating a Pay Head for Employee ESI @ 1.75% Go to Gateway of Tally > Payroll Info > PayHeads > Create 1.
Enter the Name of the Pay Head
2.
Select Employee’s Statutory Deductions as the Pay Head Type from the List of Pay Head Types
3.
Select Employee ESI @ 1.75% for the field Under
4.
Select Yes, if you want the Pay head to affect the net salary
5.
Select As Computed Value from the List of Calculation Types
6.
Select Normal Rounding for Rounding Methods
7.
Set the Rounding Limit to 0.05
8.
6. 7. 8.
Select On Current Earnings Total for Computation
9.
Enter the Slab Details in the table, as applicable
10.
Accept to save the Pay Head
Creating a Voucher Class- ESI Process. Go to Gateway of Tally > Payroll Info. > Voucher Types > Alter Values for Payroll Class: ESI Process 1.
Select End of List for Exclude these Groups
2.
Select Employer’s ESI Contributions for Include these Groups
3. 4.
2. 3.
Select the Ledger Employer’s Payable for Ledger to Use
4.
Accept and Save changes
Creating an Employer Contribution Voucher Go to Gateway of Tally > Payroll Vouchers > Payroll Voucher 1.
Press CTRL+F4 and select voucher class ESI Process .
2.
Press ALT+A (Payroll Auto Fill) and select 1-4-2006 for From , 30-4-2006 for To , the Primary Cost Category in Cost Category and Sales in Employee Group respectively.
2.
Payroll Voucher is processed with Employer Contribution details .
To View the Monthly ESI Contribution Statement After the Employer contribution voucher has been posted, Go to Gateway of Tally > Display > Payroll Reports > Statements of Payroll > Pay Sheet 1.
Press F2 and Select the period for the Pay Sheet
1.
Increments and Arrears Processing
Salary of employees that get revised periodically to a higher salary is known as Increment. When such increment is given retrospectively, it amounts to calculation and payment of arrears. Tally Payroll s such revision both as prospective change and also as retrospective change. Consider a scenario where ABC Company revises the salary on 1-7-2006 for the employees with effect from 1-52006 . To specify the revised salary details for Employee A whose Basic Salary has increased by Rs. 2000 : Go to Gateway of Tally> Payroll Info.> Salary Details> Create> Select Employee A from the List of Groups/Employees
1. 2.
1.
Enter 1-5-2006 as the Effective From date
2.
Select Copy From Previous Value from the Start Type
3.
Enter 12000 as the Rate against the Pay Head Basic Salary
4.
A ccept to save the changes made.
Create a Payroll Voucher for Employee A for the period 1-5-2006 to 31-7-2006 . Go to Gateway of Tally > Payroll Voucher 1.
Select the from the List of Ledger s
2.
Click A: Payroll Auto Fill .
2.
3.
Enter the From and To date in the Employee Filters screen
4.
In the Employee/Group field, select the Employee from the List of Group / Employees
5.
Select the Payroll Ledger from the List of Ledger s .
6.
A ccept to save the Payroll Voucher
6.
To view the Payslip generated for Employee A for the period 1-5-2006 to 31-7-2006 Go to Gateway of Tally> Display> Payroll Reports> Statements of Payroll> Payslip> Select Employee A from the List of Employees
Notice that the payment of arrears has been made for the employee with effect from 1-5-2006 . N o t e : If a company decides to revise can be altered from the Salary Details thus overriding the previous effect.
salaries with effect from screen for the existing
1-4-2006, the effective date
Pay Heads 1-4-2006
Loan Management in Tally Payroll
1.
Enter the Name of the Deduction Pay Head.
2.
Select Loan & Advances as the Pay Head Type from the List of Pay Head Types.
3.
Select the respective List of Groups for the field Under.
4.
Select Yes from the list if you want the Pay head to affect the net salary.
5.
Specify the Pay Head name to appear on the Payslip.
6.
Select Flat Rate from the List of Calculation Types .
7.
Select Calculation period form the list of Calculation Period
8.
Select Per Day from the list Calculation Basis .
9.
Set the Rounding Methods to Not Applicable
10.
Accept to save the Pay Head.
Payment of Loans / Advances In order to the Loan payment to an employee, enter the Payment voucher as shown below.
Payment of Loan Go to Gateway of Tally > ing Voucher > F5: Payment 1.
Select Not applicabl e in the Class.
2.
Change voucher date to 31-May-2006 using F2: Date button.
3.
Debit Festival Loan with an amount of 10000.00, Tally displays a sub-form to allocate this debit to a cost centre.
5.
5.
Select Employee A and accept the sub-form.
6.
Credit Cash and accept the voucher.
If in
you the
are using the voucher header
Single entry mode of and select Festival
Payment voucher, then select Cash Loan from the List of Ledgers .
Loan Instalment in Pay Structure Go to Gateway of Tally > Payroll Info > Salary Details > Alter 1.
Select Employee A from the list.
2.
Navigate through the existing pay structure till the end.
3. 4.
2. 3.
Add new Pay head Festival Loan with Calculation type Flat Rate .
4.
Select End of List to exit from the current Pay Structure.
5.
Pay Heads of previous pay structure are copied.
6.
At end of the new structure, add new Pay Head, Festival Loan with Calculation type Flat Rate, and enter Loan Installment amount, 1000.00 in the Rate field.
7.
Accept and save the Changes
When a Loan is to be Employee’s Pay Structure
recovered in Multiple Fixed Installments, with Calculation Type Flat Rate.
When all Installments for an Employee loan has alter the Pay Structure from next effective payroll or set the Value basis to Zero.
it
is
added
been recovered/deducted, date and either remove
to
you the
an
need to Pay Head
Payroll Voucher for Loan Go to Gateway of Tally > Payroll Vouchers 1.
Change the voucher date to 31-7-2006 .
2.
Select voucher class Salary Process , and Auto-fill for period 1-5-2006 to 31-5-2006 and select the group as Employee A .
Observe that Festival Loan appears as new Pay Head for Employee A.
Track Loans and Advance balances Go to Gateway of Tally > Display > Payroll Reports >Statement of Payroll> Employee Ledger Breakup 1.
1.
Select Festival Loan
As per your requirements you can configure the appearance of this report and also combine multiple loans/advances ledgers into same report.
Stopping Loan Instalment deductions When the entire loan is recovered through deduction of Installment, you can modify the employee master, either by setting the value basis of the loan Pay Head to Zero or by creating a new pay structure effective from subsequent payroll period and removing the loan Pay Head.
Printing Multiple Payslips
U sing Multi-Payslip Printing option you can configure the print format of the Payslip, and print for selected periods and employee groups. Go to Gateway of Tally > Multi- Printing > Multi-Payslip Printing
It will display the following Print configuration screen; with all Payslip configuration parameters as set in the view Payslip report configurations. However, as per your requirement you can modify these settings by selecting No in the Print option. The Format of a Printed Payslip will appear as below if the country details is set to India/SAARC in F12: General screen:
Salary Disbursement
Once the payroll is processed, disbursement of the salary may be carried out using one of the following processes.
Payment Voucher Payment voucher is a Tally ing document, Crediting to cash or bank and Debiting to any Expense, Party or Asset/Liability . In the context of Payroll the employees are paid, against their Salary credited in the Salary Payable during the Payroll Voucher entry. Similar to Payroll Voucher, entry of Payment voucher can also be automated using the Voucher Class – one separate class for - crediting to Cash or a Specific bank ledger . In other words to both, Cash and Cheque or bank transfer mode of salary disbursement one needs to create separate voucher class for each of them, and also one separate class for each bank , if multiple bank s are to be used. In order to make salary payment by Cheque, separate payment voucher for each employee should be entered. For cash disbursement both options, either to create separate vouchers or a consolidated voucher, are ed. For disbursement through a bank transfer a single consolidated payment voucher for a bank , is possible.
Salary Disbursement through Bank Transfer 1.
Create Salary Ledger under Bank Group.
Go to Gateway of Tally > s Info. > Ledger > Create Accept and Save the new Ledger
2.
Create Salary Bank Transfer Voucher Class Go to Gateway of Tally > s Info. > Voucher Type > Alter > Payment Add new voucher class Salary Bank Transfer Do not specify any group in Exclude or Include parts Select Bank – Salary
3.
Salary Payment Voucher Entry Go to payment voucher entry, Press F5 and select voucher class “Salary Bank Transfer ” Click on Payroll Auto-Fill or Press CTRL+F7 to bring up Employee Filters pop-up. Select appropriate employee group or employee (E.g. All Items ) and Salary Payable in the Payroll Ledger. Tally will fill the Payment voucher with employee wise salary unpaid/outstanding in the Salary Payable . The actual amount paid/payable to each employee may be modified if required.
4. Accept and save the voucher. Note: In the event, when cash disbursement is done prior to payment voucher entry, after the auto-fill, unpaid salaries may be removed by making the payable amount Zero, in this voucher. Such unpaid salary will remain as outstanding in Salary Payable and may be auto-filled in Payment voucher as and when the actual payment is made. In the event, where you want to make disbursement by Cheque, select individual employee in the Auto-fill and create separate payment voucher for each, later printing the Cheque from each payment voucher.
License Agreement
Read this section before using the product Software License Agreement TALLY 9 This is a legal agreement between yourself, the lawful purchaser of the software described hereunder, hereinafter referred to as the LICENSEE on the one part and Tally Solutions FZ-LLC, hereinafter referred to as the COMPANY on the other part. By installing the software described below, the Licensee agrees to be bound by the of this agreement. If you, the Licensee, do not agree to the of this agreement, promptly return the complete and undamaged software packet along with the accompanying items (including written materials, binders, brochures etc) to the place from where the software was purchased for a full refund of price paid. GRANT OF LICENSE: The COMPANY grants to the LICENSEE a non exclusive right to use the accompanying software program, TALLY 9 hereinafter called the SOFTWARE. The SOFTWARE is in ‘use’ on a computer when it is loaded into temporary memory (that is RAM) or it is ‘installed’ into permanent memory (example, Hard Disk, CDROM Disk, or any other storage device on the computer). The SOFTWARE may be used on a single computer (for the Single edition of the SOFTWARE) or on a Local Area Network (LAN) Server (for the Unlimited Multi Edition of the SOFTWARE) for use on any one or more nodes connected directly to the LAN server for simultaneous use by more than one . This is the only situation under which more than one can use the SOFTWARE simultaneously. The SOFTWARE may be freely moved from one computer to another belonging to the LICENSEE. The LICENSE is granted only for the use of the LICENSEE. The LICENSEE shall not rent, lease, or otherwise transfer this SOFTWARE and the rights to use the SOFTWARE.
INTELLECLTUAL PROPERTY & COPYRIGHT: The SOFTWARE is owned by Tally Solutions FZ-LLC and is protected by Copyright Laws of UAE and International Treaty Provisions relating to protection of all Intellectual Properties. Therefore, the Licensee must treat this SOFTWARE like any other copyrighted and intellectual property material (e.g. a book or musical recording). The Licensee shall not copy the SOFTWARE and/or written materials accompanying the SOFTWARE.
LIMITED WARRANTY AND REMEDY WARRANTY: There is a limited warranty from the Company that the SOFTWARE will perform substantially in accordance with the accompanying written materials for a period of 90 (ninety) days from the date of purchase and that the medium on which the SOFTWARE is supplied, will be free from defects in materials and workmanship under normal use and service for a period of 90 (ninety) days from the date of purchase. WARRANTY is void unless the purchase of the SOFTWARE is from authorized vendors in the geographical territory of the LICENSEE, or from the COMPANY. WARRANTY is applicable if, and only if, the licensee has completed the activation process by logging in the serial number and the key for the software, and the registration information of the licensee has been received and acknowledged by the COMPANY. Otherwise the WARRANTY shall not apply. NO OTHER WARRANTY: The COMPANY and all its suppliers disclaim all other warranties, whether expressed or implied, including, but not limited to, implied warranties of merchantability and fitness for a particular purpose, with regard to the SOFTWARE and the accompanying written materials. LICENSEE’S REMEDIES: The COMPANY and its suppliers’ entire liability and Licensee’s exclusive remedy shall be at the option of the COMPANY, either (a) refund of the price paid on the return of the SOFTWARE to the supplier and giving the proof of having uninstalled the activation license, or (b) repair or replacement of the SOFTWARE that does not meet LIMITED WARRANTY of the COMPANY, and which is returned to the supplier with a copy of the proof of purchase (such proof of purchase being either the original invoice or receipt of the supplier). The LIMITED
WARRANTY is void if the failure of the SOFTWARE has resulted from virus, any other software or process on the computer of the LICENSEE, improper use, accident, theft, abuse or misapplication of the SOFTWARE. Any replaced SOFTWARE will be warranted for the remainder of the original warranty period or 30 (thirty) days whichever is longer. NO LIABILITY FOR CONSEQUENTIAL DAMAGES: The COMPANY and its suppliers under no circumstances shall be liable for any damages whatsoever (including, without limitation, damages for loss of business profit, business interruption, loss of business information, or any other monetary or non-monetary loss) arising out of the use or the inability to use this SOFTWARE, even if the COMPANY has been advised of the possibility of such damages. DISPUTE RESOLUTION AND JURISDICTION All disputes between the parties connected with the of this agreement, or the use or inability to use the SOFTWARE or any other services of the COMPANY, related to the SOFTWARE, shall be subject to arbitration of a person to be appointed by the COMPANY, and the decision of the arbitrator will be binding on all parties as per applicable statutes. The arbitration proceedings shall be conducted in English and place of arbitration shall be Singapore. All proceedings shall be governed and construed in accordance with the laws prevailing in Singapore and only competent courts within Singapore shall have jurisdiction to adjudicate the same. If you have any questions or clarifications concerning this LICENSE, please in writing: CUSTOMER SERVICE CELL C/o Tally (India) Pvt. Ltd., 331-336, Raheja Arcade, Koramangala, Bangalore – 560 095 INDIA. (Please quote your Tally 9 serial number in all correspondence or with the COMPANY concerning the SOFTWARE)
Related Documents c2h70


Tally Workshop Notes d250
November 2019 60
Tally 9.2 Notes 1v1wq
October 2019 171
Tally 9.1 Notes 702s47
December 2019 45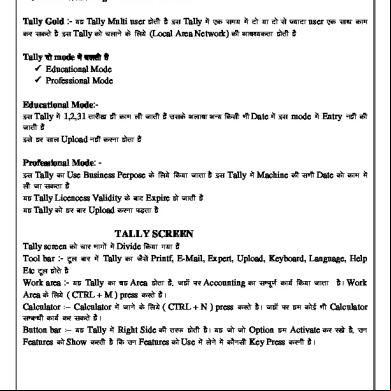
Tally Notes In Hindi Pdf 3a2h3o
October 2019 163
92 2e1m4e
October 2021 0More Documents from "Aman Kumar" 6i3z3s

Blue Prism 2h6cy
March 2023 0
Tally 9.2 Notes 1v1wq
October 2019 171
Caching Apple's Signature Server - Jay Freeman (saurik).pdf 274a2j
November 2019 42
Biobattery - Seminar Reports_ppt_pdf_doc_presentation - Seminar Report,pdf,ppt,doc,topics,free .pdf 23j73
December 2019 41
Iobit Malware Serial Key 273sl
October 2019 208