Choke Reaming 4k1214
This document was ed by and they confirmed that they have the permission to share it. If you are author or own the copyright of this book, please report to us by using this report form. Report 2z6p3t
Overview 5o1f4z
& View Choke Reaming as PDF for free.
More details 6z3438
- Words: 2,529
- Pages: 4
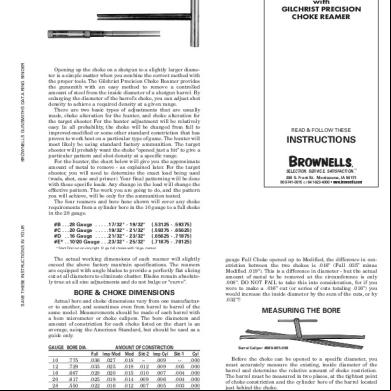
CHOKE ADJUSTING
SAVE THESE INSTRUCTIONS IN YOUR
BROWNELLS GUNSMITHS DATA RING BINDER
with GILCHRIST PRECISION CHOKE REAMER
Opening up the choke on a shotgun to a slightly larger diameter is a simple matter when you combine the correct method with the proper tools. The Gilchrist Precision Choke Reamer provides the gunsmith with an easy method to remove a controlled amount of steel from the inside diameter of a shotgun barrel. By enlarging the diameter of the barrel’s choke, you can adjust shot density to achieve a required density at a given range. There are two basic types of adjustments that are usually made, choke alteration for the hunter, and choke alteration for the target shooter. For the hunter adjustment will be relatively easy. In all probability, the choke will be changed from full to improved-modified or some other standard constriction that has proven to work best on a particular type of game. The hunter will most likely be using standard factory ammunition. The target shooter will probably want the choke “opened just a bit” to give a particular pattern and shot density at a specific range. For the hunter, the chart below will give you the approximate amount of metal to remove - as explained later. For the target shooter, you will need to determine the exact load being used (wads, shot, case and primer). Your final patterning will be done with these specific loads. Any change in the load will change the effective pattern. The work you are going to do, and the pattern you will achieve, will be only for the ammunition tested. The four reamers and bore hone shown will cover any choke requirements from a cylinder bore in the 10 gauge to a full choke in the 28 gauge. #B . . .28 Gauge . . . . .17/32" #C . . .20 Gauge . . . . .19/32" #D . .16 Gauge . . . . .21/32" #E* . .10\20 Gauge . . .23/32"
-
19/32" 21/32" 23/32" 25/32"
(.53125 (.59375 (.65625 (.71875
-
READ & FOLLOW THESE
INSTRUCTIONS
SELECTION. SERVICE. SATISFACTION.™ 200 S. Front St. Montezuma, IA 50171 800-741-0015 or 641-623-4000 • www.brownells.com
.59375) .65625) .71875) .78125)
* Start First cut on very tight 12 ga. full chokes with 16 ga. reamer.
The actual working dimensions of each reamer will slightly exceed the above factory max/min specifications. The reamers are equipped with angle blades to provide a perfectly flat slicing cut at all diameters to eliminate chatter. Blades remain absolutely true at all size adjustments and do not bulge or “curve”.
BORE & CHOKE DIMENSIONS Actual bore and choke dimensions vary from one manufacturer to another, and sometimes even from barrel to barrel of the same model. Measurements should be made of each barrel with a bore micrometer or choke calipers. The bore diameters and amount of constriction for each choke listed on the chart is an average, using the American Standard, but should be used as a guide only. GAUGE BORE DIA. 10 12 16 20 28
.775 .729 .667 .617 .550
AMOUNT OF CONSTRICTION Full Imp Mod Mod Skt-2 Imp Cyl Skt-1 .036 .027 .018 -.009 -.035 .025 .019 .012 .009 .005 .028 .020 .015 .010 .007 .004 .025 .019 .014 .009 .006 .004 .022 .016 .012 .007 .005 .003
MEASURING THE BORE
Barrel Caliper #080-005-000
Cyl .000 .000 .000 .000 .000
When referring to the Bore & Choke Dimensions Chart, , the differences between the various choke diameters is OVER-ALL diameter difference. For example, if you want a 12
076-200-543 Feb. 04r
gauge Full Choke opened up to Modified, the difference in constriction between the two chokes is .016" (Full .035” minus Modified .019"). This is a difference in diameter - but the actual amount of metal to be removed at the circumference is only .008". DO NOT FAIL to take this into consideration, for if you were to make a .016" cut (or series of cuts totaling .016") you would increase the inside diameter by the sum of the cuts, or by .032"!!
Before the choke can be opened to a specific diameter, you must accurately measure the existing, inside diameter of the barrel and determine the relative amount of choke restriction. The barrel must be measured in two places, at the tightest point of choke constriction and the cylinder bore of the barrel located just behind the choke. The bore can be measured with the Brownells Choke Comparison Calipers and your own micrometer or you can use one of the many, shotgun bore specific micrometers or gauges listed in and available through the Brownells Catalog.
© 2004 BROWNELLS, INC.
3 of 4
To measure the inside diameter of a shotgun barrel, first clamp the barrel in a padded bench vise. Insert the bore gauge or micrometer into the bore and determine the smallest inside diameter of the choke section of the barrel. Move the micrometer or gauge down the bore to the cylinder bored portion of the barrel located just behind the choke and get a reading of the diameter. It should be larger in diameter than the choke section. Subtract the first measurement from the second measurement and refer to the chart on page 1 to determine the relative amount of choke restriction. Please that this method and chart will only determine the relative amount of choke restriction Actual choke restriction can only be determined by patterning the shotgun with the type of ammunition that will be used.
DOING CHOKE ADJUSTMENT WITH THE GILCHRIST PRECISION CHOKE REAMER The handle and extension consist of two pieces. The extension shaft threads onto the rear of the cutter shank and the T-handle threads onto the rear of the extension shaft. The fit of the threaded section is loose, and this is deliberate. A loose thread fit prevents the cutters from being rotated in a counter-clockwise direction. This can cause serious damage to the cutters, and the choke inside the barrel. DO NOT ALTER THE FIT OF THE THANDLE OR THE EXTENSION SHAFT, OR ATTEMPT TO ROTATE THE CUTTERS IN A COUNTER-CLOCKWISE DIRECTION. This is a manual tool; DO NOT APPLY POWER.
Choke Reamer shown with Clymer Choke Tooling Bushings & C-Clips in place.
Clymer Choke Tooling Bushings are used to pilot the cutter shaft. Bushings are selected to the nearest .001" under bore size. This size is best determined by using a shotgun barrel gauge. For accurate readings, make sure the barrel is CLEAN AND FREE of powder, lead and plastic fouling. Two bushings, both the same size, are required to properly align the cutter shaft with the bore of the barrel. To install the bushing on the shaft, first unscrew the cutter head, remove three of the C-clips, and place the bushing on the shaft. Replace two of the C-clips then slip the second bushing into the shaft. Install the last C-clip to hold the second bushing in place. The bushings should now be secured on the shaft with a space of 2.15" between them. NOTE: If the bushings do not move freely in the bore, apply a light coat of oil in the barrel for the pilot bushings to ride on. Lubrication may help smooth the hand feed. Otherwise, go to the next smaller size bushing. The barrel should be removed from the action before altering the choke. Secure the barrel vertically in a padded vise, muzzle toward the floor and approximately waist high. In addition to the reamer and handle assembly you will need: dark cutting oil (DoDrill™ will work fine), a cleaning rod and plenty of shotgun-sized cleaning patches. A small can or bucket on the floor under the barrel will help catch the excess oil and used patches. Select the appropriate reamer. Adjust the reamer to minimum diameter. Pour a small amount of cutting oil on the cutters and insert them down from the breech end, toward the muzzle of the barrel. Align the pilot bushings in the bore and slowly rotate the cutter handle in a clockwise direction until the cutting blades the choke portion of the barrel. DO NOT STRIKE THE INSIDE OF THE BARREL AND CHAMBER WITH THE CUTTERS WHILE THE PILOTS ARE NOT ENGAGED AND CENTERING THE SHAFT! If the angle blade reamer goes all the way thru the bore without touching the sides, remove the tool and adjust the cutters to a slightly larger diameter (.003-.005"). This is done by backing off on the rear adjusting nut (the one toward the handle) one half turn maximum, and tightening the front adjusting nut (the one toward the front end of the cutter). This pushes the blades to the rear and up the inclined cuts to enlarge the overall diameter of the reamer. An angle Blade Reamer is tapered. The small end of the reamer is in front. It guides the reamer gently into the choke portion of the bore and enhances alignment with the bore and choke. Adjust the reamer a small amount at a time until it just touches the sides of the choke. Apply more cutting oil and make the first cut. Rotate the cutter handle in a clockwise direction. Allow
2 of 4
➘
Arrow shows flat on adjustment nut
the weight of the reamer and handle to apply the pressure. When the reamer has cut its full length, continue rotating it in the same direction, and withdraw the reamer back up the barrel. Brush the chips from the reamer and clean the barrel with a tight fitting patch. Measure the choke. Repeat the procedure if additional metal must be removed. There is a flat on the adjusting nuts that can be used as a scale (see illustration). Position this flat between two of the blades and make a cut. Remove the reamer and rotate the nut to a position between the next two blades. The second cut will remove .002" from the DIAMETER of the choke.
HONING
No. 2 Barrel Hone #531-108-002
The final .001" should be removed with the hone. The honing stones are pressed against the sides of the choke by the coil spring and the pressure should be firm at all times to prevent chatter. The flexible shaft assures correct alignment with the bore. The hone can be rotated in several ways but a regular electric hand drill is all that is necessary. Insert the hone in the choke and turn the drill on. Move the hone in and out for fifteen seconds with plenty of cutting oil in the barrel. ALWAYS turn the drill OFF before removing the hone. Wipe the bore clean and inspect. The barrel should be smooth and free of all scratches.
REAMER CARE The cutting edge of angle blade reamers should be lightly honed for best performance. Arkansas stones and thin India stones should be used for sharpening. The best way to keep them clean and sharp is to keep them oiled and wrapped at all times when not in use. Do NOT knock chips out of reamer on edge of bench or on block of wood. Carefully brush reamers to remove chips. NEVER turn a reamer counter-clockwise as you remove it from a barrel. Always keep turning in the same direction until the reamer is completely removed from the barrel. DO NOT take a big cut at one time with Angle Blade Reamers. Never make a cut larger than .003" and preferably less. ALWAYS release the tension on your Angle Blade Reamers when not in use. In COLD WEATHER Angle Blade Reamers should be warmed before exerting extreme setting pressure to prevent possible fracture of blades.
CHROME-LINED BARRELS These reamers will not cut chrome-lined barrels. Any attempt to do so will ruin the reamer and void the guarantee. To determine if a barrel is chrome-lined, touch a drop of Oxpho-Blue or other good cold blue to the inside of the muzzle. If it blues or stains, it is not chrome-lined, and is okay to work on. Gunsmith customers have advised us they have removed the chrome-lining by careful honing and copious flooding with cutting oil prior to normal choke adjustment with satisfactory results. This can be a tricky operation depending upon the thickness/uniformity/hardness of chrome, and should only be undertaken with caution and an intimate knowledge of what is required.
© 2004 BROWNELLS, INC.
076-200-543 Feb. 04r
REVERSE OR “JUG” CHOKES Reverse or “Jug” type Chokes are occasionally found in shot-
guns. The choke effect is obtained in Reverse Choking by the removal of metal from the bore, starting a short distance behind
the muzzle and extending down the barrel toward the breech. On a 12 gauge, for example, the recess may be from 10" to 12" long and about .015" deep for modified choke and .021" deep for full choke. You can readily see from this that you cannot “Open Up” a choke such as this by making the recess deeper. Doing so would tighten the choke! Opening the pattern on such a gun can only be achieved by very carefully honing the short stretch of barrel between muzzle and choke recess. Repeated test-firings should be made during this type of adjustment to be sure too much metal is not removed and is opened up.
REAMER SHARPENING INSTRUCTIONS As with any precision tool, you should be very careful in the use and maintenance of this reamer. Always observe the following guidelines: 1. NEVER back off or turn the reamer in a COUNTER-CLOCKWISE direction. When removing the reamer from the workpiece, continue to turn it in a clockwise direction 2. NEVER use this reamer in a chrome or nickel-plated bore. 3. Always use a good cutting oil such as Do-Drill™ and frequently clear the chips from the reamer during use. 4. NEVER try to cut more than .003" in one when using an adjustable reamer. Cutting too much is a major cause of “chatter”. 5. During use, keep the reamers clean and well oiled. Ensure that there are no chips under the blades of the adjustable reamers. 6. Stone the FACE of the blades when sharpening reamers; refer to Drawings #1 and #2. Do NOT stone or “sharpen” the TOP of the blades. Doing so VOIDS all guarantees/warranties. 7. Clean and oil reamers after use and store in individual plastic tubing or boxes to protect the blades from chipping or breakage. 8. Reamers should always be treated with the same care as given a precision micrometer or caliper. The more careful you are, the longer your reamer will last! If you have any problems or questions relating to your reamers, don’t hesitate to call. Our technical staff is available to help Monday through Friday from 8:30 am to 4:30 pm Central time.
076-200-543 Feb. 04r
DRAWING #1 BLADE FOR ANGLE BLADE REAMERS STONE FACE OF BLADE ONLY ON FLAT SHARPENING STONE
DRAWING #2 LONG FORCING CONE REAMER TOP OF BLADE
FACE OF BLADE
SHARPENING STONE
SHARPENING STONE
© 2004 BROWNELLS, INC.
BLADE
TOP OF BLADE FACE OF BLADE
INCORRECT
CORRECT (Face being stoned)
REAMER
(Top being stoned)
3 of 4
R
200 S. Front St. Montezuma, IA 50171
800-741-0015 or 641-623-4000 www.brownells.com SELECTION. SERVICE. SATISFACTION.™
4 of 4
© 2004 BROWNELLS, INC.
076-200-543 Feb. 04r
Related Documents c2h70
Choke Reaming 4k1214
December 2019 37
Choke Manifold a1o5l
August 2021 0
Hand Reaming And Broaching 6ov5p
October 2022 0
Mapal Reaming Fine Boring 5e4v3s
December 2019 90
Production Choke Basics 4u1k5a
December 2021 0