Nec Ipasolink-200 All Ip Upgrade Guide 3q4z2t
This document was ed by and they confirmed that they have the permission to share it. If you are author or own the copyright of this book, please report to us by using this report form. Report 2z6p3t
Overview 5o1f4z
& View Nec Ipasolink-200 All Ip Upgrade Guide as PDF for free.
More details 6z3438
- Words: 581
- Pages: 9
内部公开 Internal Use Only▲
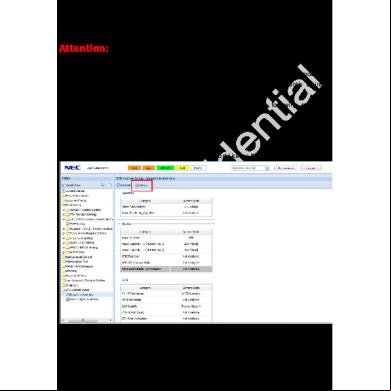
NEC iPasolink-200 All IP Upgrade Guide Attention: 1. This guide is to introduce how to upgrade all IP in iPasolink-200 equipments. 2. Make sure that equipments are in power off status during the dismantle & install process. 3. Please be gentle enough to avoid breaking equipments during the dismantle & install process. 4. There may be some mismatching in actual situation. Please do following operations cautiously and accordingly.
1
iPasolink-200 License Importing the Web LCT interface. S/W License Setup -> Import License Key. Click “Setup”.
Import the License key correspondingly.
<以上所有信息均为中兴通讯股份有限公司所有,不得外传> All Rights reserved, No Spreading abroad without Permission of ZTE
第1页
内部公开 Internal Use Only▲
After importing, check the S/W License Information.
<以上所有信息均为中兴通讯股份有限公司所有,不得外传> All Rights reserved, No Spreading abroad without Permission of ZTE
第2页
内部公开 Internal Use Only▲
2
iPasolink-200 Cards Dismantle & install
There are total 4 slots in iPasolink-200 which can insert AUX, STM-1, E1, CLK and Power cards. Notice that the CLK card is concealed under the AUX card.
2.1 Top Cover Board You need to open the top cover board if you want to change any card in iPasolink-200. The top cover board is fixed by 9 screws. At first, you should remove 4 screws on both sides.
<以上所有信息均为中兴通讯股份有限公司所有,不得外传> All Rights reserved, No Spreading abroad without Permission of ZTE
第3页
内部公开 Internal Use Only▲
Remove another 5 screws on the .
Hold the top cover board and pull it up gently to remove it.
<以上所有信息均为中兴通讯股份有限公司所有,不得外传> All Rights reserved, No Spreading abroad without Permission of ZTE
第4页
内部公开 Internal Use Only▲
2.2 AUX Card Remove 3 screws fixed on the of AUX card.
Remove one screw which is fixed between the AUX card and main board.
After removing all screws, pull it up gently to dismantle the AUX card.
2.3 CLK Card After removing the AUX card, you can find the CLK card which is installed right under the AUX card. <以上所有信息均为中兴通讯股份有限公司所有,不得外传> All Rights reserved, No Spreading abroad without Permission of ZTE
第5页
内部公开 Internal Use Only▲
CLK card is fixed on the main board by a screw. Remove this screw and pull it up gently to dismantle the CLK card.
2.4 STM-1/E1 Card There is one holding screw on the of STM-1/E1 card. Besides, there are another 3 screws fixed between the STM-1/E1 card and main board.
After removing all screws, pull it up gently to dismantle the STM-1/E1 card. <以上所有信息均为中兴通讯股份有限公司所有,不得外传> All Rights reserved, No Spreading abroad without Permission of ZTE
第6页
内部公开 Internal Use Only▲
2.5 Power Unit There is one holding screw on the of power unit.
There is another screw fixed between the power unit and main board.
After removing all screws, pull it up gently to dismantle the power unit.
2.6 Fan Unit Fan unit is on the right side of iPasolink-200 equipments. If you want to remove it, you just need to screw off the holding screw and take it out gently.
<以上所有信息均为中兴通讯股份有限公司所有,不得外传> All Rights reserved, No Spreading abroad without Permission of ZTE
第7页
内部公开 Internal Use Only▲
3
Equipment Clock Setting
After Dismantle & install cards, the Web LCT interface. Provisioning -> Equipment Clock / Synchronization -> Equipment Clock Setting. Click “Modify”.
Enable the Sync ETH. Choose “Master” CLK mode in near end IDU. Choose “Slave” in far end.
Disable the external clock.
<以上所有信息均为中兴通讯股份有限公司所有,不得外传> All Rights reserved, No Spreading abroad without Permission of ZTE
第8页
内部公开 Internal Use Only▲
<以上所有信息均为中兴通讯股份有限公司所有,不得外传> All Rights reserved, No Spreading abroad without Permission of ZTE
第9页
Related Documents c2h70
Nec Ipasolink-200 All Ip Upgrade Guide 3q4z2t
November 2022 0
Netapp 7.3 Upgrade Guide w1h1z
December 2019 54
Drawings X3 Upgrade Guide 1p4c3b
December 2019 41
Vblock Upgrade Guide 2ki2b
November 2021 0
E90 Audio Upgrade Guide 36f1a
November 2019 50
Netbackup 7.7.3 Upgrade Guide 3626t
November 2019 102More Documents from "Anojhkumaran Rajendra" 131h1s

Answers To The Innovation Management Questions 37362f
October 2022 0
Nec Ipasolink-200 All Ip Upgrade Guide 3q4z2t
November 2022 0
2015.462792.yoga-dipika.pdf 1do5x
December 2019 82
Industrial Drives And Applications-10ee74.pdf 1x3d2j
October 2019 90
Jm S40 Hyperbola 54836
January 2021 0