Moving From Adobe Illustrator To Coreldraw_dom r1a6v
This document was ed by and they confirmed that they have the permission to share it. If you are author or own the copyright of this book, please report to us by using this report form. Report 2z6p3t
Overview 5o1f4z
& View Moving From Adobe Illustrator To Coreldraw_dom as PDF for free.
More details 6z3438
- Words: 3,099
- Pages: 20
Moving from Adobe Illustrator to CorelDRAW © 2014 Aptech Limited
All rights reserved. No part of this book may be reproduced or copied in any form or by any means – graphic, electronic or mechanical, including photocopying, recording, taping, or storing in information retrieval system or sent or transferred without the prior written permission of copyright owner Aptech Limited.
All trademarks acknowledged. APTECH LIMITED Head Office: Aptech House, A-65, MIDC, Marol, Andheri (East), Mumbai - 400 093, India. www.aptech-worldwide.com E-mail: [email protected] Edition 1 - May 2014
Preface This book will showcase the similarities and comparison of tools in Adobe Illustrator and CorelDRAW. It will also teach you to apply various effects and import images from Corel CONNECT. The ARENA Design team has designed this course keeping in mind that motivation coupled with relevant training and methodology can bring out the best. The team will be glad to receive your , suggestions, and recommendations for improvement of the book.
Please feel free to send your to the ARENA Design team at the Head Office, Mumbai.
ARENA Design Team
Table of Contents CorelDRAW and Adobe Illustrator Similarities between Adobe Illustrator and CorelDRAW Comparing Tools of Adobe Illustrator and CorelDRAW Common Tasks Summary Exercise Working with Effects Contour Effect Lens Effect Rollover Effect Importing Images from Corel CONNECT Summary Exercise
Answer Key
Iconography : Note
: Quick Test
: Quick Answers
: Exercise Answers
Se ssi on 1
CorelDRAW and Adobe Illustrator Learning Outcomes In this session, you will learn to:
Identify the similarities between CorelDRAW and Adobe Illustrator
Compare tools of Adobe Illustrator and CorelDRAW
System Requirements
Microsoft® Windows® 8 (32-bit or 64-bit Editions), Microsoft® Windows® 7 (32-bit or 64-bit Editions), Windows Vista® (32-bit or 64-bit Editions), or Windows® XP (32-bit), all with latest service packs installed
Intel® Pentium® 4, AMD Athlon™ 64 or AMD Opteron™
1GB RAM
1.5 GB available hard disk space for installation
1024 x 768 screen resolution
DVD drive
Microsoft Internet Explorer 7 or higher
1.1 Similarities between Adobe Illustrator and CorelDRAW Adobe Illustrator and CorelDRAW have many similarities that make it easy to move from graphics application to another application. After learning Adobe Illustrator, it is easy to learn CorelDRAW. Even though there are similarities in the basic drawing and design capabilities, Adobe Illustrator and CorelDRAW have some basic differences. Many having similar meanings are referred to by different names. Refer to Table 1.1, wherein Adobe Illustrator are listed with their CorelDRAW equivalents.
Adobe Illustrator
CorelDRAW
Anchor points
Nodes
Artwork
Drawing
Compound object
Combine
Gradient fill
Fountain fill
Adobe Illustrator
CorelDRAW
Mask
Power Clip
Outline view
Wireframe view
Path
Curve
Placing images
Inserting images
Rasterizing
Converting to a bitmap
Stroke
Outline
Swatches palette
Color palettes
Unite
Weld
Table 1.1: Adobe Illustrator and CorelDRAW
1.2 Comparing Tools of Adobe Illustrator and CorelDRAW Many tools of Adobe Illustrator and CorelDRAW produce the same results even though their mode of operation and names differ slightly. The comparison of tools between Adobe Illustrator and CorelDRAW is shown in Table 1.2.
Adobe Illustrator Tools
CorelDRAW Tools
Selection tool
Pick tool
Size tool
Pick tool
Skew tool
Pick tool
Rotate tool
Pick tool
Add Anchor Point tool
Shape tool
Pencil tool
Freehand tool
Paintbrush tool
Artistic Media tool or Brush tool
Rectangle tool
Rectangle tool
Adobe Illustrator Tools
CorelDRAW Tools
Rounded Rectangle tool
Rectangle tool
Type tool
Text tool
Area Type tool
Text tool
Reflect tool
Mirror buttons
Scissors tool
Knife tool
Star tool
Polygon tool or Star Shapes
Symbol Sprayer tool
Artistic Media tool
Twist tool
Interactive Twister Distortion tool
Warp tool
Smudge Brush tool or Envelope tool
Convert Anchor Point tool
Shape tool
Delete Anchor Point tool
Shape tool
Direct Selection tool
Shape tool
Reshape tool
Shape tool
Line Segment tool
Freehand tool
Path Type tool
Text tool
Blend tool
Interactive Blend tool
Ellipse tool
Ellipse tool
Drop Shadow tool
Interactive Drop Shadow tool
Gradient tool
Interactive Fill tool
Mesh tool
Interactive Mesh Fill tool
Paint bucket tool
Interactive Fill tool
Measure tool
Dimension tool
Adobe Illustrator Tools
CorelDRAW Tools
Rectangular Grid tool
Graph Paper tool
Wrinkle tool
Roughen Brush tool
Table 1.2: Comparison of Adobe Illustrator and CorelDRAW tools
Quick Test 1.1 1. The Mask term in Adobe Illustrator is known as ____________ in CorelDRAW. Outline
Weld
Fountain Fill
Power Clip
2. The Pencil tool is common in Adobe Illustrator and CorelDRAW. True
False
1.3 Common Tasks The interfaces of Adobe Illustrator and CorelDRAW are -friendly. The working of the two applications is almost similar. The commonly used tools and commands of Adobe Illustrator and CorelDRAW are as follows:
The artboard in Adobe Illustrator is called the drawing page in CorelDRAW. Illustrations are drawn or created on the drawing page. The objects present on the drawing page will only be printed.
The Open, Save, Save As, Undo, Redo, Rulers, Grids, and Guides are commands that function in a similar manner across all software.
The Selection tool in Adobe Illustrator and the Pick tool in CorelDRAW are used to select an object. When an object is selected, a dotted bounding box appears around the object as shown in Figure 1.1.
Figure 1.1: Object selected using the Pick and Selection tool in CorelDRAW and Adobe Illustrator respectively
In both – Adobe Illustrator and CorelDRAW, the Zoom tool and the Hand tool (hidden within the Zoom tool) are used to zoom and pan an image respectively.
To create simple objects such as rectangles, ellipses, and polygons, click the respective tools and drag to create the object.
To add text to an illustration, select the Text tool and type the text.
To add color to an object, select it with the Pick tool and choose any color from the color palette, located on the right side of the CorelDRAW window.
To align objects, firstly select the objects. Later, on the Arrange menu, point to Align and Distribute, and select the required command.
The Cut, Copy, Paste, Export, and Snap to commands work in a similar manner in Adobe Illustrator and CorelDRAW.
Use the Arrange Order command to arrange the order of objects.
Concept of layers and function of the Pen tool is similar in Adobe Illustrator and CorelDRAW.
To place an image on the current artboard/document, the Import command is used in CorelDRAW and the Place command in Adobe Illustrator.
The effects given to images in CorelDRAW and Adobe Illustrator are known as ‘Bitmap’ and ‘Photoshop’ effects respectively.
The term used for shaping objects is known as ‘shaping’ in CorelDRAW and ‘pathfinder’ in Adobe Illustrator.
1.4 Summary In this session, CorelDRAW and Adobe Illustrator, you learned that:
Adobe Illustrator and CorelDRAW have many similarities in functions and tools.
The interfaces of Adobe Illustrator and CorelDRAW are -friendly.
Adobe Illustrator and CorelDRAW produce the same results even though the mode of operation and names differ slightly.
1.5 Exercise 1. The ____________ in Adobe Illustrator is called the drawing page in CorelDRAW. Toolbox Outline board Sketch board Artboard 2. In Adobe Illustrator, the _____________ tool is used to select an object. Pick Selection Hand Zoom 3. In CorelDRAW, the __________ command is used to place an image on the drawing page. Export Place Import Copy 4. The Path in Adobe Illustrator is equivalent to the Curve in CorelDRAW. True False 5. Pathfinder is the term used for shaping objects in CorelDRAW. True False
Se ssi on 2
Working with Effects Learning Outcomes In this session, you will learn to:
Apply contour, lens, and rollover effects
Import images using Corel CONNECT
2.1 Contour Effect Contour effect is not complicated as blend effects. Contour effects are useful for creating perfect outlines for open or closed paths, thereby creating several new shapes. On applying a contour effect, dynamically linked shapes are created and arranged concentrically within the center of the original object. Contour effect can be used to create concentric line series, in which lines progress from inside to outside of the object. The number of contour lines can also be set, as per requirements. Further, after applying the contour effect to an object, the contour settings can be copied or cloned to another object. The color of contour lines and fills between two contour lines can also be changed. Color progression can also be set in contour effect, wherein one color blends into another. On linking a particular contour effect to an object, the object turns into the control object and the new shapes that are created form a ‘contour group.’ The number of contour lines can be specified in the Contour Steps box and the distance between two contour lines is specified in the Contour Offset box, located on the Property bar. Contour line progression can be accelerated by clicking the Object and Color Acceleration button on the Property bar and by moving the object slider. Refer to Figure 2.1.
Figure 2.1: Contour application
2.2 Lens Effect Lens effect can be applied to nearly all objects. This effect does not change the properties or attributes of an object. On the other hand, it changes the appearance of the object’s area beneath the lens. Lens effect can also be applied to artistic texts and bitmaps.
On application of lens effect to an object, the lens itself becomes the vector object. Lens docker window contains different options for lens effect, which are as follows:
Frozen: With this option, the view seen through the lens remains constant even after the lens is removed. Therefore, this option is used to freeze the view of an object.
Viewpoint: On selecting this option, the Edit button, which is normally hidden, appears on the right side of the Viewpoint option. The Edit button is used for repositioning the lens effect. This can be done by using the cursor or by changing the X and Y values in appropriate boxes.
Remove Face: This option is available only for certain types of lens effect. It helps in choosing the objects that participate in the lens effect.
Brighten: As the name indicates, this option is used for setting the brightness and darkness of an object. Brightness value can be set in the range of -100 to 100.
Color Add: Depending on the specified value, this option allows applying the corresponding color to the object.
Color Limit: This option has an opposite effect to that of Color Add. By selecting this option, all the colors of the object except for those which have been limited, can be viewed. For instance, when placing a green color limit lens over a bitmap, all the colors of the object, except green get filtered out in the lens area.
Custom Color Map: This option transforms the colors seen through the lens to colors that fall within a specific color range. The start and end values of the color range can be chosen by the as well as the progression between the start and end colors. Progression can follow a direct, forward, or reverse route through the color spectrum.
Fish Eye: This option is used to distort, magnify, or shrink the objects underneath the lens in a manner similar to wide angle camera lens. The angle of the lens mainly depends on the percentage value that is specified. Refer to Figure 2.2.
Figure 2.2: Fish eye lens effect
Heat Map: This option facilitates the creation of the effect of an infrared image. This is done by mimicking the heat levels of different colors in the object that lies underneath the lens.
Invert: This option facilitates changing colors of objects lying underneath the lens into their corresponding complementary CMYK colors. Complementary colors are opposite colors in the color wheel.
Magnify: This option is used to uniformly enlarge the area of the object under the lens based on the specified amount. This option overrides the fill of the object and makes the object look transparent.
Tinted Grayscale: This option is used to change the colors of the area of an object under the lens into their corresponding grayscale values. However, the actual color depends on the choice of the . This option is used to create Sepia tone effect on the object.
Transparency: This option is used to make an object look similar to a tinted film or colored glass. Transparency varies depending on the rate value that has been applied.
Wireframe: This option is used to display the object area lying beneath the lens in the color or fill that is specified by the .
Quick Test 2.1 1. On the Lens Docker window, the ______________ option is used to freeze the view of an object. Frozen
Magnify
Heat Map
Wireframe
2. Concentric line series can be created by using the lens effect. True
False
2.3 Rollover Effect CorelDRAW’s Web resources are integrated into different areas throughout the application. This enables the to apply Web specific properties to objects, such as rollover effects, hyperlinks, and image maps. Rollovers are objects set to react to the cursor being held over, and/or clicked on an object. Hyperlinks are links to existing Web pages. Image maps are objects created with one or more defined areas that feature unique hyperlinks to Web pages. Rollovers are unique object types. Hyperlinks may be applied to any single object or to specific characters in a paragraph text object. Selected objects may be defined as Web objects using the Internet toolbar. To activate the Internet toolbar, right-click any visible toolbar and then select Internet from the pop-up menu. Rollovers enable you to apply animated effects, sounds, and/or Internet URL address links to objects in reaction to mouse actions. Mouse action is the action of moving the cursor over or clicking an object. As shown in Figure 2.3, rollovers have three basic states namely, Normal, Over, and Down. By varying these states, you can create interaction conditions.
The Normal state defines the static state of an object.
The Over state defines the appearance of the object whenever a cursor moves over it.
The Down state defines the appearance of an object when clicked.
Figure 2.3: Rollover states To apply the rollover effect to an object, select the required object and click the Create Rollover button on the toolbar. Alternatively, on the Effects menu, point to Rollover, and click Create Rollover to convert the object into a rollover.
After defining the object as a rollover object, you have to define the appearance of an object in different states. To do so, click the Edit Rollover button on the toolbar or right-click the object and click Edit Rollover on the Context menu. Alternatively, on the Effects menu, point to Rollover, and then click Edit Rollover to edit the object. Normal is the default selected state. You generally need not make any changes to the object properties in this state. To make changes in the Over state, from the Active Rollover State, select Over. Changes could be in its color or in some other appearance-related attribute. This effect will be visible when you move the cursor over this object. To make changes in the Down state, from the Active Rollover State, select Down. Like the Over state, the can also make changes in of fill color or outline color of the object. This effect will be visible when you click the object. Once you have finished making the changes in all three states, click the Finish Editing Rollover button on the rollover toolbar to end the editing state. To preview the rollover effect, click the Live Preview of Rollover button on the rollover toolbar. For detailed step-by-step procedure, refer to demo Rollover from: eResources 4 Me>> My Varsity>> Moving from Adobe Illustrator to Corel>> Show Me How
2.4 Importing Images from Corel CONNECT Images of a project can be directly accessed from Connect Docker and Tray Docker. Refer to Figure 2.4. The Connect Docker is situated on the right side of the CorelDRAW window and the Tray Docker appears at the bottom of the CorelDRAW window. Images used in the Corel CONNECT program of CorelDRAW Suite appear in the Tray Docker. This makes it easier to select images for a project and share with other Corel programs of CorelDRAW Graphic suite. Any change in Corel CONNECT will instantly reflect in the tray and vice versa.
Figure 2.4: Connect Docker and Tray Docker For detailed step-by-step procedure, refer demo Introduction to Corel Connect from: eResources 4 Me>> My Varsity>> Creating Artworks>> Show Me How
2.5 Summary In this session, Working with Effects, you learned that:
Contour effects are useful for creating concentric line series and perfect outlines for open or closed paths.
The Lens effect changes the appearance of the object’s area beneath the lens.
The Lens effect can be applied to artistic text and bitmaps.
Rollovers are objects set to react to the cursor being held over, and/or clicked on an object. They are unique object types.
Hyperlinks are links to existing Web pages. They may be applied to any single object or to specific characters in a paragraph text object.
Image maps are objects created with one or more defined areas that feature unique hyperlinks to Web pages.
Rollovers enable you to apply animated effects, sounds, and/or Internet URL address links to objects in reaction to mouse actions.
Images of a project can be directly accessed from Connect Docker and Tray Docker.
Images used in the Corel CONNECT program of CorelDRAW Suite appear in the Tray Docker.
2.6 Exercise 1. On the Lens Docker Window, __________________ option is useful for selecting objects participating in the lens effect. Color Add Remove Face Viewpoint Transparency 2. ____________________ are unique object types. Rollovers Hyperlinks Concentric lines Image maps 3. ________________ state defines the static state of an object. Active Rollover Normal Over Down
4. The Down state defines the appearance of the object when clicked. True False 5. The Lens effect does not change the properties or attributes of an object. True False
Answer Key Quick Answers
Exercise Answers
Quick Test 1.1 1. Power Clip
2. False Quick Test 2.1
1. Frozen
2. False
Exercise 1.5 1. Artboard
2. Selection
3. Import
4. True
5. False Exercise 2.6 1. Remove Face
2. Hyperlinks
3. Normal
4. True
5. True
Bibliography CorelDRAW X6: The Official Guide - Gary David Bouton
Smashing Logo Design: The Art of Creating Visual Identities - Gareth Hardy
Related Documents c2h70
Moving From Adobe Illustrator To Coreldraw_dom r1a6v
November 2021 0
Adobe Illustrator 6q5cw
October 2021 0
Adobe Illustrator 6q5cw
February 2023 0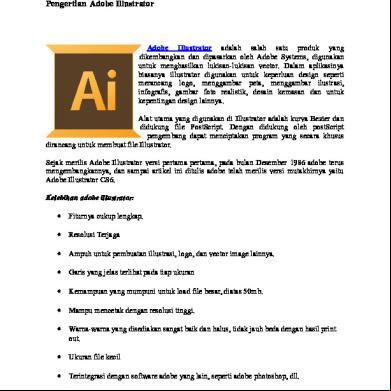
Pengertian Adobe Illustrator 4m4349
January 2021 0
Manejo Adobe Illustrator 1u1fk
June 2021 0
Adobe Illustrator Cs4 4e3p4y
May 2022 0More Documents from "Prashant Pandey" y321f

Power Electronics Interview Questions 12644f
January 2022 0
3246ing - Ca Ipcc 3v5vt
November 2019 42
Moving From Adobe Illustrator To Coreldraw_dom r1a6v
November 2021 0
Eddy Current Brakes Seminar Report 4hb1m
December 2019 41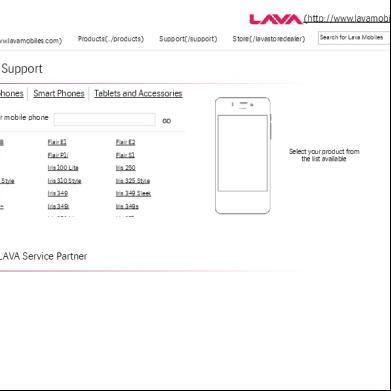
Lava Service Centre List In India_ Spare Parts Price List - Lava Mobiles 1d5g54
December 2019 102